
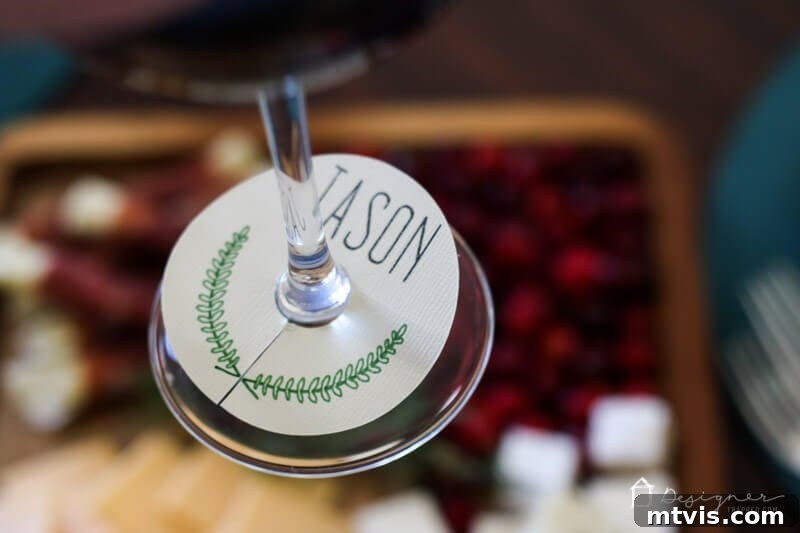
Elevate Your Celebrations: The Ultimate Guide to DIY Wine Glass Charms with Cricut
Transform your next gathering from ordinary to extraordinary with these incredibly charming and practical DIY wine glass charms! Perfect for holidays, dinner parties, or any festive occasion, these personalized markers are not only a delightful decorative touch but also ingeniously solve the age-old problem of mixed-up drinks. If you’ve been searching for an easy, impactful craft project that adds a touch of sophistication and fun to your entertaining, look no further. In just minutes, you can create a set of bespoke wine glass charms using your Cricut machine, ready to impress your guests and ensure everyone knows which glass is theirs.
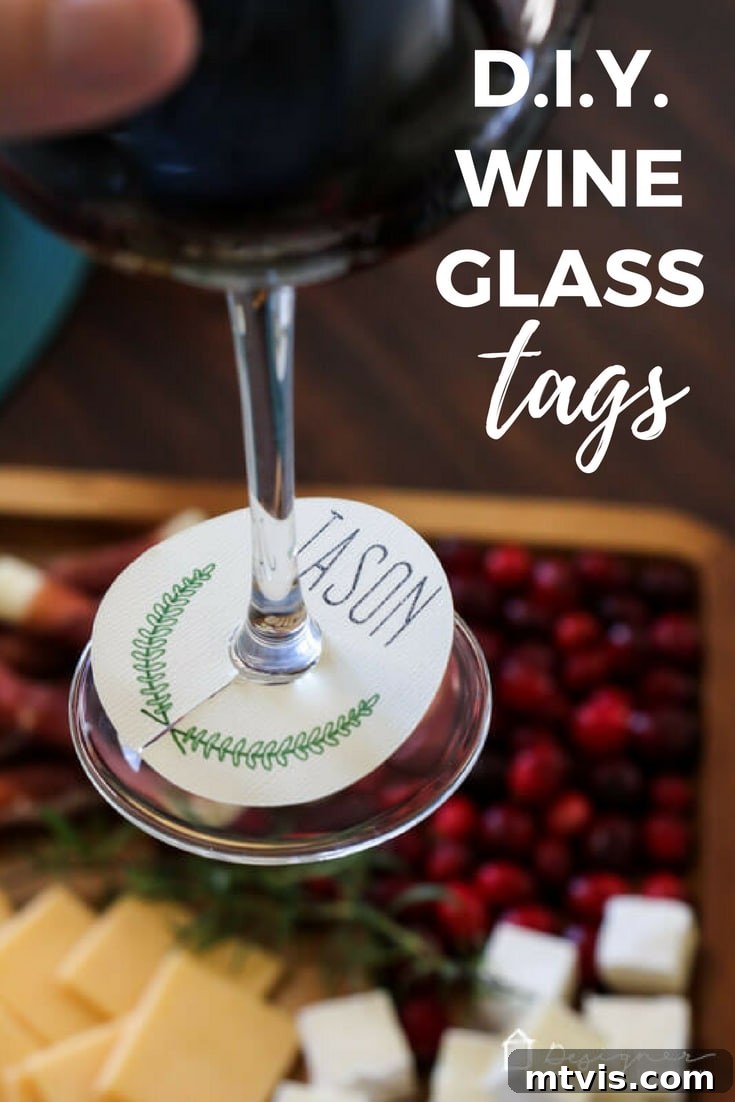
This inspiring DIY project is proudly sponsored by Cricut, making creativity accessible to all.
Discover the Magic of Personalized Wine Glass Charms
Have you ever hosted a party where guests inevitably pick up the wrong wine glass, leading to confusion and unnecessary waste? It’s a common dilemma, one that I personally faced while preparing for Friendsgiving this year. Despite numerous gatherings, my collection of identical wine glasses always led to a flurry of “Is this mine?” questions. It was then that I realized the simple, elegant solution I had been overlooking: wine glass charms! Far from being a mere decorative accessory, these tiny identifiers are game-changers for any host.
Making your own DIY wine glass charms with a Cricut machine is not only incredibly simple but also immensely satisfying. I honestly regret not discovering this crafting secret sooner! The process is so straightforward that you can easily whip up a batch in time for Thanksgiving, Christmas gatherings, New Year’s Eve parties, or any festive event on your calendar. Beyond their practicality, these charms serve as wonderful conversation starters and add a truly personalized touch that ready-made options simply can’t match.
Please note: This post includes affiliate links for your convenience. Should you choose to make a purchase through one of these links, I may earn a small commission at no extra cost to you. This helps support my blog and allows me to continue sharing exciting DIY projects. For more details, please refer to my full disclosure policy.
Why Every Host Needs DIY Wine Glass Charms
While the primary benefit of wine glass charms is preventing mix-ups, their advantages extend far beyond simple identification. Integrating them into your party planning can elevate the entire guest experience and reflect your thoughtful attention to detail:
- Eliminate Confusion: The most obvious benefit – no more guessing games! Each guest can easily identify their glass throughout the evening.
- Add a Decorative Touch: Charms can be designed to match your party’s theme, color scheme, or the season, acting as miniature decorations for your stemware.
- Spark Conversation: Unique designs or personalized charms can serve as icebreakers, prompting guests to comment on their charm or ask about the crafting process.
- Personalized Guest Experience: Showing your guests that you’ve thought about their comfort and enjoyment, even down to their drink, makes them feel special.
- Thoughtful Hostess Gifts: A beautifully crafted set of DIY wine glass charms makes an excellent and personal hostess gift for friends and family.
- Eco-Friendly Entertaining: By making it easier to keep track of glasses, you reduce the need for guests to grab new ones, cutting down on dishwashing or disposable cup waste.
Unleash Your Creativity: Making DIY Wine Glass Charms with Cricut
The beauty of using a Cricut machine for this project lies in its unparalleled precision and versatility. Whether you’re a seasoned crafter or just starting, a Cricut makes intricate designs and personalized touches incredibly accessible. For those unfamiliar, a Cricut is a smart cutting machine that can cut hundreds of materials, from paper and vinyl to fabric and leather, with professional accuracy. For our wine glass charms, its ability to both cut complex shapes and draw fine details simultaneously is a game-changer.
While you certainly could make these charms by hand with scissors and a pen, the Cricut significantly speeds up the process, ensures consistent results, and allows for much more elaborate designs than manual crafting. It transforms what could be a tedious task into an enjoyable and efficient creative endeavor. If you’ve been contemplating investing in a cutting machine, projects like these perfectly showcase their value.
Materials Needed for Your DIY Wine Glass Charms:
Gathering the right materials is the first step towards crafting your beautiful charms. Here’s what you’ll need:
- Cardstock: Choose a sturdy cardstock in colors that complement your chosen design or party theme. Medium-weight (65-80 lb) cardstock works well for durability without being too thick for your machine. Consider textured or glitter cardstock for extra flair!
- Cricut or other Cutting Machine: Your crafting powerhouse! The Cricut Explore Air series or the Cricut Maker are excellent choices for this project, offering precise cutting and drawing capabilities. These machines frequently have fantastic deals, so it’s worth checking for current promotions. If you’re weighing your options, you can explore a detailed comparison of Cricut vs. Silhouette machines or delve into a comprehensive review of the Cricut Maker to find the perfect fit for your crafting needs. While a cutting machine simplifies the process dramatically, remember that these charms can also be crafted by hand, though it will require more time and patience for intricate details.
- Pens that Fit Your Cutting Machine: To add those beautiful drawn details to your charms. I personally recommend Cricut pens for seamless integration with your machine and Design Space. For this project, I used a Gel Tip 0.8 Glitter Black pen for elegant outlines and a 0.4 Tip Sour Apple pen for a vibrant pop of color. Experiment with different tip sizes and colors to achieve diverse effects.
- Small Jump Rings: (Essential for attaching charms to glasses – not explicitly listed in original but critical for functionality) These tiny metal rings allow your charm to gracefully hook onto the stem of a wine glass. Select a size appropriate for your charm and easy manipulation.
- Jewelry Pliers (Optional but Recommended): For opening and closing jump rings with ease and without damaging the charms.
- Clear Sealant Spray (Optional): To protect your cardstock charms from condensation and spills, extending their life.
Your Step-by-Step Guide to Crafting Beautiful Wine Charms
This tutorial is designed with Cricut machine users and Cricut Design Space in mind, offering a streamlined process. However, the core principles can be adapted for other cutting machines and design software you might be using.
Step 1: Design Selection and Customization
The foundation of your charming project begins with the design. You have two fantastic options:
First, if you love the elegant winter laurel graphic I designed for my charms, you can easily use it. Click here to download this beautiful, absolutely free winter laurel graphic. This design is versatile enough for various holiday and seasonal themes.
Second, once you have your design, you’ll need the template for the charm shape. Access the pre-designed template I created in Cricut Design Space by clicking here. This template includes the perfect shape and a small hole for attaching your jump ring. You can then upload my laurel graphic or any other design you’ve created into this template within Design Space. Size your graphics to fit within the charm template, ensuring they’ll be legible and attractive when cut.
Step 2: Prepare Your Cricut Project in Design Space
With your template and design ready, it’s time to set up your project. In Design Space, make sure your design is attached to your charm shape if you want the drawing and cutting to happen on the same material. Use the “Draw then Cut” function if your design involves both pen drawings and cutting. Select the appropriate settings for your chosen cardstock type, ensuring the machine knows the exact pressure and blade depth needed for a clean cut. Specify which pens you’ll be using for the drawing elements.
Step 3: Load Materials and Let Your Cricut Work Its Magic
Place your chosen cardstock onto a cutting mat – a LightGrip or StandardGrip mat will typically suffice for cardstock, depending on its weight. Load the mat into your Cricut machine. Insert the pens you specified in Design Space into the designated clamp (Clamp A for pens, Clamp B for the blade). Press the flashing ‘Go’ button on your machine. Your Cricut will then precisely draw your intricate designs, followed by cutting out each charm with perfect accuracy. It’s truly amazing to watch the machine bring your designs to life!
Step 4: Finishing Touches and Assembly
Once your Cricut has completed its job, carefully remove the charms from your cutting mat. Use a spatula tool or gently bend the mat away from the cardstock to prevent tearing. Now, it’s time to add the jump rings. Using small jewelry pliers, gently open a jump ring, thread it through the small hole on your charm, and then thread it around the stem of your wine glass. Close the jump ring securely with the pliers. That’s it! Your beautiful, personalized wine glass charms are now complete and ready to adorn your stemware.
I absolutely adore how these charms turned out. The combination of intricate design and personalized detail truly elevates the presentation of any drink. Take a look at the finished products!
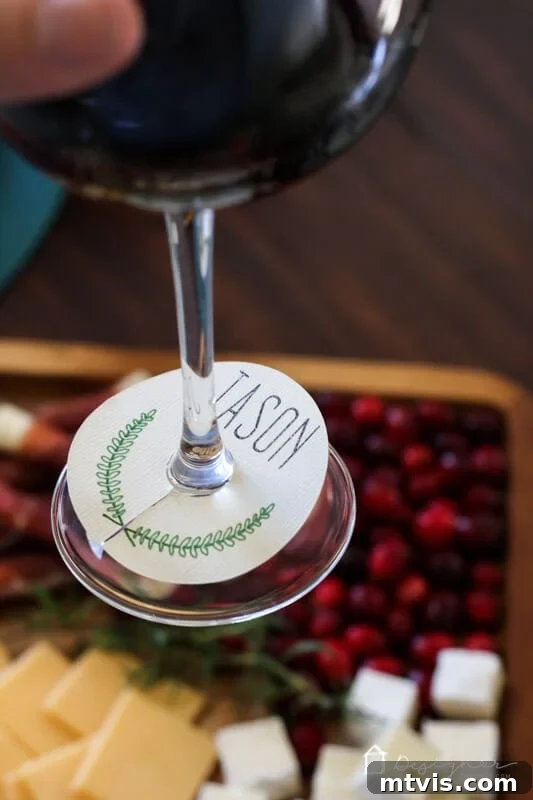
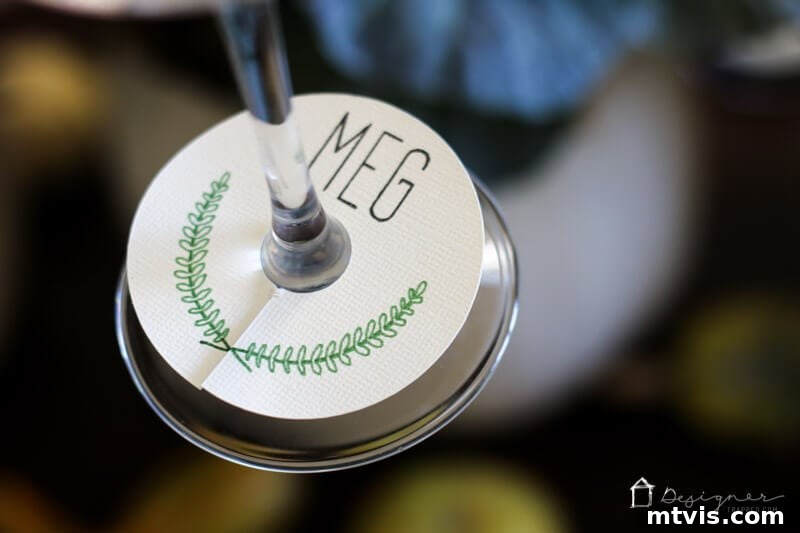
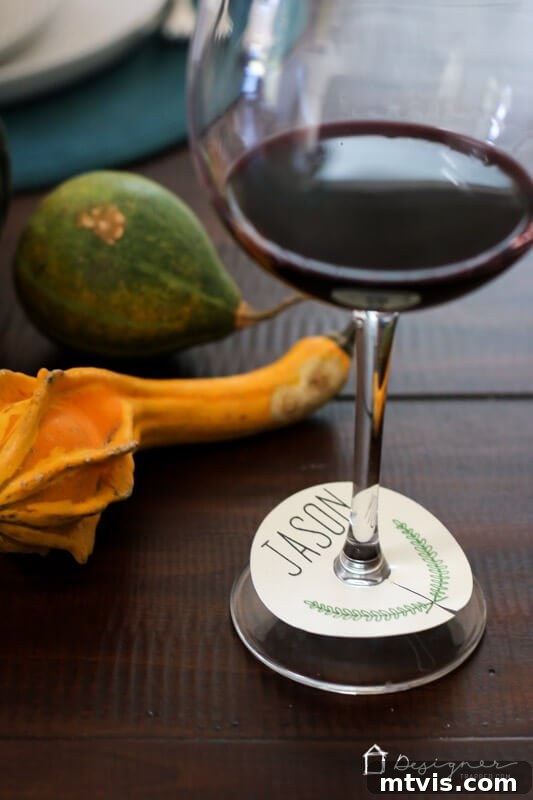
Endless Customization: Charms for Every Occasion
The beauty of DIY wine glass charms is their incredible versatility. Once you’ve mastered the basic technique, you can unleash your creativity to design charms for virtually any occasion:
- Holiday Themes: Think tiny pumpkins or autumn leaves for Thanksgiving, snowflakes and reindeer for Christmas, shamrocks for St. Patrick’s Day, or hearts for Valentine’s Day.
- Seasonal Celebrations: Design floral motifs for spring garden parties, sunny patterns for summer barbecues, or warm-toned designs for cozy winter evenings.
- Special Events: Create personalized charms for birthdays (age-themed), anniversaries (dates or initials), bridal showers (mini rings or gowns), or baby showers (tiny pacifiers or bottles).
- Personalized Gifts: Design a set of charms featuring each recipient’s initial or a design that reflects their hobbies and interests for a truly thoughtful present.
- Color Coordination: Match your charms to your table decor, linens, or even your favorite wine’s label for a cohesive and polished look.
Tips for Success and Longevity of Your Handmade Charms
To ensure your DIY wine glass charms look their best and last through many celebrations, consider these tips:
- Material Choice: While cardstock is excellent for ease and variety, for increased durability and water resistance, you could laminate your cardstock charms after drawing and before cutting. Alternatively, consider cutting materials like thin faux leather, wood veneer, or acrylic with your Cricut Maker for truly resilient charms.
- Sealing for Protection: If using cardstock and not laminating, a light spray of clear sealant (like Mod Podge Acrylic Sealer) can protect them from condensation and minor spills, making them more reusable.
- Storage: Store your charms in a small jewelry box or a compartmentalized craft organizer to keep them safe, organized, and ready for your next gathering.
- Cleaning: For cardstock charms, avoid getting them wet. For laminated or more durable material charms, a quick wipe with a damp cloth should suffice.
- Experimentation: Don’t be afraid to try different pen types (gel, glitter, metallic), cardstock colors, and design elements. The Cricut opens up a world of possibilities!
Conclusion: Sip in Style with Your Handmade Creations
Crafting your own DIY wine glass charms is a wonderfully rewarding project that brings both style and functionality to your entertaining repertoire. It’s a testament to how simple, thoughtful details can significantly enhance the guest experience, making your parties more organized, personal, and memorable. So, grab your Cricut, unleash your creativity, and start making these adorable charms today. You’ll be able to enjoy quality time with your friends and family, sipping your favorite beverages without ever worrying about whose glass is whose again!
This article was written by me in collaboration with Cricut. All opinions and experiences shared are my own, reflecting my genuine enthusiasm for their products and the joy of DIY crafting.
