
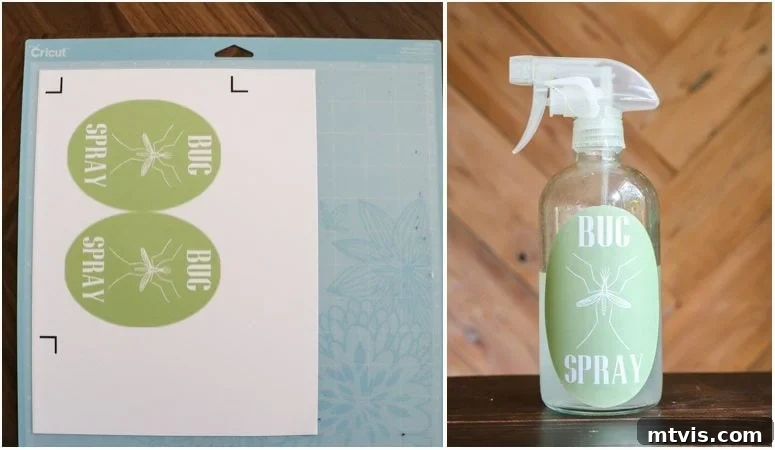
Unlock Your Creativity: The Ultimate Guide to Making Custom Stickers and Labels with Cricut
This is a sponsored conversation written by me on behalf of Cricut. The opinions and text are all mine.
Hello creative community! As a long-time enthusiast and owner of a versatile die-cutting machine, I’ve explored countless ways to leverage its capabilities. Among the myriad of projects, one of my absolute favorites has consistently been the creation of custom DIY stickers and labels using my Cricut machine. There’s a unique satisfaction in personalizing items, and stickers offer an incredibly versatile medium to achieve just that. From organizing every corner of my home to adding a special touch to gifts, custom labels have become an indispensable tool in my creative arsenal.
It’s a common misconception that Cricut machines are solely for cutting vinyl or paper. While they excel at those tasks, their true potential extends far beyond. Learning how to make stickers with your Cricut machine is surprisingly simple and opens up a whole new world of personalization. If you’ve ever wondered how to transform your digital designs into tangible, peel-and-stick creations, you’re in the right place. This comprehensive guide will walk you through the entire process, empowering you to craft your own unique stickers and labels with ease.
This post contains some affiliate links for your convenience (which means if you make a purchase after clicking a link I will earn a small commission which helps keep my blog up and running but it won’t cost you a penny more)! Click here to read my full disclosure policy.
Why DIY Stickers and Labels Are a Game-Changer for Organization and Creativity
The appeal of making your own stickers goes beyond just saving a few dollars. It’s about complete creative control. Imagine designing a label that perfectly matches your home decor, or a set of planner stickers tailored to your specific needs. The possibilities are truly endless. Here’s why embracing DIY stickers with your Cricut machine is a brilliant idea:
- Unleash Personalization: No more settling for generic designs! Create labels that reflect your unique style, whether it’s minimalist, vibrant, or quirky.
- Cost-Effective Solutions: Store-bought specialty stickers and labels can be surprisingly expensive. Making them yourself, especially in bulk, is significantly more budget-friendly.
- Perfect for Organization: From pantry containers and spice jars to craft supplies and cleaning bottles, custom labels bring order and beauty to every space.
- Creative Expression: Beyond organization, use stickers for scrapbooking, card making, decorating laptops, personalizing gifts, or even creating temporary tattoos (with the right material).
- Ease of Use: With a Cricut machine, the process is streamlined and user-friendly, allowing even beginners to achieve professional-looking results.
This tutorial will guide you through creating a charming sticker label, specifically for my DIY bug spray, but remember, the techniques you learn can be applied to any sticker or label project you envision!
Essential Materials for Crafting Your Cricut Stickers
Before diving into the design process, let’s gather the necessary tools and materials. Having everything ready ensures a smooth and enjoyable crafting experience.
What You’ll Need:
- A Cricut Cutting Machine: I personally use the Cricut Explore Air 2 for its reliability and versatility. However, any Cricut Explore or Maker machine will work beautifully for this project.
- Cricut Printable Sticker Paper: This is crucial for achieving vibrant, high-quality printed stickers. Cricut offers various types, including printable vinyl for more durable, waterproof stickers. For standard labels, the sticker paper is perfect.
- An Inkjet Printer: Essential for printing your designs onto the sticker paper before the Cricut machine cuts them. Make sure your printer has sufficient ink.
- StandardGrip Cutting Mat: Your Cricut machine needs a mat to hold the sticker paper in place during the cutting process.
- Weeding Tool (Optional but Recommended): Helpful for removing excess sticker paper around your designs, especially for intricate cuts.
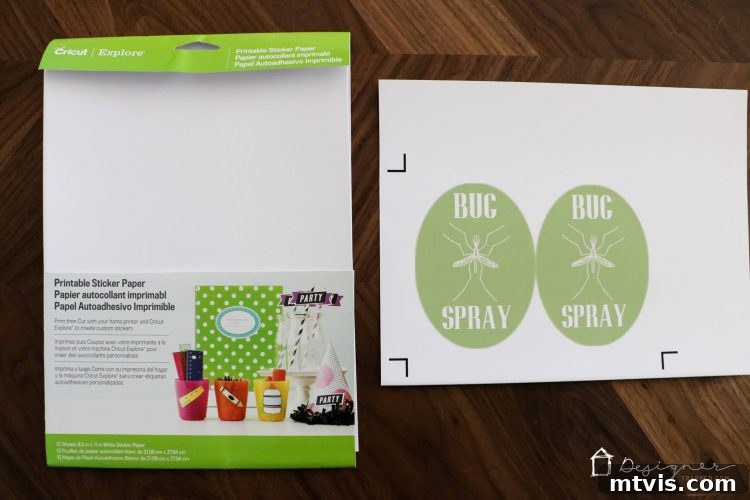
Step-by-Step Guide: Crafting Stickers and Labels in Cricut Design Space
Now, let’s get into the heart of the process. Making stickers with your Cricut involves using the “Print Then Cut” feature in Cricut Design Space. This powerful function allows you to print any design from your home printer and then precisely cut around it with your Cricut machine. Follow these detailed steps to create your own custom stickers.
1. Prepare Your Design in Cricut Design Space
- Open Cricut Design Space: Launch the software on your computer or mobile device.
- Start a New Project: Click “New Project” to open a blank canvas.
- Create or Upload Your Design:
- Text: Use the “Text” tool to type out your label text. Experiment with different fonts available in Design Space or your system.
- Shapes: Add basic shapes (circles, squares, ovals) from the “Shapes” menu to create the base of your label.
- Images: Browse Cricut’s extensive image library or upload your own SVG or PNG files. For stickers, PNG files with transparent backgrounds work best.
- Combine Elements: Arrange text, shapes, and images to form your desired sticker design. For instance, place your bug spray text onto an oval shape.
- Size Your Design: Adjust the size of your sticker to fit your intended object. Remember, there are limitations to the “Print Then Cut” area (typically around 6.75″ x 9.25″ for most machines).
2. Master the “Print Then Cut” Feature
- Select All Elements: Drag your mouse to select all parts of your sticker design (text, images, shapes).
- “Flatten” Your Design: This is a critical step for “Print Then Cut.” With all elements selected, click the “Flatten” button at the bottom of the Layers panel. Flattening combines all selected layers into a single printable layer, telling your Cricut machine to print everything as one image and then cut *around* the outer edge. You’ll see the design change from individual layers to a single “Print then Cut” layer.
- Duplicate for Multiple Stickers (Optional): If you need multiple copies of the same sticker/label (like for two bug spray bottles), copy your flattened design and paste it. You can arrange multiple flattened designs within the “Print Then Cut” boundary. For optimal results, select *all* your flattened designs and click “Flatten” again. This ensures they are treated as a single print job, optimizing paper usage.
3. Print Your Stickers
- Click “Make It”: Once your design is flattened and sized, click the green “Make It” button in the top right corner.
- Review Mat Preview: Design Space will show you a preview of your mat. Ensure your stickers are arranged correctly and within the printable area.
- Send to Printer: Click “Continue” and then “Send to Printer.”
- Printer Settings:
- Toggle “Add Bleed” ON: This is highly recommended. Bleed extends a small border of color around your design, ensuring that even if the cut is slightly off, you won’t have white edges on your finished sticker.
- Toggle “Use System Dialog” ON: This allows you to access your printer’s advanced settings. Here you can select “Best” or “Photo” quality for a crisper print and choose the correct paper type (e.g., “Glossy Photo Paper” or “Cardstock”) to ensure the ink adheres properly to the sticker paper.
- Load Sticker Paper: Place your Cricut Printable Sticker Paper into your inkjet printer, ensuring it’s loaded correctly according to your printer’s instructions (usually face-down or face-up depending on the tray).
- Print: Click “Print” from your system dialog box.
4. Cut Your Stickers with Your Cricut Machine
- Place on Mat: Once printed, carefully place the printed sticker sheet onto your StandardGrip mat, aligning it with the top-left corner as shown in Design Space.
- Select Material Settings: In Design Space, choose the appropriate material setting. For Cricut Printable Sticker Paper, select “Printable Sticker Paper.” If you’re using printable vinyl or another material, choose its corresponding setting. You might need to experiment with the pressure setting for a perfect “kiss cut” (where only the sticker layer is cut, not the backing).
- Load Mat: Load the mat into your Cricut machine.
- Start Cutting: Press the flashing “Go” button on your machine. Your Cricut will scan the registration marks around your printed design, then precisely cut out each sticker.
- Unload and Enjoy: Once cutting is complete, unload the mat. Carefully peel your custom stickers from the backing paper.
You can find many helpful video tutorials online for a visual walkthrough of these steps in Cricut Design Space, which can be invaluable for understanding the interface and process. The general method for creating your own stickers and labels is consistent across various designs.
Tips for Perfect Cricut Stickers Every Time
Achieving flawless stickers takes a little practice and attention to detail. Here are some pro tips to help you along the way:
- Printer Calibration: Ensure your printer is calibrated correctly within Cricut Design Space. This helps the machine cut precisely where it should.
- Test Cuts: If you’re using a new material, always do a small test cut first to ensure your settings are correct for a perfect “kiss cut” – cutting through the sticker layer but not the backing.
- Clean Mat: A clean, sticky mat is essential for preventing your sticker paper from shifting during cutting, which can lead to misaligned cuts.
- Ink Quality: Use good quality ink in your printer for vibrant, long-lasting colors.
- Lamination for Durability: For waterproof or highly durable stickers (e.g., for water bottles or outdoor use), consider applying a clear laminate sheet over your printed stickers *before* cutting them with your Cricut. You’ll need to adjust your cut settings if you laminate.
- Storage: Store your sticker paper flat to prevent curling or damage.
Creative Applications for Your Handmade Cricut Stickers
These custom stickers and personalized labels turn out perfectly, offering limitless possibilities for how and where you can use them. Here are just a few ideas to spark your imagination:
- Home Organization: Label pantry jars, spice racks, storage bins, file folders, and cleaning supply bottles (like my DIY Bug Spray—so important for identifying homemade concoctions!).
- Planner & Journaling: Create custom planner stickers for events, tasks, or decorative elements.
- Craft Room Essentials: Organize craft supplies, threads, beads, and tools with clear, attractive labels.
- Kids’ Items: Label school supplies, lunchboxes, toy bins, or create fun reward charts and decorative stickers for their rooms.
- Gift Giving: Design unique gift tags, personalized seals for envelopes, or custom labels for homemade treats and preserves.
- Party Favors: Add a personalized touch to party bags, water bottles, or decorations for birthdays and special events.
- Business Branding: Small business owners can create custom product labels, packaging seals, or branding stickers.
- Decorative Accents: Use them to decorate laptops, phone cases, notebooks, or add flair to scrapbooking layouts.
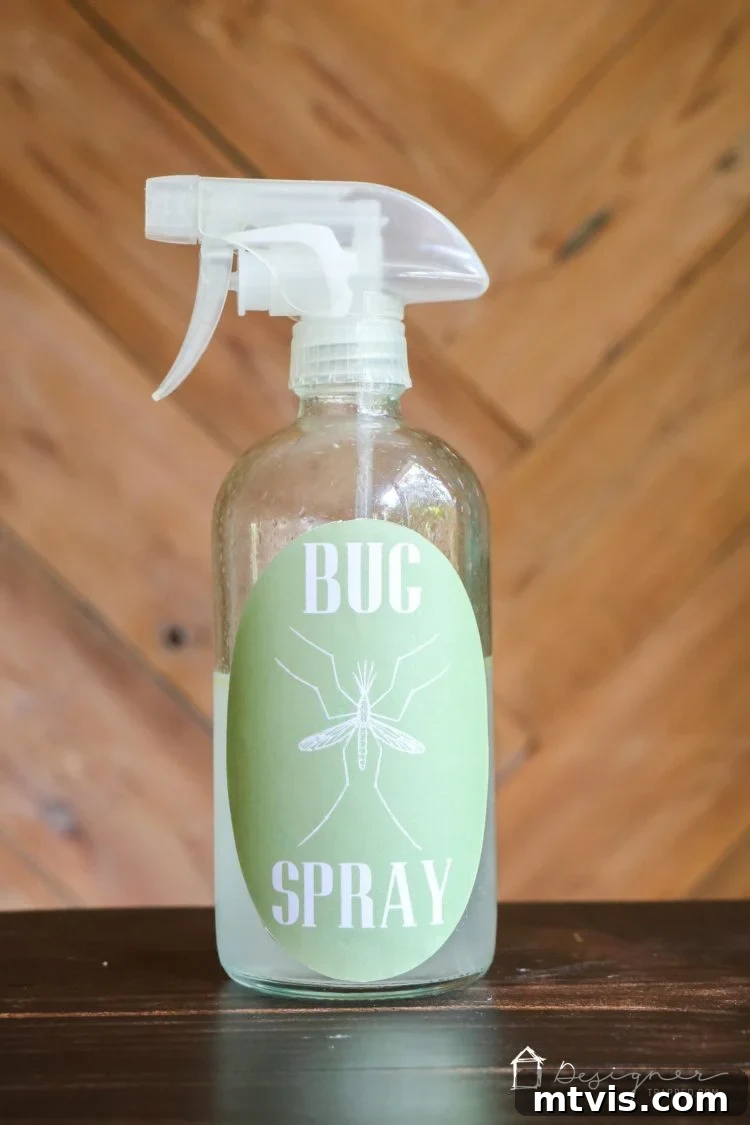
As you can see, the application for these custom stickers is incredibly broad. For instance, the bug spray label I created is not just cute but also functional. Since we frequently mix our own household cleaners and concoctions, having clear, attractive labels on our spray bottles is essential for quick identification and safety. This small detail truly elevates the everyday!
More Cricut Project Ideas to Explore
Once you’ve mastered making stickers, you’ll be eager to tackle more exciting projects with your Cricut machine. Here are a few ideas to keep your creative momentum going:
- Custom T-Shirts and Apparel: Use iron-on vinyl to personalize clothing, tote bags, and accessories.
- Personalized Home Decor: Create wall decals, stencils for painting, or custom signs.
- Greeting Cards and Invitations: Design intricate cards for every occasion with cardstock and the scoring stylus.
- Vinyl Decals: Make decals for car windows, mugs, tumblers, or electronic devices.
- Paper Crafts: Explore intricate paper cutting for 3D projects, garlands, or scrapbooking elements.
Each project offers a new opportunity to learn and expand your Cricut skills!

Making your own stickers and labels with a Cricut machine is a rewarding and practical skill that will enhance your crafting endeavors and organizational efforts. With a little practice, you’ll be able to create professional-looking, custom designs for virtually anything. So, fire up your Cricut, open Design Space, and start transforming your ideas into beautiful, tangible stickers today!
This is a sponsored conversation written by me on behalf of Cricut. The opinions and text are all mine.