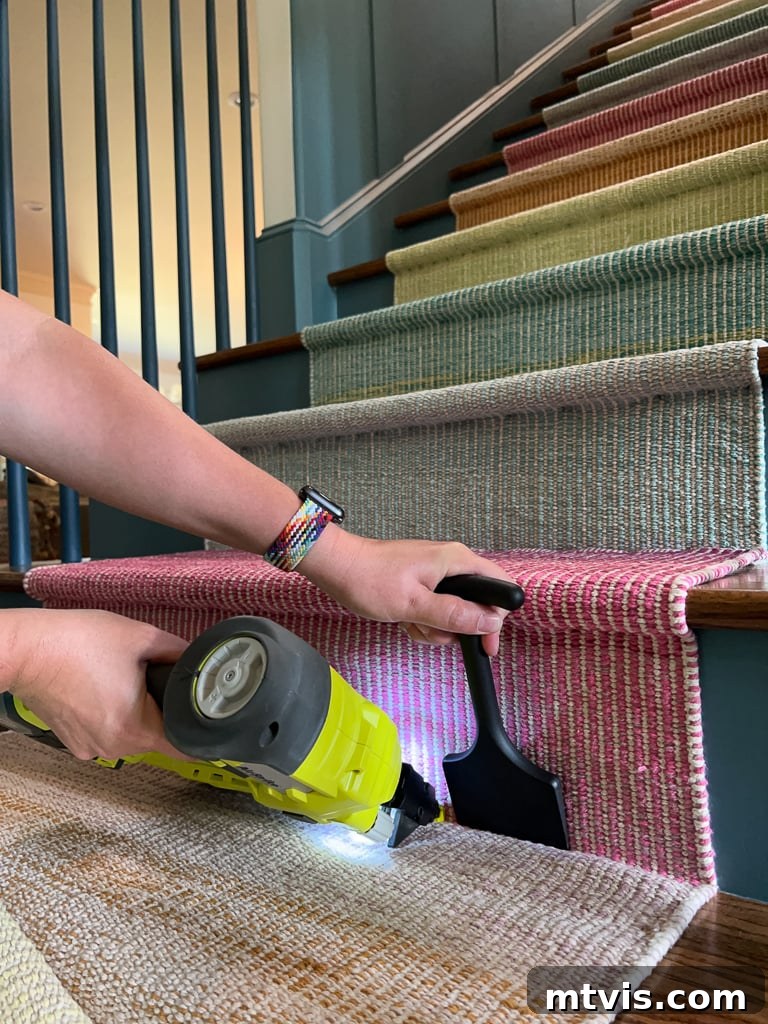
Transforming a staircase from dull to dazzling might seem like a daunting task, but believe it or not, installing a stair runner is a straightforward DIY project that most homeowners can tackle with confidence. We recently embarked on this home improvement journey ourselves, and the results were truly impactful, elevating our once-uninspired stairs into a vibrant focal point. This comprehensive guide will walk you through every step of the process, showing you exactly how to install a stair runner yourself, achieving a professional finish and adding significant style to your home.
Our journey to a refreshed staircase began in June of 2022. We kicked off our major stairway transformation by replacing our stair balusters to update the entire stair railing, followed by a fresh coat of paint on nearly every surface, including our stair risers. To further enhance the space, we installed the easiest DIY board and batten accent wall in both our hallway and within the staircase itself. This series of renovations completely revitalized what was once a super dark area, now flooded with natural light thanks to the VELUX Sun Tunnels we had installed in our upstairs hallway.


While all these renovations brought significant improvements to the appearance of our formerly bland staircase, I still felt something was missing – a touch of texture, a splash of color, and an added layer of comfort. That’s when we decided to install a stair runner ourselves. We approached the project with some trepidation, unsure of what challenges might arise, but to our delight, it proved to be a remarkably simple and entirely achievable DIY endeavor. The final outcome exceeded our expectations, leaving us absolutely thrilled with the transformation.
Why Install a Stair Runner?
Beyond aesthetics, stair runners offer a multitude of practical benefits that enhance both the functionality and safety of your home. They are a fantastic investment for any staircase, whether you have hardwood, tile, or even painted stairs.
- Enhanced Safety: Perhaps the most significant advantage, stair runners provide crucial traction, significantly reducing the risk of slips and falls, especially for children, the elderly, and pets. The added grip makes navigating the stairs much safer.
- Noise Reduction: Hard stair surfaces can amplify footsteps, creating unwanted noise throughout your home. A stair runner acts as a sound dampener, absorbing echoes and muffling footfall, contributing to a quieter and more peaceful living environment.
- Protection for Your Stairs: If you have beautiful hardwood stairs, a runner protects them from daily wear and tear, scratches, dents, and heavy foot traffic. This helps preserve the integrity and longevity of your flooring, maintaining its pristine condition for years to come.
- Added Comfort: Walking on a soft, cushioned surface is far more comfortable than stepping directly on hard stairs. This is particularly noticeable if you frequently use the stairs, providing a luxurious feel underfoot.
- Aesthetic Appeal: Stair runners are a powerful design element. They introduce color, pattern, and texture, instantly transforming a plain staircase into a stylish centerpiece. They can tie together different design elements in your home, add visual interest, and reflect your personal style.
If you’ve ever found yourself wondering how to install a stair runner to reap these benefits, I’m here to assure you that this is a project well within your capabilities. With the right tools and a clear step-by-step guide, you can absolutely do it! Here’s how to bring a fresh, inviting look to your stairs…
How to Install a DIY Stair Runner
Video Overview
For a quick visual guide before diving into the detailed written instructions, I highly recommend watching this short 60-second video. It provides an excellent overview of the project, which will make the written steps even clearer.
(Video removed to comply with “no Javascript” rule. Original content referenced a 60-second video overview of the project.)

This post contains affiliate links for your convenience. Click here for my full disclosure policy.
Materials Needed for Your DIY Stair Runner
Gathering all your materials and tools before you begin will ensure a smooth and efficient installation process. Here’s what you’ll need:
- Stair runners of your choice: We used these beautiful stair runners. The detailed measurement instructions below will help you determine the exact quantity.
- Non-slip rug pad: Essential for preventing your runner from shifting and providing extra cushioning.
- Double-sided carpet tape: To secure the rug pad to the treads and provide initial hold for the runner.
- Bolster chisel (or carpet tucker): A crucial tool for pushing the runner tightly into the crease where the tread meets the riser, ensuring a neat, professional look.
- Pneumatic stapler (or a powerful cordless staple gun): We highly recommend this cordless staple gun, as it eliminates the need for an air compressor, making the job much easier.
- Measuring tape: For accurate measurements of your stairs and runners.
- Heavy-duty scissors or utility knife: For precise cutting of the rug pad and runners.
- Cardboard or template material: For creating a consistent rug pad template.
- Optional: Fabric guard spray: Highly recommended for protecting your runner from stains, especially if it’s a light color or you have kids and pets.
- Optional: Oak strips or quarter-round molding: For a finished look at the top and bottom of the staircase.
Time needed: 4 hours
The entire stair runner installation project, from preparation to the final touches, took us approximately 4 hours. While my knees felt it a bit, the process was surprisingly quick and manageable. I even managed to enjoy an audiobook for a good portion of the project, indicating just how straightforward it can be.
-
Measure to Determine Your Total Runner Length.
Accurate measurements are critical to ensure you order the correct amount of runner. Begin by measuring the depth of a single stair tread (the horizontal part you step on) and the height of a single riser (the vertical part between treads). Add these two measurements together to get the length needed for one full step. Next, multiply this sum by the total number of stairs you intend to cover. Finally, divide that total by 12 to convert your measurement into feet, which is typically how runners are sold. Always round up to ensure you have enough material.
For example, our treads measured 10.5 inches, and our risers were 9 inches tall. With 17 stairs, our calculation was: (10.5 inches + 9 inches) x 17 stairs = 19.5 inches x 17 stairs = 331.5 inches. Dividing by 12, we got 27.625 feet, which we rounded up to 28 feet.
Important Note on Ordering: If your total required length necessitates multiple runners, it’s crucial to order consistent lengths to maintain a uniform pattern scale. For instance, if you need 28 feet of coverage, it’s better to order four 8-foot runners rather than two 12-foot runners and one 8-foot runner. This attention to detail will prevent any visible discrepancies in the pattern.
-
Cut Your Carpet Pad to Size.
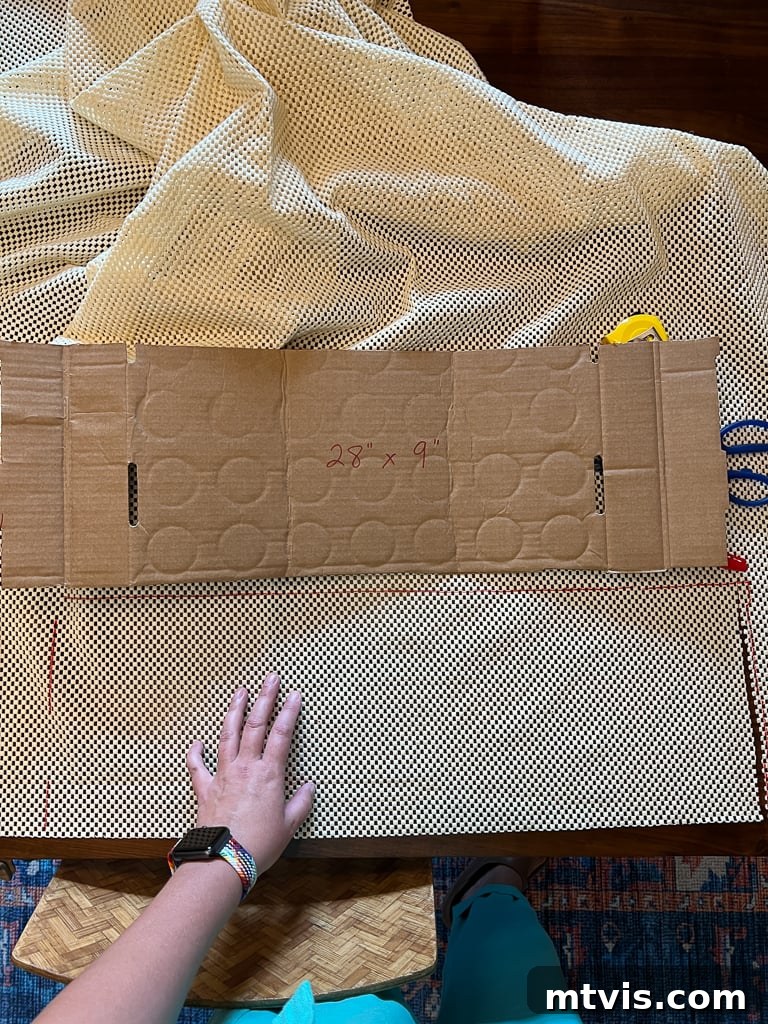
The non-slip rug pad should be completely hidden beneath your stair runner. We chose a runner that was 31 inches wide, so we decided to cut our rug pads to 29 inches wide, allowing a 1-inch border on each side. To ensure consistency and speed, I created a simple cardboard template measuring 29 inches wide by 9 inches deep (matching our riser height). This template made it incredibly easy to quickly and accurately cut out all the individual rug pads.

Using a template to efficiently cut rug pads for each step. -
Add Double-Sided Carpet Tape to the Carpet Pads.
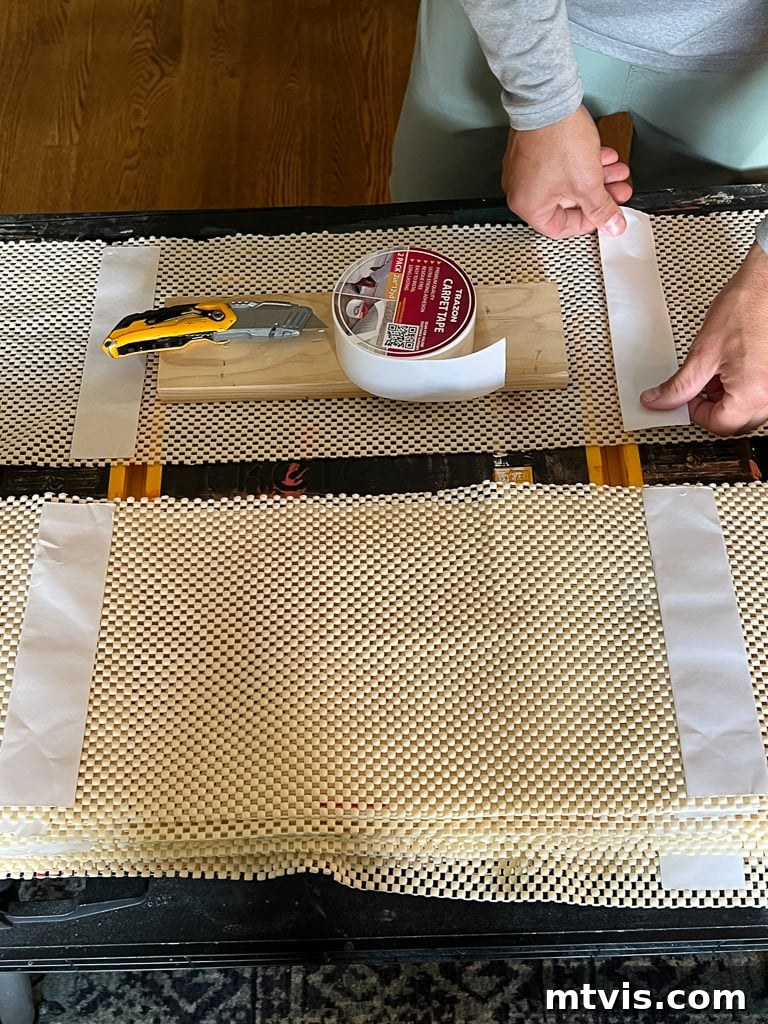
As I worked on cutting the carpet pads, my partner Joe simultaneously applied two strips of double-sided carpet tape to each pad. Placing one strip near the front edge and another near the back edge ensures the pad stays securely in place on the stair tread.
Carpet tape provides initial adhesion for the rug pads. -
Tape the Carpet Pads Onto Your Stair Treads.
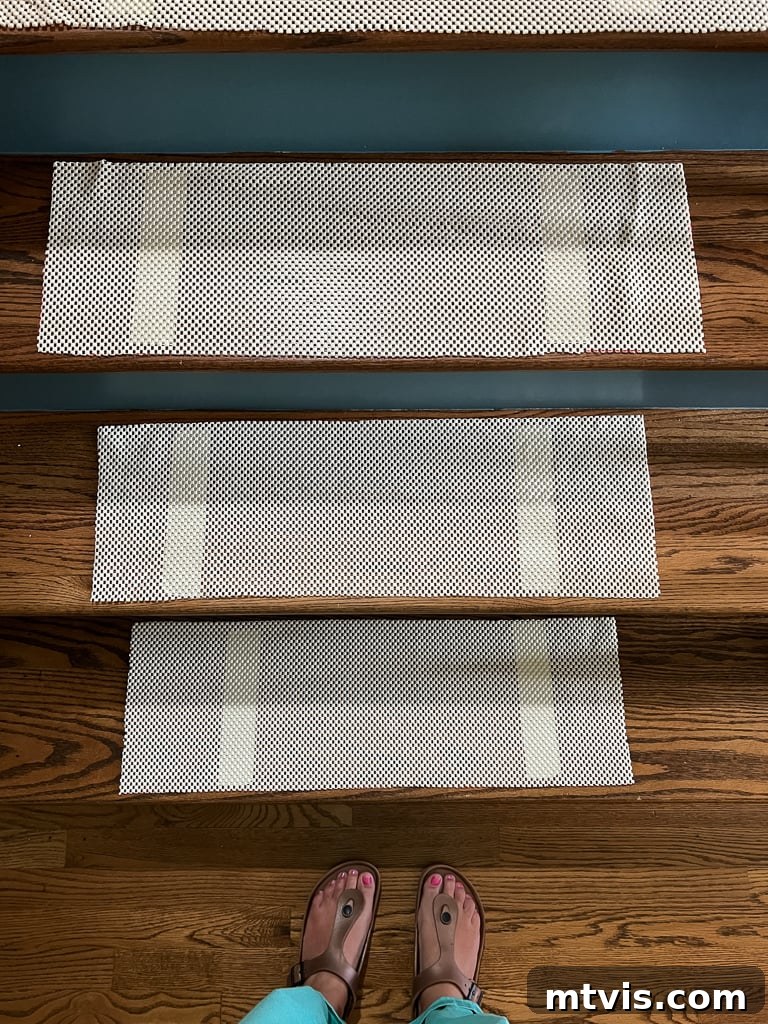
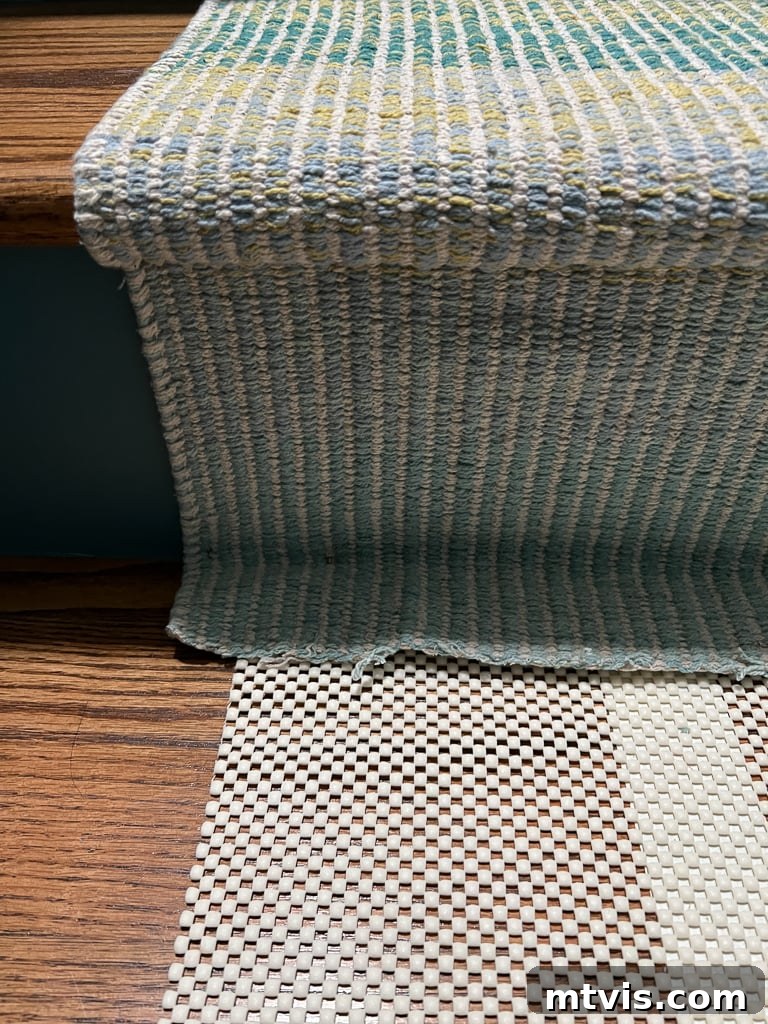
With the carpet tape applied, we carefully centered and pressed each rug pad onto the individual stair treads. It’s important to take your time here, ensuring each pad is perfectly aligned in the middle of the tread to maintain a consistent border once the runner is installed. The tape will hold the pads firmly, preventing any shifting during the runner installation.
Properly centered rug pads provide a cushioned, stable base for the runner. -
OPTIONAL: Treat Your Runners with a Fabric Guard.
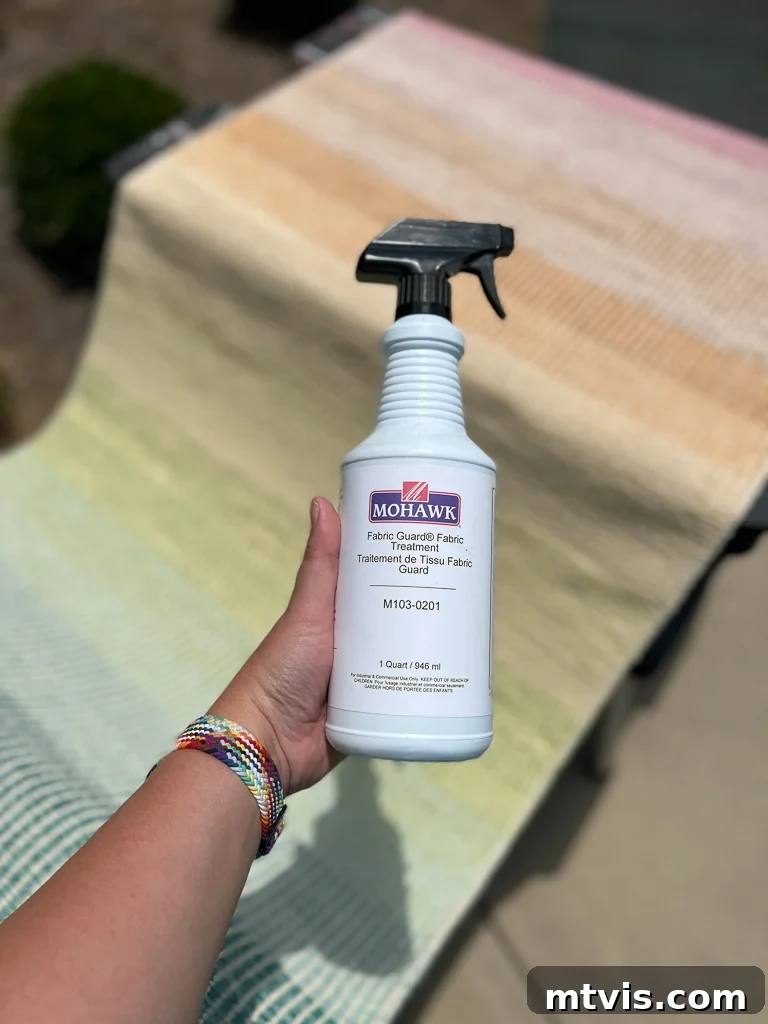
This step is entirely optional but comes highly recommended, especially if your chosen runner is made of light-colored cotton or if you have a busy household with children and pets. We opted to treat our runners with a fabric guard before installation to protect them from spills and stains. While my longtime favorite fabric guard is no longer available, any fabric guard suitable for your runner’s material will do the trick.
The application is quick and easy: simply spray the entire surface of the runner, ensuring even coverage without oversaturating the fabric. Allow it to dry for approximately 10 minutes before proceeding. This small effort can significantly prolong the life and appearance of your stair runner.
Protecting your investment with a fabric guard for easier maintenance. -
Staple the Top of Your Runner into Place.
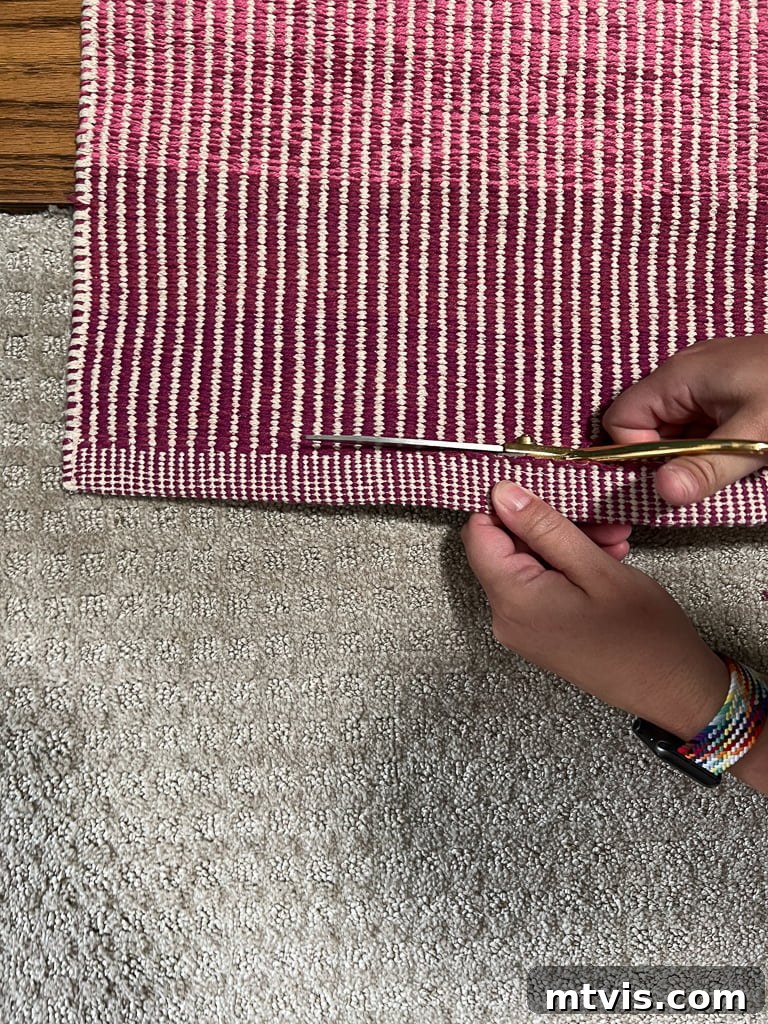
We began our stair runner installation at the very top of the staircase. Our personal preference was to cover the “partial tread” at the top, where our stairs meet the hallway carpet. We felt this created a more cohesive and finished look compared to having a bare tread. To achieve this, I carefully trimmed off the finished edge of the runner, as it was too bulky to tuck neatly. This allowed us to cleanly tuck the cut edge under and meet flush with the carpet.
Preparing the runner for a seamless transition at the top. If you prefer not to cover your top tread, you would simply align the top of the runner with the bottom edge of the very first tread, leaving the finished edge of the runner intact. Regardless of your starting preference, use your staple gun to secure the runner every 3 inches or so. Make sure to staple both outer edges of the runner firmly into the wood beneath, pulling the runner taut as you go.
Ensuring a secure and taut start for your stair runner. -
Wrap the Runner Around the Bullnose of Your Stair Tread.
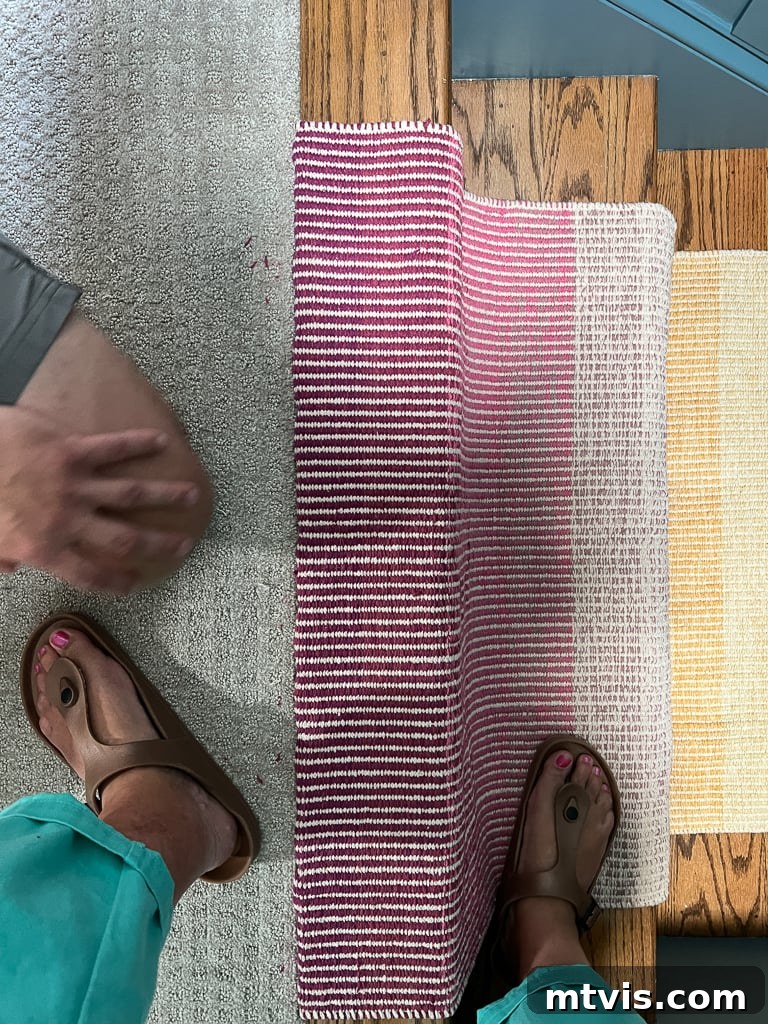
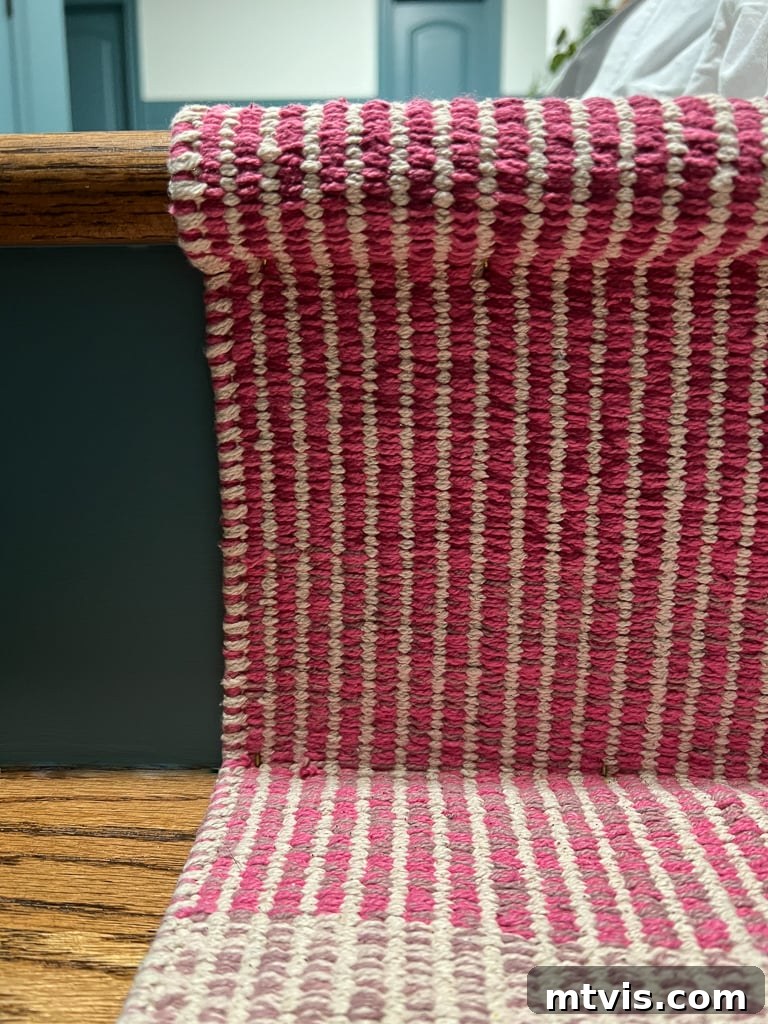
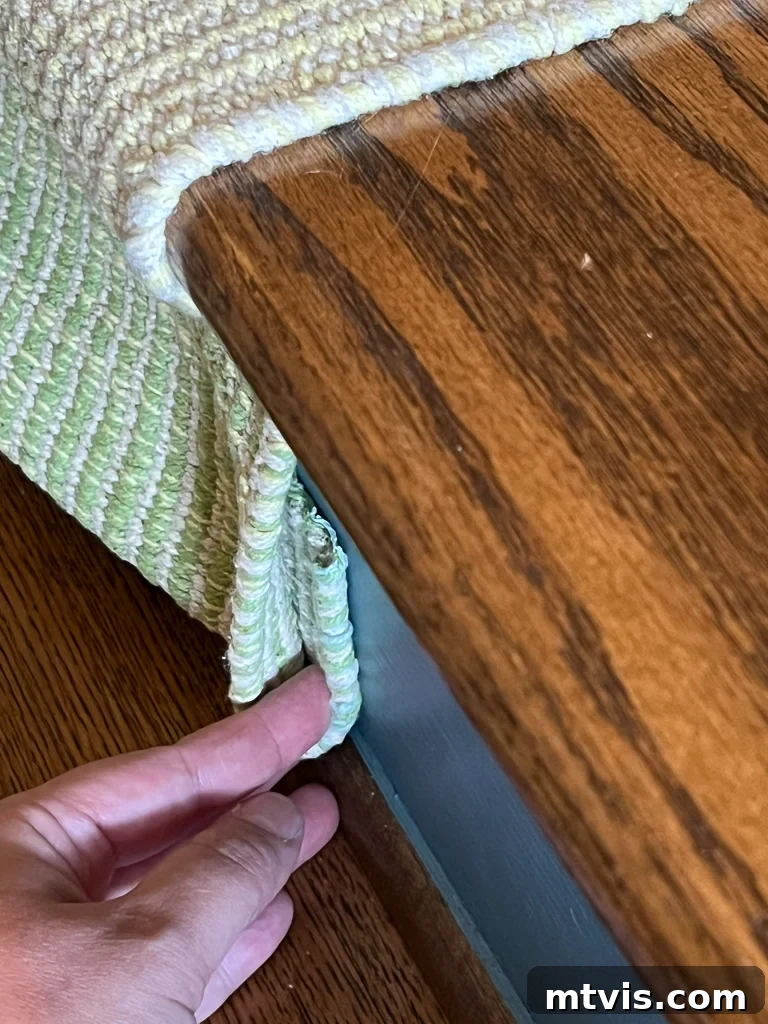
For stairs with a bullnose (the rounded edge of the tread), we opted for a “waterfall” or “wrap-style” installation. This method involves allowing the runner to drape over the bullnose, maintaining a continuous flow, before being tucked and stapled underneath. To achieve a crisp look, pull the runner very taut around the bullnose and staple it securely in place underneath, approximately every 3 inches. Always ensure you staple both outer edges for maximum durability and a neat finish.
The “waterfall” method creates an elegant, draped appearance. -
Secure the Runner at the Base of the Stair Riser.
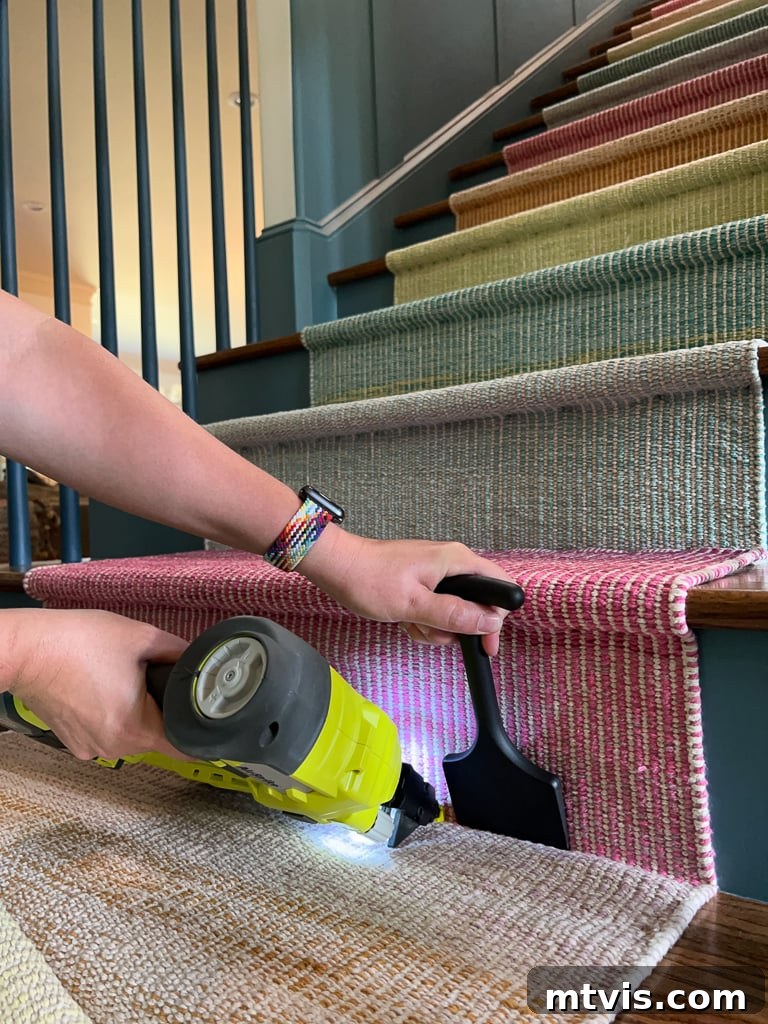
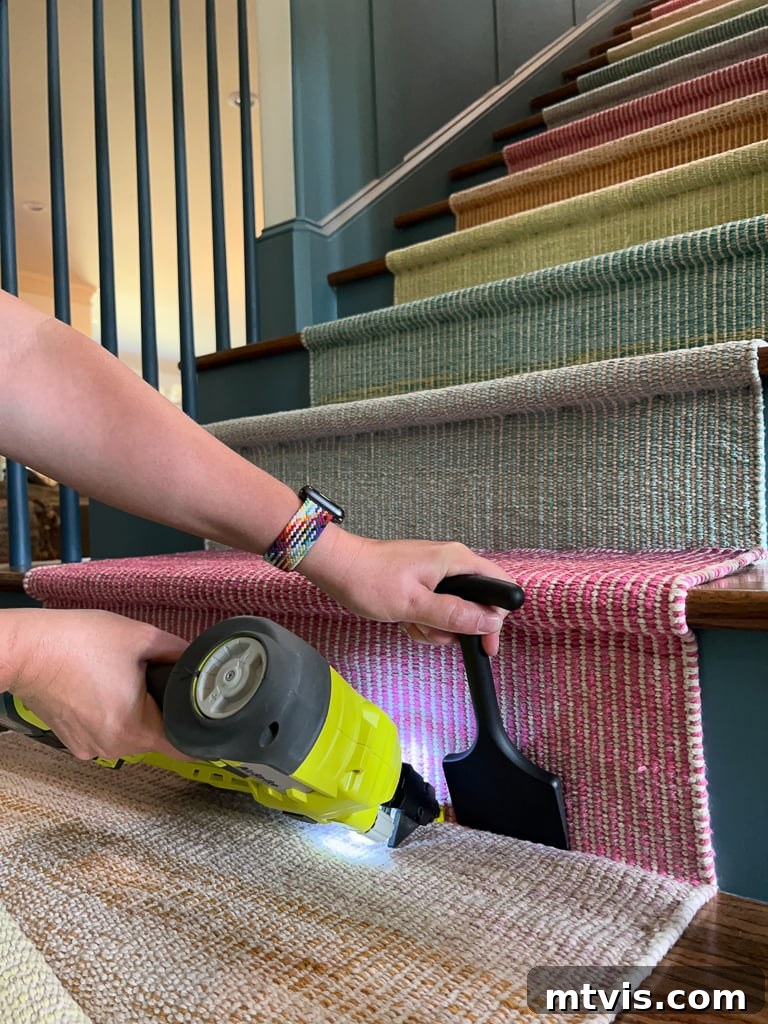
After wrapping the bullnose, the next step is to secure the runner at the base of the stair riser. Use your bolster chisel to push the runner firmly into the crease where the tread meets the riser. This ensures a tight, clean line and prevents the runner from shifting. Once it’s tucked in, staple the runner approximately every 3 inches along this crease, again making sure to hit both outer edges. The bolster chisel is incredibly helpful for keeping the rug taut and creating that perfectly crisp angle.
A bolster chisel ensures a tight, professional finish at each riser. -
Repeat Steps 7 and 8 Until You Reach the End of Your Stair Runner.
Continue this rhythmic process of wrapping the stair treads around the bullnose and stapling the runner at the base of each stair riser. Maintain consistent tension and alignment throughout. We found it helpful to periodically pause and take measurements from the outer edges of the stairs to ensure our runner remained perfectly centered on the stair treads as we worked our way down the staircase.
-
Join Your Next Runner.
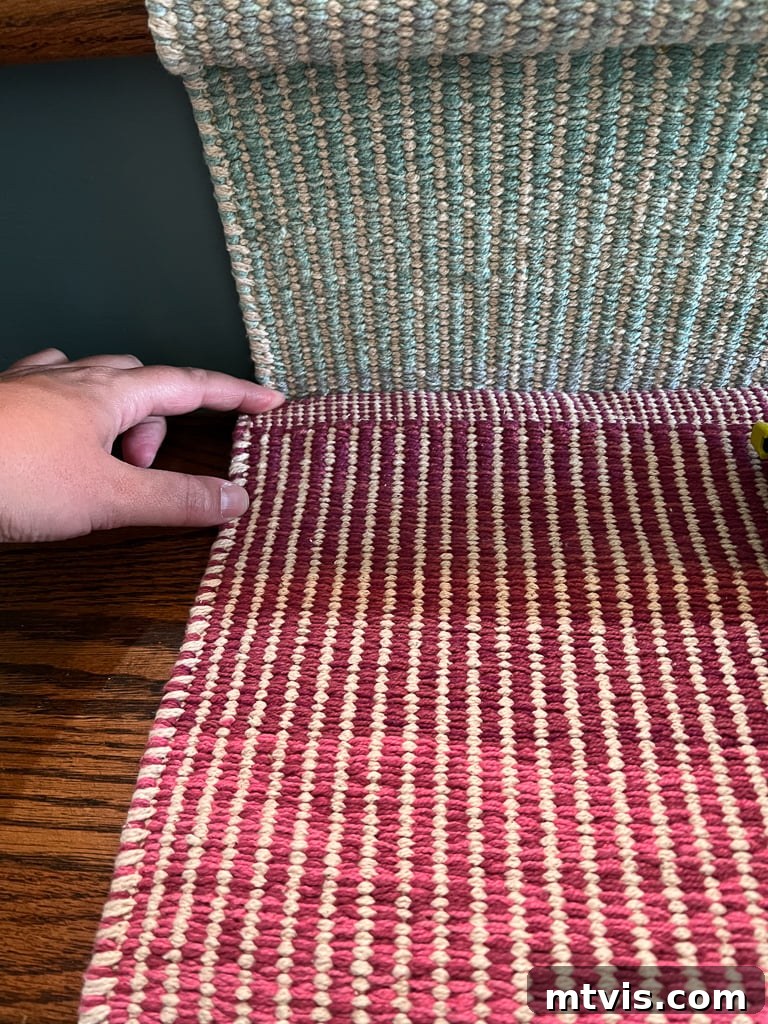
When you reach the end of your first runner, you’ll need to seamlessly join it with the next one. We recommend making this join at the back of a tread, where it meets a riser, as this tends to be the least noticeable location. For our runner, the pattern repeat made this the most logical and aesthetically pleasing place to connect.
First, cut off the end of your first runner, leaving approximately 2 inches of material for the overlap. Removing the factory edge at this point helps to reduce bulk, creating a flatter seam. Then, align the factory edge of your second runner directly over the 2-inch cut edge of the first runner. Carefully match any patterns and ensure the outer edges are perfectly aligned before stapling the overlap securely into place. This technique results in a clean, professional-looking seam.
Preparing the seam by cutting the initial runner’s edge. Achieving a clean, almost invisible join between runner segments. -
Repeat the Steps Above to Install the Joined Runner.
Once your runners are joined, simply continue the installation process as before. Keep wrapping the stair treads and stapling the runner firmly into place, ensuring consistent tension and alignment with each step. Repeat this procedure for all subsequent runners until you successfully reach the final stair riser at the bottom of your staircase.
-
Secure the Stair Runner to the Bottom of Your Stairs.
Upon reaching the last tread, pull the runner taut against the bottom riser using your bolster chisel. Carefully measure and cut off the excess runner, leaving approximately 2 extra inches of material. This allowance is crucial for creating a neat, finished edge. Fold these extra 2 inches under the runner, creating a double layer, and then staple this folded edge firmly against the bottom of your riser. This creates a clean, factory-like edge that looks polished and prevents fraying.
Finishing the bottom of the runner with a clean, folded edge. -
Add the Finishing Details.
To elevate the professional appearance of your DIY stair runner, consider adding decorative finishing touches. At the very bottom of our stairs, we installed a small, flat strip of oak. We stained this oak strip to perfectly match our existing wood floors, providing a seamless and polished transition between the runner and the floor below.
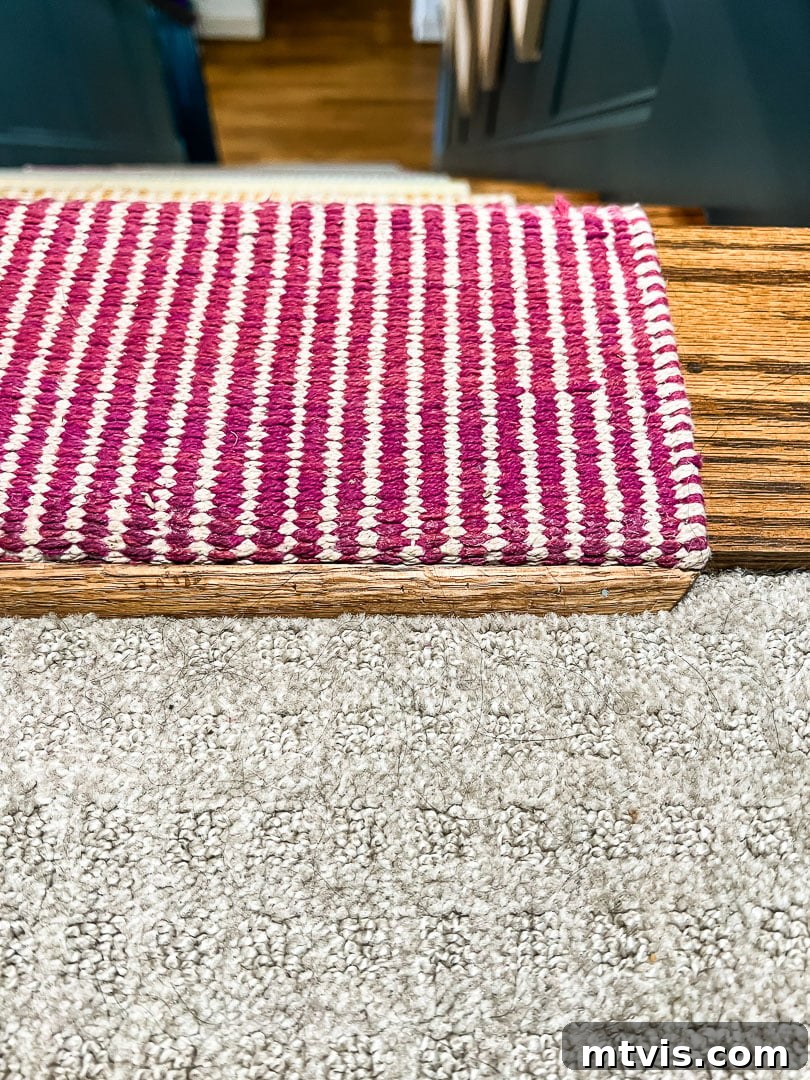
A wooden strip creates a clean and intentional end to the runner. Similarly, at the top of the stairs, where the runner met the hallway carpet, we added a piece of oak quarter-round molding. After staining it to complement our wood tones, we carefully nailed it into place. This molding serves as an elegant transition piece, neatly concealing any raw edges and creating a smooth, upscale connection between the stair runner and the carpeted hallway. (Please overlook any stray dog hair in the photo – the day of installation was long and vacuuming wasn’t top priority!)
Quarter-round molding provides a polished transition at the top of the stairs.
Choosing Your Perfect Stair Runner
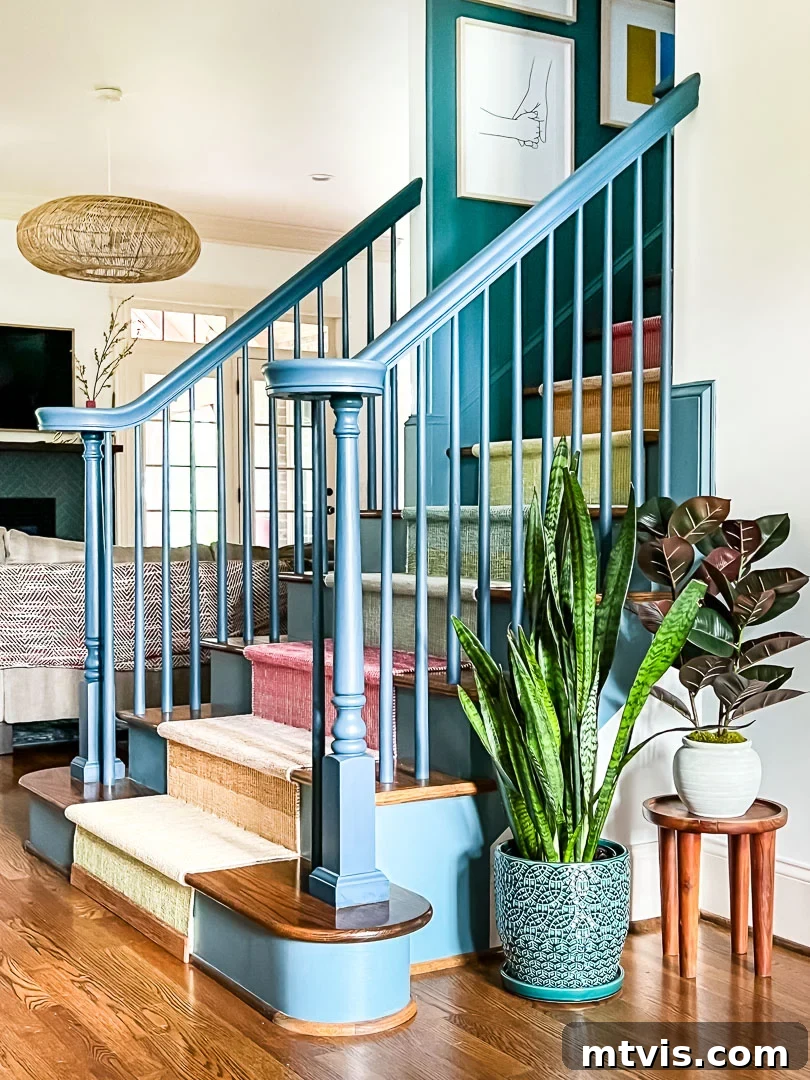
Selecting the right stair runner is an exciting part of the process, as it allows you to infuse your personal style into your home. While we opted for these beautiful woven cotton runners by Annie Selke, which were easy to cut and wrap around our stair treads due to their flexible nature, there’s a vast array of options available. Don’t feel limited to woven cotton; many materials and styles work wonderfully on stairs.
When making your selection, consider:
- Material: Beyond cotton, options include durable wool (excellent for high traffic and natural fibers), synthetic blends (often stain-resistant and affordable), sisal or jute (for a natural, rustic look), and polypropylene (very resilient and easy to clean).
- Pattern and Color: This is where you can truly make a statement. Stripes can elongate your staircase, geometric patterns add modern flair, while subtle textures or solid colors offer a timeless elegance. Consider how the runner will complement your existing decor and color palette.
- Width: Most stair runners come in standard widths, with 2 1/2 feet (31 inches) being a common and versatile size. This width typically allows for a generous border of exposed wood on either side, which is aesthetically pleasing. Measure your stairs to ensure the chosen width will provide adequate coverage and the desired reveal of your underlying stairs.
- Pile Height: Low-pile runners are generally more practical for stairs as they are less prone to tripping hazards and easier to clean. Higher pile can be luxurious but might show wear more quickly in high-traffic areas.
In my opinion, Dash and Albert offers an exceptional selection of runners, known for their quality and diverse designs. However, many other sources provide fantastic options that would work well for a DIY stair runner project. You can explore some of my other favorite stair runner ideas to spark your inspiration!
Scroll and click on any image for full product details.
(Product showcase widget removed to comply with “no Javascript” rule. Original content displayed a selection of stair runners.)
Photos of the Finished Project
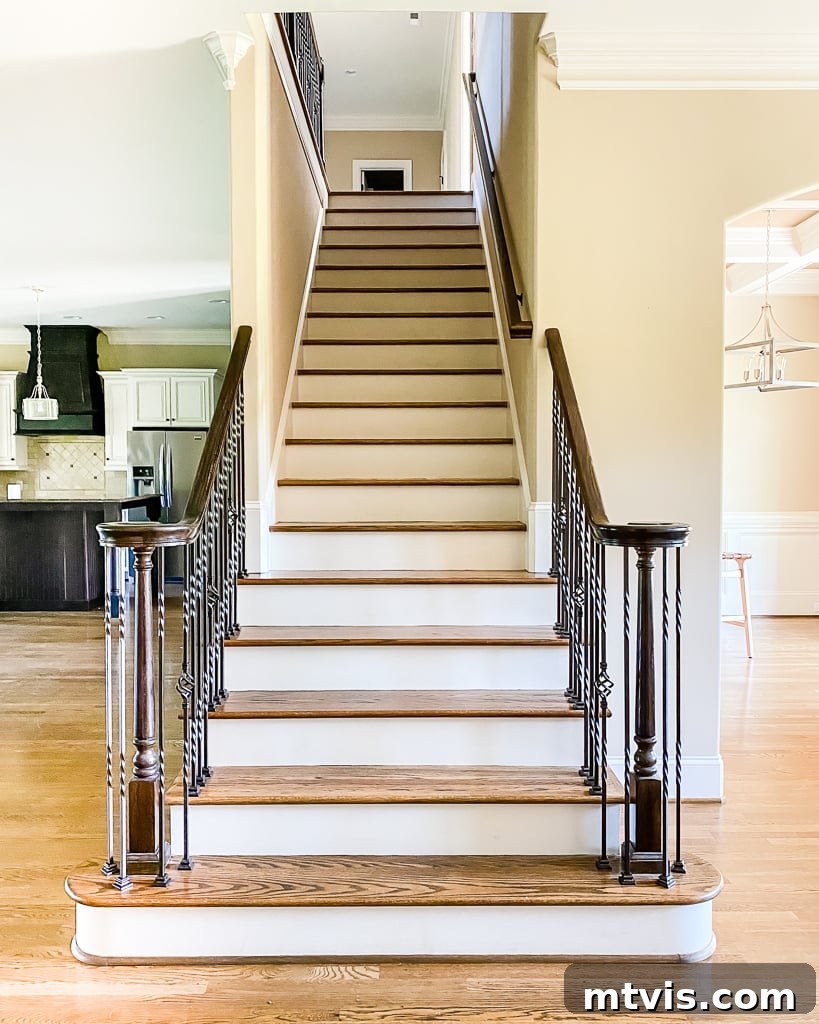
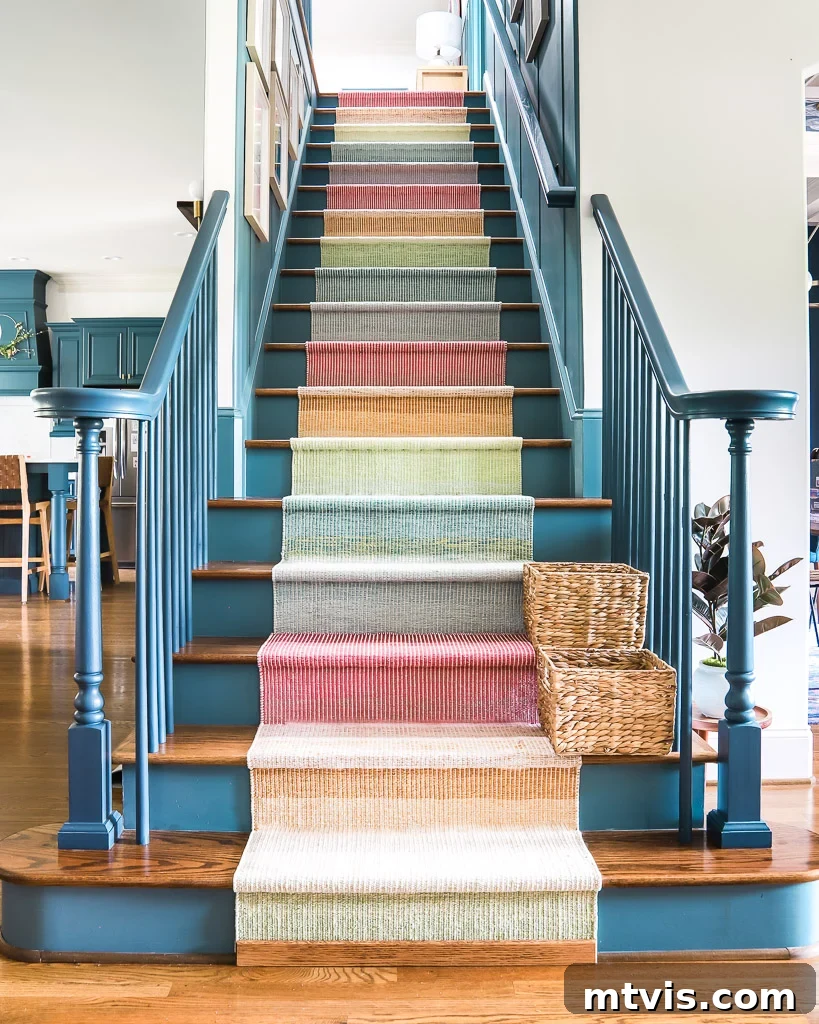
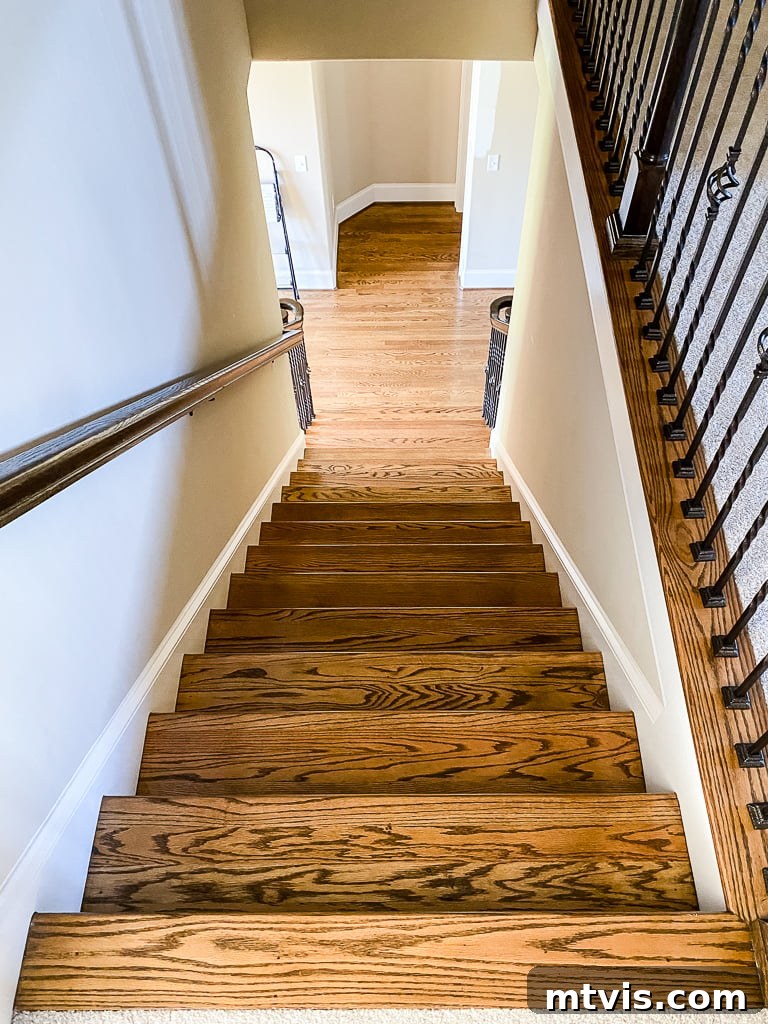
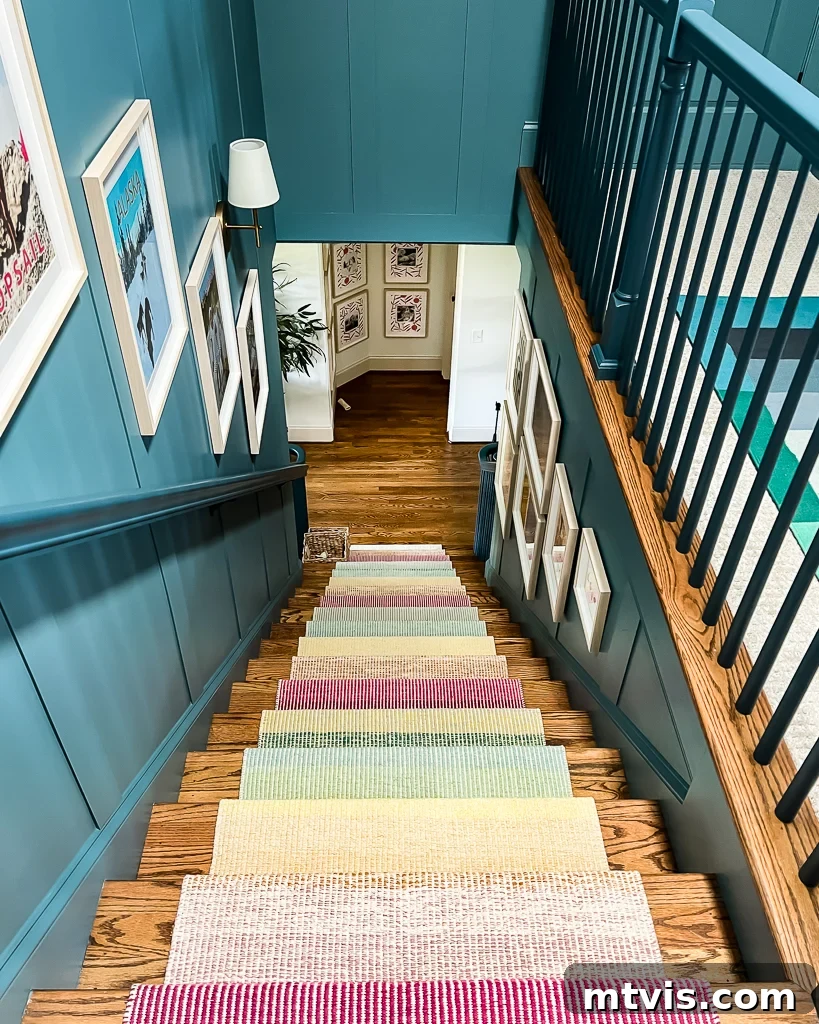
I am absolutely in love with our transformed staircase. It’s truly a night and day difference from where we started! The photo on the left below captures our stairs the day we closed on the house – a blank canvas awaiting a vibrant makeover. Not only have our stairs been revamped, but our kitchen and dining room have also undergone significant transformations. What are your thoughts on this dramatic before-and-after?
Frequently Asked Questions About DIY Stair Runners
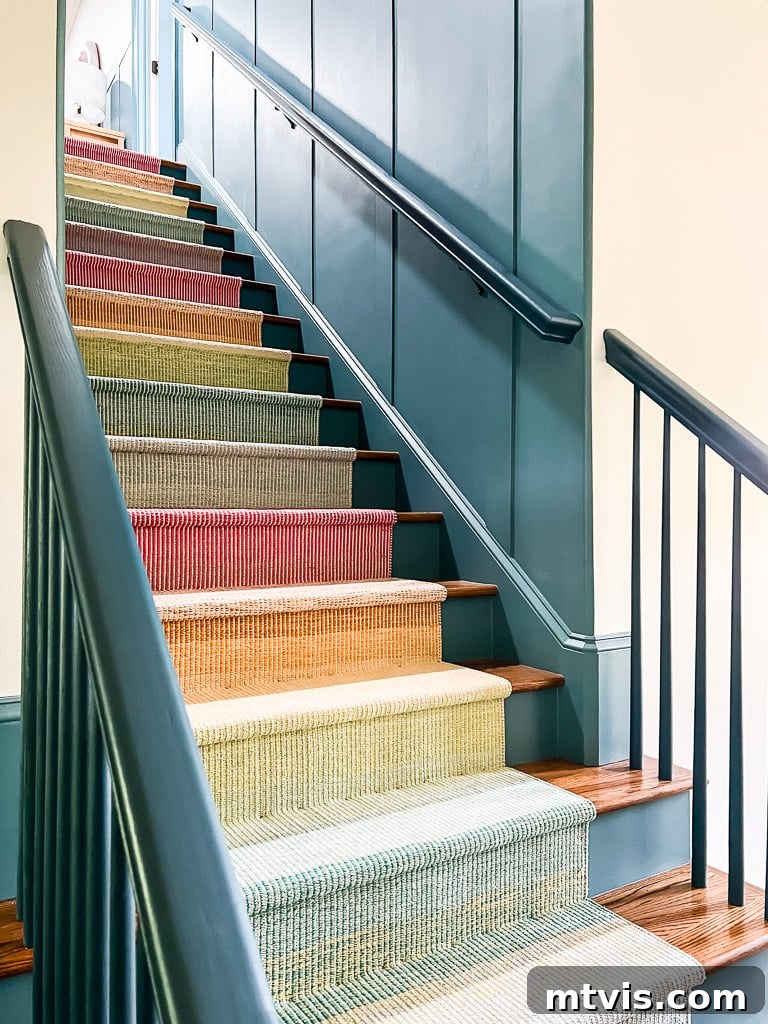
This is one of the most common questions I receive! When freshly installed, the staples are indeed somewhat visible, particularly with the type of flat-weave cotton runner we chose (see the photo below from immediately after installation). Achieving a completely invisible staple line can be challenging in a DIY stair runner installation, especially without specialized professional tools.
If you opt for a rug with a thicker pile, the staples would naturally be less noticeable, as the pile would conceal them. Another option to consider is installing decorative stair runner rods, which are specifically designed to cover the staples at the base of each riser, though this wasn’t an aesthetic we personally preferred. It’s worth noting that since we completed this project in 2022 and are now updating this post in 2025, the staples have definitely become less conspicuous over time, blending in more with the runner, though you can still spot them if you look closely.
We installed our stair runner nearly three years ago, and I’m thrilled to report that it’s holding up beautifully! We initially had concerns because several people on Instagram shared experiences where professionally installed woven cotton stair runners looked horrible and stretched out within a year. Our runner, however, remains nicely taut and securely in place, even with daily use from two kids and a dog.
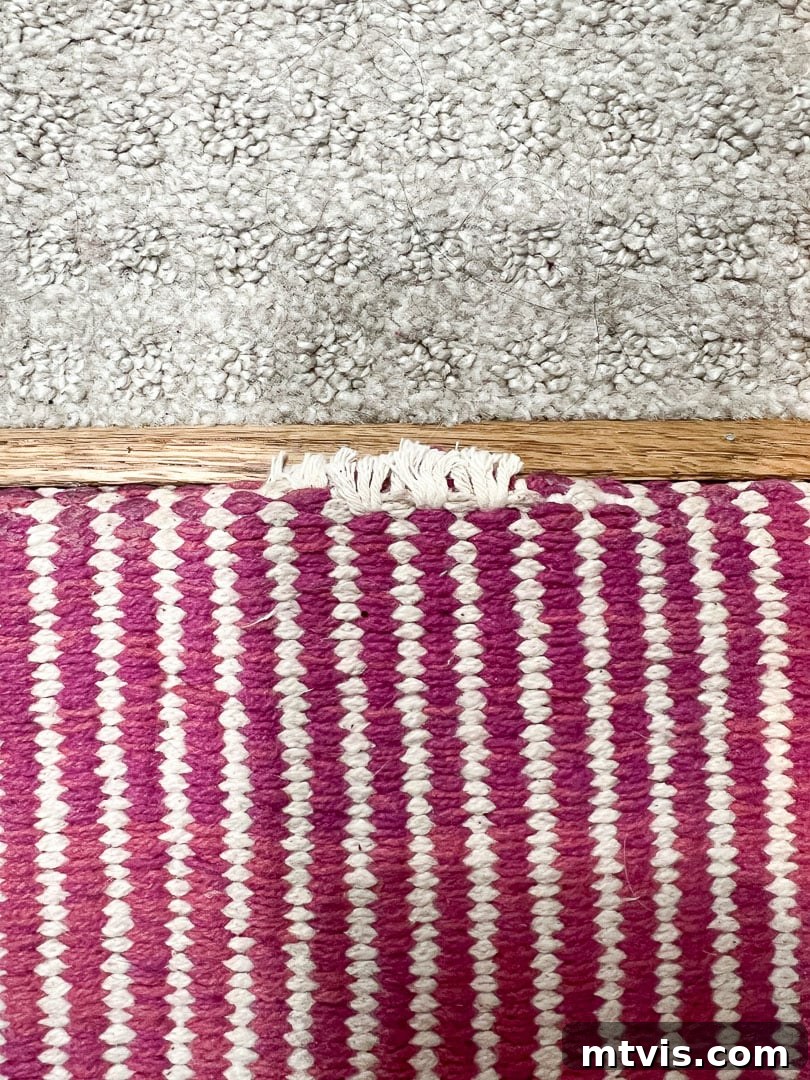
The ONLY issue we’ve encountered is a slight bit of fraying at the very top of the stairs, where the runner meets the hallway carpet. We believe this is entirely our fault and could have been easily prevented. At the time of installation, we didn’t think to apply carpet tape underneath the portion of the runner covering the top tread that transitions to the carpet. This extra layer of adhesion would likely have stabilized the edge more effectively. While the fraying has been present for a few months and doesn’t appear to be worsening, it’s something we are actively looking to address.
While some individuals attempt to install stair runners using only double-sided carpet tape, based on my experience, carpet tape eventually loses its adhesive power and fails, especially in high-traffic areas. I’m not concerned about the rug tape failing under our rug pads, as the pads are sandwiched between the runner and the stairs, and the entire runner is securely fastened with staples. However, I would definitely be worried about the long-term stability and safety if we had relied solely on rug tape to secure the runner itself. Staples provide the necessary structural integrity and prevent the runner from shifting, wrinkling, or becoming a tripping hazard.
Cleaning your stair runner regularly is key to maintaining its appearance and longevity. For daily maintenance, we simply vacuum our runner with a handheld vacuum cleaner or the hose attachment of our upright vacuum. For deeper cleaning or spills, the fabric guard we applied has been invaluable. Most spills can be blotted up quickly with a clean cloth and mild soap and water. For more stubborn stains, a carpet cleaner designed for the runner’s material can be used, always testing a small, inconspicuous area first.
Installing a stair runner on curved or winding stairs is certainly possible, but it presents a greater challenge than straight stairs and may be better suited for professional installation or an experienced DIYer. The primary difficulty lies in cutting and manipulating the runner to follow the curves gracefully without bunching or wrinkling. This often requires precise templating and custom cuts. While the basic principles of stapling and securing remain the same, the complexity of fitting the runner to irregular shapes increases significantly.
Thank you for reading this extensive guide! I hope that if you’re planning to tackle this rewarding project yourself, you now feel confident and equipped with the knowledge of exactly how to install a stair runner. I promise, you absolutely can do it! Be sure to save this tutorial to Pinterest so you can easily find it again later when you’re ready to start your own staircase transformation.
More STAIR Posts
SEE ALL stair POSTS
-
15 Chic Stair Railing Ideas to Update Your Staircase
-
How to Install a Stair Runner: A Step-by-Step Tutorial
-
15+ Inspiring DIY Staircase Makeover Ideas
-
From Carpet to DIY Hardwood Stairs: Step-by-Step Tutorial
-
How to Replace Balusters to Update Your Stair Railing
-
Stair Riser Ideas to Make Your Stairs More Stylish
Curious about my complete approach to transforming rooms and spaces throughout our home? Discover the strategies and insights within Designer in a Binder® – your affordable and straightforward guide to decorating with confidence.
For exclusive content, behind-the-scenes peeks, and fresh design inspiration delivered straight to your inbox, don’t forget to subscribe before you go!
(Newsletter signup form removed to comply with “no Javascript” rule.)
Sign up for exclusive content and behind-the-scenes sneak peeks!