Transforming your living space with IKEA furniture is a popular and budget-friendly approach to interior design. However, even the most beloved IKEA pieces can accumulate minor dings, dents, and imperfections over time, diminishing their charm. For years, finding a truly effective and perfectly color-matching repair solution remained a challenge for DIY enthusiasts and IKEA lovers alike. But now, an innovative furniture repair system has emerged, making it remarkably simple to restore your IKEA items to their original glory with an impeccable color match, allowing you to preserve the aesthetic of your custom IKEA hacks or beloved existing pieces.
The IKEA Obsession: From Hacks to Home Decor
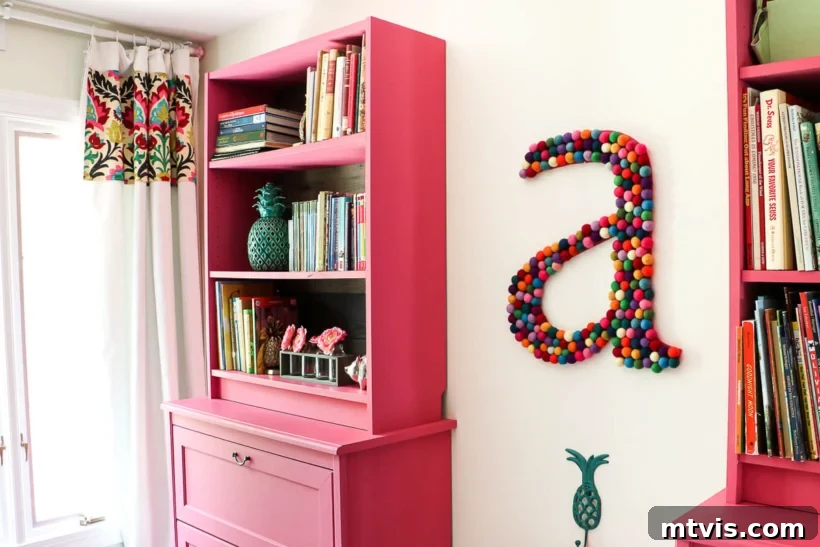
If you’ve followed my journey for any length of time, you know my deep appreciation for IKEA furniture. I’m often the first to suggest an IKEA excursion, always excited by the potential to transform simple, affordable items into unique, custom-looking pieces. Over the years, I’ve embarked on numerous IKEA hacks, achieving stunning results that prove creativity doesn’t have to break the bank. Some of my most popular transformations include the widely celebrated IKEA Malm hack and my elegant IKEA desk hack, which now resembles a high-end designer piece.
Beyond personal projects, I’ve also customized countless IKEA items for my children, such as their vibrant IKEA kids’ table and chairs. And who could forget the viral sensation of my IKEA Billy bookcase hack, which I used to craft stunning built-ins that appear entirely custom-made?
My passion for IKEA furniture is evident in my home and my creative endeavors. While IKEA pieces are generally well-made and durable, everyday use inevitably leads to minor wear and tear—a ding here, a scratch there. This is a natural occurrence with any furniture, regardless of its price point. While I previously discovered the secret to flawlessly painting IKEA laminate furniture, a truly effective method for repairing those pesky dings and dents while perfectly matching IKEA’s specific colors remained elusive. That is, until now.
The Game-Changer: Mohawk 3-in-1 Repair Sticks for IKEA Furniture
Imagine my delight when I learned that Mohawk had developed a 3-in-1 Repair Stick, specifically formulated with colors designed to perfectly match the most common finishes of IKEA furniture. This was a revelation, a genuine “aha!” moment for anyone who loves IKEA but struggles with keeping their pieces pristine. This product isn’t just a repair tool; it’s a furniture savior for those dedicated to maintaining the aesthetic and longevity of their IKEA investments.
This post contains affiliate links for your convenience. Click here for my full disclosure policy.
I eagerly put the Mohawk 3-in-1 Repair Sticks to the test immediately, and they have since become an indispensable part of my DIY toolkit. Most recently, I employed them to repair some significant damage on our IKEA Galant bookshelves. These shelves sport the common IKEA faux wood grain “black-brown” finish, a popular choice for many homes.
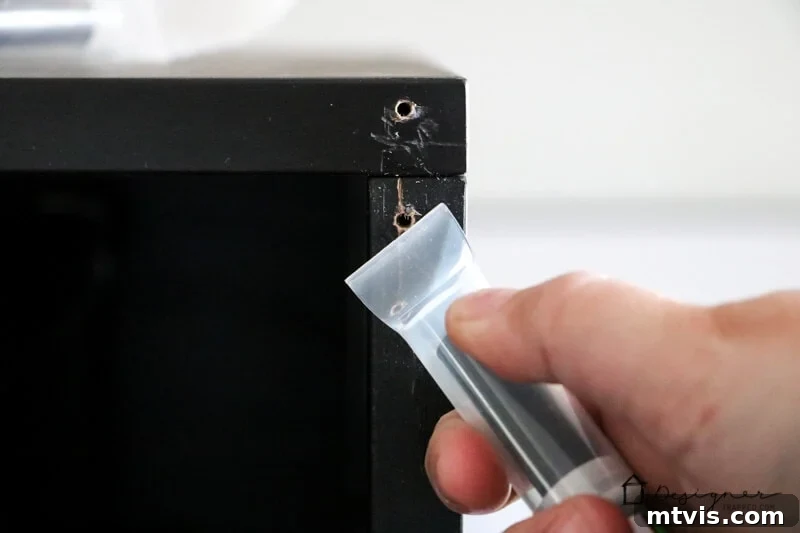
The damage resulted from a previous decor experiment: I had attempted to hang a curtain rod from the top of the bookshelves to create a custom cabinet look, hoping to conceal the contents within. While the idea was sound in theory, the execution left much to be desired. Upon removing the rod and hardware, I was left with several large, unsightly holes where the screws had been driven into the top corners of the shelves. These were far more than minor nicks; they were glaring imperfections requiring more than a simple touch-up.
Thanks to the Mohawk 3-in-1 Repair Sticks, I was able to repair these prominent holes in mere minutes. The sticks allowed me to preserve the unique characteristics of the furniture while achieving an absolutely perfect color match and a seamless application. Let me show you exactly how I accomplished this quick and effective DIY furniture repair.
DIY IKEA Furniture Repair: Achieving Perfect Color Matching with Ease
Repairing your IKEA furniture doesn’t require professional skills or expensive tools. With the right product and a few simple steps, you can tackle dings, dents, and holes, restoring your pieces to their original condition. The Mohawk 3-in-1 Repair Stick offers an all-in-one solution for filling, coloring, and leveling imperfections, making it accessible even for novice DIYers.
Materials Needed
- Mohawk 3-in-1 Repair Stick in the appropriate color for your project. I’ve linked to the white option, which is one of the most common IKEA furniture colors.
- Mohawk offers 4 colors specifically matched for IKEA furniture: black, brown, white, and white stain.
- For IKEA’s black-brown furniture color, a common and sometimes tricky shade to match, I recommend using the brown paint marker in conjunction with the black fill stick for the most accurate and natural blend.
- Paper towel or a soft, clean cloth.
Step-by-Step Guide to Furniture Repair
For those who prefer visual learning, an official demonstration of the Mohawk 3-in-1 Repair Stick, featuring my own repair of a black IKEA office chair, is available below. However, I’ve also provided detailed written instructions with step-by-step photos for a comprehensive guide. Even if you’re new to furniture repair or IKEA hacking, these repair sticks are designed to deliver professional-looking results with minimal effort.
1) Prepare the Damaged Area: Level and Smooth
Begin by inspecting the damaged area on your furniture. Often, dings or dents can cause small pieces of the material to protrude slightly above the surface. To ensure a smooth, even repair, use the built-in leveler cap of the Mohawk Repair Stick. Gently run the cap across the damaged spot. This action will effectively remove any raised or damaged particles, creating a flat and clean surface for the subsequent repair steps. This initial preparation is crucial for achieving a seamless finish.
2) Activate the Paint Marker: Ensure Consistent Color Flow
Before applying any color, it’s essential to activate the paint marker component of your 3-in-1 Repair Stick. Shake the stick vigorously for approximately 60 seconds to thoroughly mix the paint pigment. This ensures an even and consistent color application. Next, press the marker tip down firmly onto a paper towel. Continue pressing and dabbing until the paint saturates the entire marker tip, indicating it’s ready for use. This step prevents splotchy application and ensures a smooth color flow.
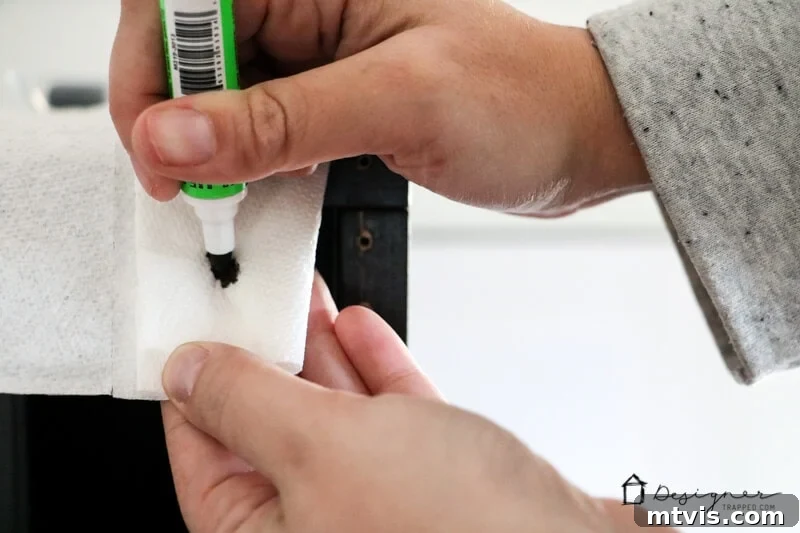
3) Restore Lost Color: Precision Application
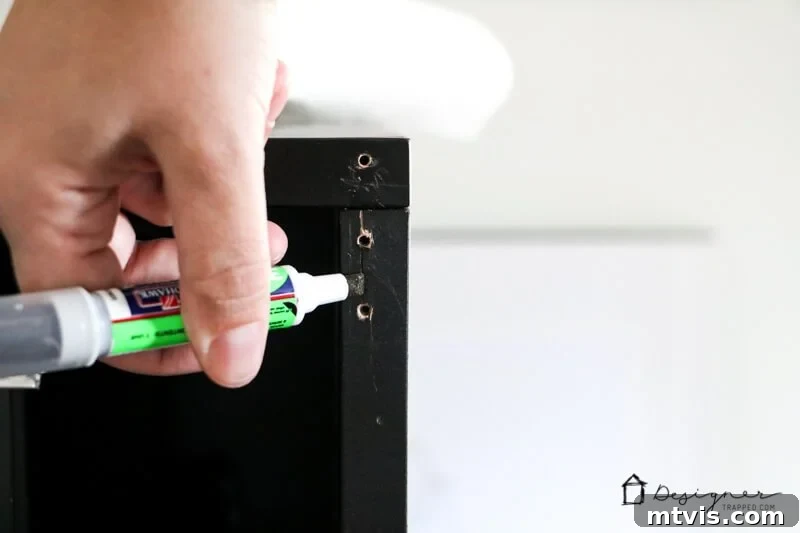
Once the marker is primed, carefully use the paint marker tip to reintroduce color to any areas where the original finish has been lost due to the damage. This step is particularly important for scratches, chips, or areas where the underlying material is exposed. Apply the paint precisely, focusing only on the discolored areas. The fine tip allows for detailed work, ensuring that only the damaged parts receive new color, blending seamlessly with the surrounding furniture finish.
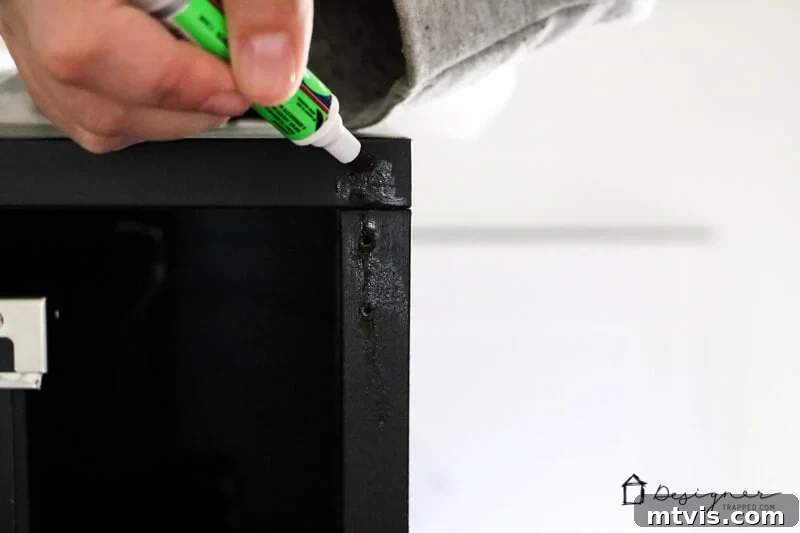
4) Fill Imperfections: Build Up for a Smooth Surface
Now, transition to the fill stick component of the tool. This wax-based stick is designed to fill in dings, dents, holes, or any voids in the furniture surface. Hold the fill stick at a 45-degree angle to the surface and apply firm pressure as you rub it back and forth over the damaged area. Continue this motion until the void is completely filled, ensuring full coverage. A useful tip here is to err on the side of overfilling the damaged areas slightly. This allows for a clean scrape in the next step, ensuring the repaired area is perfectly flush with the original surface without leaving a depression.
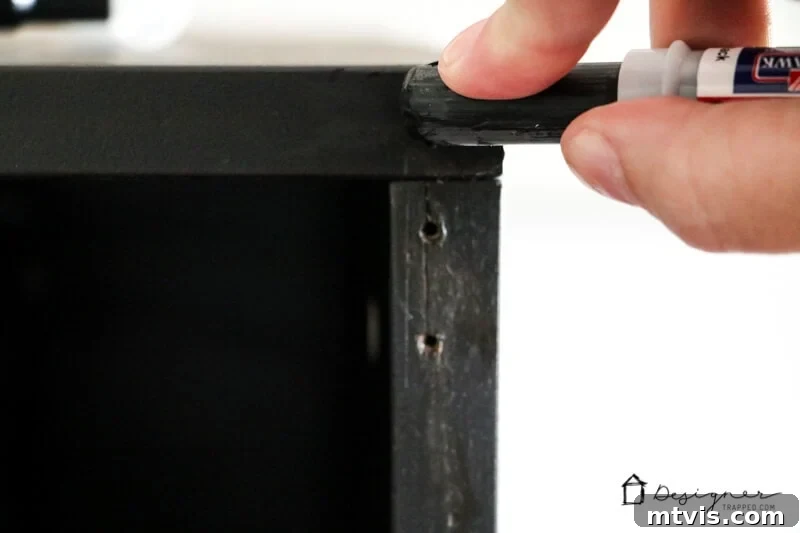
5) Level the Surface: Scrape Off Excess
Once the fill material has been applied, use the leveler cap (the same tool used in step 1) to carefully scrape off any excess product. Hold the cap flat against the furniture surface and firmly drag it over the filled area. This action removes any raised wax, leaving a smooth, level finish that seamlessly integrates with the surrounding furniture. Take your time to achieve a perfectly flush surface, ensuring there are no bumps or ridges.
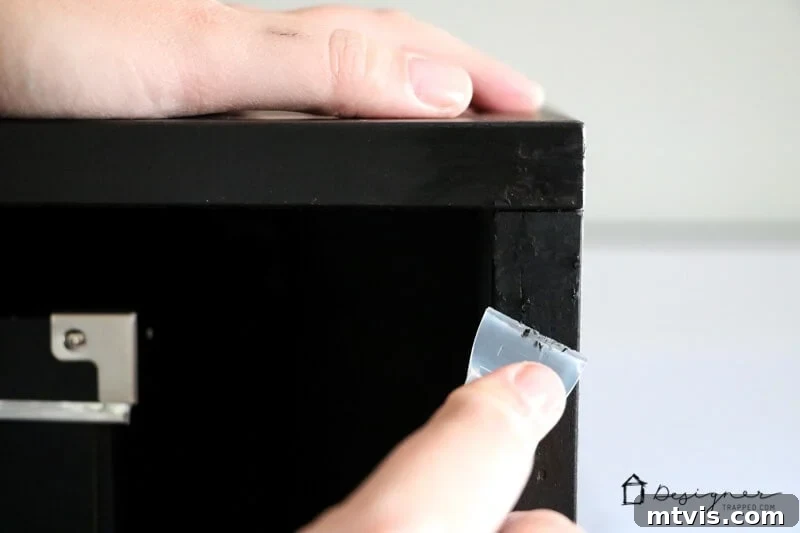
6) Final Polish: Buff Away Residue
For the final touch, take a clean cloth or a fresh paper towel and gently buff the repaired area. This step removes any faint wax residue or smudges, leaving the surface clean and polished. Buffing also helps to blend the repair even further, ensuring a truly invisible fix. After these six simple steps, your IKEA furniture will look as good as new, free from the previous imperfections.
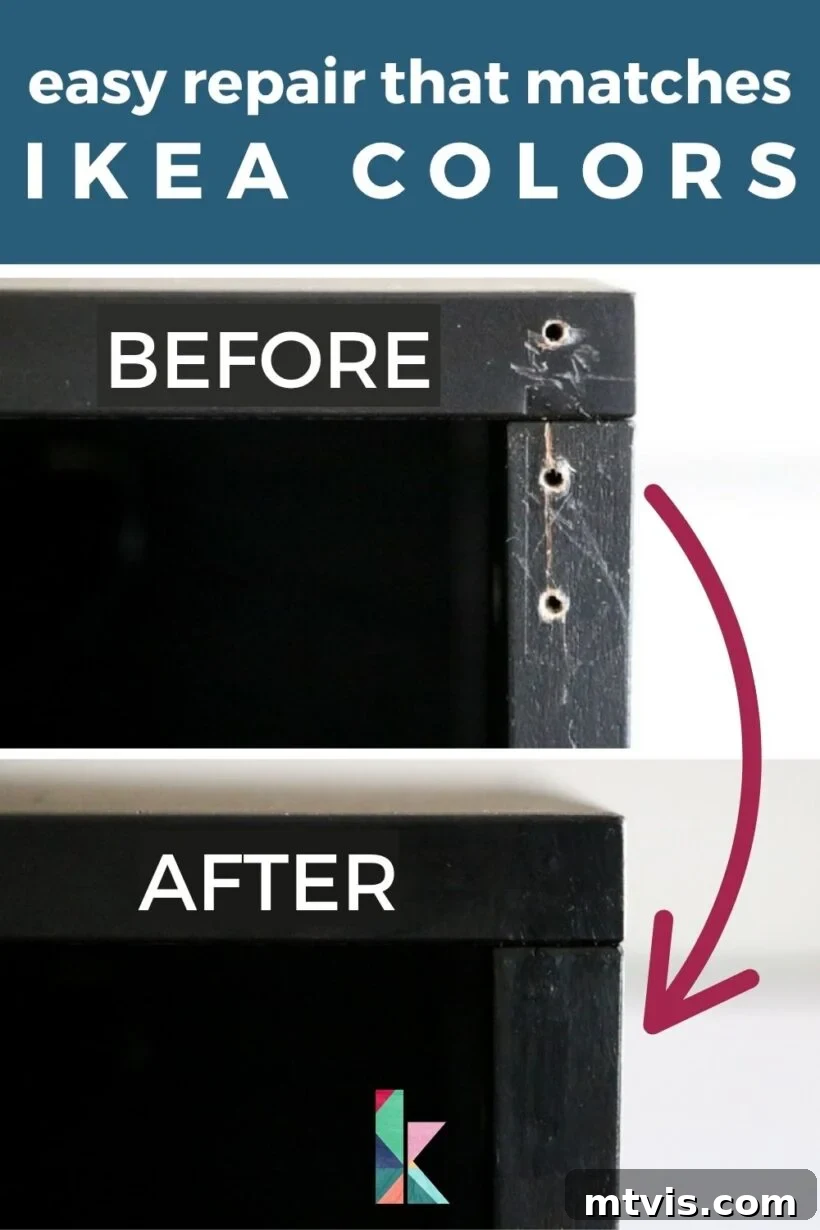
That’s it! I wasn’t exaggerating when I said this furniture repair process is incredibly easy and efficient. But the true magic lies in the outcome: with Mohawk’s 3-in-1 Repair Sticks, you achieve a flawless color match for your IKEA paint or stain. This level of precision was something I had never been able to accomplish with any other product before. Imagine: a 5-minute repair that results in a perfect, undetectable color match. This is undeniably a significant DIY victory! Observe the remarkable before and after transformation:
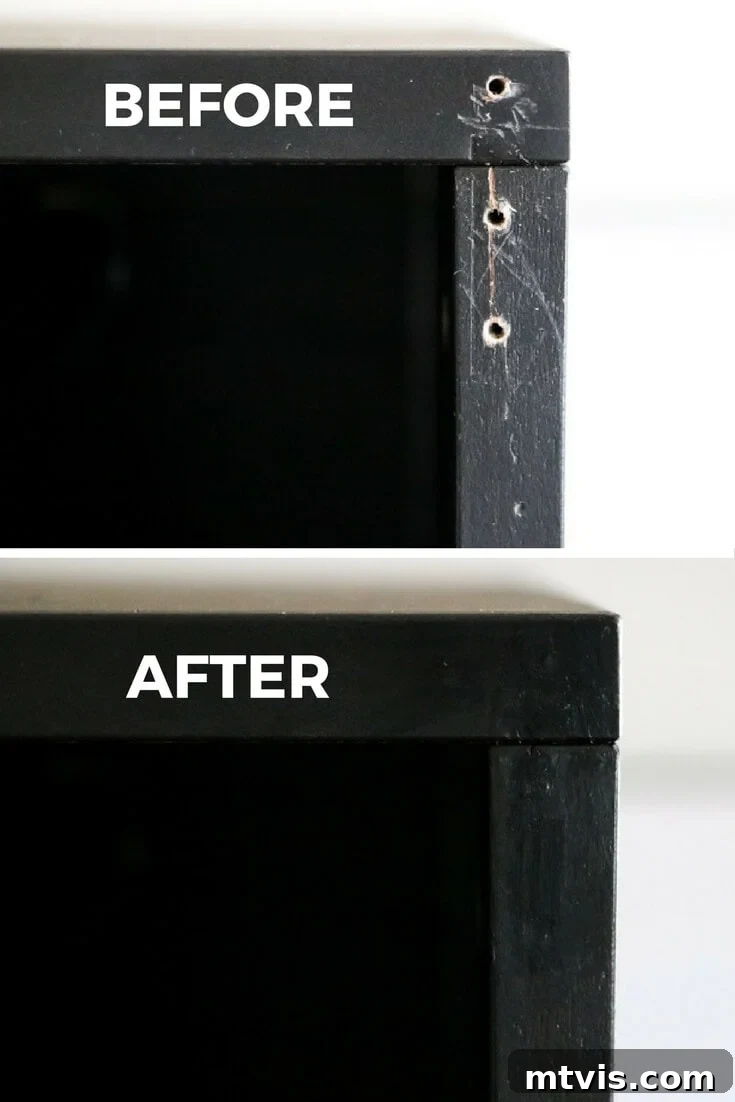
My IKEA Galant bookcases are now far more aesthetically pleasing, with all the previously inflicted damage completely erased. There was no need for power tools, messy sanding, or tedious painting. There are no visible brush strokes or any signs of a cover-up; the repair is truly invisible. The entire process took just minutes and required nothing more than the versatile 3-in-1 repair sticks. This product offers a genuinely simple, budget-friendly, and effective solution for common furniture woes.
Beyond Bookshelves: Versatility for All Your IKEA Pieces
What are your thoughts? Do you have any IKEA furniture pieces around your home that could benefit from this quick and easy repair? Perhaps a light grey dresser with a scuff, a small bathroom cabinet with a chipped edge, an IKEA coffee table showing signs of wear, or shelving units with unsightly marks? The beauty of the Mohawk 3-in-1 Repair Sticks lies in their versatility and the smooth, perfect pigment application they offer. Whether it’s a minor scratch or a more significant ding, you can achieve a perfect stain and an impeccable cover-up for virtually any size project on your laminate or veneer IKEA furniture. This empowers you to extend the life of your favorite pieces, maintain their beauty, and continue enjoying your personalized home decor.
More IKEA HACK Posts
SEE ALL DIY POSTS
-
Creative Hacks for IKEA Bookshelves and Built-In Cabinets
-
Easy Furniture Repair to Match IKEA Paint Colors!
-
IKEA Billy Bookcase Hack for Loads of Storage
-
Affordable IKEA Desk Hacks You Will LOVE
-
How to Paint IKEA Furniture and Mistakes to Avoid
-
50 IKEA Hacks You Have to See to Believe
Curious about my full approach to transforming rooms and spaces within our home? Explore Designer in a Binder®, my comprehensive guide to DIY decorating.
For exclusive content, behind-the-scenes sneak peeks, and more DIY tips delivered directly to your inbox, don’t forget to subscribe before you leave!