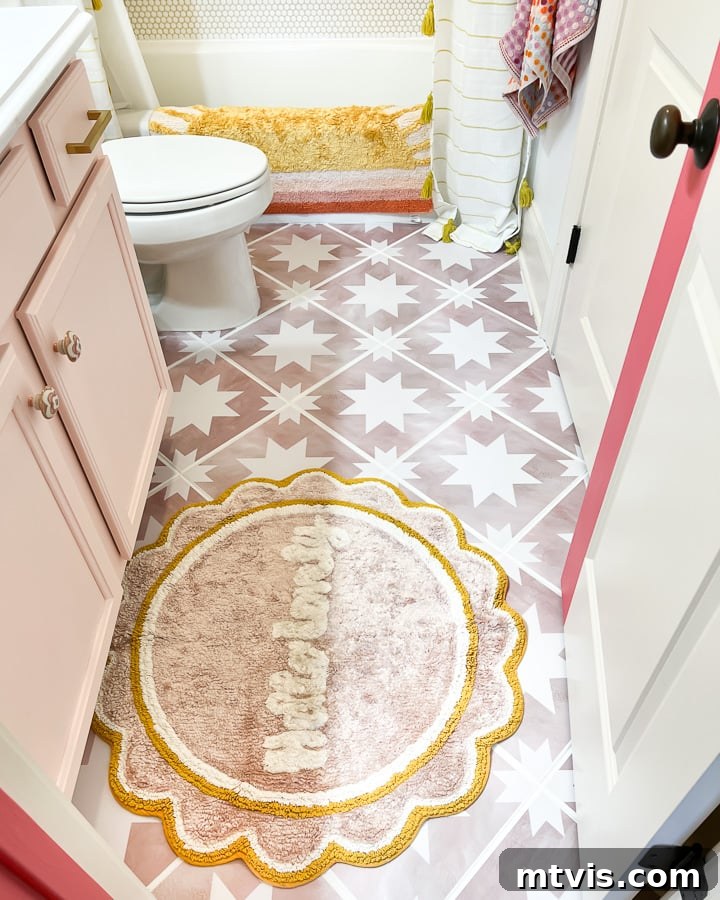
Are you contemplating a home refresh and wondering if tile stickers are the perfect solution for your upcoming project? If you’re seeking a swift, mess-free, and budget-friendly way to revitalize your living spaces, then tile stickers are an exceptional choice! Many homeowners, however, approach this innovative decorating option with a degree of skepticism and a multitude of questions.
This comprehensive guide aims to address all your burning questions about tile stickers. Are they truly effective? How straightforward is their removal? Are tile stickers genuinely waterproof? What is their expected lifespan? Drawing from extensive personal experience, having successfully utilized tile stickers in two of our bathrooms and our laundry room, I’m here to provide in-depth answers and insights. We’ll explore these questions and much more, including a video showcasing their impressive durability over time.
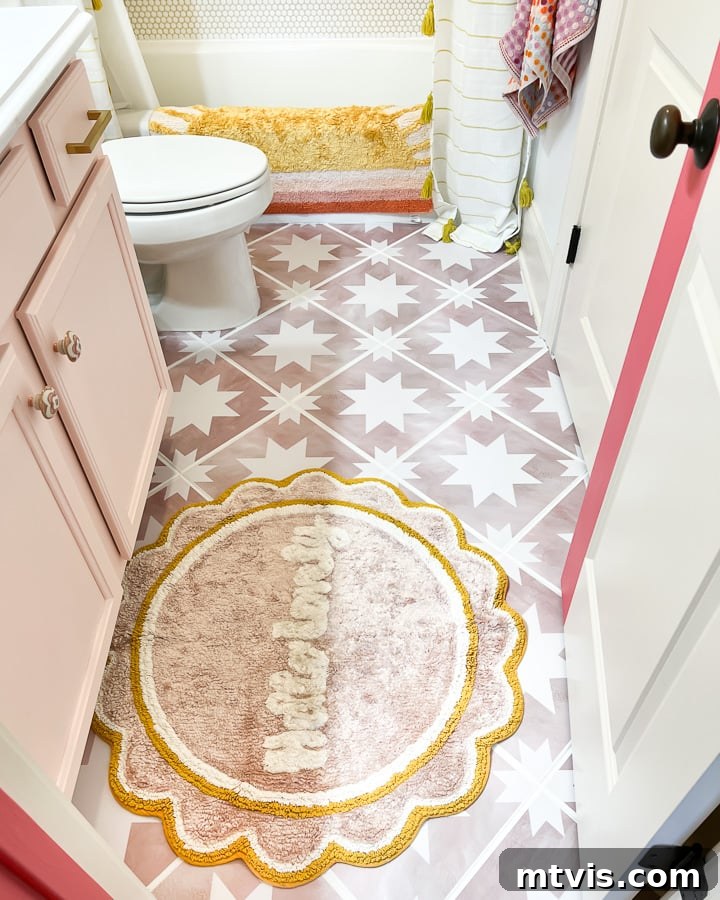
Table of Contents
Toggle
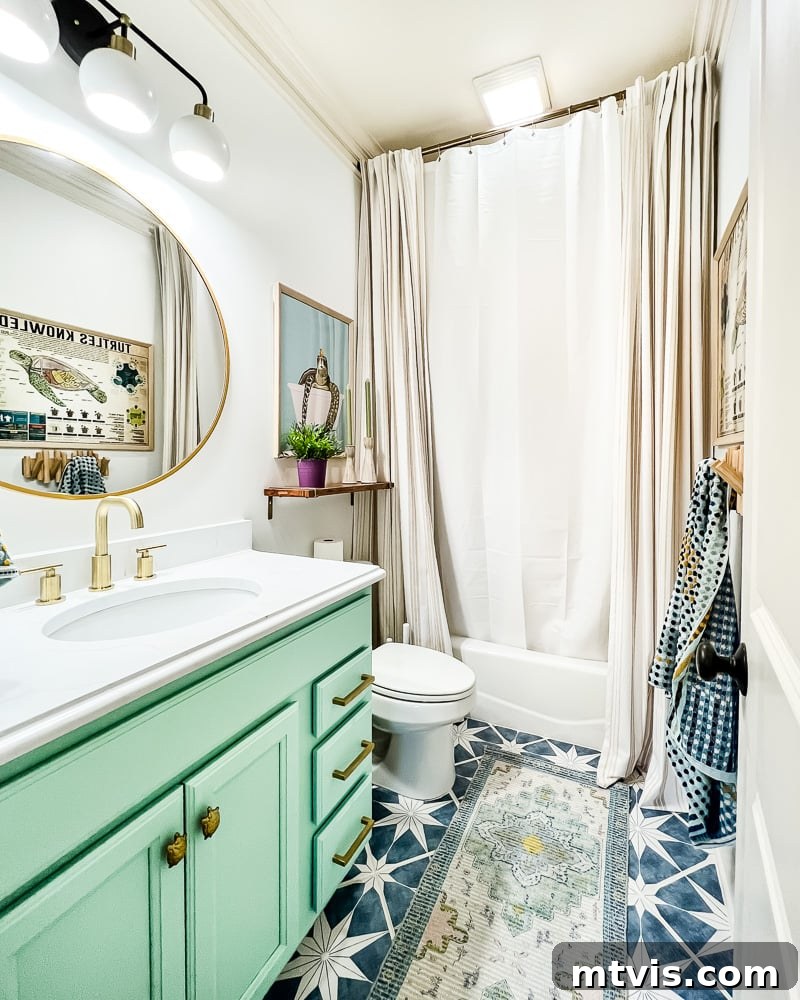
That stunning floor you admire above? Yes, those are beautifully applied floor tile stickers! Having personally incorporated them into three distinct areas of our home, I consistently receive countless inquiries about their performance and appeal. It’s time to dedicate a detailed post to thoroughly answer all your questions about these transformative home decor elements.
Need a Link to Our Home Tour?
If you’re curious about the paint colors we’ve chosen for our current home or where we’ve sourced our furniture, art, rugs, and other decor elements, simply click the link below to visit our comprehensive home tour page!
This post contains affiliate links for your convenience. Click here for my full disclosure policy.
What Are Tile Stickers? An Introduction to Vinyl Decals
Tile stickers, also commonly referred to as vinyl tiles or tile decals, are incredibly thin adhesive sheets, roughly the thickness of a standard playing card. Crafted from high-quality, waterproof vinyl, these innovative products offer a brilliant alternative for homeowners looking to update their spaces without the hassle and expense of traditional tile replacement.
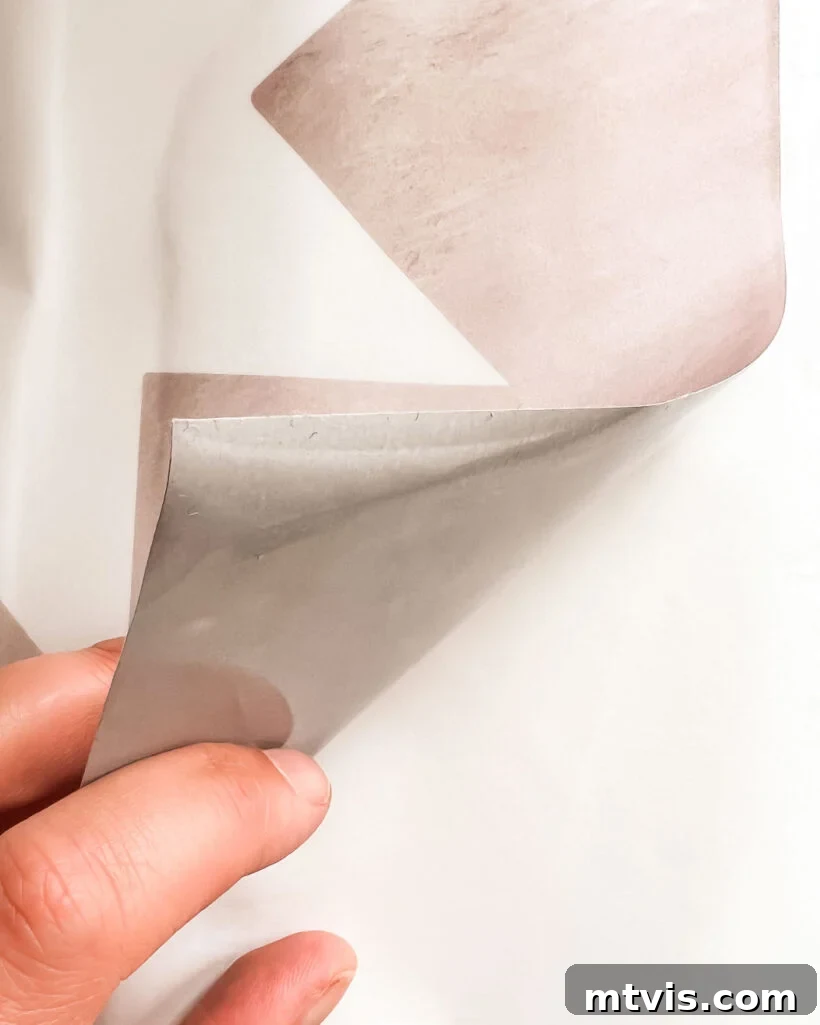
These vinyl marvels are not only waterproof but also remarkably scratch-resistant and exceptionally durable, designed to withstand daily wear and tear. One of their most compelling features is the elimination of messy demolition or grouting, making them an ideal DIY-friendly project. The easy peel-and-stick installation process empowers anyone to achieve a professional-looking tile transformation with minimal effort and specialized tools.
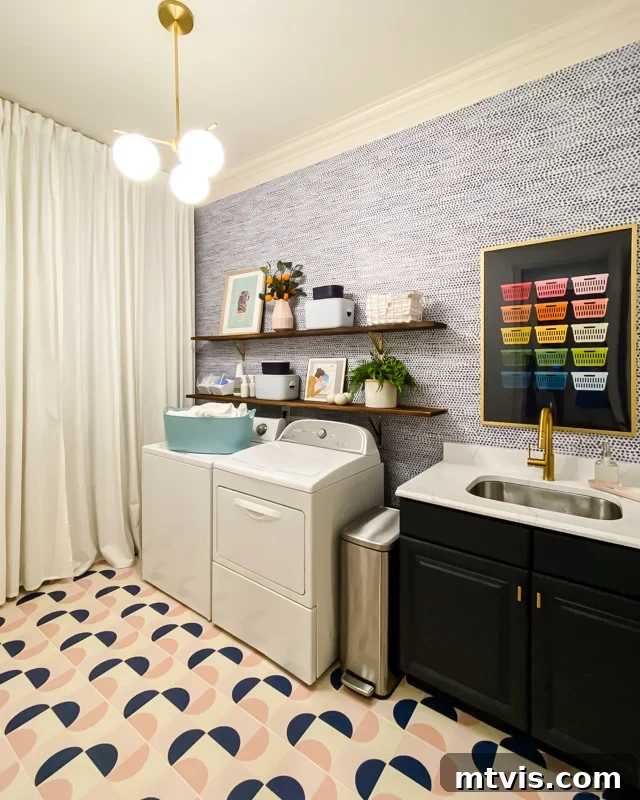
It’s crucial to distinguish tile stickers from peel-and-stick tiles, as they are entirely different products. Peel-and-stick tiles are typically much thicker, often made from a material known as luxury vinyl plank (LVP) or luxury vinyl tile (LVT). While we successfully used this specific peel-and-stick tile in our previous laundry room and absolutely adored the results, its application and composition are distinct from the thinner tile stickers or tile decals.
Vinyl tile stickers have surged in popularity due to their extensive array of colors, patterns, and designs. They excel at mimicking the high-end aesthetic of expensive cement tiles, intricate Moroccan tiles, or classic ceramic patterns, but at a mere fraction of the cost. This affordability, coupled with their removability, also makes them a favorite among renters seeking temporary yet impactful home decor upgrades.
Versatile Applications: Where Can You Use Vinyl Tile Stickers? What Surfaces Will They Stick To?
A common question we receive is: “Can you put tile stickers over existing tiles?” The answer is a resounding yes! However, the versatility of tile stickers extends far beyond just covering old tiles. They can adhere to a wide array of surfaces, making them a flexible option for various home renovation projects. A leading seller of high-quality tile decals, Quadrostyle, provides comprehensive guidance on their website regarding suitable surfaces. Here’s a detailed list of where tile stickers typically perform best:
- Smooth Ceramic and Porcelain Tiles: Ideal for both wall and floor tiles, offering a seamless and renewed look.
- Painted Drywall: Works exceptionally well on surfaces painted with satin or gloss finishes, providing a sleek base for adhesion.
- Laminated Surfaces: Perfect for upgrading furniture or fixtures made of materials like Formica, melamine, or popular IKEA pieces.
- Existing Resilient Flooring: Easily applied over linoleum, vinyl, and laminate flooring for a quick floor transformation.
- Wood Surfaces: Suitable for parquet and properly varnished wood, adding a new design dimension.
- Sealed Concrete and Stone: Adheres effectively to sealed concrete and polished stone, such as granite, marble, and terrazzo.
- Glass, Metal, Plastic, Acrylic, and Perspex: These non-porous surfaces provide excellent adhesion for tile stickers, opening up creative possibilities beyond floors and walls.
While tile stickers offer incredible flexibility, there are certain surfaces where they are not recommended. Understanding these limitations is key to ensuring a successful and long-lasting application:
- Rough or Textured Surfaces: Tile stickers will not properly adhere to highly textured wall or floor tiles, such as slate or tumbled marble, nor to surfaces with irregular edges or pockmarks (e.g., handmade tiles). The uneven surface prevents full contact and secure adhesion.
- Matte or Chalk Finish Paints: Drywall painted with matte, velour, or chalk finishes often lacks the smooth, non-porous quality needed for strong adhesion.
- Damaged Surfaces: Cracked paint, old, peeling wallpaper, or damp and cracked surfaces will compromise the sticker’s ability to stick firmly and evenly.
- Unsealed or Raw Materials: Unsealed subflooring, unsealed plywood, or raw wood are too porous and will not provide a suitable base. Similarly, waxed or oiled wood paneling, and unsealed concrete or stone tiles, will repel the adhesive.
- Waxy or Porous Tiles: Ceramic tiles with a wax coating or highly porous materials like cork are unsuitable. The wax interferes with adhesion, and porous surfaces absorb the adhesive, weakening the bond.
- Brick: The highly textured and porous nature of brick makes it an unsuitable surface for tile stickers.
Transforming Your Kitchen with Tile Stickers
Kitchens are high-impact areas that often benefit immensely from budget-friendly renovations, and tile stickers offer a fantastic way to achieve a fresh look. You can seamlessly use tile stickers to update an existing tile backsplash by applying them directly over your current tiles. For those without an existing backsplash, or if you simply have drywall behind your countertops, these decals can be installed directly onto the wall, creating the illusion of a beautifully tiled surface. When considering tile stickers for areas near heat sources, such as behind a stove or cooktop, always ensure you select heat-proof tile decals specifically designed for such applications. If heat remains a significant concern, an alternative like painting your tile backsplash might be a more suitable option.
While technically possible, I generally do not recommend using tile stickers for kitchen floors. Although our tile stickers have performed exceptionally well in our bathrooms, a kitchen floor typically experiences much heavier foot traffic, spills, and overall wear, which might compromise the long-term integrity of the stickers. For a durable kitchen floor update, I would instead suggest installing a floating tile floor over your outdated surface. However, if you’re looking for a temporary, short-term aesthetic fix for your kitchen floor, tile stickers could certainly serve as a great, impactful option.
Bathroom Bliss: Updating with Tile Stickers
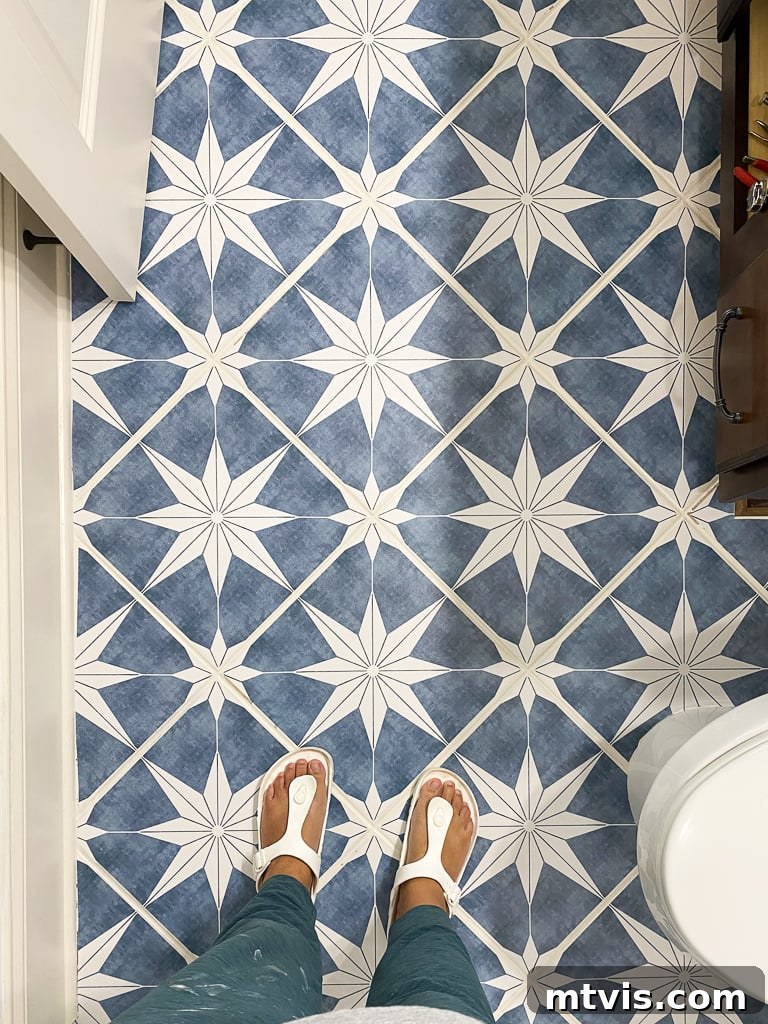
Bathrooms are another prime location for the transformative power of tile decals. You can effortlessly use these stickers to refresh an outdated tile floor, as we’ve successfully demonstrated in both Avery’s bathroom and Attley’s bathroom. Furthermore, tile stickers can be applied directly over linoleum or sheet vinyl flooring, artfully creating the sophisticated appearance of individual tiles. And, of course, they are an excellent choice for revitalizing a bathroom backsplash, adding style and protection with ease.
Many reputable tile sticker manufacturers confirm that their vinyl tile decals are suitable for use in showers, touting their waterproof properties. While I haven’t personally installed them in a shower environment, I have a friend residing in NYC who applied them to cover a row of accent tiles she disliked in her rented shower. She reports that they are holding up beautifully, showcasing their resilience in a high-moisture setting. This anecdotal evidence further supports their suitability for damp areas, providing a flexible and temporary solution for renters or anyone looking for a quick shower aesthetic upgrade.
The Advantages and Disadvantages of Tile Stickers: A Balanced View
To help you decide if tile stickers are the right choice for your home renovation project, let’s explore their key advantages and potential drawbacks.
Pros: Tile stickers stand out as an incredibly budget-friendly flooring idea, offering a dramatic aesthetic upgrade without the financial strain of traditional tiling. Their ease of installation is a major draw for DIY enthusiasts, requiring no specialized tools, messy grout, or demolition. The market boasts an endless variety of colors, patterns, and designs, from intricate Moroccan motifs to sleek modern aesthetics, allowing for extensive customization. Furthermore, their removability makes them a renter-friendly solution, as they can be easily peeled off without damaging the underlying surfaces like tile or linoleum, restoring the space to its original condition. This also makes them ideal for temporary updates or when you simply want to refresh your decor regularly.
Cons: Based on my extensive experience, tile stickers are not ideally suited for areas with extremely heavy foot traffic. While durable, constant high-impact use can eventually lead to wear. Successful application heavily relies on thorough surface preparation; neglecting this crucial step can lead to poor adhesion and premature peeling. Most importantly, selecting the correct tile sticker size is paramount. If the stickers are incorrectly sized, particularly if they overlap or are too close to grout lines, the corners are prone to peeling up, even with meticulous installation. In essence, rushing the installation process or failing to order the precise size can significantly diminish your satisfaction with the final results. Attention to detail truly makes all the difference for a long-lasting and beautiful finish.
Longevity and Durability: How Long Do Floor Tile Stickers Last?
The lifespan and performance of tile stickers are critically dependent on two factors: installing the correct size and preparing your surface meticulously. When these conditions are met, tile stickers can last indefinitely, providing years of beauty and functionality. Trust me, I speak from direct, hard-earned experience.
Our initial foray into tile stickers was, unfortunately, a significant learning curve and a definite fail. The issue was entirely avoidable: we purchased the wrong size tile stickers for our laundry room. This led to persistent problems with the edges peeling up, ultimately forcing us to admit defeat and install a floating tile floor over the original, peeling surface. This experience underscored the absolute necessity of precise sizing.
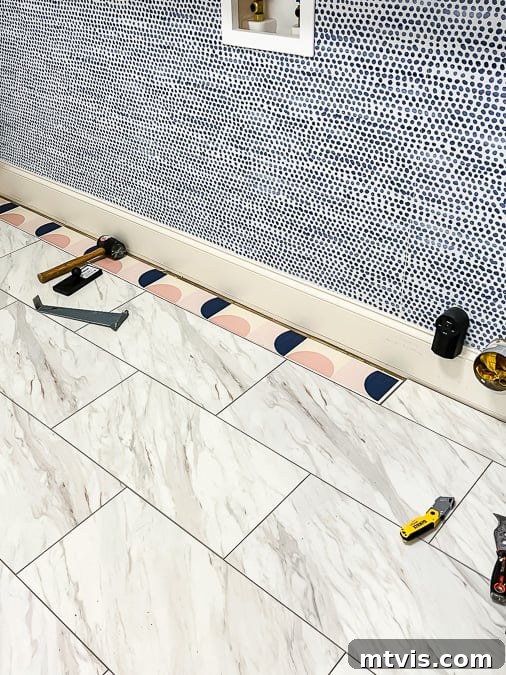
Since that laundry room mishap, we have applied correctly sized vinyl tile decals in two other areas, and I can confidently say I have zero regrets. The floor tile stickers in our daughters’ bathrooms have been subjected to daily use for over 16 months now, and they are holding up absolutely perfectly. There’s no peeling, ripping, or any signs of wear. We are beyond thrilled with their performance. The secret truly lies in understanding and implementing the correct sizing, which I will elaborate on later in this post, ensuring that your tile stickers provide lasting beauty and value.
I highly recommend watching the short video below to witness firsthand how exceptionally our tile stickers are holding up after 16 months of consistent use. Seeing is believing!
Step-by-Step Installation: How to Apply Tile Stickers
While each manufacturer typically provides their own detailed installation instructions, which you should always review thoroughly, the general process for applying tile decals remains largely consistent across brands. You can gain a clear understanding of the general installation technique by watching the short video below, or by consulting my dedicated post on how to update outdated tile without replacing it. This universal approach ensures a smooth and successful application, regardless of where you purchase your tile stickers.
The general installation process for tile stickers is remarkably straightforward, typically involving a few key steps: First, ensure your surface is meticulously cleaned and thoroughly dry. Next, carefully measure your existing tiles to determine the precise size needed for your stickers (remembering the crucial sizing tip discussed later). Once your surface is prepped and your stickers are ready, simply peel the backing from the decal, align it perfectly with your tile, and firmly press it down, working from the center outwards to smooth out any air bubbles. With a little patience and precision, you’ll achieve a flawless finish.
Frequently Asked Questions About Tile Stickers
Tile stickers are crafted from a highly durable, adhesive-backed vinyl film. This film is then laminated with an additional protective layer to guard against fading, scratching, and general wear. When you purchase tile stickers from reputable sellers like Quadrostyle or Snazzy Decal, you’re investing in a material similar to what’s used for outdoor signage and vehicle wraps. This high-grade material is engineered to be incredibly sticky, exceptionally durable, and completely waterproof, ensuring a long-lasting and resilient finish for your home renovation projects.
This is perhaps the most critical step for a successful tile sticker installation. My first experience with tile stickers for our laundry room involved custom-cutting them to the exact dimensions of our ceramic tiles, which turned out to be a significant error. I learned this crucial lesson when ordering from Snazzy Decal on Etsy for Avery’s bathroom.
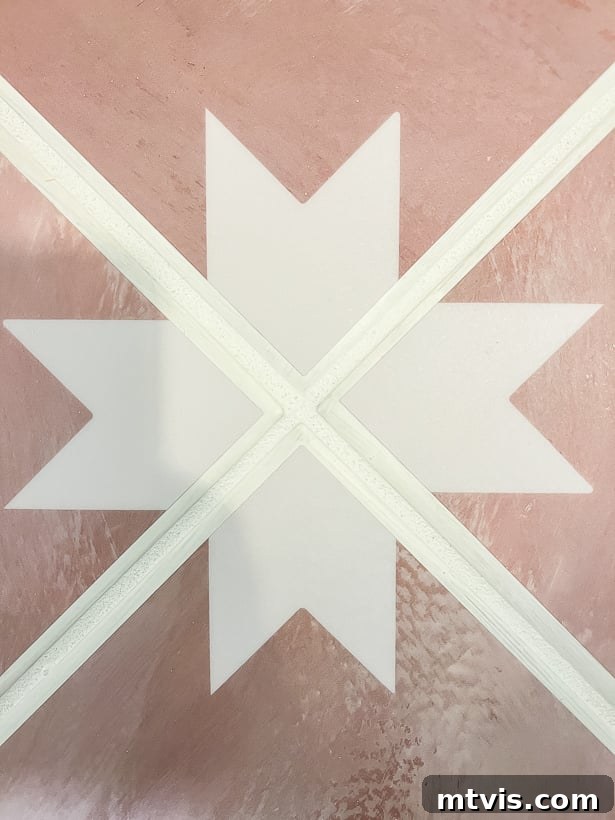
Snazzy Decal provided very specific instructions: you should order your tile stickers approximately 1/8″ SMALLER THAN YOUR ACTUAL TILES on each side. This intentional gap creates a small border around the tile, ensuring the sticker adheres entirely to a perfectly flat surface, rather than potentially overlapping a slight slope or bevel that some tiles possess. The tile sticker should absolutely not extend all the way to or overlap the grout line. As you can observe in the image below from Attley’s bathroom, the tile stickers deliberately do not reach the very edge of the tiles—this is precisely the correct installation method for long-term adhesion.
It’s also worth noting that most tile sticker companies offer custom cutting services. Even if you only see standard sizes listed (e.g., 12″ x 12″), don’t hesitate to message the seller to inquire about custom dimensions. They will almost certainly accommodate your request and guide you through the ordering process.
The prep work for tile stickers is minimal but crucial for optimal adhesion. Begin by thoroughly vacuuming any dirt, dust, or debris from your surface. Following this, deep clean the area exceptionally well using a heavy-duty degreaser like TSP (Trisodium Phosphate) to remove any grime, soap scum, or residue. The surface must be completely dry before application.
If you are installing floor tile stickers and your existing grout lines clash with the new sticker design, you might consider painting the grout lines first. As I mentioned in the embedded video earlier in this post, some of the paint on our grout lines eventually peeled off. This was likely due to rushing the process and using leftover wall paint; a more durable porch and floor paint would have been a better choice. However, even if minor touch-ups are needed, it’s a relatively simple task.
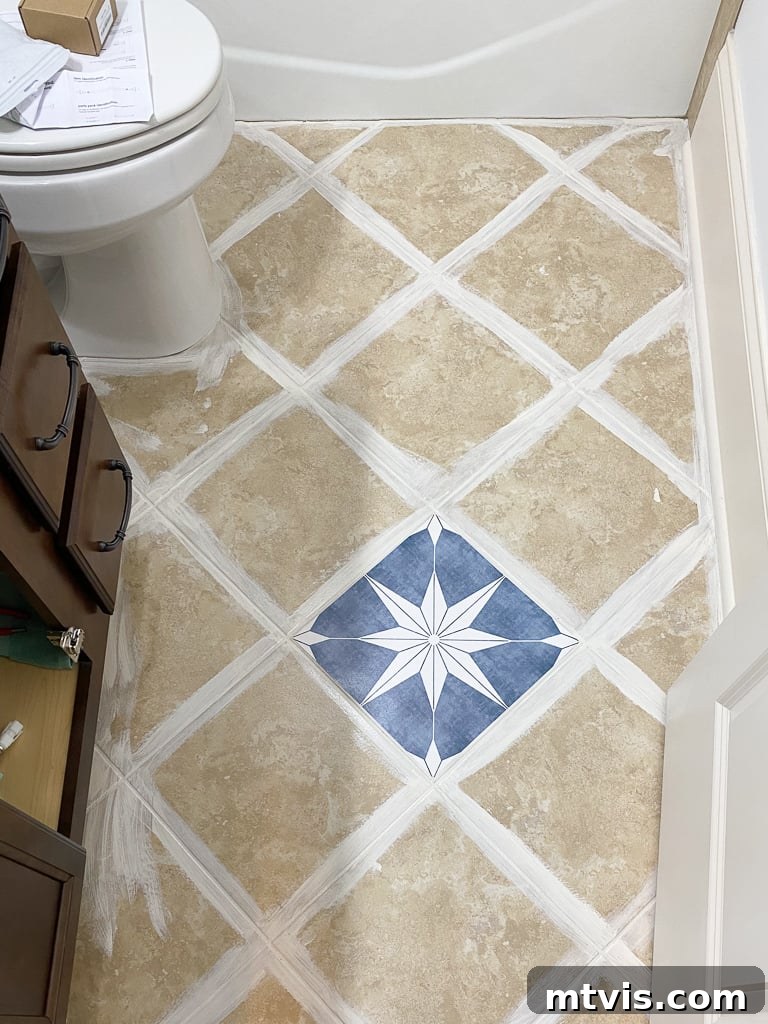
This is a very common question! Tile stickers are thin enough that once applied, you don’t really register them as an additional layer “sitting on top” of your existing tiles. They integrate quite seamlessly. While they are not perfectly smooth like glass, their texture is subtle, often described as similar to the vinyl cover of a binder—just the tiniest hint of texture. They feel pleasantly soft and smooth underfoot, providing a warmer sensation than cold ceramic tile, but without feeling like cheap, artificial plastic. The overall tactile experience is quite comfortable and surprisingly high-quality.
Tile stickers are ideally suited for smooth ceramic tile and porcelain tile, which is the type of surface we successfully applied them to. Many people inquire if tile stickers can be used on textured tiles, such as slate, travertine, or tumbled marble. Based on the comprehensive list of compatible and incompatible surfaces provided earlier in this post, the answer is definitively NO. The surface of the existing tile must be relatively smooth and the edges straight to allow for proper adhesion and a clean finish. Any significant texture will prevent the sticker from lying flat and adhering securely.
Beyond traditional tiles, you can also use tile stickers on smooth linoleum, vinyl, or even hardwood floors. If you apply them to these surfaces, you have the option to skip grout lines entirely by butting the tile stickers directly against each other for a continuous look. Alternatively, if you prefer the appearance of grout lines, you can paint the underlying floor a desired color and then strategically space out the stickers to create your preferred grout effect.
Most tile sticker manufacturers indicate that their vinyl tile decals are waterproof and therefore suitable for shower environments. While I personally haven’t used them in a shower, I have a friend in New York City who successfully installed them over accent tiles she disliked in her rented shower, and she reports that they are holding up beautifully. This suggests their capability to withstand consistent moisture exposure.
That being said, I would personally exercise caution and would not recommend using them in a shower for a long-term solution. While I wouldn’t be concerned about the stickers themselves peeling off due to water, I would worry about the potential for mold or mildew to form along the tiny, exposed edges of the tile stickers. Despite their thinness (about the thickness of a playing card), these edges can create micro-crevices where moisture can accumulate and foster mold growth over time, potentially impacting hygiene and aesthetics. For shower applications, ensure excellent ventilation and regular, thorough cleaning to mitigate this risk.
Many readers express concern about water exposure, but rest assured, vinyl tile stickers are explicitly designed to be waterproof! You can confidently mop them with standard floor cleaners without any issues. However, I would advise against using overly caustic or abrasive tile cleaners, as these could potentially affect the sticker’s laminate finish or printed design over time. If water spills or splashes onto them, simply wipe it up as you would with a regular tile floor. They are built to withstand normal moisture.
It’s important to clarify that while they are waterproof, tile stickers should not be exposed to standing water for extended periods. If water is allowed to sit on the stickers for a prolonged duration, it could eventually seep under the edges, compromising the adhesive and leading to the tiles loosening or lifting. Promptly wiping up spills is always the best practice for maintaining their longevity.
Fortunately, nearly all reputable tile sticker companies offer custom cutting services. So, even if the listings only show set sizes (like 12″ x 12″) that don’t match your specific tile dimensions, don’t be discouraged. Simply message the seller or company directly and inquire if they can custom cut your desired size. The answer will almost certainly be yes, and they will provide clear instructions on how to place your custom order, often requiring you to provide precise measurements of your existing tiles. This flexibility ensures you can get the perfect fit for your project.
That’s an excellent question! We’ve had experience with several different brands. The charming pink tile stickers in Attley’s bathroom were sourced from Tile Stickers With Soul. For Avery’s bathroom, we opted for decals from Snazzy Decal. And the tile stickers we initially used in our laundry room came from Mirth Studio.
Out of these, my personal favorite for ease of installation were the ones from Snazzy Decal, primarily because each sticker was individually pre-cut. The quality of the stickers from Tile Stickers With Soul was equally excellent, but they arrived on a large roll of backing paper, which made the handling and cutting process a bit more challenging during installation. Ultimately, both offer great quality, but the pre-cut option can certainly streamline your DIY project. You can explore some of my top tile sticker recommendations at the bottom of this post.
Yes, tile stickers are designed to be removable, which is a key feature contributing to their popularity, especially among renters. We actually had a firsthand experience removing two tile stickers from Avery’s floor when we installed a new toilet after the old one unexpectedly cracked. The base shape of the new toilet was different, necessitating removal. While the adhesive is strong and requires a firm pull, the stickers came off cleanly and in one piece, leaving absolutely no residue or stickiness behind on the underlying tile. Fortunately, we had a couple of leftover tile stickers, making replacement quick and easy. This demonstrates their renter-friendly nature and the ability to reverse your decor choices without damage.
Since we unfortunately ordered the wrong size tile stickers for our laundry room floor in our first attempt, I can tell you exactly what goes wrong. The most common and frustrating issue is that the corners of your tile stickers will begin to peel up. This occurs if the stickers are cut too close to the grout line, or, even worse, if they slightly overlap the grout itself. Grout lines are typically recessed or slightly uneven, preventing the sticker from forming a complete, flat seal. This lack of full adhesion around the edges, particularly the corners, leaves them vulnerable to lifting due to foot traffic, cleaning, and general wear.
If you’d like to see a visual example of what happened to our laundry room tile stickers due to incorrect sizing, you can watch the short video below. This video also provides a helpful demonstration of how to install a floating tile floor, which serves as an excellent alternative for updating your floor without the need for messy demolition of the old one.
I have experience with both methods; I painted and stenciled the floor in our old kitchen and also successfully figured out how to paint a vinyl floor in our previous laundry room. Both painted floors looked fantastic and held up beautifully thanks to the use of high-quality porch and floor paint.
While you can certainly achieve similar patterns to those found on tile stickers using floor paint and stencils, I can tell you from experience that it is an incredibly time-consuming process. Additionally, the lines produced with a stencil are rarely as clean and crisp as the precision-cut designs of tile stickers. Painting around intricate fixtures like toilets, vanities, and tubs with a stencil presents a significant challenge due to tight spaces and curves. For these reasons, I would generally recommend a painted and stenciled floor primarily for more open and less intricate floor spaces.
In comparison, installing tile stickers is significantly quicker, easier, and can be just as durable as a well-painted floor, especially in areas with moderate traffic. It offers a more efficient and often more precise way to achieve patterned floor transformations.
Tile stickers offer a pleasant tactile experience that is distinct from traditional tile. They are not as cold to the touch as ceramic or porcelain tiles, providing a slightly warmer sensation underfoot. However, they also don’t feel like cheap, flimsy plastic. Instead, they have a surprisingly soft and smooth quality, often compared to the subtle texture of a high-quality vinyl binder cover. This slight texture prevents them from feeling perfectly slick, contributing to their comfortable and natural feel.
When dry, tile stickers are generally not slippery at all, providing good traction comparable to most standard flooring surfaces. However, similar to many types of tile, they can become a bit slippery when wet. The tile stickers we have personally used and tested have proven to be no more or less slippery than the original tile surfaces they covered. As with any floor in a wet environment, exercising caution and ensuring quick cleanup of spills is always advisable.
When considering tile stickers for a fireplace surround, the primary concern is heat. Vinyl, the material from which tile stickers are made, can melt or warp if exposed to excessively high temperatures. Therefore, if your fireplace is operational and regularly used, I would strongly advise against using vinyl tile stickers on the surrounding tiles. The heat generated could damage the stickers and potentially release fumes. However, if your fireplace is purely decorative and never used for fires, then applying vinyl tile stickers to its surround can be a perfectly safe and stylish way to update its appearance.
Most tile sticker manufacturers generally state that their products can be used behind a kitchen stove or cooktop, provided the tile stickers are positioned at least 4 inches away from any direct heat source. The key here is to confirm the specific heat resistance properties with the company you plan to order from, as material compositions can vary slightly. Always check the manufacturer’s guidelines for fire safety and optimal performance. For peace of mind and long-term durability, ensuring adequate distance from intense heat is crucial to prevent any potential warping, melting, or discoloration of the vinyl.
Discover My Favorite Tile Sticker Selections
Below, you’ll find a curated selection of some of my absolute favorite tile stickers, chosen for their quality, design, and overall impact. I’ve personally vetted these styles and sources, and I’m confident they’ll inspire your next DIY project!
Click on any image for full product details.
Phew! That was a significant amount of information, wasn’t it? I sincerely hope this detailed guide has thoroughly answered all your questions regarding tile stickers. If, by chance, I missed anything or you have further inquiries, please don’t hesitate to drop a comment below. I’ll do my absolute best to provide you with an answer!
Here are some other valuable posts you may find inspiring for your next home project:
- Gorgeous But Cheap Flooring Ideas
- DIY Vanity Makeover: Concrete Overlay
- 15 Affordable DIY Countertops That Will Blow Your Mind
- 18+ Budget Friendly DIY Backsplash Ideas
- How to Paint a Tile Backsplash in 5 Simple Steps
Curious about my unique approach to transforming rooms and spaces throughout our home? Be sure to check out Designer in a Binder®. It’s my comprehensive, affordable, and simple system designed to help you decorate your home with confidence and ease.
For exclusive content, behind-the-scenes sneak peeks, and fresh DIY inspiration delivered straight to your inbox, don’t forget to subscribe before you go! Join our community and embark on your next home transformation journey with us.