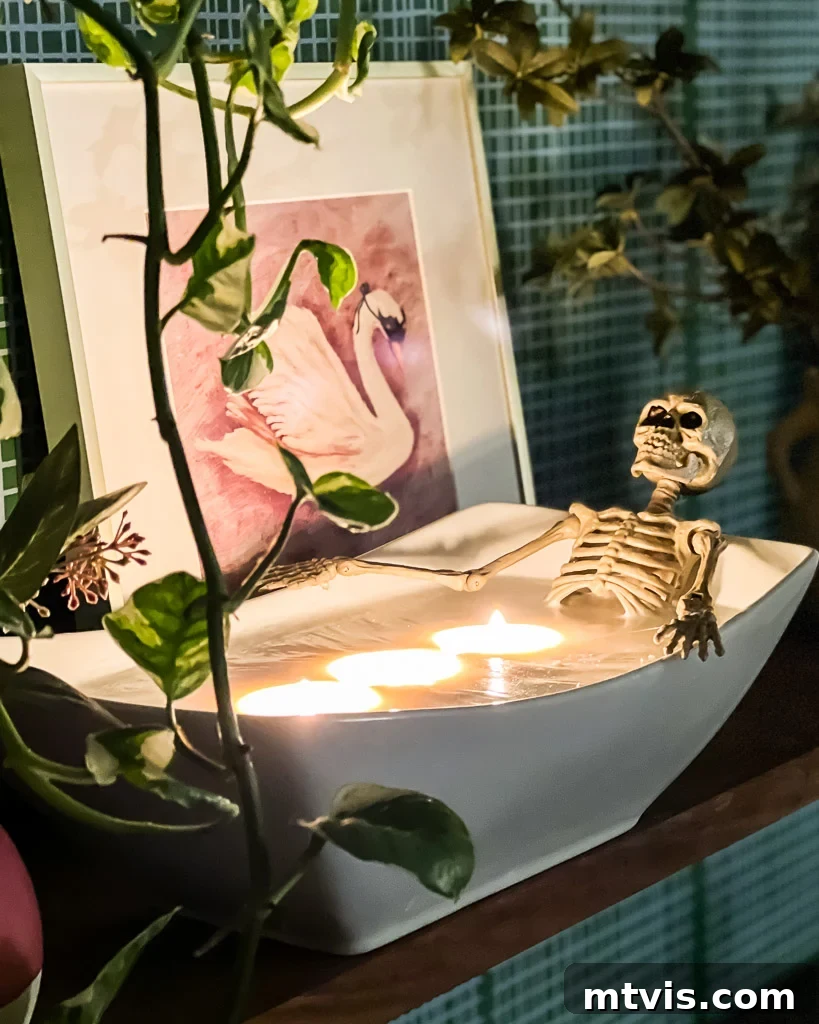
Create Your Own Supersized Skeleton in a Bath Halloween Candle: Easy DIY Decor That Lasts for Years!
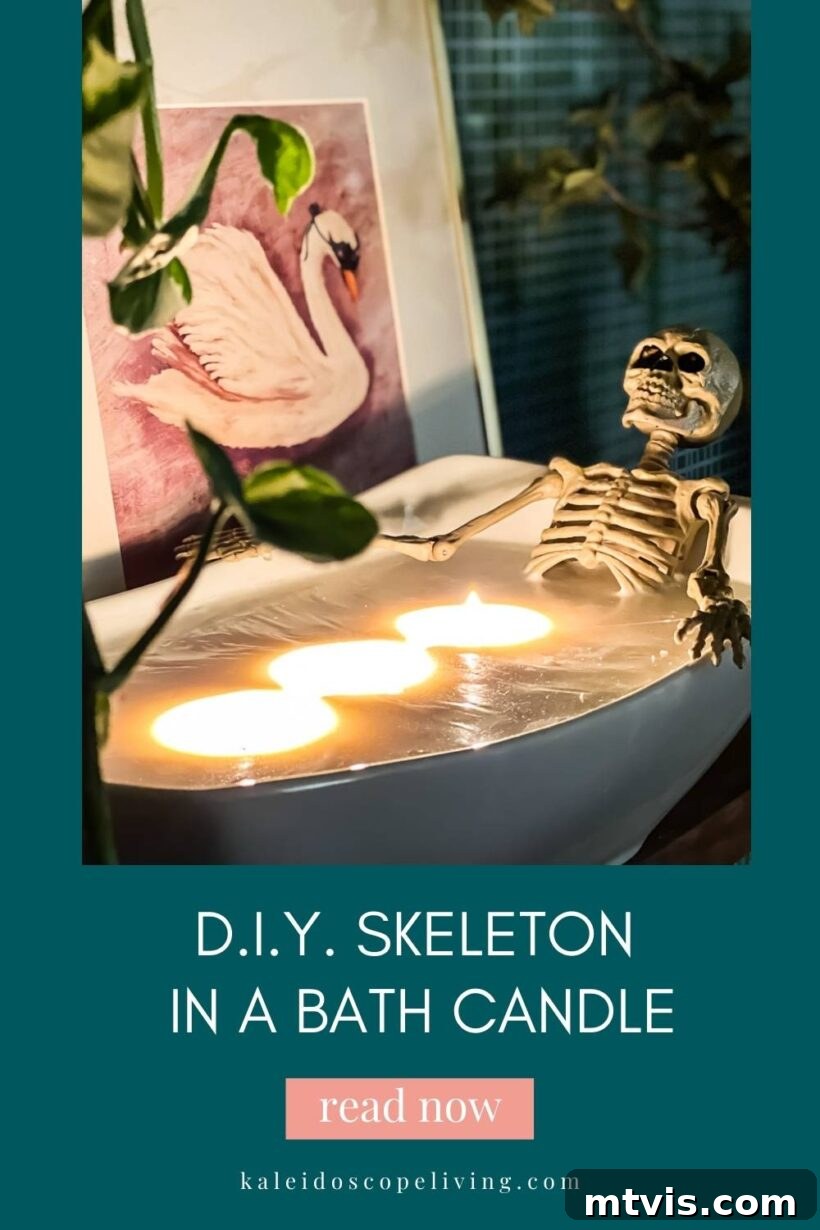
This year marks a delightful first for our family: embracing interior Halloween decor! For years, our spooky spirit was confined to the outdoors, mainly spurred by our girls’ enthusiastic pleas to deck out our new home a few years back. The shift was primarily to add excitement to a big family move, and it worked wonders, turning our house into a festive Halloween haven.
Initially, I was hesitant about bringing the Halloween theme indoors. Would it be too much? Would it clash with our existing style? However, my girls’ persistent enthusiasm finally won me over. And now, I can honestly say I regret not doing it sooner! Decorating our interior spaces for Halloween has been an absolute blast, filling our home with laughter and a wonderfully eerie charm. If you’re curious to see how we transformed our living spaces, you can take a full tour of our interior Halloween decor here.
This post contains affiliate links for your convenience. Click here for my full disclosure policy.
As I delved into the world of interior Halloween decorating, one item immediately caught my eye: an adorable skeleton in a bath candle on Amazon. The concept was utterly charming, a perfect blend of spooky and cute. Despite the price tag (a hefty $33 at the time of my order), I couldn’t resist and quickly added it to my cart, imagining it as a captivating centerpiece for our Halloween display.
However, reality struck upon its arrival. While undeniably cute, the candle was significantly smaller than I had anticipated. This was entirely my oversight, as I hadn’t thoroughly checked the product dimensions. More disappointingly, the fragrance was not to my taste, lacking the inviting autumnal scent I had hoped for. All in all, for $33, it simply didn’t deliver the impact or sensory experience I expected. My personal decorating philosophy dictates that displayed objects should ideally be larger than the size of a fist to truly make a statement in a room, and this tiny candle just didn’t measure up.
Yet, the core idea – a skeleton enjoying a relaxing bath – absolutely captivated me! Rather than return it, I saw an opportunity. Why not take this fantastic concept and create my own version? A supersized, custom-scented, and truly impactful “skeleton in a bath” candle that would command attention and fill our home with a delightful aroma. And the best part? It’s surprisingly easy to make, promises to last for years, and offers incredible customization. Let’s dive into the tutorial and bring this wonderfully macabre vision to life!
How to Make a Skeleton in a Bath Candle
Crafting your own large-scale Halloween decor is not only cost-effective but also incredibly rewarding. This DIY skeleton in a bath candle is a perfect example, offering a unique and charming addition to your seasonal display. Follow these simple steps to create a show-stopping piece that will impress all your guests.
Materials Needed for this DIY Halloween Candle
Gathering your supplies is the first step to any successful DIY project. For this charmingly spooky candle, you’ll need a few key items:
- A Ceramic Bathtub-shaped Container: The foundation of your candle. I personally used this rectangular serving bowl, which perfectly mimicked a vintage clawfoot tub. Look for something that’s sturdy, heat-resistant, and has a good depth to hold plenty of wax.
- A Plastic Skeleton: Ensure your skeleton fits comfortably within your chosen ceramic piece. The size of your container will dictate the size of your skeleton. I used this exact skeleton, which posed perfectly for a relaxing bath.
- Soy Wax Flakes: My preferred choice for a clean, long-lasting burn. I utilized approximately 4.5 pounds for my large candle, so adjust based on your container’s volume. Soy wax is eco-friendly and holds fragrance well.
- Candle Wicks: The number of wicks will depend on the size of your container. For a large candle like mine, I found that 3 wicks provided an even melt pool. Make sure they are appropriate for soy wax.
- Essential Oil or Fragrance Oil: This is where you customize your candle’s aroma! Choose a scent that evokes the spirit of fall or Halloween. I highly recommend this essential oil; it smells absolutely amazing and fills the house with a wonderful seasonal fragrance.
- Double Boiler Wax Melting Pot: While optional, using a dedicated melting pot is highly recommended. It ensures even heating and keeps your regular kitchen pots free of residual wax, which can be difficult to clean. If you don’t have one, use a heat-safe bowl set over a pot of boiling water.
- Meat Thermometer: Essential for monitoring wax temperature.
- Hot Glue Gun: For securing wicks.
- Metal Skewers or Wick Holders: To keep wicks centered while the wax sets.
- Scissors: For trimming wicks.
(Note: The original content included a video player. As per instructions to remove JavaScript and maintain HTML content only, the video embed has been omitted. The instructions are fully written out below.)
Step 1: Melt the Wax.
Begin by carefully measuring out your soy wax flakes. Place them into your double boiler wax melting pot. If you don’t have a double boiler, you can create one by placing a heat-safe metal or glass bowl over a pot of simmering water, ensuring the bottom of the bowl does not touch the water. Bring the water to a gentle boil, then place your melting pot/bowl into it. Heat the wax slowly, stirring occasionally with a spoon or stir stick, until it reaches approximately 175 degrees Fahrenheit. I find a simple meat thermometer works perfectly for this. If you don’t have a thermometer, simply heat the wax until it is fully melted, clear, and easily pourable, with no solid flakes remaining. As a general rule of thumb, soy wax flakes typically melt down to about half their starting volume; for example, two cups of flakes will yield roughly one cup of melted wax.
Step 2: Add Your Fragrance.
Once your wax is fully melted, remove it from the heat and allow it to cool slightly. It’s crucial not to add fragrance when the wax is too hot, as the heat can diminish the scent’s potency. Once the temperature drops to around 160-170 degrees Fahrenheit (or when it’s still liquid but slightly cooler to the touch), it’s time to infuse your candle with its signature aroma. Add your chosen essential oils or fragrance oils. I used a generous amount of the recommended essential oil – it smells absolutely incredible and is perfect for creating a cozy, autumnal atmosphere. Don’t worry about counting individual drops; simply add until the scent strength is to your liking, stirring thoroughly to ensure even distribution. Remember, the scent will be more subtle when the wax is cold, so err on the side of a slightly stronger fragrance at this stage. This particular essential oil is so delightful, we’ve even been diffusing it throughout our home!
Step 3: Place Your Skeleton and Attach Your Wick(s) to the Container.
This is where your candle starts to take shape and personality! Carefully position your plastic skeleton within your chosen ceramic container. I arranged mine to look like he was casually lounging, perhaps enjoying a relaxing soak after a long day of haunting. For a large candle like this, using multiple wicks (I opted for three) ensures an even burn pool, preventing tunneling and maximizing the candle’s lifespan. To secure the wicks, apply a small dab of hot glue to the metal base of each wick and firmly press it onto the bottom of your serving bowl. This prevents the wicks from shifting as you pour the wax. To keep the wicks perfectly upright and centered while the wax hardens, use metal skewers, clothespins, or specialized wick holders resting across the rim of your container. Proper wick placement is essential for a clean, efficient burn.
Step 4: Pour the Wax into Your Container.
With your skeleton in place and wicks secured, it’s time to pour the fragrant, melted wax into your container. Pour slowly and steadily to avoid disturbing the wicks or creating air bubbles. Because our candle is quite large, I had to repeat steps 1, 2, and 4 multiple times to achieve the desired fill. This multi-pour method also helps prevent cracks or sinkholes that can occur in very deep candles. Ensure each layer cools sufficiently before adding the next if you’re doing multiple pours. The final batch of wax should fill the “tub” nicely, leaving a small amount of room at the top (about a half-inch to an inch) to prevent overflow when burning.
Step 5: Let the Wax Harden Overnight.
Patience is key for this final step! Allow your wax to harden completely overnight, or ideally, for at least 24 hours. This allows the wax to cure thoroughly, which is vital for a strong “cold throw” (scent when unlit) and “hot throw” (scent when lit). Rushing this process can lead to a less fragrant candle or an uneven burn. Once fully hardened, carefully remove your wick holders (skewers, clothespins, etc.) and trim each wick to approximately 1/4 inch. This length is optimal for a steady, clean flame. Now, your magnificent, supersized skeleton in a bath candle is ready to be displayed and enjoyed!
The initial investment for supplies totaled around $50, which, when compared to the $33 tiny candle from Amazon that offered little satisfaction, feels like an excellent deal. The beauty of this DIY project is its longevity; we can simply keep adding wax as needed, making it a sustainable and cherished piece of Halloween decor for many seasons to come. It’s truly an investment in lasting festive fun!
I proudly placed our skeleton in a bath candle on the shelves that adorn our freshly wallpapered wall. (If you’re curious about how we achieved this look, you can learn how to make any wallpaper removable and renter-friendly here). The result has exceeded all my expectations. Its substantial size ensures it makes a significant impact, instantly drawing the eye and adding a whimsical touch of spooky charm. And the scent? It’s absolutely divine, filling our home with a cozy, inviting aroma. Best of all, my girls adore it! They eagerly light it every evening, transforming our living room into a magical, fragrant haven. I truly hope that someday, they’ll recount fond memories of crafting this unique skeleton in a bath candle with their mom when they were kids. It’s more than just decor; it’s a cherished family memory in the making.
Why Choose DIY Halloween Decor?
Beyond the satisfaction of creating something with your own hands, DIY Halloween decor offers numerous advantages. Firstly, it allows for complete customization. You can choose the exact size, color, scent, and style to perfectly match your home’s aesthetic and your personal taste, something mass-produced items often fail to deliver. Secondly, DIY projects like this candle can be surprisingly cost-effective in the long run. While there’s an initial outlay for materials, the ability to replenish wax and reuse your core decor elements means you’re investing in years of enjoyment rather than disposable seasonal items. Thirdly, it’s a fantastic way to bond with family. Engaging children in creative projects fosters their imagination and provides cherished memories. Lastly, handmade items inject personality and warmth into your home, making your decor truly unique and conversation-starting. This skeleton candle isn’t just a decoration; it’s a story, a memory, and a testament to personalized creativity.
Safety Tips for Your Halloween Candle
While your new DIY skeleton candle is a delightful addition to your Halloween decor, safety should always be a top priority. Here are some essential tips to ensure a safe and enjoyable experience:
- Never Leave a Burning Candle Unattended: This is the golden rule of candle burning. Always extinguish candles before leaving a room or going to sleep.
- Keep Away from Flammables: Place your candle on a stable, heat-resistant surface, away from curtains, papers, clothing, and any other combustible materials.
- Keep Out of Reach of Children and Pets: Ensure the candle is placed where curious hands or paws cannot knock it over.
- Trim Your Wicks: Before each use, trim your wicks to 1/4 inch. This prevents excessive smoking, soot buildup, and an overly large flame, ensuring a cleaner and longer burn.
- Avoid Drafty Areas: Burning a candle in a drafty spot can cause it to burn unevenly, reducing its lifespan and potentially increasing fire risk.
- Don’t Burn All the Way Down: Discontinue use when about 1/2 inch of wax remains at the bottom of the container. This prevents the container from overheating and cracking, especially with ceramic.
- Extinguish Properly: Use a wick snuffer to extinguish the flame. Blowing out a candle can spread hot wax and smoke.
- Monitor the Skeleton: While the plastic skeleton is submerged in wax, ensure it remains fully covered and doesn’t get exposed to the direct flame as the wax melts down. If it becomes exposed, consider carefully removing it or ensuring the flame is well clear.
Customize Your Spooky Scent
The beauty of making your own candle lies in the complete control you have over its fragrance. While I loved the specific essential oil I chose for its autumnal notes, you have a vast array of options to tailor your skeleton candle’s scent to your personal preference and Halloween theme. Consider these ideas:
- Pumpkin Spice & Everything Nice: Classic fall scents like pumpkin spice, cinnamon, nutmeg, and clove create a warm, inviting atmosphere perfect for the season.
- Earthy & Mysterious: Scents such as patchouli, cedarwood, frankincense, or sandalwood can evoke a more mysterious, ancient, or “graveyard” vibe.
- Crisp Autumn Air: For a fresher, invigorating scent, look for blends with apple, pear, or cypress notes, reminiscent of a brisk fall day.
- Sweet & Spooky: Vanilla, caramel, or even candy corn fragrances can add a touch of playful sweetness to your spooky decor.
- Smoky & Enchanting: A subtle hint of bonfire, oud, or vetiver can add depth and a truly unique, enchanting ambiance.
Experiment with blending a few essential or fragrance oils to create a truly unique aroma that tells a story. Just remember to use high-quality, candle-safe oils for the best results and safest burn.
Take a look at how it turned out!
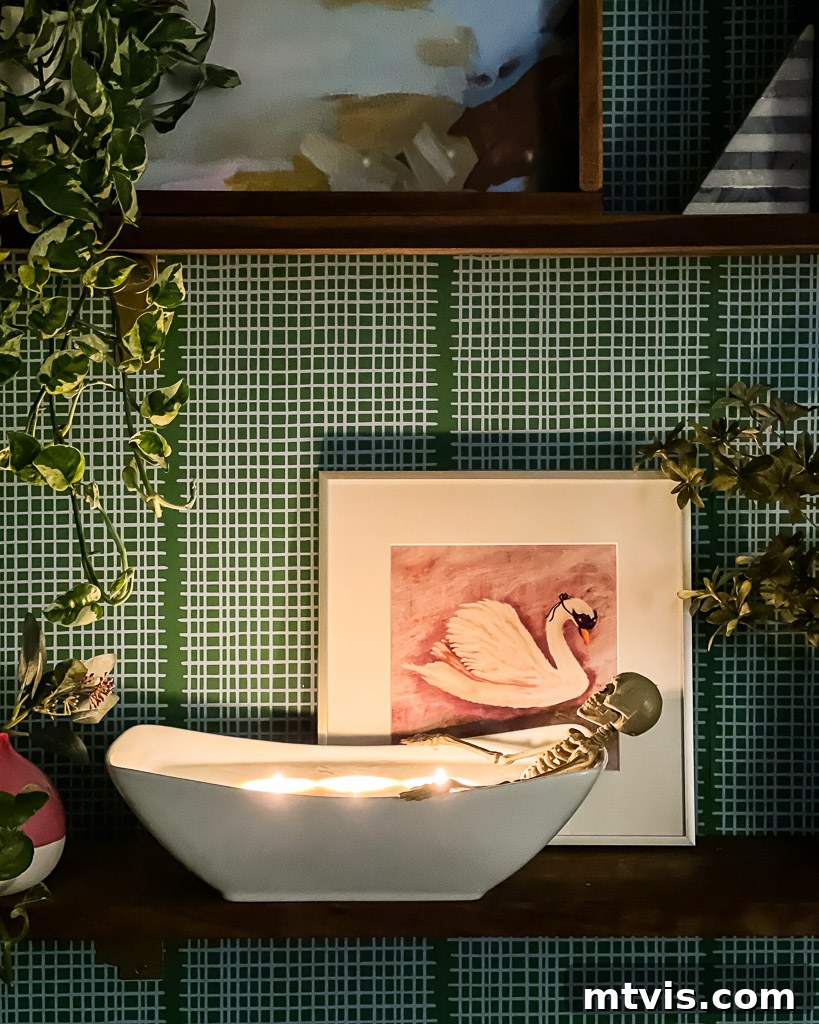
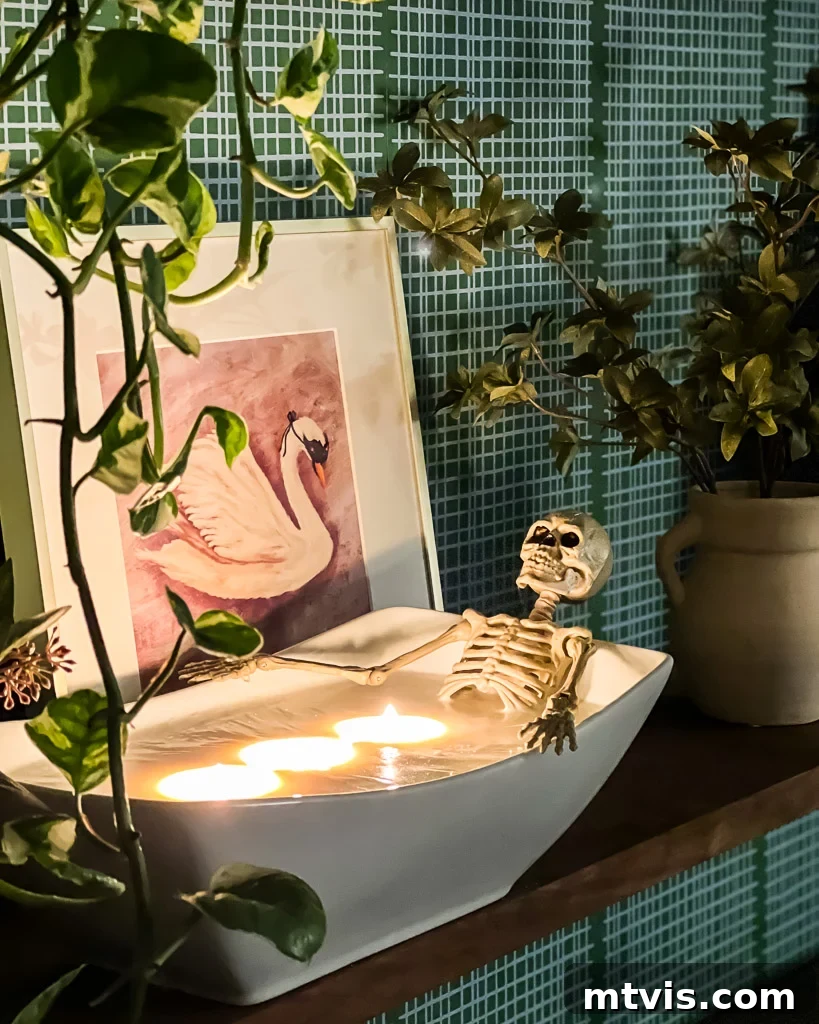
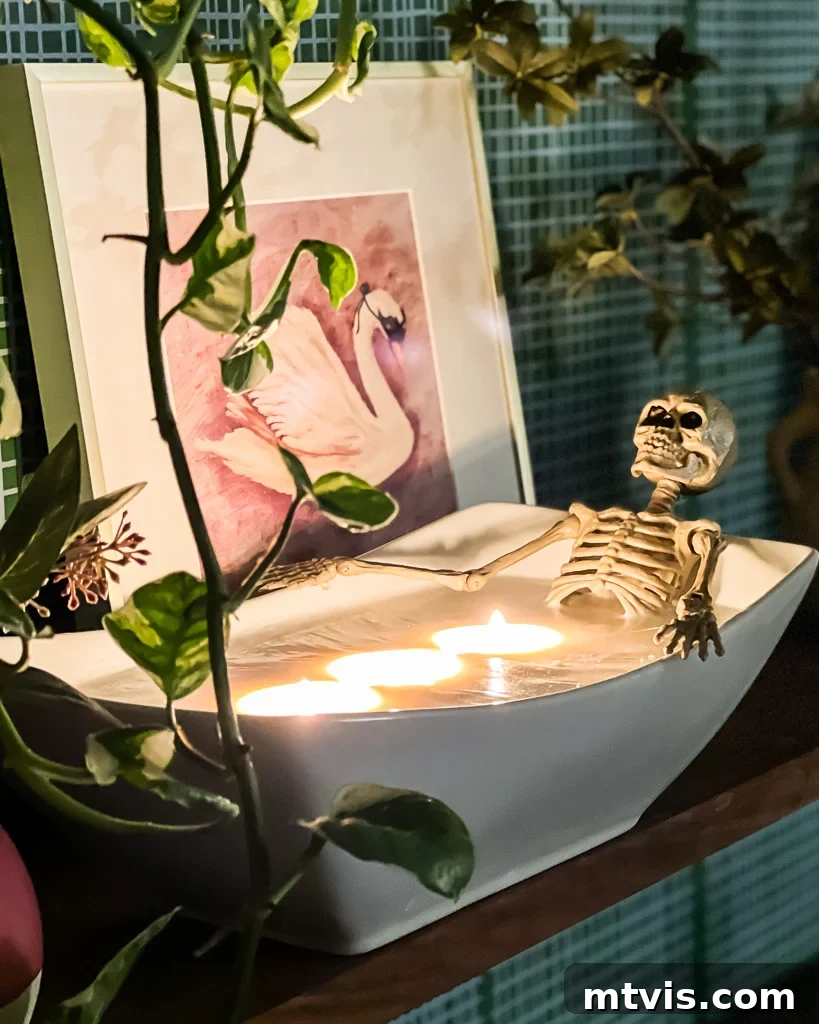
What do you think of our supersized creation? We absolutely adore it, and it has quickly become a highlight of our Halloween decor!
Other posts you may enjoy for more seasonal inspiration:
- No-Carve Pumpkin Decorating Ideas We Love!
- My 2022 Halloween Decor Picks from Target, Amazon and More
- Inspiring DIY Thanksgiving Crafts and Decor
- Colorful & Modern Free Fall Printables
- The Absolute BEST Fall Printables (for FREE)
- Stylish & Inexpensive Fall Decorating Ideas
- DIY Halloween Costumes for Toddlers and Kids
Wondering how I approach transforming rooms and spaces in our home? Be sure to check out Designer in a Binder® – your affordable and simple guide to decorating your dream home.
For exclusive content, behind-the-scenes sneak peeks, and more DIY inspiration, don’t forget to subscribe to our newsletter before you go! Join our community and keep the creative ideas flowing.