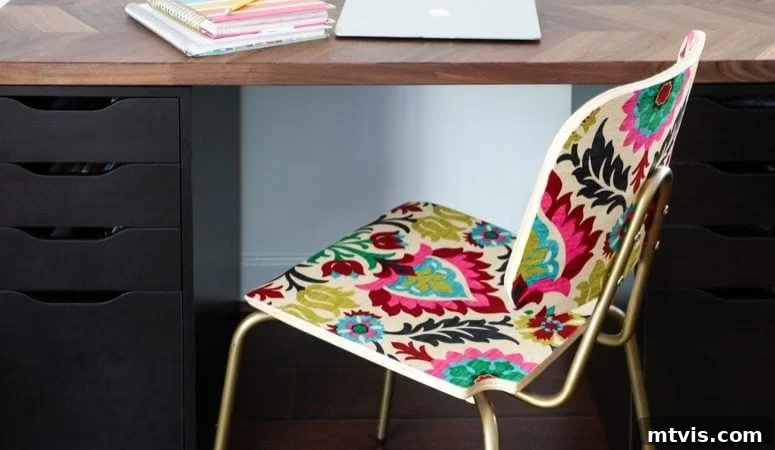
Have you ever dreamed of giving your furniture a fresh, custom look without the hassle and expense of traditional upholstery or painting? Imagine transforming an ordinary piece into a unique statement with vibrant patterns and rich textures. The secret? Decoupaging furniture with fabric! This incredibly budget-friendly DIY technique allows you to breathe new life into wooden pieces, creating stunning, personalized accents for your home with just a few simple materials like Mod Podge and your favorite textile.
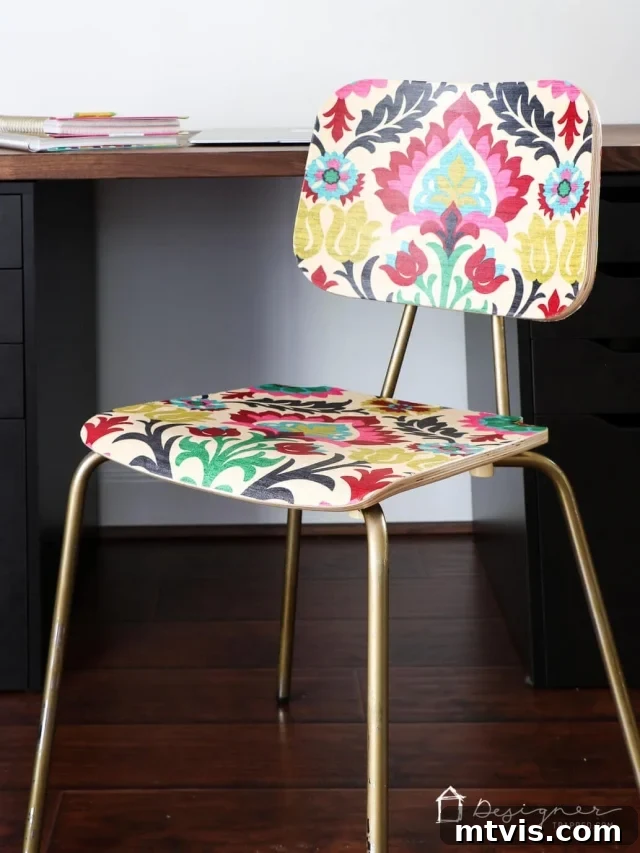
My journey into the world of fabric decoupage began when I embarked on transforming an unused room into my home office and craft room. The final touch, a perfect desk chair, proved to be an unexpected challenge. During my search, I stumbled upon a beautifully upholstered chair, adorned with a fabric that instantly captured my heart. Its elegance and distinctive pattern were exactly what I envisioned for my creative space. However, its price tag of $445 was significantly beyond my budget – in fact, it was closer to what I had allocated for the entire room makeover!
While the thought of owning that dream chair was tempting, spending such a large sum simply wasn’t an option. This predicament sparked my creativity and led me to seek an alternative. I was determined to achieve the same high-end aesthetic without the exorbitant cost. After some diligent searching, I found the perfect fabric and a suitable, affordable wooden chair. This allowed me to create my own custom version, a piece that perfectly mirrored my inspiration, but at a fraction of the price. The final result exceeded all my expectations, not only in its beauty but also in the surprising ease of the process. I’m absolutely thrilled with it, and now I’m excited to share the complete step-by-step tutorial with you, so you can achieve similar stunning transformations in your own home!
This post contains some affiliate links for your convenience. Click here to read my full disclosure policy.
Transform Your Furniture: A Comprehensive Decoupage Tutorial
Essential Materials for Decoupaging Furniture with Fabric
- Fabric: The amount you’ll need varies based on the size of your furniture piece and how you plan to position the pattern. For a standard chair, approximately 1 yard is usually sufficient. Opt for a fabric that is not too thick or stretchy for easier application and a smoother finish.
- Chair or Furniture Piece: I used a basic wooden chair, which I purchased for around $45 online. If time allows, consider exploring consignment shops, thrift stores, or yard sales for an even more affordable and unique find. Look for pieces with relatively flat surfaces for the simplest decoupage application.
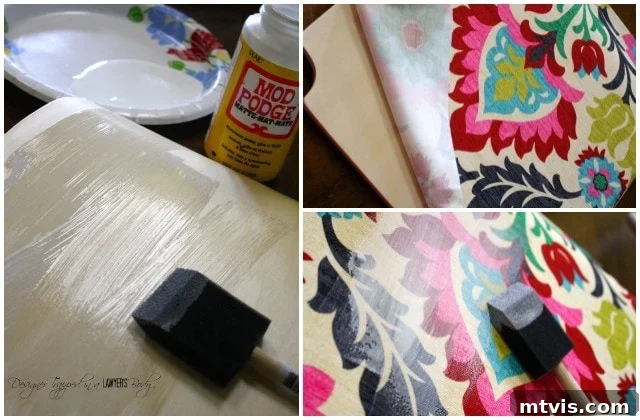
- Matte Mod Podge (or alternative decoupage glue): Mod Podge is a fantastic all-in-one glue, sealer, and finish. The matte finish provides a subtle, non-glossy look, but gloss or satin options are also available if you prefer. Ensure you have enough for multiple coats.
- Gold Spray Paint (Optional): This is for custom accents. I chose to spray paint the original silver metal legs of my chair a gleaming gold to match my desired aesthetic. Choose a high-quality spray paint for even coverage and durability.
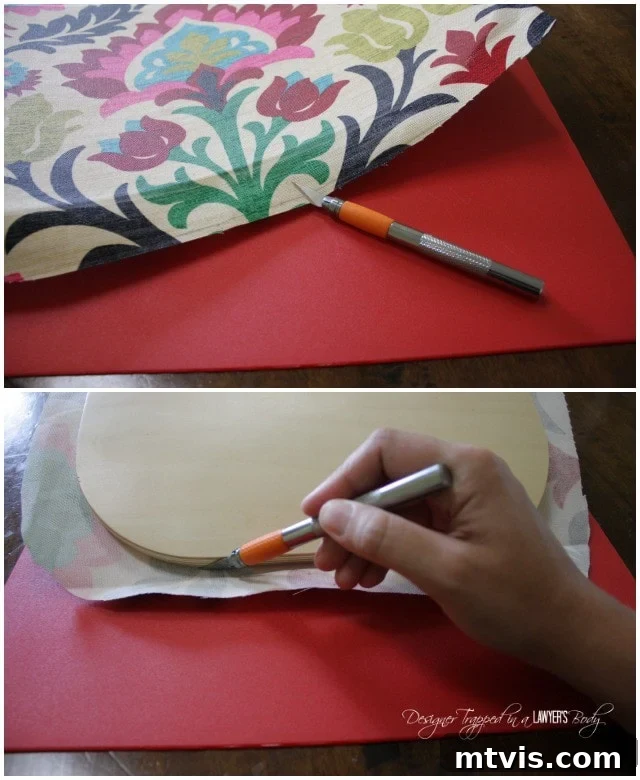
- Exacto Knife or Sharp Craft Knife: Essential for precise trimming of excess fabric, ensuring clean, crisp edges around your furniture piece. A fresh, sharp blade is key for clean cuts.
- Foam Paint Brush: Ideal for applying Mod Podge smoothly and evenly without leaving brush strokes. You may want a few different sizes for larger surfaces and intricate areas.
- Other helpful tools: A brayer or old credit card for smoothing fabric, sandpaper (fine-grit) for light prepping if needed, and a damp cloth for cleaning up excess glue.
For a visual overview of the project, feel free to watch the video below (it will play after a short ad). Then, dive into the detailed step-by-step instructions provided further down for a comprehensive guide!
Time needed: 3 hours
Transform your wooden furniture with beautiful fabric using this comprehensive decoupage tutorial. The estimated time to complete the active steps excludes crucial drying time.
- Prepare and Disassemble Your Furniture.
Before you begin the decoupage process, it’s highly recommended to disassemble your furniture piece, if possible. This makes it significantly easier to work on each surface individually, ensuring clean edges and a professional finish. For example, removing a chair seat from its frame allows for complete fabric coverage and easier trimming. If your piece is new, like my wooden chair, you might be able to skip the disassembly for some parts, but consider any painting or prepping. I took this opportunity to spray paint the metal legs of my chair a lovely gold, adding a custom touch before the fabric application. Always ensure your furniture surface is clean, dry, and free of dust or debris. A light sanding with fine-grit sandpaper can help the Mod Podge adhere better, especially on very smooth or glossy surfaces, but it’s often not strictly necessary for wood.
- Precisely Trace and Cut Your Fabric Pieces.
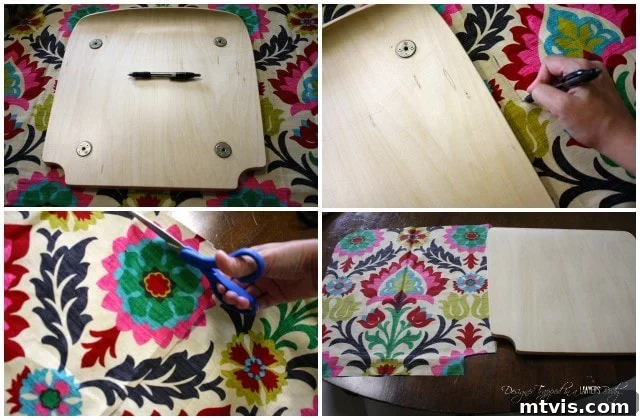
Lay your chosen fabric flat on a clean, hard surface, ensuring it is smooth and wrinkle-free. Carefully place the furniture piece (or its disassembled section, like a chair seat) onto the fabric. Using a pencil or fabric marker, trace the perimeter of the wood piece. This initial trace serves as your guide. Now, here’s a crucial tip: trace again, this time approximately 1 inch beyond your initial line. This extra allowance provides a margin for error, ensures full coverage, and gives you enough fabric to wrap slightly around edges or trim precisely later. If your fabric has a distinct pattern, consider its placement carefully before tracing to ensure the desired design is centered or aligned beautifully on your furniture. Once traced, use sharp fabric scissors to cut out your fabric piece along the outer, larger traced line. Precision here will make the application much smoother.

- Apply Mod Podge and Secure Your Fabric.
Using a foam paint brush, apply a generous, even layer of Mod Podge (or your chosen decoupage medium) directly onto the surface of the wood furniture piece where the fabric will be applied. Ensure the entire area is coated, right up to the edges. Work relatively quickly, as Mod Podge can start to dry. Carefully position your pre-cut fabric piece onto the wet Mod Podge. Starting from the center, gently smooth out the fabric towards the edges using your hands, a brayer, or an old credit card. This is a critical step for preventing air bubbles and wrinkles. Take your time to work any imperfections outwards. Don’t worry if the fabric extends beyond the edges; you’ll trim it later. In my case, I placed the fabric directly over the pre-drilled hardware holes for the chair back, and once assembled, it wasn’t an issue at all. Once your fabric is perfectly positioned and smooth, apply a final top coat of Mod Podge over the entire fabric surface. This layer acts as a sealant, protecting the fabric and giving it a durable finish. Ensure an even coat and allow the piece to dry completely, ideally overnight, or for a minimum of 12-24 hours, depending on environmental humidity. Proper drying is key to a strong bond and a smooth finish.
- Trim Excess Fabric and Seal Edges.
By the following morning, or once thoroughly dry, your fabric should feel firm and stiff, especially around the edges where it has absorbed the Mod Podge. If it’s still damp or pliable, allow more drying time. Once rigid, you are ready to trim off the excess fabric. Using a sharp Exacto knife or craft knife (a fresh blade is crucial for clean cuts), carefully use the edge of your furniture piece as a guide. Cut off the fabric as close to the wood’s edge as possible, creating a clean, seamless finish. For curved edges, use short, precise strokes. Be patient and steady to avoid ragged edges.
You may find some stray threads of fabric after trimming. Carefully trim these off with small, sharp scissors as needed. To fully seal the edges and prevent any future fraying or lifting, apply an additional, thin coat of decoupage glue along the entire perimeter of your decoupaged surface. This final seal will flatten any remaining stray threads and create a robust, protected edge. - Repeat for All Remaining Pieces.
If your furniture piece has multiple sections you wish to decoupage, simply follow the exact same steps (Prepare, Trace & Cut, Apply & Smooth, Trim & Seal) for each remaining wooden component. This ensures consistency and a professional finish across your entire project. Take your time with each section, allowing adequate drying time between steps, especially for the Mod Podge coats.
- Reassemble and Enjoy Your Transformed Furniture!
Once all your decoupaged pieces are completely dry and sealed, the final exciting step is to reassemble your furniture. Carefully put all the components back together, ensuring everything is secure. Step back and admire your handiwork! You’ve successfully transformed a plain piece into a custom, high-impact item for your home, all through the magic of fabric decoupage. Your patience and effort have paid off with a unique creation!
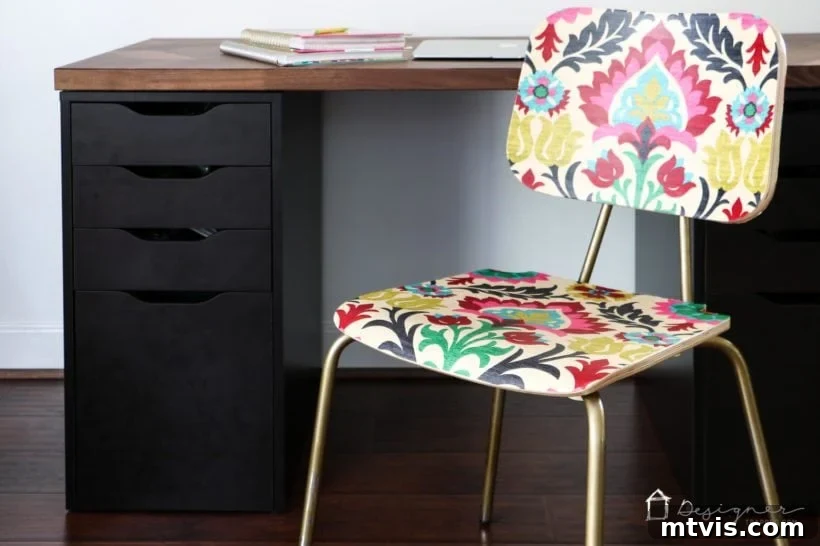
That’s truly all there is to it! For an investment of roughly $60, I managed to create a totally custom chair that mirrors the look of my inspiration chair, but at a mere fraction of the original cost. I absolutely adore it! The beauty of this decoupage furniture project is its simplicity – there’s no need for tedious priming or sanding, which makes it an ideal DIY for beginners and seasoned crafters alike.
After using this decoupaged chair extensively for a considerable period, I can confidently say it holds up wonderfully. Like any well-loved piece, it occasionally requires a tiny bit of maintenance. I sometimes trim a few stray threads that appear over time, and I’ve applied additional Mod Podge to one particular corner where the fabric started to show minimal loosening. As for the spray-painted legs, they’ve needed a touch-up or two, primarily due to my initial rush and only applying a single coat. The key takeaway is that with just a little ongoing care, this decoupage chair remains incredibly durable and functional, despite being a frequently used item in our home.
This project remains one of my all-time favorite makeovers. While it might be one of the simplest and most budget-friendly furniture transformations I’ve undertaken, its impact is undeniably high. It proves that you don’t need a huge budget or complex skills to create truly stunning and personalized pieces for your living space.
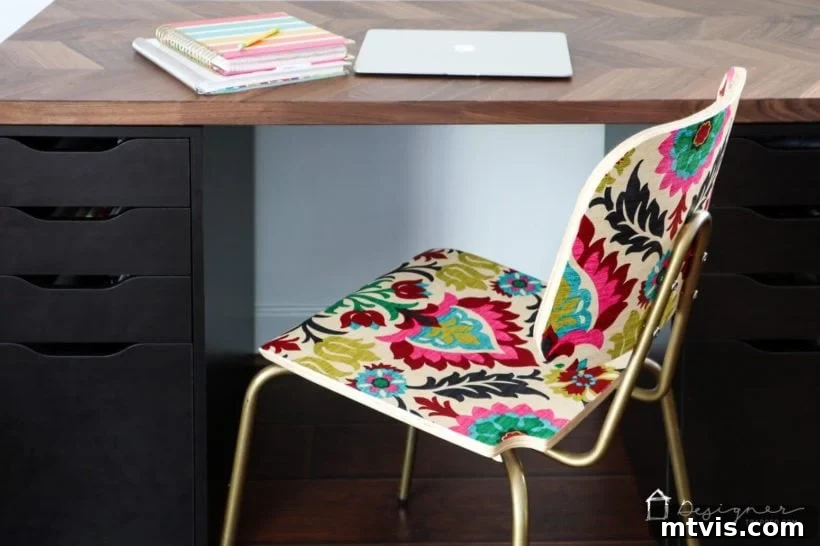
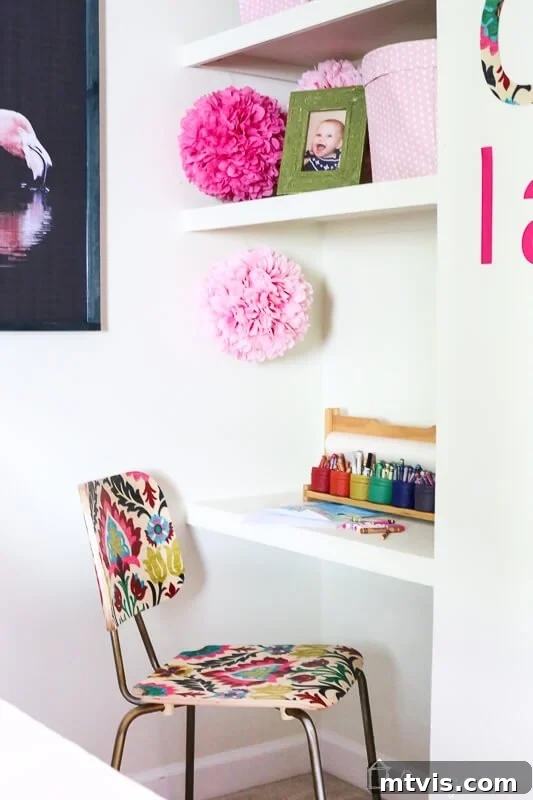
Years after its initial transformation, my decoupaged chair found a new home. I replaced my desk chair with a different style and moved this cherished piece into my daughter Attley’s “big girl” room. It integrated seamlessly, coordinating perfectly with her custom decoupaged wall quote, creating a cohesive and vibrant space that she absolutely adores.

Decoupage truly is an unsung hero in the vast world of DIY projects and home decor. Its versatility is astounding; you can apply this technique to an incredible array of surfaces, not just furniture. From customizing small decorative items to creating large-scale wall art, the brilliant decoupage ideas are genuinely limitless! So, gather your chosen furniture piece, your favorite decoupage paper, fabric, or even wallpaper, grab your trusty Mod Podge, and get ready to unleash your creativity and transform your home with personalized style!
Other inspiring posts you may enjoy:
- How to Decoupage Napkins to Customize Anything!
- 50 of the Best IKEA Hacks I’ve Ever Seen
- 17 Easy DIY Projects to Do While You’re Stuck At Home
- DIY Photo Canvas Prints With Authentic Texture
- 14 Inspiring IKEA Desk Hacks
- Sherwin-Williams Pure White Color Review with Pictures
Curious about my unique approach to transforming rooms and spaces throughout our home? Discover the comprehensive guidance and practical strategies within Designer in a Binder®. It’s designed to make home decorating accessible and enjoyable for everyone.
And if you’re eager for exclusive content, behind-the-scenes sneak peeks, and fresh DIY inspiration delivered directly to your inbox, be sure to subscribe to my newsletter before you go!