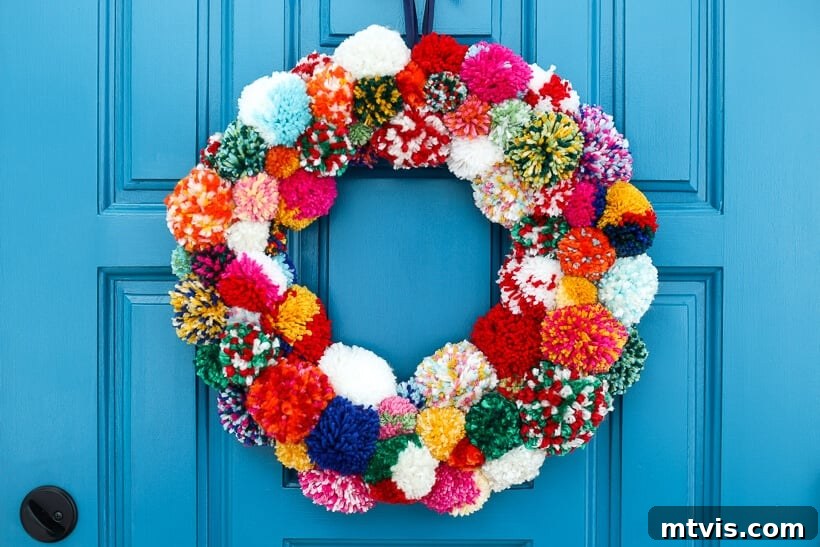
Are you tired of the same old traditional fall and winter wreaths that lack vibrant colors and modern appeal? If your home decor style leans towards the bright, cheerful, and unique, then you’re in the right place! This comprehensive guide will show you how to create a stunning DIY pom-pom wreath that brings a burst of joy to your space, perfectly transitioning through multiple seasons. Say goodbye to dull and hello to dazzling with this fun, handmade project!
For those who love infusing their living spaces with personality and color, a homemade pom-pom wreath is an absolute game-changer. It’s a delightful alternative to mass-produced decor, offering a touch of whimsical charm that’s hard to find elsewhere. Not only is it incredibly customizable, allowing you to pick every shade and texture, but it also serves as a fantastic conversation starter. Imagine a vibrant, fluffy wreath gracing your front door or an interior wall, radiating warmth and creativity throughout your home. This tutorial empowers you to craft such a masterpiece, ensuring your seasonal decorations are anything but ordinary.
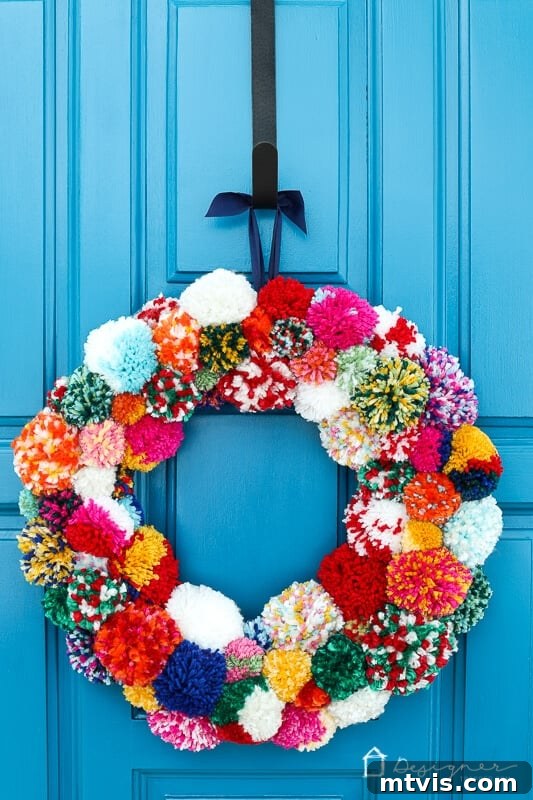
Table of Contents
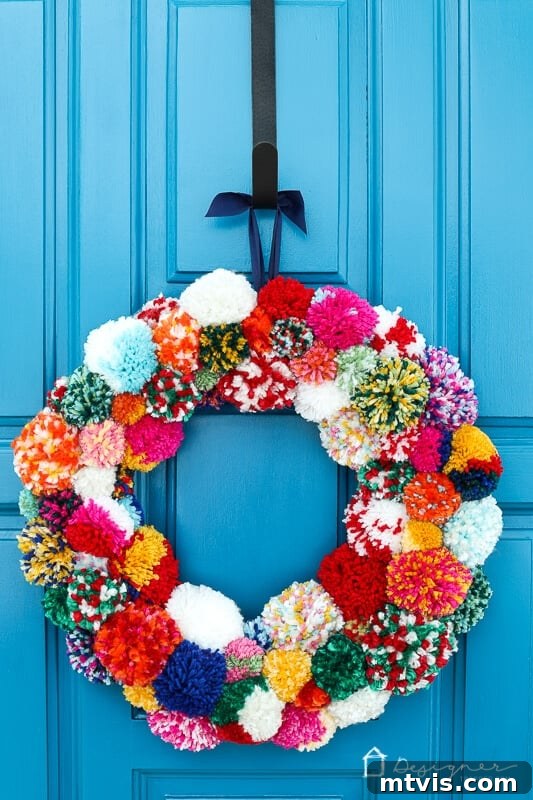
My journey into crafting this particular pom-pom wreath began a few years ago when I stumbled upon an exquisite, yet astronomically priced, pom-pom wreath at Anthropologie. While its aesthetic captivated me, two significant drawbacks immediately surfaced: its hefty price tag of $118 and its rather diminutive size of just 14 inches. Knowing I could achieve a similar, if not superior, result for less, I embarked on a creative mission. I gathered a sturdy wreath form, a set of reliable pom-pom makers, and an abundance of colorful yarn, ready to bring my vision to life.
Let’s be upfront: crafting this DIY pom-pom wreath is an investment of your time. It truly is a time-consuming project, demanding patience and dedication. However, despite the hours it requires, the process itself is remarkably simple and incredibly rewarding. In fact, this was a project that brought my entire family together! All four of us enthusiastically participated, making pom-poms whenever we had a spare moment, until we accumulated enough fluffy creations to completely cover our chosen 16-inch wreath form. It transformed into a delightful collective endeavor, proving that the best creations often come from shared efforts.
Financially, this project offered a significant saving compared to its retail counterpart. I spent approximately $45 on a diverse selection of yarn (and still have plenty left over for future crafts!), plus an additional $25 on the other essential supplies. This brought the total cost to around $70. While it might not be the cheapest DIY project you’ll undertake, it’s undeniably more palatable than spending $118 for a significantly smaller, store-bought wreath. The value of a custom-made piece that perfectly matches your aesthetic, especially one that becomes a cherished family project, far outweighs the initial investment. Read on to discover how you can create your very own colorful and captivating pom-pom wreath, a true statement piece for any home.
This post contains some affiliate links for your convenience. Click here to read my full disclosure policy.
DIY Pom Pom Wreath Tutorial: Crafting Your Colorful Masterpiece
Embarking on a DIY project is always exciting, especially when the outcome promises to be as vibrant and charming as this pom-pom wreath. This tutorial breaks down each step into easy-to-follow instructions, ensuring that even novice crafters can achieve a professional-looking result. From selecting your materials to the final touches, we’ll guide you through the process of creating a durable, beautiful, and utterly unique piece of home decor. Prepare to transform simple yarn into a stunning focal point for your home.
Supplies Needed for Your Colorful Wreath
Gathering the right supplies is the first crucial step in any successful DIY project. For this pom-pom wreath, quality materials will ensure both the longevity and aesthetic appeal of your finished piece. Don’t skimp on essentials, and remember that investing in better tools, like the recommended pom-pom makers, can significantly enhance your crafting experience and the final outcome. Here’s a detailed list of what you’ll need:
- 16-inch Foam Wreath Form: The foundation of your wreath. A foam base is ideal because it’s lightweight and easy to pin pom-poms into securely. Consider the size carefully; a 16-inch form offers a substantial display without being overly cumbersome.
- Yarn in Colors of Your Choosing: This is where your creativity truly shines! Select a variety of colors, textures, and even thicknesses to add depth and interest to your wreath. Acrylic yarns are often a great choice for pom-poms as they are durable, come in a vast array of colors, and are relatively inexpensive. I found excellent deals on yarn at Joann Fabrics, often buying during their half-off sales. Don’t be afraid to mix and match; the more variety, the more dynamic your wreath will look.
- Pom Pom Makers: These tools are essential for creating perfectly shaped, consistent pom-poms.
- Initially, we tried these more affordable pom-pom makers. While functional, they were a bit fiddly and less efficient.
- After experiencing some frustration, we upgraded to these pom-pom makers. I cannot stress enough how much better these work! They are incredibly user-friendly and produce far superior results. The slight increase in cost is absolutely worth the investment for the time and effort you’ll save. We purchased both the medium and large packages, utilizing all four available sizes to create a diverse collection of pom-poms for a textured and visually engaging wreath.
- Scissors: A sharp pair of craft scissors is crucial for cleanly cutting yarn and trimming your pom-poms.
- Straight Pins or T-pins: You will need a significant quantity of pins to secure your pom-poms. It’s vital to have pins that are at least 2 inches long or longer, especially for larger pom-poms, as shorter pins simply won’t provide adequate security and stability within the foam form.
- 2-inch Ribbon: Choose a ribbon that complements your chosen yarn colors and suits your desired hanging style. A sturdy ribbon will ensure your wreath hangs safely and stylishly.
Visual Guide to Crafting Your Pom Pom Wreath
Sometimes, seeing a process in action can clarify details that written instructions might miss. Before diving into the step-by-step guide, I highly recommend watching a short video overview. While I cannot directly embed dynamic video player scripts, understanding the flow of the project visually will undoubtedly enhance your crafting experience. This visual aid offers a fantastic way to grasp the techniques for making pom-poms and attaching them to the wreath form, giving you confidence as you begin your own project. Look for videos online that demonstrate pom-pom wreath making to complement these instructions.
(Please note: The original article included an embedded video player. Above is an HTML5 video tag replacement. You may need to host this video file or link to a public platform for full functionality.)
Video Details:
- Upload Date: 2022-11-22T15:27:29+00:00
- Name: DIY Pom Pom Wreath.mp4
- Description: Want a colorful and fun wreath that is perfect for more than just one season? This DIY pom pom wreath is for you. Learn how to make your own with this tutorial.
Step 1: Create a Plethora of Pom Poms
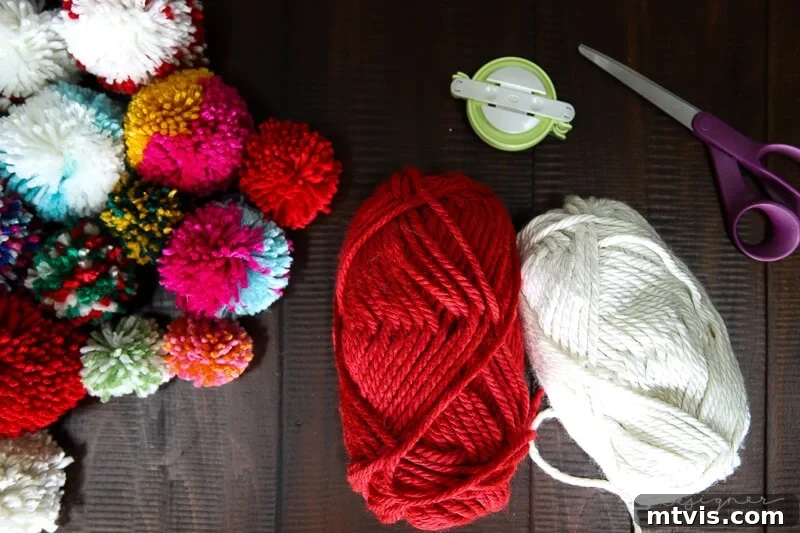
The initial and most time-intensive step in this project is, without a doubt, making a seemingly endless number of pom-poms. While I wish I had counted the exact quantity we used, rest assured, it’s quite a lot! For our wreath, we incorporated an impressive range of 15 different types of yarn, varying in color, thickness, and texture, which contributed significantly to its vibrant and eclectic appearance. Don’t be afraid to experiment with your yarn choices to achieve a truly unique look.
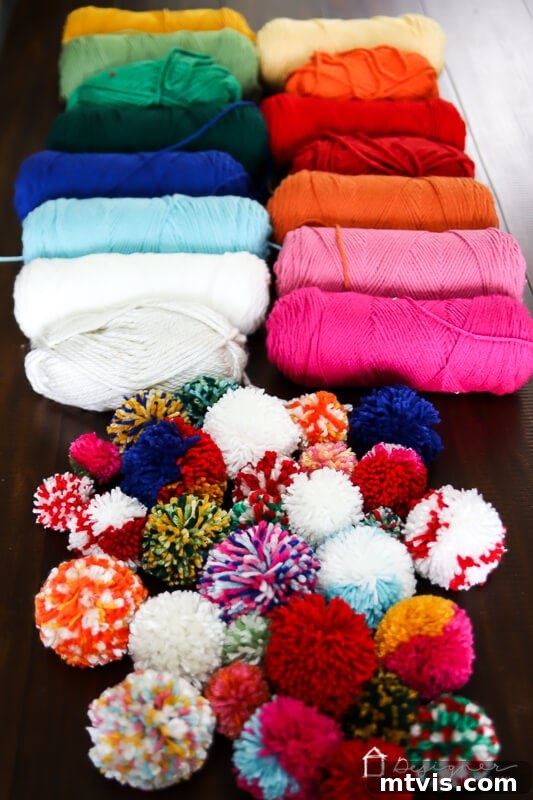
Making pom-poms is a straightforward process, especially with the right tools. Simply follow the directions provided with your pom-pom makers. The basic steps involve wrapping yarn around the maker, cutting along the groove, and tying a knot to secure the pom-pom before removing it from the tool and trimming it. To give you a clearer idea, here are a few photographs illustrating the process, highlighting some tips for creating diverse pom-pom styles.
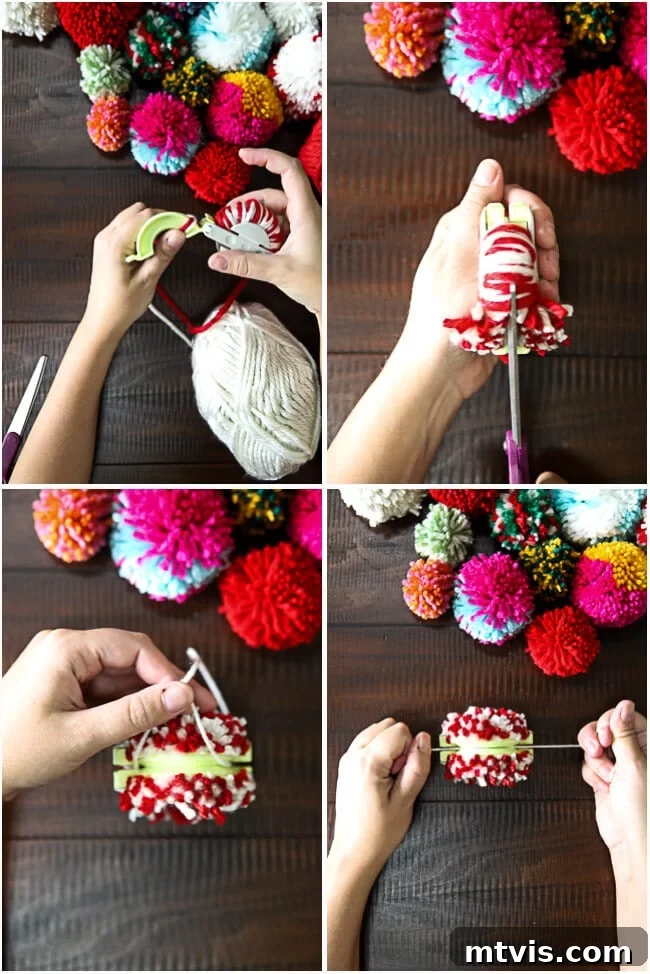
Here are some specific tips regarding the variety of pom-poms you can create to add visual interest to your wreath:
- Multi-Colored “Confetti” Pom-Poms: To achieve a vibrant, confetti-like effect, you’ll want to wrap several different strands of yarn around your pom-pom maker simultaneously. This technique blends the colors together, creating a richly variegated pom-pom that adds an exciting pop to your wreath. Experiment with complementary or contrasting color combinations for different moods.
- Color-Block Style Pom-Poms: For a more structured, color-block look, wrap one color of yarn at a time. However, use multiple distinct colors on a single pom-pom maker, wrapping each color section by section. This creates a pom-pom with clearly defined bands of color, offering a different kind of visual texture. The contrast between these and the confetti style will make your wreath truly dynamic.
- Extra Fluffy Pom-Poms: The fluffiness of your pom-poms largely depends on the type of yarn you use. For those luxuriously soft and full pom-poms, opt for a thicker, looser yarn type. Yarns with a higher wool content or a bulky acrylic will naturally yield a fuller, more substantial pom-pom. The yarn pictured below, for example, is perfect for achieving that extra plush look.
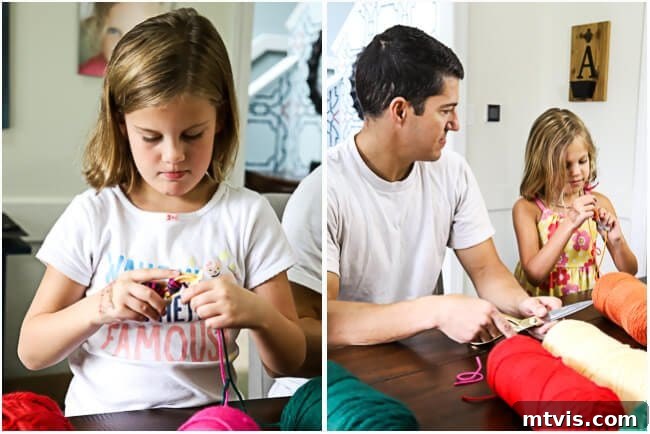
One of the unexpected joys of this project was how much my daughters, Attley and Avery, embraced the pom-pom making process. Their enthusiasm was contagious, and they quickly became expert pom-pom crafters. Even my husband, Joe, got involved in the fun, albeit with a slightly less exuberant demeanor than the girls! It’s truly a craft that can bring everyone together, making the time fly by and creating wonderful memories along with beautiful decor.
Step 2: Begin Attaching Your Pom Poms to the Wreath Form
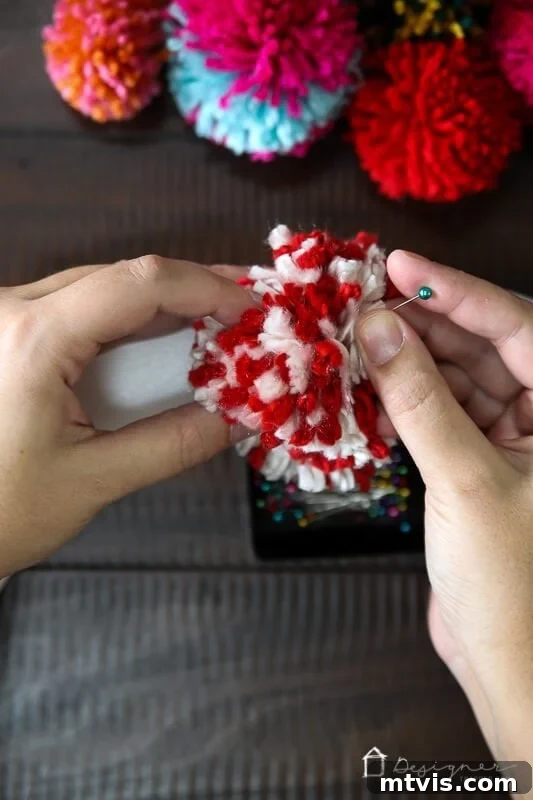
Once you’ve amassed a respectable pile of pom-poms, it’s time for the exciting part: bringing your wreath to life! This step involves strategically pinning your fluffy creations onto the wreath form. Starting this process even before all pom-poms are made can be incredibly helpful. It allows you to visualize how many more you’ll need, and crucially, enables you to balance the colors and sizes across the wreath, ensuring a harmonious and aesthetically pleasing distribution. Think of it as painting with yarn, carefully placing each “brushstroke” to build your masterpiece.
Step 3: Continue the Process Until Your Wreath is Full
With your initial pom-poms in place, continue the delightful task of making and pinning them onto your wreath form. Utilize straight pins or, ideally, T-pins to firmly secure each pom-pom. The key to a lush and full wreath is density; don’t be shy about placing pom-poms close together, allowing them to gently push against each other. This creates a seamless, opulent look, ensuring no unsightly gaps remain. Remember, the longer pins (2 inches or more) are crucial here for providing the necessary grip, especially for the larger, fluffier pom-poms.
When working, I highly recommend laying your wreath form flat on your workspace. This technique is important because you will not be attaching pom-poms to the back of the wreath. The goal is for your finished wreath to sit flush against the wall or door it will hang on. Therefore, focus all your efforts on filling every visible space on the front and sides of the wreath while it’s resting flat. The back of your wreath will remain the plain foam form, which is perfectly fine as it won’t be seen once hung. Continue this process of crafting and attaching until your wreath form is completely obscured from the front and sides, resulting in a magnificently full and vibrant display.
Step 4: Add a Stylish Ribbon for Hanging
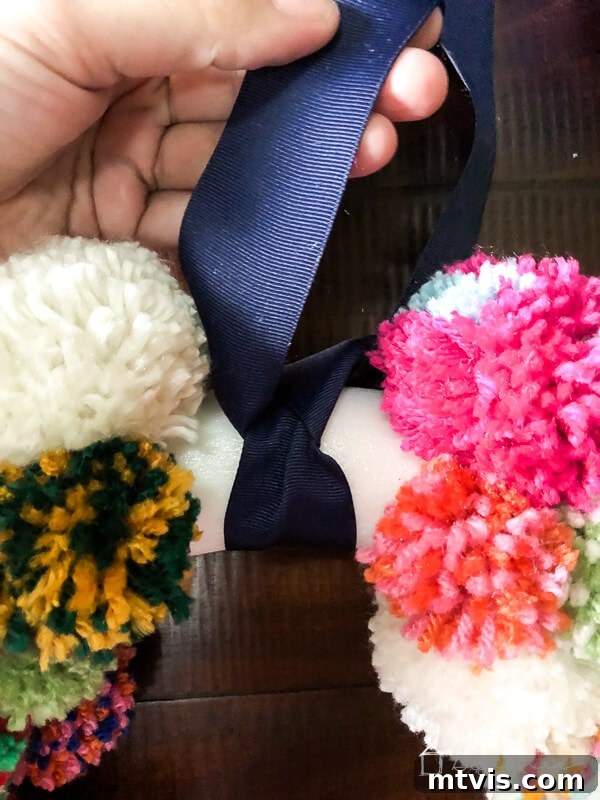
The final touch to your beautiful pom-pom wreath is adding a functional and decorative ribbon for hanging. For our wreath, we chose a classic 2-inch navy blue ribbon, which provided a lovely contrast and sophisticated anchor for the myriad of colors. Timing is key here: before filling in the very last section of your wreath form (leave about 2 inches of exposed foam), carefully tie your chosen ribbon around this area. Once the ribbon is securely knotted, you can then proceed to pin the remaining pom-poms directly over the ribbon. This method elegantly conceals the ribbon’s attachment point, making it appear as though the ribbon seamlessly emerges from the lush pom-pom landscape, enhancing the overall polished look of your handmade decor.
And there you have it! A super easy, yet absolutely GORGEOUS, DIY pom-pom wreath that defies traditional seasonal decor. While I won’t pretend it’s a quick craft – the time investment is considerable – the end result is profoundly satisfying and undeniably worth every minute. I particularly adore its versatility; it’s perfectly suited for both Fall and Winter, and honestly, its cheerful aesthetic could brighten any season. The fact that this single, beautiful creation will serve as a delightful decoration for multiple seasons each year makes the effort feel even more justified and the memories of crafting it even more cherished.
Caring for Your Pom Pom Wreath
To ensure your beautiful, handmade pom-pom wreath remains a vibrant part of your home decor for years to come, a little care goes a long way. Since yarn can attract dust, a gentle dusting with a soft brush or a quick blast of cool air from a hairdryer on a low setting can keep it looking fresh. Avoid direct sunlight for prolonged periods, as this can cause colors to fade over time. When storing your wreath between seasons, place it in a breathable container or bag to protect the pom-poms from getting crushed or accumulating excessive dust. A large gift box or a dedicated wreath storage container works wonderfully.
Customization and Seasonal Variations
One of the greatest advantages of a DIY pom-pom wreath is its endless customization potential. While our wreath boasts a multi-seasonal appeal, you can easily tailor yours for specific holidays or themes:
- Christmas Cheer: Opt for traditional reds, greens, whites, and golds, perhaps adding a few metallic or glittery yarns. Incorporate small bells or mini ornaments into some pom-poms for extra festive sparkle.
- Spring Refresh: Think pastels – soft pinks, baby blues, mint greens, and gentle yellows. You could even weave in small faux flowers or leaves.
- Summer Vibes: Bright, bold, and tropical colors would be perfect. Consider shades of turquoise, coral, sunshine yellow, and fuchsia.
- Ombre Effect: Select yarns from the same color family but in varying shades, arranging them to create a gradual transition of color around the wreath for a sophisticated look.
- Themed Wreaths: If you have a specific room theme (e.g., coastal, bohemian), choose colors and textures that align. For a coastal feel, use blues, whites, and sandy tones, perhaps with some textured rope-like yarn.
Let your imagination be your guide! The beauty of this project lies in making it truly your own.
Other posts you may enjoy:
If you loved creating this colorful pom-pom wreath, you might be interested in exploring more DIY projects to personalize your home. Here are some other creative ideas that blend craftsmanship with unique style:
- DIY Magical Christmas Lanterns: Add a warm, inviting glow to your holiday decor.
- How to Make a Christmas Reindeer from Logs!: A charming, rustic addition to your festive display.
- How to Make a Gift Bag Out of Wrapping Paper: Practical and pretty for all your gift-giving needs.
- 6 Secrets to Elevate Your Christmas Aesthetic: Tips and tricks for a truly stunning holiday home.
- DIY Advent Calendars: Count down to Christmas with a personalized touch.
- DIY Santa Sacks: A festive and reusable alternative to traditional stockings.
Curious about my unique approach to transforming rooms and spaces within our home? Dive into the details and discover the secrets behind my design philosophy with Designer in a Binder®. It’s an affordable and straightforward method designed to help you decorate your home with confidence and style, demystifying the design process one room at a time.
For even more exclusive content, behind-the-scenes glimpses into my projects, and early access to new ideas and tutorials, be sure to subscribe to my newsletter before you leave! Join a community of fellow decor enthusiasts and never miss out on inspiration to make your home uniquely yours.