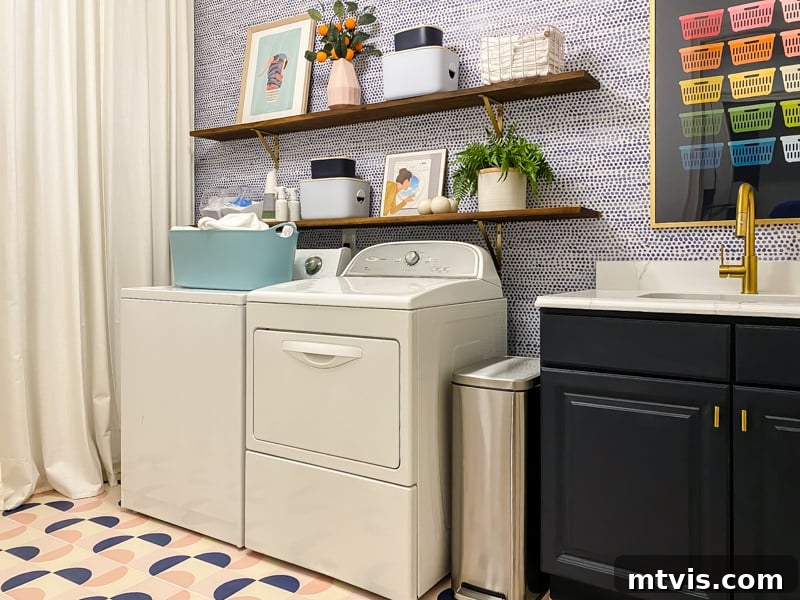
Welcome to the grand reveal of our latest home transformation – a vibrant and modern laundry room makeover that has truly stolen our hearts! If you’ve been dreaming of a space that combines style, functionality, and affordability, you’re in the right place. Join us as we unveil the stunning changes we made, proving that even utility spaces can be beautiful.
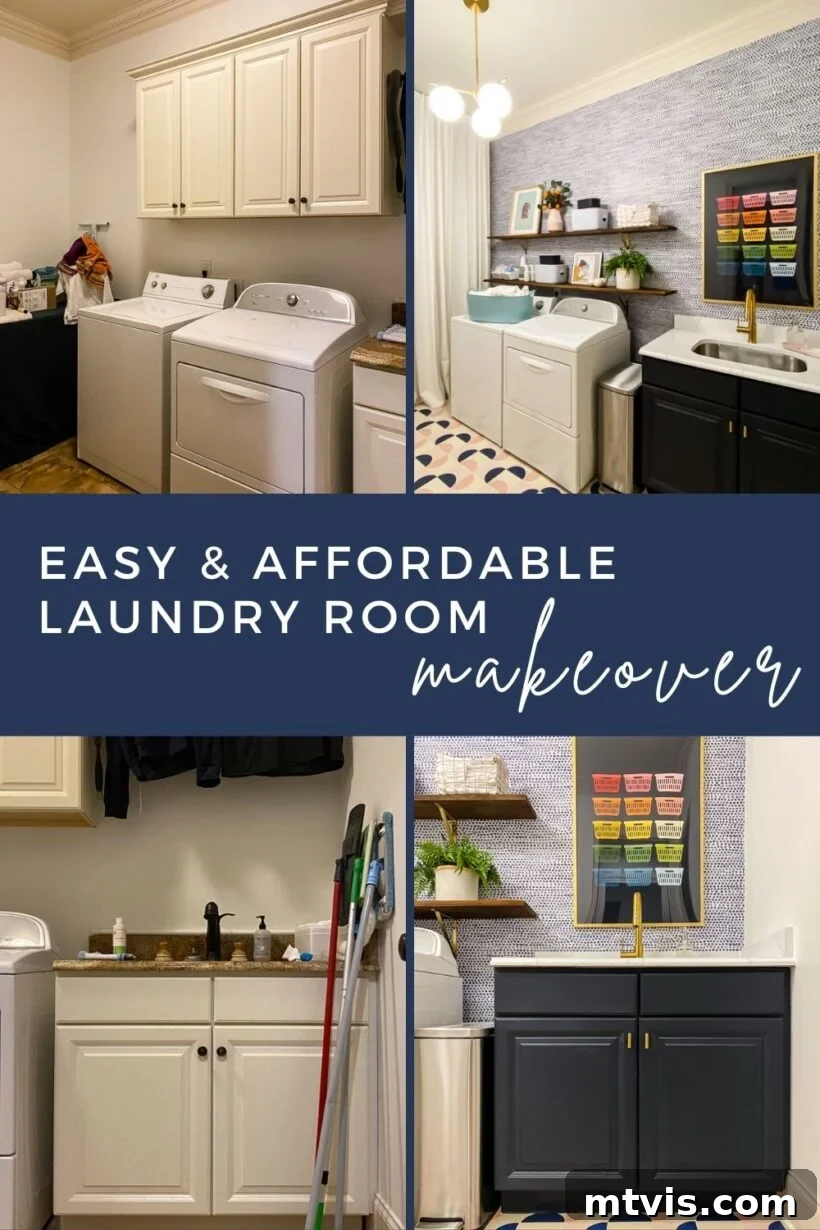
For anyone who follows our journey on Instagram, you’ll know that transforming this specific laundry room in our current house has been a labor of love over the past few weeks. It’s actually a fun full-circle moment for me: my very first blog post ever chronicled a laundry room makeover in our previous home! Do you recall our initial laundry room renovation for a mere $71, or the more extensive colorful refresh we gave it seven years later, right before we sold the house? It’s safe to say I have a deep appreciation for a well-executed laundry room makeover.
Our design philosophy revolves around the belief that every single room in your home deserves attention, care, and a touch of beauty – yes, even often-overlooked spaces like laundry rooms, pantries, and mudrooms. These are functional areas, but their functionality shouldn’t come at the expense of style or personal enjoyment. And out of all the laundry room transformations we’ve undertaken, this latest project stands out as my absolute favorite. It masterfully blends vibrant colors with sleek modern aesthetics, and the best part? It was incredibly easy and affordable to achieve!
A Quick 2022 Update: Lessons Learned and Long-Term Solutions
While we initially adored many aspects of this makeover, especially our innovative flooring choice, continuous living and the high-traffic nature of a laundry room sometimes reveal unexpected challenges. We’ve since implemented a few modifications to the laundry room, primarily addressing the floor. Unfortunately, the tile stickers on the floor didn’t quite endure the daily wear and tear as we had hoped. This led us to install a more robust new floating tile floor, which offers significantly greater durability and longevity.
Although I genuinely miss the stunning aesthetic of those initial tile stickers, the new laundry room floor provides a much more practical and permanent solution for this high-use area. It’s an important lesson in balancing immediate visual appeal with long-term functionality. However, it’s crucial to note that using tile stickers to update outdated tile remains a fantastic idea, particularly when you ensure you order the correct size tile stickers for your specific application. In fact, I provide detailed guidance on what size tile stickers to order in this comprehensive post. We successfully used tile stickers in both Attley’s bathroom makeover and Avery’s bathroom makeover, and they continue to hold up beautifully, proving their value in less demanding environments.
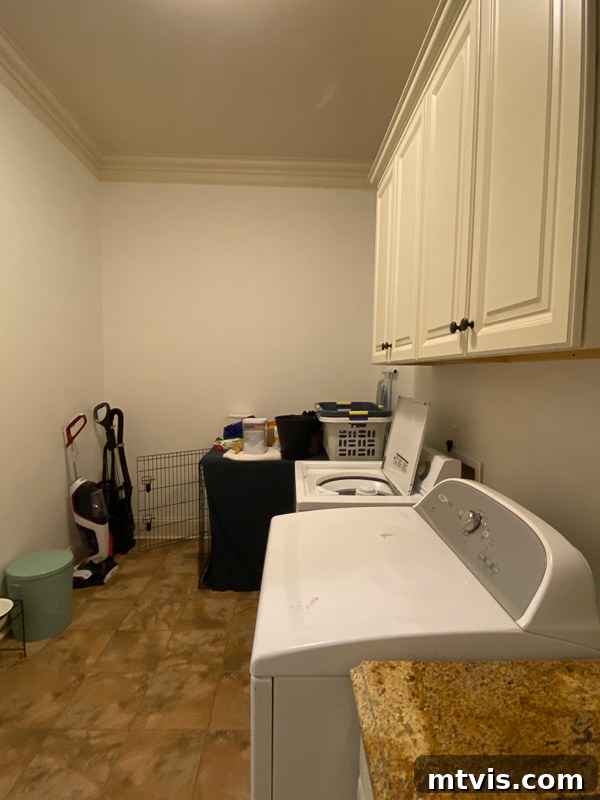
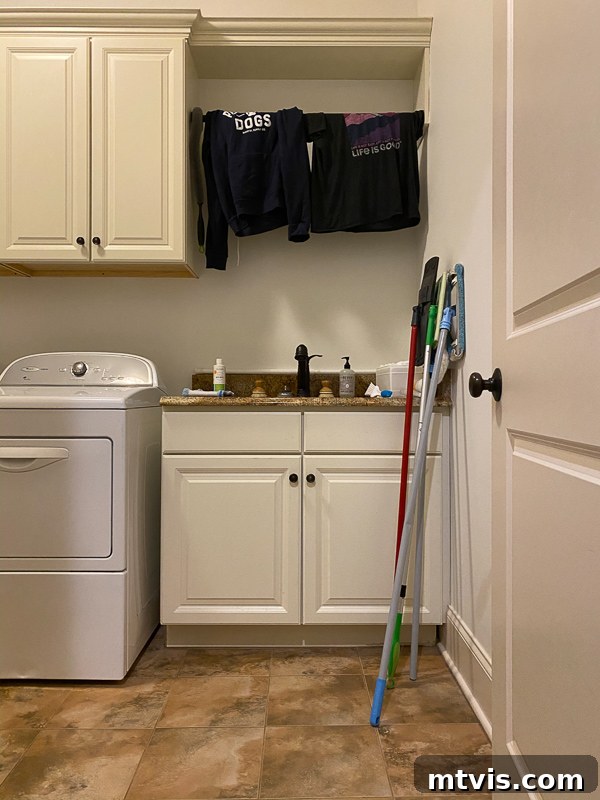
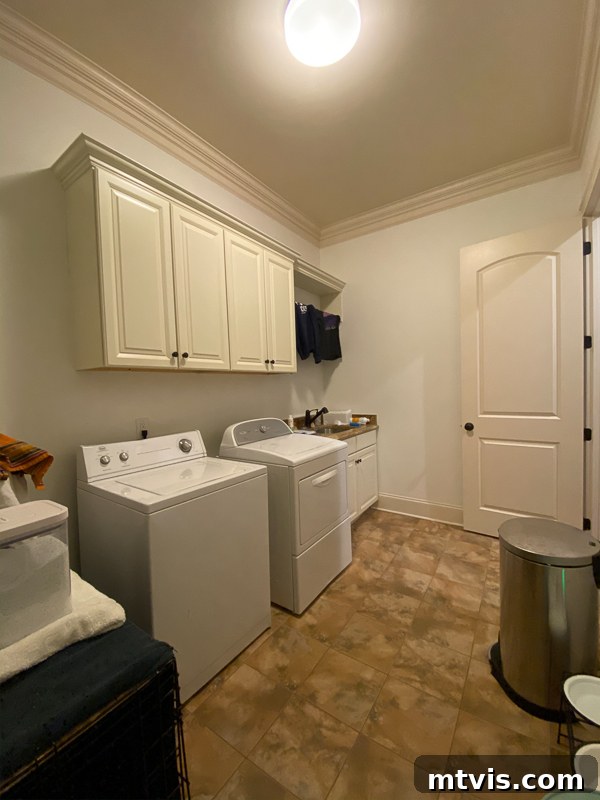
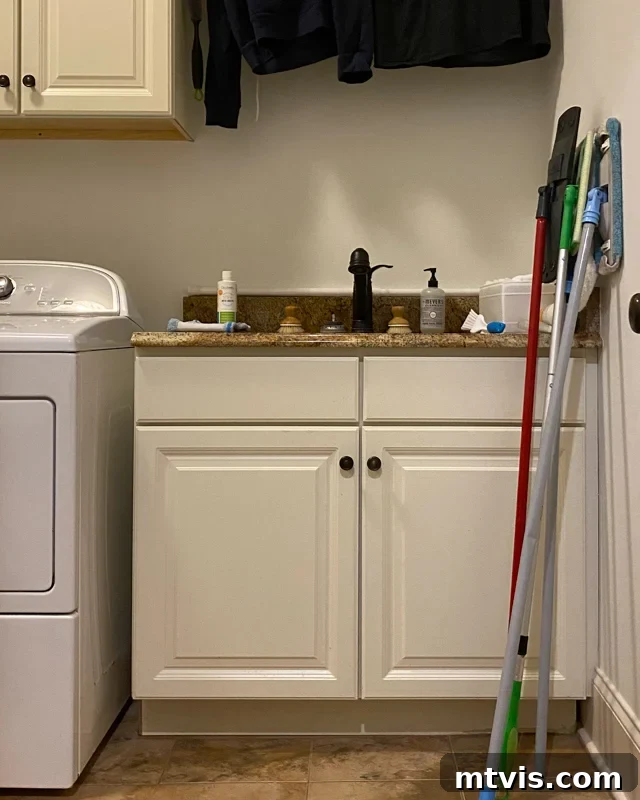
Before diving into the “after,” let’s revisit the starting point. Our laundry room is a generously sized space, measuring 12 feet by 7 feet, offering ample potential. However, its original storage configuration was far from ideal – frankly, it was a chaotic mess. The only existing storage consisted of a single cabinet beneath the sink, which, as many homeowners know, often becomes frustratingly cramped and disorganized. Above the washer and dryer, there were additional cabinets. But here’s the kicker: at 5’9″, I’m relatively tall, yet reaching anything beyond the lowest shelf in those upper cabinets was a constant struggle. Not only were they mounted exceptionally high (these are 10-foot ceilings, remember), but the significant protrusion of the washer and dryer forced an even further, more awkward reach. The long and short of it? Those upper cabinets were almost entirely useless for our daily needs, leading to untapped potential and constant clutter.
To truly appreciate the transformation, let’s take a moment to see what the laundry room looked like before we embarked on this exciting makeover journey.
Now, prepare to be inspired as we reveal how this neglected utility room was transformed into a vibrant and highly functional space. Let’s take a look at its stunning new appearance!
Smart Functional Changes for Maximum Efficiency
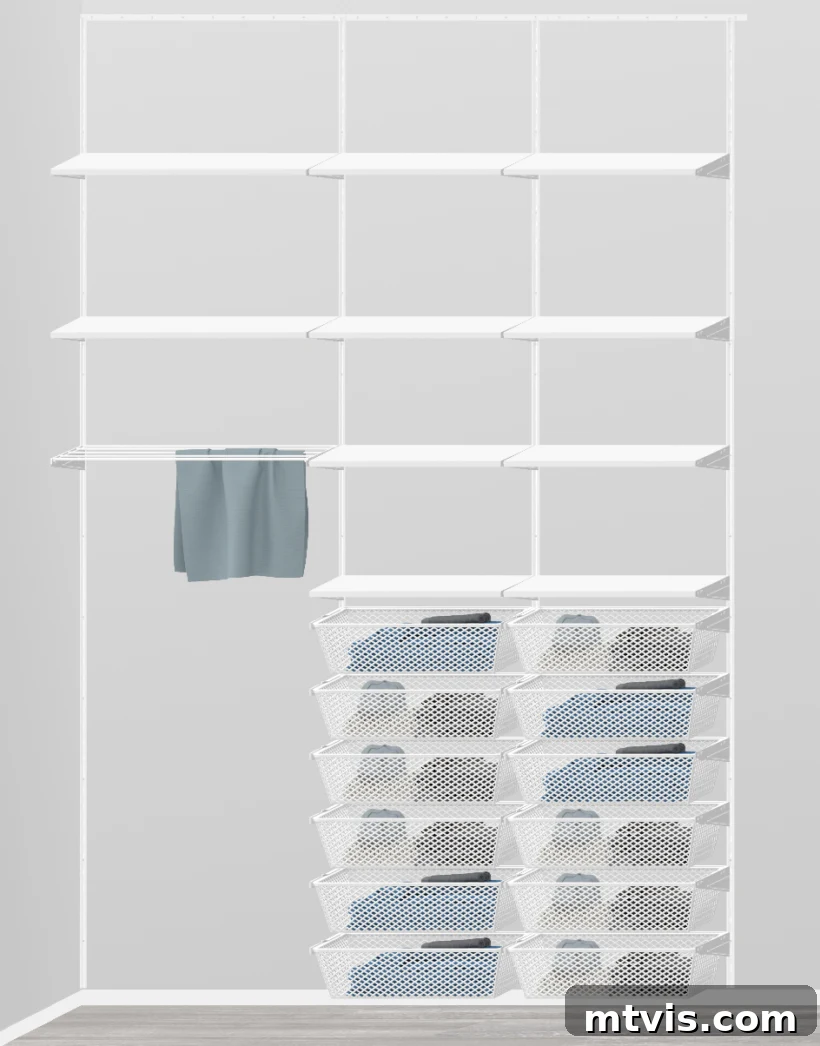
Our primary goal was to maximize storage and improve workflow. We started by removing Riggins’ crate, which opened up an entire blank wall – a prime opportunity for a dedicated storage solution. This space became home to an extensive new closet system utilizing the highly versatile IKEA Boaxel system. For those familiar with IKEA, this is the excellent successor to the Algot closet system that we frequently used in our old house. With 10-foot ceilings, this system provides an extraordinary amount of storage capacity, allowing us to neatly organize everything from laundry supplies to household essentials. The best part? All of this incredible storage, including a practical drying rack, plus the elegant floor-to-ceiling curtains we used to conceal it, cost us an incredibly reasonable $620 (including delivery fees!). This budget-friendly solution proves that exceptional organization doesn’t have to break the bank.
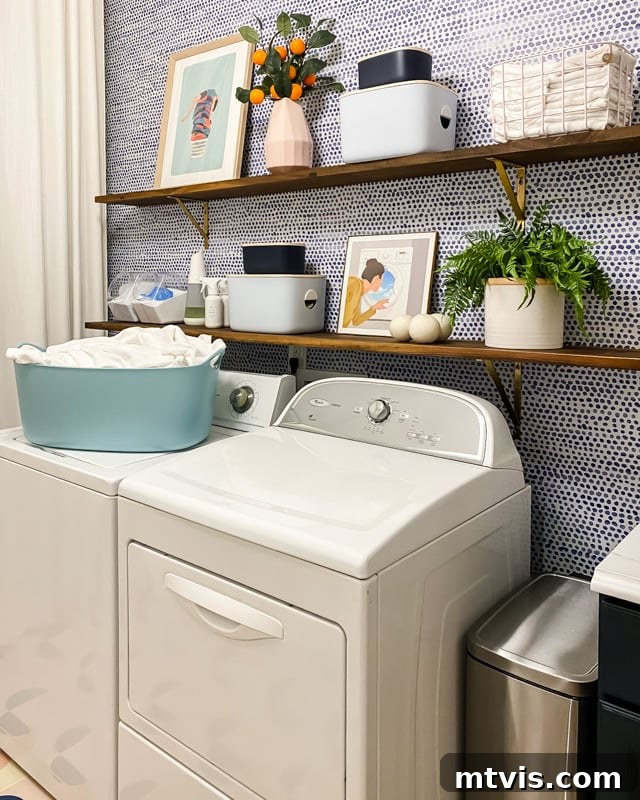
Another pivotal functional upgrade involved rethinking the space above the washer and dryer. We decisively removed the old, inaccessible upper cabinets and replaced them with more practical and aesthetically pleasing open shelving. We achieved this using the incredibly straightforward easiest DIY wall shelves method we previously employed for the shelves in our family room. These new shelves are not only significantly more functional, placing frequently used items within easy reach, but they also add a beautiful design element to the room. We sourced gorgeous walnut wood for these shelves from a wonderful local business, GPS Hardwoods in Kernersville, NC, adding a touch of natural warmth and sophistication. Simple yet sturdy brackets were used to securely hold them in place. Now, essential items like laundry detergent, Oxiclean, and dryer balls are conveniently accessible. Of course, no space is complete without a personal touch, so I adorned the shelves with some fun, colorful art and lush green plants, transforming practical storage into a charming display.
Dramatic Aesthetic Changes for a Modern & Cheerful Vibe
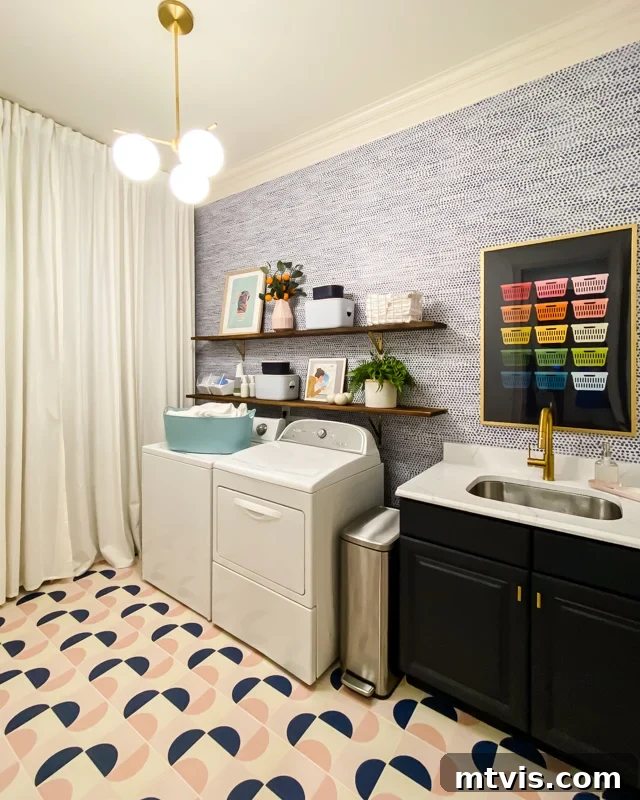
Beyond functionality, the visual transformation of this space is truly remarkable. It now boasts a completely fresh and inviting look. We started by updating the light fixture, a small change that often makes a huge impact on a room’s overall ambiance. To inject personality, color, and a playful pattern, we introduced this stunning removable wallpaper. Removable wallpaper is a game-changer for those who love bold designs but want the flexibility to change their minds without a permanent commitment, or for renters looking to personalize their space.
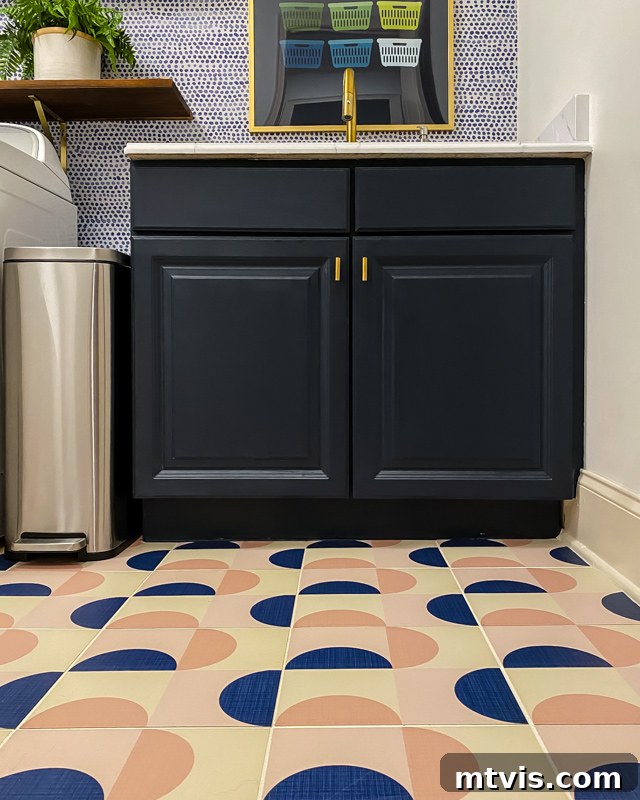
Our initial plan for the flooring involved something truly exciting: the fantastic vinyl tile stickers from Mirth Studio! These offered an incredibly easy and affordable way to update our tired, outdated tile floors without any demolition or strenuous labor. The process was simple, and the immediate visual impact was absolutely stunning. However, as noted in our 2022 Update, we later discovered that while tile stickers are an excellent temporary or low-traffic solution, they didn’t hold up quite as expected in our busy laundry room environment. The constant foot traffic and potential for moisture proved to be a bit too much for their long-term durability in this specific application. For a truly permanent and highly durable solution, we ultimately installed a new floating tile floor. This experience reinforced that while tile stickers are amazing for projects like updating outdated tile in bathrooms or other lower-traffic areas (especially when you follow my guide on how to order the correct size tile stickers), a traditional floating tile floor is a superior choice for high-wear areas like a main laundry room. Nevertheless, the world of home design offers a plethora of affordable and budget-friendly flooring ideas that can work beautifully in laundry rooms, depending on your needs and expectations.
During the design planning phase for our laundry room, as detailed in our design plans post, I had initially envisioned incorporating luxurious pink velvet curtains to gracefully conceal the new closet system. However, a practical challenge emerged: the curtains weren’t available in the essential 120-inch length we needed for our tall ceilings, and I wasn’t keen on the idea of custom sewing them. Embracing flexibility in design, we ultimately chose simple, creamy white curtains instead. This turned out to be a serendipitous decision; the soft, neutral tone of the curtains provides a beautiful, airy backdrop that complements the colorful wallpaper and other vibrant elements without overwhelming the space, adding a touch of understated elegance while still serving their functional purpose.
The sink area received a dramatic, budget-friendly overhaul. We began by painting the existing sink cabinet, transforming its look with a fresh coat of “Midnight Blue” Fusion Mineral Paint – a rich, deep hue that adds sophistication and anchors the space. Following the exact same successful process we used to paint our kitchen countertops to stunningly resemble marble (you can find that detailed tutorial post here), we revitalized the countertops. This DIY method allowed us to achieve a high-end look at a fraction of the cost of new stone. To complete the transformation, we swapped out the outdated hardware for sleek, modern pulls and installed a contemporary faucet, instantly elevating the entire area. These surprisingly affordable fixes made this part of the room look drastically different and infinitely more stylish. And, as always, I believe every room benefits from art; yes, even laundry rooms need art! The charming laundry basket art print positioned above the sink is actually a piece I created myself and loved so much that I decided to make it available in my shop – you can order one HERE.
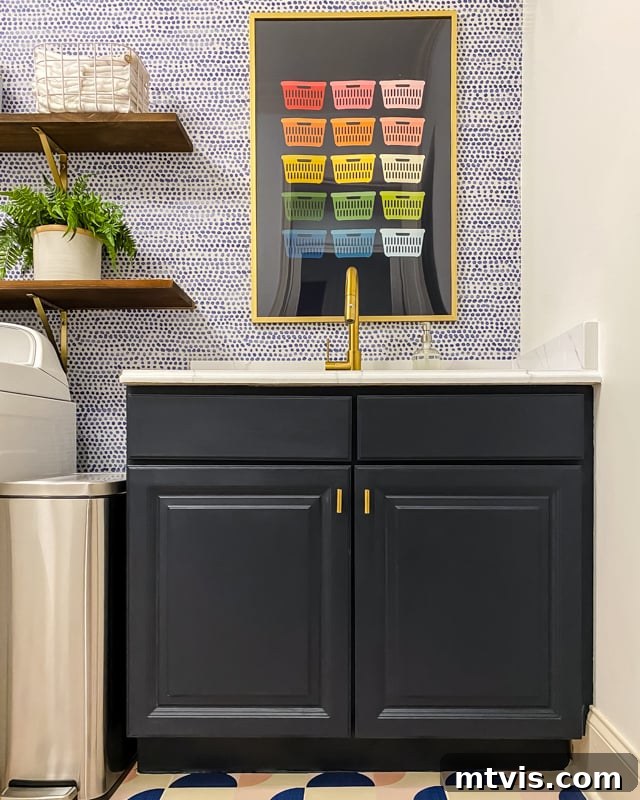
That completes the detailed overview of all the impactful changes we implemented in this modern laundry room makeover. We’ve meticulously planned and executed each step to create a space that is not only highly efficient but also a joy to be in. Now, let’s simply indulge in more stunning photos of the finished space, allowing you to fully appreciate the transformation and spot all the delightful fun laundry room art we’ve incorporated throughout. You’ll find a comprehensive source list at the very end of this post to help you recreate any of these looks in your own home.
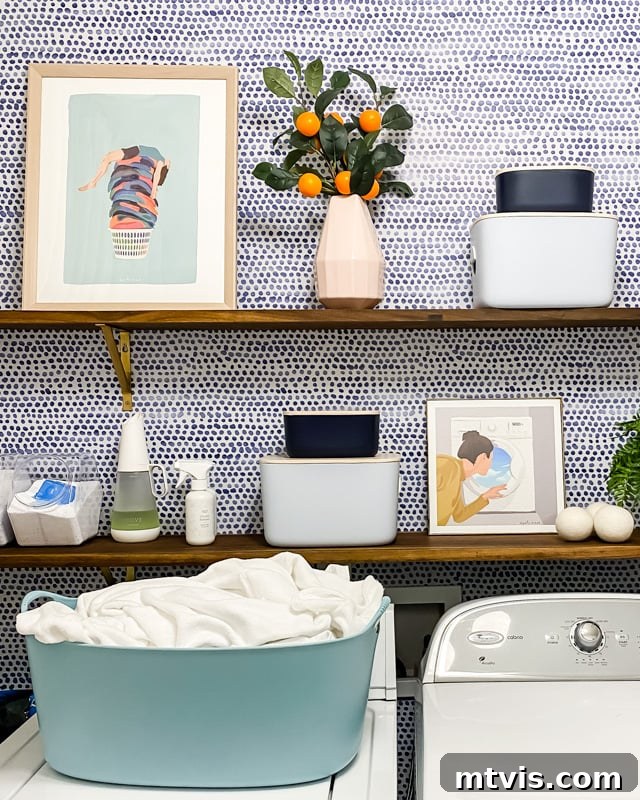
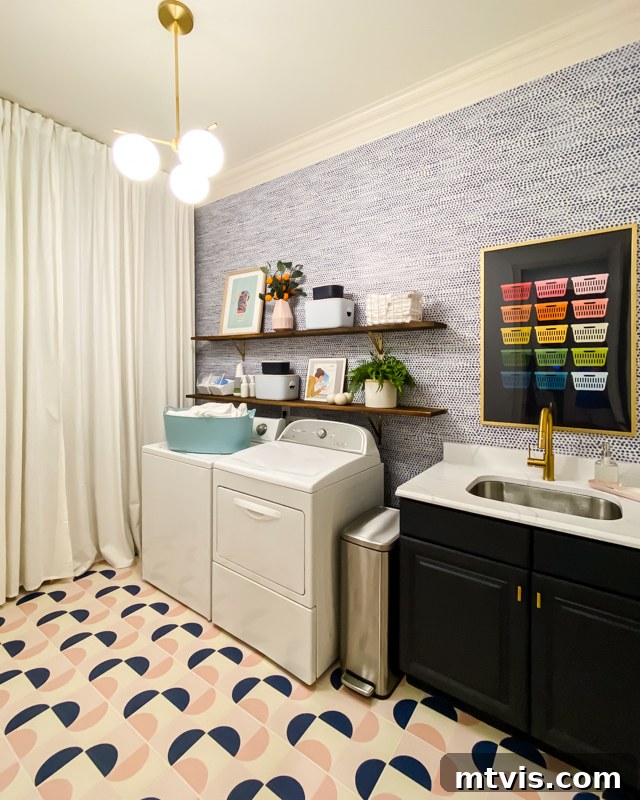
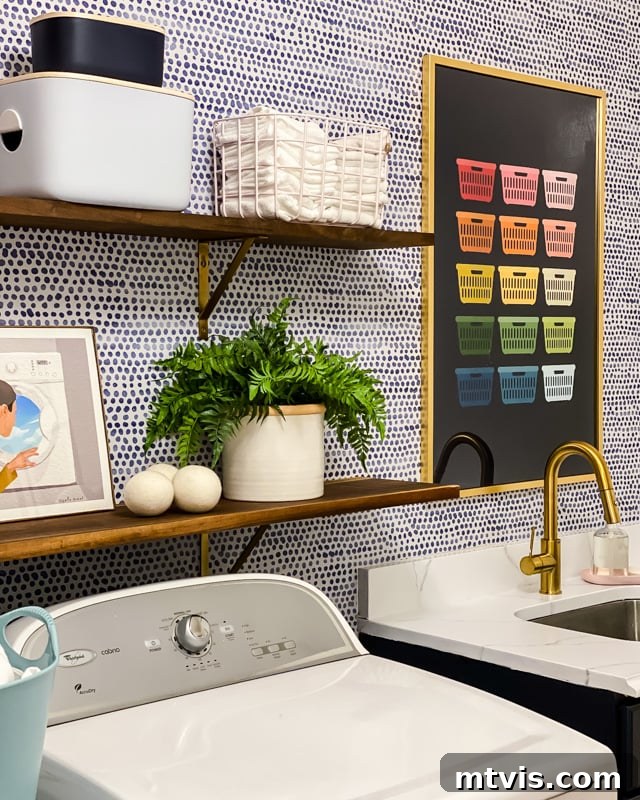
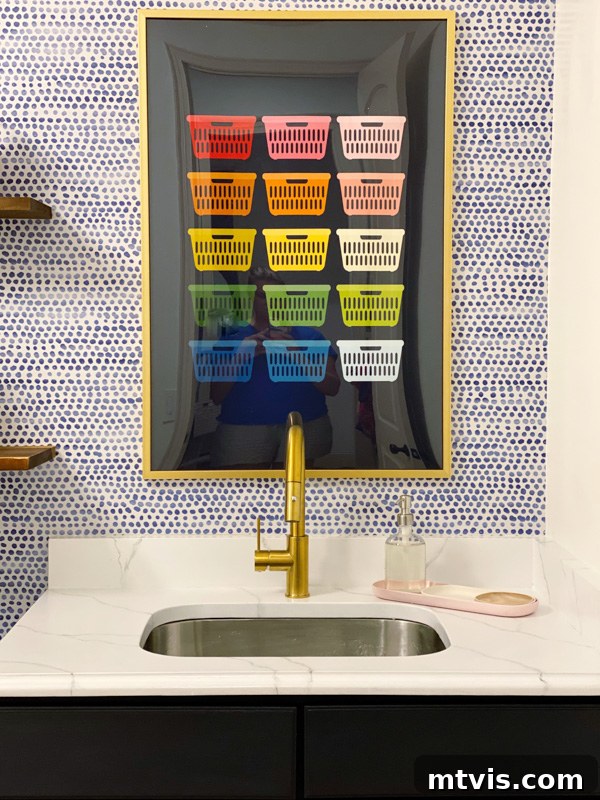
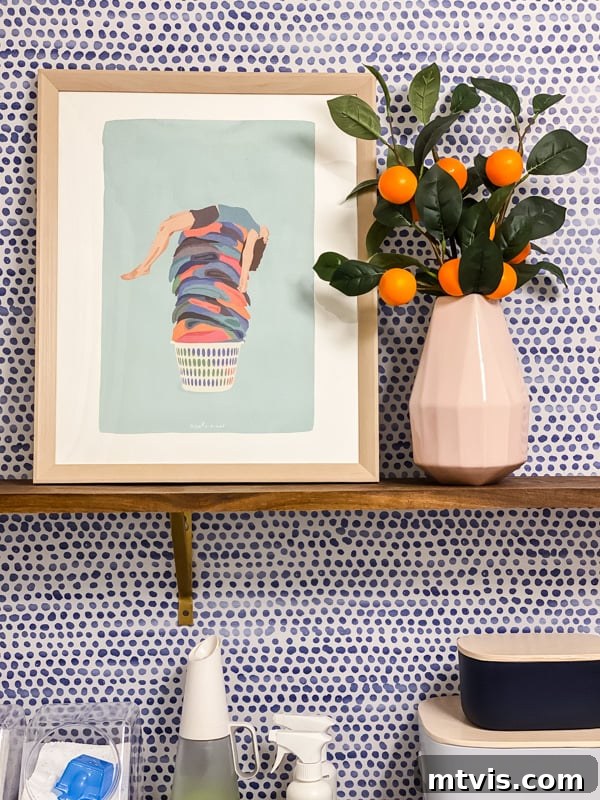
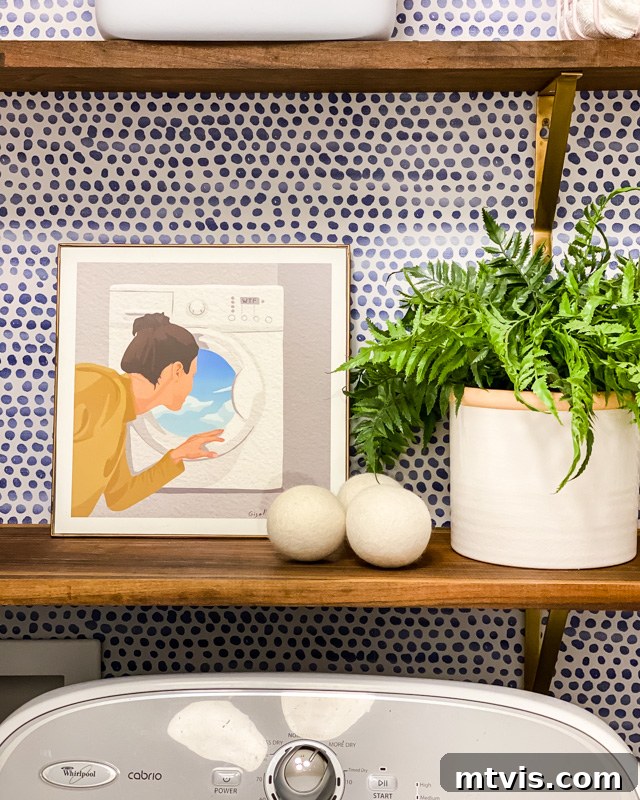
So, what do you think of our vibrant new laundry room? We are absolutely thrilled with every aspect of this transformation, from its enhanced functionality to its joyful aesthetics. It’s a testament to the fact that with thoughtful planning and a little DIY spirit, any space can be reimagined to better suit your needs and delight your senses.
Modern Laundry Room Source List
- Wall Color: Pure White by Sherwin-Williams
- Trim Color: Divine White by Sherwin-Williams
- Cabinet Color: Midnight Blue by Fusion Mineral Paint
- Vinyl Tile Stickers (Note: See 2022 Update for long-term durability in high-traffic areas)
- Laundry Basket Rainbow Art
- Ceiling curtain rail (we used 2 tracks)
- Curtain rail sliders/hooks
- Removable Wallpaper: Link to product
- Walnut Wood for Shelves: GPS Hardwoods (local business in Kernersville, NC)
- Simple Shelf Brackets: (Self-sourced, similar available at most hardware stores)
- Floating Tile Floor: (Details can be found in our floating tile installation post)
All other sources are pictured below. Just click on any image for full product details!
More Room Makeovers
SEE all room makeovers & reveals
-
Tips for a Budget Bathroom Makeover + Attley’s Bathroom Reveal
-
How to Decorate Bedroom Doors to Look Like Apartment Doors
-
Our Kitchen Renovation Reveal- It’s Neutral AND Colorful
-
Our Neutral But Still Colorful Kitchen Design
-
Why We Decided to Renovate Our Kitchen + The New Layout
-
Our Budget-Friendly Pantry Makeover
Curious about our systematic approach to transforming rooms and spaces throughout our home? You’ll find our entire methodology detailed in Designer in a Binder®. This comprehensive guide provides an affordable and straightforward way to plan, design, and decorate your home with confidence and creativity.
For even more exclusive content, behind-the-scenes sneak peeks into upcoming projects, and personal design tips delivered directly to your inbox, be sure to subscribe to our newsletter before you go! Don’t miss out on staying connected with all our latest inspirations and transformations.