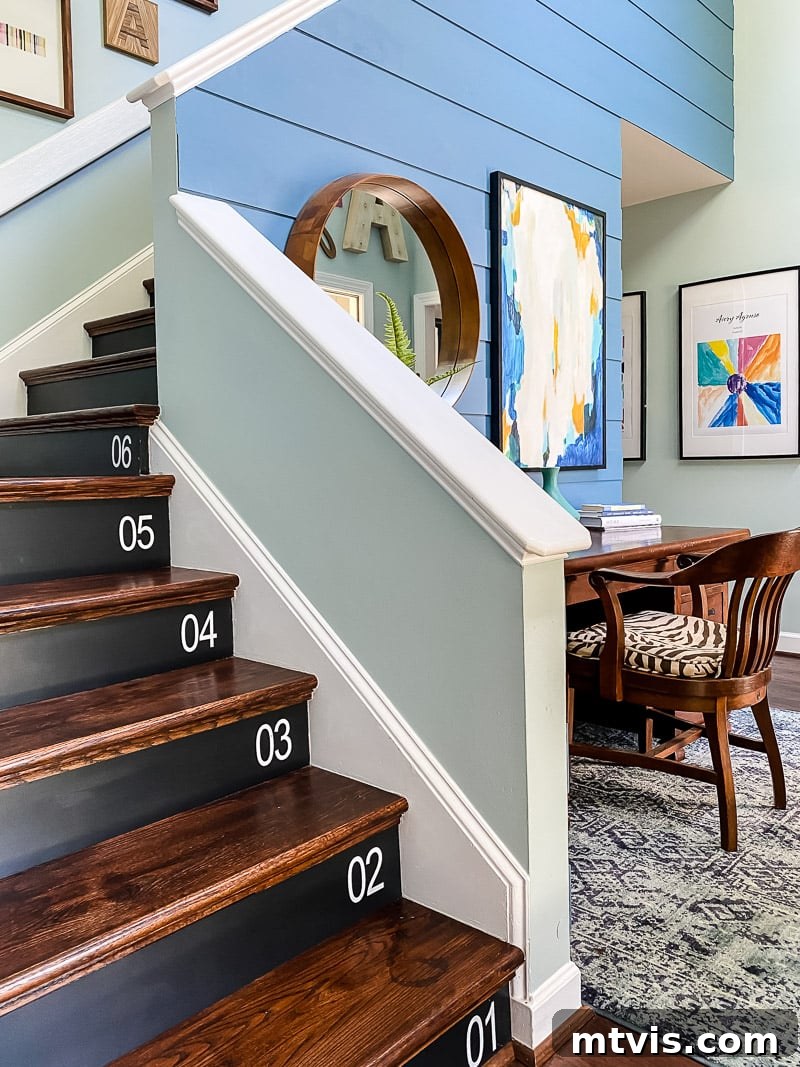
Dreaming of a grand staircase that welcomes you home with warmth and elegance? Hardwood stairs are an impeccable choice, offering unmatched beauty, exceptional durability, and long-lasting value to any home. If you’re a passionate DIY enthusiast, you might be surprised to learn that transforming your carpeted staircase into a sophisticated hardwood showpiece is a very achievable do-it-yourself project. We successfully completed this renovation in just a day and a half, dramatically upgrading our home’s aesthetic. In this comprehensive guide, we’ll share the full tutorial, empowering you to tackle this rewarding home improvement project with confidence.
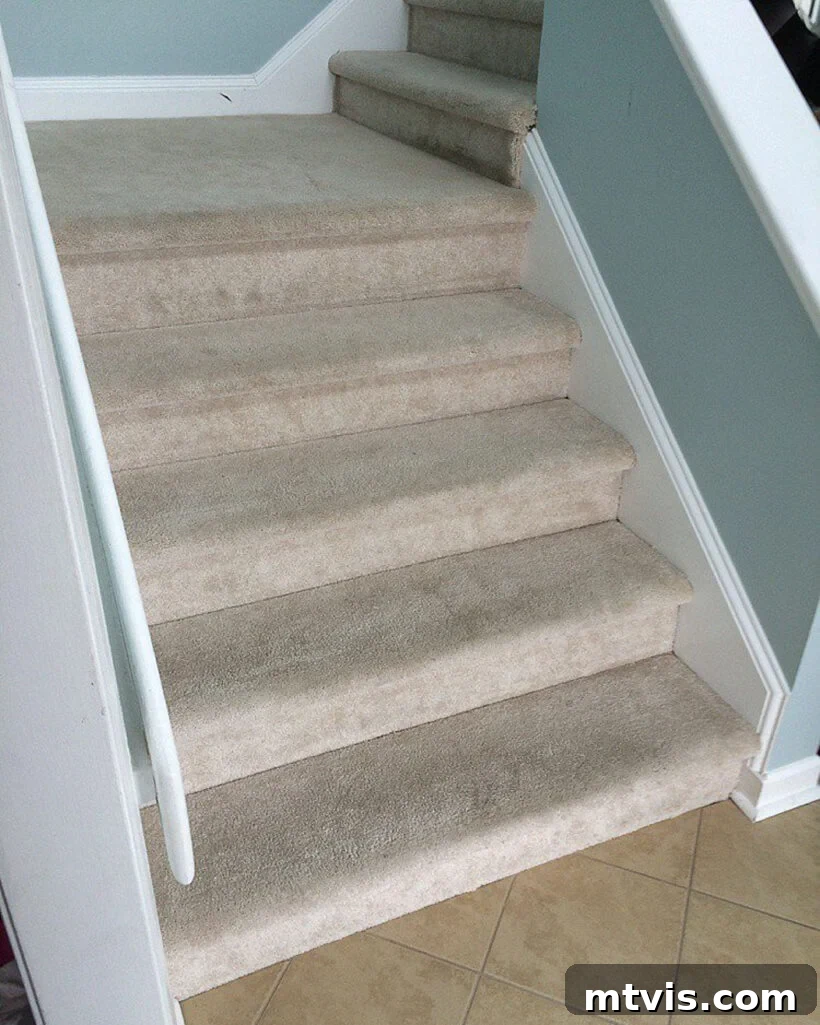
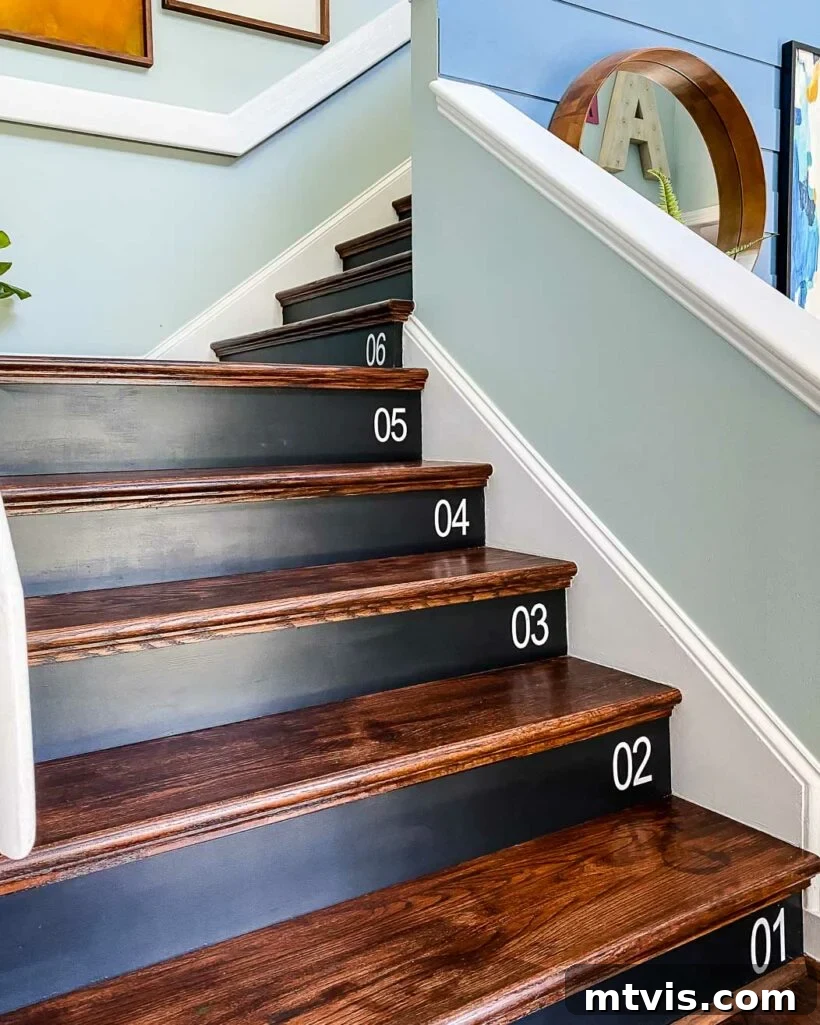
Table of Contents
* UPDATE: We originally installed our DIY hardwood stairs and published this tutorial in 2015. We are thrilled to report that they still looked absolutely perfect when we sold this home in 2020, standing the test of time and daily wear with remarkable quality. *
Why Choose Hardwood Stairs for Your Home?
Our home’s dated staircase, cloaked in uninspiring beige carpet, was a prime candidate for a serious upgrade. It lacked character and failed to make the positive first impression we desired. By deciding to modernize the staircase through the removal of the carpet and the installation of beautiful hardwood stair treads, we embarked on a transformation that exceeded all expectations. This project not only enhanced the aesthetic appeal of our entryway but also significantly contributed to the overall value and functionality of our home. Hardwood stairs offer a multitude of benefits, from their inherent beauty and timeless appeal to their exceptional durability and ease of maintenance. Unlike carpet, hardwood doesn’t trap dust, allergens, or pet dander, making it a healthier option for your indoor environment. Furthermore, hardwood can be refinished multiple times, ensuring its longevity and allowing for aesthetic updates over the decades. This project proved to be one of the most impactful and satisfying home improvements we’ve ever undertaken.
DIY vs. Professional Hardwood Stair Installation: Cost & Benefits
Initially, the thought of installing wood stair treads seemed daunting, almost impossibly difficult. However, after having completed numerous DIY projects and home improvement projects over the years, including installing new laminate flooring throughout our entire home, we can confidently say that installing these new stair treads was surprisingly straightforward – far easier than laying extensive flooring. This truly took us by surprise! Not only was the process more manageable than anticipated, but it was also significantly more affordable than hiring professionals. In a previous home, we opted for professional installation, and the cost was quite shocking, serving as a strong motivator to tackle this project ourselves this time around.
This post contains affiliate links for your convenience. Click here for my full disclosure policy.
Materials and Tools for Your DIY Staircase Makeover
Choosing the Right Stair Treads
When it comes to upgrading to hardwood stairs, selecting the right materials is crucial for both aesthetics and durability. There’s a wide variety of stair tread options available, often referred to as “retreads” or “stair caps.” While some home improvement stores like Home Depot might stock basic options, you’ll frequently find a broader selection and better quality by ordering them. For our project, we ultimately chose NuStair hardwood stair treads. Their system offered two key advantages: 1) high-quality materials, and 2) the convenience of having all necessary components, including the specialized adhesive, shipped directly to our doorstep. This saved us an immense amount of time and effort in sourcing materials locally.
The NuStair system truly streamlined our DIY hardwood stairs installation, making it one of the smoothest projects we’ve completed in recent memory. We were confident in the quality and the system’s design, but the ease of installation still genuinely surprised us. We accomplished about 95% of the work in just one weekend – a remarkable 1.5 days! This efficiency made the entire experience incredibly rewarding.
General Materials Needed
- Wood treads / hardwood treads (often called “retreads” or “stair caps”)
- Construction Adhesive (urethane-based for strong, flexible bond)
- Nail puller (essential for removing old staples and tacks)
- Utility knife (for cutting carpet and other materials)
- Hammer (for general demolition and nail setting)
- Crow bar (for prying up tack strips and stubborn materials)
- Circular saw (a basic but effective tool for cutting treads and risers)
- Miter saw (highly recommended for precise, angled cuts, significantly simplifying the process)
- Table saw (also makes cutting treads to width much easier and more accurate)
- Caulk, painter’s tape, and touch-up paint (for a clean, professional finish. Learn how to match existing paint colors if needed)
- Wood Stain (if using unfinished treads)
- Water-based polyurethane (for sealing stained treads)
- Sanding paper/blocks (various grits for preparing wood)
- Measuring tape and pencil
- Safety glasses and work gloves (always prioritize safety!)
Helpful Installation Video Guide
Before you dive into your DIY hardwood stairs project, we highly recommend watching this installation video. Even if you opt for a different stair retread product, the fundamental installation principles and techniques demonstrated here will be very similar and incredibly valuable.
Step-by-Step Tutorial: Installing DIY Hardwood Stairs
Time needed: 1 day and 4 hours
Transforming your carpeted stairs into elegant hardwood is a rewarding DIY project. It took us approximately 1.5 days to completely remove the old carpeting and install brand new wood stair treads. Follow these detailed steps to achieve a professional-looking finish yourself.
-
Step 1: Remove Your Old Carpet & Tack Strips.
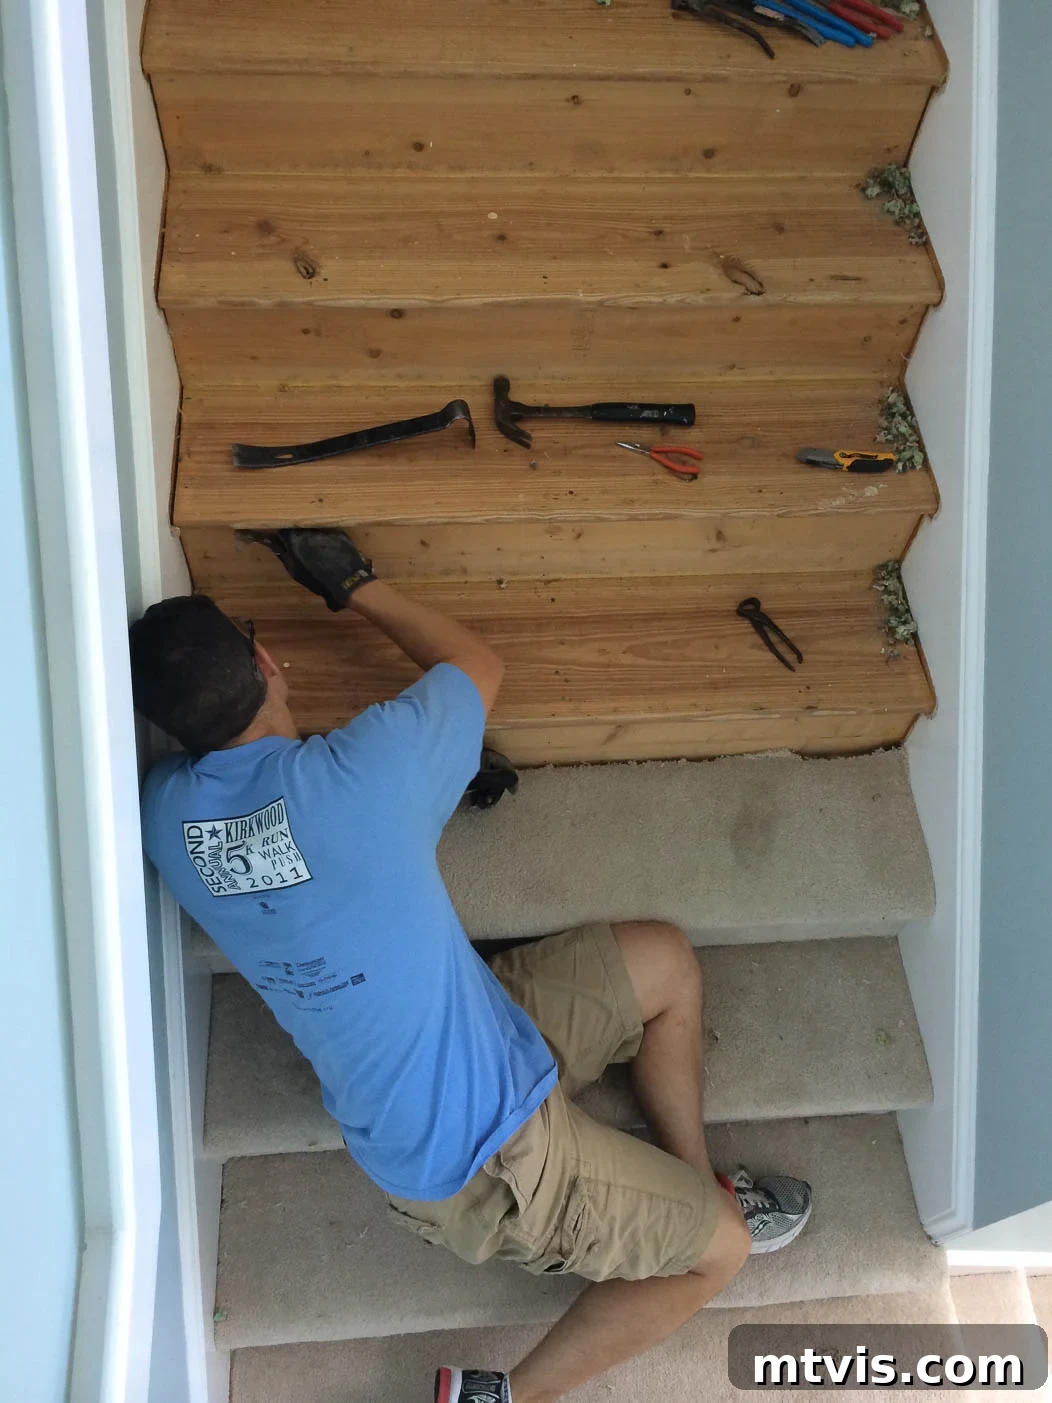
The initial phase of your staircase makeover involves carefully removing the existing carpet and its underlying padding. Begin by using a sturdy utility knife to cut the carpeting into smaller, more manageable sections. This will make it easier to pull up and dispose of. While removing the carpet itself is often relatively straightforward, the subsequent task of extracting the tack strips and countless staples can be a bit more labor-intensive, though it moves quicker than you might expect. A good pair of pliers or a dedicated nail puller will be indispensable for thoroughly removing any remaining staples, carpet tacks, or stray nails. Ensure the subfloor (typically plywood or OSB) is completely clean and free of debris, as a smooth foundation is critical for the new treads. This “demo” stage typically requires about 4 person-hours of focused effort.

-
Step 2: Stain and Finish Your Hardwood Stair Treads.
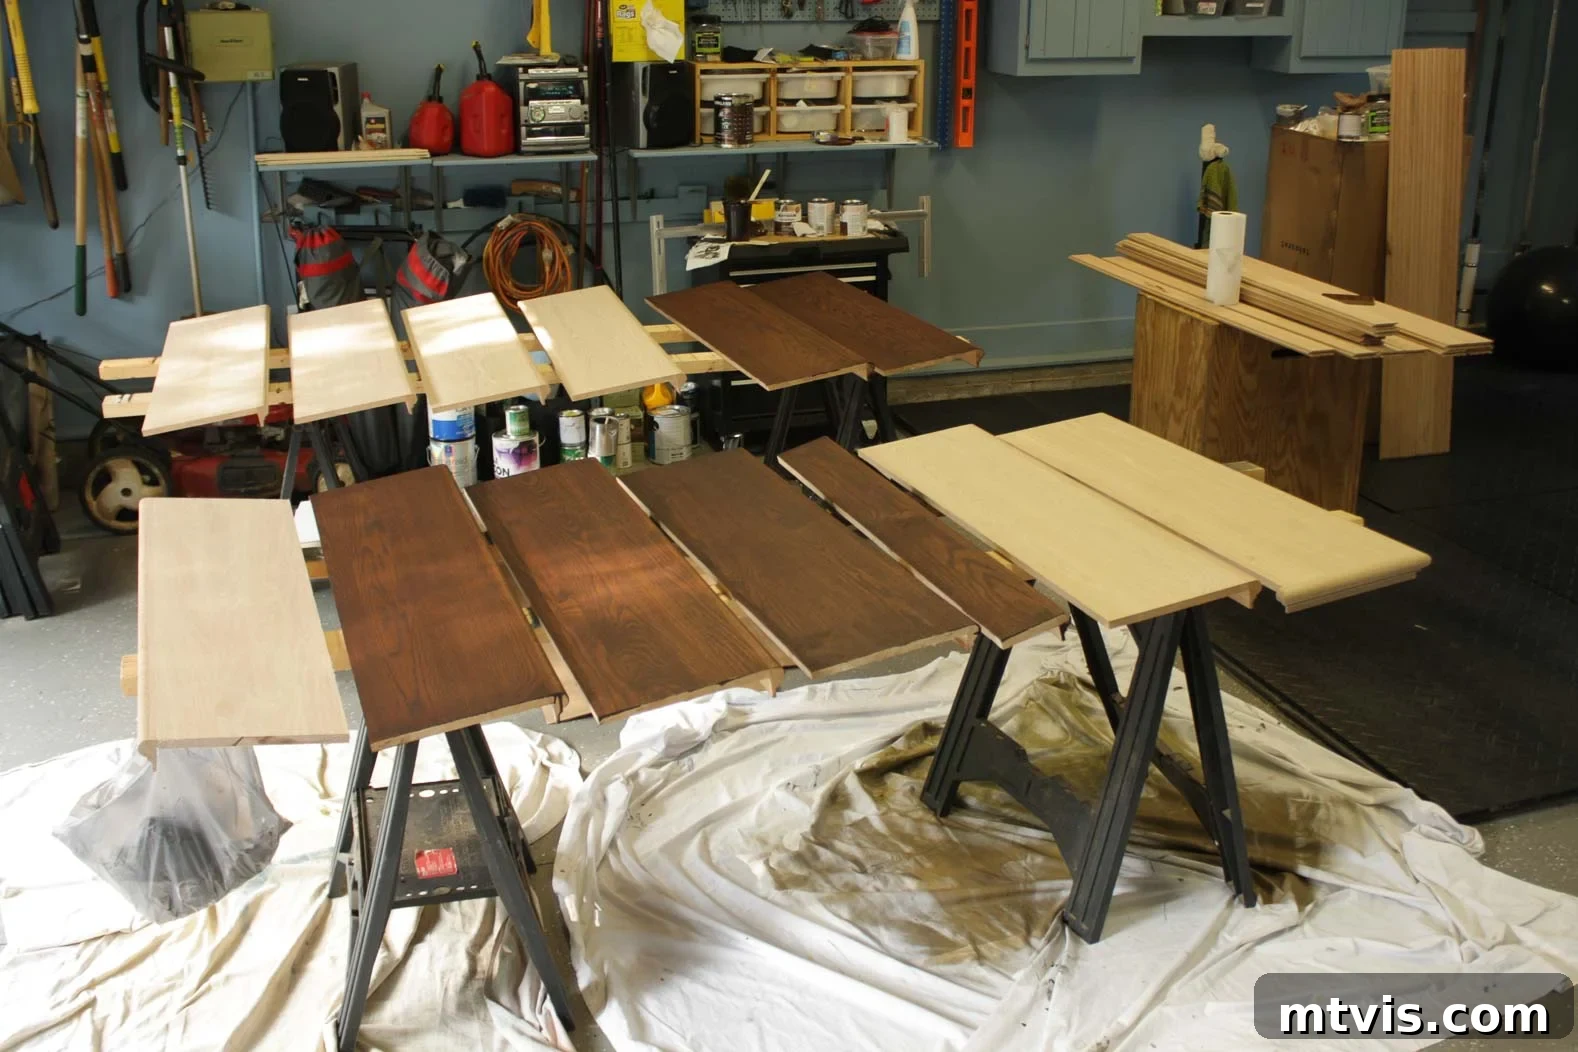
Unless you’ve opted for pre-finished wood treads, this step involves bringing your raw wood to life. We chose unfinished red oak treads to allow us the flexibility to custom mix a stain that perfectly matched the laminate flooring already installed throughout our home. This process involved extensive staining, applying a consistent coat to each tread. Fortunately, our chosen stain achieved excellent coverage with just a single application. The stain dried remarkably quickly, allowing us to apply a protective layer of water-based polyurethane later that same evening. This clear coat not only enhances the wood’s natural beauty but also provides crucial protection against daily wear and tear, ensuring your DIY hardwood stairs remain stunning for years. Ensure proper ventilation during this process.
-
Step 3: Paint the Stair Risers.
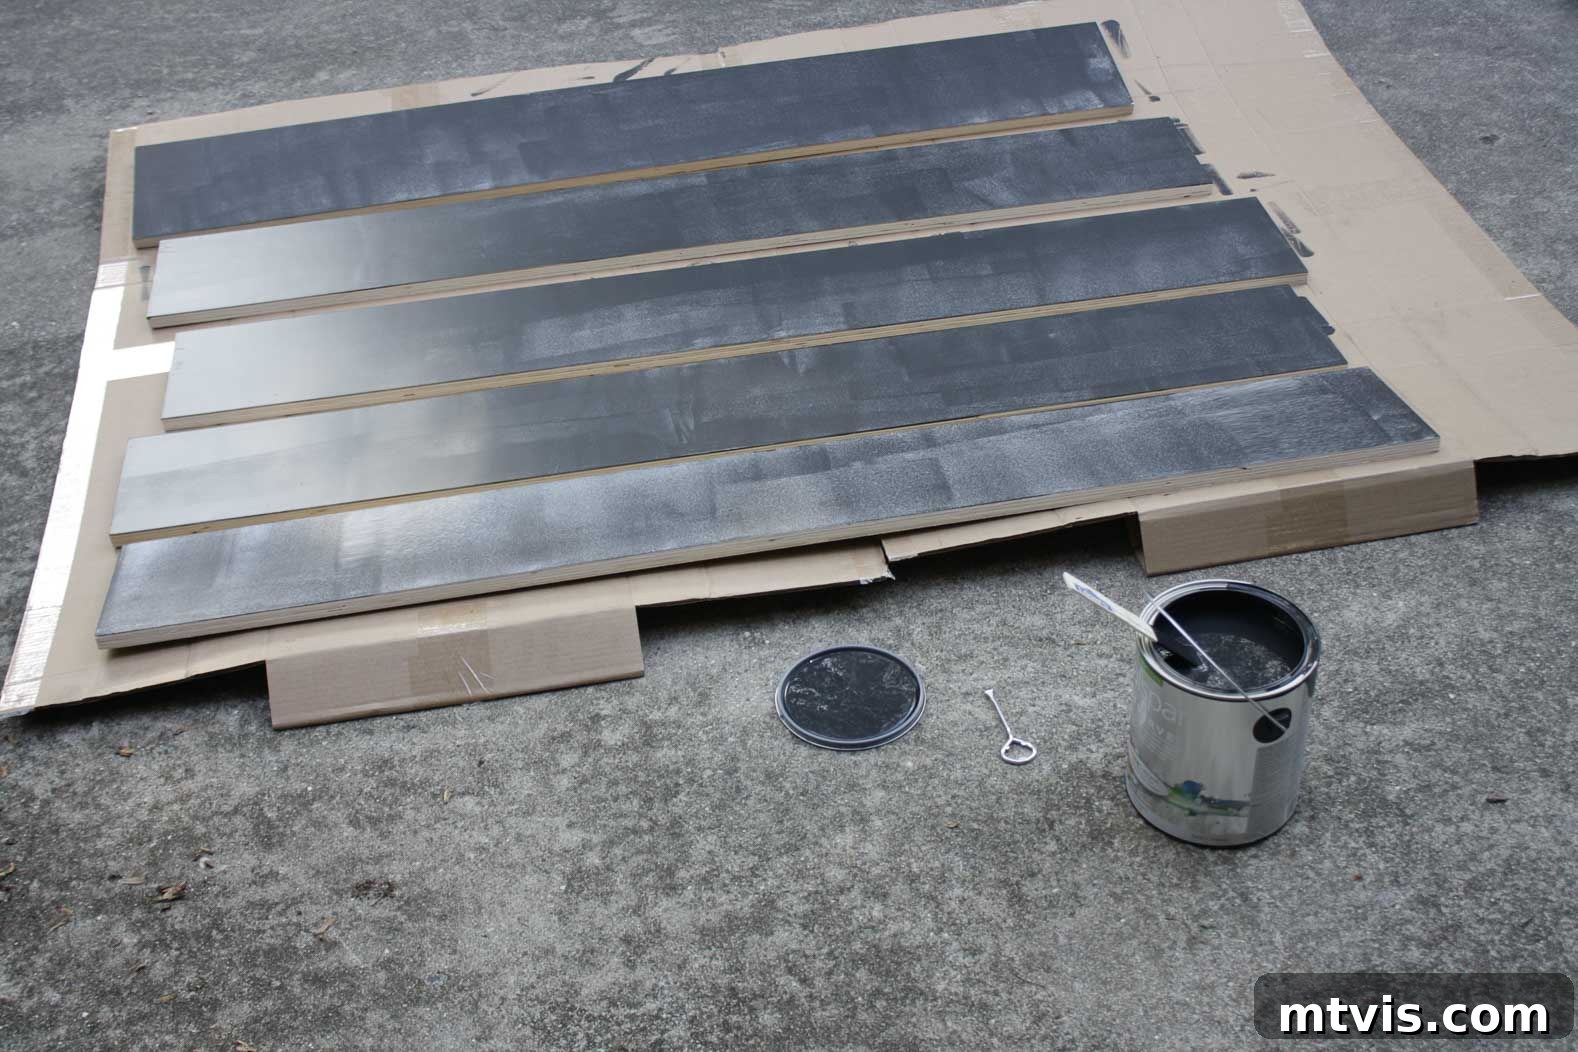
Our NuStair retread kit, like many others, thoughtfully included separate stair risers. We decided to paint our risers a sophisticated black to create a striking contrast with the stained treads. A major advantage was that the risers came pre-primed, which saved us a valuable step. We applied two coats of black paint to ensure complete, opaque coverage, and this process moved along quite swiftly. Joe and I worked together, and the combined staining, sealing, and painting of all components took approximately 4 hours. After completing this, we allowed both the stained treads and painted risers to dry thoroughly overnight, ensuring they were perfectly cured and ready for installation the following day.
-
Step 4: Precisely Trim All Stair Treads and Risers to Size.
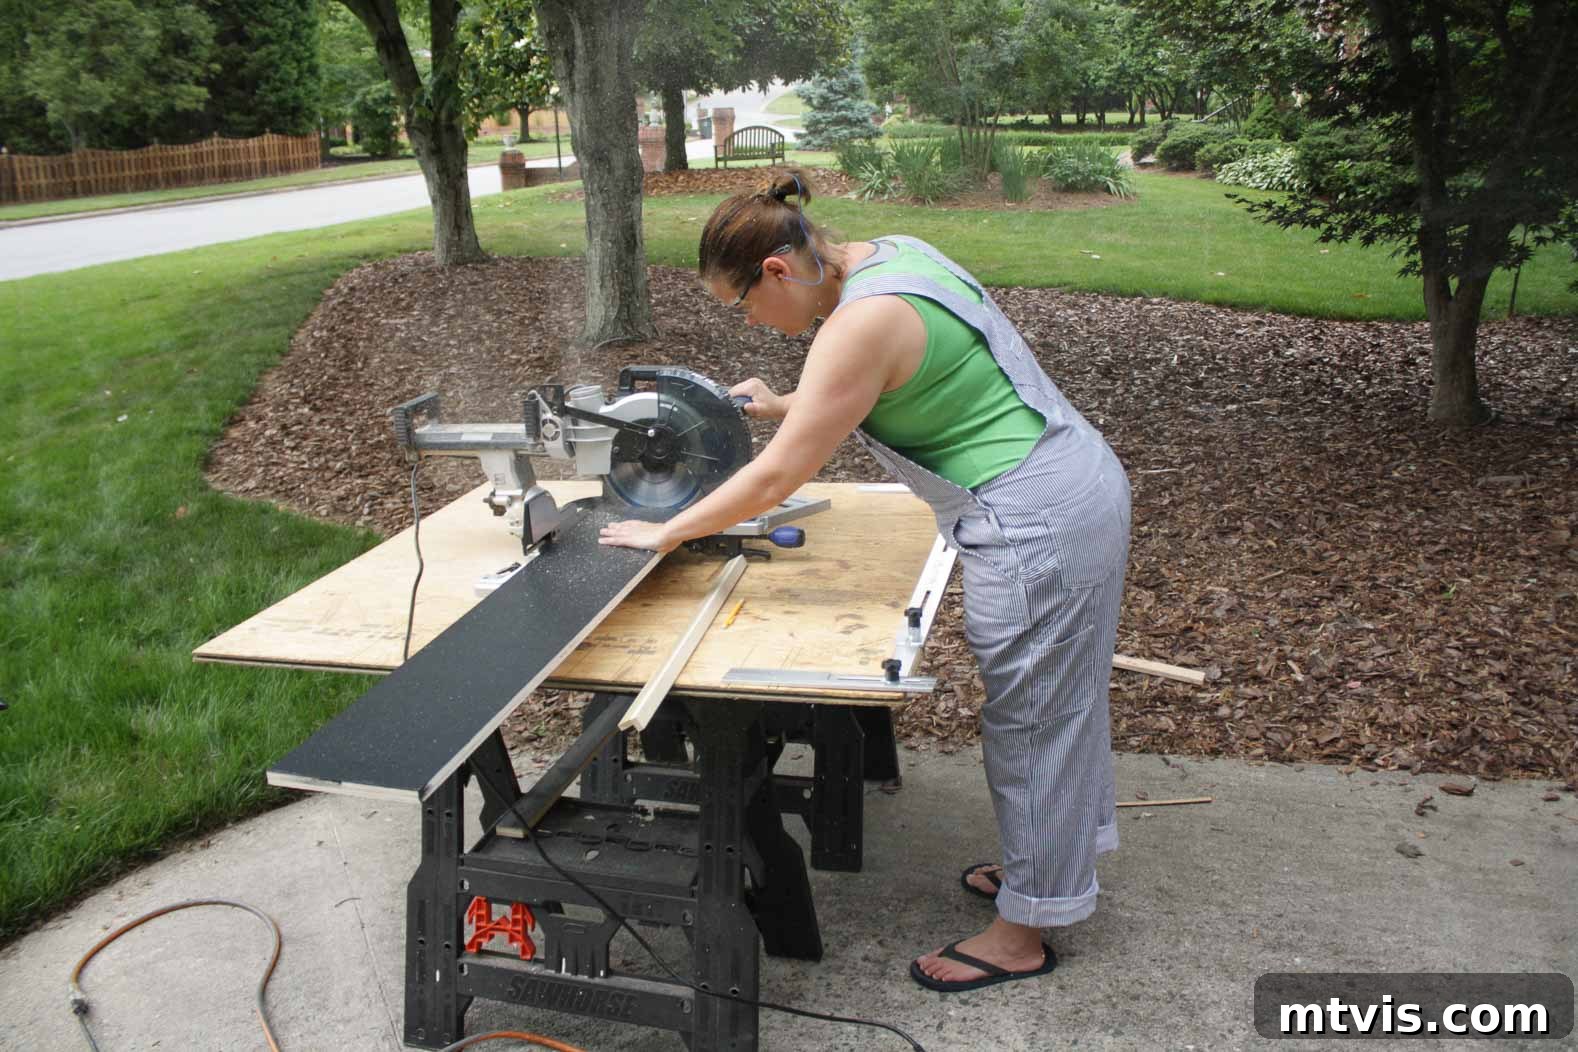
Believe it or not, this stage of the installation process is surprisingly simple, especially with the right tools. NuStair provided a clever device called a “NuScribe,” which functions like a specialized slide ruler. This tool is placed on top of each existing step, allowing its adjustable arms to conform perfectly to the unique angles and dimensions of your stair stringers (the side supports of your staircase). Once a snug, precise fit is achieved, you lock down the arms of the NuScribe. Then, you transfer this exact measurement to your new NuStair tread or riser, mark your cut lines, and make your cuts with a circular, miter, or table saw. Precision here is key for a professional, gap-free finish. Always double-check your measurements!
-
Step 5: Install the First Wood Stair Tread and Risers.
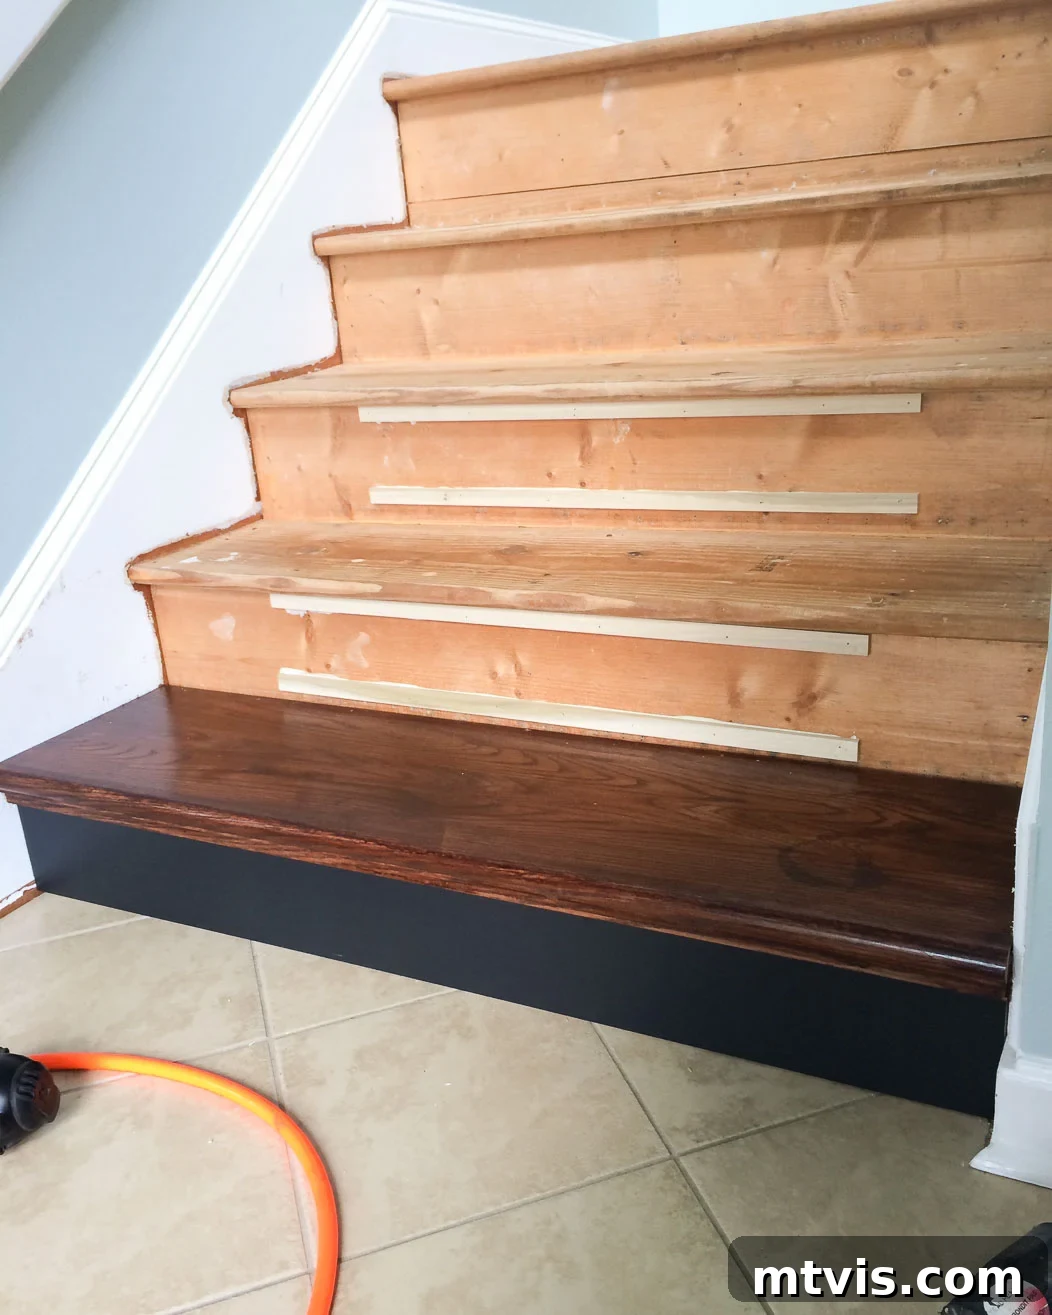
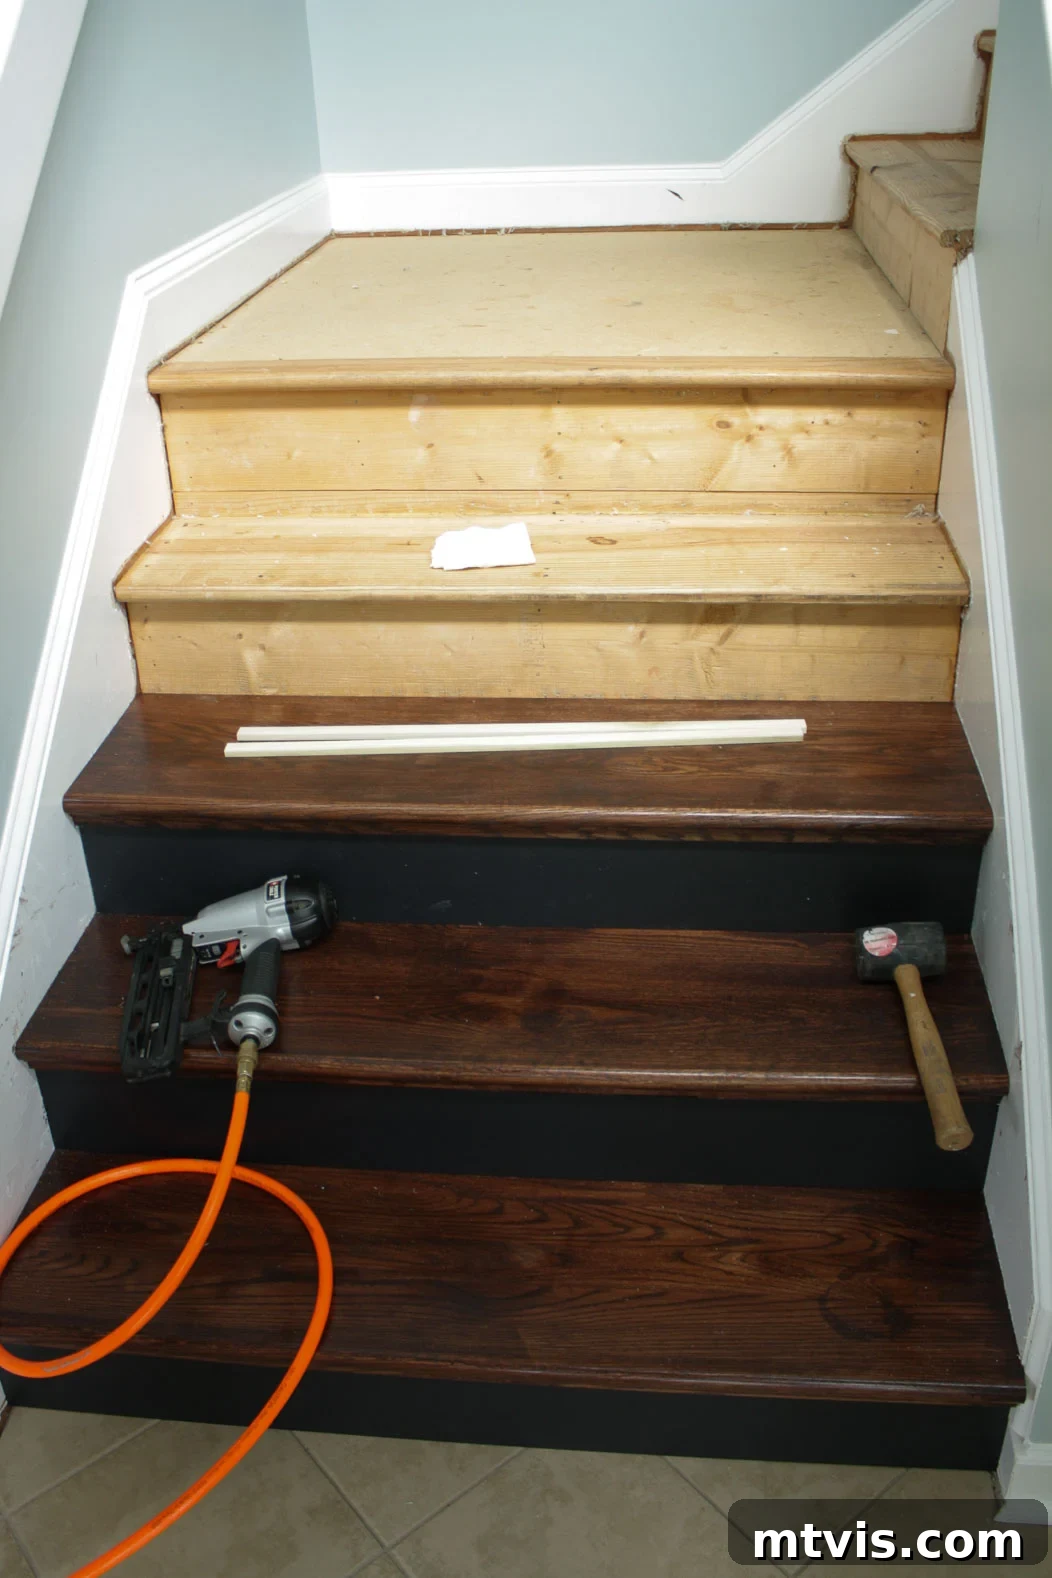
Begin by installing your first pre-finished stair tread. Apply a generous, zigzag bead of urethane-based construction adhesive to the existing step, ensuring good coverage for strong adhesion. Carefully position the new tread, pressing it firmly into place. Secure the back edge of the tread by nailing it down; this placement is strategic as the nail heads will later be hidden by the riser. Next, you’ll address the bullnose (the rounded front edge) of your existing plywood stairs. If you choose not to cut off the bullnose, shims are essential. Install a set of shims (often included in kits) using both adhesive and nails behind where the riser will sit. These shims prevent the new tread from protruding too far forward, ensuring a flush and professional appearance. Finally, install the first riser, with its cut edge facing upwards and its factory edge resting neatly against the floor. The image below illustrates the installed first tread and riser, alongside the shim placement for the subsequent steps.
-
Step 6: Continue Installing Wood Treads and Risers Systematically.
With the first set of tread and riser firmly in place, you simply repeat the process, working your way up the staircase. The key is to maintain consistency in your adhesive application, precise cutting, and secure fastening. Each new tread and riser locks into the system, creating a seamless and sturdy new staircase. Take your time with each step, ensuring everything is level, square, and tightly fitted. This systematic approach ensures a beautiful, professional, and long-lasting result for your DIY hardwood stairs. Don’t rush, and enjoy watching your staircase transform with each installed piece!
-
Step 7: Install Hardwood Flooring on Your Landing (If Applicable).
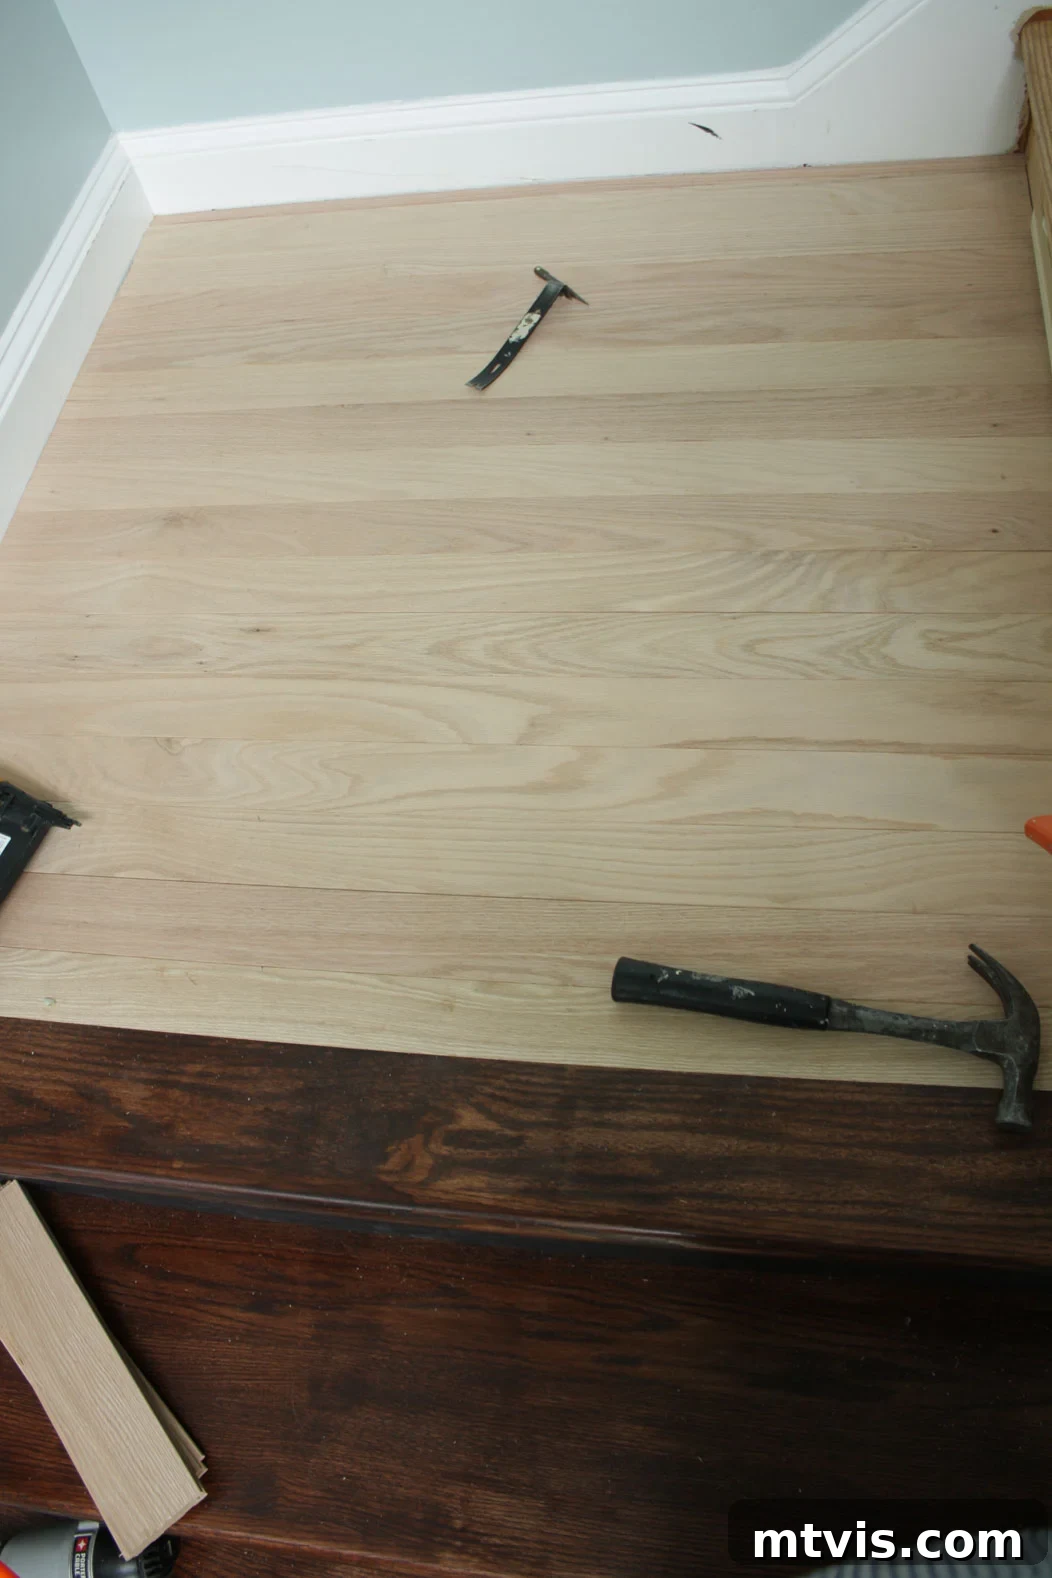
Many staircases incorporate a small landing where the stairs turn or change direction. Our staircase had such a landing, and to ensure a cohesive and polished look, we extended the hardwood theme onto this area. We installed hardwood red oak planks on the landing, carefully staining them to perfectly match the newly installed stair treads. The great advantage here was that we were able to order the precise, smaller quantity of hardwood planks needed for this landing directly from NuStair, ensuring color and wood species consistency with the rest of our DIY hardwood stairs. This attention to detail creates a harmonious flow from the stairs to the adjacent living space.
-
Step 8: Caulk and Touch-Up Paint for a Flawless Finish.
The final steps involve refining the installation to achieve a truly professional and seamless look. Once all the new wood treads and risers were securely installed, we meticulously caulked along all the edges where the treads and risers met the walls and stringers. This not only fills any tiny gaps for a clean line but also provides a finished, architectural detail. Following the caulking, we performed any necessary touch-up painting on the baseboards, banisters, or handrails. This attention to detail ensures that the entire staircase area looks fresh, polished, and beautifully integrated into your home’s design. And with that, your stunning DIY hardwood stairs makeover is complete!
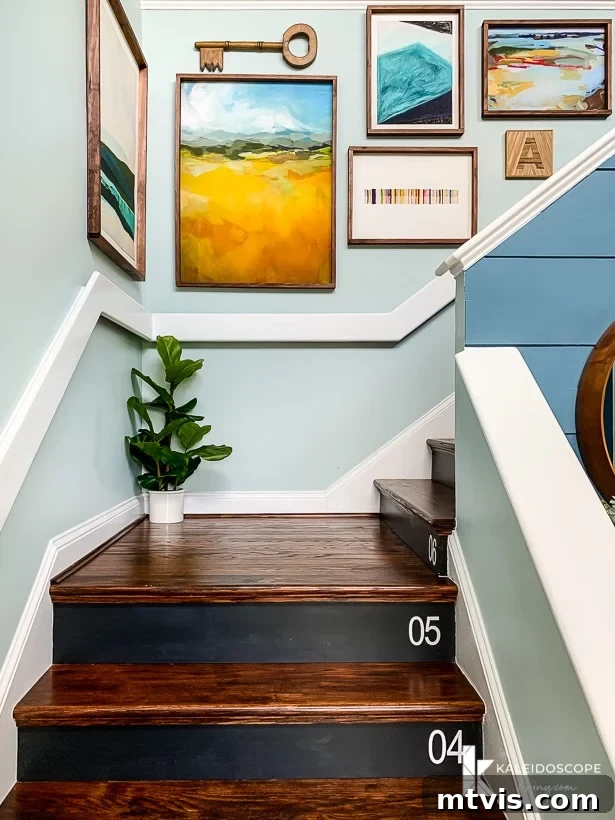
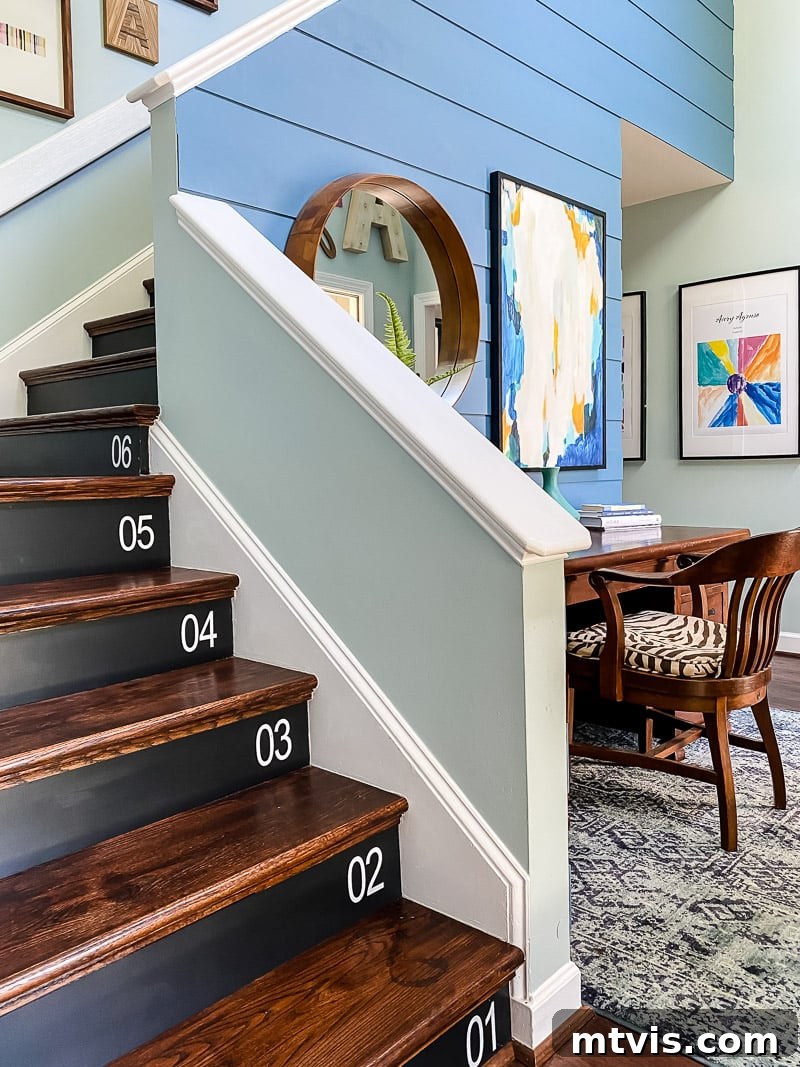
To add a unique and stylish touch to our new stair risers, we decided to number them. While considering various stairwell design elements, a fun stair runner was an option, but we really wanted to appreciate the clean, modern look and the hard work we’d put into the project. Instead, we used durable peel-and-stick vinyl for the numbers (though a stencil and a little paint would work equally well for a similar effect).
Of course, we couldn’t resist completing the foyer’s transformation with an eye-catching gallery wall, incorporating our inexpensive DIY frames. We also installed a modern plank wall and painted it one of our favorite blue paint colors, tying the entire entryway together beautifully. The finished look is something we are incredibly happy with, showcasing a complete and cohesive design.
Frequently Asked Questions About Hardwood Stairs
Hiring professionals for a full stair renovation can indeed be a significant investment. Generally, the cost of replacing carpeting with wood stairs can range from $3,000 to $5,500, or even more. This price fluctuates considerably based on several factors: the number of steps, the complexity of your staircase (e.g., straight flight vs. turns, landings), the type of wood chosen, and whether you have balusters or open/closed railings that require special attention. In a previous home, we opted for professional installation, and the expense was truly astonishing. While I don’t recall the exact figure from nearly two decades ago, the cost for the stairs alone surpassed that of installing hardwoods across the entire first floor of the house. This experience strongly motivated us to pursue the DIY route for our current home.
Choosing to install DIY hardwood stairs yourself offers substantial cost savings! For our entire project, including all the wood treads, risers, the specific wood needed for the landing, high-quality adhesive, necessary shims, and the specialized NuScribe measuring tool, the total cost came in at approximately $2,000. This is a fraction of what professional installation would have cost, making it one of the most cost-effective and impactful home improvement projects we’ve ever undertaken. The significant aesthetic upgrade and increased home value undoubtedly played a role in helping us sell our home quickly when we moved. It’s a testament to the value of a well-executed DIY project.
When properly installed and maintained, DIY hardwood stairs can easily last for decades, often exceeding 20-30 years or more. The longevity primarily depends on the quality of the wood treads, the strength of the installation (good adhesive and fasteners), and regular maintenance. Our own experience with the NuStair system, installed in 2015 and still looking flawless in 2020, speaks to this durability. Unlike carpet that wears out, stains, and traps allergens, hardwood can be refinished multiple times over its lifespan, allowing you to sand down and re-stain or repaint to refresh its appearance without needing a full replacement.
For stair treads, durability is paramount. Harder wood species are generally preferred as they can withstand heavy foot traffic and are more resistant to dents and scratches. Popular choices include:
- Red Oak: A classic and widely available option, known for its hardness and distinct grain pattern. It stains beautifully and is what we used for our project.
- White Oak: Slightly harder than red oak, with a straighter grain and often preferred for a more contemporary look.
- Maple: Very hard and durable, with a fine, uniform grain that takes stains well, creating a smooth finish.
- Hickory: One of the hardest domestic woods, hickory offers exceptional durability and a striking grain pattern, though it can be more challenging to work with.
- Brazilian Cherry (Jatoba): A popular exotic hardwood, extremely hard and naturally dark, offering a luxurious look.
Consider both durability and how the wood’s grain and color will complement your home’s existing flooring and decor when making your selection.
If you’re prepared to invest the time and effort, installing hardwood stairs is an incredibly worthwhile DIY project that yields stunning results. By diligently following these steps, you can confidently remove the outdated carpeting from your stairs, meticulously finish the wood treads, and install them for a beautifully polished and sophisticated look. While the process may span a couple of days, the enduring outcome will be a breathtaking addition to your home that will enhance its charm and value for many years to come! The satisfaction of stepping onto your self-installed hardwood stairs is truly incomparable.
What are your thoughts? Are you now convinced that you possess the skills and determination to tackle your own staircase makeover? Seriously, this project is well within the capabilities of many DIYers! For even more inspiration and ideas, be sure to explore these other DIY staircase makeover ideas to spark your creativity and personalize your space even further.
More STAIR Posts
SEE ALL stair POSTS
-
15 Chic Stair Railing Ideas to Update Your Staircase
-
How to Install a Stair Runner: A Step-by-Step Tutorial
-
15+ Inspiring DIY Staircase Makeover Ideas
-
From Carpet to DIY Hardwood Stairs: Step-by-Step Tutorial
-
How to Replace Balusters to Update Your Stair Railing
-
Stair Riser Ideas to Make Your Stairs More Stylish
You may also enjoy these posts:
- Gorgeous But Cheap Flooring Ideas
- 16 Ideas for the Perfect Entryway Storage Bench
Curious about our systematic approach to transforming rooms and spaces throughout our home? Discover the methodologies and insights within Designer in a Binder®, our comprehensive guide to decorating your home with confidence and ease.
For exclusive content, behind-the-scenes sneak peeks, and further design inspiration, be sure to subscribe to our newsletter before you go! Join our community and never miss out on our latest DIY adventures and home decor tips.