
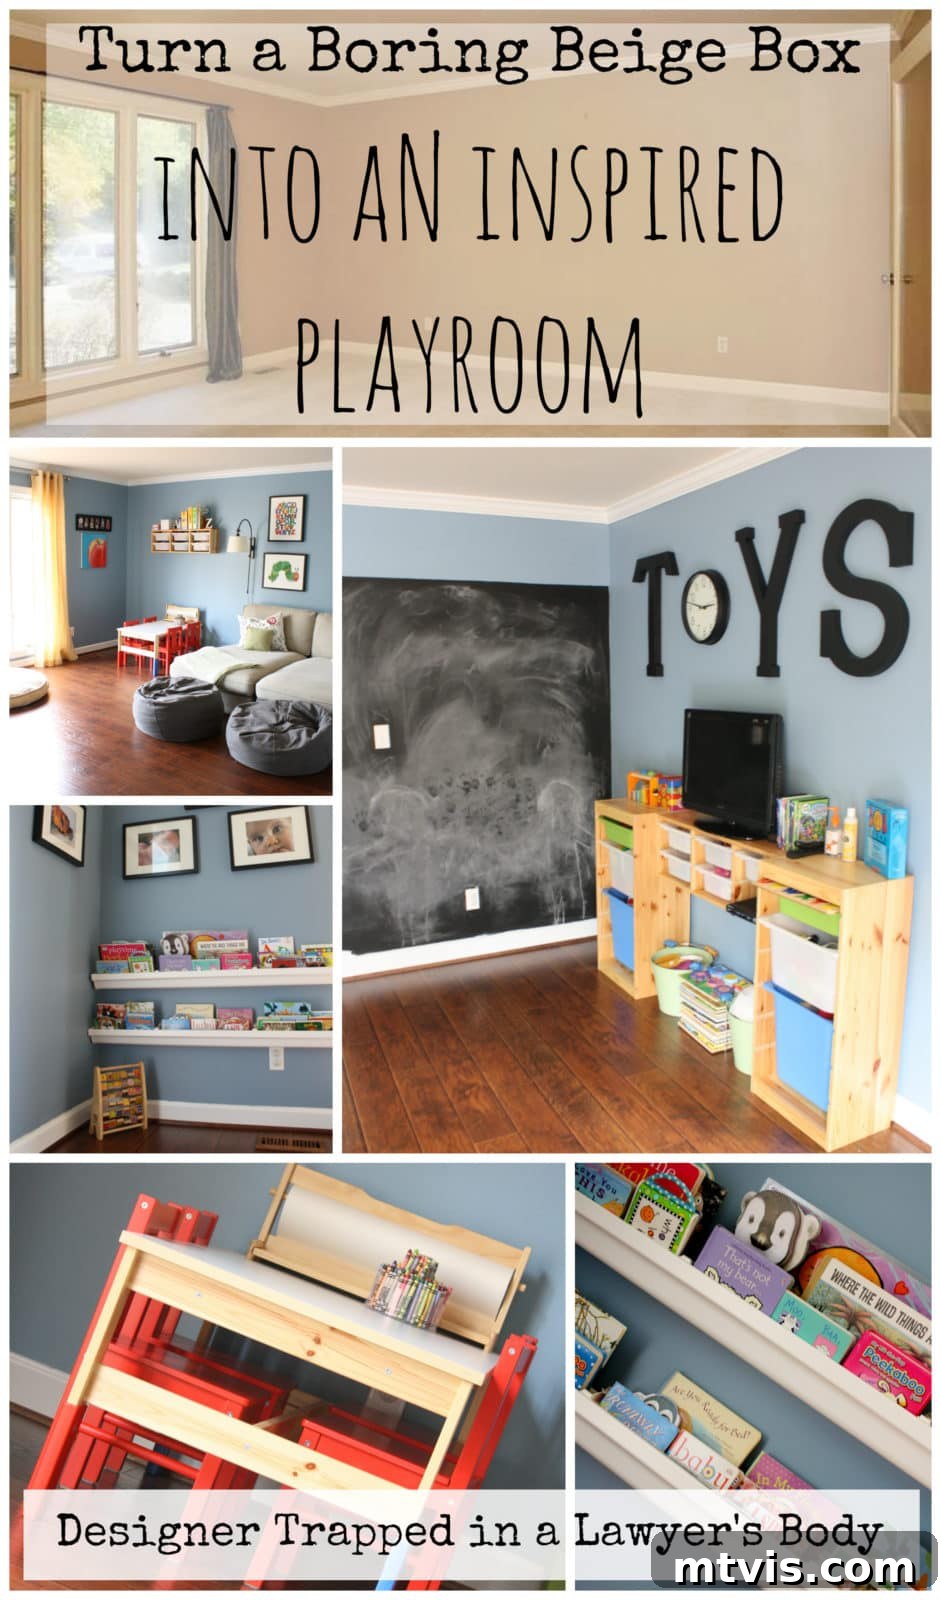
 Get ready for an inspiring home transformation! We are absolutely thrilled to finally unveil one of our most exciting projects: the conversion of our previously uninspired living room into a vibrant, functional, and utterly joyful playroom for our twin girls. This journey has been incredibly rewarding, and we can’t wait to share every detail, tip, and triumph with you. But first, let’s set the stage by looking back at where we began. When we first moved into this house, this particular room was anything but inviting. Frankly, it was both boring and depressing, a space that lacked purpose and personality.
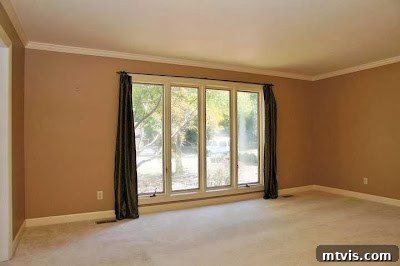
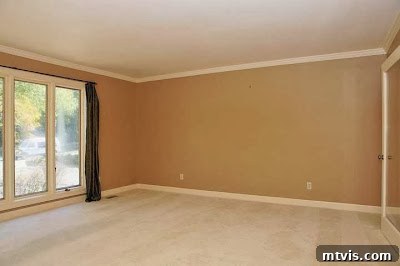
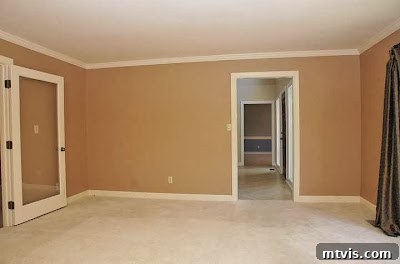
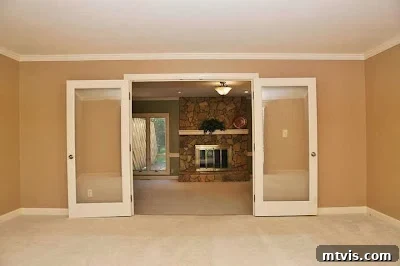
As many of you know from our “Tour My Home” page, our family prioritizes practical, lived-in spaces over formal, “fancy rooms.” This particular room, with its traditional living room designation, was simply not serving our needs. What we truly longed for was a dedicated playroom – a space where our twin girls could explore, create, and play freely without taking over the entire house. From the moment we first toured this home, I instantly recognized the immense potential of this room. Its fabulously large casement windows flood the space with an abundance of wonderful natural light, a feature I consider absolutely ideal for any children’s playroom. Natural light not only brightens the mood but also enhances creativity and reduces eye strain during play. I also fell in love with its elegant glass French doors, which open seamlessly into our family room, creating a wonderful flow between key communal areas. This layout was a major selling point for envisioning an integrated, yet distinct, play zone. (You might notice an outdated fireplace in the family room in some of the “before” shots; rest assured, that eyesore is now history! Stay tuned for our upcoming family room reveal, where we’ve purposely avoided showing any “after” glimpses of the playroom that might spoil that surprise.) UPDATE: Our much-anticipated family room reveal is now live! CLICK HERE FOR DETAILS!
While having the playroom visible from the foyer isn’t always the first choice for home design, it works perfectly for our family. We embrace the vibrant energy a playroom brings, and our friends, family, and other visitors are definitely not the “stuffy” type! Exposing our lively playroom to guests simply reflects our family’s personality. Plus, this strategic location offers incredibly quick and easy access to the downstairs powder room, which was a huge advantage when our girls were in the midst of potty training shortly after we moved in. It’s a testament to how practical considerations can sometimes outweigh conventional design rules. (For those curious about our home’s layout, you can always view the first-floor floor plan by visiting our “Tour My Home” page).
The vision for this playroom transformation was clear: we had to bid farewell to the drab, “baby poop brown” walls and the tired, dingy carpet. These initial changes were paramount to creating a fresh, inviting canvas. And that’s exactly what we did! But before we delve into the gritty details of how we achieved this dramatic overhaul, let’s jump straight to the glorious results. Prepare to be amazed by the incredible transformation!
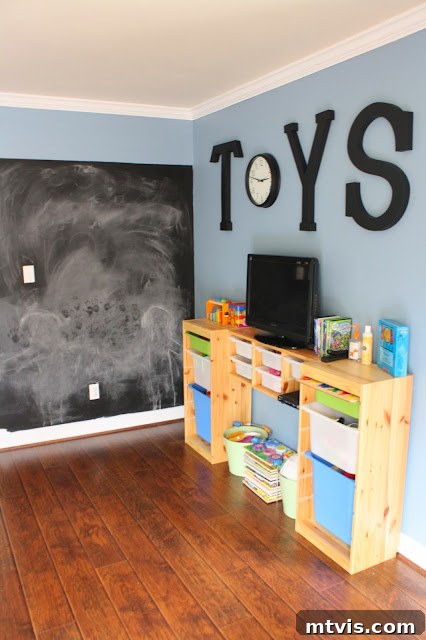
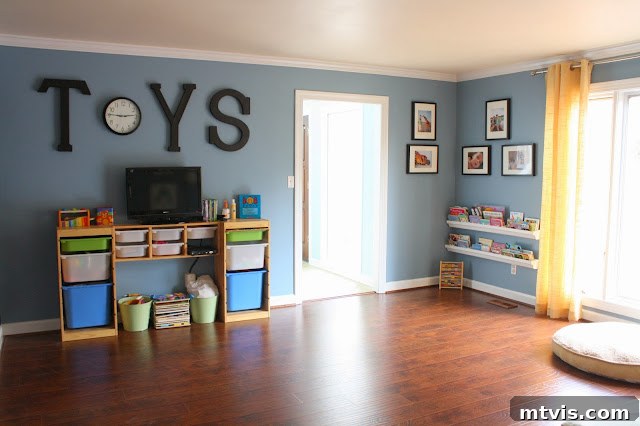
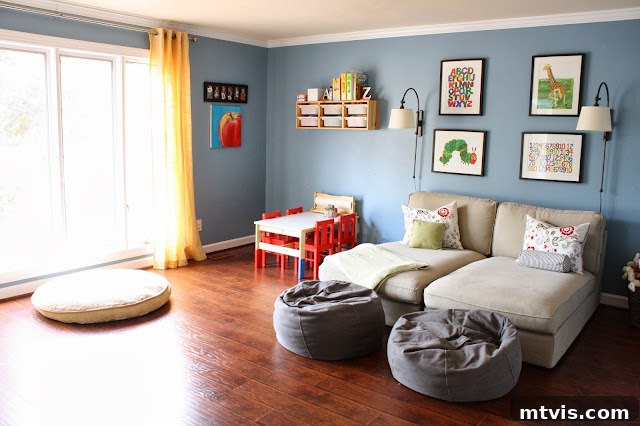
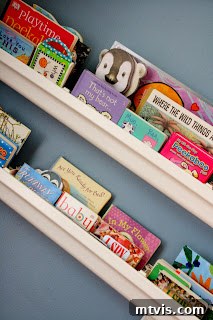
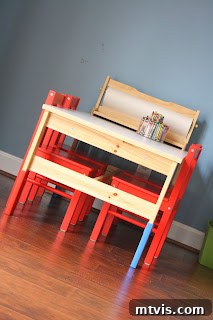
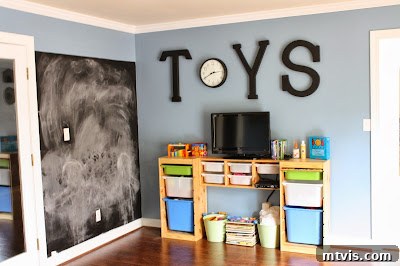
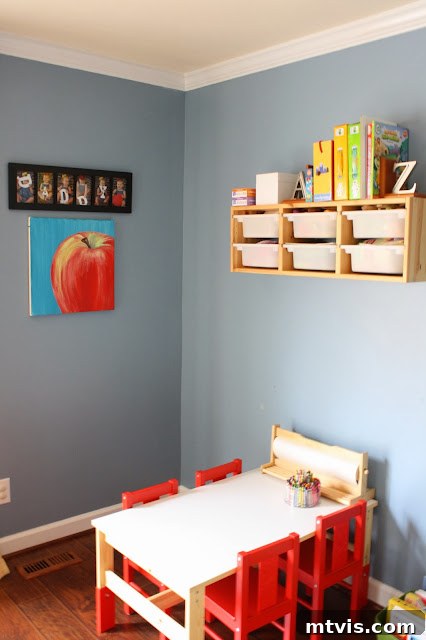
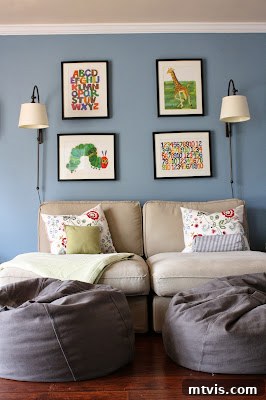
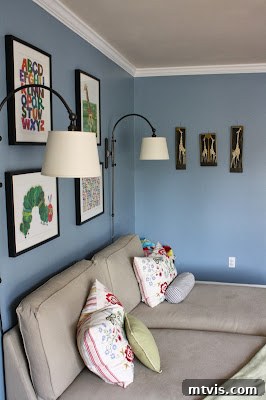
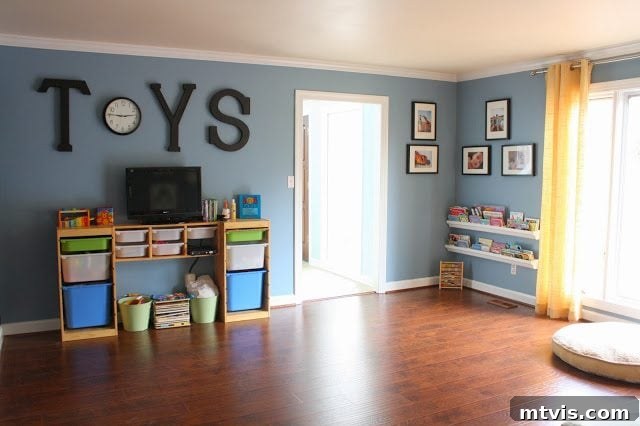
Isn’t this a truly happy playroom?! We absolutely adore it, and more importantly, so do the girls. While I did do a quick “tidy up” for these photos, it’s important to note that I did not remove any toys from the room or clean the chalkboard wall. What you’re seeing is genuinely how our playroom looks on a day-to-day basis. This speaks volumes about the effectiveness of our storage solutions; they truly accommodate all the girls’ toys, making it incredibly easy for us to maintain tidiness and organization. Crucially, this design empowers the girls to retrieve and put away their books and toys independently, fostering a sense of responsibility and self-sufficiency. The few items stored higher up are there for a reason – they require adult supervision, such as markers or toys with small pieces. For those wondering if we really leave crayons on the table all the time, the answer is a resounding yes! By some miracle, Attley and Avery have consistently shown respect for their art supplies, coloring only on the paper we provide. They’ve certainly earned our trust with the crayons, allowing for spontaneous bursts of creativity.
Phase 1: Laying the Colorful Foundation
The initial phase of our playroom transformation focused on creating a vibrant and welcoming backdrop. We began by painting the walls a gorgeous, calming blue color – a significant departure from the previous drab hue. Complementing this, we hung golden yellow grommet curtains, adding a touch of warmth and playfulness to the large windows. This color palette was intentionally chosen to stimulate creativity and bring a cheerful atmosphere. We also painstakingly painted all the trim a crisp, true white. This was a much-needed upgrade from the dated taupe/beige color that previously made the room feel dull. My wonderful husband, Joe, also took on the task of changing all the electrical outlets and light switches from an old almond color to pristine white. It’s genuinely astonishing what a difference such a small, seemingly insignificant detail can make in brightening and modernizing a space.
To further enhance the interactive nature of the playroom, I dedicated the wall to the right of the French doors to a special project. I first applied a magnetic primer, followed by a chalkboard topcoat. The girls absolutely adore having their own large chalkboard wall for drawing, practicing letters, and unleashing their artistic talents. DISCLAIMER: If I were to do this again, I would definitely skip the magnetic primer. While a great idea in theory, it was quite messy to apply and can barely hold a magnetic letter. It simply wasn’t worth the time or effort involved, though the chalkboard aspect itself is a huge hit.
Thoughtful Furniture Choices for Kids’ Playrooms
When it came to furniture, we aimed for comfort, durability, and functionality. We were fortunate to already own the two chaise lounges. We specifically chose chaise lounges for this space because we find them infinitely more comfortable for snuggling up to read with the girls or enjoying a family movie than a traditional couch. Their elongated design allows for relaxed lounging, perfect for quiet time amidst the active play. We also already had the incredibly versatile Trofast storage system from Ikea. This system is truly amazing for playroom organization and is remarkably reasonably priced, offering excellent value. Its modular design allows for customized configurations, and the durable bins are perfect for sorting toys, making cleanup a breeze. The little table and chairs, ideal for crafts, snacks, and imaginative play, also came from Ikea, solidifying our love for their practical and child-friendly designs. The bookshelves are a creative DIY project made from rain gutters – a brilliant, space-saving solution that keeps books at the girls’ eye level, encouraging reading. We’ll be featuring this clever project in a detailed post sometime in the future, so keep an eye out for that! The super comfortable bean bag chairs are from The Land of Nod {affiliate link below*}. They are absolutely fabulous because their covers are completely removable and washable – a non-negotiable feature for any kids’ playroom! They provide a cozy spot for reading or just relaxing after an energetic play session.
– 30 Grey Personalized Bean Bag
(includes Cover and Insert)
These bean bags also offer free embroidered personalization – a lovely touch that makes them truly special for each child. Now, for the delightful decorative details that truly bring this playroom to life! I wanted impactful, yet affordable, wall decor. I ordered a set of paper mache letters to spell out “TOYS” from Consumer Crafts. This was an incredibly inexpensive way to add a playful focal point. I simply spray painted the letters black for a bold look – easy, effective, and high-impact. In conjunction with the letters, we incorporated an inexpensive clock from Target, making the “TOYS” display both decorative and functional.
To add some artistic interest to the walls without breaking the bank, I ordered a set of 12 Eric Carle Decorative Prints {*affiliate link} and framed four of them. Eric Carle’s whimsical illustrations are beloved by children and adults alike, and their vibrant colors perfectly complement the playroom’s cheerful aesthetic. I just love how these prints enhance the room’s playful atmosphere. We already had the stylish wall lamps from Pottery Barn, which we repurposed from a different room in our previous house. These provide excellent task lighting for reading or drawing. All the frames you see throughout the room also came from Ikea – yes, my enthusiasm for Ikea, especially for kid-friendly spaces, knows no bounds! While I still feel the room could greatly benefit from a soft, inviting area rug to define the space and add comfort, it simply wasn’t in the budget during this phase of the renovation. Perhaps a future upgrade!
Phase 2: The Transformative Flooring Upgrade
Several months after completing the initial decor and painting, we embarked on Phase 2, which brought about one of the most significant improvements: tearing out that nasty, old carpet and replacing it with the most gorgeous hand-scraped laminate floors I have ever seen. Yes, you read that right – laminate! A massive shout-out and heartfelt thanks go to Sarah at The Yellow Cape Cod for introducing us to these incredible floors. They strike the perfect balance between exceptional quality and affordability, a true game-changer for a high-traffic kids’ zone. These floors are not only stunning but also incredibly durable and easy to clean, making them ideal for a playroom environment. More detailed information on these specific floors, along with the entire installation and finishing process, will be shared in an upcoming post, so be sure to check back or follow along so you don’t miss it!
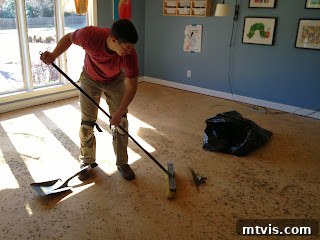
As many of you dedicated DIYers already know, the “getting there” process of any home renovation can be pretty darn ugly and messy. Yet, it’s crucial to show these raw, honest stages of the transformation. The wonderful, handsome, and incredibly handy man you see in these process photos is my husband, Joe. He’s an absolute rockstar when it comes to home projects! You can clearly see how gross the subfloor looked after we meticulously ripped out the old carpet and its padding. It was a dusty, dirty job, but well worth the effort for the beautiful foundation it laid.
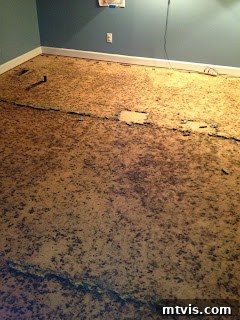
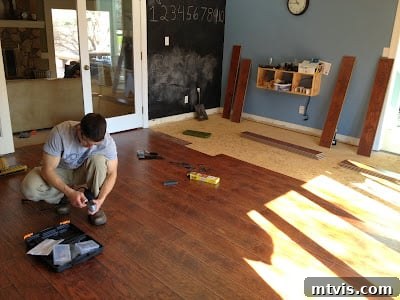
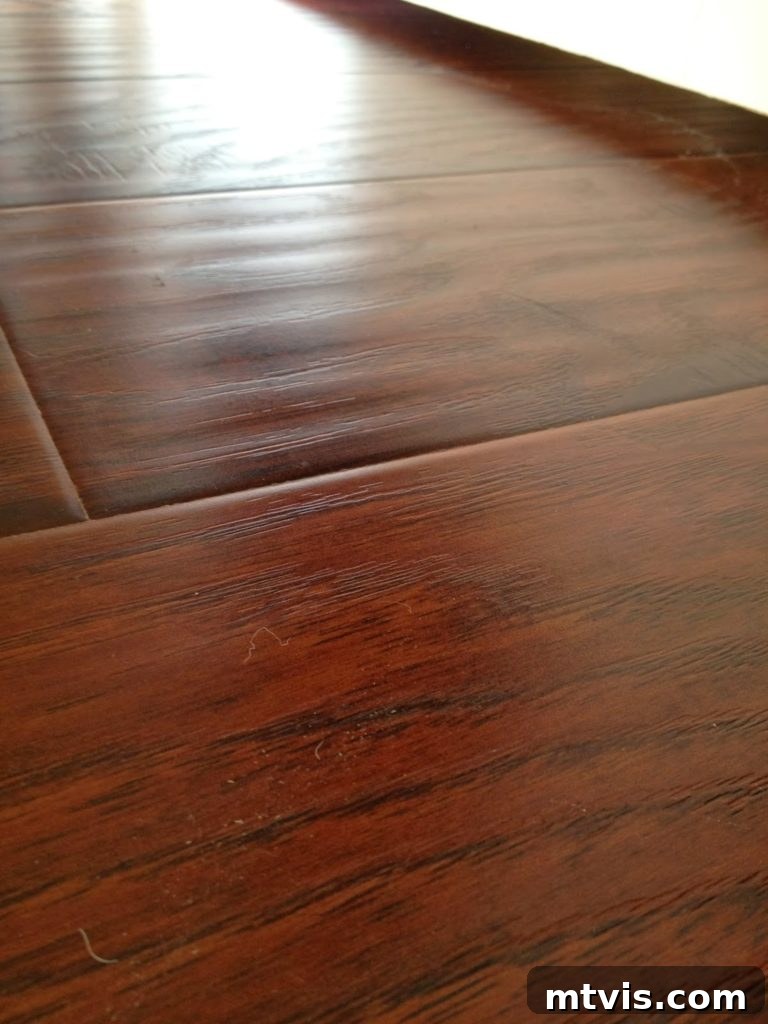
Just look at these gorgeous hand-scraped laminate floors up close – the texture and rich color are truly captivating. I bet you can’t wait to hear more about them and our experience with the installation process, can you? Make sure to check back or follow us closely so that you don’t miss that detailed post!
The Power of Before & After: A Visual Comparison
To truly appreciate the extent of this transformation, nothing beats a few side-by-side comparisons. Witnessing the stark contrast between the dull, unused living room and the bright, energetic playroom is incredibly satisfying. It highlights how thoughtful design, strategic color choices, and functional furniture can completely revolutionize a space and its purpose within a home.
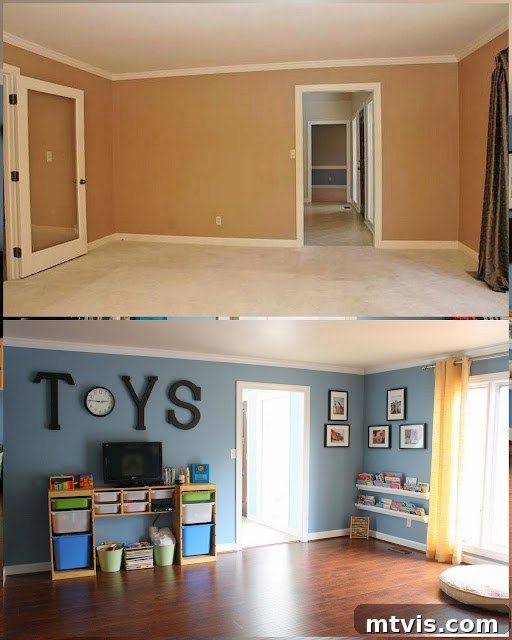
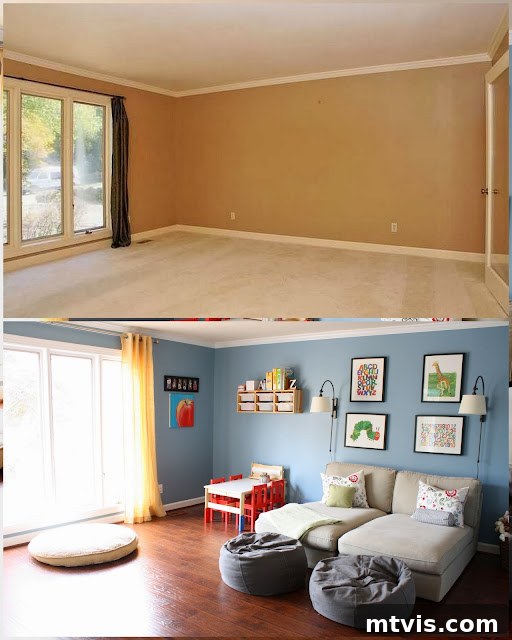
And now, for the most heartwarming part of any home renovation project: seeing the space truly come alive with the people it was designed for. Here are two more photos, because I simply cannot resist showing you Attley and Avery actually using and enjoying their wonderful, custom-designed play space. Their joy is the ultimate reward for all the hard work and planning!
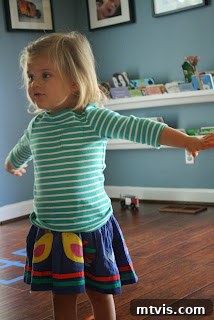
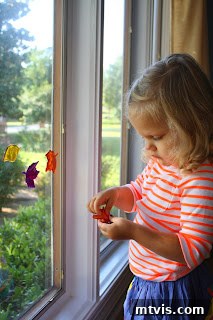

So, what do you think of our living room turned playroom transformation? We’d love to hear your thoughts, your favorite details, or any questions you might have about creating your own dream playroom! Share your insights in the comments below.
* This post contains affiliate links, which means I may receive a (very) small commission if you click a link and purchase something. It does NOT result in additional charges to you or cost you anything extra. The small amount of affiliate money I earn per month is how I pay the fees to keep this site up and running. Thanks so much for your support!
We are absolutely thrilled to report that this playroom reveal was proudly featured on: