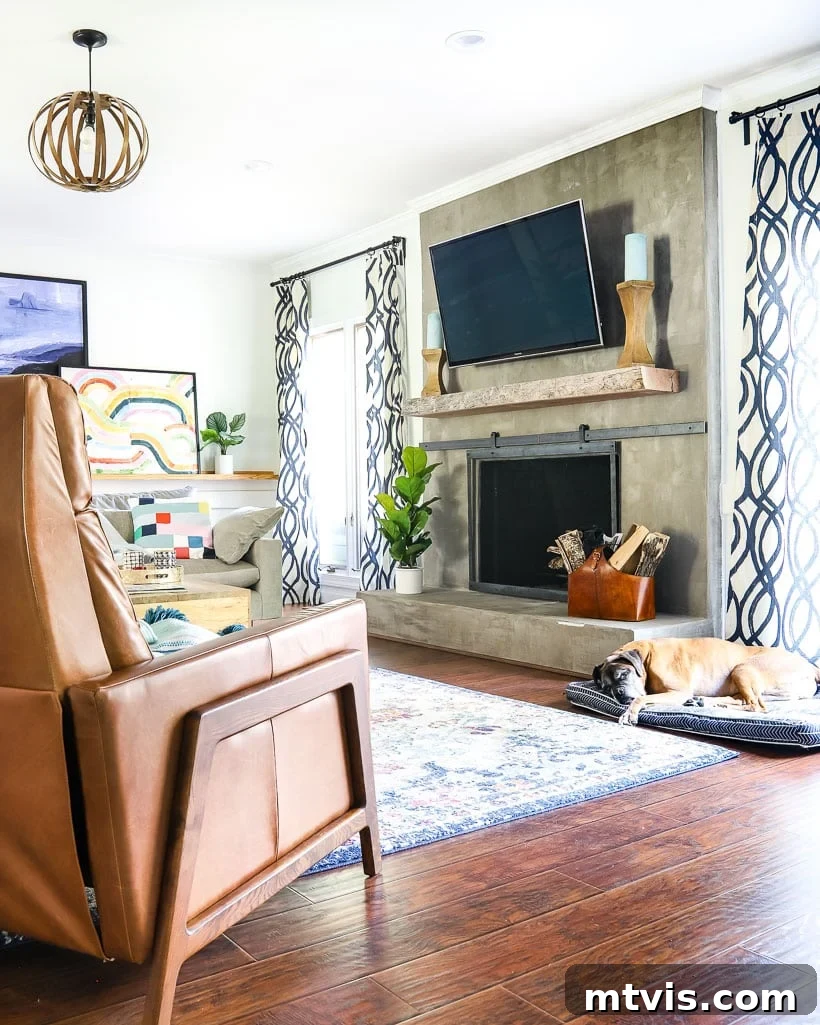
Transforming an outdated fireplace can dramatically enhance the ambiance and style of any living space. If you’ve been dreaming of a modern, sleek update without breaking the bank, this comprehensive guide to a DIY concrete fireplace makeover is for you. We’ll show you how to achieve a stunning, contemporary look that homeowners adore, all for less than $100. Prepare to be amazed by the before and after!
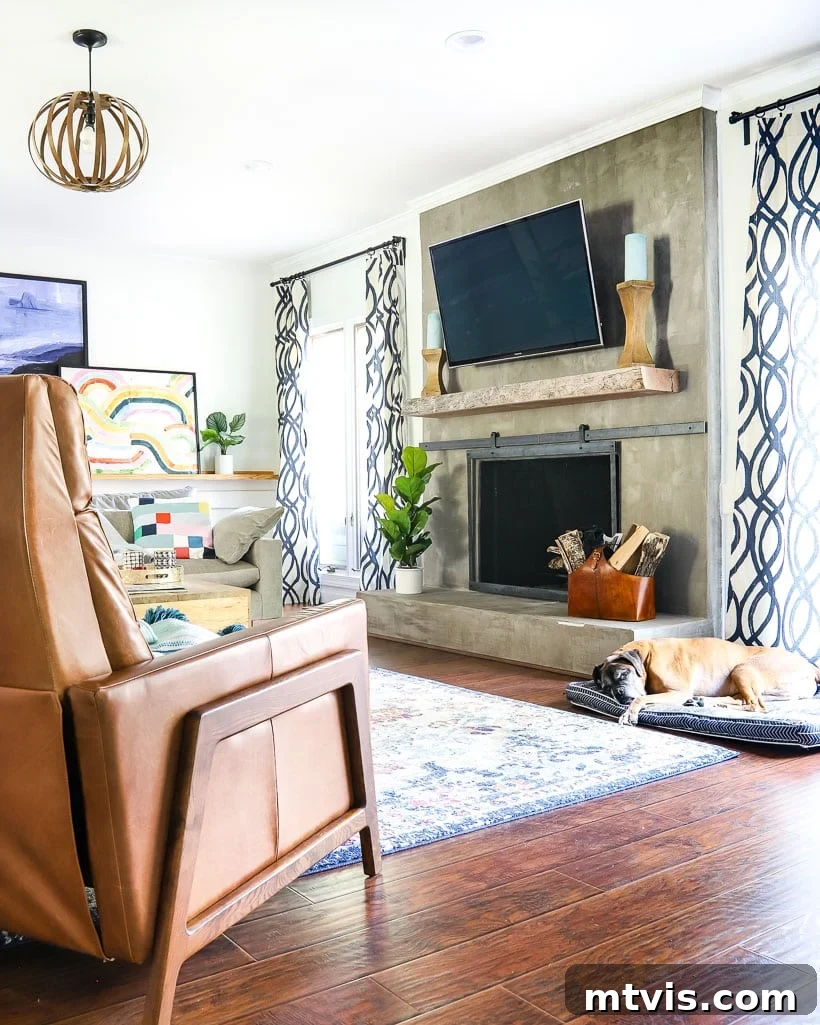
Table of Contents
This post contains some affiliate links for your convenience. Click here to read my full disclosure policy.
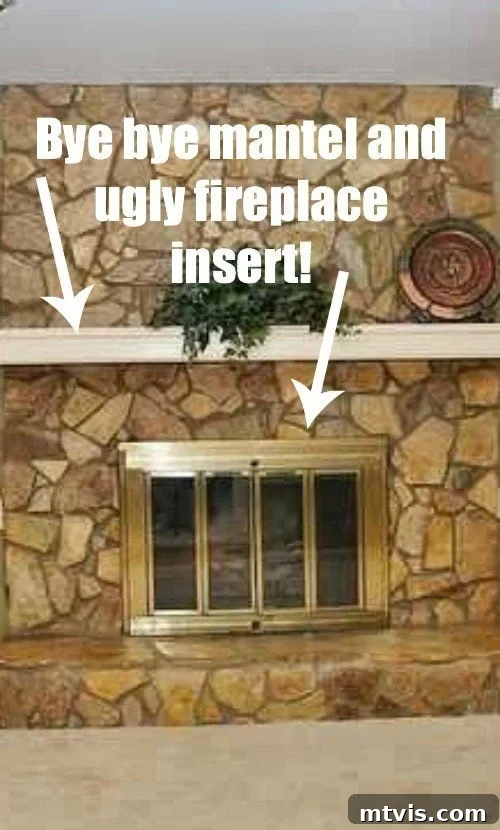
When we first purchased our home, we knew right away that the fireplace would be one of the first things we’d tackle. The existing 1986 stone veneer was far from our desired aesthetic; it felt dated, cluttered, and had been improperly sealed, resulting in a somewhat unsightly mess. Our vision for the living room was clear: a clean, simple, and contemporary space that felt open and inviting. Naturally, my quest for fireplace makeover ideas began with extensive online research.
I quickly became enamored with the sleek, minimalist appeal of concrete fireplaces. If you’re familiar with my DIY concrete vanity project, you’ll know my appreciation for the versatility and beauty of concrete runs deep. However, the idea of tackling a fireplace seemed like a monumental task, so much so that I was initially prepared to hire professionals.
Unfortunately, our consultations with local contractors proved frustrating. Many told us the project couldn’t be done, while others quoted exorbitant prices of $2,000 to $3,000, often with the caveat that they only “thought” it would work. This lack of confidence and prohibitive cost pushed us back to the drawing board. After countless hours of research, I stumbled upon Ardex Feather Finish, a phenomenal concrete product that seemed to offer exactly what we needed: the ability to achieve our desired concrete aesthetic at an incredibly low cost.
Since its completion and feature in our family room renovation post, this fireplace has certainly sparked conversations. While a few have expressed skepticism, the overwhelming majority have absolutely loved it! If you’re among those who appreciate a bold, modern transformation, keep reading for the detailed, step-by-step instructions on how to replicate this budget-friendly concrete fireplace update in your own home.
How to Cover a Fireplace with Concrete for a Modern Look
Covering an existing fireplace with a concrete overlay is an excellent way to achieve a clean, modern, and industrial aesthetic. The key lies in proper preparation, using the right materials, and applying thin, even coats to build up a durable and beautiful finish. This DIY method leverages the strength of a cement board base and the smooth, versatile properties of Ardex Feather Finish to create a seamless concrete surface over your old fireplace facade. It’s a process that combines demolition, construction, and artistic application to yield a truly transformative result.
Essential Materials and Tools for Your DIY Concrete Fireplace Project
Before embarking on your fireplace transformation, gather all the necessary materials and tools to ensure a smooth and efficient workflow. Having everything on hand will prevent unnecessary delays and trips to the hardware store, making the entire process more enjoyable.
- Demolition Hammer: Absolutely essential for efficient removal of old stone or tile facades. We rented ours from Home Depot for a day, which was a huge time-saver compared to manual chiseling.
- Cement Board: Provides a stable, fire-resistant, and ideal substrate for the concrete overlay. Ensure you measure your fireplace dimensions accurately to determine the number of sheets needed.
- Mesh Tape: Used to reinforce the seams between cement board panels, preventing cracks in your concrete finish.
- Electric Drill: A powerful corded drill is crucial for drilling into masonry and driving screws through cement board. Battery-operated drills often lack the necessary torque.
- Masonry Drill Bit and Screws: Specifically designed to penetrate brick or concrete effectively and securely attach the cement board.
- 14-inch Drywall Tray: Ideal for holding and carrying a workable amount of mixed concrete.
- 12-inch Drywall Knife (or Trowel): Your primary tool for applying the concrete mixture smoothly and evenly.
- Ardex Feather Finish or Henry’s Feather Finish: This is the star of the show! We used approximately two full bags for our project. It’s a self-drying, cement-based patching compound known for its exceptional bond and ability to create a smooth, thin concrete finish.
- A 5-gallon Bucket: Essential for thoroughly mixing the concrete product with water.
- Drill Attachment Mixer: While you can mix by hand, a paddle mixer attachment for your electric drill will ensure a lump-free, perfectly consistent mixture, which is vital for a smooth application.
- Safety Gear: Don’t forget safety glasses, gloves, and a dust mask, especially during demolition and mixing.
Step-by-Step Guide to Creating Your DIY Concrete Fireplace
Before diving into the practical steps, a crucial disclaimer: This process worked successfully for us because we took the necessary precautions. We had our chimney professionally inspected and consulted with a contractor to confirm that the stone on our fireplace was purely a facade and could be safely removed without compromising structural integrity. In other words, we were confident our chimney would not collapse if the stone was taken off. If you are uncertain about the structure you’re dealing with, always seek professional advice first! Our tutorial also assumes the presence of a brick structure underneath your existing facade. With these important considerations out of the way, let’s get started on your stunning fireplace transformation!
Time needed: 2 days
Follow this detailed tutorial for step-by-step instructions to DIY your own modern concrete fireplace, achieving a professional look on a budget.
- Step 1: Remove your fireplace insert and/or mantel.
Begin your fireplace overhaul by carefully removing any existing elements that will not be part of your new design. If your fireplace features an old, unsightly insert, as ours did, this should be the first item to go. Similarly, if you have a mantel, detach it thoroughly. Depending on its construction, this might involve unscrewing, prying, or carefully disassembling. Ensure you have proper tools and assistance for safe removal, especially for heavy inserts or mantels. Clearing the area completely will give you a clean slate for the subsequent demolition and application.

- Step 2: Demolish your existing facade (if necessary).
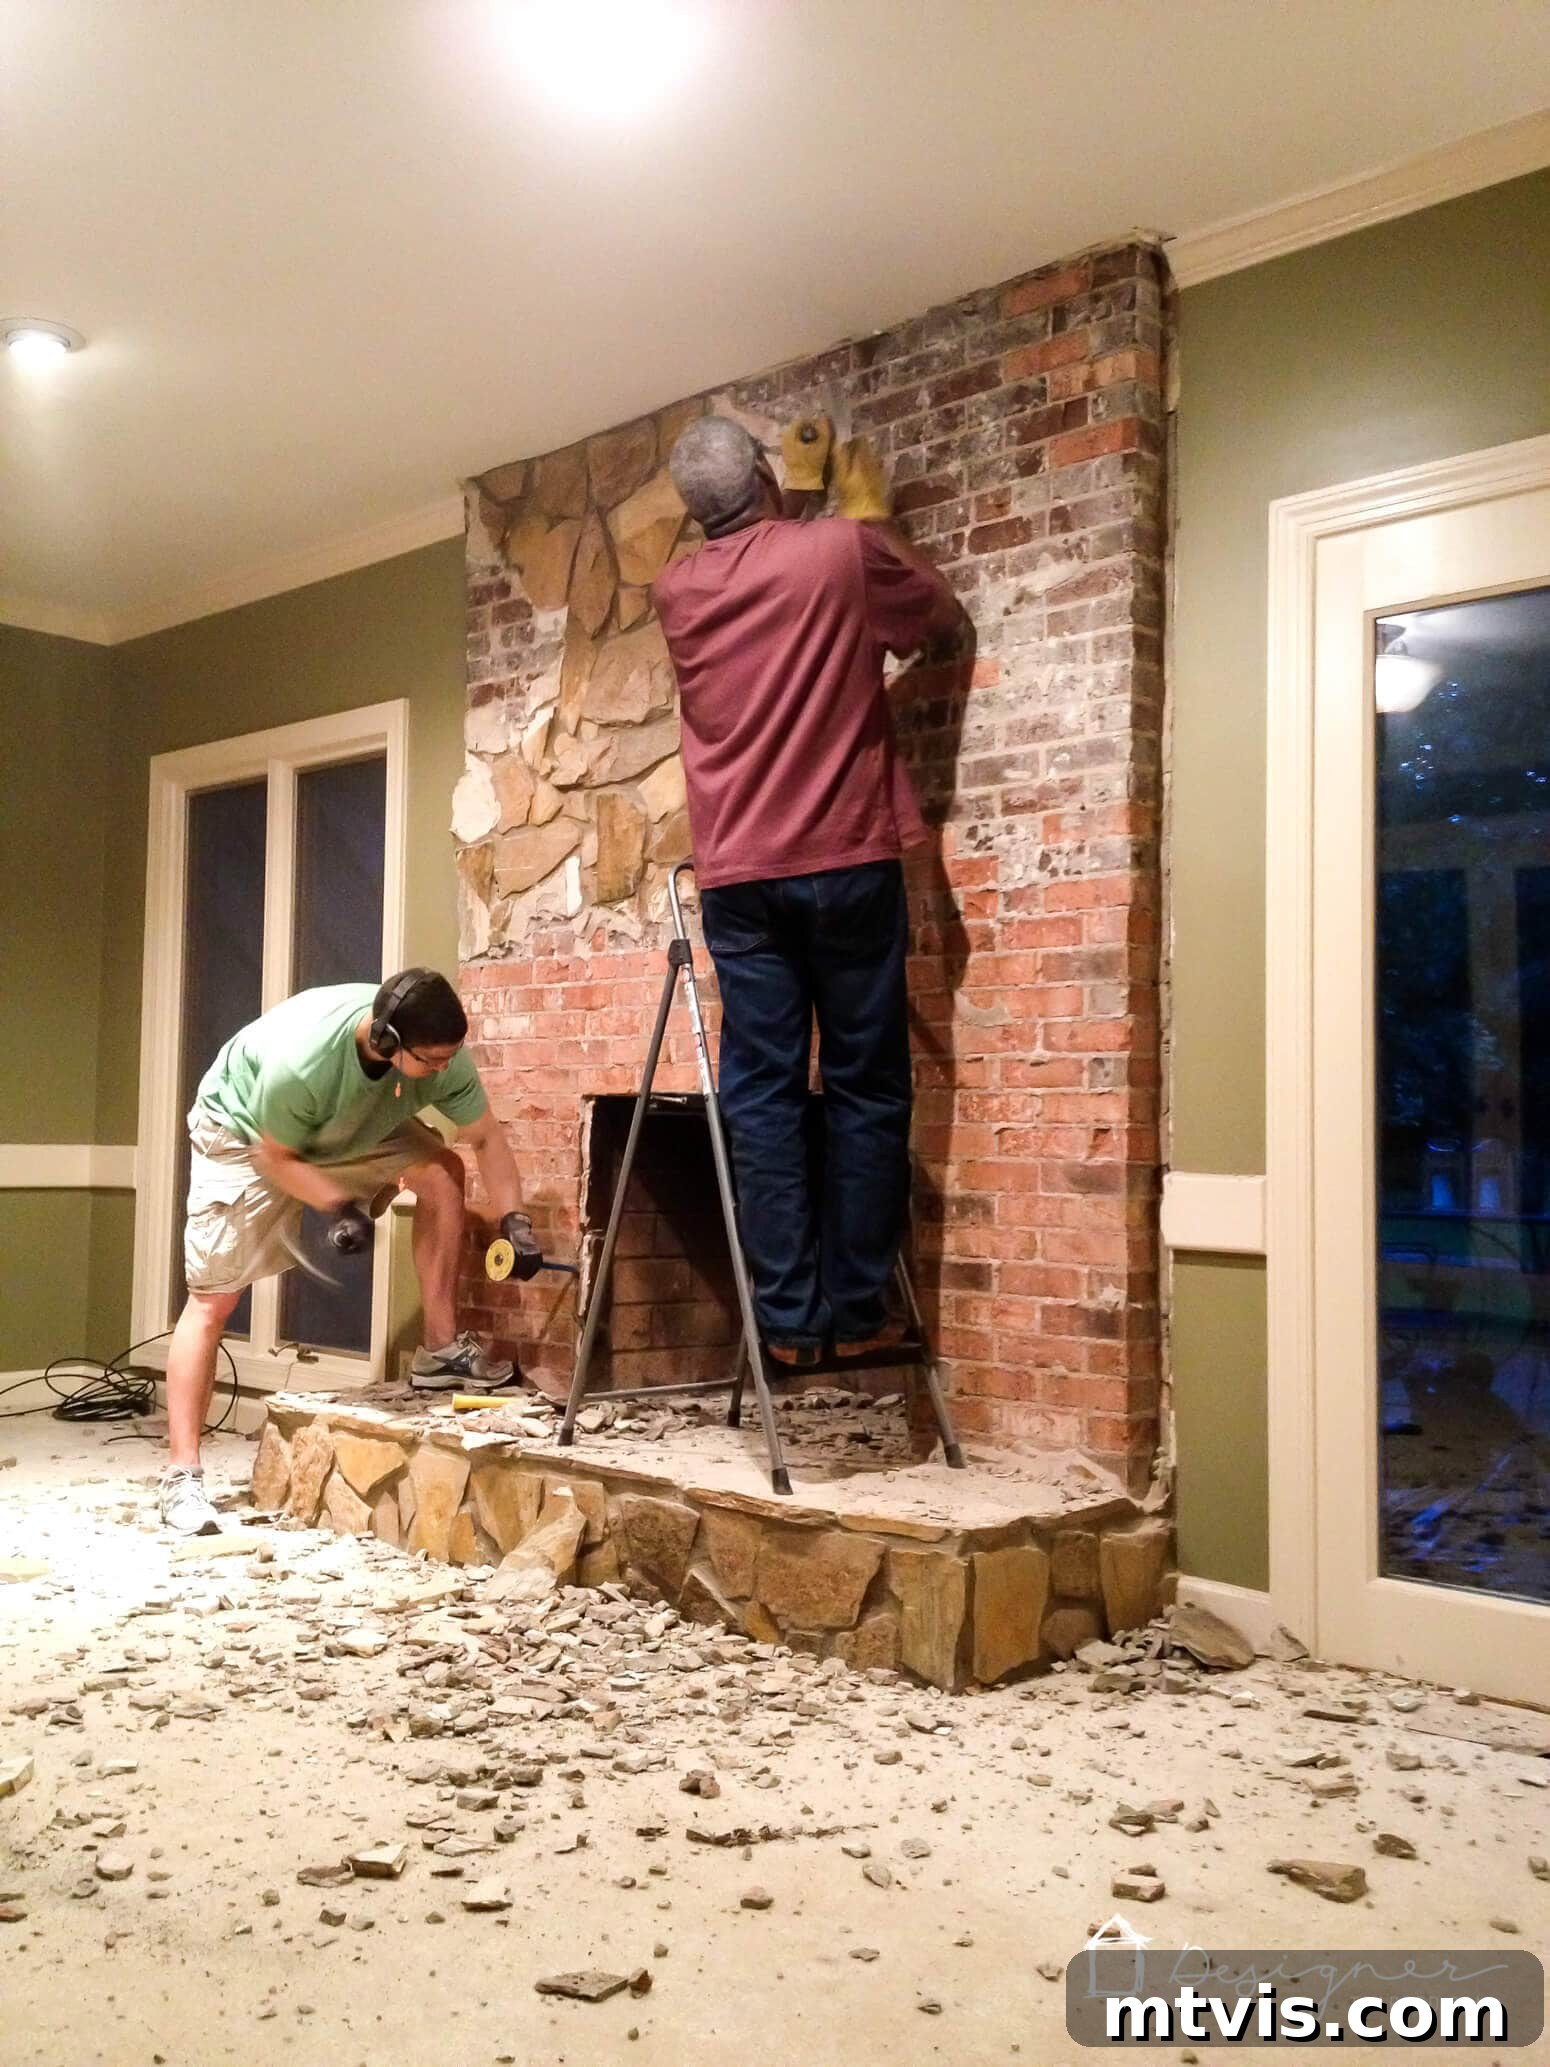
If you are fortunate enough to have a solid brick fireplace that you wish to simply overlay, you can rejoice and skip this challenging step! However, for those with an outdated stone, tile, or other facade that needs to be removed, preparation is key. We highly recommend renting a demolition hammer for this task. My husband, Joe, initially started with just a chisel and hammer, but quickly realized the immense effort required. Investing in a demolition hammer from the start will save you significant time, energy, and frustration. This tool makes quick work of chipping away the old facade. Once the facade is removed, you should be left with the underlying brick structure. For us, even at this stage, the fireplace already looked significantly better and revealed the potential for a clean, modern design. A huge shout-out to my amazing step-dad, Roger, for his invaluable assistance with the demolition! You can see him lending a hand to Joe in the photo below.
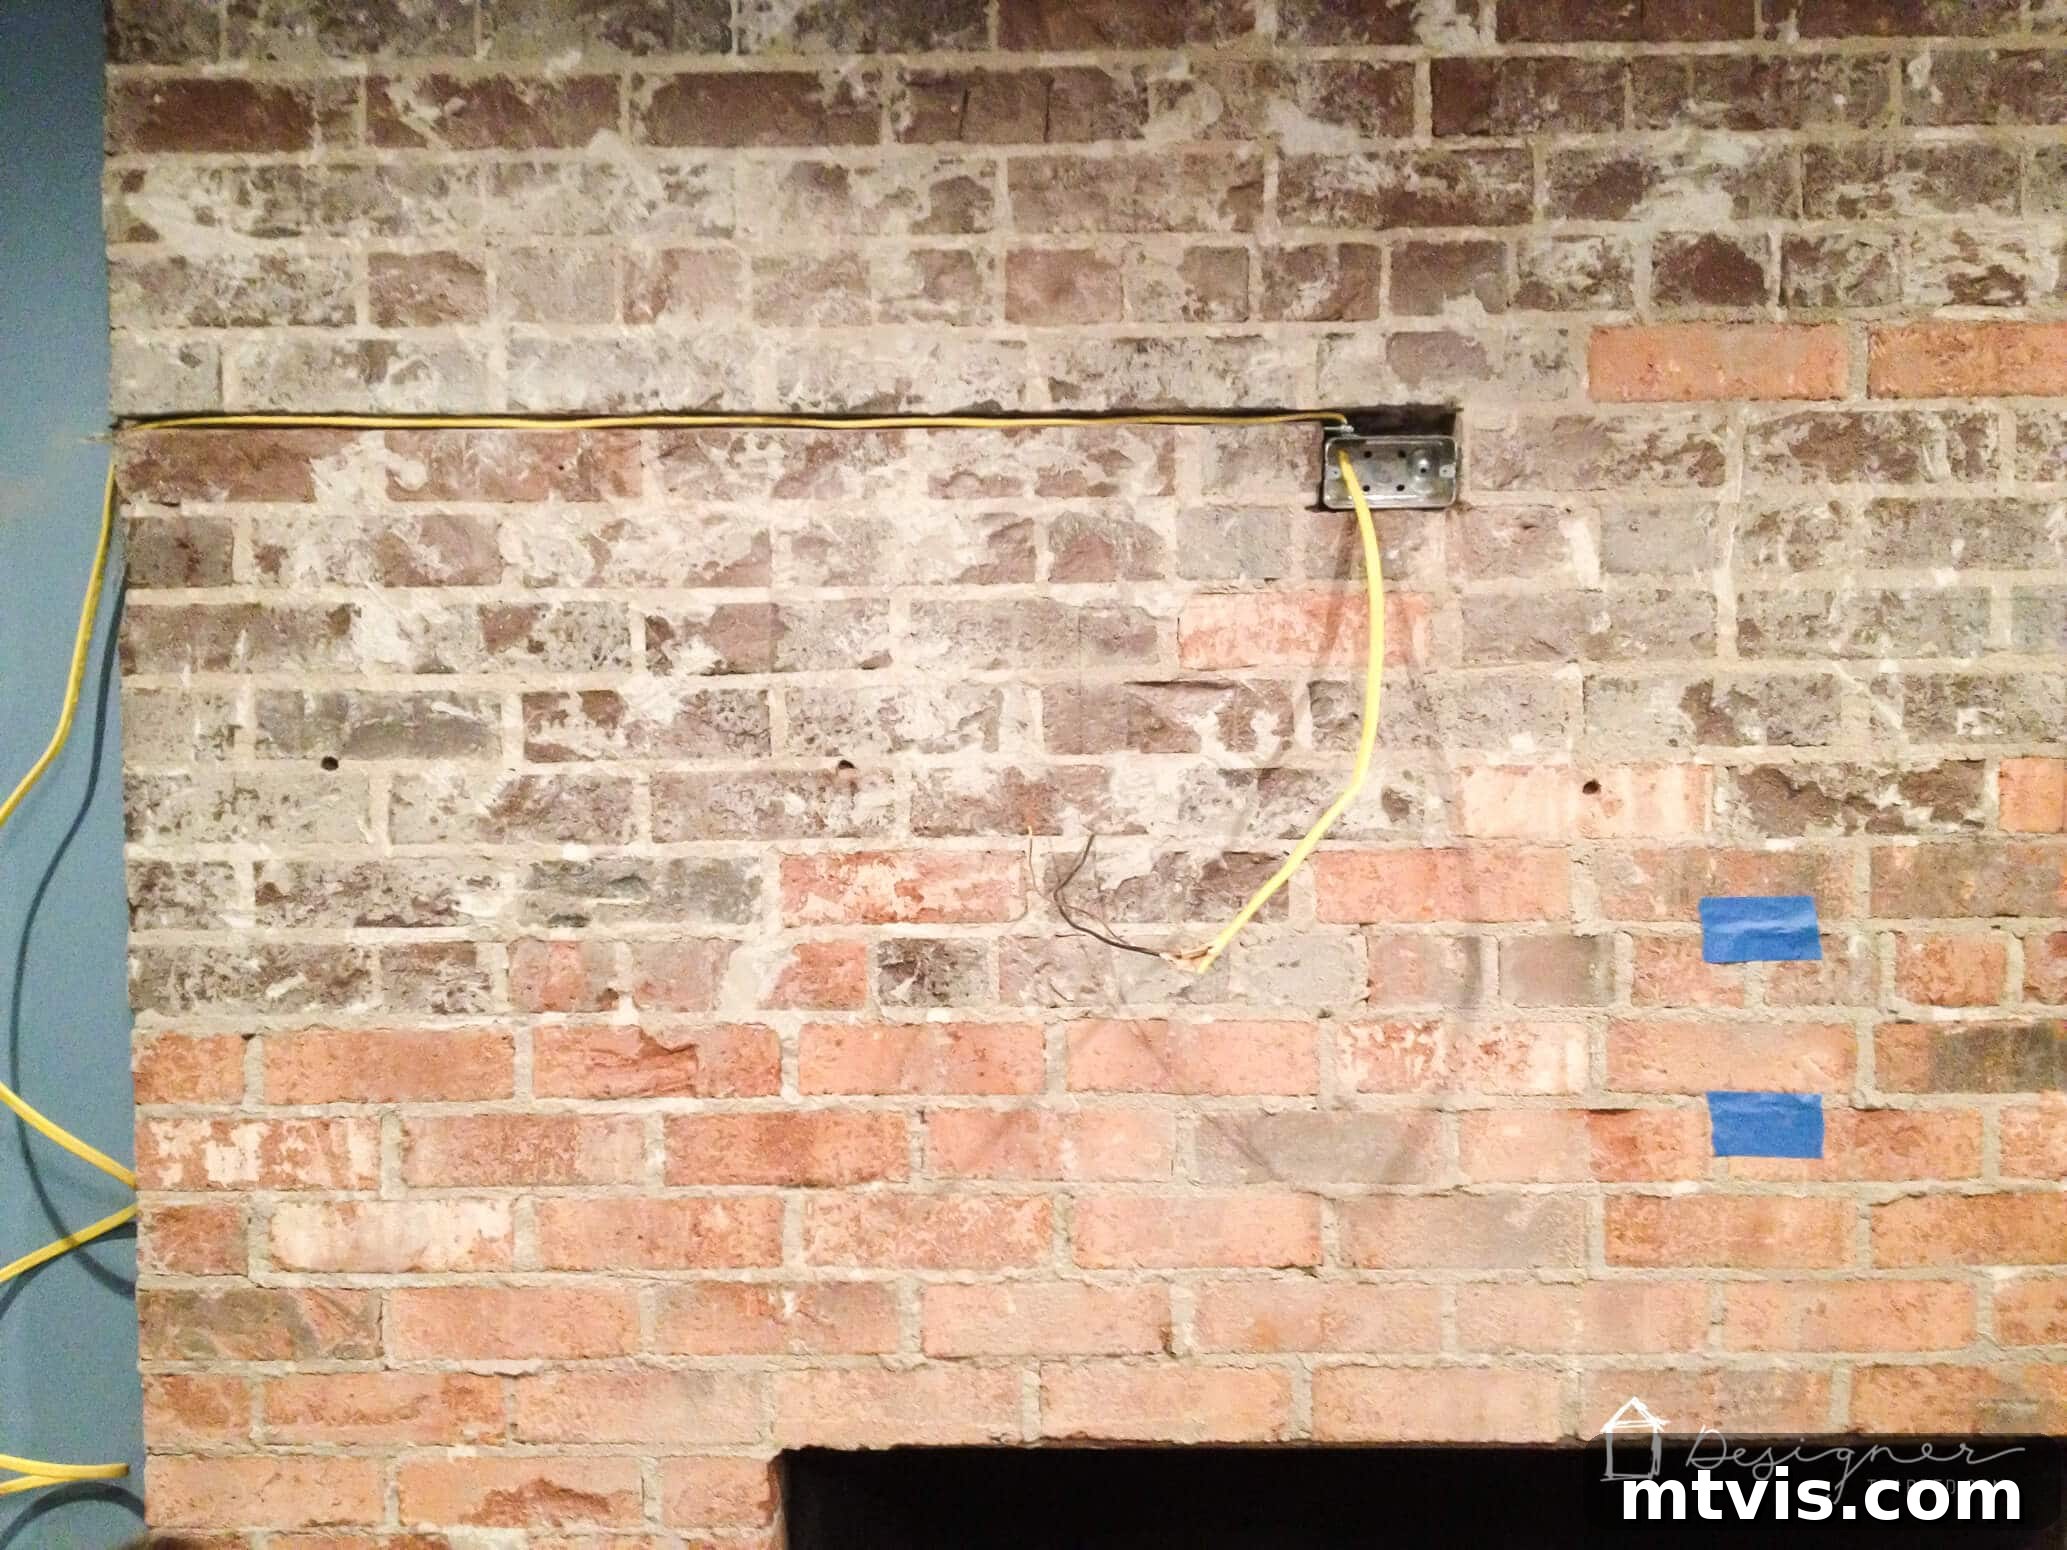
As an optional step, we decided to create a channel within the mortar joints of the brick to run electrical wiring. This allowed us to install a hidden outlet behind where our TV would eventually be mounted, providing a seamless look without visible cords. While this is a fantastic customization, I must emphasize the importance of consulting with a qualified electrician if you plan to integrate any electrical work into your fireplace renovation. Electrical work should only be attempted by those with appropriate knowledge and experience to ensure safety and compliance with building codes.
- Step 3: Attach cement board to your brick and tape the seams.
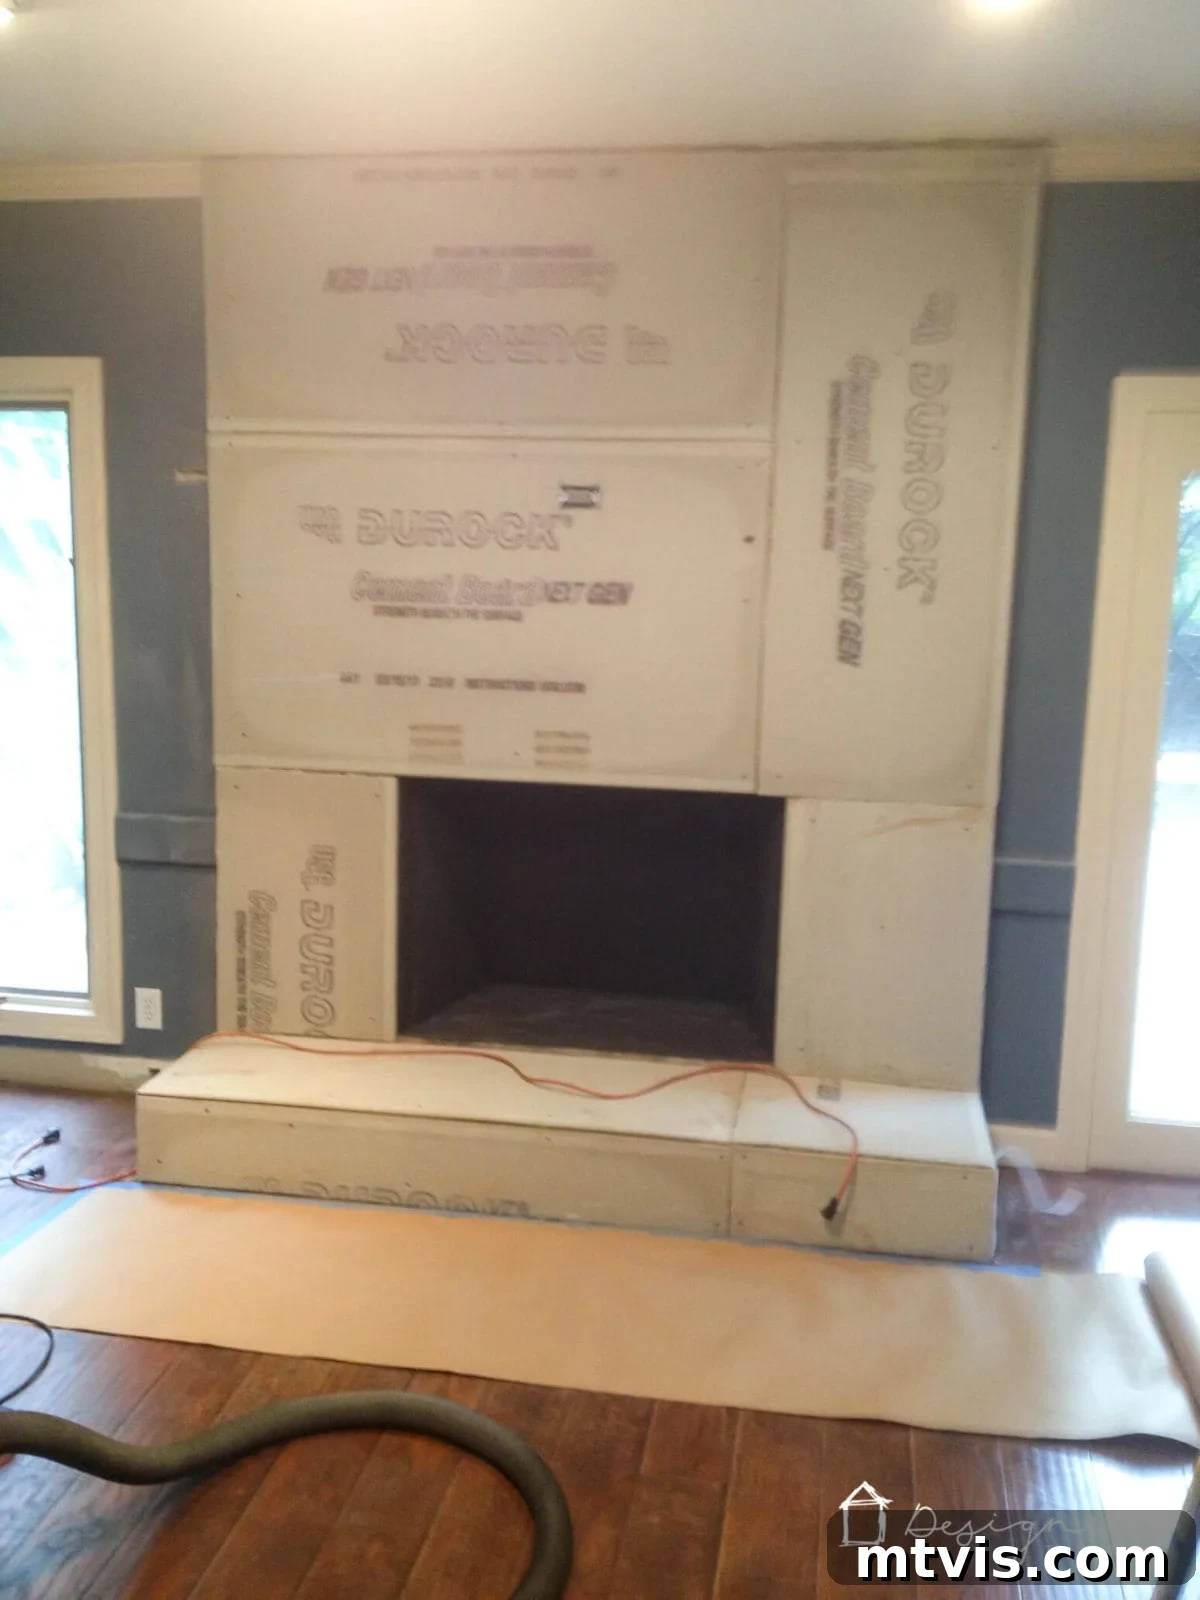
With the old facade removed and the brick exposed, it’s time to create a new, stable surface for your concrete overlay. Cut your cement board panels to fit the dimensions of your fireplace using a utility knife and straight edge, scoring and snapping them. Then, use a powerful ELECTRIC drill equipped with an appropriate masonry bit and masonry screws to firmly attach the cement board to the underlying brick. It is absolutely crucial to use an electric, corded drill for this step, as battery-operated drills typically lack the sustained power and torque required to effectively drill into masonry. Ensure the cement board is securely fastened and flush against the brick surface. Once all the panels are in place, meticulously tape all seams and corners using mesh tape. This mesh tape serves as crucial reinforcement, preventing future cracks in your concrete finish by providing stability across the joints.
- Step 4: Apply the concrete finish.
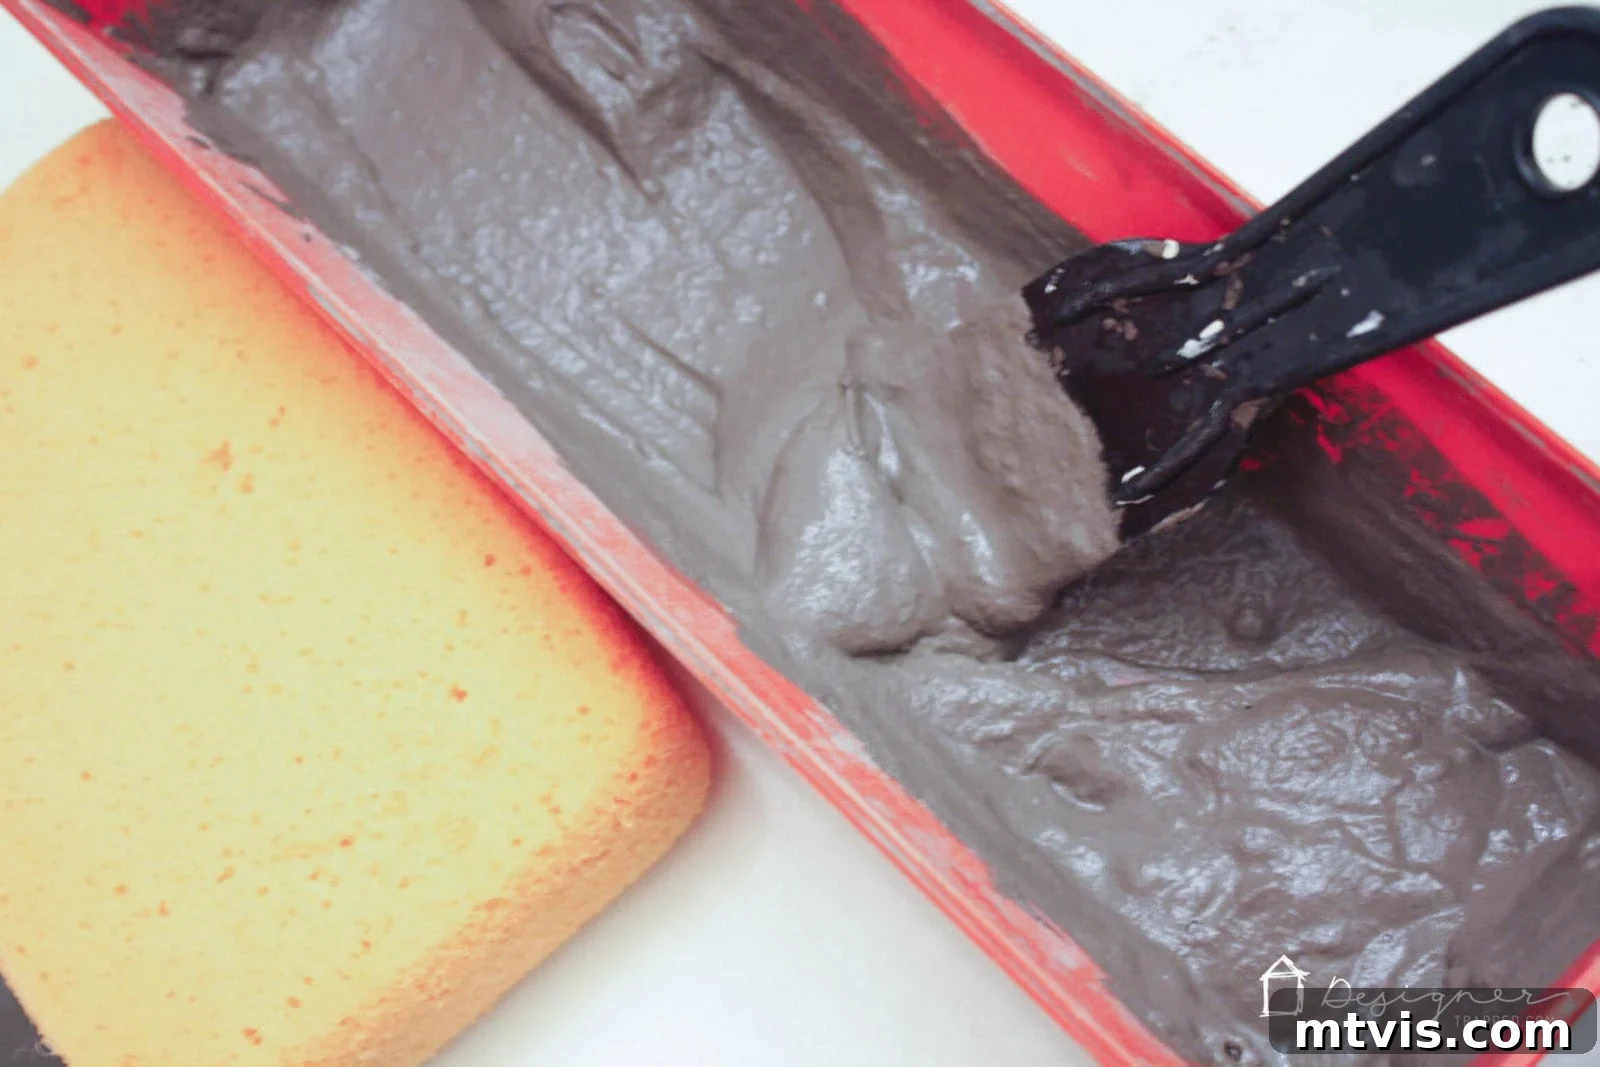
Now for the exciting part – applying the concrete finish that will bring your modern fireplace to life! In your large 5-gallon bucket, gradually add water to the Ardex Feather Finish dry mix while continuously stirring. The goal is to achieve a consistent, lump-free mixture with the texture of thin pancake batter. The precise consistency is incredibly important for smooth application and optimal workability. Once mixed, allow the concrete mixture to sit undisturbed for about 5 minutes. This “slaking” period allows the polymers to fully hydrate, enhancing the product’s workability and extending its open time. After 5 minutes, give it another thorough stir. This is what a properly mixed batch will look like:
Carefully transfer a manageable amount of the mixed concrete into your drywall tray. Using your drywall knife, begin applying the mixture to the cement board. We recommend starting by focusing on the taped seams first, ensuring they are thoroughly covered and smoothed out. Then, work your way across the remaining surfaces. Apply the mixture in long, even strokes, aiming for a THIN layer. The beauty of Ardex Feather Finish is its ability to be applied in very thin coats, allowing you to build up the desired texture and thickness over multiple applications. For edges and tight corners, we found it easiest and most effective to use our fingers, gently pressing and smoothing the concrete into place. Unfortunately, this project was completed before our blogging days, so we don’t have step-by-step photos of the application process. However, if you’d like a visual reference for working with this product on a different surface, please refer to my DIY concrete vanity post. Despite having zero prior experience with concrete application, we found it remarkably easy to work with. If you’ve ever tackled plaster or drywall mud, you’ll find yourself a step ahead of where we started!
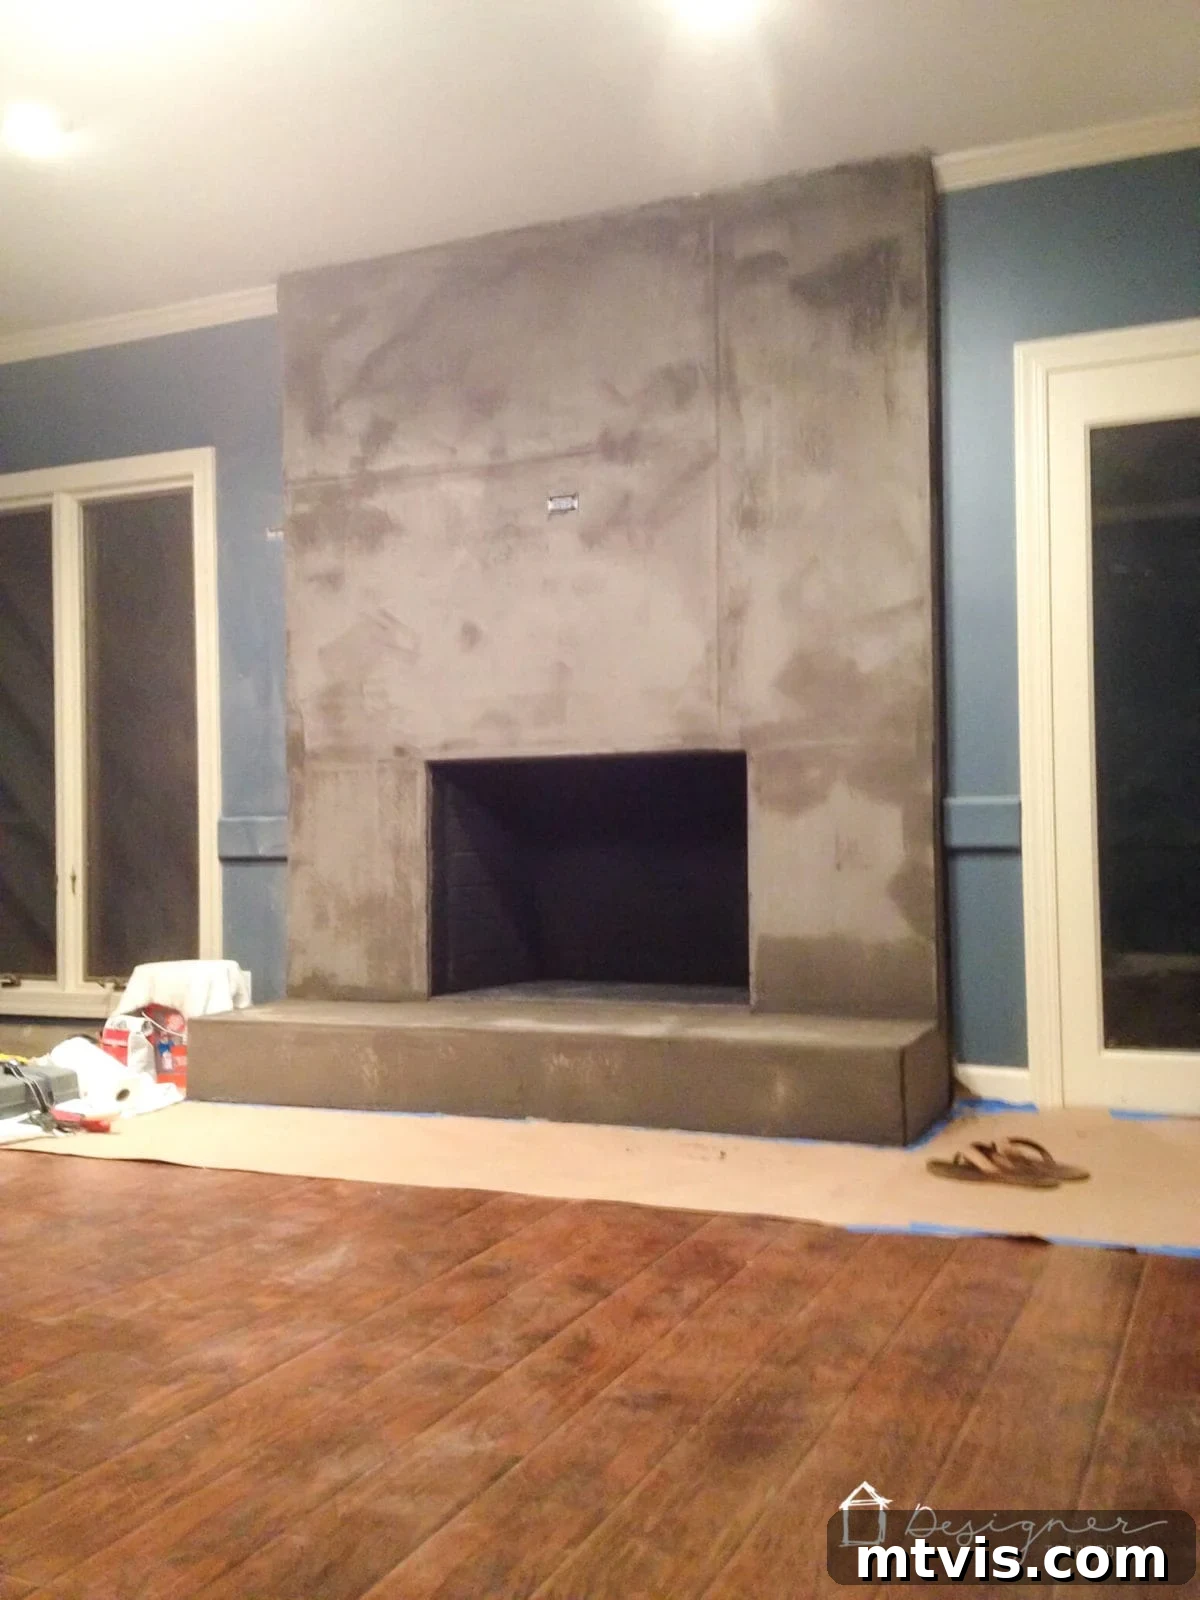
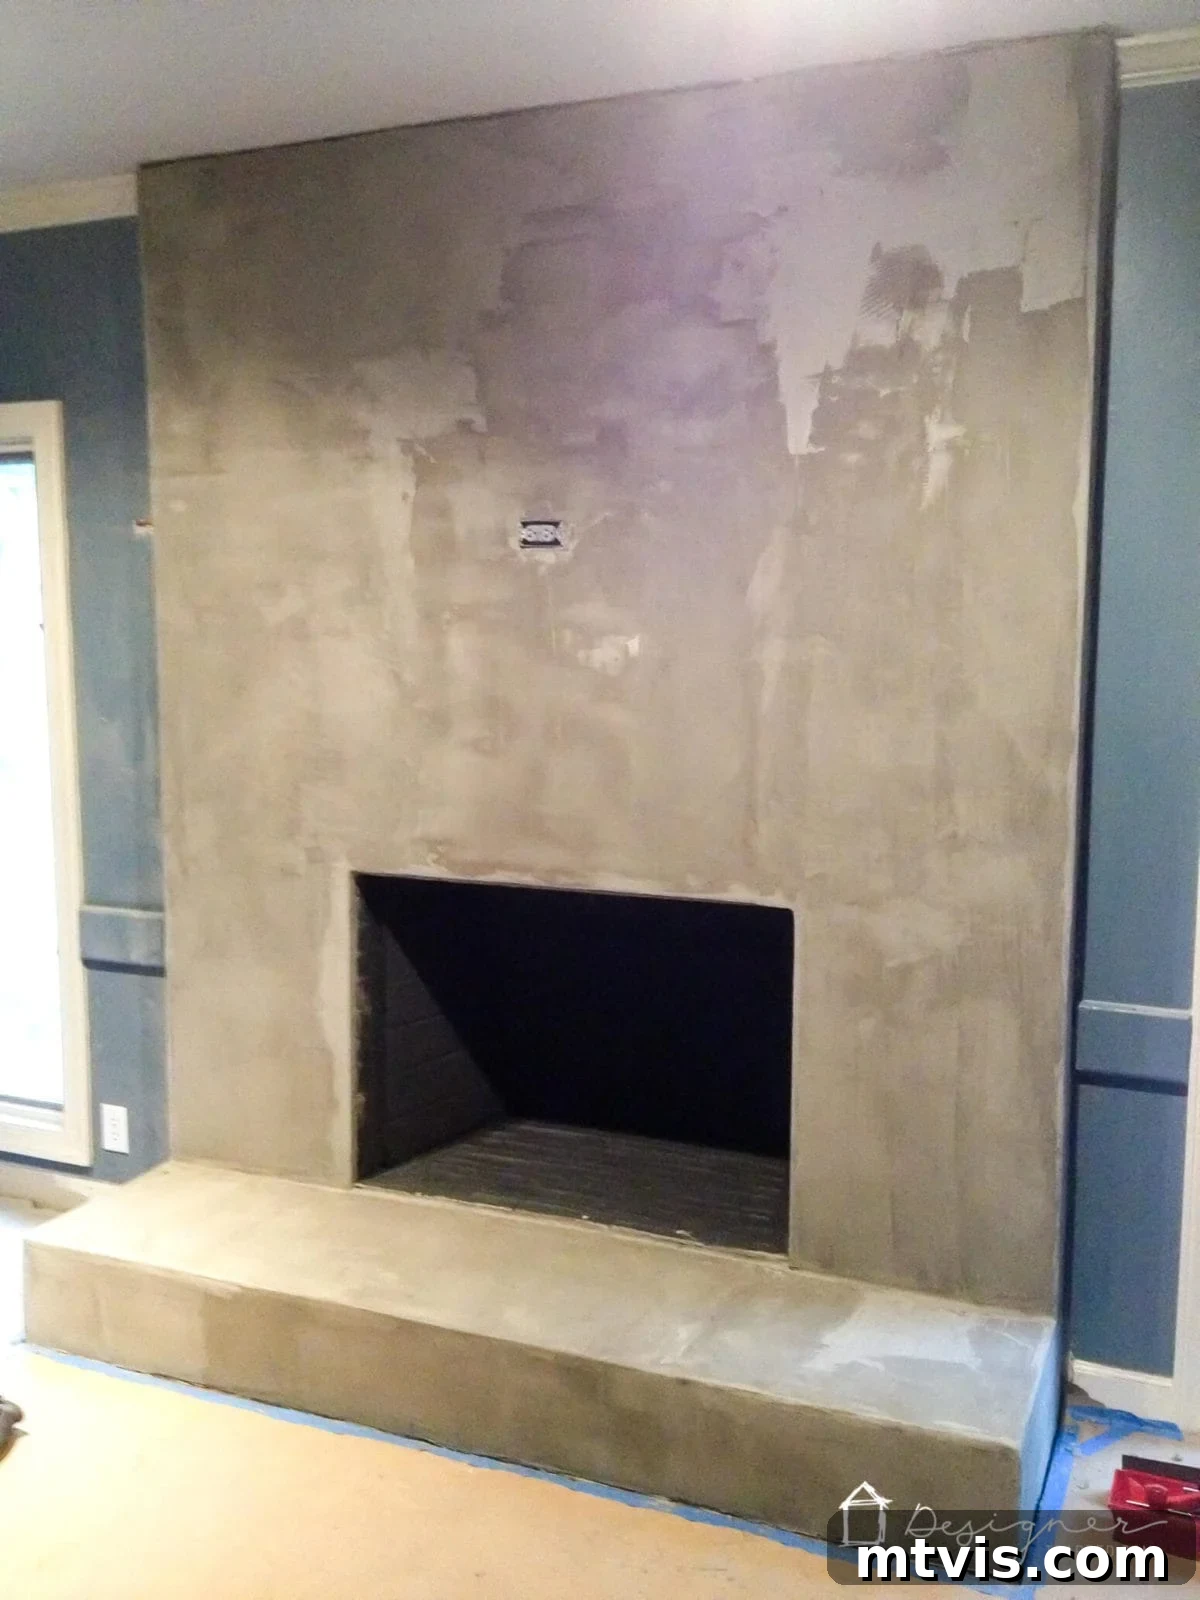
After the first coat, your DIY concrete fireplace will likely look something like this. You’ll notice that the cement board seams may still be visible, and the finish might appear somewhat mottled as it dries. Do not worry – this is completely normal! With each subsequent coat, these imperfections will disappear, and the surface will become increasingly uniform and smooth.
Observe how dramatically the seams vanish and the surface gains a cohesive appearance after just a couple more thin coats. The magic of Ardex Feather Finish truly shines through as layers build upon each other, creating a solid, uniform concrete aesthetic.
- Step 5: Optional sanding and sealing.
Once you’ve applied all your concrete coats and are satisfied with the coverage, you’ll consider the final touches: sanding and sealing. We did experiment with light sanding between some of the initial coats, but in retrospect, we found it largely unnecessary and quite messy. Personally, I absolutely love the unique, organic texture created by hand-troweled concrete, so sanding out all the subtle trowel marks would have been counterproductive to achieving our desired aesthetic. If you notice any particularly high spots or uneven areas, a gentle sanding with fine-grit sandpaper can certainly smooth these down. Otherwise, our recommendation is to allow each coat to dry completely, then apply another thin coat until you are completely happy with the overall finish. We applied somewhere between 4 to 5 coats, losing count in the process, to achieve the depth and smoothness we desired. After the final coat dried, we were so pleased with its naturally smooth texture and distinctive look that we opted against any further sanding.
Similarly, we chose not to apply a sealer to our concrete fireplace. Given its location and intended use, we didn’t anticipate any significant risk of spills, such as red wine, that would necessitate heavy protection. However, if your fireplace is in a high-traffic area, or if you prefer a subtle sheen and enhanced durability, applying a concrete sealer is a wise choice. Sealers can protect against stains, moisture, and general wear, and some can even deepen the color or add a slight gloss to the finish. For those considering sealing, you can use a similar sealer to the one I applied to our DIY concrete vanity. Always ensure the concrete is fully cured before applying any sealer, and follow the manufacturer’s instructions carefully for the best results.
And that’s it! For a total cost of less than $100, we completely revolutionized our fireplace, transforming it into a stunning DIY concrete focal point that anchors our family room. It’s truly gratifying to think that some of the “professionals” we consulted couldn’t envision or execute this simple, budget-friendly solution. We absolutely adore the clean, simple lines and modern aesthetic of our updated fireplace. The concrete finish is not just beautiful to look at, but also smooth to the touch, precisely matching the vision I had for this space.
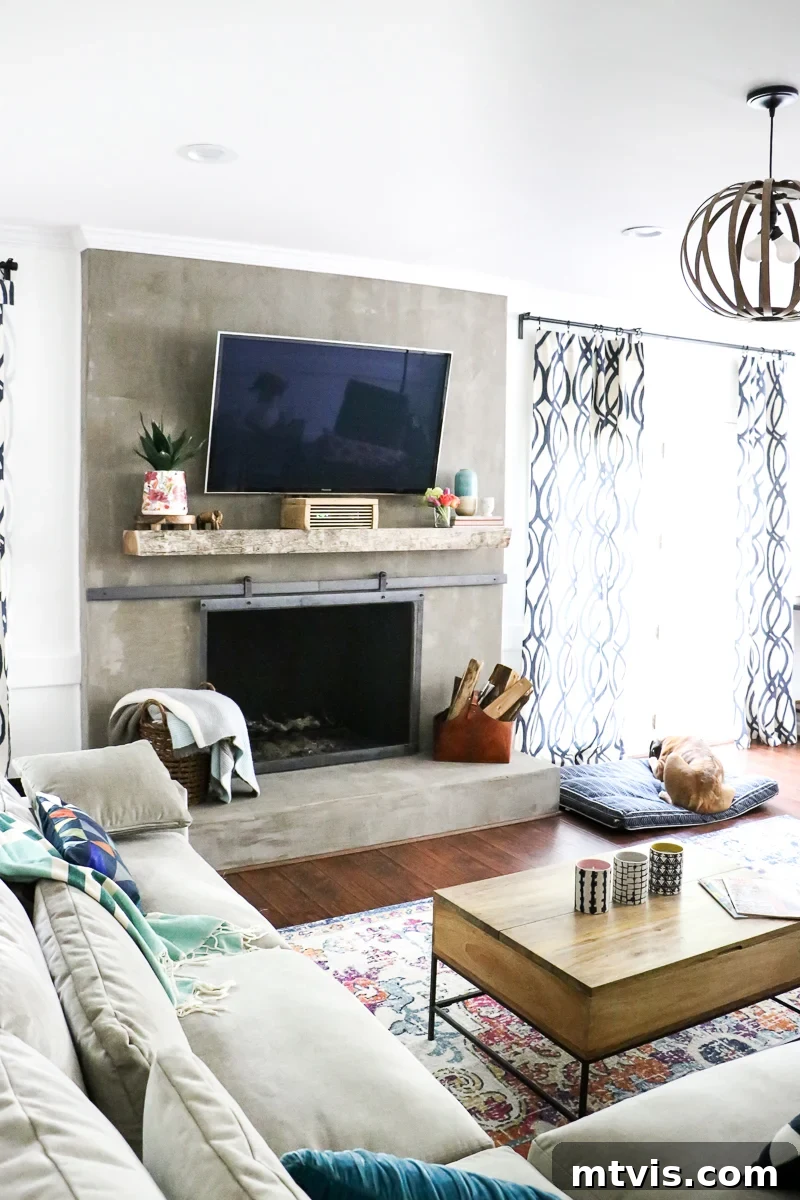

To truly complete our vision for the fireplace, we added an incredible DIY metal sliding barn door fireplace screen. This addition not only enhances safety but also perfectly complements the industrial-chic aesthetic of the concrete. The entire setup is pure perfection and fills me with joy every time I reflect on how dramatically it changed from its awful “before” state to the gorgeous “after” reality!

One of my absolute favorite comparisons is viewing the fireplace transformation from my home office/craft room, which directly overlooks our family room. The stark difference between the outdated fireplace and its current sleek form is almost unbelievable, providing a constant source of satisfaction.
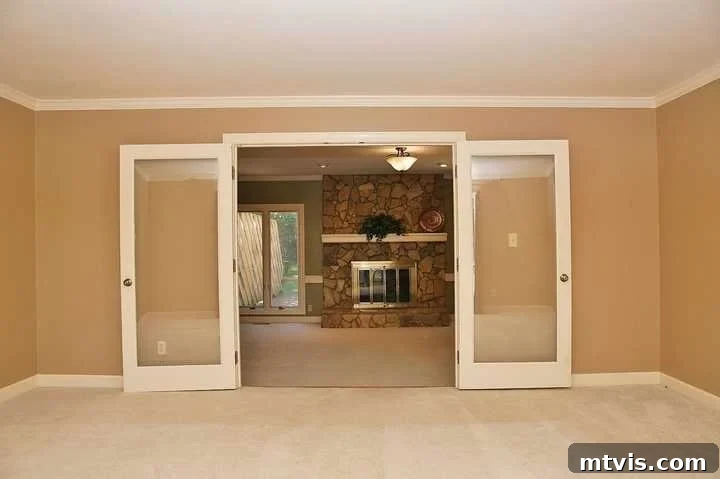
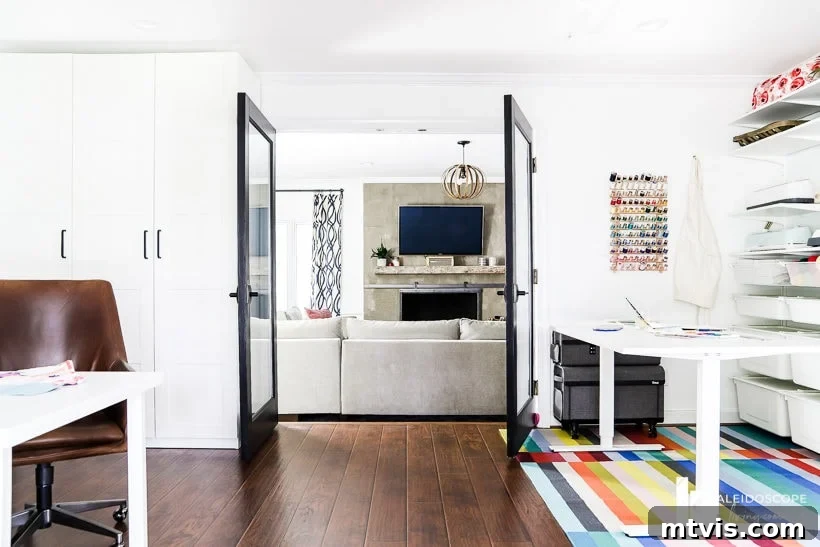
What are your thoughts on our DIY concrete fireplace? Can you believe that this dramatic, stylish transformation was achieved for such an incredibly low cost – less than $100? We hope this detailed tutorial empowers you to embark on your own fireplace renovation journey and create a space you’ll love!
Other ideas you may enjoy for transforming your home:
- DIY Concrete Vanity: Achieve a High-End Look for Less
- Stunning DIY Tiled Fireplace Makeover Reveal
- The Coolest DIY Concrete Projects Out There for Your Home
- The Easy Way to Update Bathroom Tile Without Replacing It!
- DIY Staircase Makeover in 2 Days: Tutorial & Reveal
- DIY Range Hood Finish With Wood and White Concrete
- 18+ Budget-Friendly DIY Backsplash Ideas to Refresh Your Kitchen
Curious about my comprehensive approach to transforming rooms and spaces throughout our home? Discover the secrets and strategies in Designer in a Binder®, my go-to guide for affordable and stylish decorating.
For exclusive content, behind-the-scenes sneak peeks, and more DIY inspiration, be sure to subscribe to our newsletter before you go!