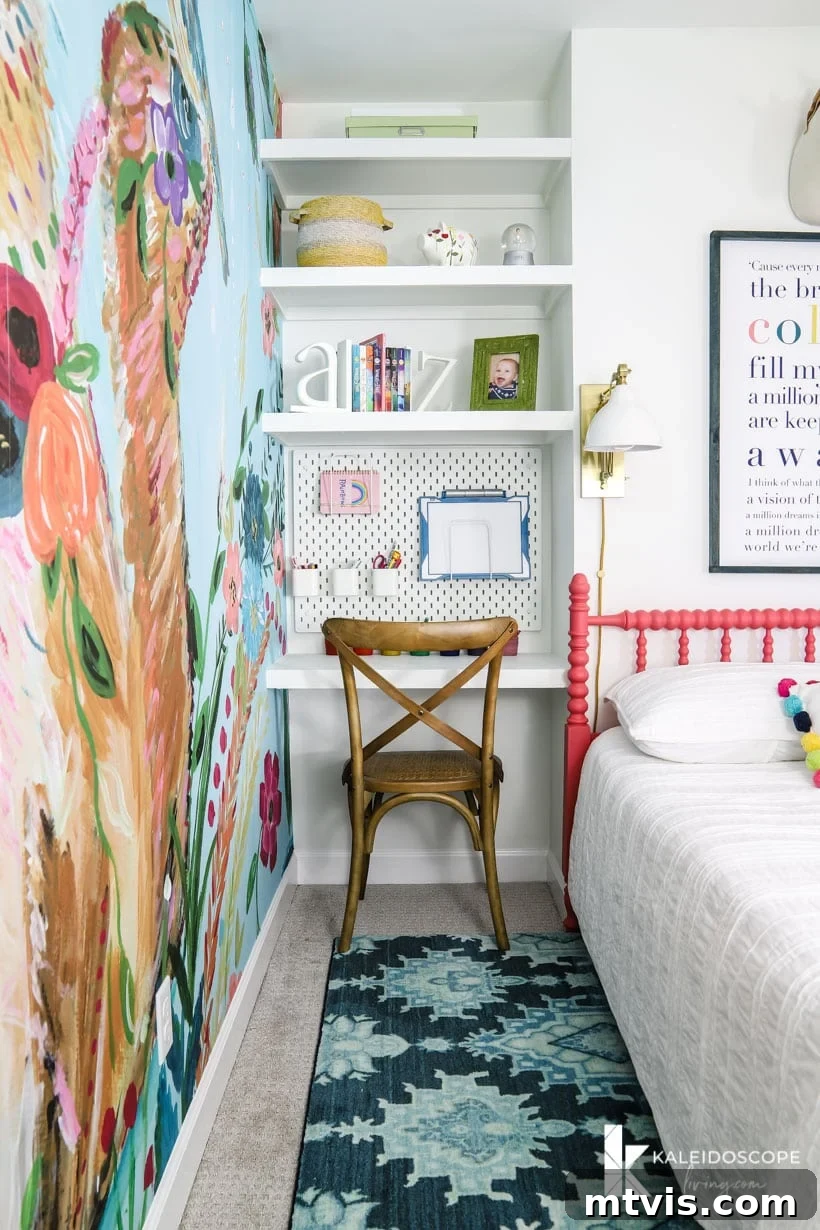
Have you ever found yourself staring at an odd corner or a forgotten alcove in your home, wondering how to transform that wasted space into something beautiful and functional? You’re not alone! Many homes feature quirky nooks that can be a real design challenge. But what if we told you that creating custom storage and style could be one of the easiest DIY projects you undertake? With DIY floating shelves, even those with limited DIY experience can unlock incredible potential, turning tricky spots into practical and aesthetically pleasing features.
We recently tackled such a challenge in our daughter’s bedroom, where an awkward nook was begging for a purpose. By adding tailor-made floating shelves and a sleek floating desk, we completely reimagined the space. What was once a void is now a vibrant, organized area, offering both ample storage and a dedicated workspace. This transformation proves that thoughtful DIY solutions can truly elevate any room.
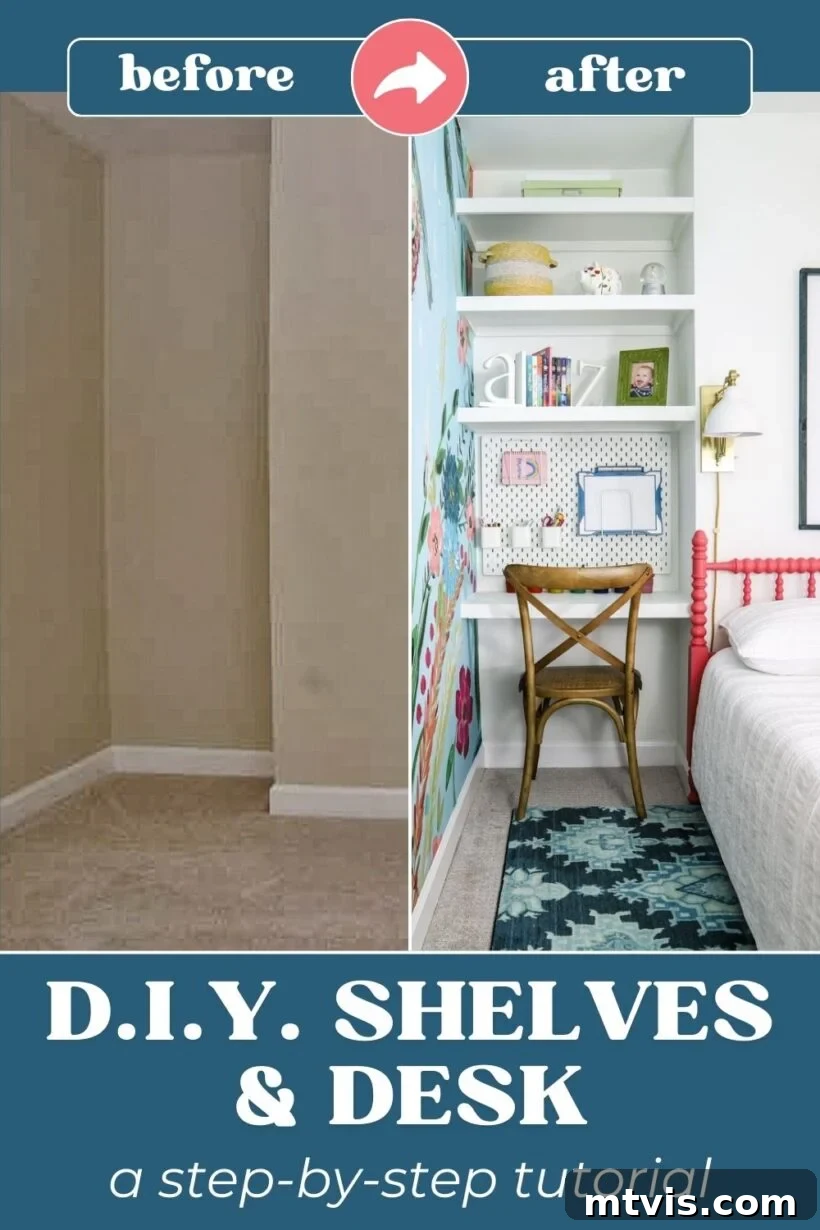
Indeed, floating shelves are a versatile and elegant solution for virtually any room. They offer a clean, minimalist look, making spaces feel larger and more open while providing essential storage. Whether you’re looking to display decor, organize books, or create a workstation, these shelves are a big win all around. Their simple construction and installation make them an ideal project for DIY enthusiasts of all skill levels, promising a significant impact with a relatively small effort.
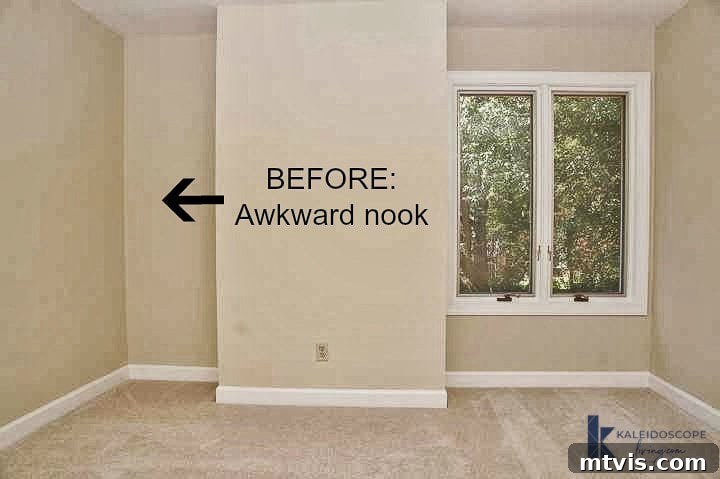
For those new to our journey, or as a reminder of the initial state of Attley’s room, let’s rewind. The peculiar indentation in the room was a direct result of the chimney running up through the house, leaving a deeply recessed and challenging area that defied conventional furniture placement.
After much deliberation and creative brainstorming, we envisioned transforming this architectural peculiarity into a dynamic feature. Our plan was ambitious: to integrate both practical floating shelves and a custom desk within the confines of the nook. The outcome exceeded our expectations, turning what seemed like a design flaw into one of the room’s most cherished highlights. This project stands as a testament to the idea that with a bit of ingenuity, every room “problem” holds the potential to become a striking design solution.
This post contains affiliate links for your convenience, which means we may earn a small commission at no extra cost to you if you make a purchase. Click here for our full disclosure policy.
How to Build and Install Stunning DIY Floating Shelves
Embarking on a floating shelf project might seem daunting, but with the right guidance, it’s an achievable and incredibly rewarding endeavor. Our step-by-step tutorial will walk you through everything you need to know, from selecting materials to applying the final coat of paint, ensuring a professional and durable result. These shelves are designed to be sturdy, beautiful, and fully customizable to fit your unique space.
Essential Materials for Your Floating Shelf Project
Gathering the right tools and materials is the first critical step towards a successful DIY project. For these floating shelves, we’ve carefully selected items that balance durability, ease of use, and cost-effectiveness. Remember, quality materials make a significant difference in both the process and the final outcome.
- Plywood: Opt for high-quality plywood (we used 3/8″ for light duty, but recommend thicker for heavier items) for the top and bottom of your shelves. Consider cabinet-grade plywood if you plan to stain your shelves for a smoother finish.
- 1 x 2 Pine Boards: These will form the crucial internal support structure for your shelves. Pine is lightweight, easy to work with, and readily available.
- Stud Finder: An absolute must-have for safe and secure installation. This reliable and inexpensive model is our top recommendation for consistent accuracy over pricier alternatives.
- Table Saw or Circular Saw: Essential for precise cuts. We highly recommend our favorite circular saw for its versatility and performance.
- Circular Saw Guides (Optional, but highly recommended): For perfectly straight cuts, especially for beginners. These two guides are invaluable:
- Kreg Rip Cut Guide
- Kreg Accu-Cut Guide
- Straight Edge: For guiding your saw if you’re not using dedicated guides.
- Level: Crucial for ensuring your shelves are perfectly horizontal.
- Brad Nailer: Speeds up assembly and provides strong, clean fasteners.
- 2″ Brad Nails: For attaching support pieces to studs.
- 1″ Brad Nails: For securing plywood to the support frame.
- Measuring Tape & Pencil: For accurate marking.
- Safety Glasses & Hearing Protection: Always prioritize safety when working with power tools.
- Wood Spackle or Filler: For concealing nail holes.
- Sandpaper (various grits): For smoothing surfaces and preparing for finish.
- Caulk Gun & Paintable Caulk: For sealing gaps between shelves and walls, achieving a seamless look.
- Paint or Wood Stain: To achieve your desired finish and protect the wood.
- Paint Brushes/Rollers: For application of paint or stain.
Understanding the Anatomy of Floating Shelves
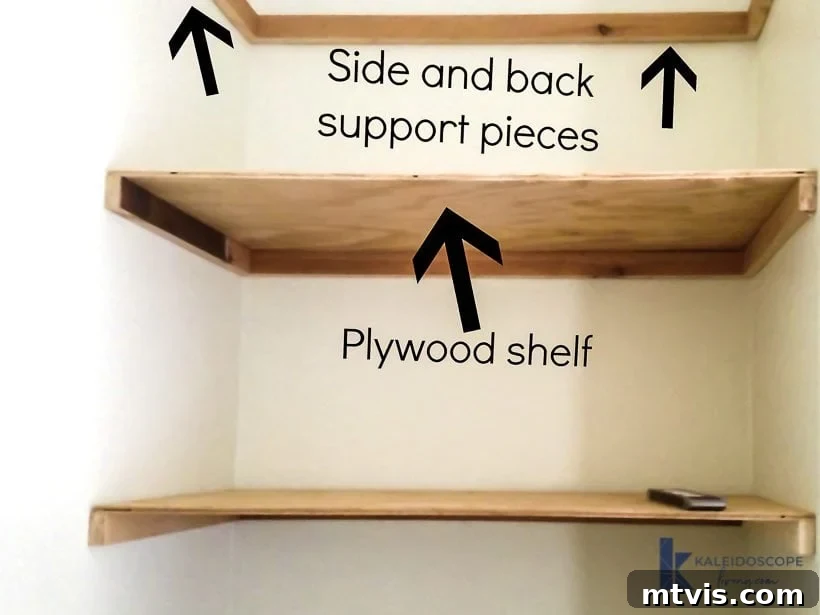
To fully grasp the construction process, it’s helpful to visualize the internal structure of these floating shelves. The “floating” effect is achieved by creating a robust, hidden frame that mounts directly to the wall, over which the plywood ‘box’ of the shelf is securely attached. This diagram illustrates how the various wood pieces come together to form a strong, cantilevered unit, providing substantial support while maintaining a sleek, unobtrusive appearance.
Step-by-Step Guide to Crafting Your Floating Shelves
Follow these detailed steps to build your own custom floating shelves and desk. Precision and patience are key, but the results are incredibly rewarding.
Step 1: Precision Planning and Measurement
The foundation of any successful project lies in accurate planning. Begin by meticulously measuring the exact dimensions of the area where your DIY floating shelves will reside. Our nook, for instance, measured approximately 33” by 15”. Don’t just measure once; measure several times across different points, especially if your walls are old or imperfect, as slight irregularities are common. Decide on the desired depth and height of each shelf, and for a desk, ensure it’s at a comfortable working height. Sketching out a simple diagram of your desired layout on paper can help visualize the final outcome and confirm all measurements.
Step 2: Preparing Your Shelf Support Framework
Once your measurements are finalized, it’s time to prepare the internal support pieces. While we recycled some old 1” x 6” pine boards by ripping them down to 1 1/2” width with a table saw, we highly recommend purchasing readily available 1 x 2 pine boards as listed in the materials. This will save you significant effort and ensure consistent dimensions. Cut your support pieces to the precise length required for the back and sides of each shelf. Due to irregularities in our nook, each shelf required unique measurements (e.g., back support between 32 1/2” and 33 1/4”, side supports between 13 3/4” and 14 1/4”).
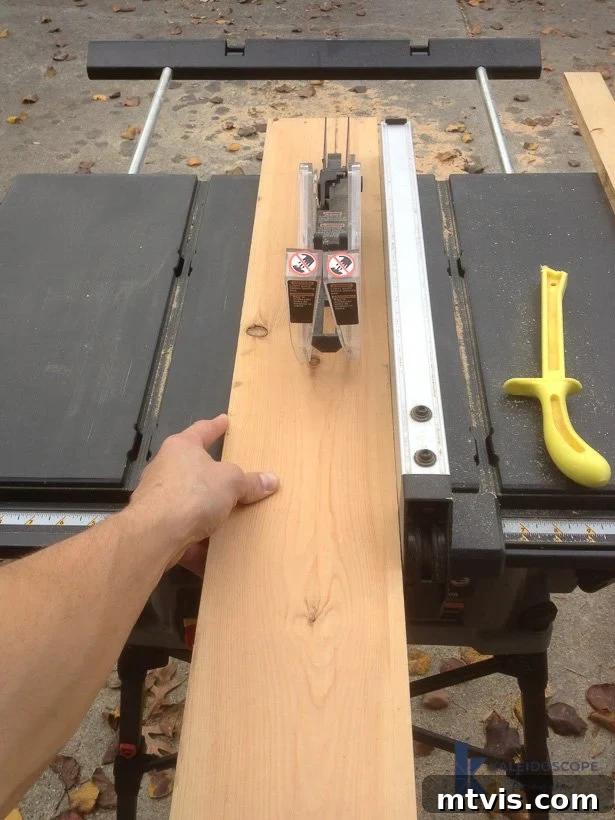
To avoid confusion, we used painter’s tape to mark the wall locations for each shelf and labeled each cut support piece accordingly. Our steadfast mantra: measure twice, cut once. This meticulous labeling allowed us to cut all necessary support pieces in one efficient session. Pro Tip: If you plan to stain your shelves, it’s advisable to stain these support pieces now, before installation, for easier application and a cleaner finish.
Step 3: Securely Installing the Support System
With your support pieces cut, you’re ready for installation. Grab your stud finder and level. Use the stud finder to locate and mark the wall studs, as these provide the most secure anchoring points. For shelves intended for light items, a brad nailer with 2” brad nails driven into studs will typically suffice. However, if your shelves are long, or destined to hold heavier objects (like books or kitchenware), we strongly recommend using stronger screws or heavier gauge nails, ensuring they penetrate deeply into the studs for maximum stability. In areas without studs, consider using heavy-duty toggle anchors. Before fastening, always use your level to ensure each support piece is perfectly horizontal. Even a slight tilt can be noticeable. We installed the desk supports at a standard desk height and spaced the upper shelves 14 inches apart for balanced storage.
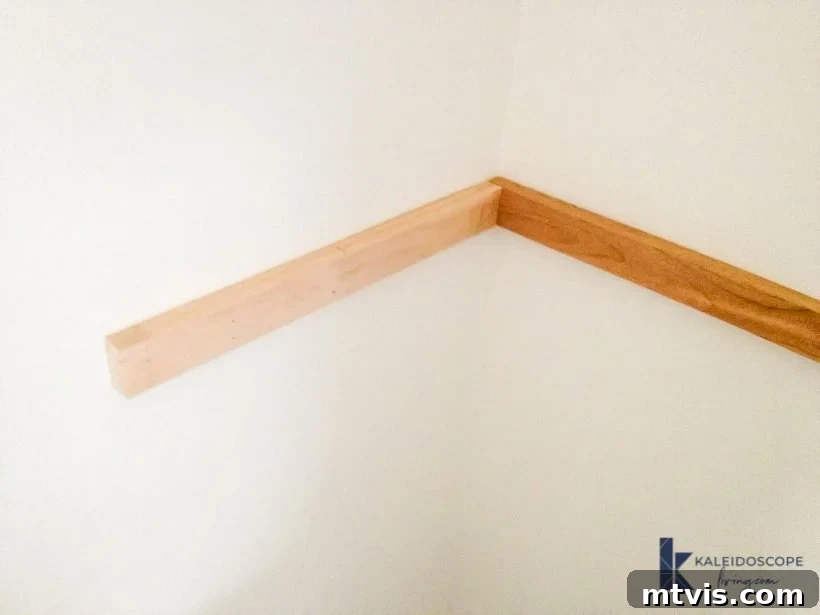
Step 4: Cutting the Plywood for Your Shelf Tops
Now, it’s time to cut the plywood for the top and bottom surfaces of your shelves. Just like the supports, carefully measure each individual shelf’s dimensions due to any wall irregularities. We used a circular saw with a straight edge for our cuts, but for superior accuracy and ease, especially on longer cuts, we can’t recommend the Kreg Rip Cut Guide enough. This tool significantly simplifies achieving perfectly straight edges. When choosing plywood, consider its thickness. For our small nook and light-duty items, 3/8” thick plywood worked well. For longer or heavier-duty shelves, a thicker plywood (such as 1/2” or 3/4”) is advisable to prevent sagging. Always ensure a stable cutting surface and wear safety glasses.
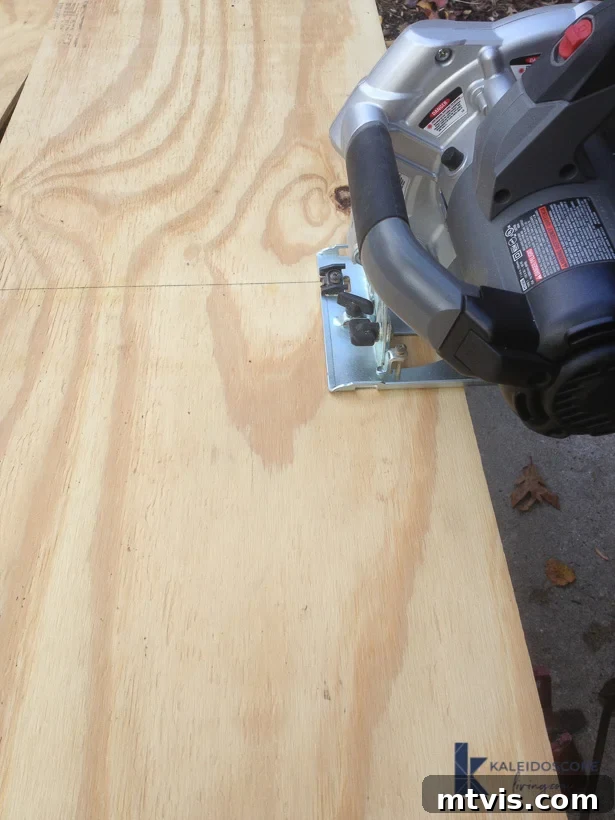
Important Note: If you’re planning to stain your shelves, this is another ideal time to stain the plywood pieces you’ve just cut. This approach ensures even coverage and avoids complex maneuvers once the shelves are assembled.
Step 5: Assembling the Shelf Structure
With the support frame firmly in place and your plywood pieces cut and pre-stained (if desired), the next step is to assemble the main structure of your shelves. Carefully position the plywood shelf tops onto the installed support pieces. Using your brad nailer, secure the plywood to the top of the support frame with 1” nails. Ensure the plywood edges are flush with the front and sides of your internal support frame. This step brings your floating shelves to life, creating a solid, box-like structure that will soon appear to defy gravity.
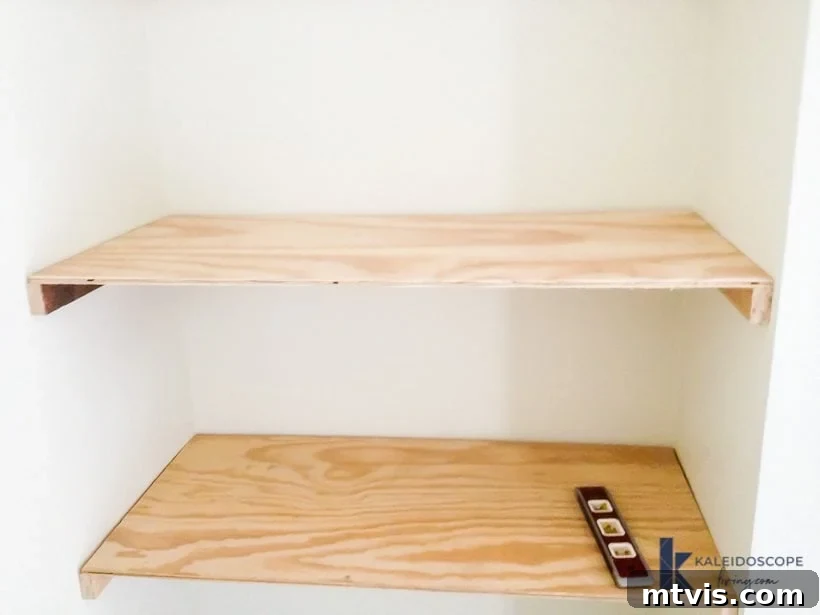
Another Stain Tip: If staining, consider pre-staining the front support pieces now, before permanent installation. This simplifies the process and ensures a consistent finish.
Step 6: Adding the Finishing Front Piece
The front support piece is critical for both structural integrity and achieving the signature “floating” look. This piece effectively conceals the internal support framework and the raw edge of the plywood, giving your shelves a substantial and professionally finished appearance. We ripped pine boards to 1 7/8” width for our front pieces, ensuring they were wider than the 1 1/2” side and back supports. This extra width is essential to fully cover the plywood edge and the support structure. If you used 1” x 2” wood for your supports, a 1” x 3” board might be a suitable choice for your front piece, depending on the thickness of your plywood. Attach these front pieces using your brad nailer, driving nails into both the plywood and the hidden support frame for a secure fit.
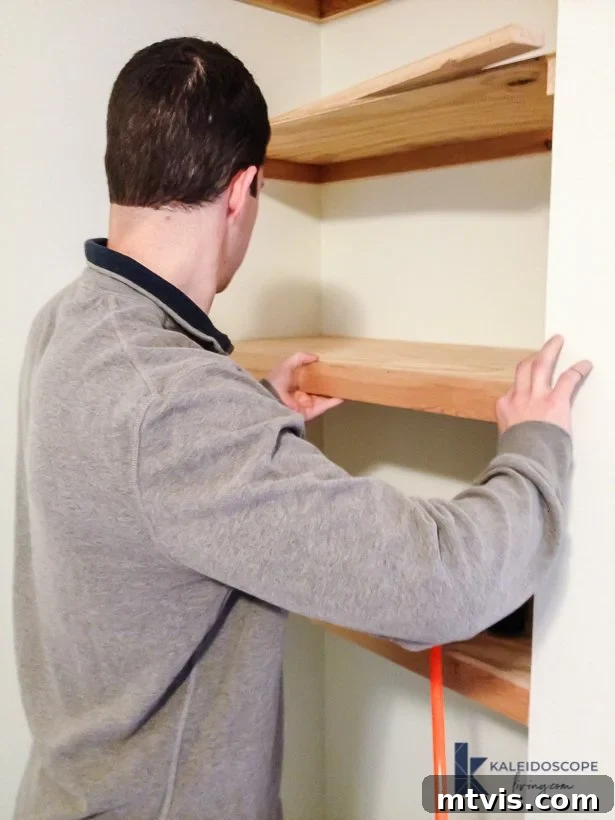
Step 7: The Final Touches: Finishing and Painting
With all your shelves securely installed, it’s time to perfect their appearance. Start by filling all visible nail holes with wood spackle or filler. Once the spackle is dry, lightly sand the filled areas and all surfaces of the shelves until smooth to the touch. Pay attention to any rough edges or imperfections. After sanding, thoroughly wipe away all dust with a damp cloth or tack cloth. Next, apply paintable caulk to any gaps between your new shelves and the surrounding walls. This crucial step creates a seamless, built-in look, making the shelves appear as if they were always part of the architecture. Allow the caulk to dry completely according to manufacturer instructions.
Finally, you’re ready to paint or stain your shelves. We opted to paint ours the same color as the room’s walls for a cohesive, integrated feel. For best results, apply a good quality primer first, followed by two or more thin coats of your chosen paint, allowing adequate drying time between coats. If you’re matching an existing wall color and don’t have leftover paint, check out our tips on how to match paint colors perfectly.
This entire project, from start to finish, took us only an afternoon to complete, and we couldn’t be happier with the transformation. What was once a challenging and awkward nook is now one of our favorite and most functional features in Attley’s beautifully organized room. Beyond its visual appeal, it provides essential additional storage and a practical small desk, proving that even the most difficult spaces can be reimagined with creativity and a bit of DIY spirit.
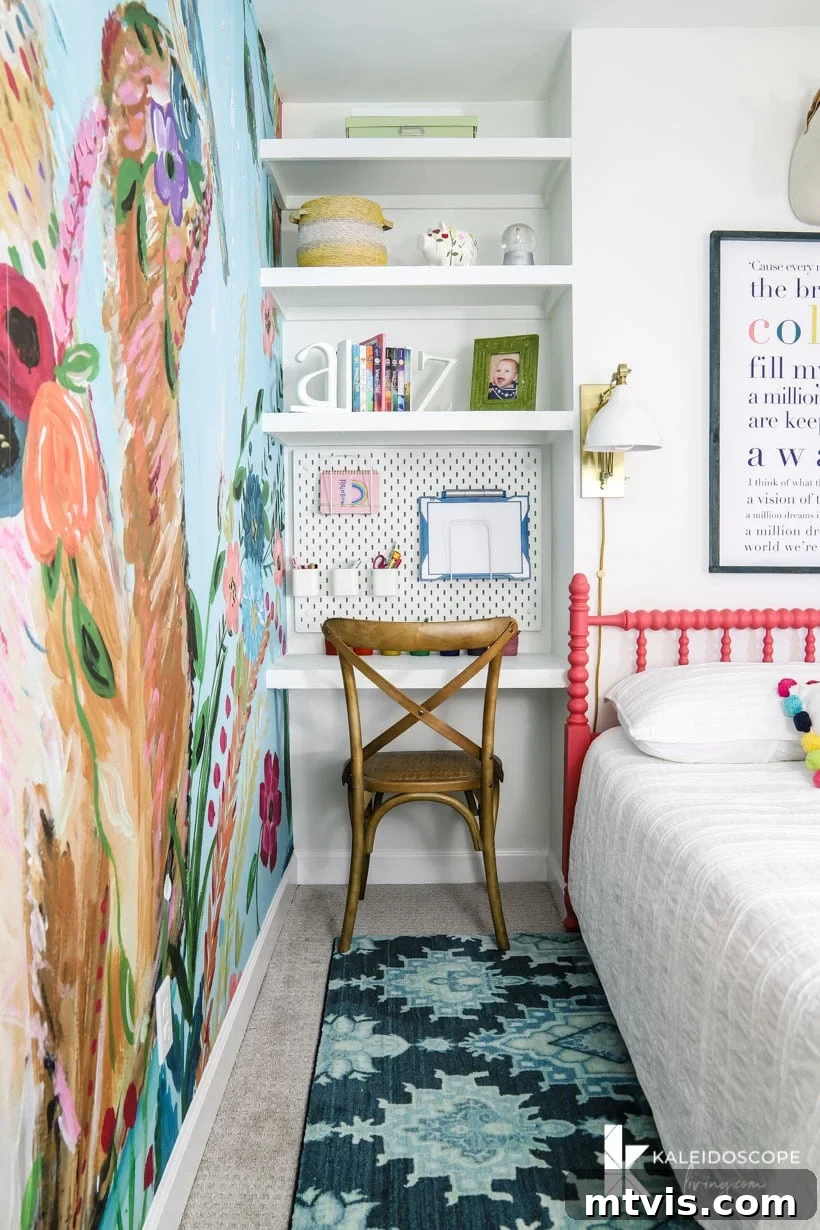
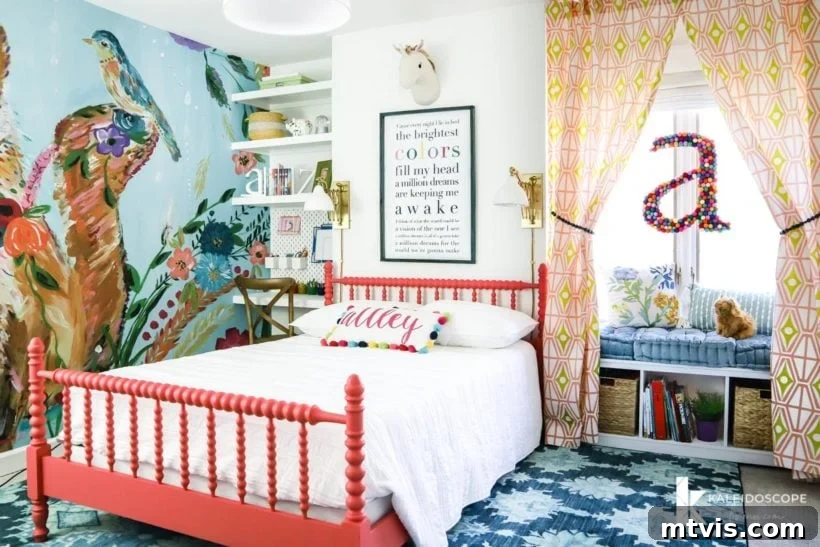
We hope this comprehensive tutorial inspires you to tackle your own DIY floating shelves project. Imagine the possibilities for your living room, bedroom, kitchen, or even a bathroom! If you’re eager to add shelving but prefer an even simpler approach, be sure to explore our tutorial on how to make the easiest wall shelves ever. Happy building!
More DIY Furniture Posts
SEE ALL DIY POSTS
-
Easy DIY Floating Shelves & Desk for an Awkward Nook
-
How to Paint IKEA Furniture and Mistakes to Avoid
-
How to Make a DIY Dog Crate that Looks Like Furniture
-
How to Decoupage Furniture With Fabric
-
IKEA Lack Hack – A High-End Look on a Dime!
-
Easy and Gorgeous Ikea Desk Hack
Curious about our philosophy and methods for transforming spaces within our home? Dive deeper into our approach with Designer in a Binder®, an affordable and simple system designed to help you decorate your home with confidence and style.
For even more exclusive content, behind-the-scenes glimpses, and design insights, make sure to subscribe to our newsletter before you go. Join our community and never miss out on new projects and inspiring ideas!