
When we decided to transform our brown granite countertops to mimic the elegant look of marble three and a half years ago, the idea was met with considerable skepticism. Many questioned its durability, predicting quick wear and inevitable regret. Now, after years of heavy daily use, it’s time to answer the burning question: were they right, or did our DIY painted countertops stand the test of time?
In this comprehensive update, we’re diving deep into the longevity and practical performance of our painted kitchen counters. We’ll share candid photos and even a video showcasing their condition after three and a half years of real-world use. This post will also guide you on who should consider undertaking this transformative project and, equally important, who might be better off exploring other options. Finally, we’ll reveal what we would do differently if we were to embark on this budget-friendly renovation once more.

Why We Opted to Paint Our Kitchen Countertops
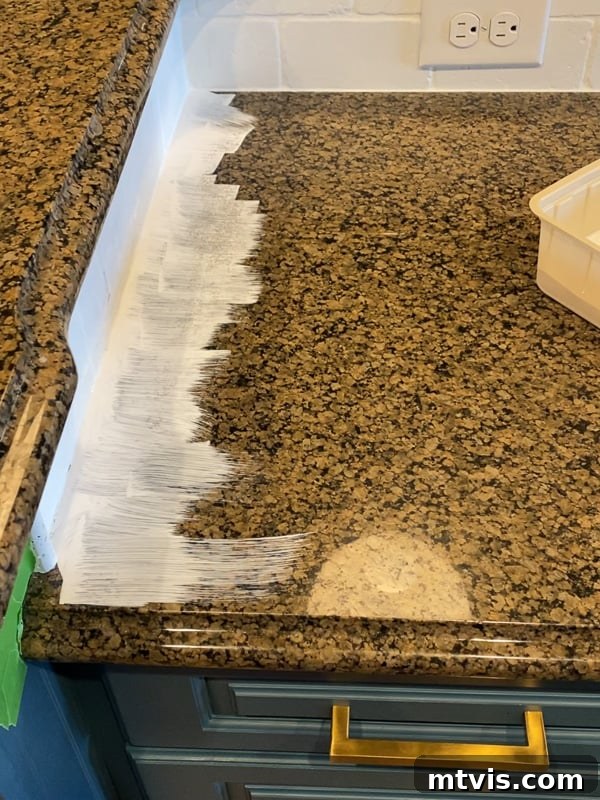
To provide some context, let’s quickly recap the genesis of this project. In early 2021, we embarked on a significant, yet budget-conscious, kitchen makeover. This included refreshing the kitchen cabinets with a fresh coat of paint and transforming our existing tile backsplash. These changes dramatically improved the kitchen’s aesthetic, aligning it much more closely with our personal style. However, the speckled brown granite countertops remained a visual disconnect, standing out against our updated decor.
Our long-term vision always involved replacing the countertops with a more modern and cohesive material, but financial constraints meant this was a future endeavor, not an immediate possibility. In the interim, we were determined to change their appearance. We explored numerous affordable DIY countertop ideas, even considering a DIY concrete overlay technique we’d successfully used before. After careful deliberation and weighing all available options, we ultimately decided to paint our granite countertops to emulate the look of marble in April 2021. This decision, though exciting for us, sparked a considerable online debate, with many predicting it would be a regrettable mistake.
How to Paint Countertops to Look Like Marble
If you’re eager to learn the detailed step-by-step process, including the exact supplies we used, our original tutorial provides all the information you need!
This post may contain affiliate links, meaning we earn a small commission at no extra cost to you if you make a purchase through our links. Click here for our full disclosure policy.
Setting Realistic Expectations: How Long Did We Expect Our Painted Counters to Last?
When it comes to projects like painting countertops, establishing clear and realistic expectations is paramount. From the outset, we never envisioned painting our kitchen counters as a permanent, flawless solution that would last indefinitely. Such an expectation, in our experience, would be unreasonable for any painted surface subjected to the rigors of a busy kitchen. We understood that paint, by its nature, is not as inherently durable as natural stone or engineered quartz.
That being said, we were genuinely uncertain about the actual lifespan of the countertop paint kit we selected. While the product boasted thousands of positive reviews, most of these testimonials were typically left shortly after the project’s completion, when the countertops looked pristine and brand new. There was little long-term data available to indicate how the finish would perform after a year or more of consistent use. This lack of historical data meant we were, in essence, conducting our own long-term experiment.
The Painting Kit We Used
After extensive research and reviewing countless user experiences, this is the specific countertop painting kit we ultimately decided on for our project.
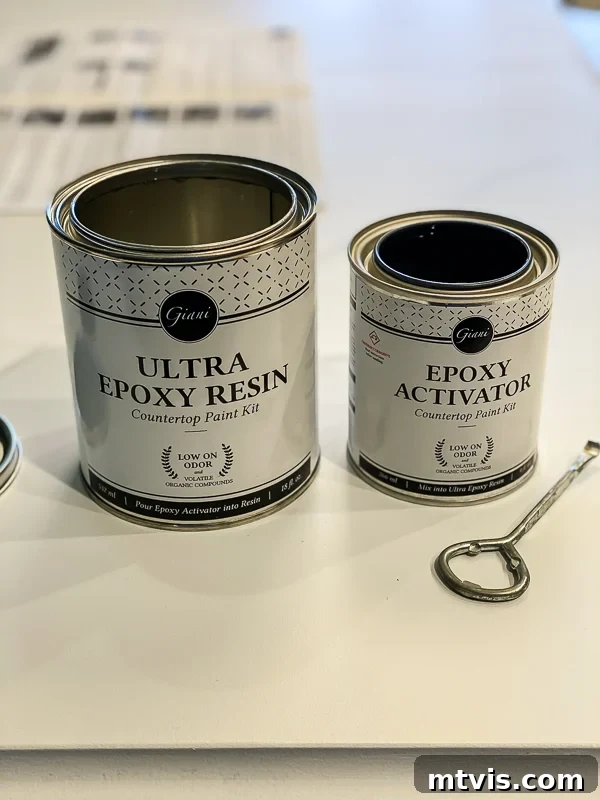
Upon completing the project, we were absolutely delighted with the initial transformation. Even though our primary motivation was a temporary aesthetic upgrade until we could afford a full replacement, the process still involved a significant amount of effort and an investment of approximately $300 for supplies. Our benchmark for success was modest: if the painted counters could withstand at least one year of wear, we would consider the time and money well spent. To our pleasant surprise and immense satisfaction, we secretly harbored hopes for them to last two years – a milestone that would truly thrill us.
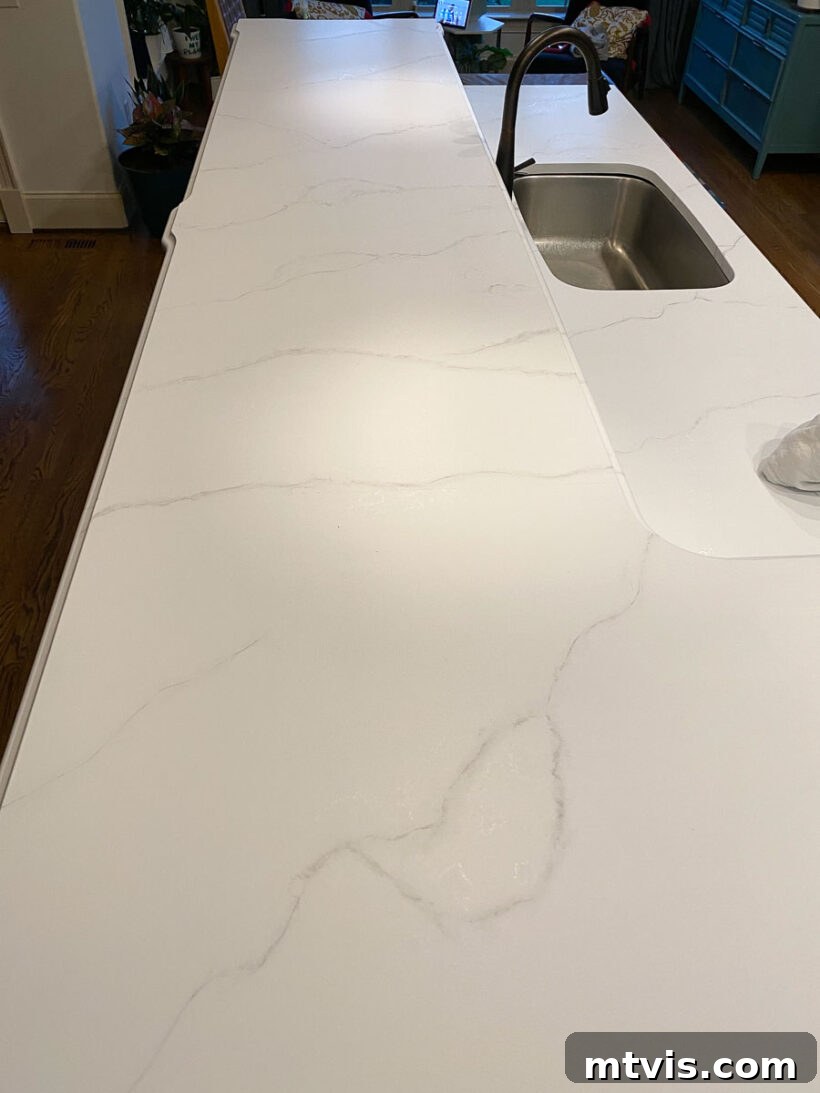
The Ultimate Reveal: How Long Did Our Painted Countertops Truly Last?
The question we receive most frequently, by far, concerns the durability of our painted countertops and their actual lifespan. Providing a straightforward answer isn’t entirely simple, as their performance evolved over time, but we’ll do our best to offer a clear and honest account. First and foremost, it’s crucial to emphasize that we did not treat our countertops with kid gloves. While we strictly adhered to the paint manufacturer’s instructions regarding hot pots and pans, our kitchen is a highly active space. We rarely dine out, preparing approximately 95% of our meals at home, which means our painted countertops endured exceptionally heavy daily use.
At the 18-Month Mark: A Period of Pristine Performance
For a remarkable 18 months, our painted kitchen counters performed beautifully, exceeding our initial expectations. During this period, we experienced no chipping, peeling, or unsightly yellowing of the countertop paint. The only minor issue that arose was the yellowing of the caulk, which we suspect was either due to the specific type of caulk used or perhaps an application error on our part. This was a superficial issue and did not detract from our overall satisfaction. We were genuinely very, very happy with their condition for a solid year and a half, a period much longer than our initial optimistic projection.

However, it was around this 18-month juncture that I began to harbor some regret regarding a specific decision: applying two coats of a satin finish Polycrylic topcoat over the epoxy resin that was included in our kit. My intention behind this additional step was to temper the very high sheen of the original epoxy resin, aiming for a more subdued, honed marble appearance. While the aesthetic result was exactly what I wanted, it introduced unforeseen challenges.
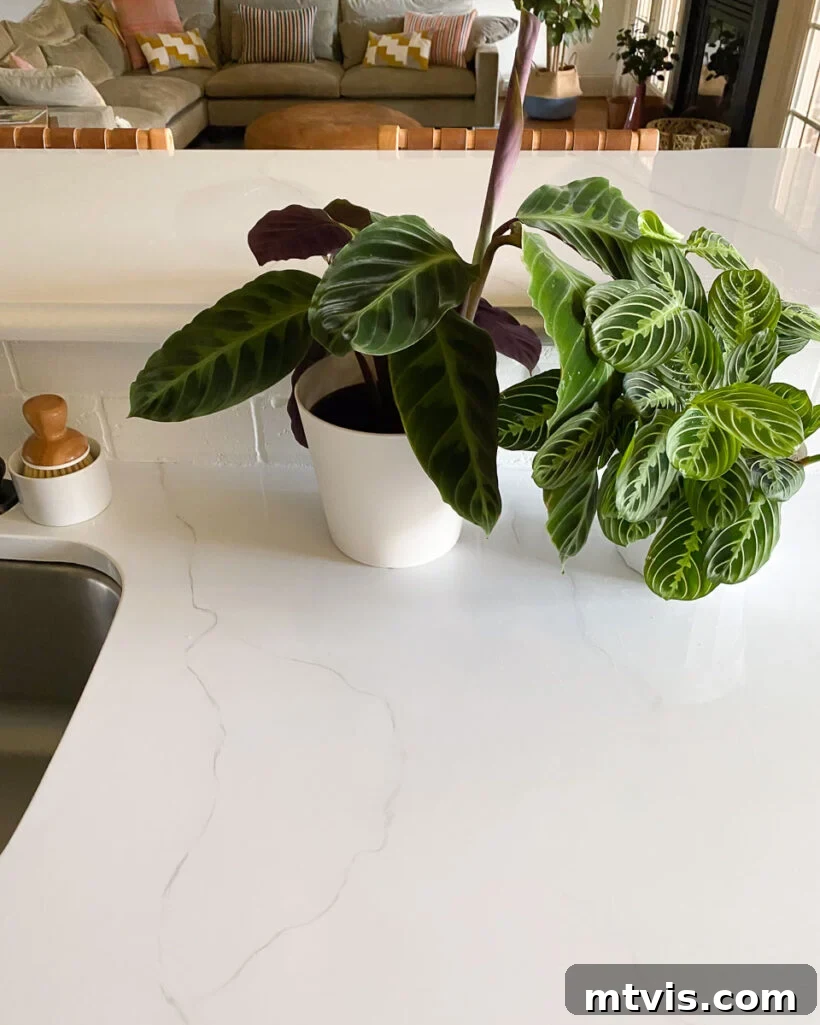
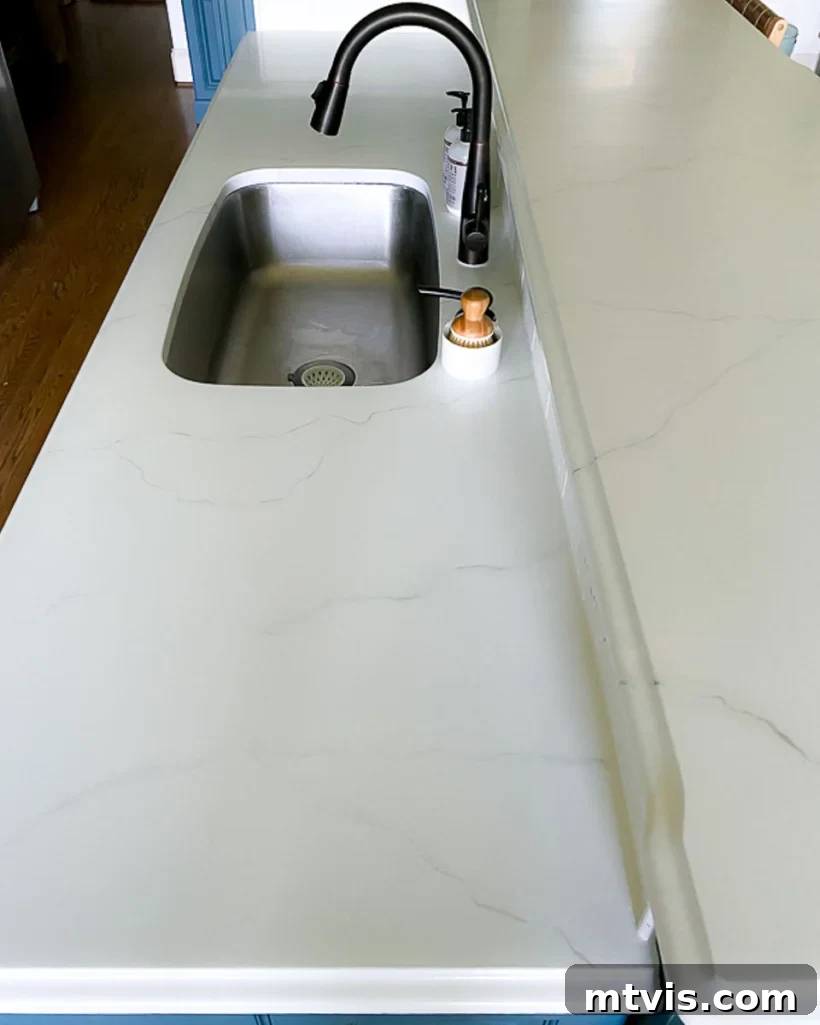
Contrary to common concerns, the polycrylic itself did not yellow. However, it proved to be more susceptible to staining than the epoxy resin alone. On one occasion, some orange peppers were inadvertently left on the counter for an extended period (a common occurrence with young children!), resulting in a faint, persistent orange stain that we couldn’t completely remove. More than once, placing a damp magazine on the surface led to ink and color transfer from the paper onto the countertop. We firmly believe that neither of these staining incidents would have occurred if we had simply left the original epoxy finish as is, without the additional polycrylic layer.
Around the 2-Year Mark: The First Significant Signs of Wear
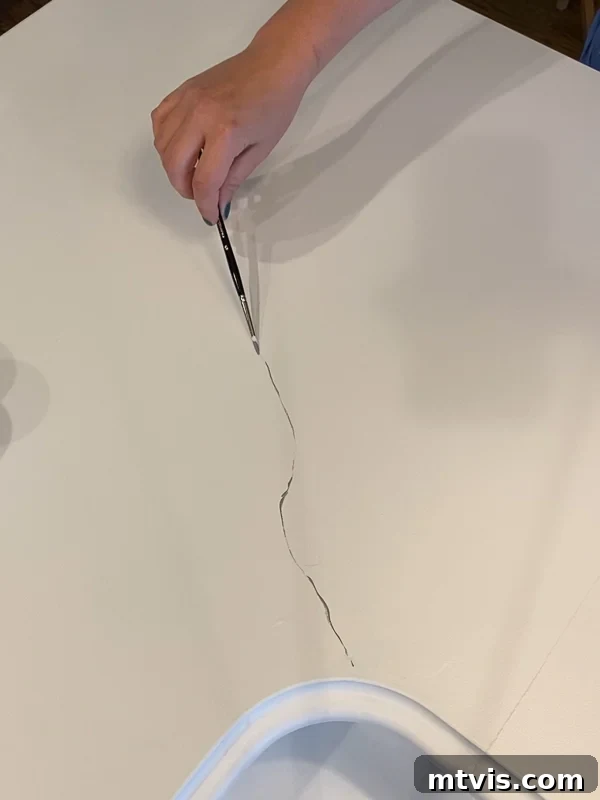
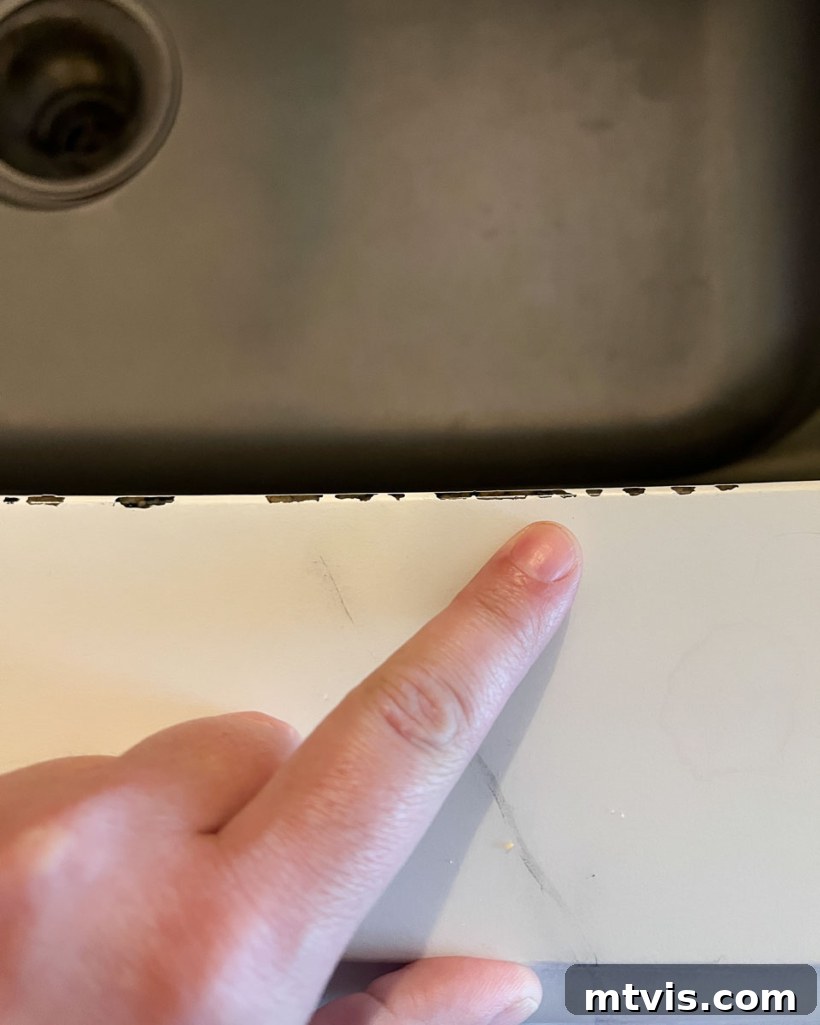
As our painted countertops approached the two-year mark, we began to observe the first notable signs of wear: chipping around the edge of our under-mount sink. This area is inherently challenging for paint and topcoat application due to its recessed nature and constant exposure to water. It’s difficult to achieve a perfectly robust coating of the protective epoxy resin in this high-traffic, wet zone. We theorize that if we had a drop-in sink, which provides a more easily protected edge, this issue might have been entirely avoided. The chips around the under-mount sink, though localized, became bothersome due to their increasing number and visibility. This area quickly became the most vulnerable point of the entire surface.
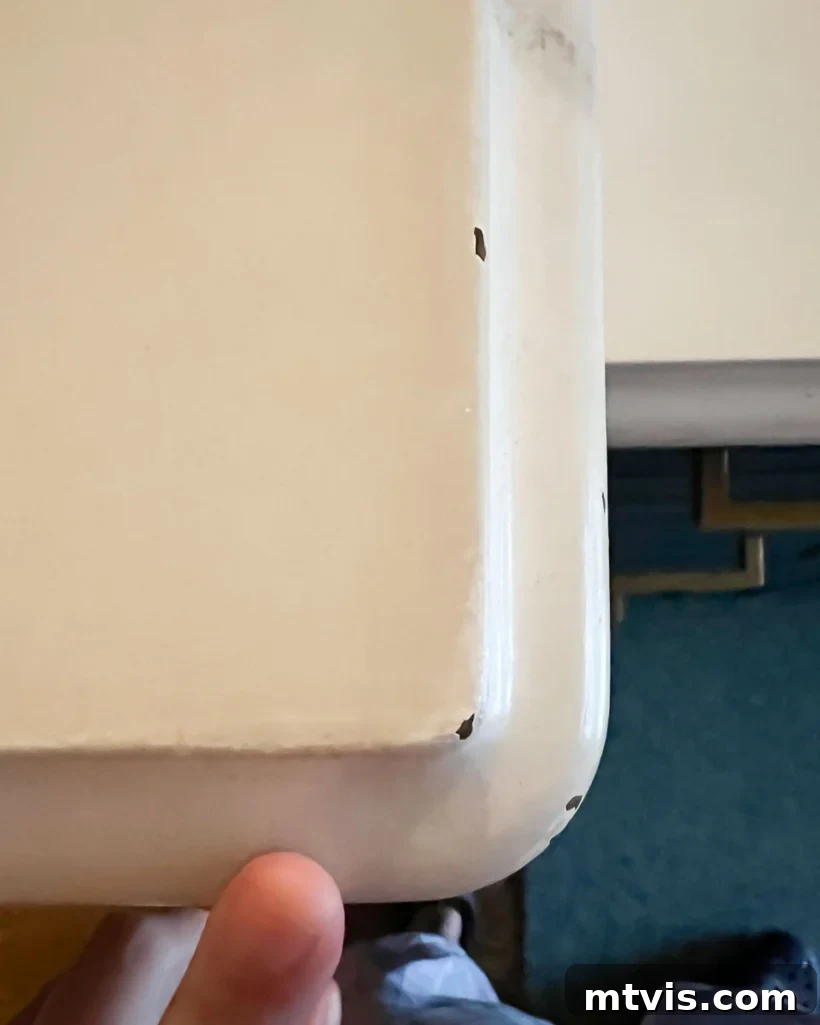
Concurrently, a few small chips also started appearing along certain countertop edges, particularly those areas that frequently encountered accidental bumps or dings from pots, pans, or kitchen utensils. However, these edge chips were far less prominent. If you were to walk into our kitchen, you would truly have to search intently to spot them, and they did not significantly impact our overall satisfaction with the countertops.
The Final Assessment: After 3 Years and 5 Months of Unrelenting Use
We continued to live with and heavily use our painted countertops until August of 2024, marking an impressive duration of 3 years and 5 months. At that point, our kitchen underwent a complete transformation as we embarked on a full gut renovation, a decision that transcended mere countertop replacement. The following video offers an honest and detailed look at the condition of our countertops after nearly three and a half years of continuous, demanding use.
The video below gives you a good look at how the countertops looked after nearly 3 1/2 years of heavy use!
Video: Our Painted Kitchen Countertops After 3 1/2 Years
The photograph below provides a clear view of the chipping around the sink, captured just one day before our kitchen demolition in August 2024. While there were certainly fewer chips at the two-year mark, their presence became increasingly evident over time.
Below, you can observe some of the minor chips along the edges of our painted counters. Again, this image was taken in August 2024, three years and five months after the painting project was completed. These chips, while present, were largely cosmetic and did not compromise the overall functionality of the surface.
The Resounding Answer: Would I Paint Our Kitchen Countertops Again?
Absolutely, without a moment’s hesitation. As previously stated, our initial expectations for painted kitchen counters were not for a permanent, flawlessly enduring surface. However, their remarkable performance and longevity, especially considering the project’s affordability, left us incredibly satisfied. The value derived from this budget-friendly update far exceeded our investment of time and money.
Our satisfaction was so profound that we subsequently replicated this DIY success in other areas of our home. We painted the countertops in our laundry room and both of our daughters’ bathrooms, demonstrating our confidence in the method and its results. This widespread application throughout our home serves as a strong testament to our positive experience with painted countertops.
Who Should Consider Painting Their Kitchen Counters? And Who Shouldn’t?
Painting your kitchen countertops is an excellent solution for some, but not for everyone. It’s crucial to assess your personal priorities and expectations before embarking on this DIY project.
You Should Probably NOT Paint Your Kitchen Counters If:
- You are seeking flawlessly perfect kitchen counters that will remain pristine for two or more years without any imperfections. No matter the products, kit, or system you use, it is highly improbable that a painted surface will remain entirely blemish-free indefinitely, especially under daily use.
- You desire the ultimate in long-term durability and investment-grade material, comparable to natural stone or high-end engineered quartz.
- You are unwilling to exercise any degree of care, such as avoiding leaving damp items or specific foods on the surface for extended periods.
You SHOULD Highly Consider Painting Your Kitchen Counters If:
- You are looking for a highly budget-friendly method to dramatically refresh the look of your existing countertops without the expense of a full replacement.
- You need a temporary yet attractive solution to update your kitchen for a couple of years, perhaps while saving for a more permanent renovation.
- You are a DIY enthusiast who enjoys hands-on projects and takes pride in transforming your home on a budget.
- You are a renter looking for a reversible or low-commitment way to personalize your kitchen.
- You are staging a home for sale and want to enhance its appeal with updated countertops without significant investment.
Interestingly, we also believe that painting your counters could even function as a permanent solution, provided you are prepared to repeat the painting process every few years. Had we not planned for a full kitchen demolition, when we started noticing chips around the two-year mark, we would have readily purchased another countertop paint kit and reapplied the finish. This relatively minor refresh would have restored them to a beautiful, brand-new appearance. However, since we knew our countertops were destined for removal, repainting and recoating them again didn’t make practical sense.
Key Takeaways: What Would I Do Differently Next Time?
As hinted at earlier, there’s one significant modification I would make if I were to tackle this project again. While I would absolutely choose the same highly effective countertop painting kit, I would unequivocally forgo applying a satin polycrylic over the epoxy resin finish. Although I adored the way the polycrylic successfully dulled the very shiny surface, achieving a more realistic, honed marble aesthetic, it regrettably introduced several issues we believe would not have occurred with the epoxy resin topcoat alone. For a detailed explanation of these issues, please refer back to the “At the 18-month Mark” section above.
Instead of the polycrylic, my revised approach would involve applying an additional, perhaps slightly thicker, coat of the epoxy resin provided in the kit. Once fully cured, I would then lightly sand the epoxy to achieve that desirable honed, less reflective marble finish. The amount of sanding required for this aesthetic adjustment would be minimal and would certainly not compromise the protective thickness of the epoxy resin topcoat, especially with an extra layer applied for added security. Therefore, if you, like me, are not entirely fond of the inherent glossy finish of epoxy resin, I strongly recommend trying this method of an extra epoxy coat followed by gentle sanding, and skipping the satin polycrylic altogether.
We genuinely hope this comprehensive post has been helpful in your decision-making process regarding whether or not to paint your counters. While it may not be the perfect solution for every individual or every kitchen, it proved to be an outstanding and highly effective option for us to significantly upgrade the look of our counters prior to undertaking a much larger renovation project. We would, without a doubt, do it again in a heartbeat!
More Paint Posts
SEE ALL PAINT POSTS
-
9 Life-Changing Painting Hacks Everyone Should Know
-
How Durable are DIY Painted Kitchen Cabinets?
-
How to Paint Kitchen Cabinets (From a DIYer Who Has Done it 3 Times)
-
How Have Our Painted Countertops Held Up?
-
How to Paint IKEA Furniture and Mistakes to Avoid
-
How Much Paint Do I Need for My Room?
Curious about our systematic approach to transforming rooms and spaces in our home? Explore Designer in a Binder® for an affordable and simple guide to home decoration.
For exclusive content, behind-the-scenes glimpses, and insider tips, be sure to subscribe to our newsletter before you leave!
Sign up for our newsletter to get exclusive content and behind-the-scenes sneak peeks!