As an interior stylist and seasoned DIY enthusiast with over two decades of experience, the project I’m most frequently asked about is, without a doubt, painting kitchen cabinets. It’s no surprise, as transforming your kitchen cabinets is hands down one of the most impactful and budget-friendly ways to update your kitchen. However, navigating the sea of conflicting advice on the “best” way to paint cabinets, which paint to use, or whether a DIY job will truly last, can be overwhelming. It’s enough to make anyone’s head spin with uncertainty.
Let me assure you, I’ve gathered a wealth of knowledge on painting kitchen cabinets through direct experience. Why? Because I have personally painted kitchen cabinets three different times, utilizing two distinct paints and methodologies. Each time, I deliberately chose methods that required the absolute least amount of prep work, making the process as quick and easy as possible without sacrificing quality. Spoiler alert: I have never once regretted these decisions! On every occasion, the results looked professionally done and proved to be incredibly durable, standing the test of time and heavy daily use.
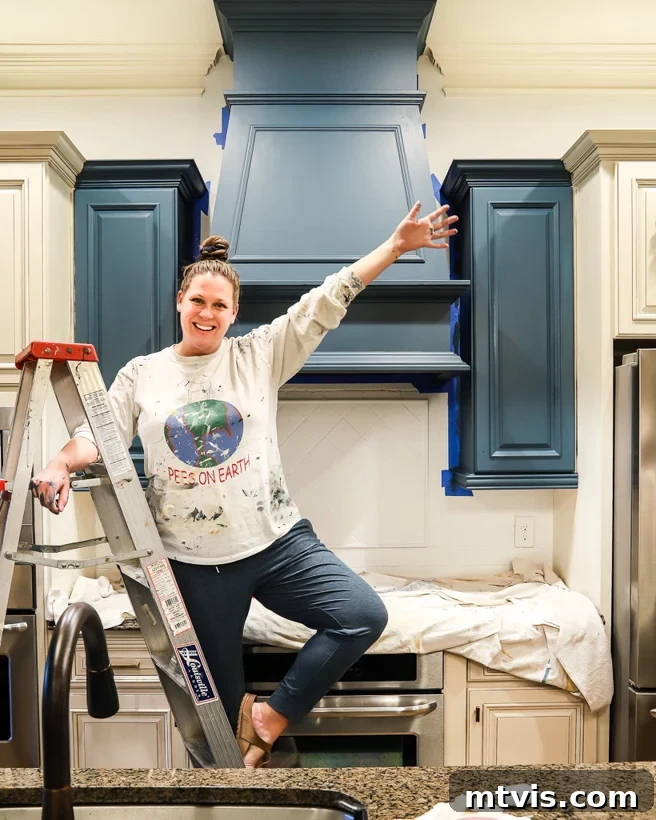
The primary goal of this comprehensive guide is to meticulously walk you through the two distinct methods I’ve successfully employed to paint kitchen cabinets on three separate occasions. I will openly share the specific pros and cons of each approach, empowering you to choose the best option for your own home renovation project. If you’re still debating whether painting your kitchen cabinets is the right decision for you, I highly recommend starting with my detailed post: “Should I Paint My Kitchen Cabinets? Crucial Questions to Ask Before Getting Started” – it offers invaluable insights to help you make an informed choice!
Fair warning! Since I’m providing both a concise overview and the full, step-by-step tutorials for each method, this is quite a detailed post. But don’t worry, you can easily navigate using the table of contents below to jump directly to the sections most relevant to your needs – it’s much quicker and more efficient than endless scrolling!
Table of Contents
- An Overview of the Two Proven Methods for Painting Kitchen Cabinets
- Method #1: Using General Finishes Milk Paint (No Sanding or Priming)
- Method #2: Using Fusion Mineral Paint (Minimal Sanding, No Priming)
- Full Tutorial: Paint Kitchen Cabinets Without Sanding or Priming Using General Finishes Milk Paint
- Essential Materials Needed for Method #1
- Step-by-Step Guide for General Finishes Milk Paint Method
- Full Tutorial: Paint Kitchen Cabinets with Minimal Prep Work Using Fusion Mineral Paint
- Essential Materials Needed for Method #2
- Step-by-Step Guide for Fusion Mineral Paint Method
- Which of These Kitchen Cabinet Painting Methods is Best for You?
- Frequently Asked Questions about Painting Kitchen Cabinets
An Overview of the Two Proven Methods for Painting Kitchen Cabinets
Before diving into the detailed tutorials, let’s get a quick understanding of the two highly effective methods I’ve successfully implemented. Both offer professional results and exceptional durability, but with slightly different approaches to preparation and paint choice.
Method #1: Using General Finishes Milk Paint – The No-Sanding, No-Priming Approach
Method #1 Quick Facts
- Time to complete: Approximately 4 days, including drying times between coats. This allows for thorough curing and maximum durability.
- Durability: Exceptional. This method held up absolutely perfectly after more than 5 years of heavy daily kitchen use, proving its long-lasting quality.
- Paint used: General Finishes Milk Paint, a premium-quality acrylic paint known for its excellent adhesion and vibrant finish.
- Overview of the process:
- Carefully removed all cabinet doors and drawer fronts for easier, more even application.
- Strategically, we did not pack the contents of our cabinets, saving significant time and effort.
- Thoroughly cleaned all cabinetry surfaces to ensure proper paint adhesion.
- Crucially, we did not perform any sanding or priming, relying on the paint’s inherent properties and a deglosser.
- Applied 3 coats of a high-quality protective top coat for ultimate durability and a professional finish.
- Pros: Unbelievably durable finish; eliminates the tedious and messy steps of sanding and priming (especially beneficial for wood cabinets); offers superior coverage and adhesion, even on challenging surfaces.
- Cons: The color palette is not as extensive as some other brands; requires three coats of top coat for optimal results, which adds to the project time; the top coat is best applied with doors laid flat to prevent drips and ensure a smooth, even finish, necessitating a larger workspace.
If I were to encapsulate this first method in a single, powerful sentence, it would be this: Reasonably quick and easy to execute, delivering the most durable finish imaginable! This approach combines efficiency with long-term resilience, making it a standout choice for anyone seeking lasting results. You can jump directly to the comprehensive tutorial for this specific method of painting your kitchen cabinets here.
My inaugural foray into painting kitchen cabinets dates back to 2014. After an extensive period of research and deliberation, I made a bold decision: to paint our kitchen cabinets without any sanding or priming whatsoever. Many people around me expressed skepticism, convinced I was making a grave error. Yet, the final results were not only stunningly gorgeous but also proved to be far more durable than even we had anticipated. This experience truly transformed my perspective on DIY cabinet painting.
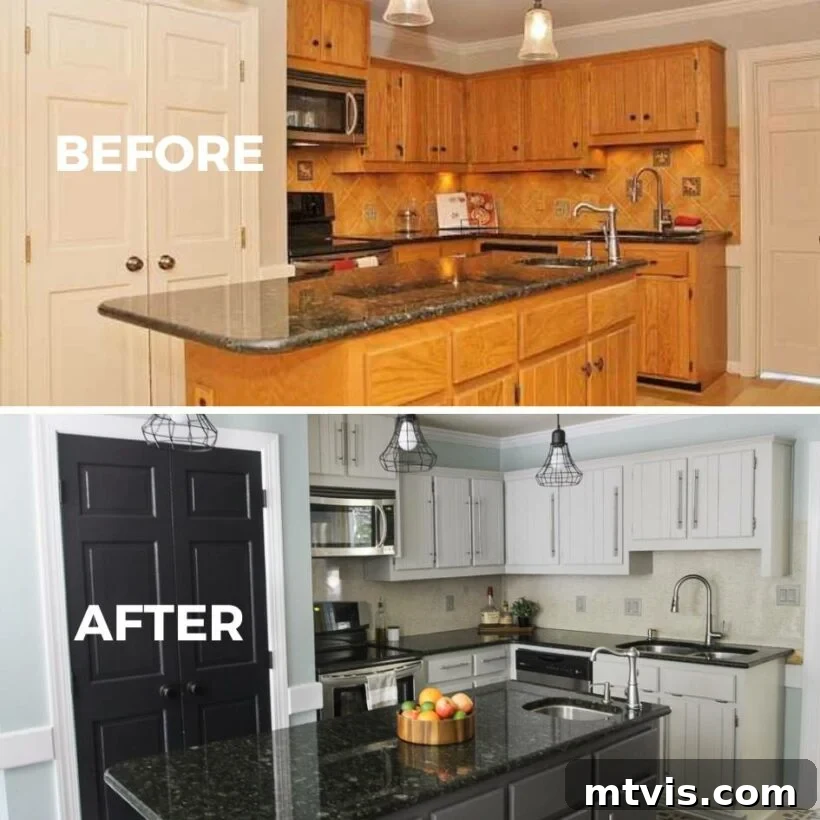
The success of this project quickly went viral, inspiring thousands of people to paint their cabinets using the exact same method. I’m incredibly happy to report that they’ve achieved equally amazing, long-lasting results! This widespread adoption and satisfaction further validate the effectiveness and simplicity of this no-sanding, no-priming technique. The quick facts above provide a concise summary, but the full tutorial below offers all the necessary details.
Method #2: Using Fusion Mineral Paint – Minimal Sanding, No Priming for Speed and Style
Method #2 Quick Facts
- Time to complete: Remarkably fast, often taking only about 2 days from start to finish. This is ideal for quick kitchen makeovers.
- Durability: Highly impressive. This method successfully withstood over 3 years of heavy household use, demonstrating excellent resilience.
- Paint used: High-quality mineral paint, specifically Fusion Mineral Paint, celebrated for its built-in topcoat, extensive color range, and superior adhesion.
- Overview of the process:
- Crucially, we did not remove any cabinet doors or drawer fronts, which significantly accelerated the project.
- Contents of the cabinets were also left undisturbed, saving immense time and reorganization effort.
- All cabinetry surfaces were meticulously cleaned to prepare for painting.
- A quick, light “scuff-sanding” was performed on all cabinetry to enhance paint adhesion without requiring heavy labor.
- No primer was necessary, thanks to the self-priming properties of Fusion Mineral Paint.
- Applied 2 coats of a protective topcoat (Fusion Mineral Paint Ultra Guard) for added scratch and water resistance.
- Pros: Offers a vast array of stunning paint colors, allowing for greater design flexibility; requires minimal prep work, making it incredibly fast and easy; the paint itself has excellent coverage and a smooth finish.
- Cons: While very durable, it’s considered slightly less indestructible than Method #1, making Method #1 preferable for “indefinite” longevity. However, it still holds up exceptionally well for many years.
Summarizing this second transformative method in a single sentence, it is: Faster, significantly easier, and still wonderfully durable! This approach is perfect for those who want a rapid yet lasting kitchen refresh. You can find the complete tutorial for this efficient cabinet painting method by clicking here.
My second experience painting kitchen cabinets took place in 2019, when I helped my friend Thea update her kitchen. Her kitchen was in dire need of some serious tender loving care, and her budget was quite restrictive. Driven by my passion for sharing practical DIY expertise and valuable tips on my blog, I was eager to experiment with different products and a new methodology. My hope was to discover and share yet another incredibly easy and effective way for you, my readers, to paint your own kitchen cabinets with confidence.
Consequently, I immersed myself in extensive research once again, seeking out the best paint for kitchen cabinets that aligned with our goals for speed and durability. We ultimately selected a different paint product, which, as expected, led to a slightly varied preparation process. Despite these differences, the outcome was equally gorgeous and, importantly, nearly as durable as my first venture, proving its worth for a busy family kitchen.
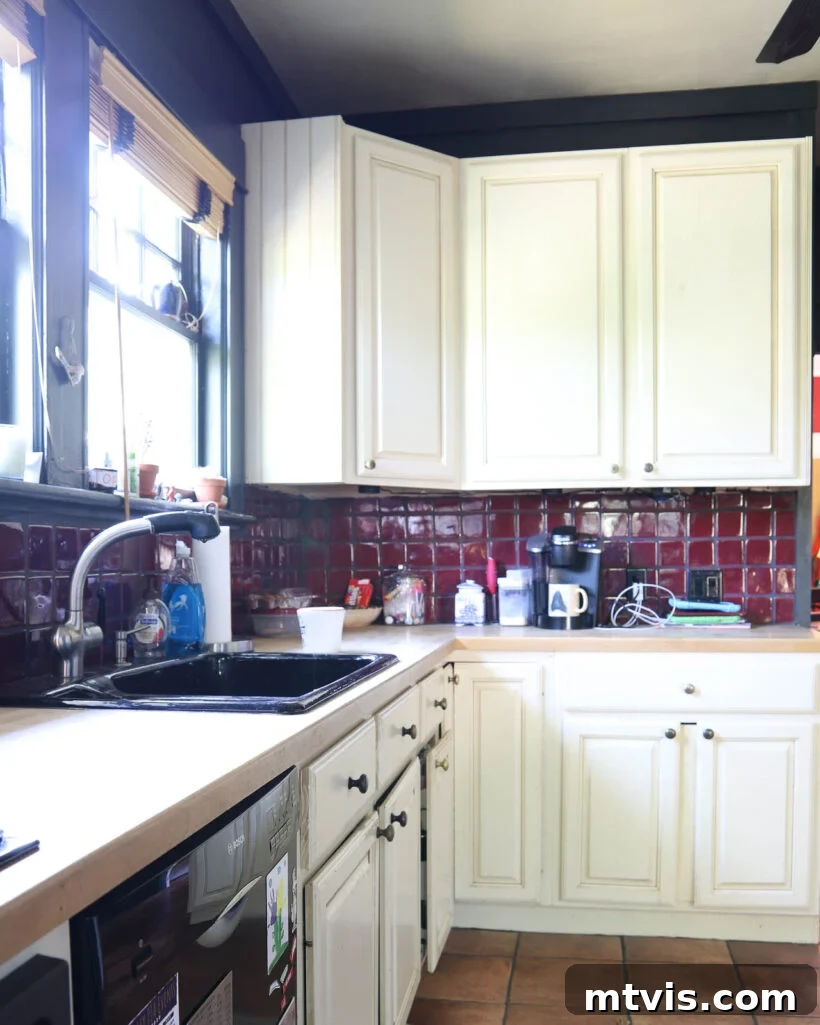
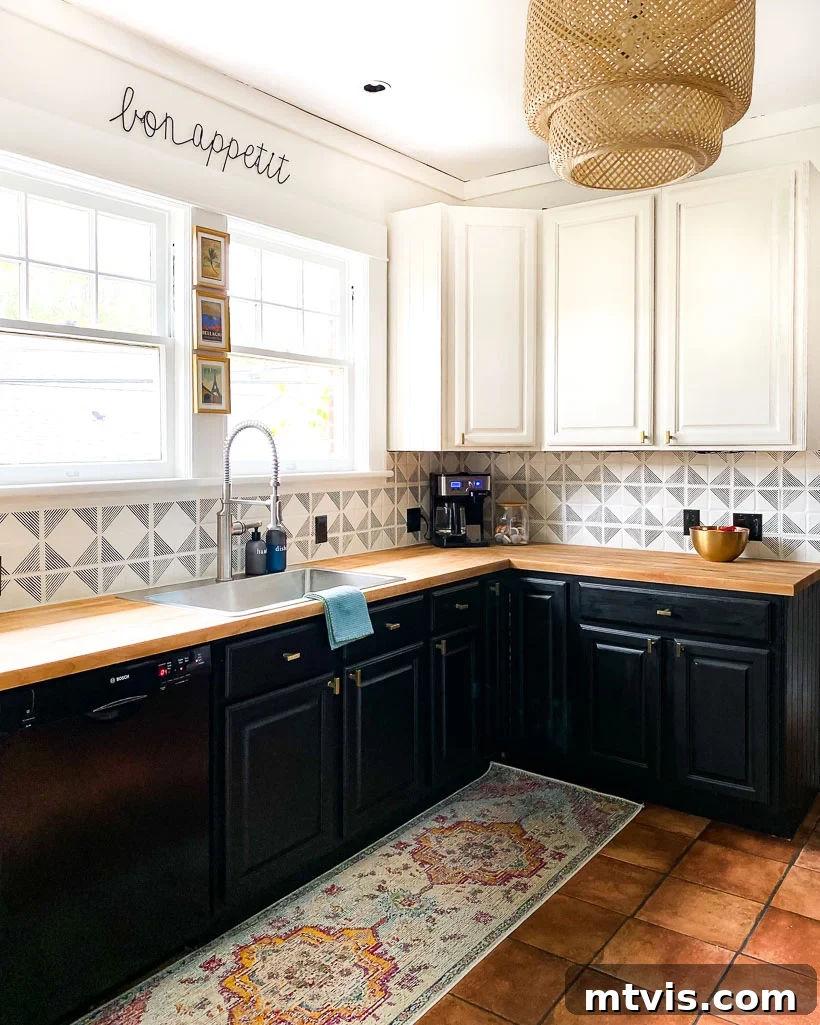
I was so thoroughly impressed with the efficiency and results of this method that I decided to use it once more in 2021, this time for painting the kitchen cabinets in my own home! This further solidifies my confidence in its effectiveness and ease of application. The quick facts highlighted earlier provide a snapshot of this method’s advantages. Now that you’ve grasped an overview of both the innovative methods I’ve used, let’s delve into the comprehensive, step-by-step tutorials for each kitchen cabinet painting technique!
Full Tutorial: How to Paint Kitchen Cabinets Without Sanding or Priming Using General Finishes Milk Paint
This method leverages the exceptional properties of General Finishes Milk Paint to achieve a robust, beautiful finish with minimal effort. It’s ideal for those who dread the thought of sanding and priming but still demand professional, long-lasting results. Follow these steps meticulously for a successful cabinet transformation.
Essential Materials Needed for Method #1
- TSP (Trisodium Phosphate) Cleaner: An industrial-strength cleaner crucial for thoroughly degreasing and cleaning cabinet surfaces, ensuring optimal paint adhesion.
- Liquid Deglosser or Liquid Sandpaper: This product effectively dulls the existing finish, creating a receptive surface for paint without the need for abrasive sanding. This is the exact deglosser we used, and it performed admirably.
- General Finishes Milk Paint: A high-quality acrylic paint known for its excellent coverage and self-leveling properties. For our project, we used 3 quarts of “Seagull Gray” for the perimeter cabinets and 2 pints of “Driftwood Gray” for the island, demonstrating that a little goes a long way.
- General Finishes High-Performance Top Coat: This top coat is vital for enhancing durability and protecting your painted surfaces. We opted for the “flat” finish, as it minimizes light reflection, making the wood grain less prominent. We applied 3 coats, consuming about 1/2 a gallon for all cabinets.
- 6-inch Paint Foam Roller and Tray: Ideal for achieving a smooth, even finish on flat surfaces without brush marks.
- Angled Paint Brush: Essential for precision work, cutting in around edges, and reaching intricate details on your cabinet frames and doors.
- Tack Cloth: A specialized cloth used to pick up fine dust particles after cleaning or light sanding, ensuring a pristine surface for painting.
- Painter’s Tape: For masking off areas you don’t want to paint, like walls, hinges, or the inside of cabinet boxes (optional, depending on your confidence with a brush).
- OPTIONAL BUT HIGHLY RECOMMENDED: Painter’s Pyramids: These elevate your cabinet doors, allowing you to paint both sides and edges without waiting for one side to dry, significantly speeding up the process. I regret not having these for my first project!
- Drop Cloths or Cardboard: To protect your floors and surrounding areas from paint drips and spills.
- Safety Gloves: Especially when working with deglosser and strong cleaners.
- Screwdriver or Drill: For easy removal and re-installation of cabinet hardware, doors, and drawers.
Step-by-Step Guide for General Finishes Milk Paint Method
Follow these steps carefully to achieve a flawless, durable finish on your kitchen cabinets:
Step 1: Test Paint Colors Extensively
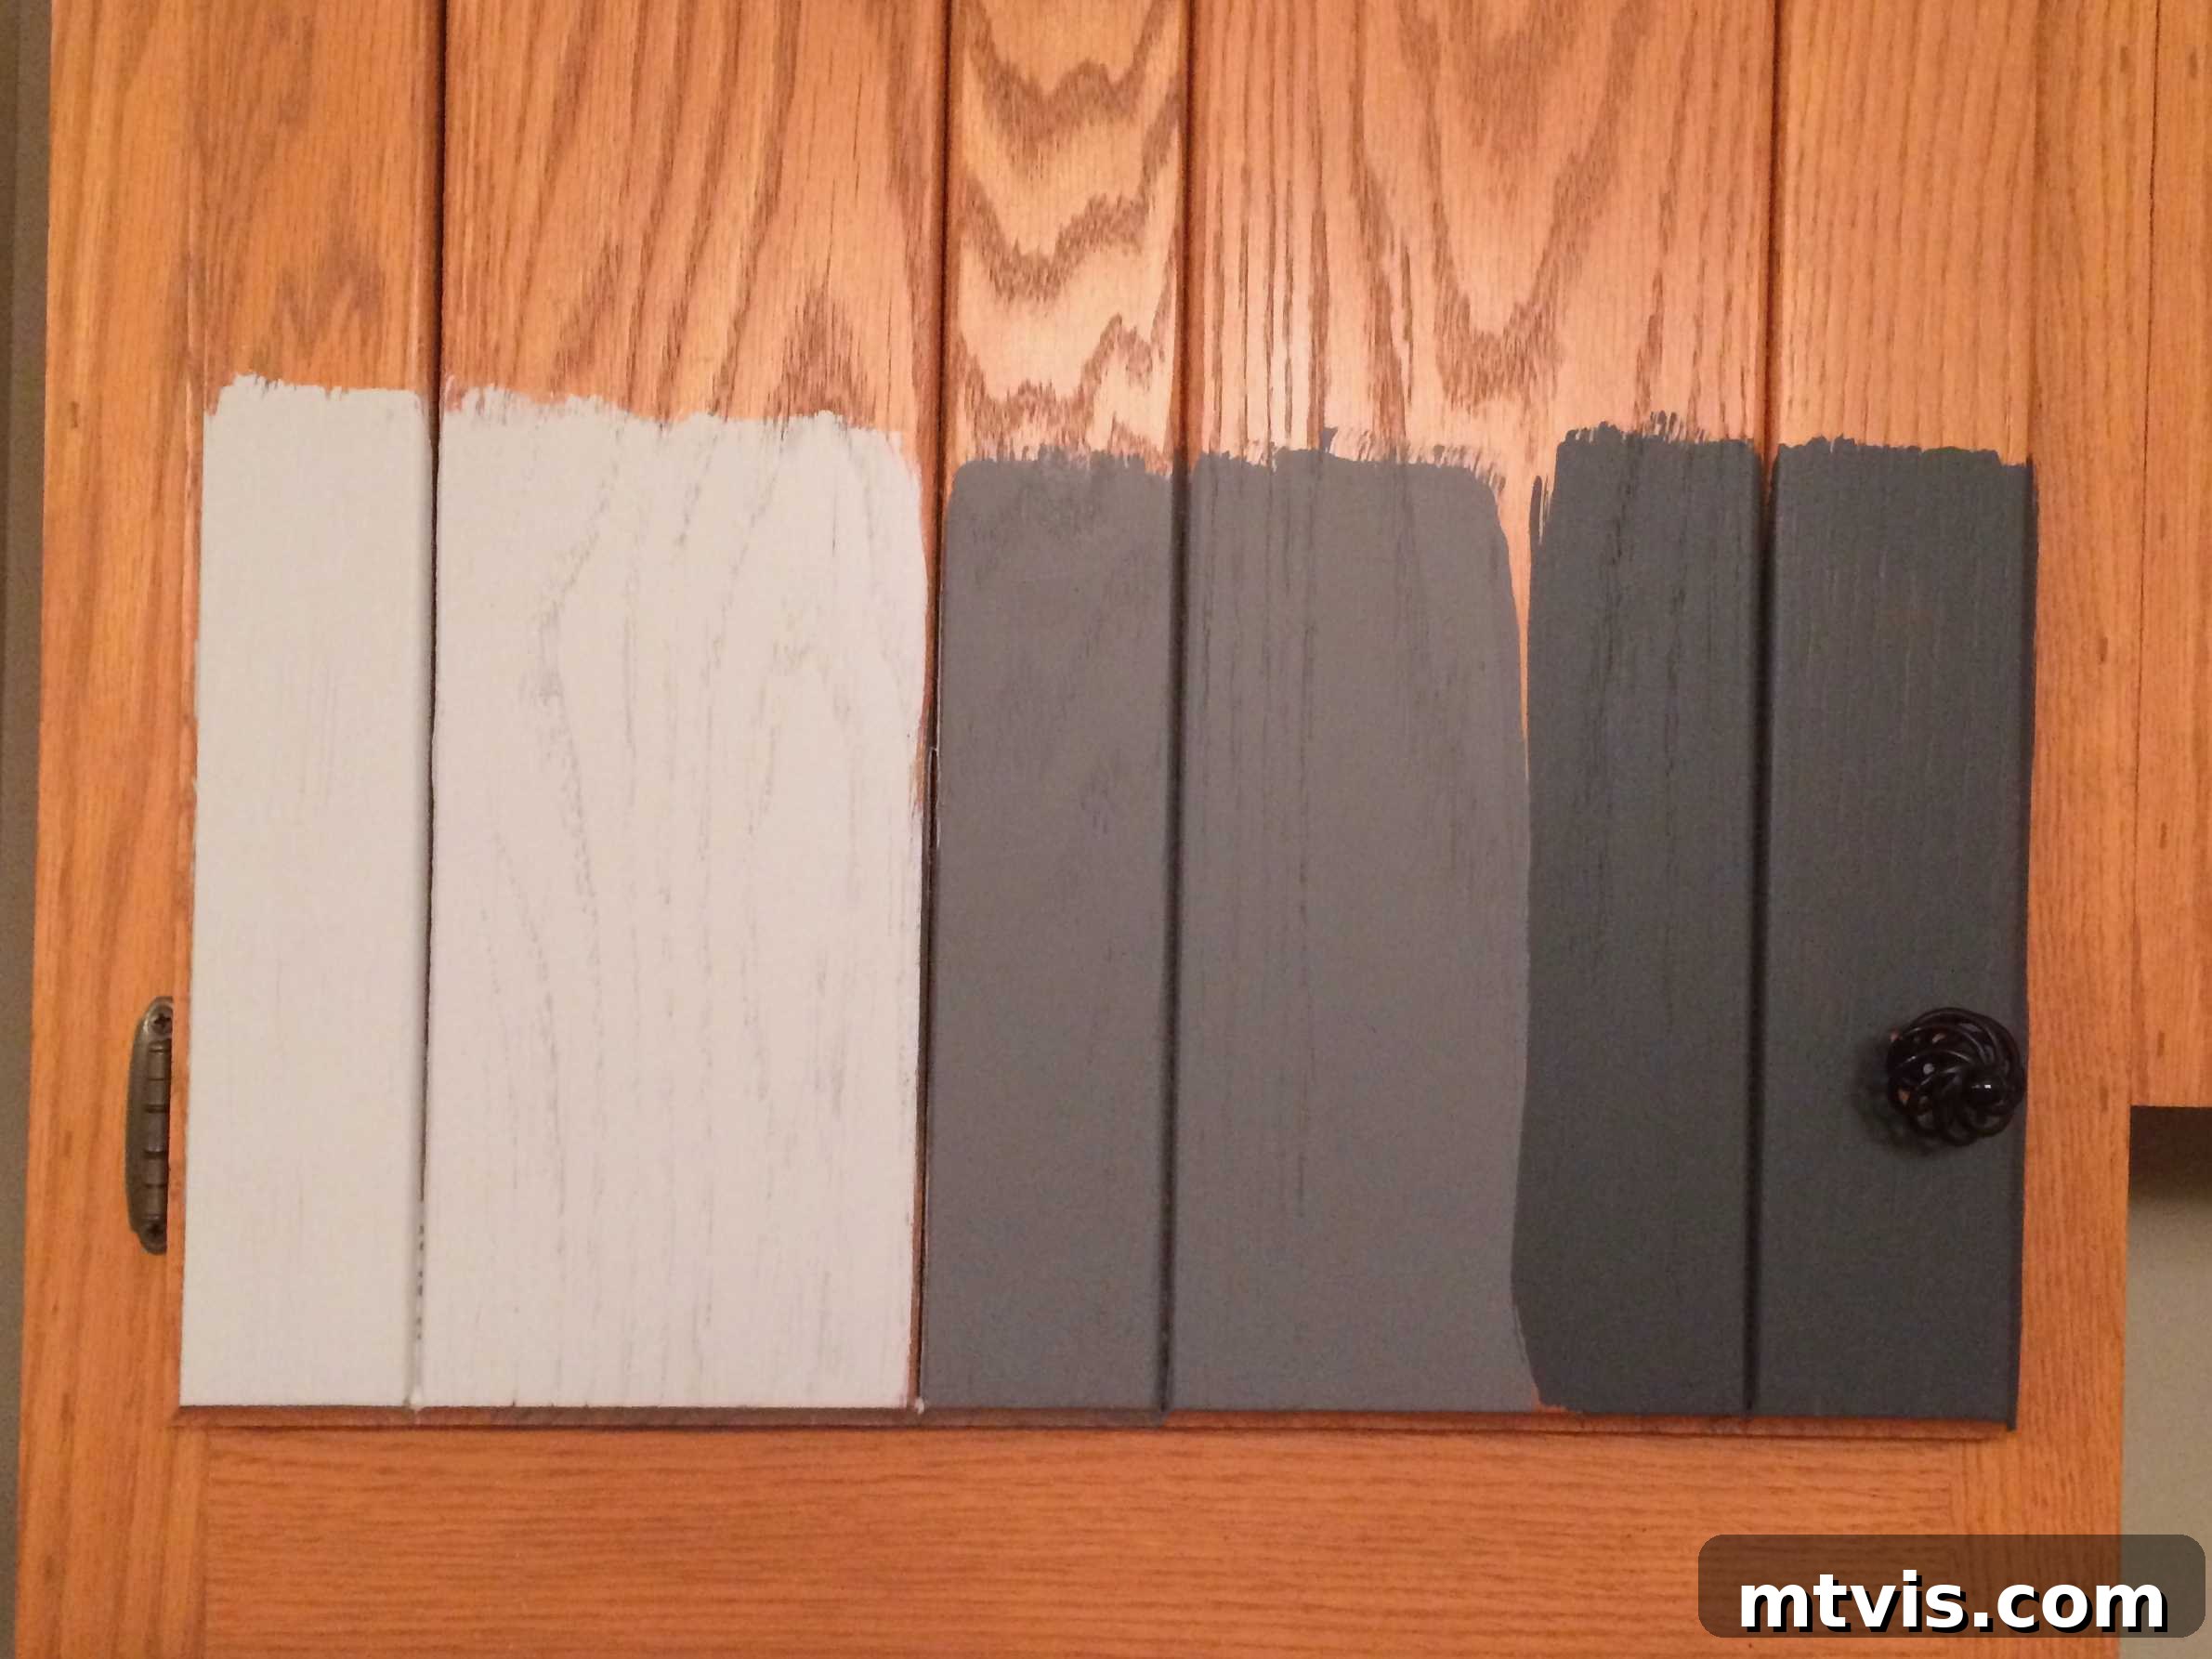
Before committing to a color, it is absolutely essential to test several paint swatches on your actual cabinets. General Finishes doesn’t typically offer small sample pots, but you can purchase pints here. This investment is well worth it, as paint colors can appear drastically different in your home’s unique lighting conditions and against existing decor. Apply a few test swatches to an inconspicuous area on one of your cabinet doors. Observe them at different times of the day to see how they interact with natural and artificial light. I personally tested six different colors as part of my Total Cabinet Transformation video training series, which you can access for FREE when you subscribe here.
Step 2: Thoughtfully Remove Hardware, Doors, and Drawers
Carefully detach all existing hardware (knobs, pulls, hinges), then remove your cabinet doors and drawer fronts. To keep things organized and ensure smooth reassembly, label each door and drawer front with a small piece of painter’s tape indicating its original location (e.g., “Upper Left, Door 1” or “Drawer under sink”). This step is crucial for achieving a factory-like finish, as it allows for comprehensive and even paint application. A significant time-saver: you do not need to empty or pack the contents of your cabinets, as you’ll only be painting the exterior surfaces of the doors (front and back) and the visible frame of the cabinet boxes. While you can remove just the drawer fronts from their boxes, I’ve found it generally easier to handle and paint the entire drawer assembly as an intact unit.
Step 3: Meticulously Clean Your Cabinetry
The importance of this step cannot be overstated. Thoroughly clean all surfaces of your cabinet frames, doors, and drawer fronts using a powerful cleaner like TSP (Trisodium Phosphate). Kitchen cabinets accumulate layers of grease, grime, and food residue over time, which can severely compromise paint adhesion. Follow the manufacturer’s instructions for mixing and applying TSP. Use a clean cloth or sponge, scrubbing gently but effectively. Rinse thoroughly with clean water and a fresh cloth to remove all cleaning solution residue. Allow everything to dry completely before proceeding. A pristine surface is foundational for a durable paint job.
Step 4: Patch and Spot Sand Any Imperfections (If Necessary)
Inspect your cabinet surfaces for any existing damage, such as dings, scratches, or old hardware holes you won’t be reusing. Fill these imperfections with a high-quality wood filler or spackle. Allow the filler to dry completely according to product instructions. Once dry, gently spot sand only the repaired areas with fine-grit sandpaper (around 220-grit) until they are perfectly smooth and flush with the surrounding surface. Remember, you are NOT sanding the entire cabinet; only the repaired spots. After sanding, meticulously wipe away all dust using a tack cloth to prevent any particles from getting embedded in your paint finish.
Step 5: Apply Liquid Deglosser to All Cabinet Surfaces
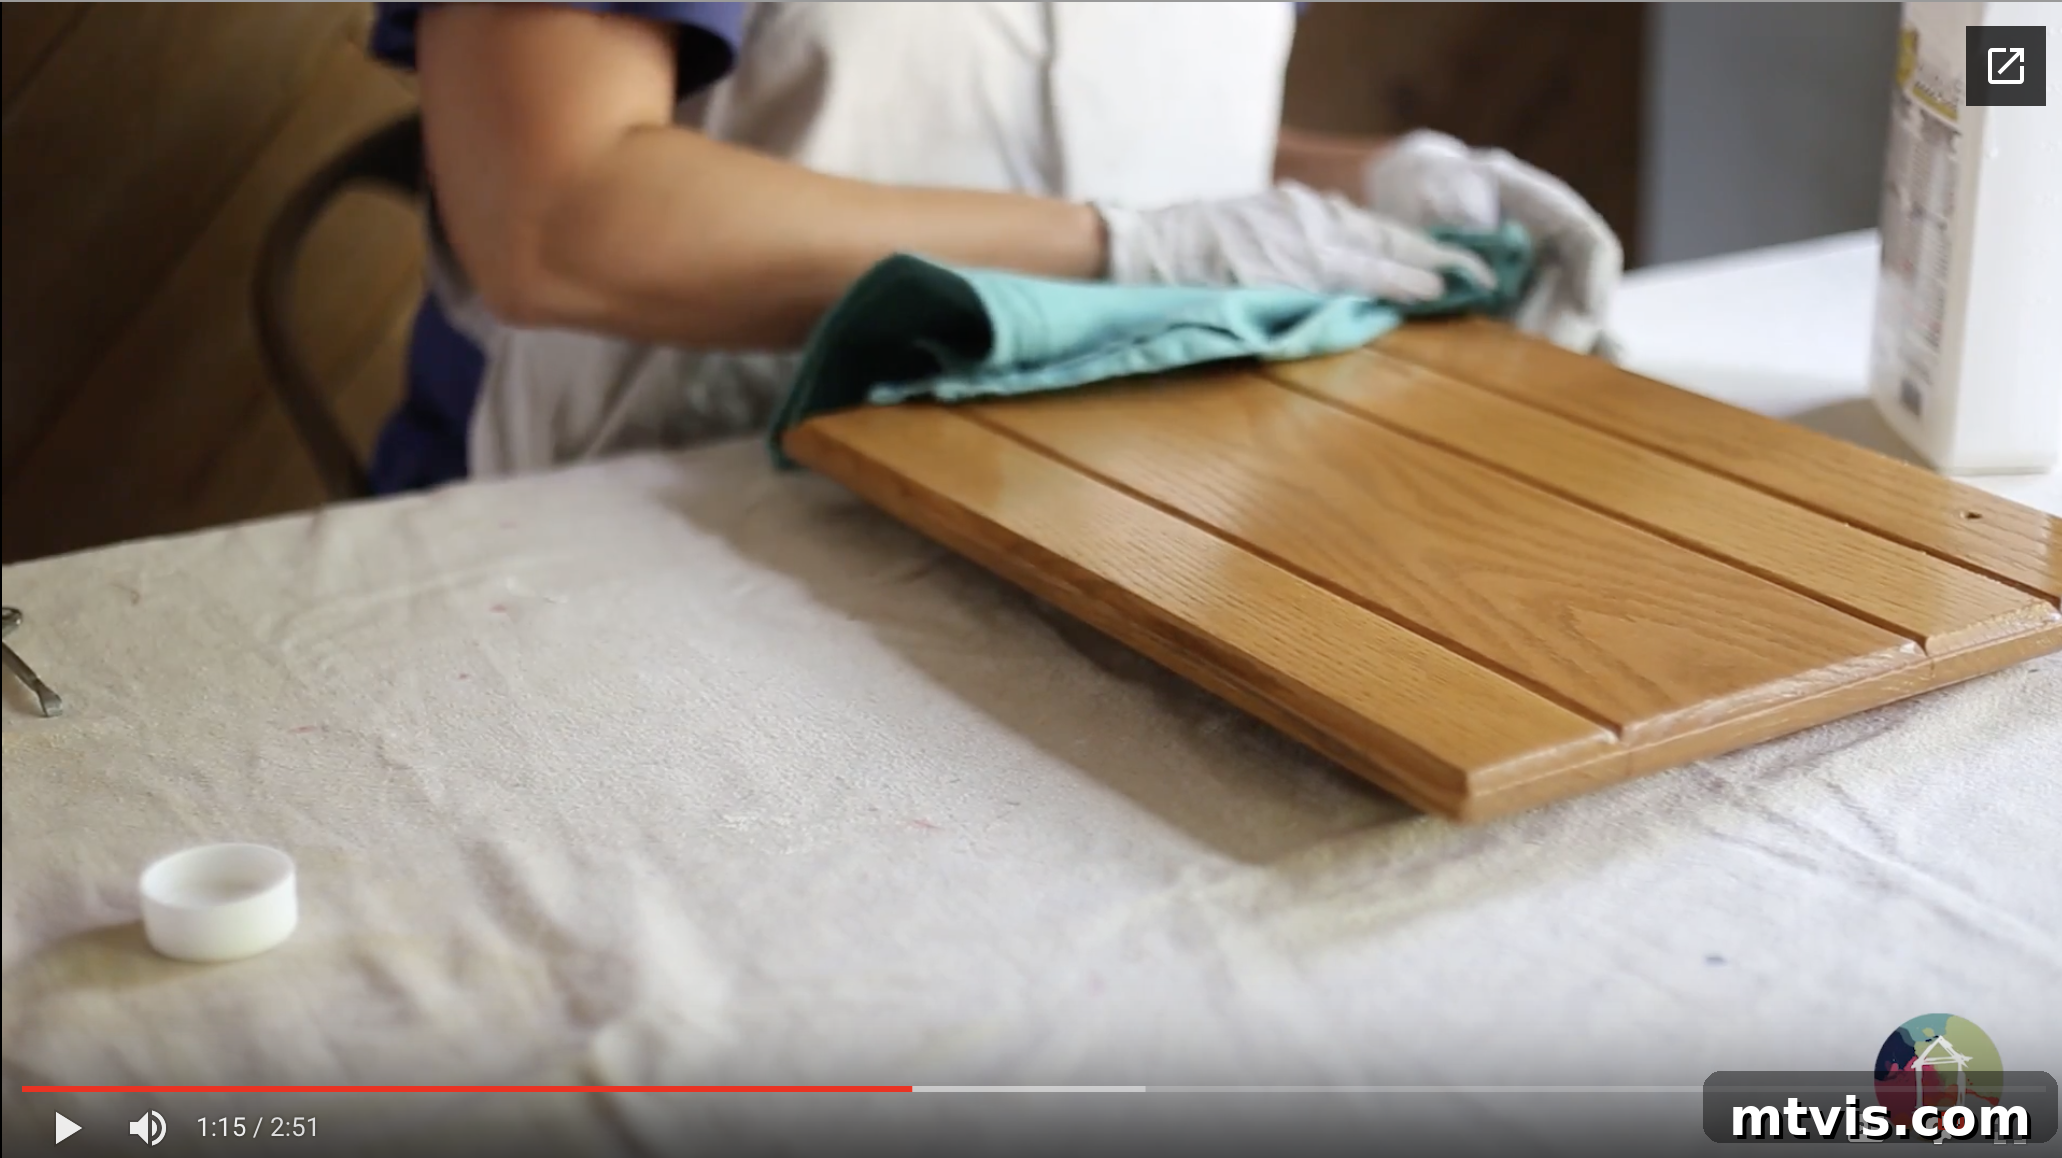
This is a critical step that replaces traditional heavy sanding. Using a clean rag, wipe down every surface that will be painted – the visible frames of your cabinet boxes, and both the front and back of your cabinet doors and drawer fronts – with a liquid deglosser or liquid sandpaper. We utilized this specific deglosser with great success. This process is a quick wipe-down; you are not aiming to scrub off the old finish or get down to bare wood. The deglosser works by chemically dulling the existing glossy finish, creating micro-abrasions that significantly improve paint adhesion. It’s perfectly normal if your cabinets don’t visually appear different after this step – the deglosser has done its invisible work. Ensure adequate ventilation during this process. I’ve included a valuable video demonstration of the deglossing process as part of my Total Cabinet Transformation FREE training series – click here to subscribe and get access to see it in action.
Step 6: Apply Two Coats of General Finishes Milk Paint (Optional Light Sanding Between Coats)
With General Finishes Milk Paint, your extensive prep work is complete – no additional sanding or priming is required! You are now ready to begin painting. For best results, lay your cabinet doors and drawer fronts flat on a protected surface. We utilized the built-in benches on our deck, which provided an excellent, flat working area. If space is limited, work in manageable batches. I cannot recommend these painter’s pyramids enough; they elevate your pieces, allowing you to paint both sides and edges with ease. I genuinely wish I had discovered them earlier!
Apply your first thin, even coat of paint. For flat areas, a dense foam roller will yield the smoothest finish, minimizing brush marks. Use an angled paintbrush for intricate details, recessed panels, and cabinet frames. Allow the first coat to dry completely according to the manufacturer’s instructions (typically 2-4 hours). We applied two full coats of the General Finishes Milk Paint. The paint offers superb coverage, and its self-leveling properties help achieve a professional look. For reference, we used 3 quarts of “Seagull Gray” for our perimeter cabinets and 2 pints of “Driftwood” for the island. Remember, thin coats are always better than thick, uneven ones.
Regarding sanding between coats: I did NOT sand between coats of paint because my finish was already smooth and free of imperfections. However, if you notice any minor dust nibs or unevenness after the first coat has dried, you can very lightly sand with 220-grit or finer sandpaper. If you choose to sand, remember to thoroughly wipe down the surfaces with a tack cloth afterward to remove all dust.
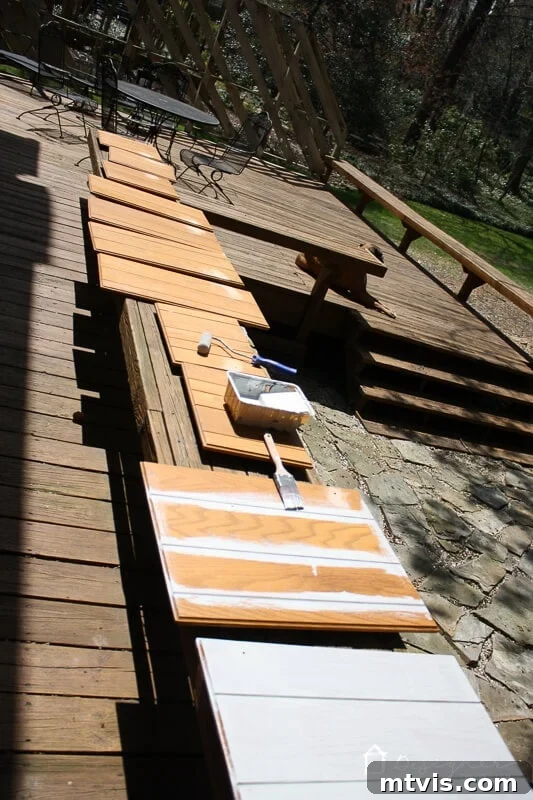
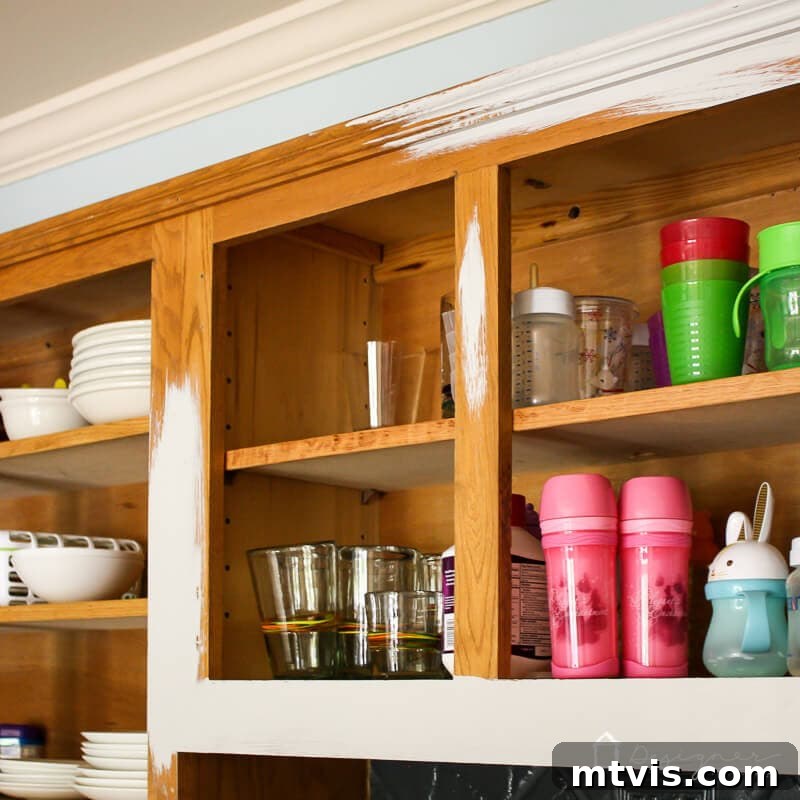
I consider myself a fairly confident and experienced painter, so I chose not to use painter’s tape to protect the areas around our cabinet boxes. Instead, I carefully “cut in” along the edges with an angled brush. If you are less experienced or concerned about getting paint on your walls or the interior of your cabinet boxes (which you won’t be painting), I highly recommend using high-quality painter’s tape to mask off those surfaces for a clean, crisp line.
Step 7: Apply Three Coats of General Finishes High-Performance Top Coat for Ultimate Durability
Once your final coat of paint has dried for the recommended period (check the General Finishes can for specific drying times, usually 12-24 hours for full cure), you are ready to apply the General Finishes High-Performance Top Coat. This step is absolutely crucial for achieving the renowned durability of this method. We applied the recommended three (yes, THREE!) thin, even coats of the topcoat. While three coats may sound daunting, each coat applies fairly quickly, and the extra layers are what provide an unbelievably resilient, hard-wearing finish that stands up to the rigors of a busy kitchen.
For our kitchen cabinets, which featured prominent wood grain, we selected a “flat” finish for the topcoat. A flat finish reflects less light compared to semi-gloss or gloss, thus making the underlying wood grain less noticeable. It’s important to manage expectations here: paint alone will NOT entirely eliminate visible wood grain, but a flat topcoat can certainly minimize its appearance. Always apply thin coats of the topcoat. I highly recommend applying the topcoat while your doors are still laying flat to ensure the smoothest, most even coverage possible and to prevent drips. Using a high-quality brush is often preferred over a roller for topcoat application, as it helps prevent bubbling. Be diligent in applying very thin, even coats; if the topcoat is applied too thickly or allowed to pool in any areas, those spots may dry with an undesirable yellowish tinge. Three very thin, even coats are the key to a crystal-clear, durable finish.
A common concern, particularly with lighter colors like “Snow White,” is a slight yellow cast from the topcoat. This phenomenon can occur with almost ANY clear poly topcoat over very light paints. I delve into this topic in more detail within my Total Cabinet Transformation FREE video series, which you can access by subscribing here. (As a helpful tip, I generally advise against using “Snow White” straight out of the can; mixing it with a tiny bit of another color can help mitigate potential yellowing.)
Step 8: Reassemble Your Kitchen, Rehang Doors, Replace Drawers, and Install Hardware
After your third and final coat of top coat has thoroughly dried and cured (refer to product instructions for recommended cure times, which can be several days for full hardness), you can proudly begin the reassembly process. Carefully rehang your kitchen cabinet doors, replace your drawers, and either reattach your existing hardware or install stylish new knobs and pulls. For our project, we chose to replace all our old hardware with sleek new handles and drawer pulls. Given the number of cabinets and drawers we had, this added an expense of just over $300, but the updated hardware significantly enhanced the overall aesthetic and truly completed the transformation, making it a worthwhile investment.
The photograph below was taken an impressive FIVE YEARS after we initially painted our kitchen cabinets, showcasing their enduring beauty during the Christmas season. They held up incredibly well, enduring years of daily wear and tear! Even a contractor who installed our Formica backsplash a couple of years post-painting was genuinely shocked and deeply impressed by the professional quality and durability of our DIY results.
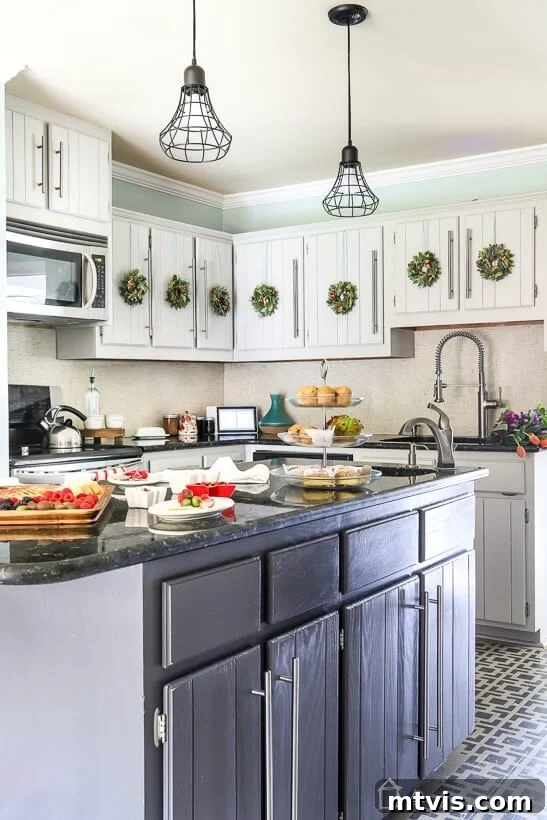
For more detailed insights into their long-term performance, you can read this post to see how they were holding up 22 months later. Additionally, a short video provides an even better, dynamic view of their condition after 5 years! The concise version of their longevity is that they remained beautiful and highly functional right up until we finally undertook a complete gut renovation of the entire kitchen. This video is also part of my Total Cabinet Transformation FREE training series. If you prefer to watch it ad-free and gain access to all the other valuable videos, simply click here to subscribe and get immediate access.
By now, if you’ve followed along, you might have burning questions such as:
- Can this method be successfully applied to paint laminate kitchen cabinets?
- How would the white paint color perform on my very dark, existing cabinets?
- Is it possible to use this paint over previously painted kitchen cabinets?
- Did you truly omit sanding in between paint coats, and what were the implications?
- What is the ideal amount of pressure to apply when using the deglosser to ensure effectiveness?
- Will brush strokes be visible in the final painted finish, or can they be avoided?
I address all these pertinent questions and many more, offering comprehensive answers and providing detailed video demonstrations within my exclusive Total Cabinet Transformation FREE training series. To gain immediate access and deepen your understanding, once again, just click here to subscribe. You can also watch a brief overview of what this invaluable video series encompasses in the short clip below, giving you a taste of the expert guidance awaiting you.
Full Tutorial: How to Paint Kitchen Cabinets With Minimal Prep Work Using Fusion Mineral Paint
This method offers an even quicker and easier route to beautifully painted kitchen cabinets, perfect for those seeking efficiency without compromising on aesthetic appeal and good durability. Fusion Mineral Paint is renowned for its excellent adhesion and built-in topcoat, making it a fantastic choice for a streamlined DIY project. Here’s how to do it.
Essential Materials Needed for Method #2
- T.S.P. (Trisodium Phosphate): As with Method #1, this powerful cleaner is essential for removing all grease and grime, ensuring a clean bonding surface.
- Fusion Mineral Paint: A highly durable, all-in-one paint with a built-in topcoat. Its strong adhesion properties significantly reduce prep work. (Don’t forget to save 10% with the code kaleidoscopelivingfmp at checkout when you order directly from Fusion Mineral Paint). For Thea’s kitchen, we used three 500 mL/1 pint containers of “Coal Black” for the lower cabinets and one 500 mL/1 pint container of “Raw Silk” for the upper cabinets, showcasing its versatile color options.
- Sandpaper and Electric Sander (optional): A fine-grit sandpaper (180-220 grit) is used for a quick “scuff sand” to create a mechanical bond. An electric sander can speed this up, but hand sanding is perfectly effective if you don’t have one.
- Paint Brushes, including a small detail brush: Quality brushes ensure smooth application. A small detail brush is indispensable for carefully painting around hinges and in tight corners without removing hardware.
- Small Foam Paint Roller Kit: Excellent for covering larger, flat surfaces with a seamless, streak-free finish.
- Fusion Mineral Paint Ultra Guard Topcoat: While Fusion Mineral Paint has a built-in topcoat, this additional topcoat provides an extra layer of protection, particularly in high-traffic areas, enhancing scratch and water resistance for even greater longevity.
- Tack Cloth: Essential for removing fine dust particles after sanding.
- Old T-shirts/Rags: For cleaning and wiping down surfaces.
- Drop Cloths: To protect flooring and countertops.
- Screwdriver: For removing cabinet hardware.
Step-by-Step Guide for Fusion Mineral Paint Method
For a dynamic visual walkthrough, you can watch the comprehensive video below, which guides you through each and every step of the process. If you prefer to absorb information through reading, simply scroll past the video for the detailed written tutorial!
(Video placeholder: Imagine an engaging tutorial video here demonstrating the Fusion Mineral Paint method, showing each step from prep to final topcoat application.)
IMPORTANT NOTE: For my friend Thea’s kitchen, we deliberately did not pack up any items within her cabinets, nor did we remove any of the cabinet doors or drawer fronts. This strategic choice allowed the project to move with remarkable speed and efficiency, and the results were absolutely flawless. If you prefer not to paint or alter your existing hinges, I strongly recommend leaving the doors and drawers in place. This approach drastically cuts down on project time and complexity, without compromising the finished look.
Step 1: Efficiently Remove Hardware & Thoroughly Clean Your Cabinets
Begin by carefully removing all your cabinet hardware – knobs and pulls. Once the hardware is off, it’s time for a thorough cleaning. Use T.S.P. (Trisodium Phosphate), following the instructions provided on the bottle, to meticulously clean all cabinet surfaces. This step is crucial for dissolving any built-up grease, grime, and kitchen residue that could prevent proper paint adhesion. A clean surface is paramount for a lasting finish. This cleaning process is typically straightforward and should take you no more than an hour, making it a manageable initial step.
Step 2: Perform a Quick, Light Scuff-Sand (Expect Less Than 30 Minutes)
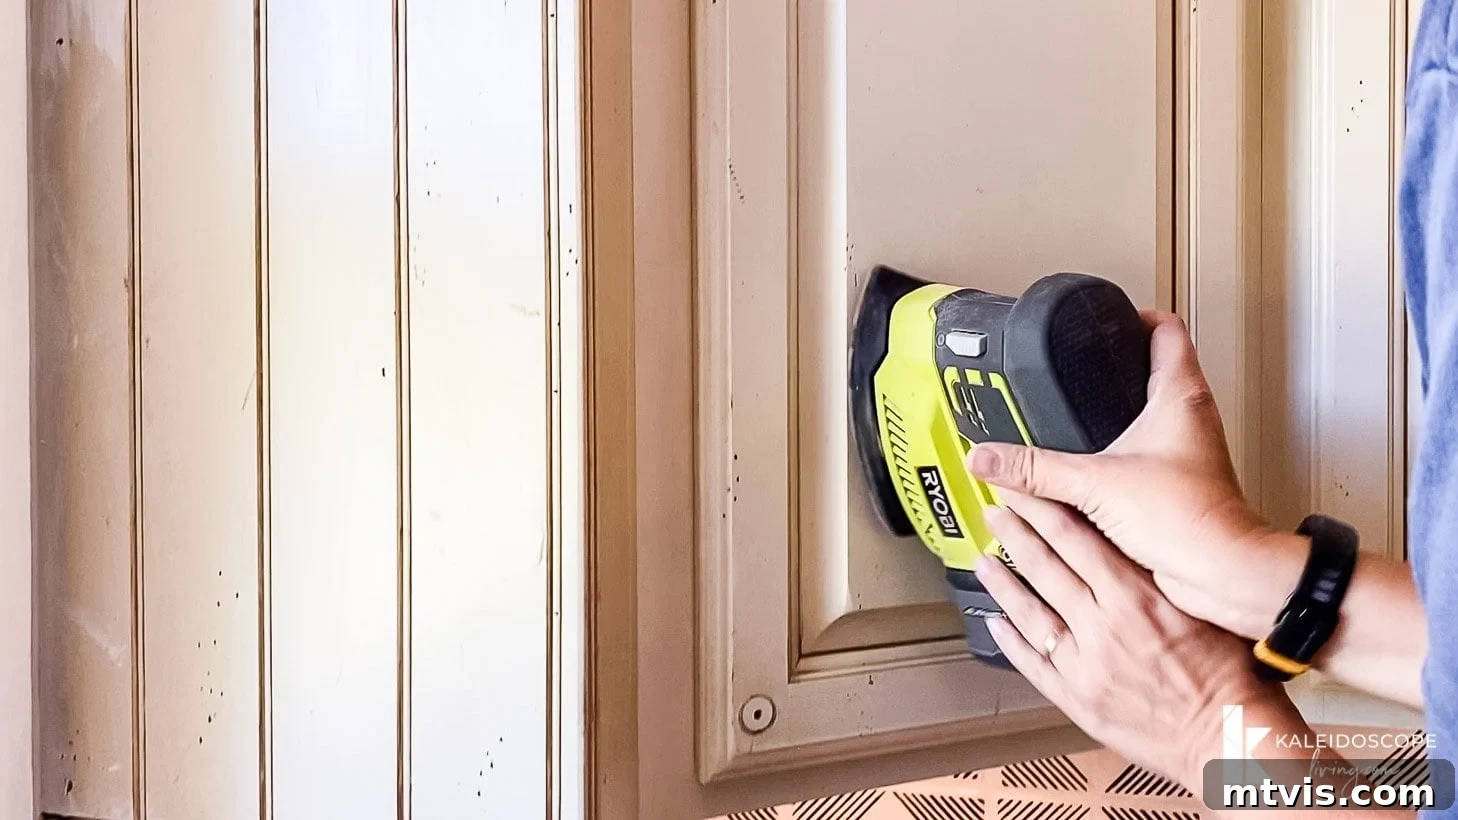
Next, you will perform a quick and light scuff-sanding on the surfaces of your cabinet frames, drawer fronts, and doors. The key here is “light” – you are not aiming to remove the existing finish or sand down to bare wood. Instead, the goal is simply to rough up the glossy surface slightly, creating a mechanical bond for the paint to adhere to. This light sanding typically took us around 30 minutes, often proving faster than the cleaning stage itself! We found a small palm sander to be incredibly efficient for this task, but you can certainly achieve excellent results by hand sanding if you don’t own an electric sander. Once sanding is complete, ensure you meticulously wipe away all dust from the cabinets using a tack cloth. Any lingering dust can compromise your paint finish.
Step 3: Begin Painting Your Cabinets with Fusion Mineral Paint – No Primer Needed!
You’ve completed the minimal prep and are now ready for the most exciting part: painting! That’s right – you do NOT need to use a separate primer on your cabinets before applying Fusion Mineral Paint. This paint is uniquely formulated with exceptional adhesion properties and is incredibly durable, setting it apart from standard latex paints. We specifically chose Fusion Mineral Paint because Thea’s family would subject these cabinets to significant daily wear, and we needed a product that could truly withstand everything they could dish out, maintaining its beauty for years.
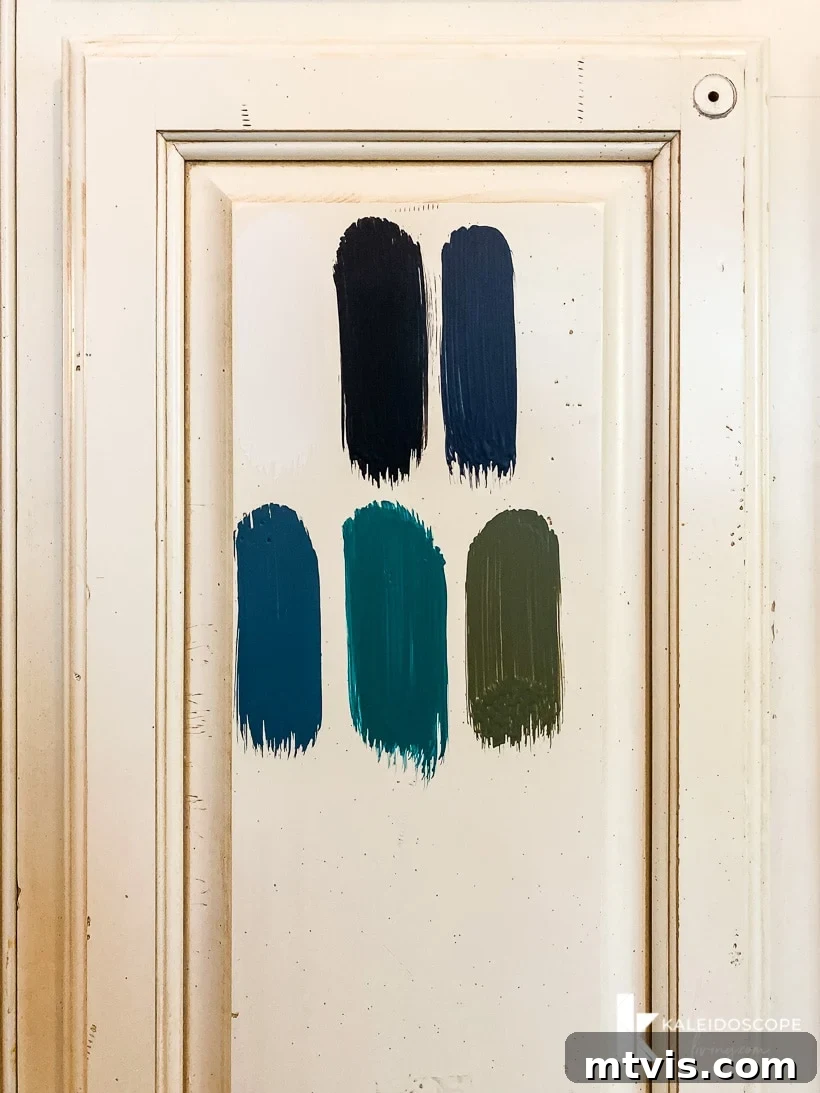
We began the painting process by sampling various Fusion Mineral Paint color options to find the perfect shades for Thea’s kitchen (a helpful tip: when ordering directly from Fusion Mineral Paint, you can save 10% by using the coupon code kaleidoscopelivingfmp at checkout!). After careful consideration, we decided on “Raw Silk” for her upper cabinets to brighten the space and “Coal Black” for her lower cabinets and pantry cabinetry, creating a striking two-tone effect.
Fusion Mineral Paint is a joy to work with. While it might feel slightly thinner or runnier than some traditional paints, its coverage is truly EXCELLENT. A key advantage is its self-leveling nature, which results in minimal (if any) visible brush strokes – delivering an incredibly smooth, professional finish. We were able to complete the entire first coat on both the upper and lower cabinets in just a few hours. We recommend using a small foam roller for all flat surfaces to achieve that seamless look, and a brush to meticulously paint into the ridges of any beadboard or raised panels. For unparalleled precision around hinges and other hardware (which we left in place), a very small detail or artist’s brush proved invaluable.
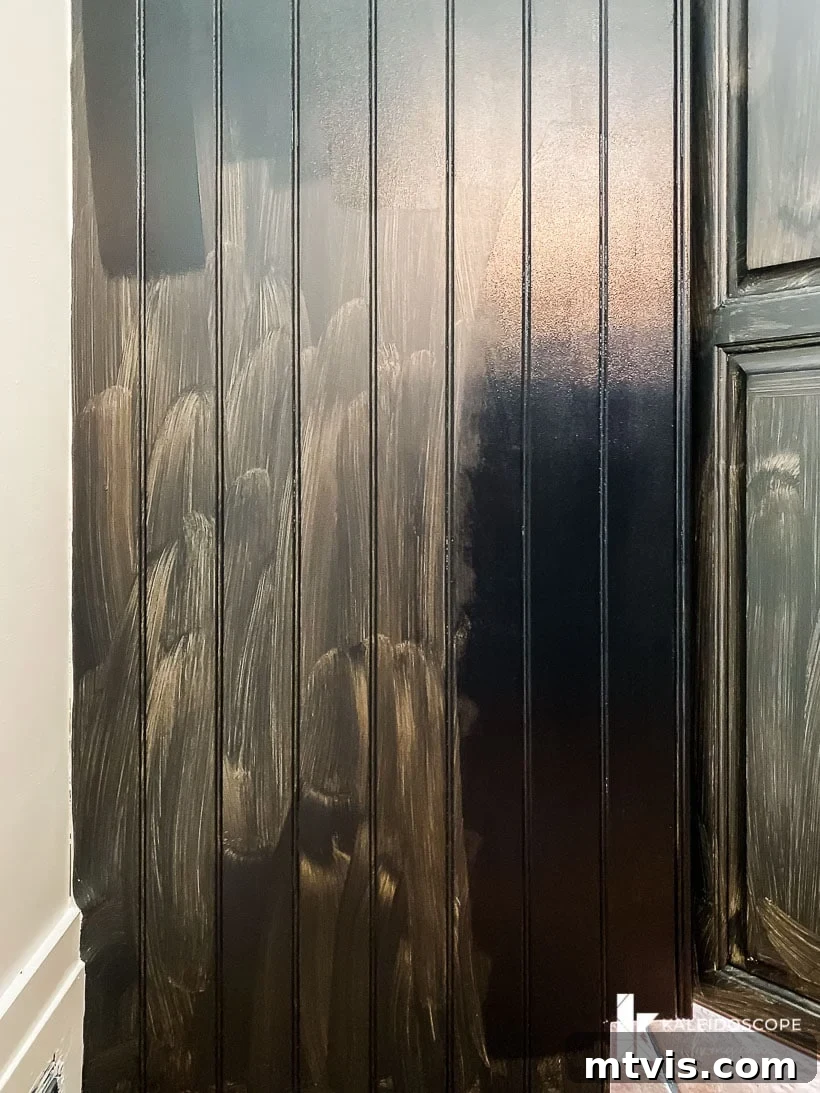
We accomplished the completion of the entire first coat and the majority of the second coat within a single day. Any remaining cabinets requiring a second coat were swiftly finished on day two. The image below vividly illustrates the significant difference in coverage achieved between a single coat and a second coat, highlighting the paint’s impressive opacity and depth.
Step 4: Apply Your Protective Top Coat (Quick and Easy)
Once you have achieved full, opaque coverage with your paint (which should require no more than two coats for most colors), allow the paint to dry thoroughly for 24 to 48 hours. This curing period is important for the paint to harden sufficiently before the next step. Following this, you are ready to give your beautifully painted cabinets an extra layer of protection using Fusion Mineral Paint Ultra Guard topcoat. This exceptional topcoat is specially formulated to be non-yellowing, preserving the true color of your paint, and is reinforced with silica for significantly increased durability against scratches and moisture. It applies with a slight whitish tint but dries completely transparent, effectively enhancing both light and dark paint colors without altering their shade. This final layer ensures your cabinets are robust enough to withstand daily kitchen activities.
Step 5: Replace Your Cabinet Hardware for a Fresh, Updated Look
After your topcoat has fully dried and cured (again, consult product instructions for specific timelines), the final and most satisfying step is to replace your cabinet hardware. This is where the transformation truly comes to life! For Thea’s kitchen, we opted for inexpensive yet stylish new hardware, choosing these gorgeous and budget-friendly knobs, which perfectly complemented her newly painted cabinets. You can delve into all the intricate details of Thea’s remarkable total kitchen makeover, completed for less than $1,000, right here. As a bonus, we even painted her tile backsplash – a simple yet incredibly effective DIY project that tied the entire look together beautifully!
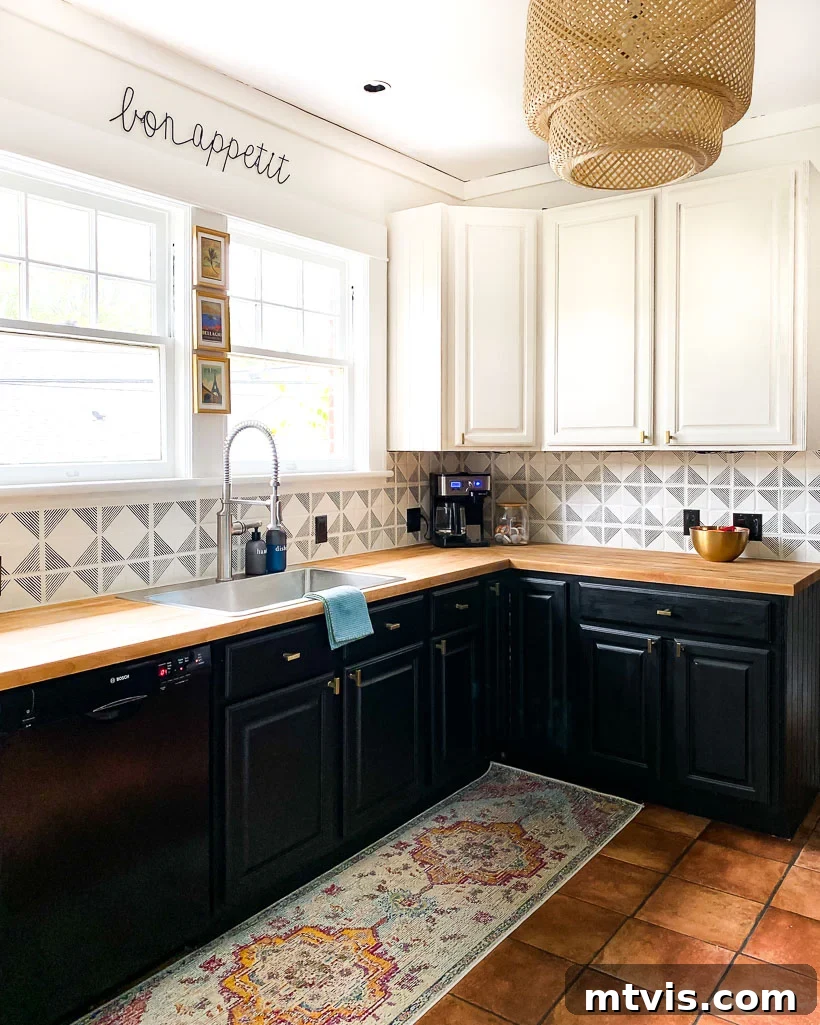
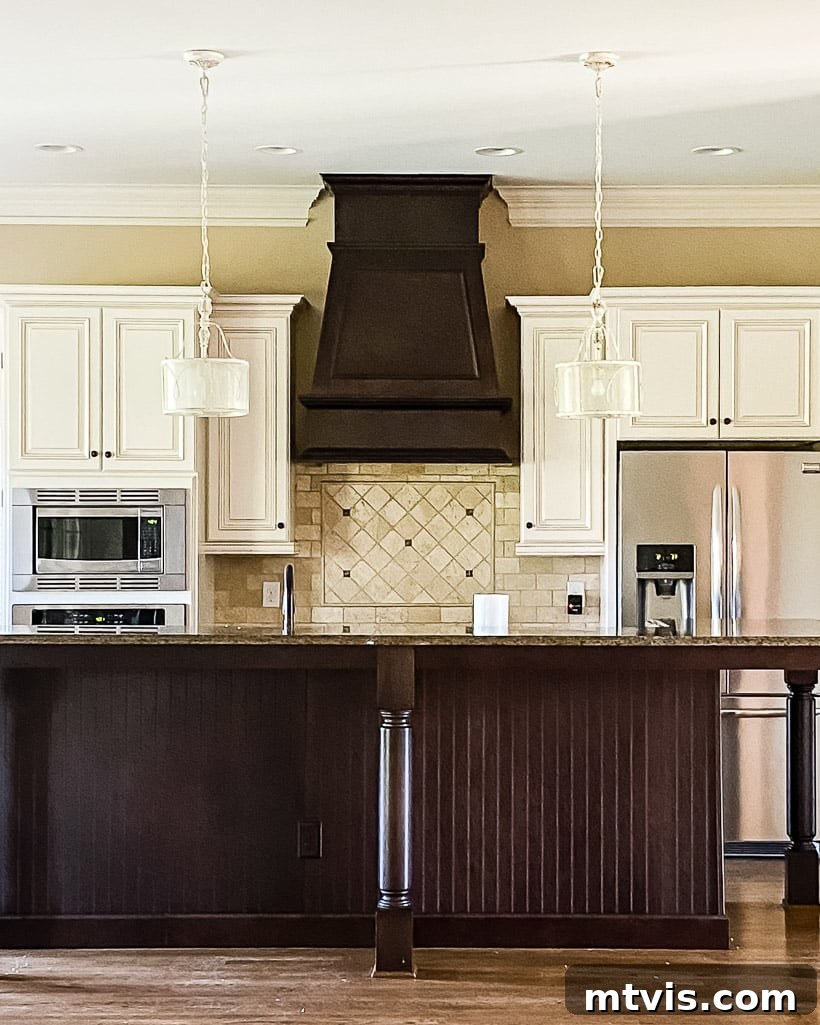
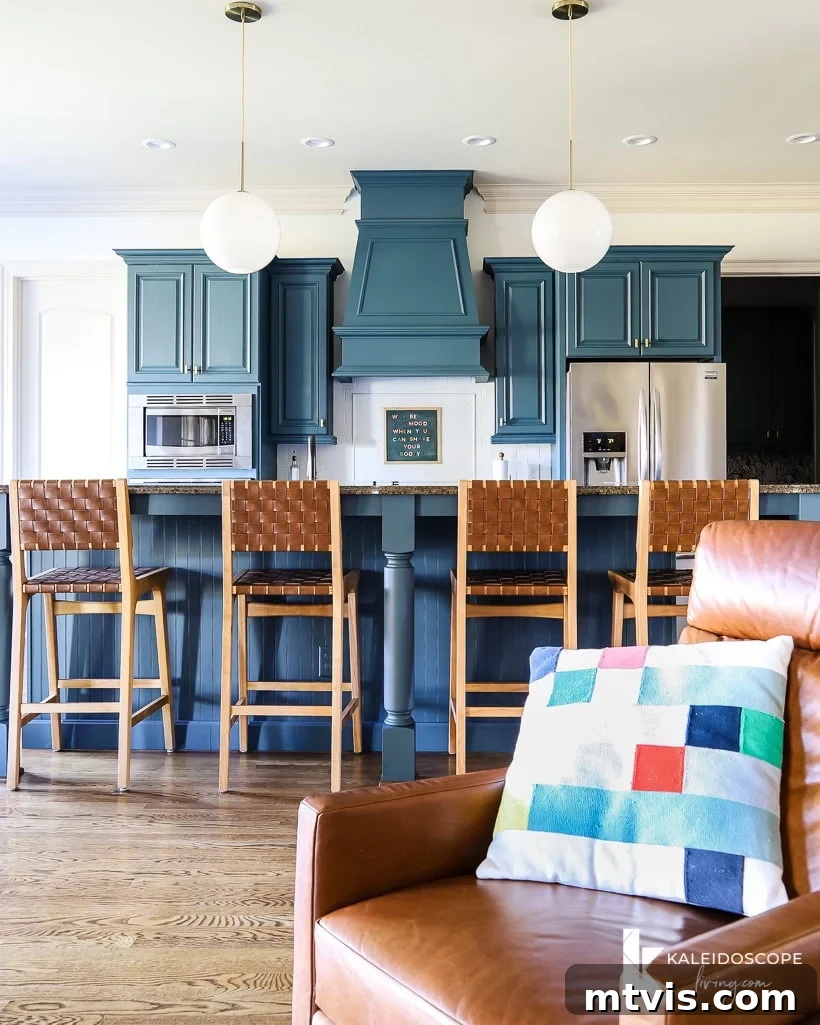
Thea’s family, known for their active lifestyle, put her cabinets through significant daily use, yet they held up flawlessly until they moved to a new home more than three years later. I was so profoundly impressed by how quick, easy, and durable this method for painting kitchen cabinets proved to be that I adopted it myself to paint the cabinets in our current home in early 2021. I chose Fusion Mineral Paint in the serene color “Seaside.” We lived with our beautifully DIY-painted cabinets for over three years until we undertook a full renovation of our current kitchen in 2024 (you can explore our neutral but colorful kitchen remodel here). Over those years, we experienced only very minor chipping on the door of our pull-out trash can and a couple of other high-impact spots. These small imperfections were easily remedied with a tiny paintbrush for quick touch-ups. Overall, we were extremely satisfied with the remarkable durability and aesthetic longevity of this painting method.
Which of These Kitchen Cabinet Painting Methods is Best for You?
This is a question I receive frequently: which of these two tried-and-true methods do I recommend for aspiring DIYers eager to paint their kitchen cabinets? Both deliver outstanding results, but your ultimate choice should align with your specific needs, desired longevity, and available time commitment. Here is my definitive bottom-line recommendation to help you decide:
- For a Beautiful, Durable Update Lasting 1-3+ Years: Choose Fusion Mineral Paint. If your goal is to refresh your kitchen’s aesthetic, provide a stunning new look, and achieve excellent durability for a period of one to three years (or even longer with proper care), I wholeheartedly recommend the Fusion Mineral Paint method. It stands out for its remarkable speed and ease of application, making it ideal for those who want a quick but impactful transformation. Additionally, Fusion Mineral Paint offers a significantly broader spectrum of gorgeous paint colors, providing more creative freedom. While “slightly less indestructible” than Method #1, it is absolutely durable enough to maintain a fantastic appearance for several years, even under regular use. This is your go-to for a stylish and efficient upgrade.
- For Indefinite, Nearly Indestructible Longevity: Choose General Finishes Milk Paint. If your primary objective is to achieve DIY painted kitchen cabinets that will literally last indefinitely, standing up to virtually anything life throws at them, then I unequivocally recommend the General Finishes Milk Paint method. While it does require a slightly greater time commitment due to the additional topcoat applications and door removal, the unparalleled durability it provides is well worth the extra effort. From our extensive experience, once properly applied, this finish proved to be virtually indestructible. If you envision your painted cabinets enduring for a decade or more, this is the method that will give you ultimate peace of mind.
Frequently Asked Questions about Painting Kitchen Cabinets
Over my years of painting cabinets and helping others, certain questions come up time and again. Here are answers to some of the most common inquiries to further assist you:
- Can I use these methods on laminate cabinets? While these methods primarily focus on wood cabinets, General Finishes Milk Paint and Fusion Mineral Paint are known for their excellent adhesion to many tricky surfaces, including laminate. However, a light scuff-sanding with Fusion Mineral Paint or using a bonding primer specifically designed for laminate might be an advisable extra step to ensure optimal adhesion for Method #1 on very slick laminate. Always perform a patch test first.
- How well do white paint colors cover dark cabinets? Both General Finishes Milk Paint and Fusion Mineral Paint offer excellent coverage. However, transforming very dark cabinets to a light white color will typically require more coats (3-4 coats instead of 2) to achieve full opacity and eliminate any bleed-through of the underlying dark tone. Using a high-quality white paint and applying thin, even coats is key.
- Can I paint over existing painted kitchen cabinets with these methods? Yes, both methods can be successfully used over existing painted cabinets, provided the current paint is in good condition (not peeling or heavily chipped). For existing painted cabinets, follow the same cleaning and deglossing/scuff-sanding steps. If the previous paint job is failing, it’s best to remove it first.
- Did you really not sand between coats of paint in Method #1? Yes, that’s correct! With General Finishes Milk Paint, if your initial coats are applied smoothly and dry without imperfections, sanding between coats is often unnecessary. This is thanks to the paint’s self-leveling properties. If you notice any texture or dust, a very light scuff with fine-grit sandpaper is recommended, followed by a tack cloth wipe.
- How much pressure is needed when using a deglosser? When applying liquid deglosser, you don’t need excessive scrubbing pressure. The chemical action of the deglosser is what does the work. Apply it with a firm but gentle wipe, ensuring the entire surface is uniformly covered. The goal is to dull the shine, not remove the finish entirely.
- Will brush strokes be visible in the final finish? Both General Finishes Milk Paint and Fusion Mineral Paint are formulated to be self-leveling, which greatly minimizes brush strokes, often leading to a nearly brush-stroke-free finish, especially on flat surfaces. Using high-quality foam rollers for flat areas and good angled brushes for details, combined with thin, even coats, will ensure the smoothest possible result.
- How do I handle wood grain showing through the paint? If your cabinets have a strong wood grain, paint alone, even with multiple coats, won’t completely obscure it. To minimize its appearance, choose a flat or matte topcoat as discussed in Method #1, as it reflects less light and makes the texture less noticeable. For a completely smooth finish on grainy wood, you would need to fill the grain with a grain filler before painting, which adds significant prep work and is beyond the scope of these minimal-prep methods.
Phew! I know that was a considerable amount of information to absorb, but congratulations – you’ve made it all the way to the end! I sincerely hope you have found this detailed guide incredibly helpful and empowering. Both of the methods I’ve meticulously outlined for painting kitchen cabinets have consistently delivered professional-looking, exceptionally long-lasting results with surprisingly minimal prep work. My greatest wish is that seeing my personal experiences and successful transformations with both approaches instills you with the confidence and motivation to embark on painting your own kitchen cabinets. Because trust me when I say this: freshly painted cabinets are, without a doubt, one of the most satisfying and impactful DIY transformations you can achieve in your home!
More Kitchen IDEAS
SEE ALL kitchen POSTS
-
Budget-Friendly DIY Backsplash Ideas for Kitchens
-
How Durable are DIY Painted Kitchen Cabinets?
-
How To Refinish Butcher Block Countertops & Maintain Them
-
Designer Tips for Choosing Perfect Kitchen Rug Runners
-
How to Paint Kitchen Cabinets (From a DIYer Who Has Done it 3 Times)
-
Our Kitchen Renovation Reveal- It’s Neutral AND Colorful
Wondering how I approach transforming rooms and spaces in our home? Be sure to check out my acclaimed guide, Designer in a Binder®. It’s an affordable and straightforward system designed to help you decorate your home with confidence and ease.
And for exclusive content, insider tips, and behind-the-scenes sneak peeks of upcoming projects, don’t forget to subscribe to my newsletter before you go! You won’t want to miss out on any future inspiration and advice.