Mastering Cricut SportFlex Iron-On: Your Ultimate Guide to Customizing Stretchy Fabrics and Activewear
For crafters and DIY enthusiasts who love personalizing items with heat transfer vinyl (HTV), there’s been a longstanding challenge: finding a vinyl that genuinely performs on stretchy fabrics. Traditional iron-on vinyl often cracks, peels, or wrinkles when applied to flexible materials like activewear, leaving many feeling limited in their creative projects. But what if there was a solution that stretched and moved seamlessly with your fabric, offering durable, long-lasting results?
Prepare to be delighted! Cricut has revolutionized the world of custom apparel with the introduction of SportFlex Iron-On™. This innovative heat transfer vinyl is specifically engineered to adhere beautifully to athletic fabrics and other stretchy materials, making it perfect for workout clothes, yoga pants, leggings, bathing suits, and much more. Say goodbye to stiff, rigid designs and hello to flexible, vibrant creations that stand the test of time and movement.
In this comprehensive guide, we’ll dive deep into everything you need to know about using Cricut SportFlex Iron-On™ for your stretchy fabric projects. We’ll cover the essential materials, provide a detailed, step-by-step tutorial, and share expert tips to ensure your custom activewear looks professional and lasts through countless workouts.
Why Cricut SportFlex Iron-On™ is a Game-Changer for Stretchy Fabrics
If you’ve ever tried applying regular iron-on vinyl to a stretchy garment, you know the frustration. The moment the fabric stretches, the vinyl pulls, creating a puckered, wrinkled, or even cracked appearance. This happens because standard HTV lacks the elasticity to flex with the material, ultimately compromising the integrity and aesthetic of your design.
Cricut SportFlex Iron-On™ was developed precisely to overcome this limitation. Its unique, lightweight, and highly flexible composition allows it to move and bend with your body and fabric, ensuring your designs remain smooth, intact, and comfortable, even during intense activity. Whether you’re making a motivational gym shirt or personalizing swimwear, SportFlex Iron-On™ delivers a superior finish.
One of the standout features is the Cricut StrongBond™ Guarantee*. This means Cricut stands firmly behind the durability and adhesion of SportFlex Iron-On™ when used and applied according to their specific instructions. This guarantee provides peace of mind, assuring you that your custom creations will endure washing and wear without lifting or peeling.
SportFlex Iron-On™ is highly recommended for a variety of tech fabrics that typically pose challenges for standard HTV. This includes popular activewear materials such as polyester, nylon, and spandex blends, which are common in performance clothing. Unlike traditional vinyls that might struggle to bond with these synthetic fibers, SportFlex Iron-On™ forms a strong, lasting connection, making it the ideal choice for virtually any stretchy garment in your wardrobe or for your athletic team.
Note: This post contains affiliate links for your convenience (which means if you make a purchase after clicking a link, I will earn a small commission but it won’t cost you a penny more!). Click here to read my full disclosure policy.
How to Use Cricut SportFlex Iron-On™ on Stretchy Fabrics: A Step-by-Step Guide
Ready to transform your activewear? Follow these detailed steps to create stunning, personalized stretchy garments with Cricut SportFlex Iron-On™.
Materials You’ll Need:
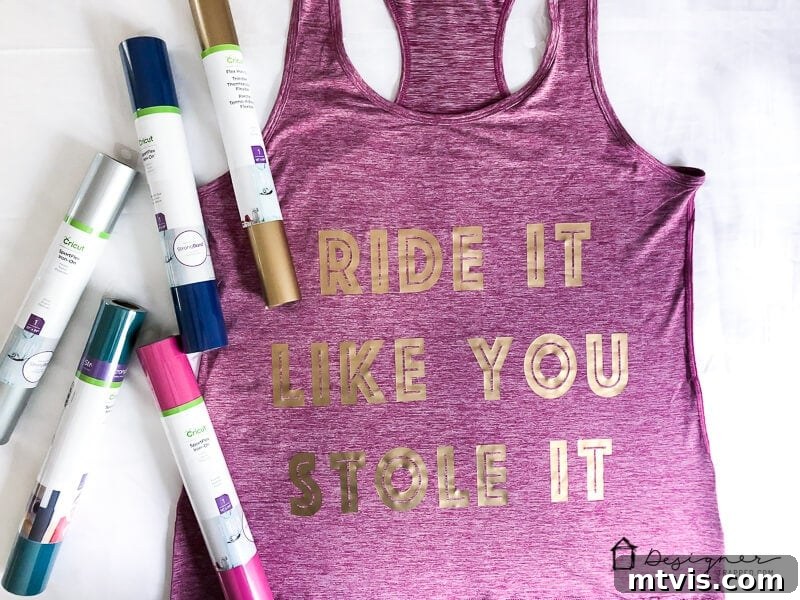
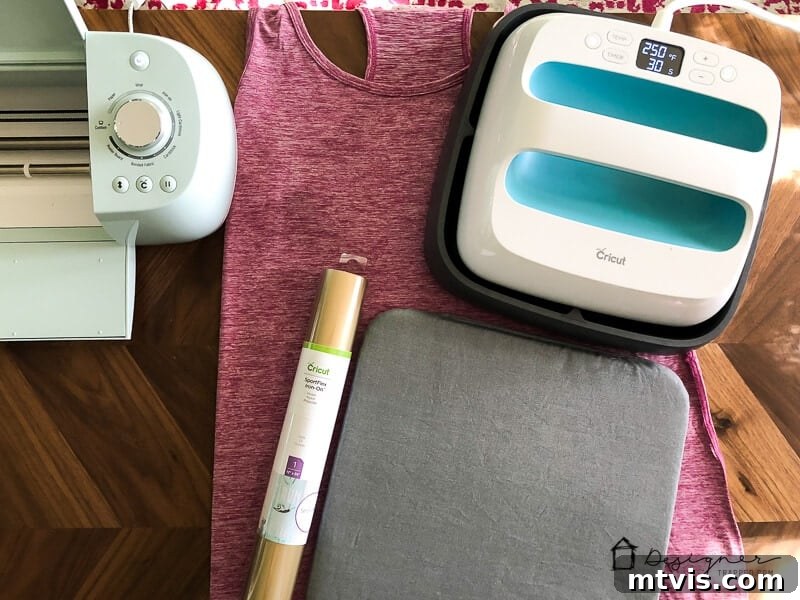
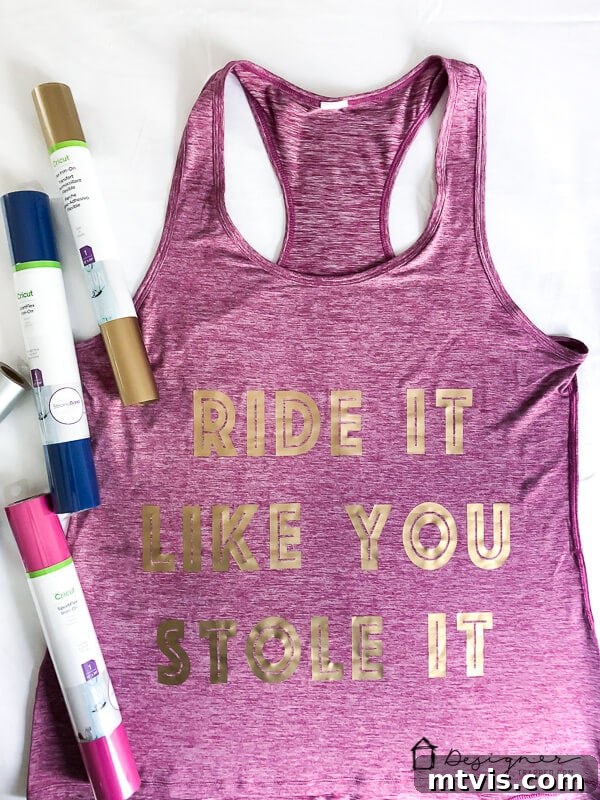
- Cricut SportFlex Iron-On™: This is a non-negotiable! Choose your favorite color – I opted for a vibrant gold for my project. Remember, regular iron-on vinyl simply won’t work on stretchy fabrics; it will wrinkle, pucker, and ultimately fail. SportFlex Iron-On™ is specifically formulated for activewear, offering the flexibility and StrongBond™ Guarantee you need for long-lasting results. It’s perfect for polyester, spandex blends, and other tech fabrics.
- High-performance stretchy garment: A tank top, yoga pants, leggings, a bathing suit, or a jersey will all work perfectly. Ensure the fabric is clean and free of any fabric softeners.
- Cricut Cutting Machine: Any Cricut machine will do the job, whether it’s the Cricut Explore Air 2, Cricut Maker, or any other model. Each offers precise cutting capabilities essential for intricate designs. If you’re deciding between machines, you can read my comparison of Cricut vs. Silhouette here.
- Cricut EasyPress or a Heat Press: While a household iron can sometimes work, an EasyPress or dedicated heat press provides consistent, even heat and pressure, which is crucial for a strong, lasting bond with SportFlex Iron-On™. This consistency minimizes the risk of peeling or bubbling.
- Cricut EasyPress Mat: This specialized mat ensures an even heating surface and protects your countertop. Avoid using a regular ironing board, as its soft, uneven surface can lead to inconsistent application.
- Weeding tool: Essential for removing excess vinyl from your cut design.
- Cricut Iron-On Protective Sheet or a thin cotton towel: To protect your design and fabric from direct heat during application.
Steps for Application:
1) Design Your Masterpiece in Cricut Design Space:
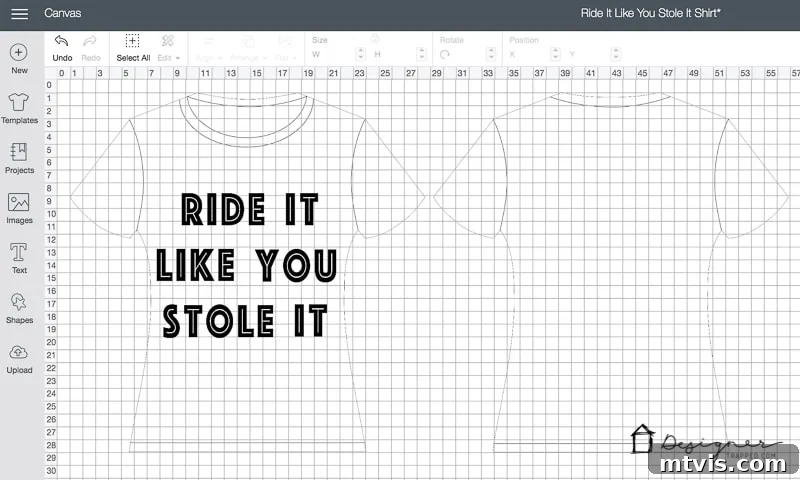
Start by creating your desired design in Cricut Design Space. This powerful software allows you to bring your creative vision to life. If you want to use my “I’m just here for the endorphins” design for your workout shirt, you can access it here.
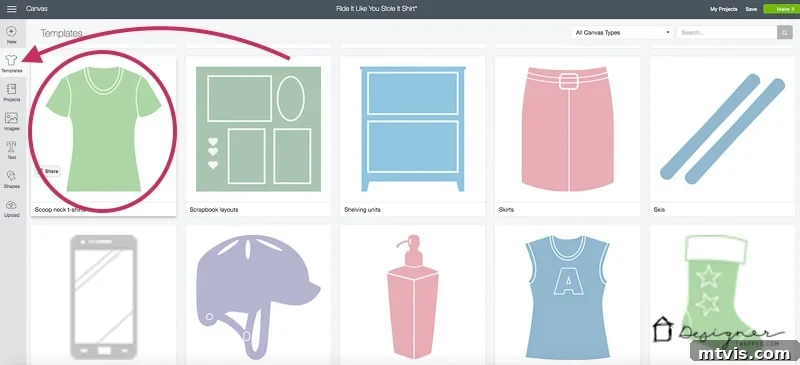
For accurate sizing and placement, I highly recommend utilizing the t-shirt templates available in Design Space. Simply click on “Templates” on the left side of your screen and scroll through the options until you find one that best matches your garment, such as the “scoop neck t-shirt” template that I used. Even if your garment is a tank top, these templates serve as an excellent visual guide for scale.
My tank top is a size large, so if your shirt is a different size, you may need to adjust the design’s dimensions to ensure it fits proportionately. Use a measuring tape on your actual garment to confirm the optimal size. To resize your design, simply click on it and drag the corner handles inward or outward until it looks perfect.
2) Prepare Your SportFlex Iron-On for Cutting:
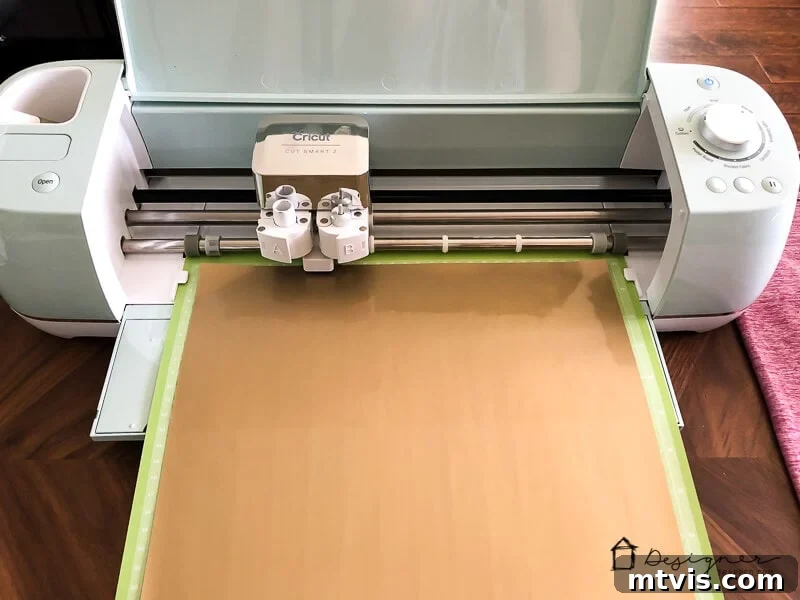
This step is crucial, especially if you’re new to working with heat transfer vinyl. Unlike traditional adhesive vinyl, iron-on vinyl is cut from the back. This means you must place your SportFlex Iron-On™ onto your cutting mat with the shiny side face down and the less shiny, textured side face up. The shiny side is the clear carrier sheet that protects your design during transfer, and it should always be against your mat.
3) Mirror Your Design (Don’t Forget!):
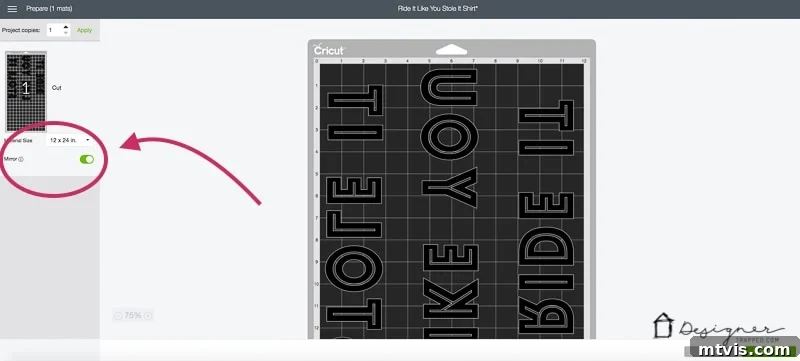
Once your design is ready, click the “Make It” button in the bottom right corner of your Design Space screen. This will take you to the mat preview screen. On this screen, it is absolutely essential to mirror your image for all iron-on projects. If you skip this step, your text and directional designs will appear backward when applied to your shirt. Simply toggle the “Mirror” button to the “on” position for each mat you are cutting.
Before cutting, select your material setting:
- If you are using a Cricut Explore Air machine (like my Explore Air 2), set your machine’s dial to “Iron On.”
- If you are using the Cricut Maker, you can select “SportFlex Iron On” from the comprehensive list of materials in Design Space.
4) Cut Your Design with Precision:
With your material selected and mirrored, click the green “Continue” button in Design Space. Load your mat into your Cricut machine, ensuring it’s properly aligned, and then press the flashing “Go” button on your machine to begin cutting. The machine will precisely cut your design from the SportFlex Iron-On™ material.
5) Weed Your Design:
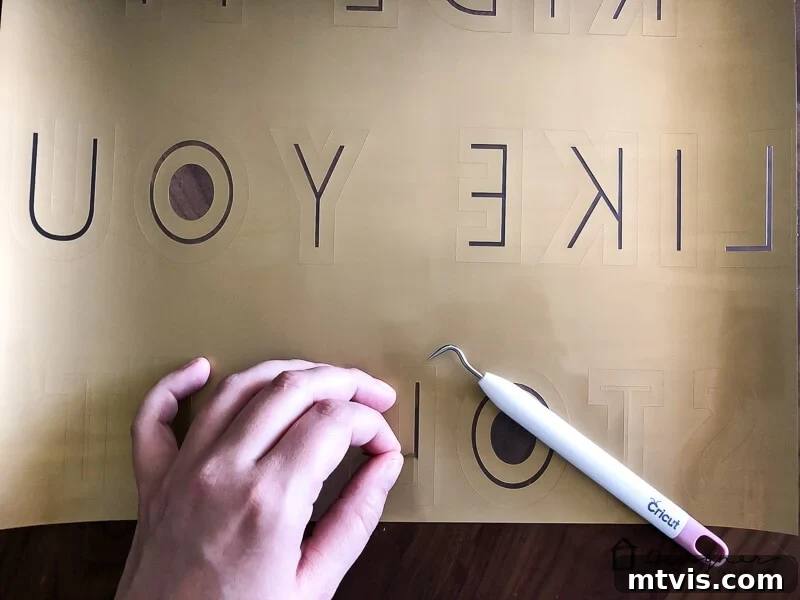
After your machine has finished cutting, unload the mat. Carefully remove the SportFlex Iron-On™ from the mat. Now it’s time to “weed” your design. This involves using your weeding tool to remove all the excess vinyl that you don’t want to transfer to your shirt, leaving only your desired design on the clear carrier sheet. Work slowly and methodically, especially with intricate details, to ensure you don’t accidentally pull up parts of your design.
6) Prepare Your Fabric and Heat Press:
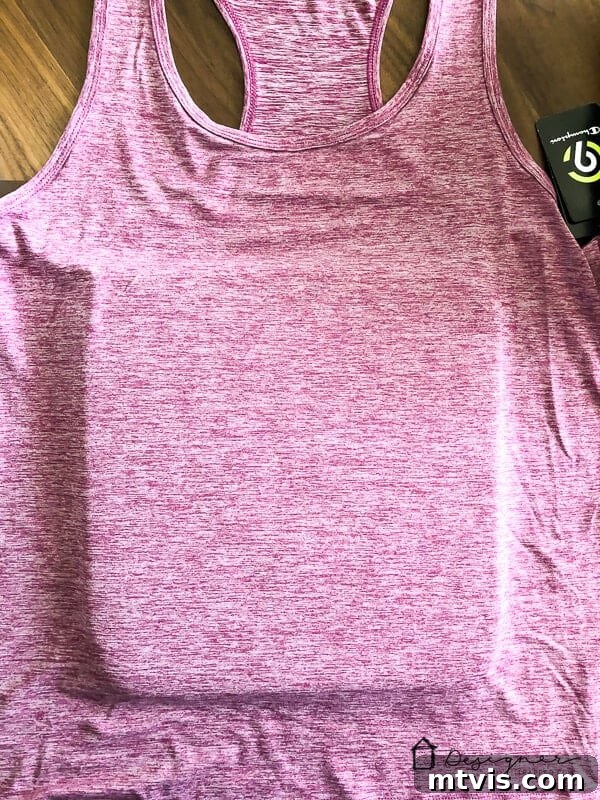
Now, let’s get ready for application! Place your stretchy garment flat on your Cricut EasyPress Mat (or another firm, protected surface). Avoid using a regular ironing board as its cushioned surface can prevent a proper bond.
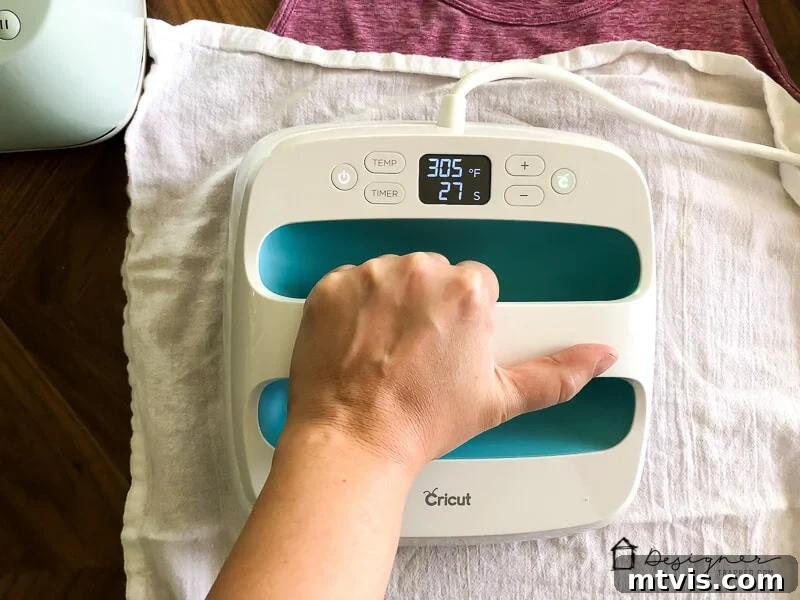
Preheat your Cricut EasyPress to 305°F (150°C). For precise settings, always consult the Cricut Heat Guide, as temperatures and times can vary slightly based on your specific material and base fabric. Once the EasyPress reaches the correct temperature, preheat the area of your garment where the design will be applied for 15 seconds. This removes moisture and wrinkles, creating an optimal surface for adhesion.
7) Apply Your SportFlex Design:
Carefully place your weeded SportFlex Iron-On™ design onto your preheated garment. Ensure it’s centered, straight, and exactly where you want it. Once positioned, place a Cricut Iron-On Protective Sheet or a thin cotton towel over the clear carrier film of your design. This protective layer shields your vinyl and fabric from direct heat.
Now, press firmly with your EasyPress for 30 seconds. Apply light to medium pressure. The built-in timer on the EasyPress is a fantastic feature that counts down for you, ensuring consistent application. If your design is larger than the EasyPress plate (my 9-inch EasyPress couldn’t cover my entire design at once), lift and move the EasyPress to cover the next section, overlapping slightly to ensure continuous heat, and press again for another 30 seconds. Repeat until all parts of your design have received the full 30-second press.
8) Final Press (Inside Out):
For an extra-strong bond, particularly important for stretchy fabrics that undergo a lot of movement and washing, turn your garment inside-out. Place it back on your EasyPress Mat and press the back of the design area for an additional 30 seconds. This helps further fuse the adhesive to the fabric fibers, enhancing durability.
9) The Reveal: Cold Peel for Best Results:
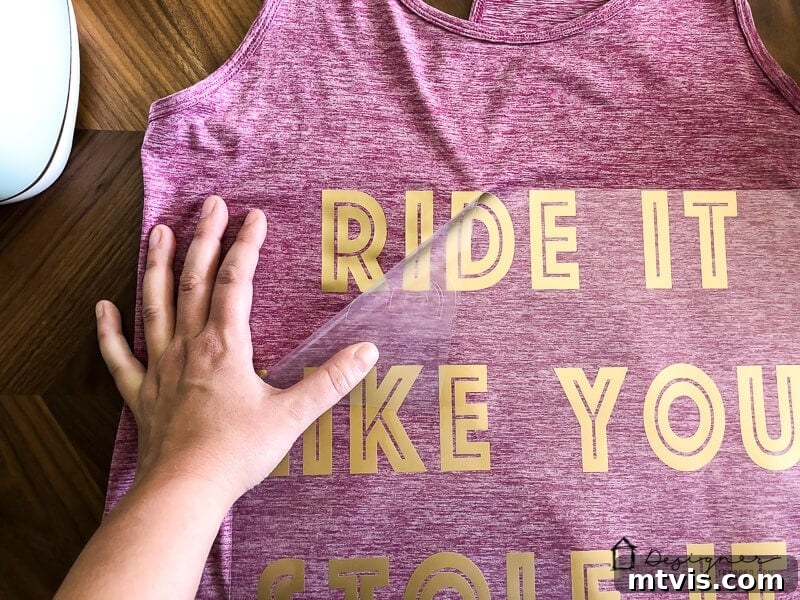
This is a critical step for SportFlex Iron-On™! After the final press, allow the design to cool completely before peeling the clear carrier sheet. SportFlex Iron-On™ is a “cold peel” material, meaning attempting to peel it while warm can lead to the vinyl lifting or not adhering properly. Patience is key here. Once fully cooled, gently and slowly peel away the clear film to reveal your awesome new customized garment!
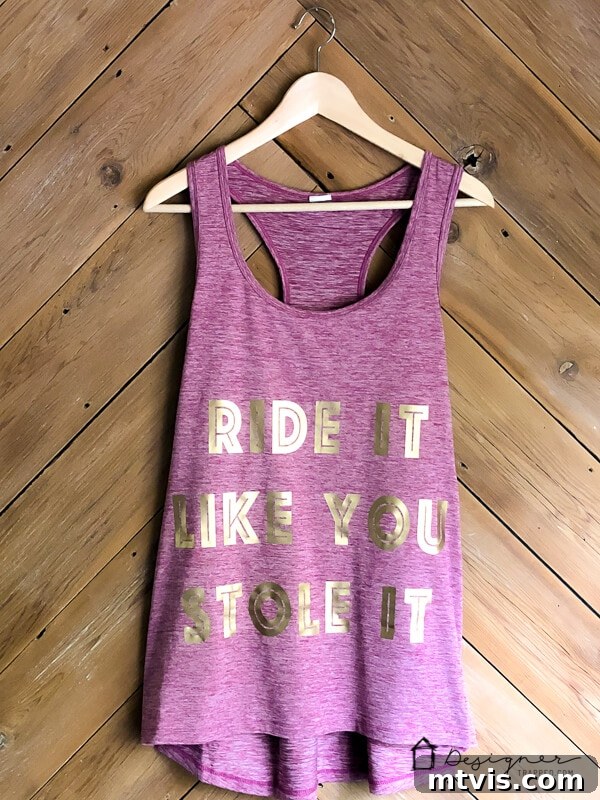
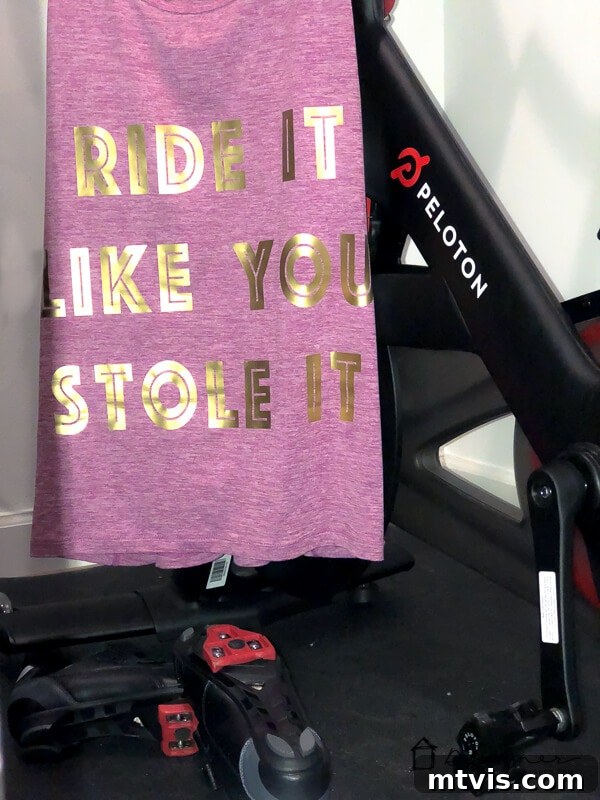
Here’s my finished fun shirt! As a proud Peloton enthusiast, it cracks me up every time I wear it for a spin session. The SportFlex Iron-On™ looks perfectly smooth and stretched with the fabric, just as promised.
Caring for Your Customized Activewear: Ensuring Longevity
To maximize the lifespan of your SportFlex Iron-On™ creations, proper care is essential. Following these guidelines will help keep your designs looking fresh and intact:
- Wait Before Washing: After application, wait at least 24 hours before the first wash. This allows the adhesive to fully cure and create its strongest bond.
- Wash Inside Out: Always turn your garment inside out before washing. This protects the vinyl design from abrasion against other clothes and the washing machine drum.
- Cold Water, Gentle Cycle: Wash in cold water on a gentle cycle. Hot water and aggressive agitation can weaken the adhesive over time.
- Mild Detergent: Use a mild detergent. Avoid harsh chemicals, bleach, or fabric softeners, as these can degrade the vinyl and its adhesion.
- Tumble Dry Low or Hang Dry: For best results, tumble dry on a low heat setting or, even better, hang dry your garment. High heat can cause the vinyl to lift or crack.
- No Dry Cleaning: Do not dry clean garments with SportFlex Iron-On™.
- Ironing (If Necessary): If you need to iron the garment, turn it inside out and iron on the reverse side. Avoid direct heat to the vinyl design.
Troubleshooting Common SportFlex Iron-On Issues
While SportFlex Iron-On™ is incredibly reliable, occasionally you might encounter minor issues. Here are some common problems and how to resolve them:
- Vinyl Not Sticking or Lifting Edges:
- Check Heat and Pressure: Ensure your EasyPress was set to the correct temperature (305°F / 150°C) and you applied consistent, firm pressure for the recommended time (30 seconds per section). Refer to the Cricut Heat Guide for precise settings.
- Cold Peel: Did you let the design cool completely before peeling the carrier sheet? SportFlex Iron-On™ requires a cold peel. If peeled warm, it may not adhere properly.
- Pre-wash Fabric: Make sure your garment was pre-washed without fabric softener, as softeners can create a barrier to adhesion.
- Re-press: If edges are lifting, place the protective sheet back over the design and re-press for 10-15 seconds, focusing on the problem areas, then allow to cool completely before peeling again.
- Bubbling or Wrinkling:
- Flat Surface: Ensure your garment was placed on a completely flat, firm surface (like the EasyPress Mat) during application.
- Even Heat: Confirm that your EasyPress covered the entire design area adequately, especially if you had to press in sections.
- Fabric Type: While SportFlex is designed for stretchy fabrics, extremely thin or delicate fabrics might react differently to heat. Always do a test press if unsure.
Unleash Your Creativity: More Ideas for SportFlex Iron-On™
The possibilities with SportFlex Iron-On™ extend far beyond workout shirts. Here are some more inspiring project ideas for your custom activewear and stretchy garments:
- Personalized Swimwear: Just like I’m planning for my twin girls’ swim team (thinking “eat my bubbles” on the butt!), SportFlex is perfect for bathing suits, swim caps, and rash guards.
- Team Jerseys & Uniforms: Customize sports jerseys for local teams, school clubs, or even family reunions.
- Yoga & Dance Apparel: Add inspiring quotes or intricate designs to yoga pants, leotards, or dance costumes.
- Headbands & Wristbands: Create matching accessories for your activewear ensemble.
- Gym Bags & Backpacks: Personalize athletic bags with names, logos, or fun graphics.
- Running Shorts & Leggings: Embellish legwear with reflective SportFlex for added visibility or unique patterns.
- Baby & Toddler Activewear: Make adorable, stretchy onesies or little sweatpants with cute designs for the tiniest athletes.
I’m genuinely thrilled about this stretch-friendly iron-on vinyl. It opens up so many new creative avenues for customizing items that were previously challenging. Don’t be afraid to experiment and have fun with it!
Other posts you may enjoy:
- Epic Craft Room Storage Ideas
- Which Cricut Machine Is Right for You?
- Cricut vs. Silhouette: My Unbiased Review
- Make ALL THE THINGS With the Cricut Maker
- How to Make Stickers and Labels with a Cricut Machine
- Personalized Christmas Ideas With Cricut