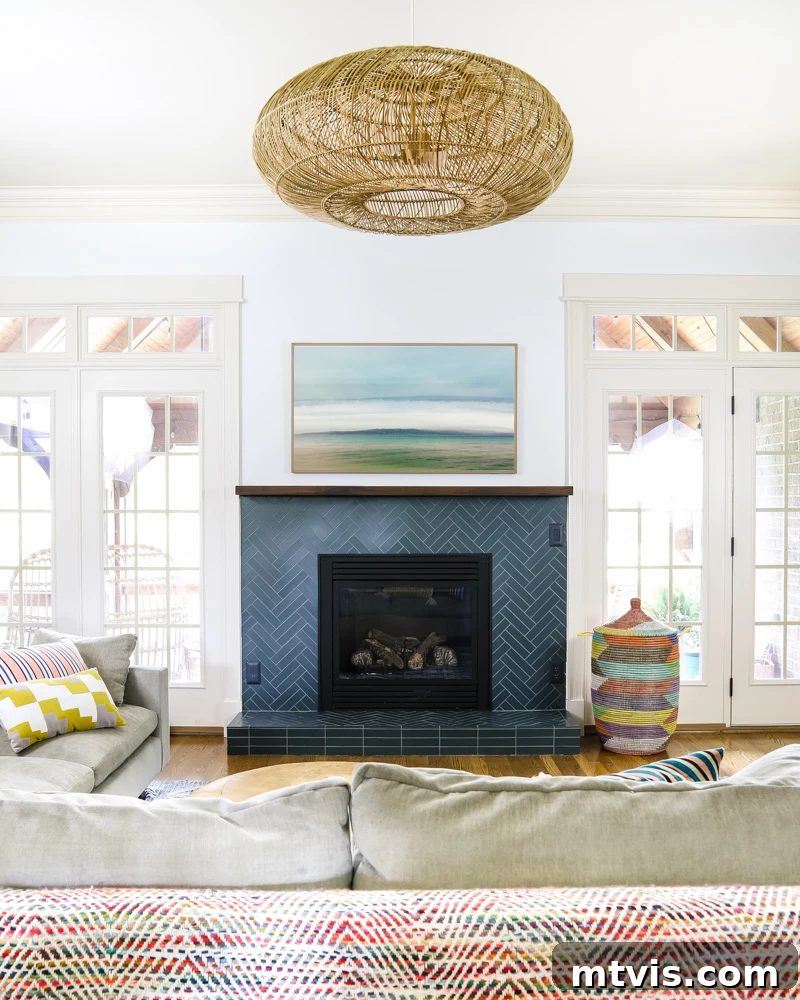
A Stunning Fireplace Transformation: From Outdated Beige to a Teal Blue Showstopper
After what felt like an endless journey, our much-anticipated fireplace makeover is finally complete! For those who’ve been following our progress on Instagram, you know this project consumed a significant portion of our summer. What began with demolition on June 24th culminated in a magnificent reveal on August 27th. If you’ve ever felt discouraged by the time commitment required for home renovations, please take heart! Our extended timeline was a testament to several factors: the intricate multi-step process, a painstaking multi-week search involving over 30 tile samples, a refreshing two-week vacation in Hawaii during July, and perhaps most notably, the unforeseen complexities of the tiling itself. Such is the reality of ambitious DIY projects!
While I won’t be providing a prescriptive step-by-step tutorial – as the specifics of our home, dimensions, and chosen materials are unique – my hope is that this detailed account will serve as a profound source of inspiration. It demonstrates the immense potential hidden within an outdated fireplace, proving that even the most unloved architectural features can be transformed into cherished focal points that truly resonate with your personal style. Embrace the journey; you absolutely can create something you adore!
This isn’t our first venture into fireplace renovations. In our previous residence, we tackled an improperly sealed, outdated stone fireplace, successfully giving it a sleek, modern concrete finish for under $100. We even went so far as to install a brand-new electric fireplace where none existed before in our old bedroom! When it comes to envisioning and executing fireplace transformations, the creative possibilities are truly boundless. Believe me.
The Uninspired “Before”: A Beige Fireplace Lacking Charm
Let’s cast our minds back to the beginning of this transformation. First, a glimpse at the fireplace’s original state, the “before” that spurred our renovation efforts:
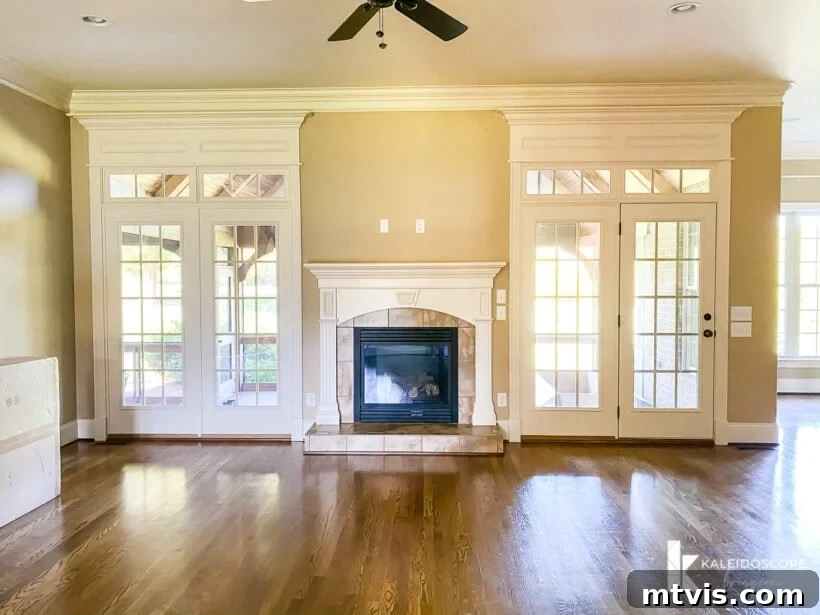
Frankly, nothing about its previous iteration resonated with our aesthetic. The entire structure was a uniform beige, and the elaborate detailing on the mantel felt excessively “fussy” and outdated for our tastes. The beige tile, predictably, was also far from appealing. Beyond the color and style, a significant design flaw was the inadequate width of the hearth and surround; they failed to span the entire space between the two flanking windows. This made the fireplace appear undersized and diminished its presence as a key feature in the room.
Adding to our list of grievances was another prominent issue on this wall: the excessive trim situated above the transom windows. It extended so high that it nearly touched the crown molding, creating a heavy, somewhat overwhelming visual effect that felt entirely unnecessary to us.
Crafting the Vision: A Design Mockup Takes Shape
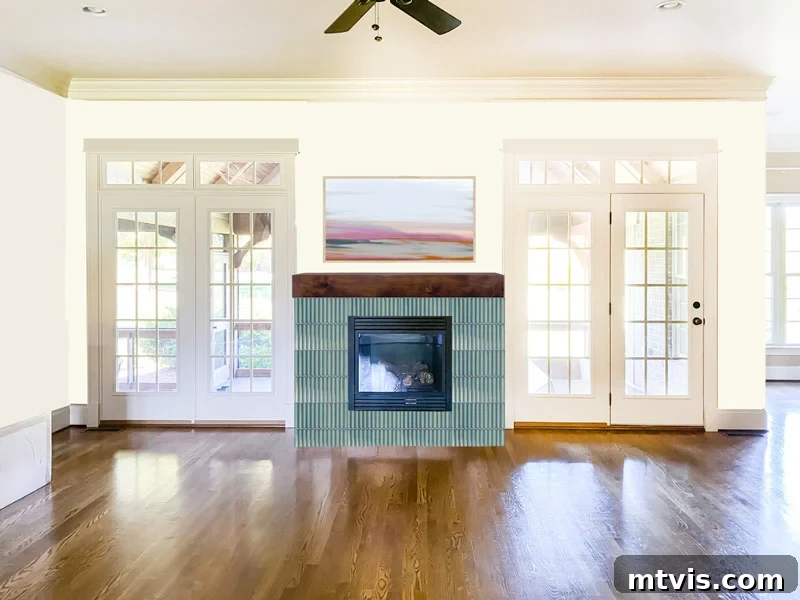
As is my usual practice, I embarked on creating a digital mockup to visualize potential changes. This initial concept proved invaluable in solidifying our design direction. It allowed us to explore various ideas, from simplifying the overly ornate trim above the windows to envisioning the dramatic transformation of the fireplace itself. This preliminary stage is crucial for ensuring alignment and confidence before any physical work begins.
The Great Tile Hunt: Weeks of Samples and Deliberation
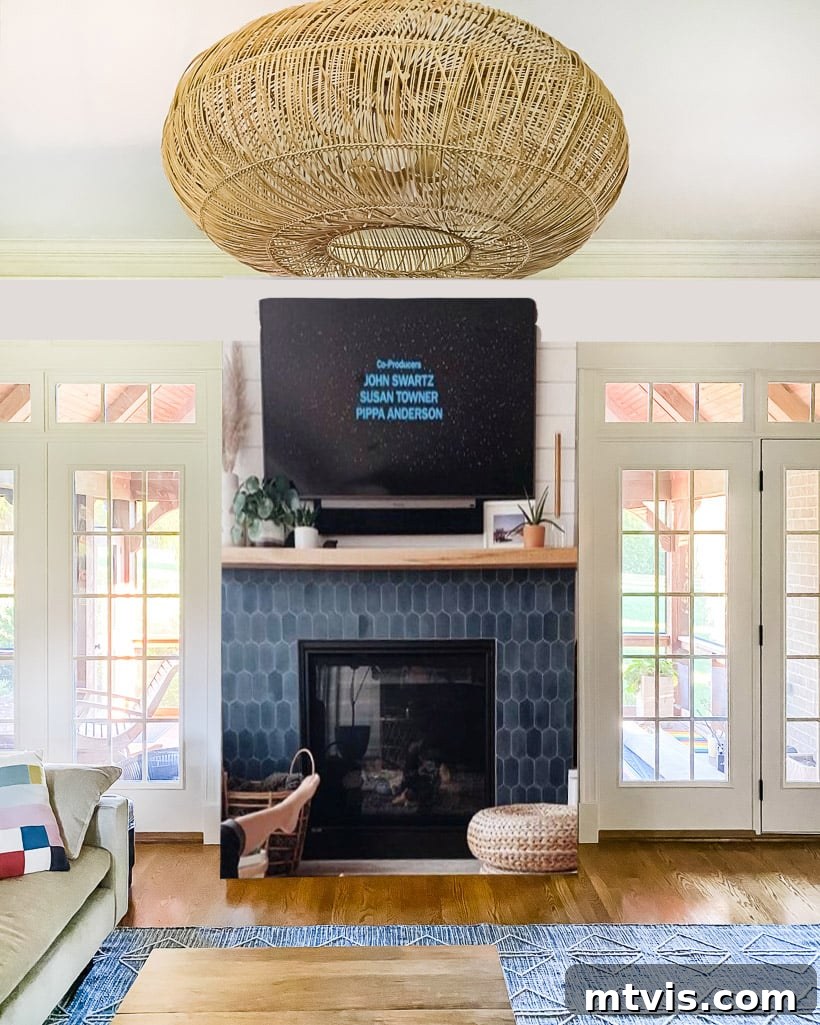
Once Joe and I reached a consensus on the overall aesthetic and direction, the notoriously challenging quest for the perfect tile began. I genuinely underestimated how arduous this selection process would be. The image below showcases the third tile sample I ordered – a “kit kat” shape that I absolutely adored and desperately wanted to use. However, Joe was not convinced. In an attempt to sway his opinion, I even created a detailed mockup incorporating the tile, hoping to illustrate its potential. Alas, my persuasive efforts were unsuccessful; he remained unconvinced!
Our comprehensive tile hunt, believe it or not, spanned an entire month. This is not an exaggeration. If you’re curious to see the extensive array of other tile samples we meticulously ordered, considered, and ultimately discarded, you can view them by clicking HERE. The sheer volume of choices, coupled with the need for a tile that harmonized with our vision, budget, and durability requirements, made it a truly exhaustive endeavor. We explored various materials, finishes, and sizes, each presenting its own unique set of pros and cons.
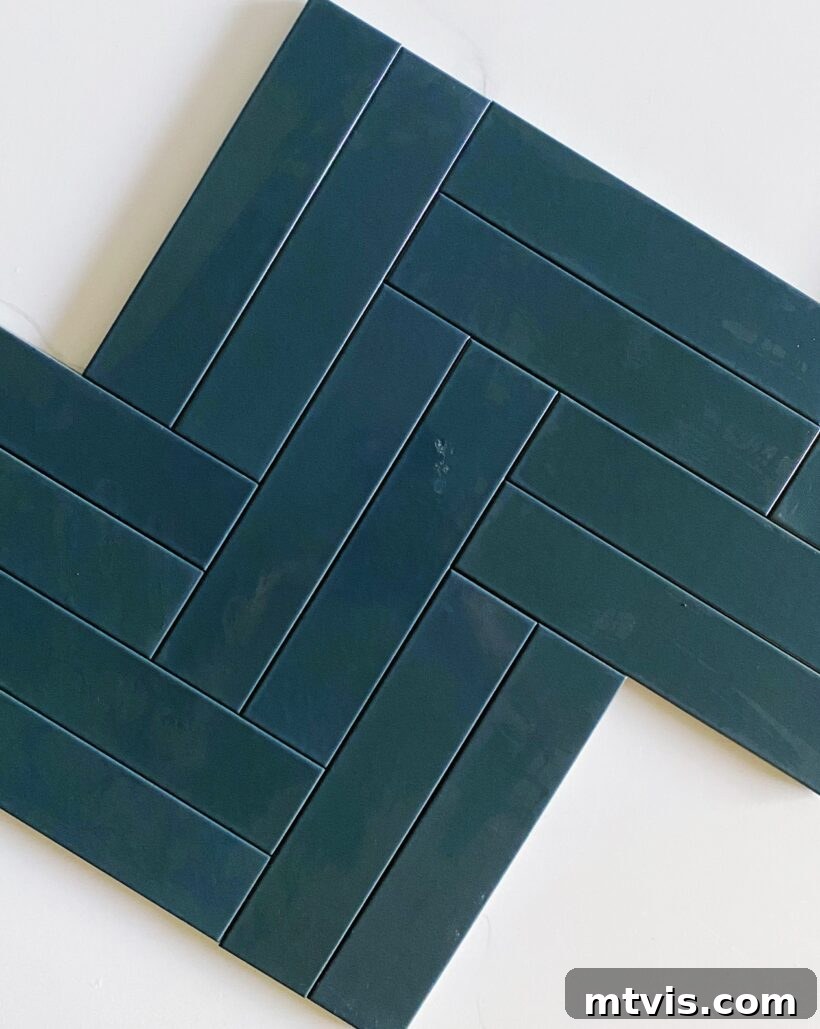
Ultimately, after much deliberation and countless samples, we settled on this exquisite matte ceramic tile by Zia Tile. Specifically, we chose their “Pacific Blue” shade. While its name suggests navy, in person, the tile reveals a stunning, more accurate teal hue, which perfectly matched the vibrant yet sophisticated color we desired. For the installation pattern, we decided on a striking double herringbone, an intricate choice that promised to elevate the fireplace into a true artistic statement. *A crucial note for prospective buyers: the Pacific Blue tile we used presents as more teal than navy in real life. The photograph I’ve included below offers a far more accurate representation of its true color than what you might see on the product page.*
The Tiling Ordeal: Our Most Challenging DIY to Date
It’s important to preface this by stating that we possess a considerable amount of tiling experience. I personally tiled every inch of our girls’ bathroom in our previous house entirely on my own. We also successfully tackled the powder room in our old home ourselves. Furthermore, we’ve installed numerous backsplashes, including the one in our last kitchen. I recount these experiences so that when I declare that this particular fireplace tiling project was THE MOST DIFFICULT TILING WE HAVE EVER UNDERTAKEN, you understand I do not make such a statement lightly.
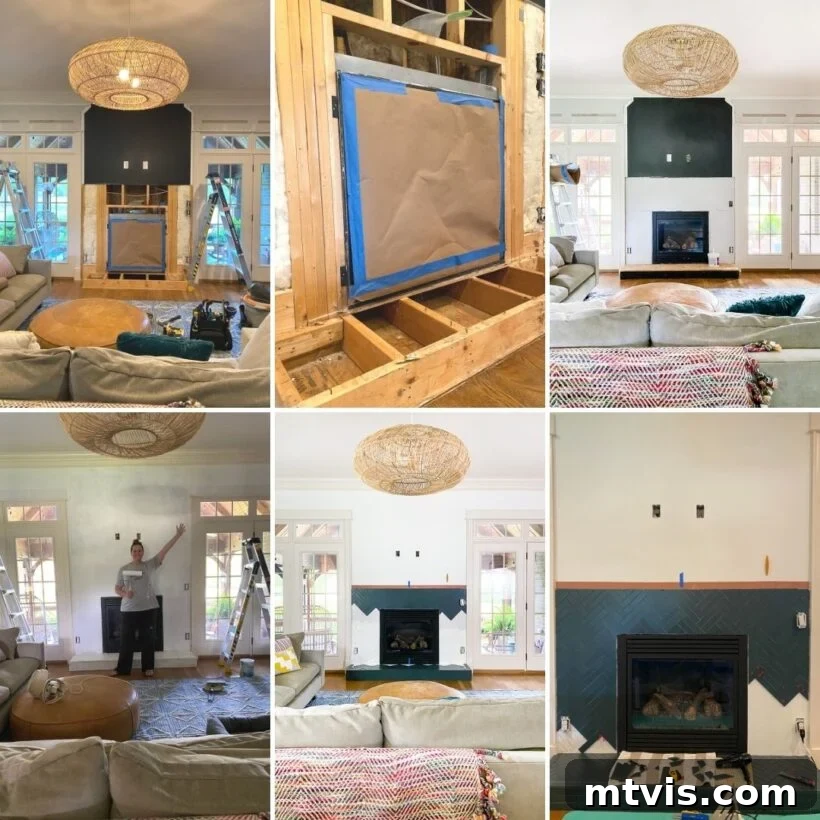
Friends, the intricate task of meticulously cutting and installing a double herringbone pattern while navigating around the fireplace box, various electrical outlets, and existing trim was an exceptionally complex and frustrating endeavor. Frankly, if you’re considering a similar project, I strongly advise against attempting this specific combination of challenges yourself. With the benefit of hindsight, we would undoubtedly have chosen to hire a professional for this phase of the renovation. The precision required for the cuts, the constant adjustments around irregularities, and the sheer effort to maintain the perfect herringbone alignment pushed our DIY skills to their absolute limit.
Despite the immense difficulties and the agonizingly slow pace of progress, we were committed to achieving the most perfect installation possible. We dedicated an extraordinary amount of time, far exceeding our initial estimates, to ensure every tile was placed with care and precision. The journey was arduous, as this glimpse into our renovation process reveals:
The Grand Reveal: A Teal Blue Masterpiece
But oh, was it worth it! The final outcome of our fireplace makeover has exceeded all our expectations. We are absolutely enamored with how it turned out, transforming a previously uninspired corner into a vibrant, stylish centerpiece. Prepare to be amazed by the stunning transformation!
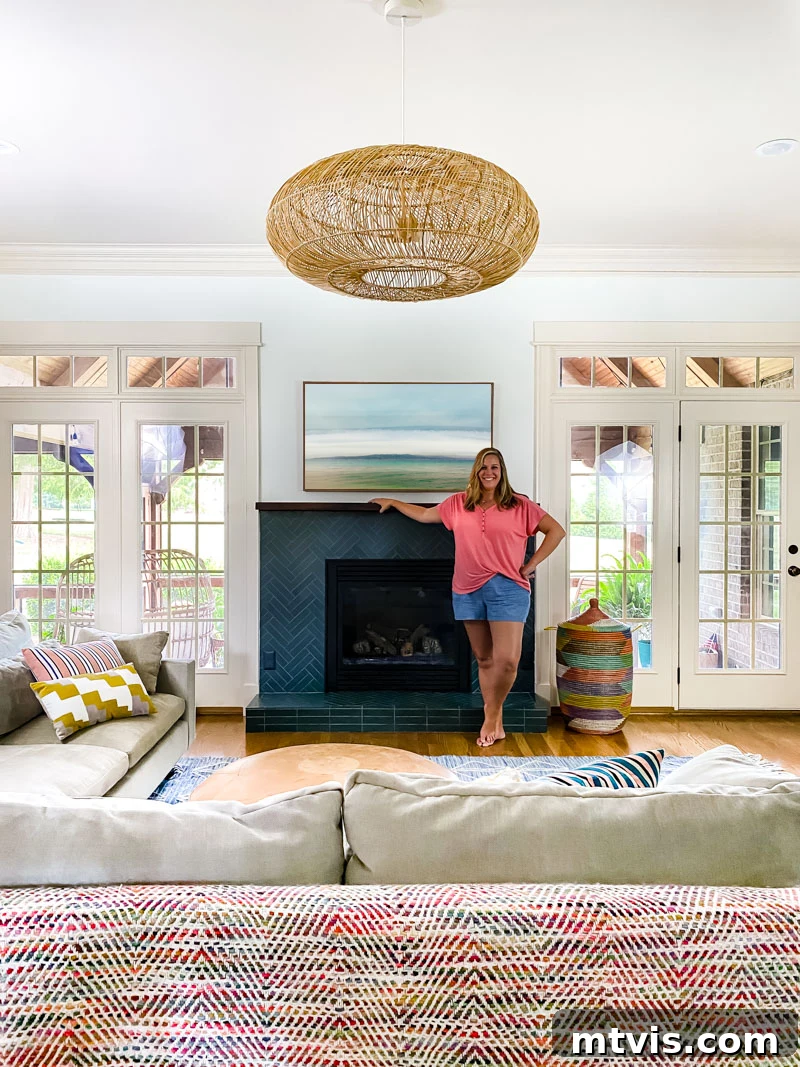
While we couldn’t eliminate the existing electrical outlets or the essential switch that operates our gas fireplace, we employed a clever solution to minimize their visual impact. We utilized paintable outlet covers, which I then custom-mixed to perfectly match the striking teal hue of the Zia Tile. This meticulous approach allowed them to blend in as seamlessly as possible, maintaining the clean, uninterrupted lines of the new design.
Ongoing Styling and Your Thoughts
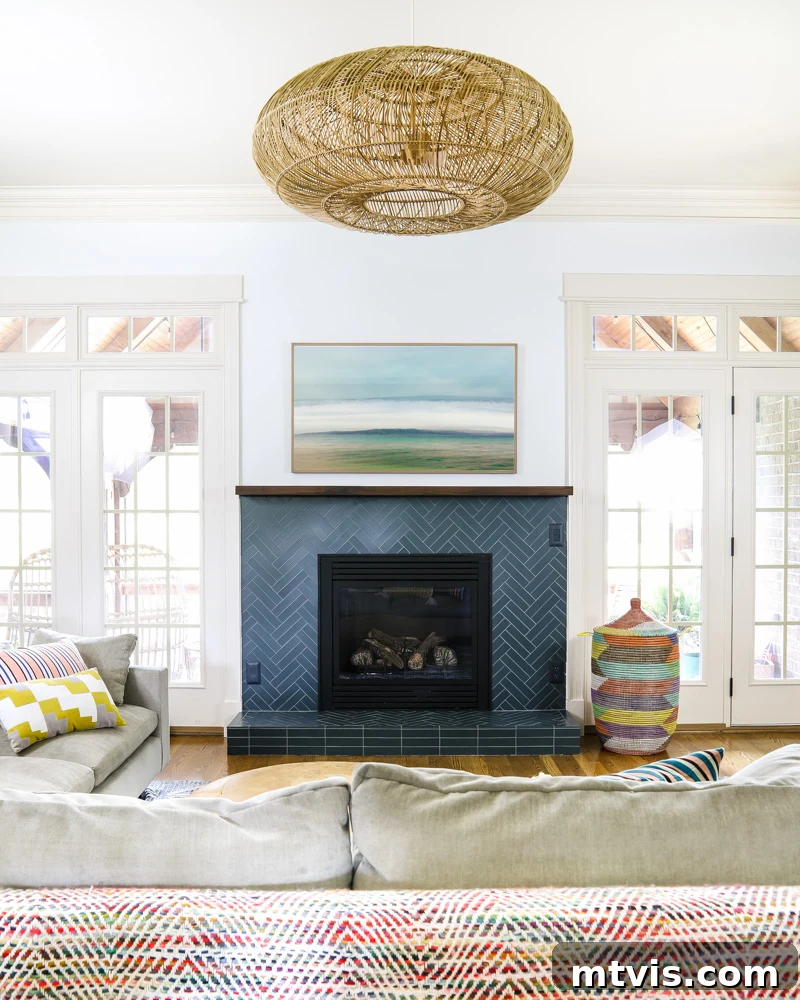
The final styling of the fireplace mantel is still a work in progress. I’m taking my time to thoughtfully curate the perfect arrangement of decor items, seeking out books, vases, and perhaps some elegant candles from around our home to complement its fresh, vibrant look. Despite this ongoing styling, we are absolutely thrilled with the dramatic transformation and the incredible impact it has had on the entire room’s ambiance!
What are your thoughts on our updated fireplace? To truly appreciate the scope of this transformation, here’s a captivating before-and-after comparison:
That concludes our detailed journey for now! To everyone who diligently followed our progress through my Instagram stories and offered constant encouragement along the way, we extend our sincerest gratitude. Your support made a significant difference!
If you’re eager to discover more about my methodical approach to transforming rooms and spaces throughout our home, I invite you to explore Designer in a Binder®. It’s a comprehensive resource designed to simplify your decorating journey.
And for exclusive content and behind-the-scenes sneak peeks into our latest projects, be sure to subscribe to our newsletter before you depart!