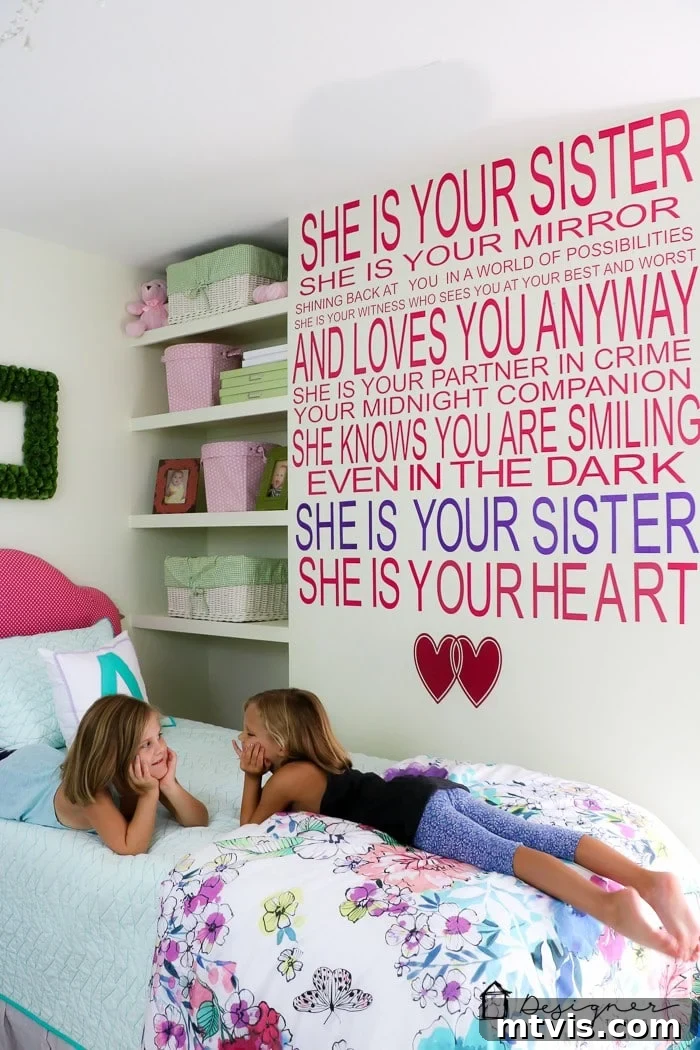
Have you ever dreamed of adding a unique, personal touch to your home decor? Imagine transforming a plain wall into an inspiring focal point with a custom message, a beloved quote, or a meaningful phrase. While pre-made wall decals are available, they often limit your choices in terms of font, size, color, and specific wording. The exciting news is that creating your own stunning DIY vinyl wall quotes is not only achievable but also surprisingly straightforward with the right tools and guidance. This comprehensive guide will walk you through every step of making personalized vinyl wall decals using a cutting machine, allowing you to bring your creative visions to life and infuse your living spaces with character and charm.
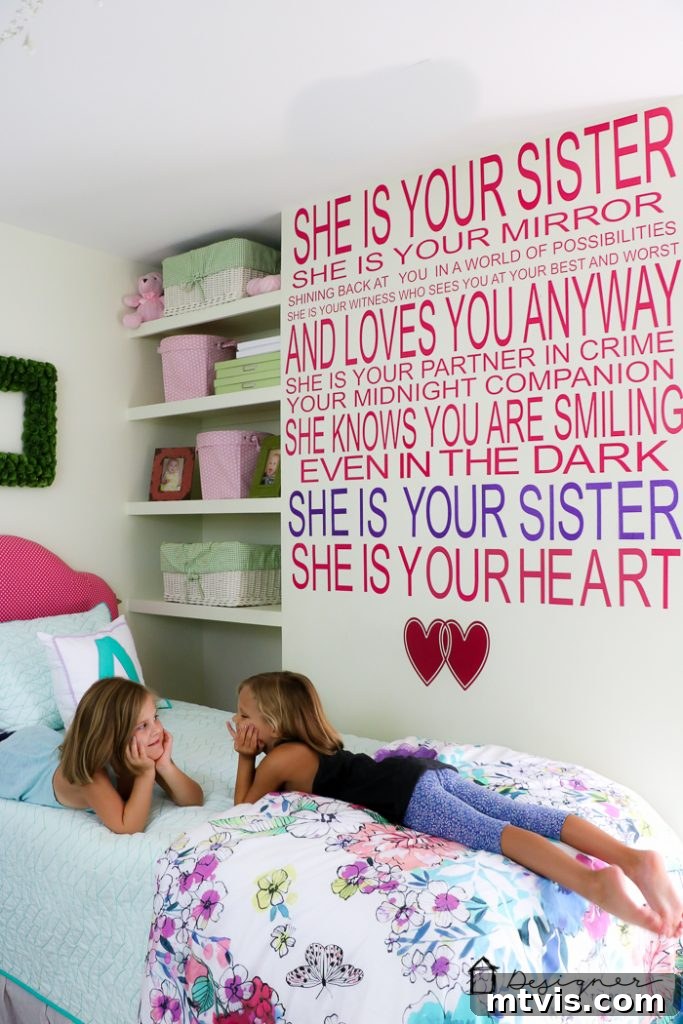
Table of Contents
This post contains affiliate links for your convenience. Click here for my full disclosure policy.
My journey into making DIY vinyl wall quotes began with a beautiful hand-painted sign I spotted on Etsy. Its heartfelt message about sisters deeply resonated with me, bringing back cherished memories of growing up with my own best friend and sister. Inspired by this sentiment, I knew I wanted to create a similar, personalized piece of wall art for my twin girls’ shared bedroom. The idea of capturing such a sweet quote in a custom design, perfectly tailored to their space, was irresistible. This project proved to be a fantastic way to add a unique and sentimental touch to their room, and it’s a process you can easily replicate for any quote, in any color, and any size you envision. Let’s dive into how you can make your own.
Why DIY Your Vinyl Wall Quotes?
Opting to create your own vinyl wall quotes rather than purchasing them offers a myriad of benefits. Foremost, it grants you unparalleled creative freedom. You are no longer constrained by the limited selections offered by retailers. You can choose:
- Any Font: From elegant scripts to bold modern sans-serifs, the font options are limitless to match your aesthetic.
- Any Size: Whether it’s a subtle accent or a dramatic statement piece spanning an entire wall, you control the dimensions.
- Any Quote: Personalize your space with inspirational sayings, family mottos, song lyrics, or inside jokes that hold special meaning to you.
- Any Color: Match your existing decor perfectly or introduce a vibrant pop of color with a vast palette of vinyl options.
Beyond customization, DIY vinyl wall quotes are often significantly more cost-effective. While a cutting machine is an initial investment, the savings on individual custom decals can quickly outweigh that cost, especially if you plan multiple projects. Furthermore, the satisfaction of creating something beautiful and meaningful with your own hands is truly priceless.
Essential Materials for DIY Vinyl Wall Quotes
Before you embark on your vinyl crafting adventure, gather these key materials. Having everything ready will ensure a smooth and enjoyable creation process:
- Adhesive Vinyl: This is the core material for your wall quote. Vinyl comes in a vast array of colors, finishes (matte, glossy, glitter, metallic), and types (removable for walls, permanent for outdoor use). For wall quotes, always opt for removable adhesive vinyl as it won’t damage your paint upon removal. I personally used beautiful pink vinyl and dazzling purple glitter vinyl for my project to add a playful touch.
- A Cutting Machine: This is your primary tool for precision cutting. Popular brands include Silhouette and Cricut. For this specific project, I utilized my Silhouette CAMEO. We’ll discuss machine choices in more detail in the tutorial.
- Transfer Paper (or Transfer Tape): Essential for moving your cut vinyl design from its backing onto your wall. This special adhesive paper ensures your design stays perfectly aligned during application. While the Silhouette brand offers good transfer paper, I’ve found that purchasing a large bulk roll is much more economical and performs just as perfectly.
- Weeding Tools: These small, pointed tools (hooks, tweezers, picks) help you remove excess vinyl from around your cut design.
- Scraper Tool (or an old credit card): Used to firmly rub over the vinyl and transfer paper, ensuring good adhesion at various stages of the process.
- Measuring Tape and Level: Crucial for accurate placement and ensuring your wall quote is perfectly straight.
- Cleaning Supplies: Rubbing alcohol and a lint-free cloth to clean your wall before application.
DIY Vinyl Wall Quote Tutorial: Step-by-Step Guide
Time needed: 4 hours
The total time for this project can vary based on the size and complexity of your wall quote. For my large-scale design, it took approximately 4 hours from start to finish. Breaking it down into manageable steps makes the process enjoyable.
-
Step 1: Choose the Right Cutting Machine
If you don’t already own one, acquiring a quality cutting machine is the first and most crucial step for creating your own custom wall quotes. While it represents an investment, consider that commissioning a bespoke wall decal of significant size from a professional company could easily exceed the cost of a machine. These versatile devices open up a world of crafting possibilities beyond just wall quotes, making them a worthwhile addition to any DIY enthusiast’s toolkit.
The market offers several excellent cutting machine brands, with Silhouette and Cricut being the two leading contenders. Each boasts unique features and software interfaces. For this particular project, I used the Silhouette CAMEO. However, I have since expanded my crafting arsenal and now primarily use Cricut machines, having found their ecosystem to be incredibly user-friendly and powerful. If you’re struggling to decide between the two, I highly recommend reading my unbiased review of Silhouette vs. Cricut for a detailed comparison to help you choose the best brand for your crafting needs and preferences.
-
Step 2: Design Your Custom Wall Quote in Software
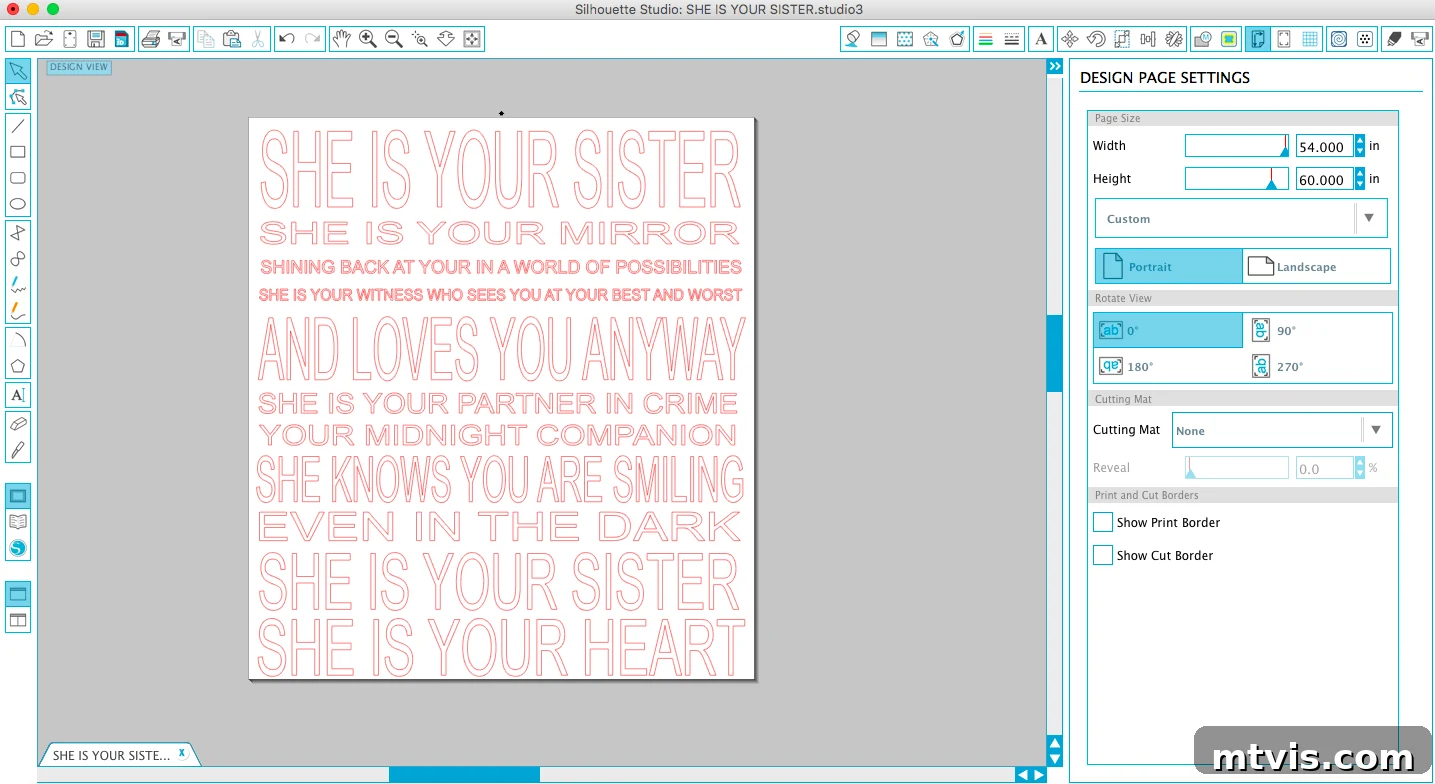
With your cutting machine selected, it’s time to bring your quote to life in the accompanying design software. Whether you’re using Silhouette Studio (for Silhouette machines) or Cricut Design Space (for Cricut machines), the process begins with digital design. Start by accurately measuring the wall or section of the wall where your quote will be applied. Input these dimensions into your design software to create a realistic canvas.
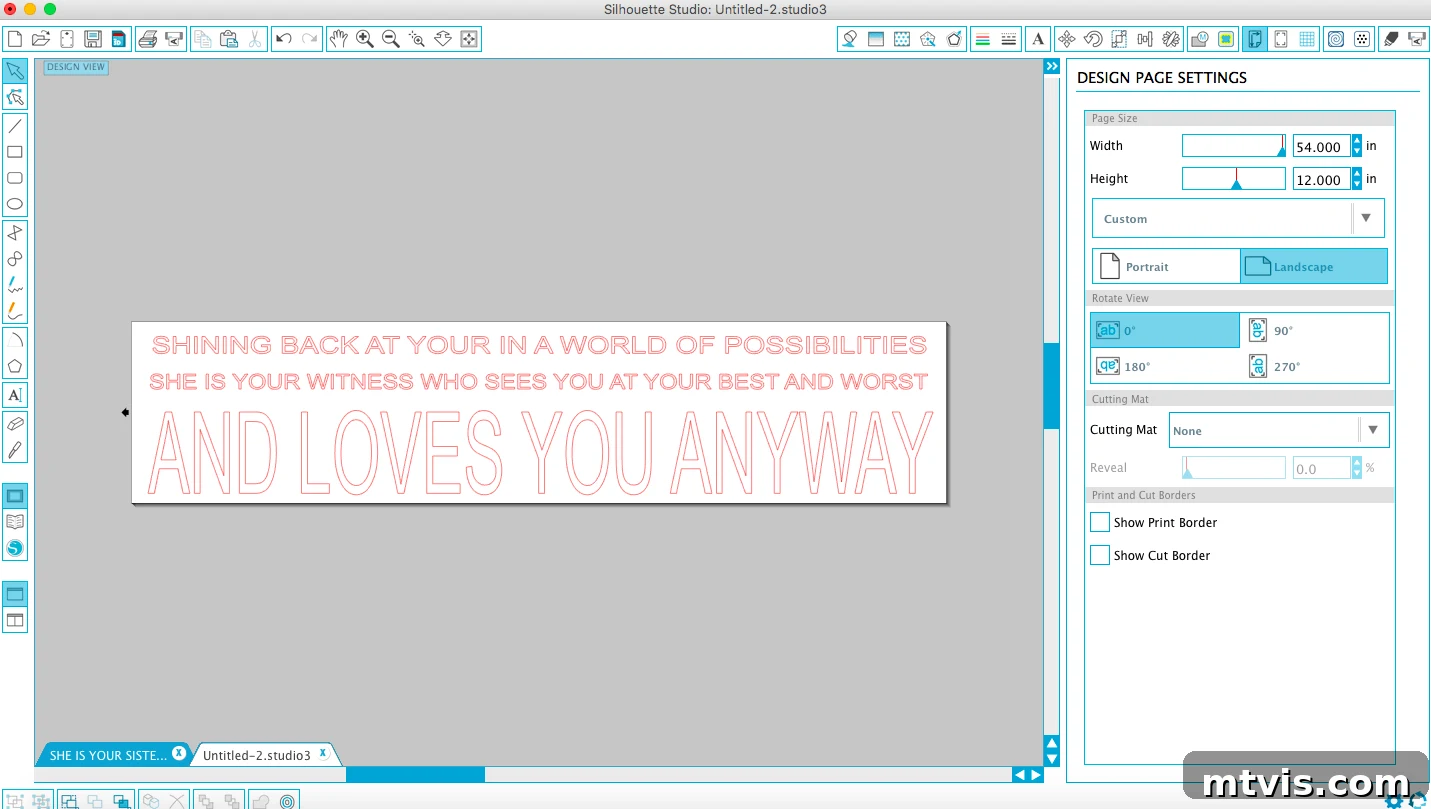
Next, type out your entire quote. This allows you to immediately visualize how the text fits within your designated space. Experiment with different fonts, sizes, and line breaks to achieve the desired aesthetic. Play around with making certain words or lines larger or smaller, or use different fonts for emphasis. Pay close attention to kerning (the spacing between individual letters) and leading (the spacing between lines of text) to ensure readability and visual balance. This design phase is where your creativity truly shines, allowing you to fine-tune every detail until it perfectly matches your vision for a personalized and impactful wall decal.

-
Step 3: Prepare Your Design and Vinyl for Cutting
Once your design is finalized and looks exactly how you want it, you’ll need to prepare it for cutting. For large wall quotes, especially those exceeding the width of your cutting mat, you’ll need to break the design into manageable sections. In Silhouette Studio, I copied and pasted lines of my quote onto new files, ensuring each section fit within my 12-inch vinyl width. I opted to cut 54-inch lengths of vinyl at a time, aligning with the width of the wall I was decorating. While this method might seem to generate more vinyl waste than cutting individual letters and maximizing each strip, it significantly simplifies the subsequent transfer process, especially for such a large project.
Interestingly, if I were to undertake this project today using Cricut Design Space, I would leverage its “splice” or “slice” feature. This powerful tool allows you to precisely cut large designs into smaller, interconnected pieces that fit on your mat, potentially saving both time and material. Regardless of your machine, when working with long pieces of vinyl, it’s crucial to support the weight of the vinyl roll as it feeds through the machine. I learned this the hard way after ruining several feet of vinyl when the roll went off track due to its unsupported weight. A simple solution is to place the roll on a stand or carefully support it by hand as it cuts, ensuring a smooth and accurate cut every time.
-
Step 4: Cut Your Design and Weed Excess Vinyl
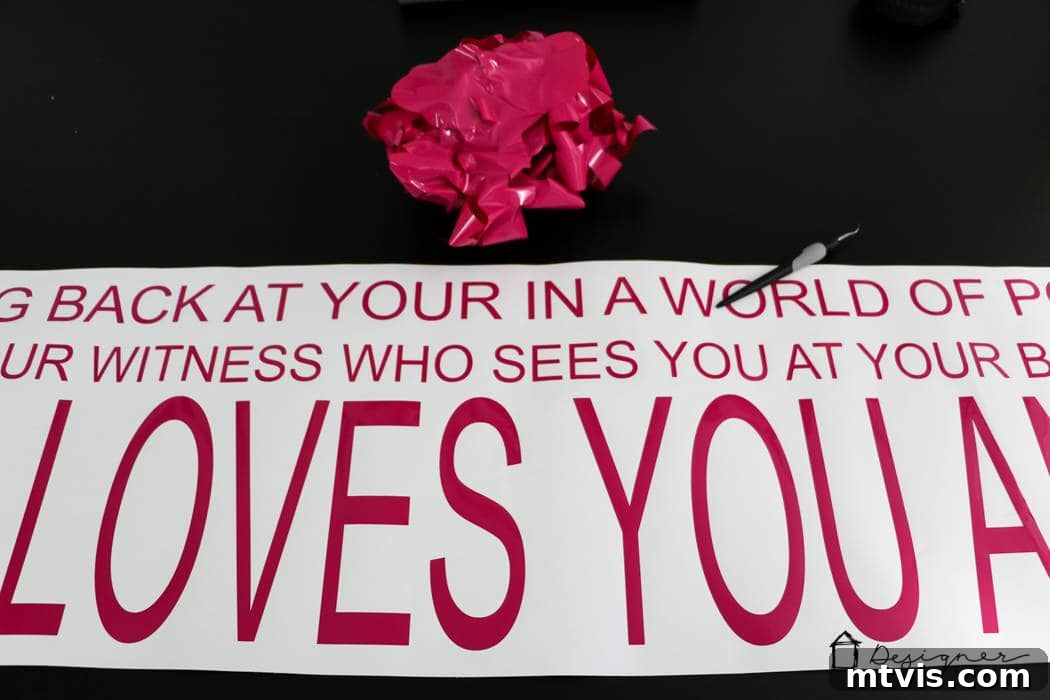
After your cutting machine has meticulously cut a section of your quote, the next step is called “weeding.” This is the process of removing all the unwanted vinyl from around your design, leaving only the letters or shapes you want to transfer to your wall. Carefully peel away the large outer sections of vinyl first. Then, using your weeding tools (a hook tool is usually best for this), gently remove the smaller inner pieces, such as the centers of letters like ‘O’, ‘A’, ‘P’, or ‘D’.
Take your time with weeding, especially for intricate fonts or small details. A good tip is to work on a well-lit surface, and sometimes placing the vinyl over a light box or a bright window can help you see the cut lines more clearly. Once all the excess vinyl has been removed, you should be left with only your clean design adhered to its paper backing, ready for the next step.
-
Step 5: Transfer Your Vinyl Design to Transfer Paper
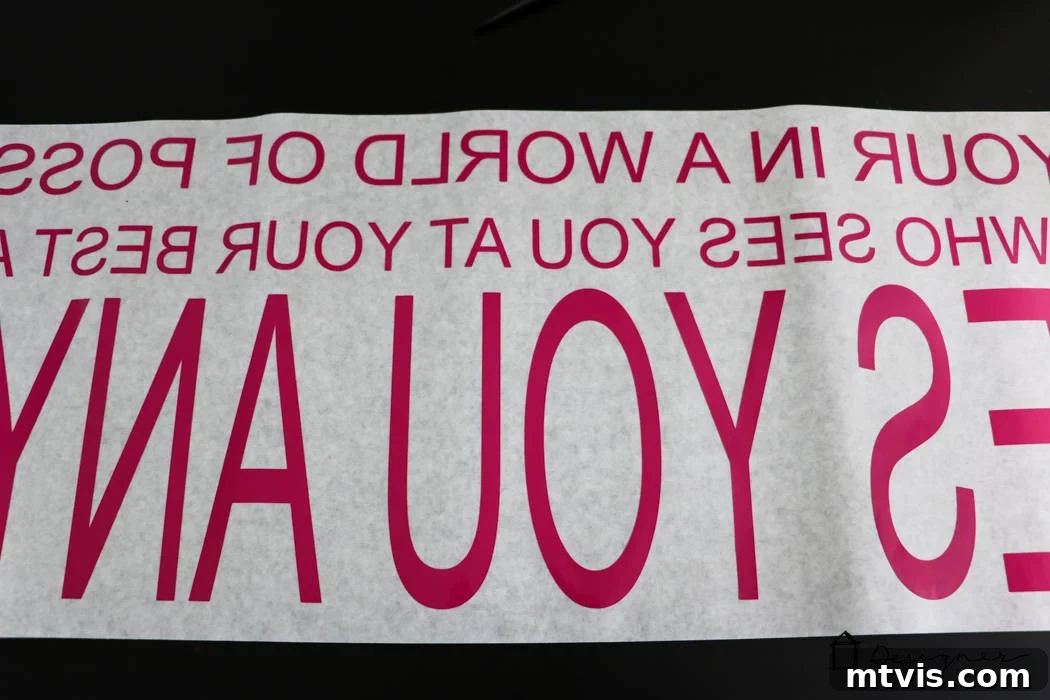
Before applying your vinyl to the wall, it’s crucial to prepare the surface. Clean the wall thoroughly with rubbing alcohol and a lint-free cloth to remove any dust, grease, or debris that could hinder adhesion. Allow it to dry completely. Next, take your transfer paper (or transfer tape) and carefully lay it over your weeded vinyl design. Start by aligning one edge of the transfer paper with the design, then slowly smooth it down over the entire quote, working from the center outwards to minimize air bubbles. Use your scraper tool (or a credit card) to firmly rub over the entire surface of the transfer paper. This process, known as “burnishing,” is vital as it helps the vinyl adhere strongly to the transfer paper, ensuring that it lifts cleanly from its original backing. The goal is for the vinyl to stick to the transfer paper more than its original backing.
-
Step 6: Apply Your Vinyl Wall Quote to the Wall
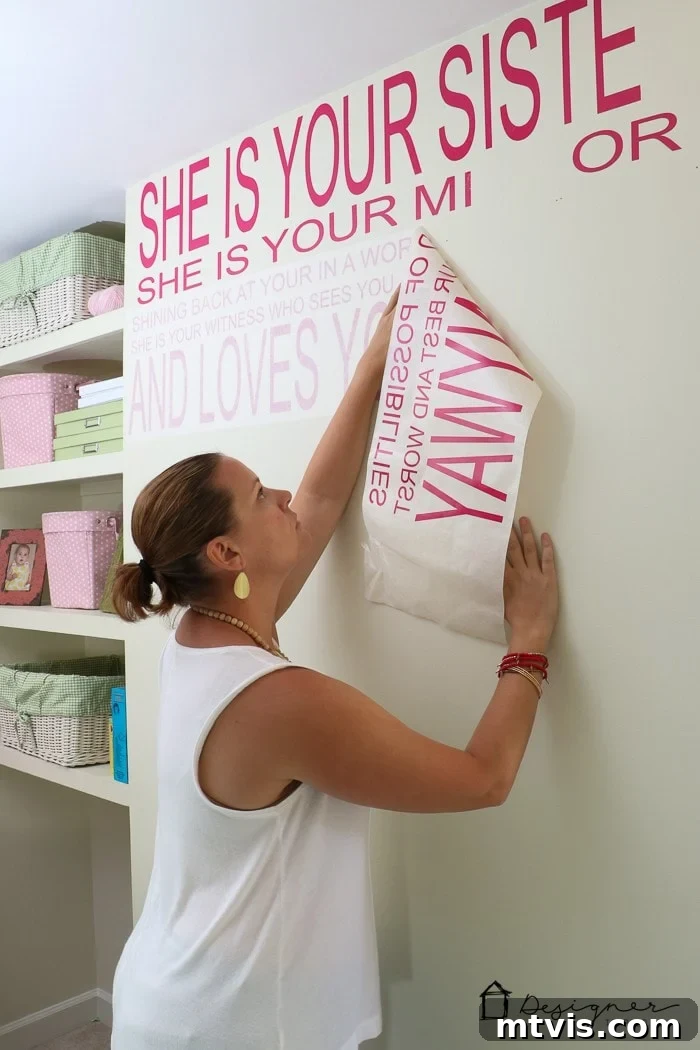
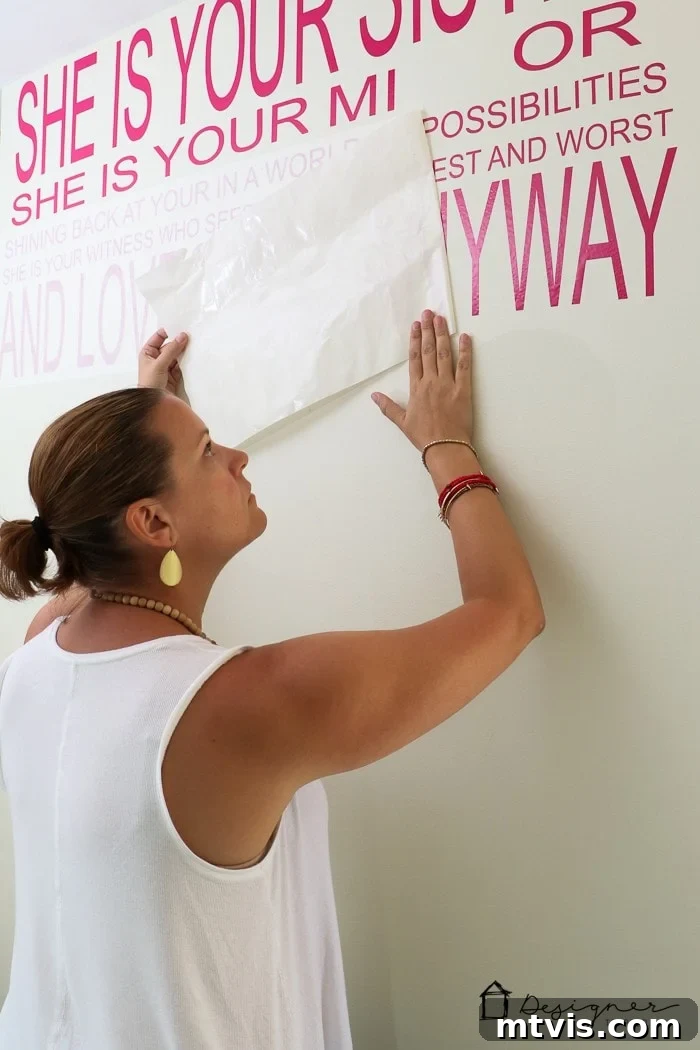
Now for the exciting part: transferring your custom wall quote to your chosen surface! Carefully peel the vinyl design, now adhered to the transfer paper, away from its original paper backing. If any parts of the vinyl don’t immediately stick to the transfer paper, simply lay it back down and re-burnish that area with your scraper tool until the vinyl lifts. Once your entire design is on the transfer paper, precisely position it on your wall. Use a level to ensure your quote is perfectly straight, and masking tape can be helpful to temporarily secure the top edge of your transfer paper in place while you finalize the alignment.
Once positioned, start by pressing the center of the design onto the wall, then slowly work outwards, smoothing firmly with your scraper tool. Apply steady, even pressure over every letter and section of the design. This strong burnishing ensures the vinyl adheres well to the wall. (Don’t worry if, like me, you find yourself missing a few letters later – vinyl allows for easy adjustments!)
-
Step 7: Carefully Peel Off the Transfer Paper
The final step to reveal your beautiful new wall quote is to slowly and gently peel the transfer paper off the wall. Begin peeling from one corner, pulling the transfer paper back at a sharp, acute angle (almost parallel to the wall, not straight out). This technique helps the vinyl letters release cleanly onto the wall. As you peel, continuously watch for any spots where a letter or part of the design isn’t sticking to the wall. If this happens, simply press the transfer paper back down, use your scraper tool to firmly rub over that area again, and then continue peeling slowly. Patience is key here to ensure a perfect transfer. Once the transfer paper is completely removed, take a moment to admire your stunning, custom-made vinyl wall quote!
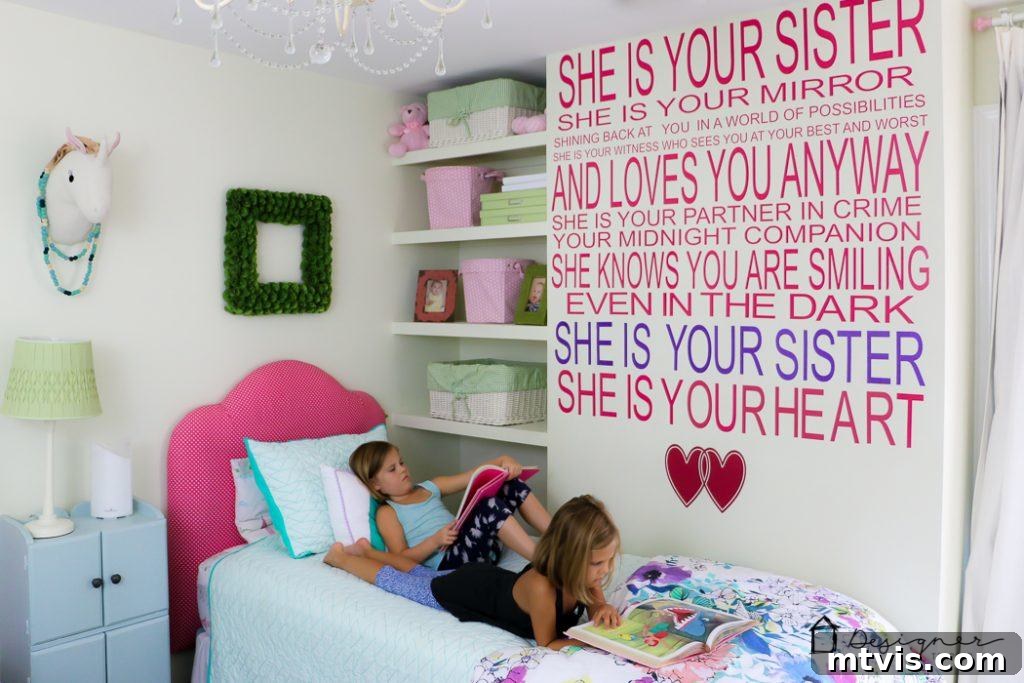
Repeat all the steps for each section of your quote until your wall is entirely transformed. The finished project for my girls’ room turned out beautifully, and we absolutely love it!
Tips for a Flawless Vinyl Wall Quote Application
One of the absolute best features of working with vinyl lettering is the forgiving nature of the material. Unlike hand-painting, where a mistake often means a messy repaint, vinyl allows for incredible flexibility. If you notice a letter is slightly crooked, the spacing looks off, or it’s not quite aligned as you intended, there’s no need to stress! Most removable wall vinyl can be slowly peeled off and carefully repositioned without damaging your wall paint. This makes the DIY process much less intimidating and more enjoyable for beginners.
Vinyl adheres remarkably well to smooth, clean surfaces, providing a durable finish that typically lasts for years. Yet, when it’s time for a change, it also peels off cleanly without leaving residue or stripping your wall. This makes vinyl wall quotes a fantastic semi-permanent decorating solution, perfect for nurseries, rental properties, or any space where you might want to refresh your decor periodically. Always ensure your wall is thoroughly cleaned and dry before application for the best adhesion and longevity.
The Joy of Custom Vinyl Wall Art
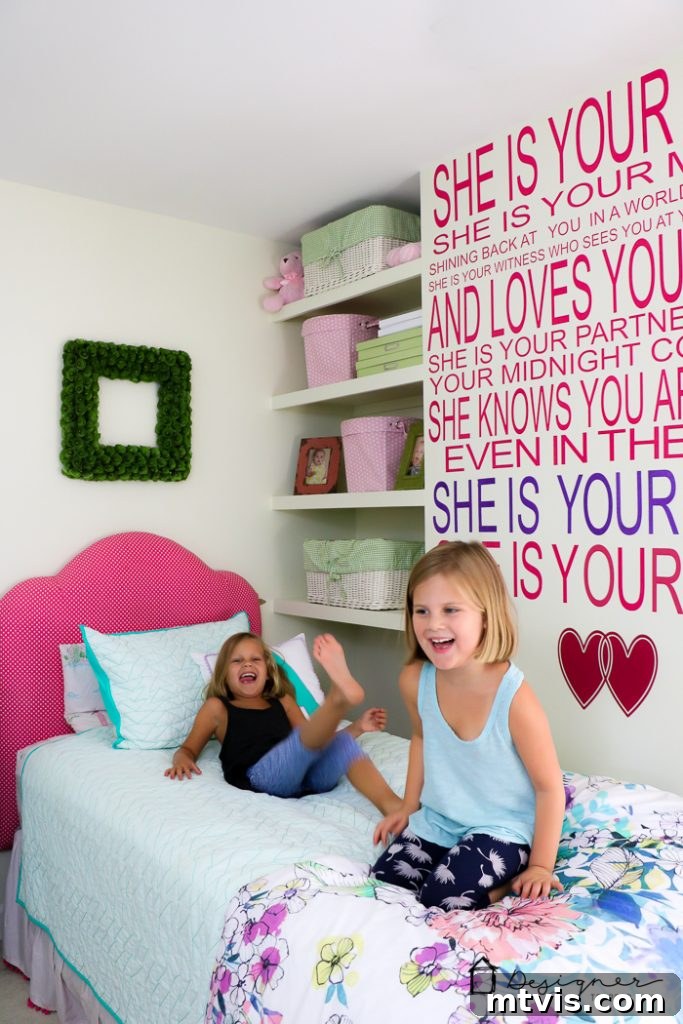
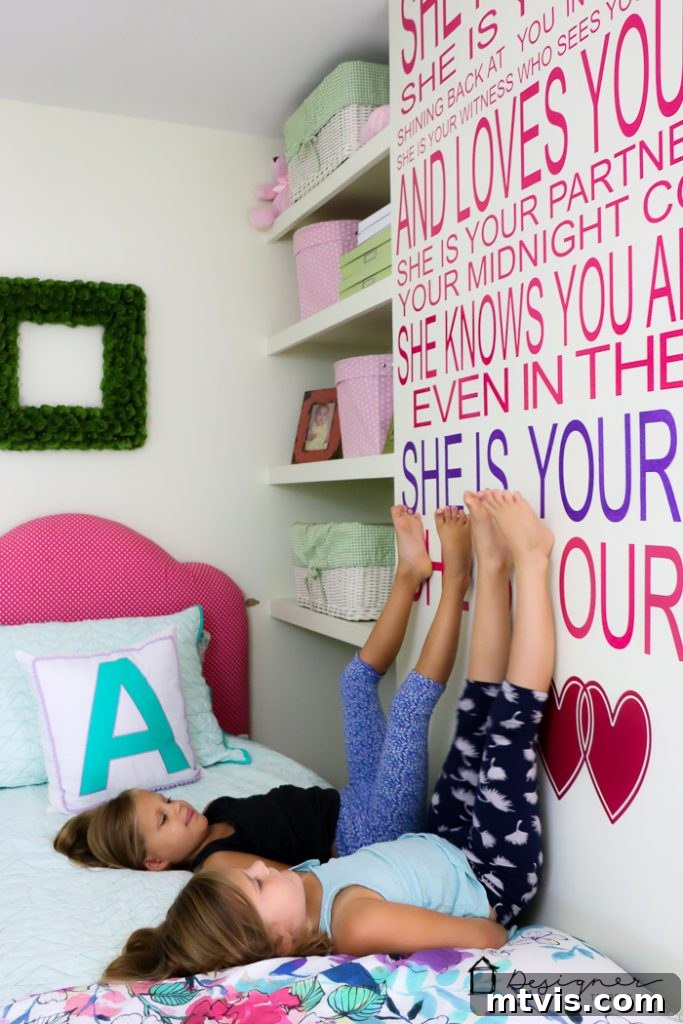
In just a few hours, this project was complete, transforming a simple wall into a meaningful statement. My girls, who are now old enough to read, absolutely adore the quote on their wall almost as much as I do. While I’m sure they don’t fully grasp its deeper significance yet, they understand the love and connection it represents. Despite the occasional sibling squabbles, they truly are best friends, and seeing this daily reminder brings me so much gratitude.
As you can see, creating your own personalized vinyl wall quotes with a cutting machine is not only a fun and rewarding DIY activity but also a highly cost-effective way to achieve exactly the custom look you desire for your home. All you truly need is a reliable cutting machine, quality adhesive vinyl in your preferred colors, a bit of patience, and your boundless imagination! The possibilities are endless when it comes to customizing your living space with unique, handmade vinyl art.
You may Also enjoy
SEE ALL cutting machine POSTS
-
DIY Santa Sacks Your Kids Will LOVE!
-
Which is the Best Cricut Machine for You?
-
How To Make Labels With a Cricut Cutting Machine – My 2 Favorite Methods
-
Silhouette vs. Cricut – My Unbiased Review
-
Personalized Christmas Ideas With Cricut
-
DIY Advent Calendar With Cricut Air Explore 2
Curious about my unique approach to transforming rooms and spaces in our home? Be sure to explore Designer in a Binder®, my signature system for affordable and stylish home decoration.
For exclusive content, behind-the-scenes sneak peeks, and more DIY inspiration delivered straight to your inbox, be sure to subscribe before you leave!