Dreaming of a beautiful new floor but dreading the mess and expense of demolition? You’re in luck! Updating your flooring doesn’t always require tearing out the old. This comprehensive guide will walk you through a surprisingly simple floating floor installation project that can transform a room, often in less than a day. Prepare to enjoy a gorgeous, refreshed space with minimal fuss and maximum impact.
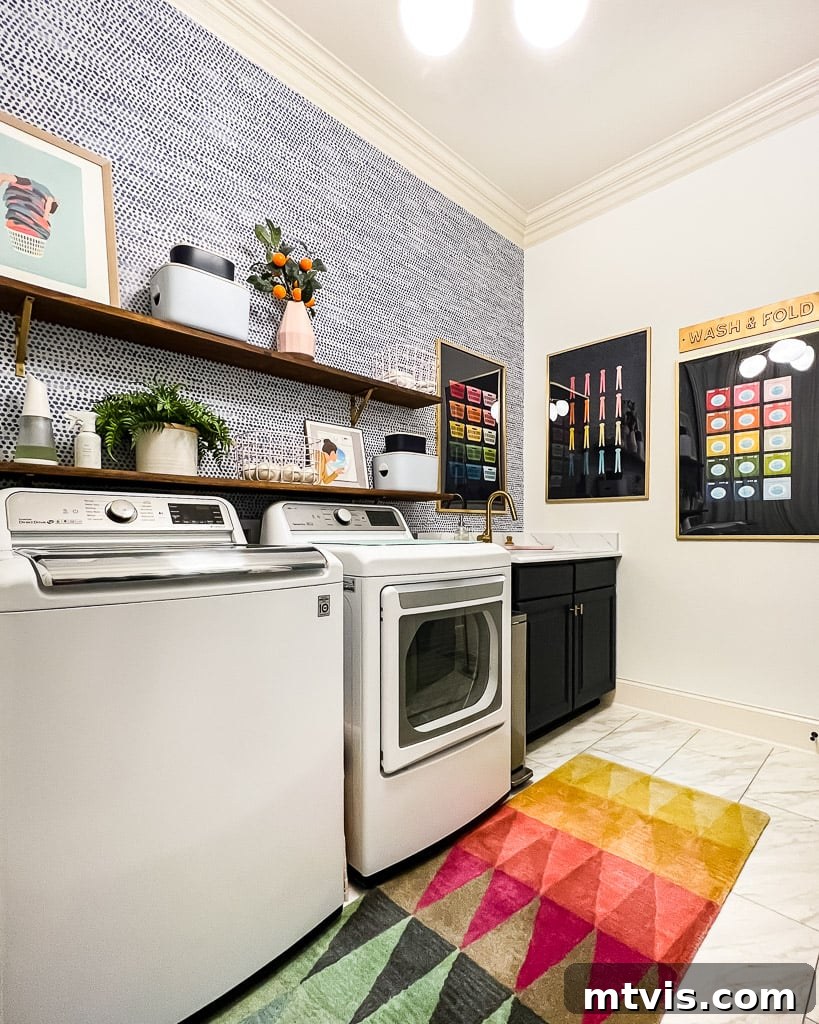
For those who follow our home renovation journey on social media, you might recall our recent laundry room floor transformation. We successfully installed luxury vinyl floating tile right over our old flooring – a method that saved us considerable time and effort. This project came about after our previous attempt to refresh the space using tile stickers didn’t quite hold up to the demands of a high-traffic area. While we absolutely loved the aesthetic of the tile stickers, a crucial oversight in sizing (ordering them the exact same size as the existing tiles instead of slightly smaller) led to peeling edges after about nine months. It was a valuable lesson learned: sometimes, a shortcut isn’t the long-term solution.
Despite the disappointment of the tile stickers, it ignited a new search for a more durable, yet equally easy, flooring option. The idea of traditional tile demolition was unappealing, to say the least. Initially, we considered luxury peel-and-stick vinyl tiles, similar to those we used in a previous laundry room project. However, this option would still require the tedious task of filling in existing grout lines to create a perfectly level surface – a preparation step we were keen to avoid. Our quest ultimately led us to discover the incredible world of floating floors, a game-changer for DIY enthusiasts looking for beautiful, long-lasting results without the hassle.
Understanding Floating Floors: What Makes Them Unique?
The term “floating floor” has gained immense popularity in the home improvement world, and for good reason. It’s important to clarify that “floating floor” doesn’t refer to a specific flooring material itself, but rather to an innovative installation method. Unlike traditional flooring that is glued, nailed, or mortared directly to the subfloor, a floating floor is installed as a single, cohesive unit that “floats” above the existing surface. This means it’s not permanently attached to the subfloor, allowing for slight movement due to temperature and humidity changes, which prevents buckling and cracking.
This versatile installation technique can be applied to a wide array of materials, offering homeowners numerous choices to match their style and functional needs. Common floating floor materials include durable laminates, robust vinyl planks, sophisticated engineered hardwood, and the highly resilient luxury vinyl flooring. Each of these materials can be manufactured with an interlocking edge system, such as click-and-lock mechanisms, that snap together seamlessly. This creates a stable, mat-like surface that rests on an underlayment or, in many cases, directly over the existing hard-surface floor, making it an ideal solution for quick and efficient renovations.
One of the most appealing aspects of floating floor products is their inherent convenience. Many come with the underlayment already integrated into the planks or tiles, eliminating an extra installation step. For those that don’t, a separate underlayment is simply rolled out over the existing surface before the flooring is laid. Regardless of the specific product, a floating floor installation is dramatically quicker and simpler than conventional methods like glue-down or nail-down flooring, typically used for solid hardwood or ceramic tile. This significant reduction in complexity is a major reason for its growing appeal among DIYers and professionals alike.
Floating floors are particularly well-suited for high-moisture areas such as kitchens, bathrooms, and laundry rooms, especially when waterproof materials like luxury vinyl are chosen. Their rapid rise in popularity is largely due to their DIY-friendly nature. The ability to tackle a flooring project yourself translates into substantial savings on labor costs, making a professional-looking floor upgrade more accessible than ever. Moreover, the material cost per square foot for many floating floor options is often more affordable than traditional flooring alternatives, offering an excellent balance of value, aesthetics, and durability.
This post contains affiliate links for your convenience. Click here for my full disclosure policy.
Selecting the Perfect Floating Tile for Our Project
After thorough research and considering the specific demands of our laundry room – a space prone to moisture and heavy foot traffic – we opted for the SMARTCORE Pro Gardena Marble 12-in x 24-in floating tile. This particular choice stood out due to several key features that aligned perfectly with our renovation goals, especially the desire for a hassle-free installation and long-term durability.
The primary selling point for us was its claim of being 100% waterproof. In a laundry room, spills, leaks, and high humidity are always a concern. Knowing that this tile wouldn’t swell, crack, or peel when exposed to water provided immense peace of mind. This feature alone makes it superior to many traditional flooring options that can be easily damaged by moisture. Furthermore, the “easy DIY click installation” aspect was a major draw. It promised that we could lay it directly over our existing hard-surface tile floor without the need for extensive subfloor preparation, acclimation time, or messy adhesives. This meant no grout line filling, no waiting for glue to set, and a significantly faster project timeline – exactly what we were looking for after our previous experience.
Beyond the practical benefits, the SMARTCORE Pro Gardena Marble also impressed us with its incredible durability. It’s designed to withstand the rigors of daily life, resisting scratches, dents, and general wear and tear, which is crucial for a frequently used area like a laundry room. And, of course, the aesthetic appeal was undeniable. The elegant marble look offered a sophisticated update that perfectly complemented our modern laundry room design, transforming it from merely functional to beautifully styled. This product truly offered a win-win scenario, combining high performance with effortless installation and stunning visual impact.
DIY Floating Tile Floor Installation Guide
Materials Needed
- Floating Flooring of Choice: We used SMARTCORE Pro Gardena Marble 12-in x 24-in. Ensure you purchase enough for your area plus 10-15% extra for cuts and waste.
- Rubber Mallet: Essential for gently tapping tiles into place and ensuring a tight, secure lock.
- Utility Knife: Ideal for scoring and snapping most floating vinyl tiles, especially for straight cuts.
- Jigsaw (Optional but Recommended): Useful for intricate cuts around doorways, vents, or curved obstacles that a utility knife can’t handle.
- Oscillating Tool: Invaluable for undercutting door casings to allow tiles to slide neatly underneath, creating a professional finish.
- Tile Spacers: Critical for maintaining the required expansion gap around the perimeter of the room, preventing future buckling.
- Measuring Tape: For accurate room dimensions and tile cuts.
- Pencil or Marker: For marking cut lines on your tiles.
Step-by-Step Instructions
This project is incredibly satisfying and achievable for most DIYers. Follow these detailed steps to achieve a flawless floating tile floor. For our 12-foot by 8-foot laundry room, the installation took us approximately 6 hours, making it the easiest and quickest floor installation we’ve ever tackled!
Time needed: 6 hours
Transform your space with a beautiful floating tile floor. This guide provides step-by-step instructions for a DIY-friendly installation over existing tile.
-
Step 1: Thoroughly Read the Manufacturer’s Instructions.
Before you begin, this is the most critical step. Always consult and adhere to the installation guidelines provided by the manufacturer for your specific flooring product. These instructions are tailored to the unique characteristics of your chosen material and subfloor, ensuring optimal performance and warranty validity. While this tutorial offers a general guide, manufacturer instructions will address specific nuances such as required acclimation times, temperature ranges, and any special considerations for installing over an existing stable tile floor (free of cracks, loose grout, or other damage).
-
Step 2: Remove Any Existing Shoe Molding or Quarter-Round.
Carefully remove any existing shoe molding or quarter-round trim from the baseboards around the room’s perimeter. This step is essential because floating floors require a crucial 1/4-inch expansion gap between the new flooring and the walls or baseboards. This gap allows the floor to naturally expand and contract with environmental changes without buckling or lifting. Once the new floor is installed, you will reinstall these moldings to neatly conceal the expansion gap, creating a polished, finished look.
-
Step 3: Strategize Your Floor Layout.
Careful planning of your layout ensures a professional and aesthetically pleasing result. Generally, laying the flooring parallel to the longest wall in the room provides the most appealing visual flow. Start by accurately measuring the width of the room. Subtract the 1/4-inch expansion gap from both sides (totaling 1/2 inch) from your room’s width. Then, divide this adjusted width by the width of your flooring tiles to determine how many full rows will fit. It’s common for the last row to require trimming lengthwise. If your calculation suggests the final row would be less than 6 inches wide, it’s advisable to rip (trim lengthwise) your *first* row down to ensure both the first and last rows are at least 6 inches wide, providing a more balanced appearance.
-
Step 4: Begin Installation from the Proper Starting Point.
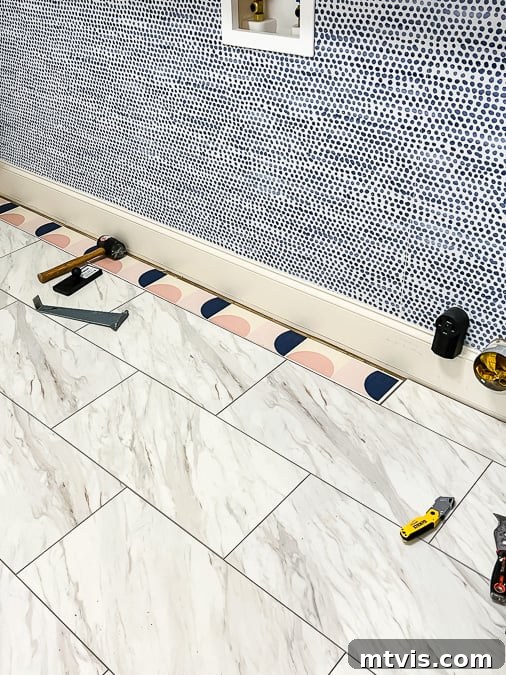
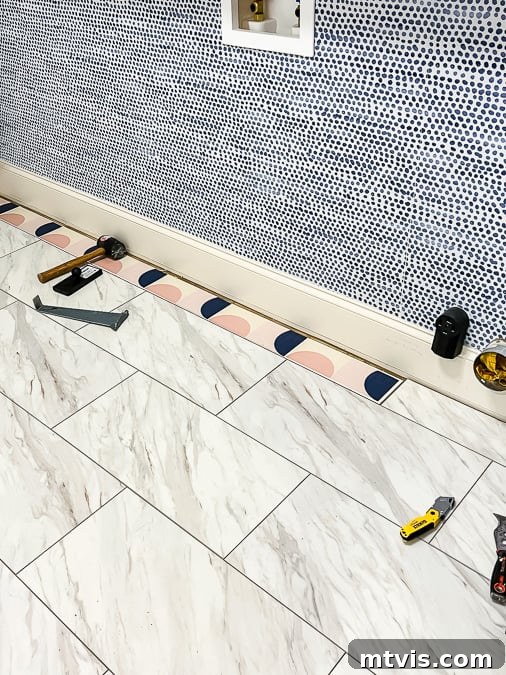
Initiate your installation from the left corner of your chosen starting wall. Position the first tile with its tongue side facing the wall. Crucially, insert several tile spacers between the tile and the wall along the entire length of the first row to maintain the necessary 1/4-inch expansion gap. This ensures the foundational row is perfectly aligned and spaced for optimal performance. You will work from left to right across the room.

Proper placement of the first tile with expansion spacers. -
Step 5: Undercut Door Casings (If Necessary).
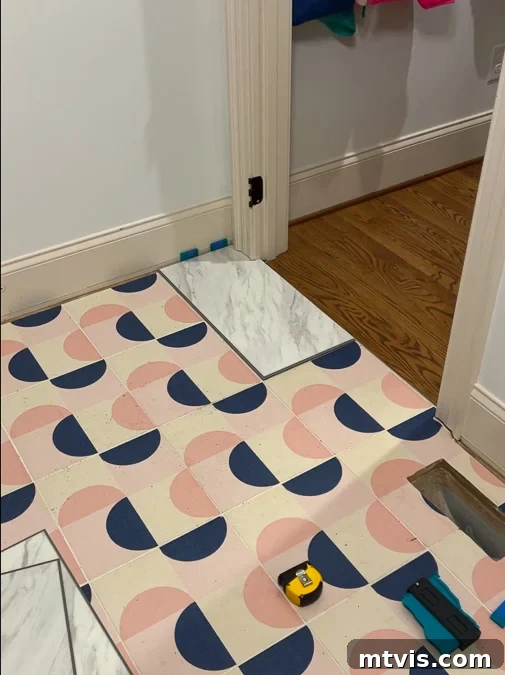
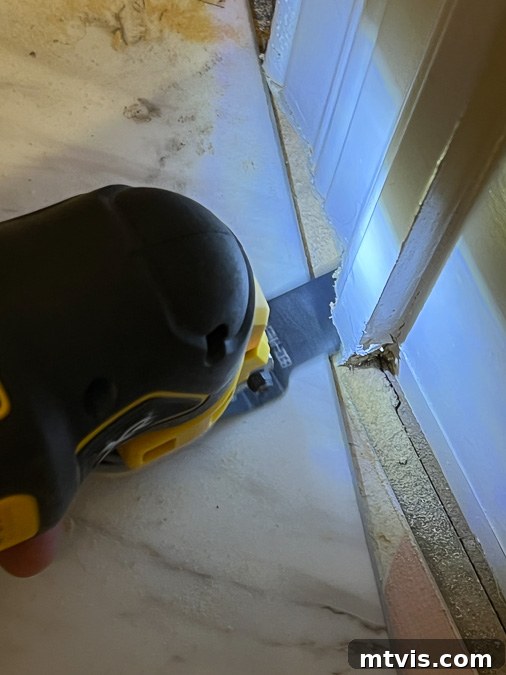
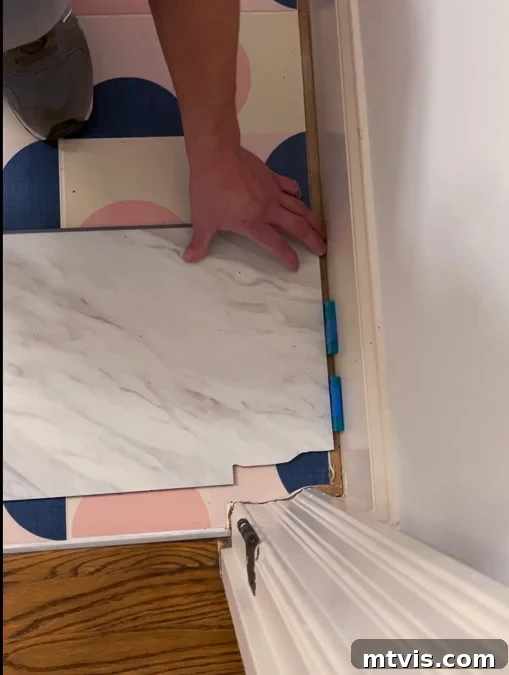
When encountering doorways or other fixed obstacles, you will need to undercut the door casings (door frames) to allow your new flooring to slide underneath seamlessly. Use an oscillating tool for precise cuts. To ensure the correct height, place a scrap piece of your new flooring tile directly on the subfloor, then rest the oscillating tool blade on top of it as you cut the casing. This creates a perfect fit. Additionally, if your existing door threshold extends beyond the door casings, you may also need to carefully trim a portion of the flooring tile to accommodate it for a flush finish.
Precision undercutting for a professional look. Custom cuts ensure a perfect fit around doorframes and thresholds. -
Step 6: Complete the First Row.
Continue installing the first row by taking the second tile, aligning its end tongue over the end groove of the first tile, and gently dropping it into place. Apply light, even pressure to securely join the two tiles. If needed, use a rubber mallet and a tapping block (or a scrap piece of flooring) to gently tap the short sides of the tiles together until they are fully locked. Remember to consistently use spacers along the wall to maintain the 1/4-inch expansion gap. Repeat this process until your entire first row is complete, ensuring each tile is tightly locked and properly spaced.
-
Step 7: Start the Second Row with a Staggered Joint.
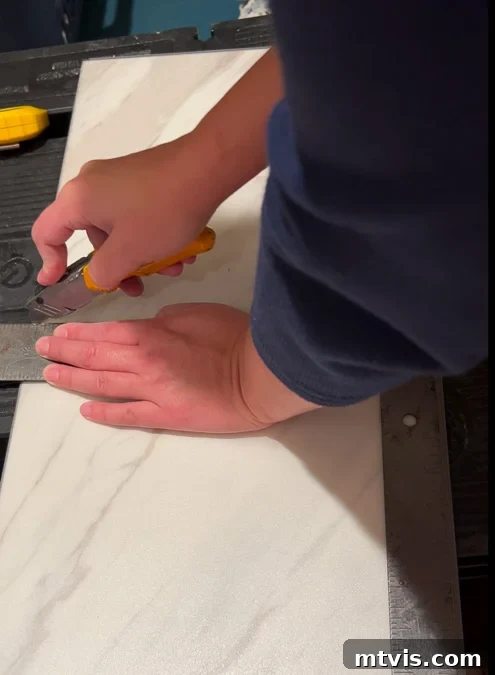
Begin your second row by cutting a tile to your desired starting length. For optimal stability and aesthetic appeal, it’s crucial to stagger the tile joints from row to row, mimicking a traditional “brick” or offset pattern. This prevents seams from lining up and creates a stronger, more resilient floor. You can typically make clean, straight cuts on luxury vinyl tiles using a utility knife by scoring deeply and then snapping the tile. For more precise or complex cuts, a table saw or jigsaw may be preferred.
Cutting tiles to size with ease. -
Step 8: Install Subsequent Rows.
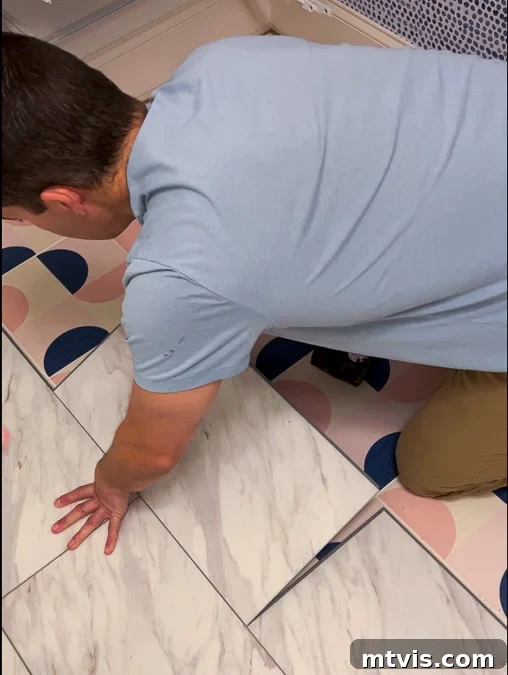
To install the first tile in the second row, angle its long side tongue into the groove of the corresponding tile in the first row, then push down firmly to lock it into place. Continue across the row, joining the short ends of the tiles as you did in the first row, using a rubber mallet if necessary for a snug fit. Repeat this process, systematically installing row after row, always ensuring that the joints are consistently staggered. As you approach the final wall, remember to maintain the 1/4-inch expansion gap to allow for natural floor movement. Failure to leave adequate space can lead to the tiles buckling or separating over time.
-
Step 9: Install Transition Molding (If Needed).
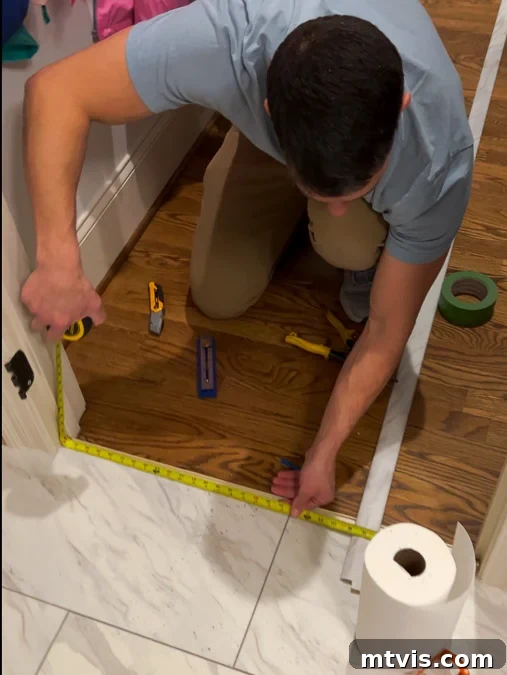
If your new floating floor adjoins another type of flooring (e.g., carpet, hardwood, or different tile) and there’s a difference in height, you will need to install transition molding. This specialized trim piece creates a smooth, safe, and aesthetically pleasing transition between the two floor surfaces, preventing tripping hazards and covering any exposed edges. Choose a transition molding that complements your new floating floor material for a cohesive look.
Seamless transition between different flooring types. -
Step 10: Reinstall Shoe Molding or Quarter-Round.
With your floating floor fully installed, the final step is to reinstall the shoe molding or quarter-round trim that you removed earlier. This trim serves a crucial dual purpose: it aesthetically covers the expansion gaps around the perimeter of the room and provides a clean, finished edge where the floor meets the wall. If you’re new to installing trim, consider referencing a guide on how to install quarter-round molding for best practices. Once the molding is in place, you can caulk any seams and paint to match your existing trim, completing your stunning new floor transformation!
The Verdict: Our Beautiful and Durable New Floor
And there you have it – a magnificent new floor installed with surprising ease! We are absolutely thrilled with the outcome of our floating tile floor in the laundry room. Having installed it over 16 months ago, we can confidently attest to its exceptional durability and flawless performance. It cleans effortlessly, resisting spills and dirt, and shows no signs of wear, proving to be an incredibly resilient and long-lasting solution. There are absolutely no regrets about choosing this method and material.
The entire installation process, from start to finish, was incredibly quick and straightforward. For our 12-foot by 8-foot laundry room, we completed the full floor installation and had the room put back together in about six hours – a truly remarkable feat for a home renovation project of this scale. The transformation is dramatic, and the result is a functional yet elegant space that we genuinely love. We wholeheartedly recommend this type of floating floor for anyone seeking a durable, beautiful, and DIY-friendly flooring upgrade.
Explore more inspiring flooring and home improvement ideas:
- Cheap But Gorgeous Flooring Ideas
- The Best Garage Flooring Options for a Fresh Update
- The Easy Way to Update Outdated Tile Without Replacing It
- How to Paint a Vinyl Floor for Long-lasting Results
Curious about our unique approach to transforming rooms and spaces in our home? Discover the secrets within Designer in a Binder®, our comprehensive guide to decorating your home with confidence and ease.
And for exclusive content, behind-the-scenes sneak peeks, and fresh DIY inspiration delivered straight to your inbox, be sure to subscribe before you go!