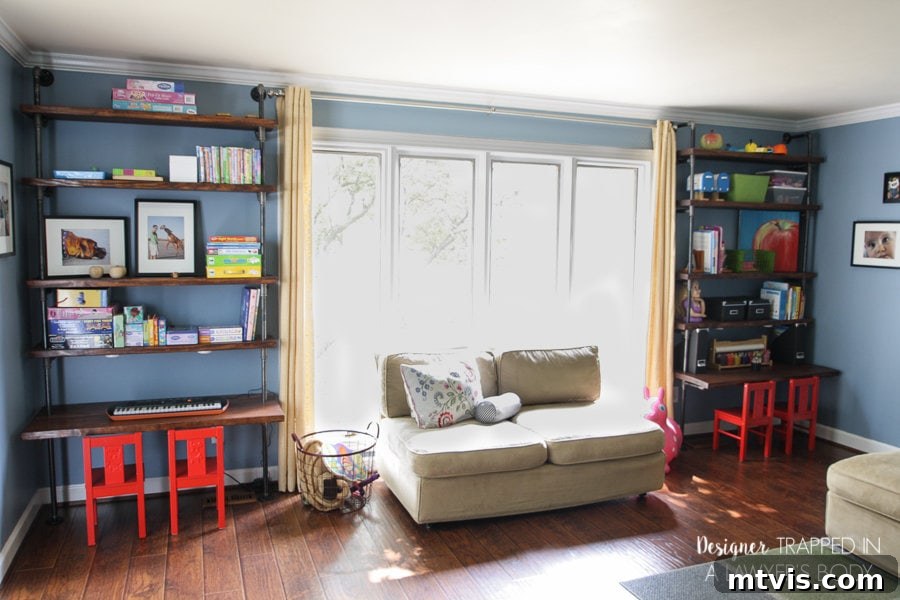
Craft Your Own DIY Industrial Pipe Shelves and Built-In Desks: A Comprehensive Tutorial for Stylish Storage
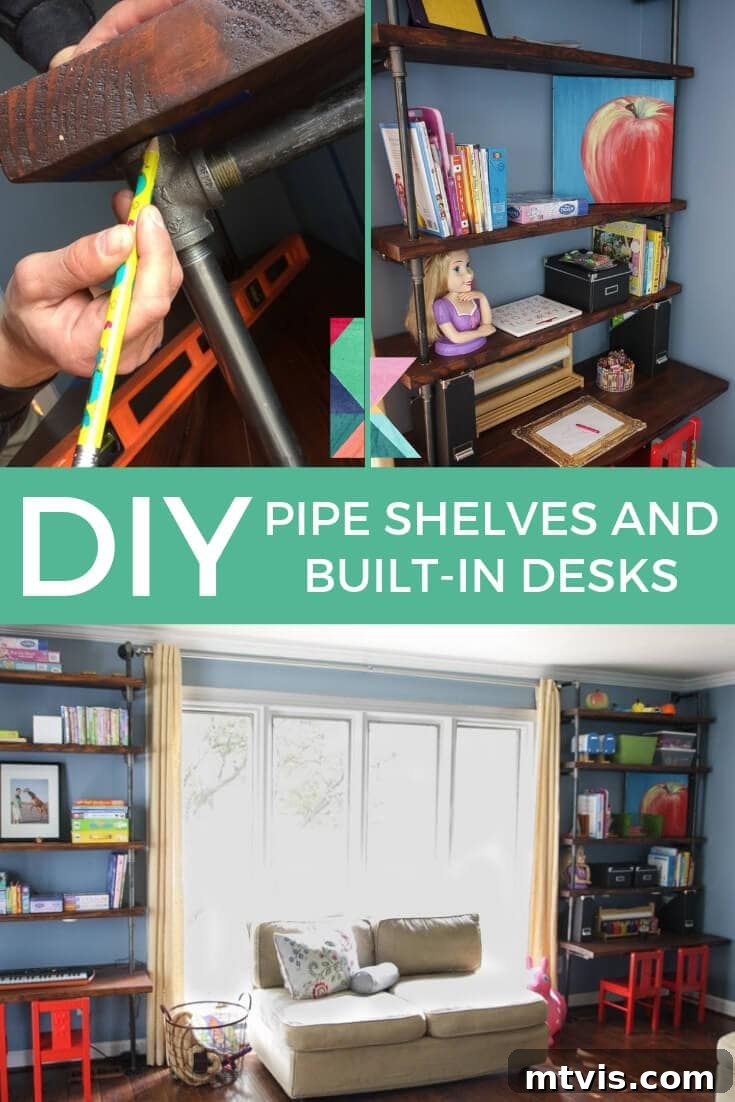
Are you constantly battling a shortage of storage space in your home? Or perhaps the storage solutions you currently have just don’t match your personal style or meet your family’s evolving needs? If you’re nodding along, you’re not alone. Many homeowners face the challenge of maximizing space while maintaining an aesthetic they love.
Our own journey to reclaim our playroom from overwhelming clutter led us to an incredible DIY solution: custom-built industrial pipe shelves with integrated desks. Our twin girls’ birthdays fall close to Christmas, and after they turned two, our home was inundated with an abundance of generous gifts – toys, books, and dress-up clothes. Despite having a dedicated playroom, we quickly ran out of effective storage options. Just a few months ago, the room was a testament to this problem. Puzzles, which our girls absolutely adore and are incredibly skilled at, were relegated to a messy pile on the floor. Lego sets were crammed onto any available surface, often precariously.
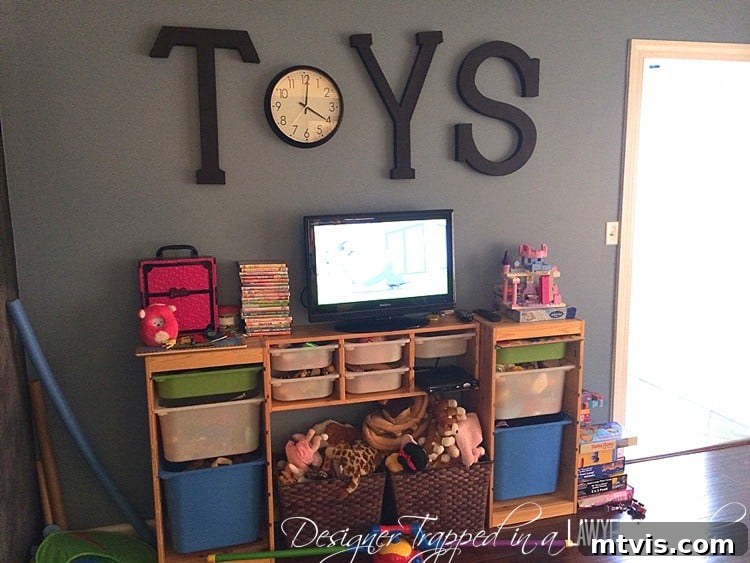
Toy bins were overflowing, and DVDs were stacked precariously atop our existing, inadequate shelves. While this might not seem “that messy” to some, for me, it was enough to cause significant frustration. More importantly, it made it incredibly difficult for our girls to find their beloved toys, leading to forgotten favorites and a general sense of disorganization. This state of affairs was hindering their play and learning, turning what should have been a joyful space into a source of stress.
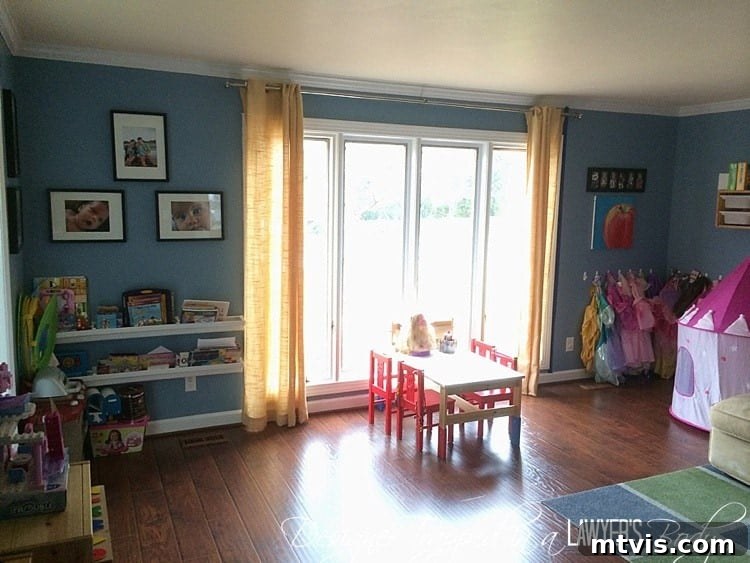
Even their dress-up clothes, which were temporarily hung on Command hooks, and the rain gutter bookshelves, once perfect for small board books, were no longer suitable for the larger, more advanced books our girls now enjoy. It was clear we needed a robust, stylish, and long-term solution that could grow with our children and their ever-expanding collection of treasures.
That’s when we decided to take on a significant DIY project: building sophisticated industrial-style pipe shelves complete with integrated desks. The transformation has been astounding, and we are absolutely thrilled with the outcome. These units provide an abundance of much-needed storage, perfectly customized to our space and our children’s needs, while adding a chic, modern aesthetic. The industrial look seamlessly blends with various decor styles, making it a versatile choice for any home. Now, we’re excited to share our detailed guide so you can embark on your own journey to create these functional and visually striking additions to your home. This post may contain affiliate links, which means we may earn a small commission if you make a purchase through our links, at no extra cost to you. Read our full disclosure policy here.
How to Build Your Own DIY Pipe Shelves and Built-In Desks: A Step-by-Step Guide
Essential Materials You’ll Need:
Gathering the right materials is the first crucial step in any successful DIY project. Ensure you have everything on hand before you begin construction to avoid unnecessary delays and frustrations. Quality materials will also ensure the longevity and stability of your finished product.
- 2 x 12 Pine Boards: The exact quantity will depend entirely on the specific dimensions, number of shelves, and the size of the desks you plan for your project. Pine is a popular choice for its affordability, widespread availability, and ease of working, making it ideal for DIY enthusiasts. Consider knot-free or select grades for a smoother finish.
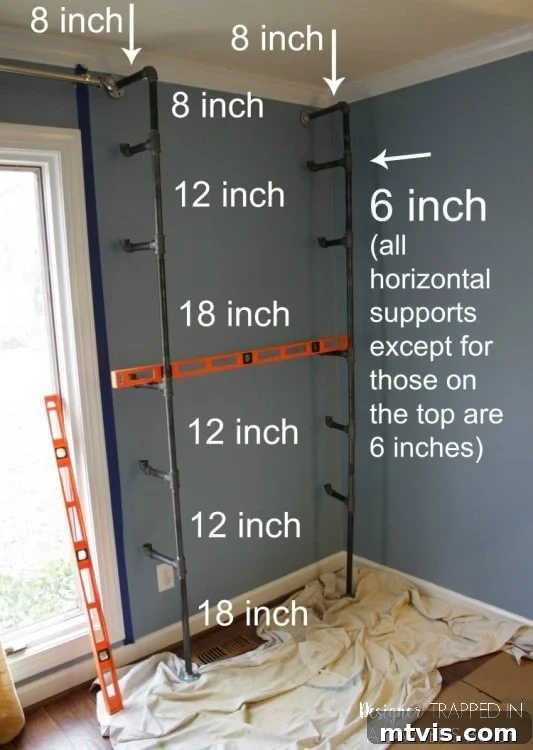
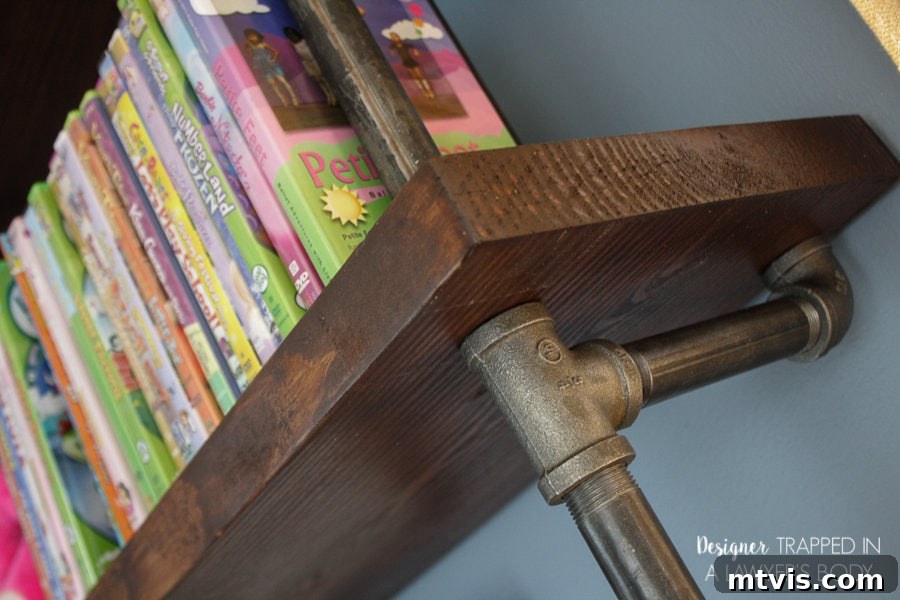
- 3/4 inch Gas Pipe: The total length required will vary by your project size. We specifically chose gas pipe because it typically comes with a desirable black finish, eliminating the need for painting, which saves both time and effort. We also opted for pre-cut lengths to avoid the hassle of cutting and threading pipe ourselves, which can require specialized tools like a pipe cutter and threader. The precise lengths you’ll need will be determined during your meticulous planning phase, as detailed in our diagram below. Important Note: If you decide to use a different pipe diameter (e.g., 1/2 inch for a lighter look or 1 inch for an even more robust aesthetic), ensure ALL your fittings (T-joints, elbow joints, floor flanges) perfectly match that chosen diameter to ensure secure and correct assembly. Mixing diameters will lead to unstable connections.
- 3/4 inch “T” Joints: These are fundamental components for connecting vertical pipe sections with the horizontal supports that will hold your shelves. Their three openings allow for continuous vertical lines with perpendicular branches.
- 3/4 inch Elbow Joints: Used for creating neat 90-degree corners in your pipe structure and for finishing off the top sections of your shelving unit where a turn is needed.
- 3/4 inch Floor Flanges: These round, flat fittings are essential for securely attaching your pipe structure to both the floor and the wall, providing crucial stability and anchoring the entire unit.
- Wall Anchors: Absolutely crucial for securely attaching floor flanges to drywall or plaster walls where solid wall studs are not conveniently present. Choose heavy-duty anchors appropriate for the weight and leverage of your shelves.
- Wood Screws: For fastening floor flanges to shelves, and for attaching wall brackets. Ensure they are of appropriate length to penetrate deeply into the wood without protruding through.
- Wood Stain: We highly recommend this specific stain for its beautiful finish and ease of use, but feel free to choose a color that perfectly complements your existing decor or desired aesthetic. Test on a scrap piece first!
- Protective Top Coat: To seal and protect your stained wood surfaces from everyday wear and tear, moisture, and scratches. We found this product to be very effective in providing a durable and attractive finish.
Essential Tools You’ll Need:
Having the right tools makes the job safer, more efficient, and ensures a professional, high-quality finish. Don’t skimp on these!
- Drill and/or Drill Driver: An indispensable tool for drilling pilot holes, driving screws, and efficiently using specialized bits like the Forstner bit. A cordless drill offers maximum flexibility.
- Kreg Jig Pocket Hole System: Invaluable for creating strong, concealed joints, especially when assembling your desk components. This system ensures professional-looking and incredibly sturdy connections without visible fasteners.
- Miter Saw: For accurately cutting your pine boards to the desired lengths for shelves and desk surfaces. A miter saw allows for precise, repeatable cuts, which is essential for a clean, symmetrical look.
- 1 1/8″ Forstner Bit: This specialized drill bit creates clean, flat-bottomed holes without splintering the wood, perfect for allowing your pipes to pass through the shelves seamlessly and snugly.
- Tape Measure: An absolute necessity for all your precise measurements. “Measure twice, cut once” is the golden rule here.
- Level: Absolutely critical for ensuring your shelves and desk are perfectly straight and even. A long level (e.g., 4-foot) will be especially useful.
- Pencil or Marker: For clearly marking cut lines, drill points, and alignment guides on both wood and wall.
- Sandpaper: Various grits (e.g., 120, 180, 220) for preparing wood surfaces before staining and for light sanding between top coats to achieve a super smooth finish.
- Clean Rags or Applicators: For evenly applying stain and protective top coat. Foam brushes or lint-free cloths work best.
- Safety Glasses and Gloves: Always prioritize safety when working with power tools and chemicals.
Detailed Steps to Construct Your Industrial Pipe Shelves and Desks:
Follow these steps carefully to ensure a successful and satisfying build. Precision in each stage will yield the most professional-looking and durable results, creating a custom piece of furniture you’ll be proud of.
Step 1: Meticulous Planning, Measuring, and Design Sketching
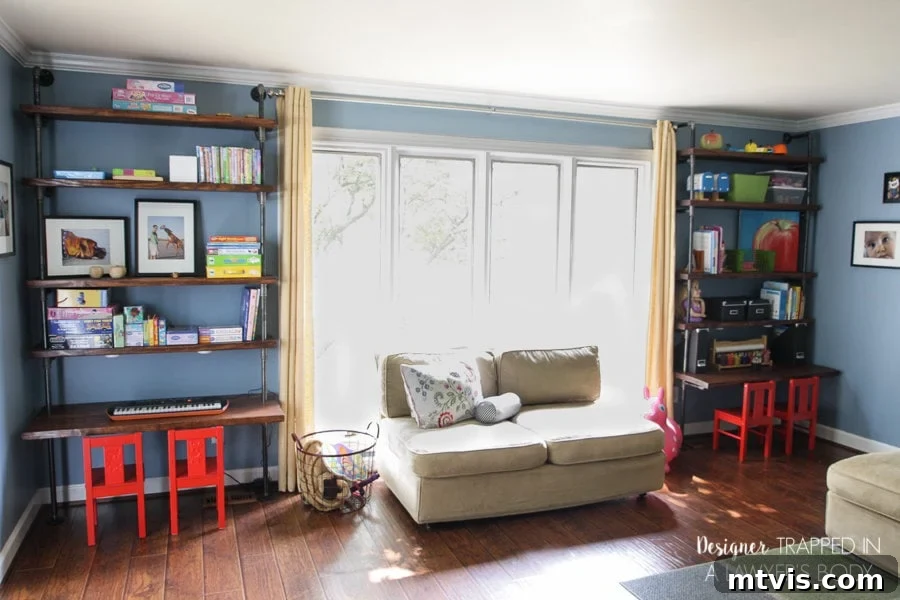
This is arguably the most critical and time-consuming phase of the entire project. Do not rush it. Begin by thoroughly measuring your designated space from floor to ceiling, and wall to wall. Consider not just the raw dimensions, but also any architectural features like windows, doors, electrical outlets, or heating vents that might impact your design. Sketch out your desired shelving unit in detail, deciding on the exact number of shelves, their spacing (consider what you plan to store on each shelf), and the precise height and depth of your built-in desk. Crucially, remember to account for the additional length that the T-joints and elbow joints will add to the overall height of your pipe structure. These fittings have their own internal dimensions that will subtly extend the vertical pipes, so factor these into your calculations for accurate shelf spacing. We designed identical units to flank a large window in our girls’ playroom, providing a symmetrical, balanced, and visually appealing look. Think about the functionality – where will the desk be used? What items need to be within reach? How deep should the shelves be for your specific items?
Step 2: Assemble the Pipe Skeleton for a Crucial Test Fit
Once you have meticulously planned your dimensions and gathered all your pipe lengths and fittings, loosely assemble the entire pipe “skeleton” of your unit. While this might seem premature before cutting any wood, it’s a vital, non-negotiable step to confirm all your measurements and ensure everything fits together as intended within your actual space. The process of threading and screwing pipes together can sometimes result in slight variations from theoretical calculations due to thread tolerances. A test fit allows you to accurately measure the precise, real-world distance between your vertical pipe supports. This final, accurate measurement will then dictate the exact length you need to cut your wooden shelves and desk surfaces, guaranteeing a perfect, custom fit.
Step 3: Precisely Cut and Flawlessly Stain Your Wooden Boards
With your precise, test-fitted measurements from Step 2, use your miter saw to accurately cut all your 2×12 pine boards to their exact lengths for each shelf and the desk. Once cut, thoroughly sand all surfaces and edges to ensure a smooth, splinter-free finish. Start with a coarser grit (e.g., 120) and progress to finer grits (e.g., 220) for a silky-smooth surface. Apply your chosen wood stain according to the manufacturer’s instructions, ensuring even coverage. Always work in a well-ventilated area to avoid fumes. After the stain has dried completely (this can take 24-48 hours depending on the product and humidity), apply several coats of your protective top coat, sanding lightly with a very fine grit (e.g., 320 or 400) between coats for an incredibly smooth, professional, and durable finish. This protective layer is absolutely essential for the longevity of your shelves, especially in a high-traffic area like a playroom or home office, safeguarding them from spills and daily wear.
Step 4: Construct the Robust Built-In Desk Surface
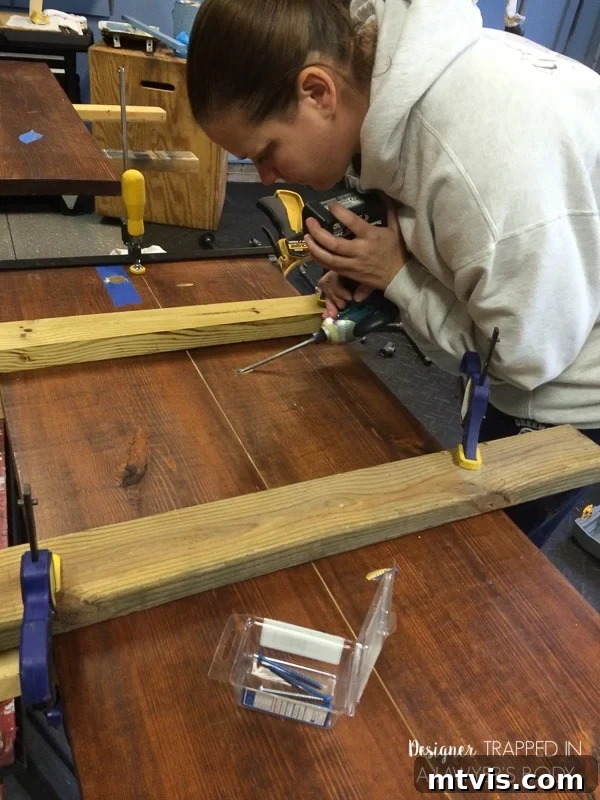
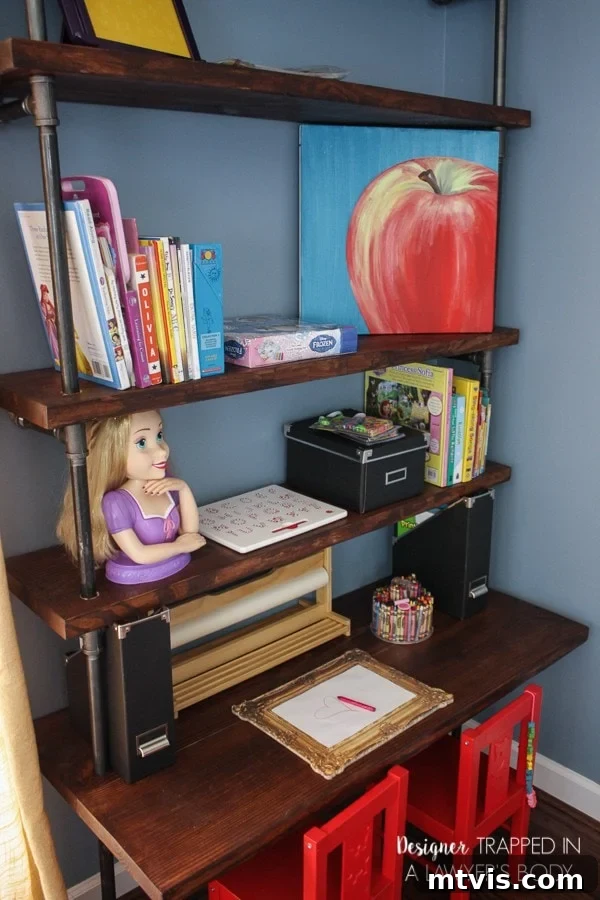
For your built-in desk, which forms the lowest horizontal surface of your unit, you’ll likely desire a wider, more substantial workspace than a single 2×12 board offers. Use your Kreg jig pocket hole system to securely join two of your 2×12 pine boards together lengthwise, creating a deeper and more functional desk surface. Pocket holes create incredibly strong, discreet joints that are perfect for this application, providing a clean appearance on the top surface. At this stage, also pre-drill the necessary holes for your vertical pipes to pass through the desk surface, using your 1 1/8″ Forstner bit. Mark these locations precisely based on your measurements from Step 2, ensuring they align perfectly with your pipe structure. More detailed guidance on precise drilling techniques is covered in Step 6.
Step 5: Install the Essential Rear Desk Support Bracket
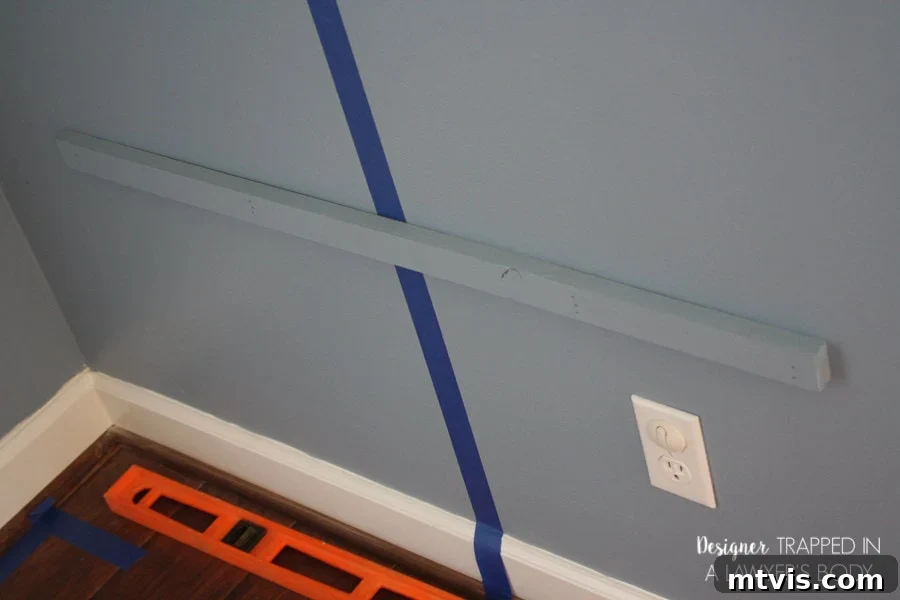
While the front of your desk will be robustly supported by the horizontal pipe pieces of your structure, the back edge requires additional support to prevent sagging and ensure a truly stable workstation. To provide this crucial stability, attach a sturdy wall bracket to the wall directly beneath where the back edge of your desk will sit. Ensure this bracket is perfectly level and positioned at the correct height to align precisely with your planned desk surface. Use appropriate heavy-duty wall anchors if you are not fortunate enough to be fastening directly into solid wall studs. This bracket will bear the significant weight of the desk at the back, distributing the load and guaranteeing a solid, reliable surface for work or play.
Step 6: Initiate Final Assembly from the Ground Up, with Precision
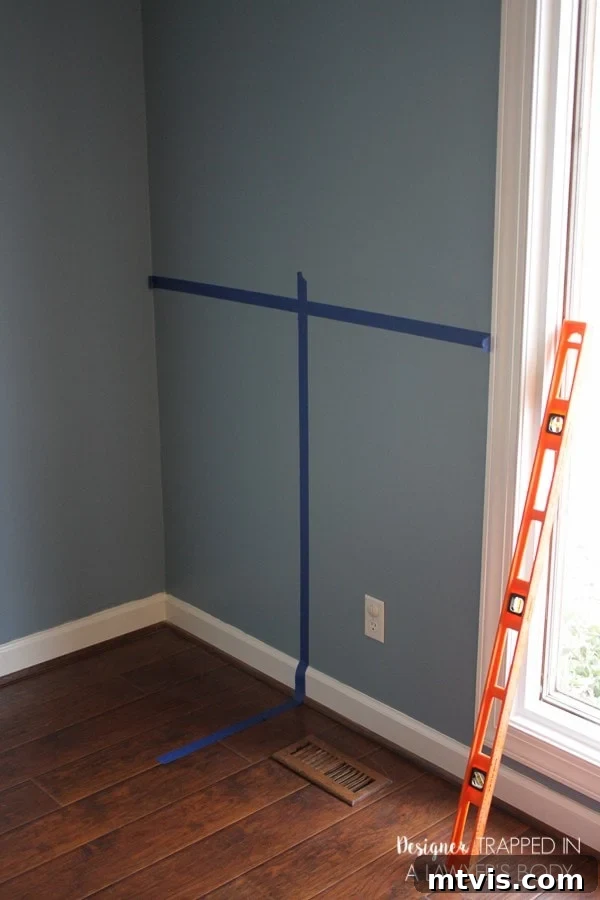
Now, the real construction begins! Start assembling your unit from the bottom and work your way upwards. Begin by securing the initial floor flanges to your actual floor. We opted for one sturdy wood screw per floor flange to hold the structure steady during initial assembly, minimizing damage to our floors. You can add more screws for extra rigidity and stability if desired, especially in high-traffic areas. Throughout the entire assembly process, constantly check for level at each and every stage – vertical, horizontal, and diagonal. This is absolutely paramount for a professional-looking, functional, and safe unit. To ensure perfect alignment and symmetry as you build, mark the centerline of your wall and the precise center of each shelf. This will guide you in accurately marking the positions for the holes you need to drill on the front edge of each shelf where the vertical pipes will pass through. A clever and effective trick is to wrap the ends of your shelves with painter’s tape; then, you can trace the exact position of the pipe directly onto the tape, avoiding direct marks on your beautifully stained wood. Use your 1 1/8 inch Forstner bit to drill these clean, precise holes. The Forstner bit is ideal for this as it creates flat-bottomed holes without splintering or tearing out the wood fibers, leaving a clean aperture for your pipes.
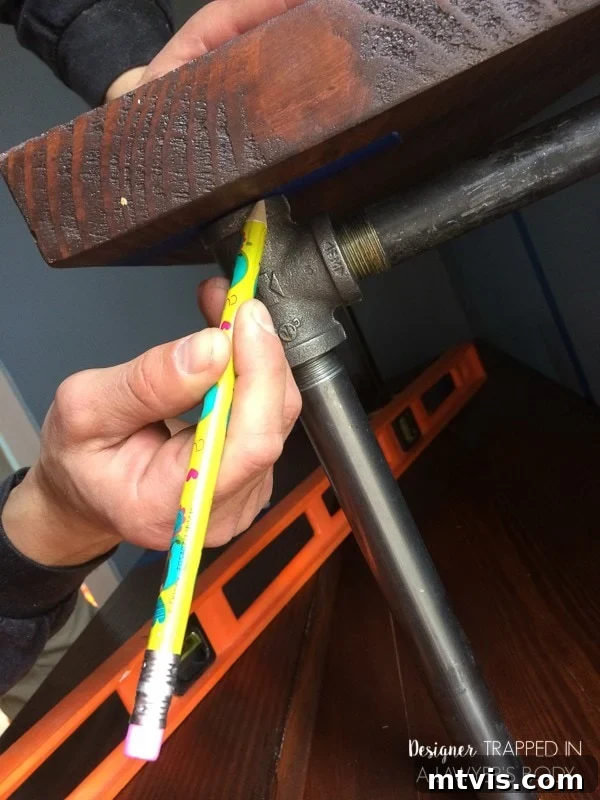
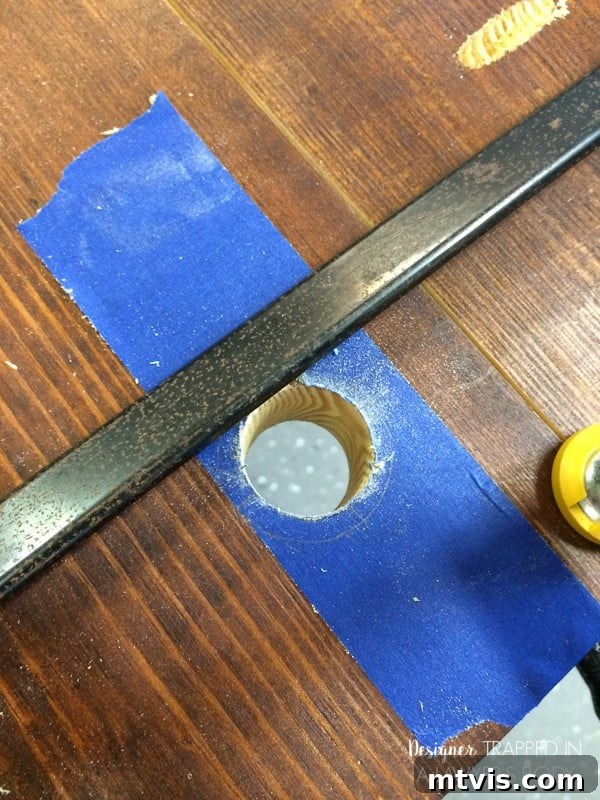
Step 7: Progressive Shelf Installation, Layer by Layer
Continue the assembly process by systematically adding each shelf, working your way up the vertical pipe structure. For every level, you will first drill the pipe holes as described in Step 6 (if not already done), carefully slide the stained and protected shelf into place over the vertical pipes, and then screw in the next length of pipe and any associated T-joints or elbow joints to secure that shelf firmly. Repeat this methodical process all the way to the top of your unit, ensuring each shelf is perfectly level and firmly integrated into the pipe structure. Take your time, re-check measurements, and confirm levelness at every stage. This iterative process ensures the entire unit is straight, strong, and visually appealing. We documented our progress on Instagram as we built, providing real-time insights into the construction process and sharing the excitement of seeing the unit take shape.
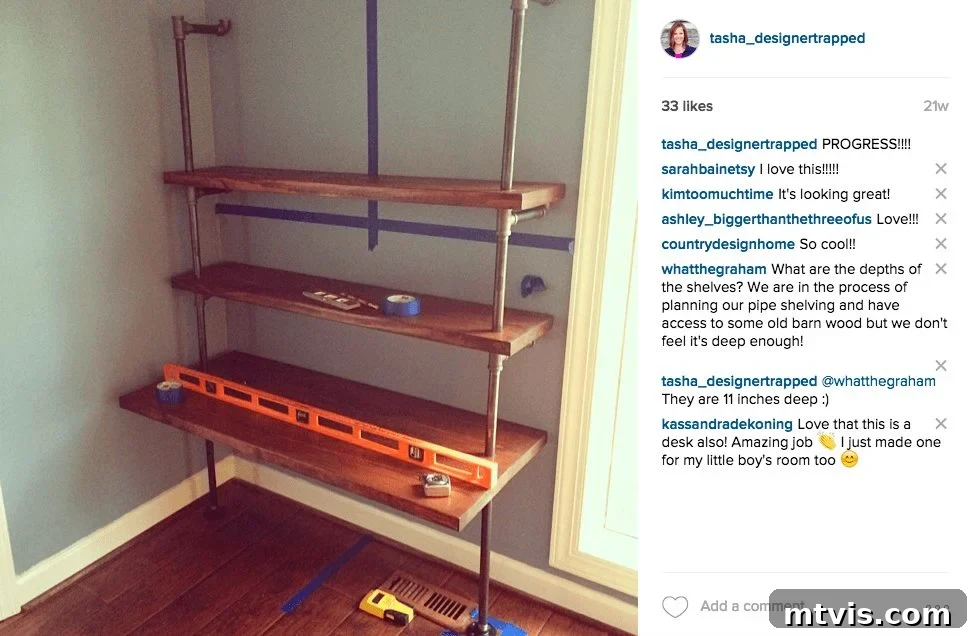
Step 8: Secure the Top of the Unit to the Wall for Ultimate Stability
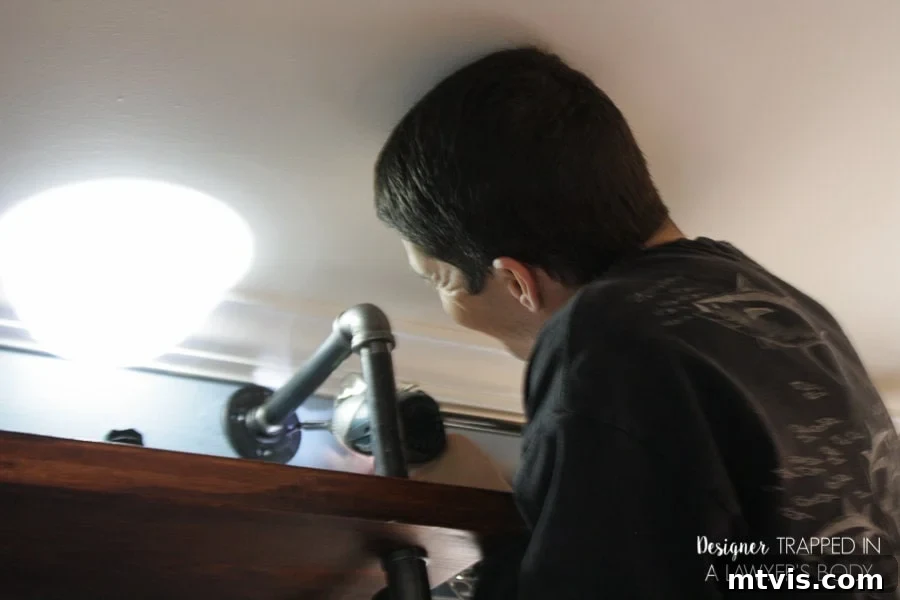
For the very top of your shelving unit, instead of a T-joint, you will typically use an elbow joint to cap off the uppermost vertical pipe. Following this elbow joint, attach a short, approximately 8-inch length of pipe. At the end of this short pipe section, secure a floor flange. This floor flange will then be attached directly to your wall. Use appropriate heavy-duty screws and robust wall anchors for maximum stability and safety, especially if you’re not lucky enough to hit a solid wall stud directly with your flange. This final attachment point provides crucial lateral stability, preventing the entire unit from swaying or tipping, and firmly integrating it into your home’s structure. This step is vital for ensuring the safety and long-term durability of your custom-built shelves, especially in a household with active children.
Time Commitment and Cost Analysis: Is It Worth It?
Let’s be transparent: this project isn’t a weekend blitz for beginners, but the rewarding outcome is well worth the effort. While the actual assembly can move quite quickly once you get into a rhythm and have all your materials prepared, the planning phase is extensive and requires careful consideration and precise measurements. Sourcing all the materials, especially the specific pipe and fittings, also takes a considerable amount of time. Be prepared for the tedious but necessary task of removing stubborn price stickers and labels from the pipe, which can surprisingly add a lot of time to the overall effort if not planned for. Additionally, good quality gas pipe, chosen for its durability and aesthetic, isn’t the most inexpensive material, but it offers superior strength and a genuine industrial look compared to lighter alternatives. Considering all aspects – meticulous planning, material acquisition, wood preparation (cutting, sanding, staining, sealing), and final assembly – we estimate dedicating a total of approximately 30 hours to this project. The materials for our two desk units and two sets of extensive bookshelves came to roughly $500. While this might seem significant at first glance, remember we opted for a substantial, robust look with higher-gauge pipe and quality pine. You could certainly reduce the cost by using a thinner diameter pipe, less expensive wood choices, or by finding reclaimed materials. However, we felt the investment was incredibly worthwhile for the aesthetic appeal, exceptional durability, and unparalleled customization we achieved. For two custom-built desks and ample shelving, perfectly tailored to our specific needs and designed to last, this price point represents excellent value compared to commissioning custom-made furniture or even purchasing comparable high-quality pre-made units that would likely fall short on customization.
The true beauty of this DIY project lies in its remarkable versatility and adaptability. While we meticulously crafted these units for our twin girls’ playroom to tame the toy chaos, their industrial charm and exceptional functionality make them suitable for almost any room in your home. Imagine them transforming a cluttered family room into a stylish entertainment hub with integrated media storage, providing an organized and inspiring workspace in a busy home office, or even adding a unique, rustic-chic touch to a bedroom. They can adapt seamlessly to various decor styles, from modern minimalist and urban loft to rustic farmhouse, simply by changing the stain color of the wood, opting for different pipe finishes, or adding your own decorative elements. The possibilities for personalization are endless, making this a truly unique and impactful addition to your home’s functionality and aesthetic.
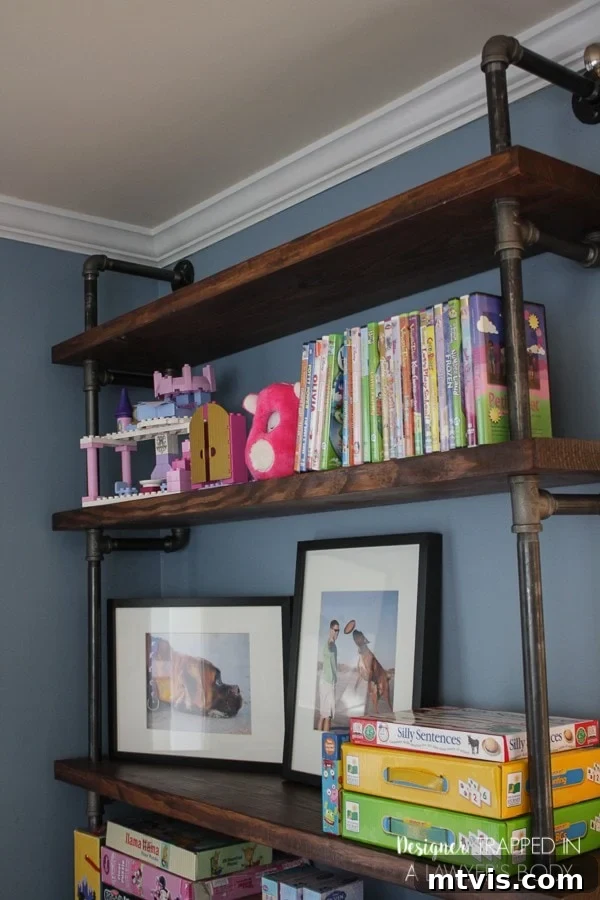
Isn’t the end result truly stunning? We are beyond delighted with how these industrial pipe shelves and built-in desks turned out. They are not only incredibly functional, providing a designated home for everything from books to art supplies and dress-up clothes, but they also significantly elevate the style and organization of the entire room. The blend of robust black pipe and warm, beautifully stained wood creates a focal point that is both intensely practical and visually appealing, proving that utilitarian design can be incredibly elegant.
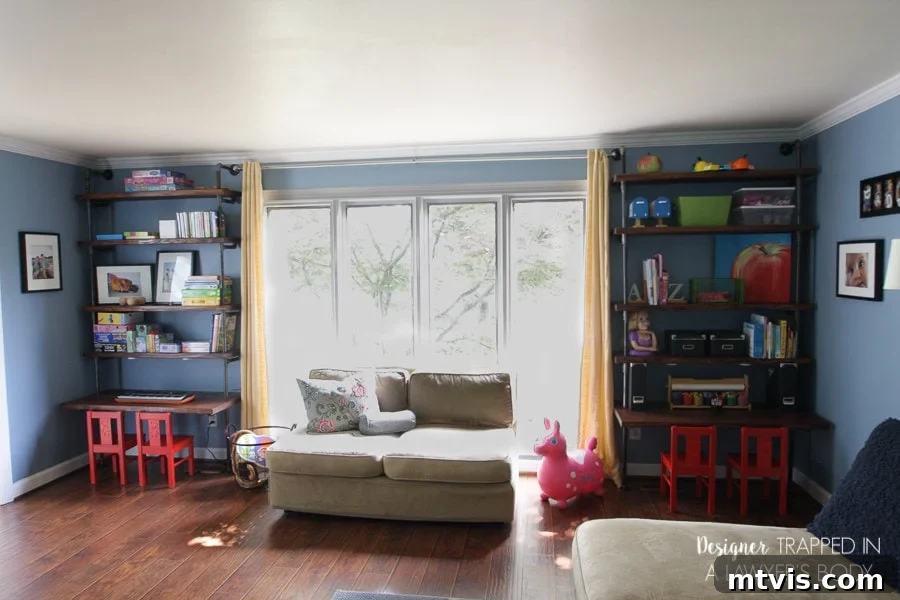
What are your thoughts on this industrial-chic transformation? We hope this comprehensive tutorial inspires you to tackle your own custom storage project and experience the immense satisfaction of building something beautiful and functional with your own hands. If you’re planning to embark on this DIY adventure, be sure to save this tutorial for future reference. Pin it to your favorite DIY or home decor board so you can easily find it when you’re ready to start planning and building!