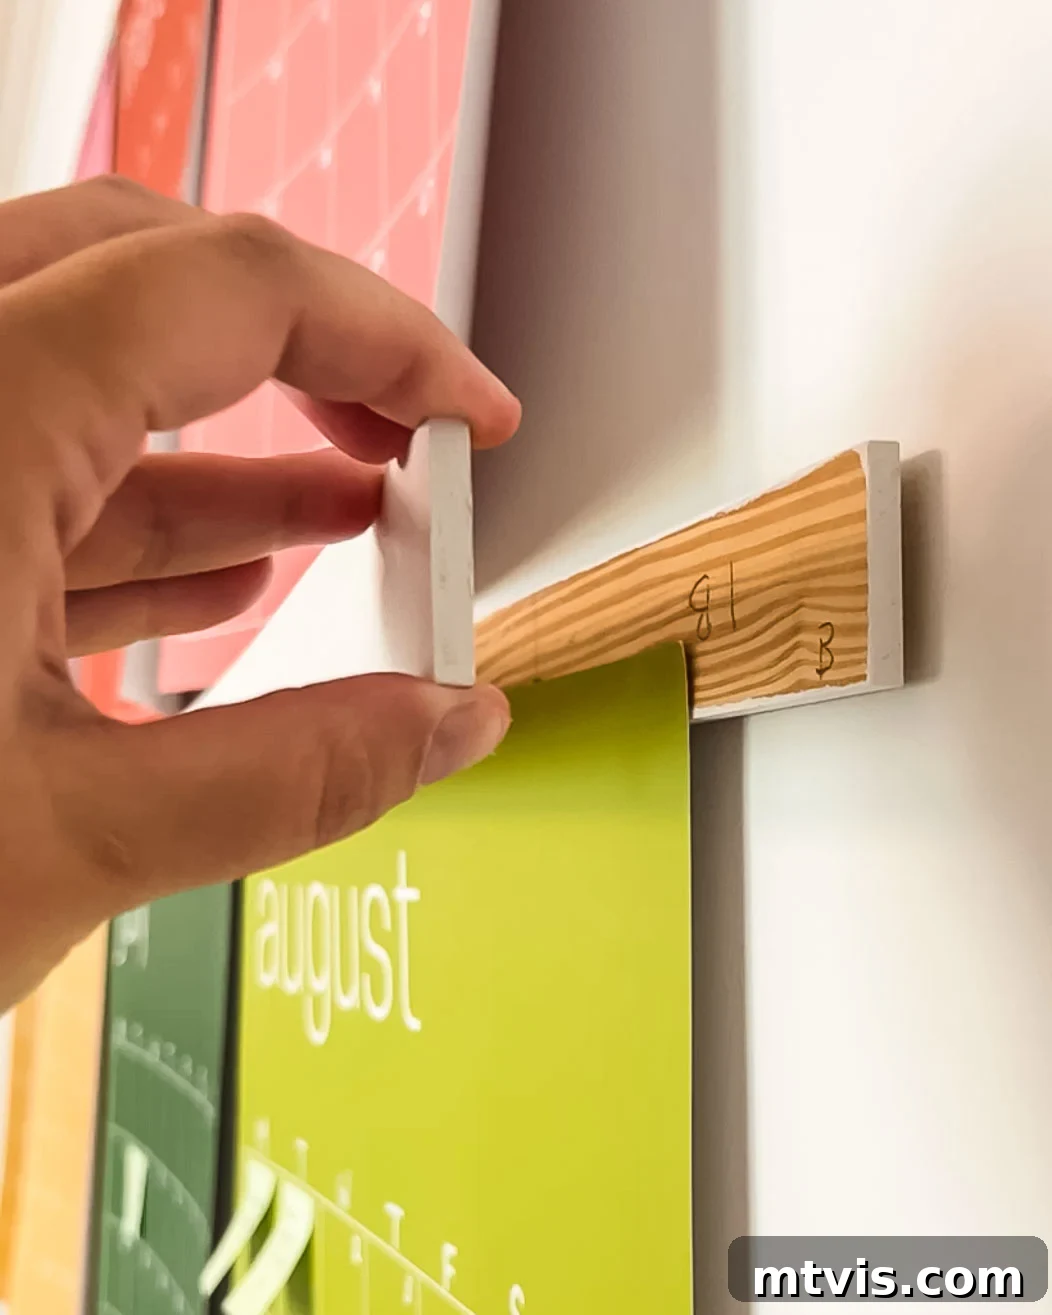
Transform your living space with a touch of creativity and practicality using these DIY oversized magnetic poster hangers. This beginner-friendly project offers a unique and stylish solution for displaying art, posters, calendars, or even your children’s latest masterpieces. Imagine easily swapping out artwork to match your mood, the season, or evolving tastes, all without the hassle of traditional frames or damaging your walls with tape and tacks. These magnetic hangers provide a clean, modern aesthetic that effortlessly elevates any room, making your walls a dynamic canvas for expression.
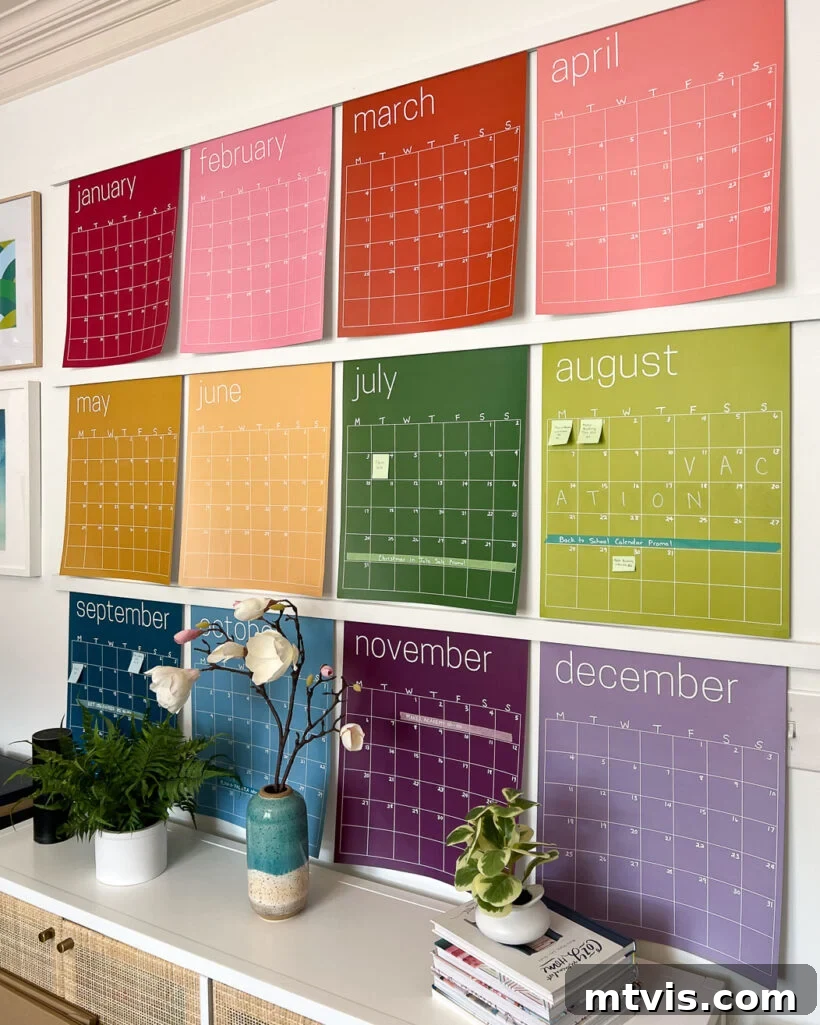
Table of Contents
Thank you to DAP Products for sponsoring this post. This post contains affiliate links for your convenience. Click here for my full disclosure policy.
I’ve always admired the minimalist charm of magnetic poster holders available online. They offer a sleek way to display artwork without the bulk of traditional frames. However, my quest for the perfect display solution hit a snag when I realized most commercially available options topped out at around four feet. My vibrant, oversized wall calendar demanded a six-foot display, and finding one ready-made proved impossible. This challenge led to an exciting DIY journey, allowing us to craft custom oversized magnetic poster hangers using readily available and inexpensive materials. This project not only solved my unique display needs but also created a versatile system for showcasing any large format art or poster with effortless changeability.
Materials Needed for Your DIY Magnetic Poster Hangers
- 1/4″ x 2″ lattice strips in your desired length: These thin wood strips are the backbone of your hangers. They are perfect because they are lightweight and easy to work with. For our project, we needed 6-foot lengths, but often hardware stores only stock 8-foot strips, which we simply cut down. You’ll need two strips for each magnetic hanger set – one for the front and one for the back – creating a secure sandwich for your artwork. Choose a wood type that can be easily painted or stained to match your decor.
- Small, heavy-duty round magnets (thinner than your wood strips): The key to effective magnetic hangers is using strong magnets that sit flush or slightly recessed within the wood. We recommend magnets that are approximately .12 inches thick to fit neatly within the .25 inch lattice strips. Neodymium magnets are an excellent choice for their powerful hold.
- DAP Plastic Wood-X with DryDex Dry Time Indicator: This wood filler is fantastic for smoothing out any rough areas or imperfections on your lattice strips, ensuring a professional, finished look. The color-changing indicator helps you know exactly when it’s ready for sanding.
- DAP Rapid Fuse All-Purpose Adhesive: A strong, fast-drying adhesive is crucial for securely bonding the magnets into their drilled holes. This adhesive creates a durable bond that will keep your magnets in place over time.
- Compound miter saw (or a hand saw and miter box): For precise cuts to achieve your desired hanger length. If you don’t own a power saw, a hand saw with a miter box works perfectly well for this project. Many hardware stores also offer cutting services.
- Sandpaper (various grits, e.g., 120-220 grit): Essential for smoothing the wood filler and lattice strips, preparing them for paint or stain.
- Drill: For creating the recesses for your magnets.
- Forstner bit: Select a size that is just slightly larger than the diameter of your chosen magnets. A Forstner bit creates flat-bottomed holes, ideal for seating magnets securely.
- Paint or wood stain (optional): To customize the look of your hangers to match your home decor. Consider a clear sealer if you want to highlight the natural wood grain.
- Painter’s tape: Useful for holding wood strips together during cutting and for marking.
- Command picture hanging strips (or small nails/screws): For hanging the completed magnetic rails on your wall without damage.
How to Make Oversized Magnetic Poster Hangers: A Detailed Guide
Video Overview
Before diving into the detailed instructions, I highly recommend watching a quick video overview of this project. Visual guidance can provide invaluable context and clarity for each step, making the written tutorial even easier to follow. Although the specific video player is not included here, you can typically find a project overview on the original blog or related DIY channels.
There’s an Easier, Alternative Method!
While the magnetic poster hangers are truly beautiful and functional, I frequently hear from readers who adore the aesthetic but prefer to avoid the complexities of precise magnet alignment, extensive measuring, and using power tools. The good news is, I’ve developed a fantastic, quicker, and simpler approach to achieve the exact same stylish look without any of those challenges!
If you’re looking for a hassle-free project that still delivers that coveted oversized poster hanger style, I highly recommend exploring my tutorial on how to make faux oversized poster hangers. This method is perfect for anyone seeking an effortless DIY experience, proving that beautiful home decor doesn’t always require advanced skills or a workshop full of tools.
Step-by-Step Tutorial: Crafting Your Magnetic Poster Hangers
Time needed: 2 hours
This project is surprisingly quick and rewarding, taking approximately 2 hours to complete (excluding paint drying time). It’s a perfect weekend DIY that yields impressive results!
-
1. Cut your lattice strips to length.
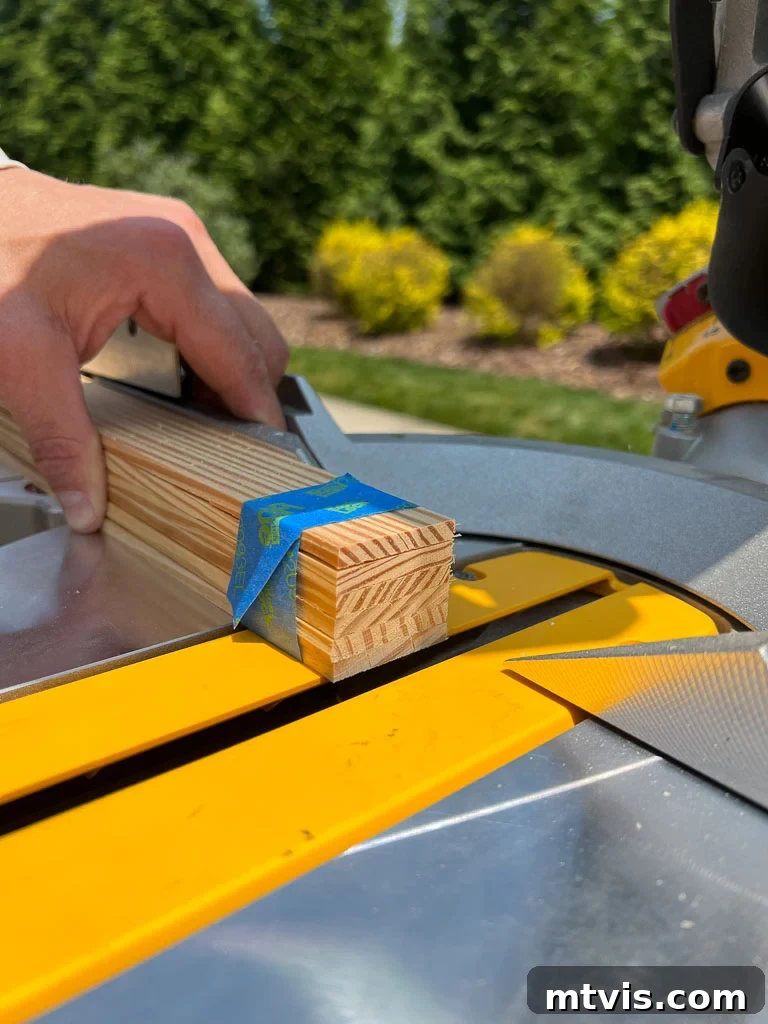
Begin by cutting your lattice strips to the precise length required for your artwork. As mentioned, we needed 6-foot lengths for our calendar, so we trimmed down 8-foot strips. To ensure all pieces are uniform and to prevent movement during cutting, stack your lattice strips together and secure them tightly with painter’s tape before making your cut.
* PRO TIP: No compound miter saw? No problem! A hand saw and miter box can achieve clean, straight cuts. Alternatively, many large hardware stores like Home Depot or Lowe’s offer convenient cutting services for a small fee, which can save you time and effort.

-
2. Plan your magnet spacing and placement.
This step is crucial for the functionality and aesthetic of your magnetic poster hangers. First, determine the horizontal spacing of your magnets. For our large wall calendar, where each month was 16 inches wide, we strategically spaced our magnets so that each calendar section would securely connect with at least two magnets.
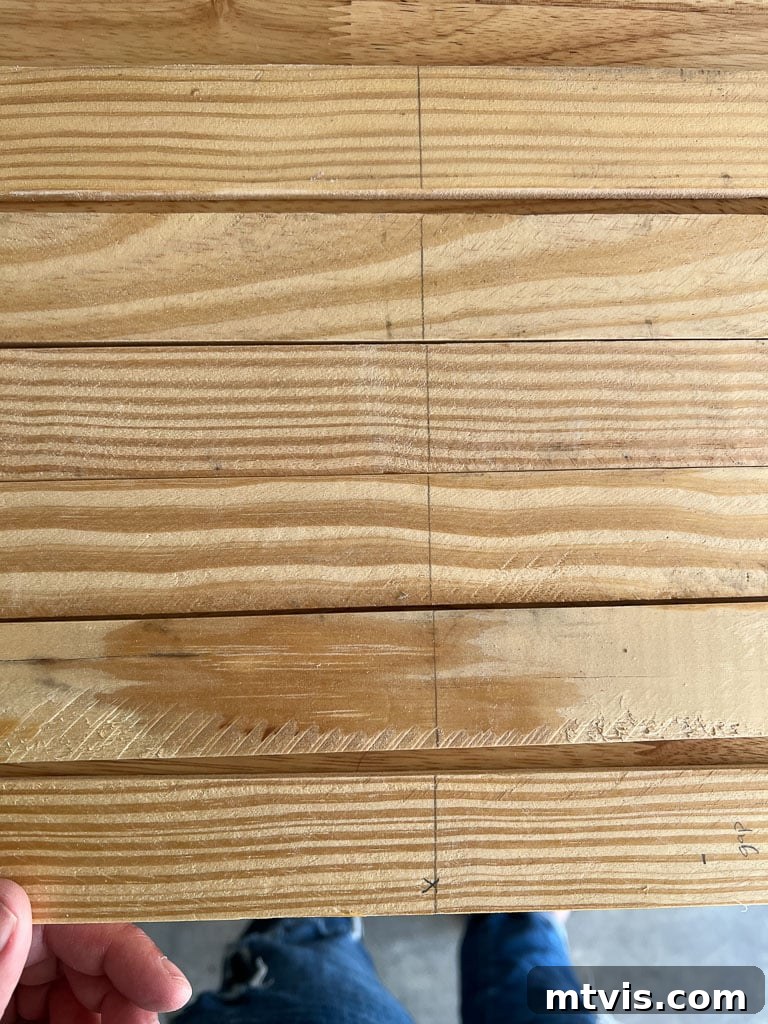
Once you’ve settled on the ideal horizontal spacing, draw a continuous line down all your lattice strips. This ensures perfect alignment when drilling and guarantees your magnets will match up across all the pieces. Next, decide on the vertical placement. We opted to position our magnets within the lower one-third of the lattice strip, marking all pieces consistently. Precision is key here; magnets on opposing strips must align perfectly to attract, so take your time measuring and marking.
-
3. Drill the holes for your magnets.
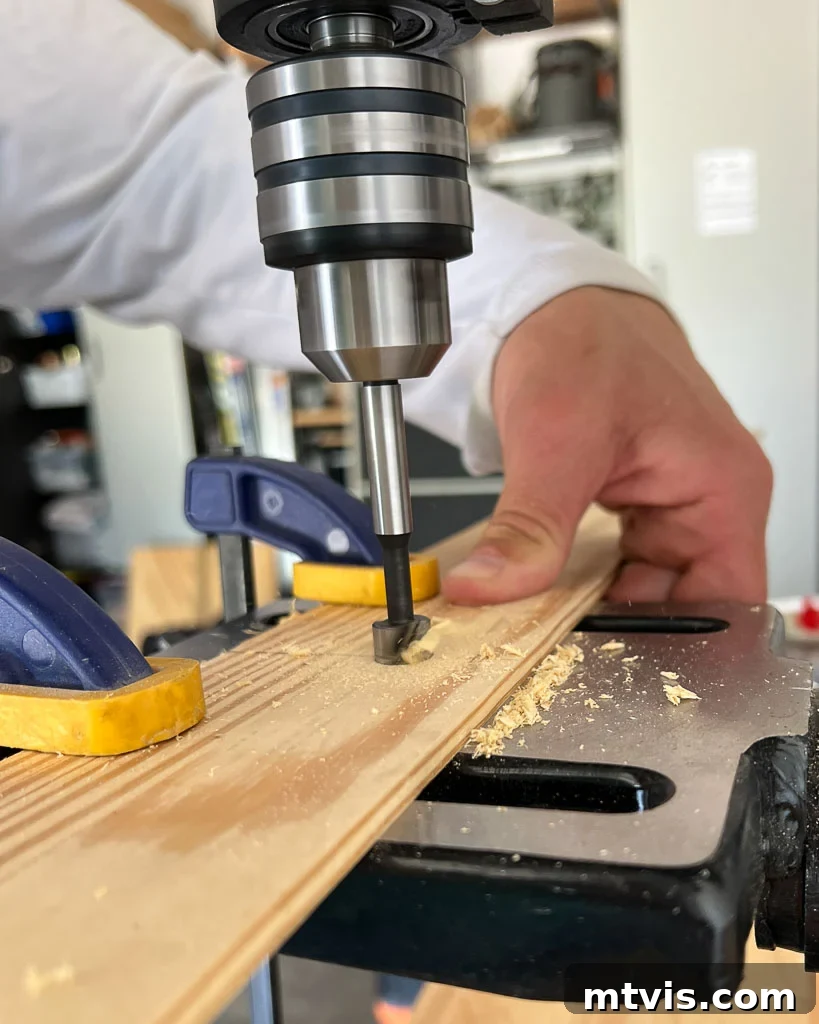
With your magnet placement meticulously marked, it’s time to drill. Use a Forstner bit that is just slightly larger than your magnets. This type of bit creates clean, flat-bottomed holes that are ideal for seating magnets flush with the wood surface. The goal is to drill deep enough so the magnets are nearly flush or perfectly recessed, but critically, do not drill all the way through the wood! Many drills feature depth gauges or stops that you can set to prevent over-drilling. If your drill lacks this feature, practice on a scrap piece of wood or apply a piece of tape to your drill bit as a visual depth guide. Safety first: always wear eye protection when using power tools.
-
4. Glue your magnets in place.
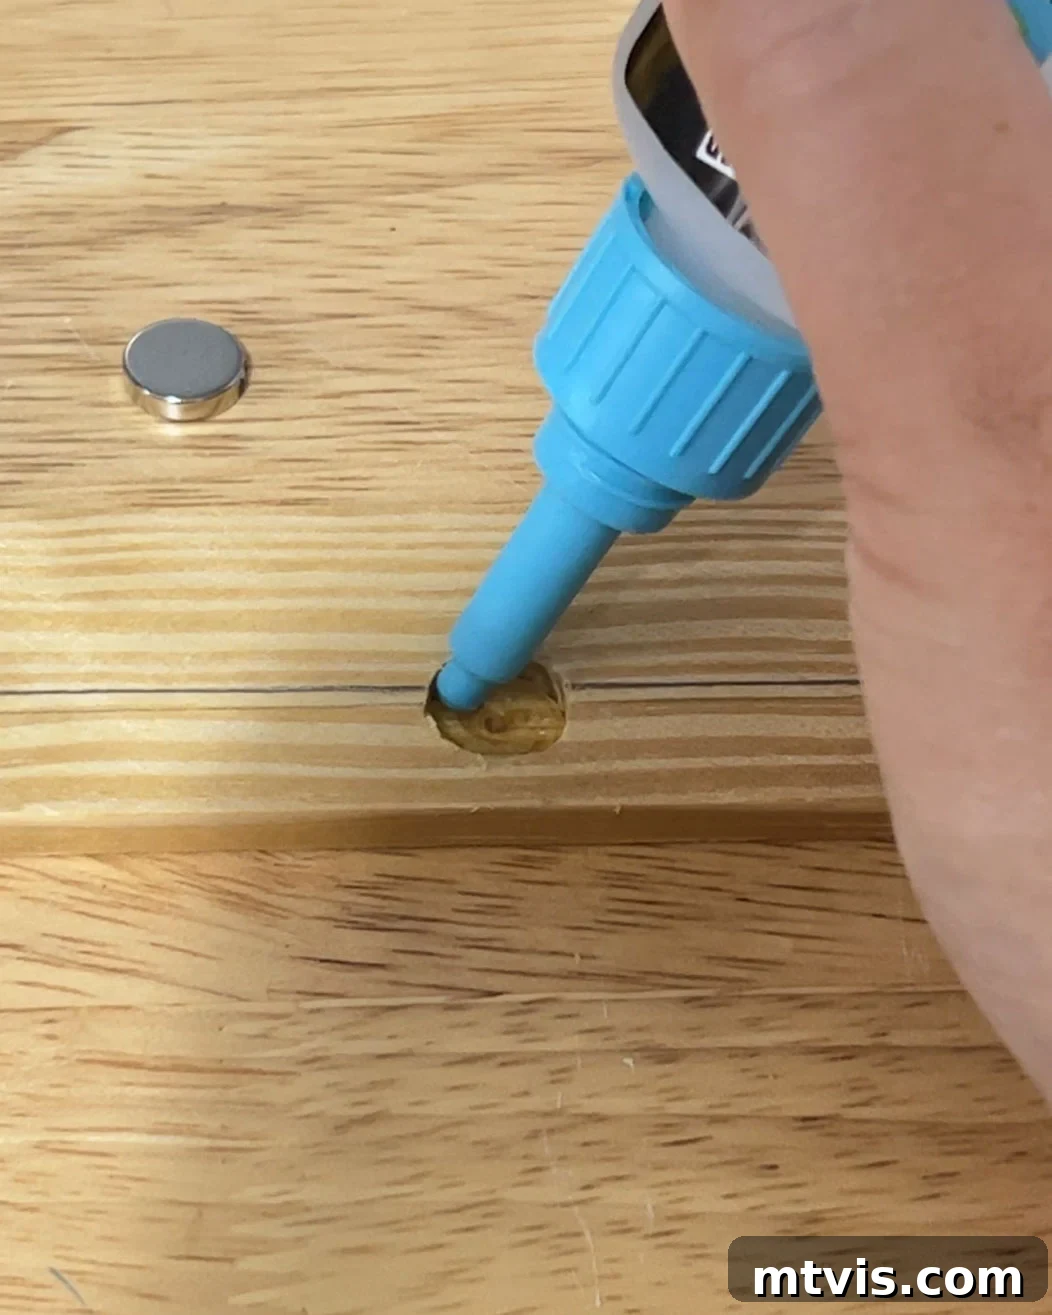
Now for the essential step of securing your magnets. We used DAP Rapid Fuse All-Purpose Adhesive for its strong, quick-drying properties. This stage requires careful attention to detail: magnets have distinct north and south poles. Opposite poles attract, while like poles repel. Before gluing, lightly place two corresponding magnet pairs together (one in the front strip, one in the back strip) with a piece of paper or poster material in between to confirm they attract correctly. Once polarity is confirmed, apply a small amount of adhesive into each drilled hole, gently press the magnets into place, and allow them to cure fully according to the adhesive’s instructions. Incorrect polarity will prevent your hangers from functioning!
-
5. Smooth out the rough texture of the lattice strips.
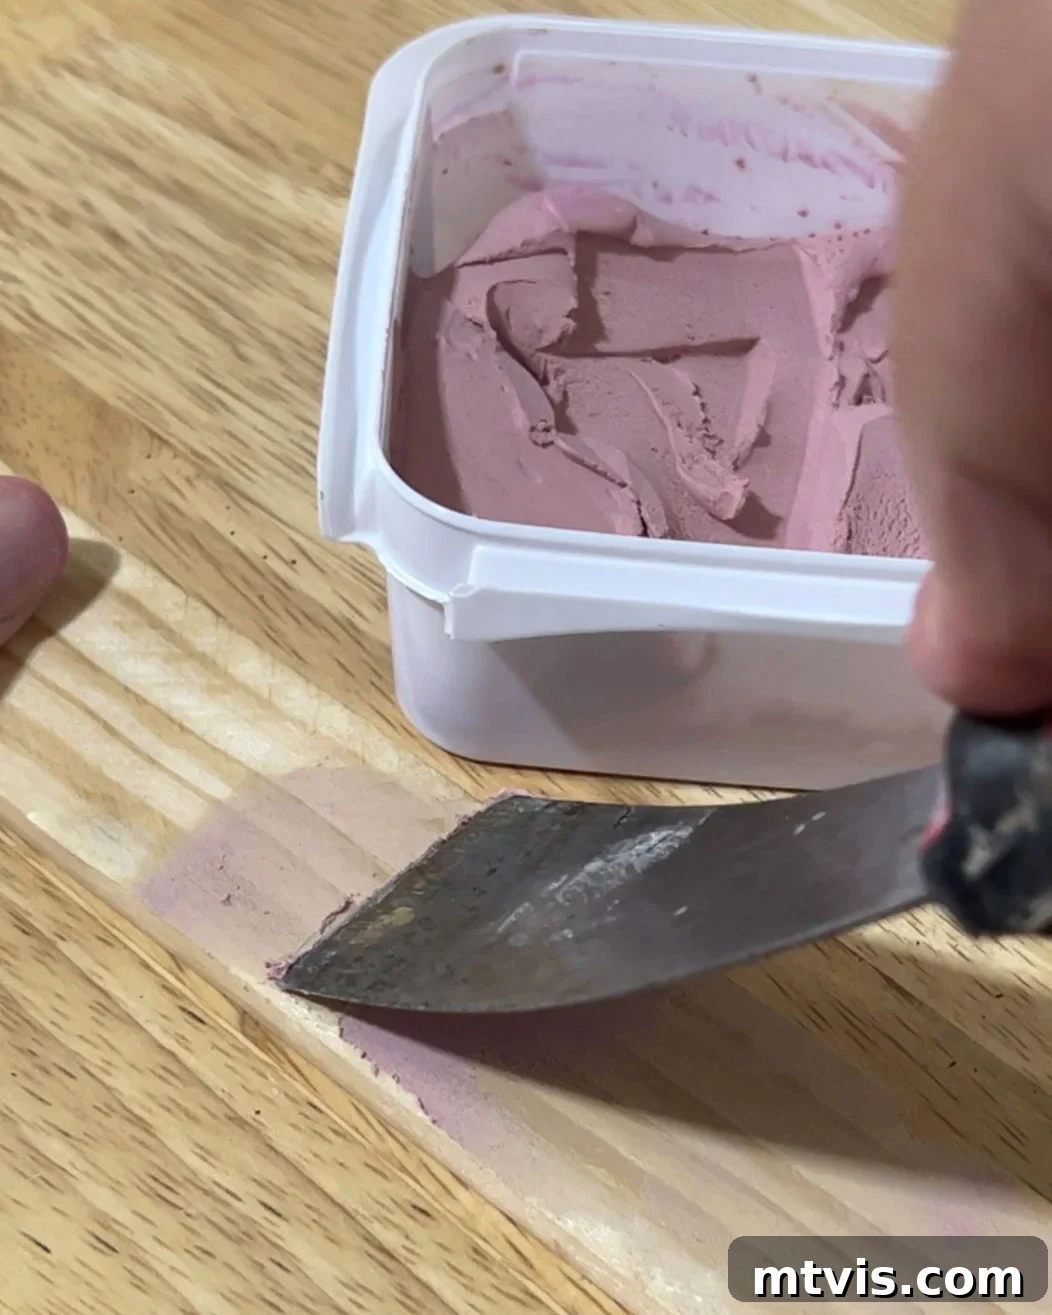
Lattice strips are an incredibly cost-effective material, but they often come with a somewhat rough, unfinished surface. To achieve a high-end, smooth finish, apply DAP Plastic Wood-X with DryDex Dry Time Indicator wood filler to any rough spots, knots, or small imperfections. This specific filler is fantastic because it goes on pink and dries to a natural wood finish, clearly indicating when it’s ready for sanding.
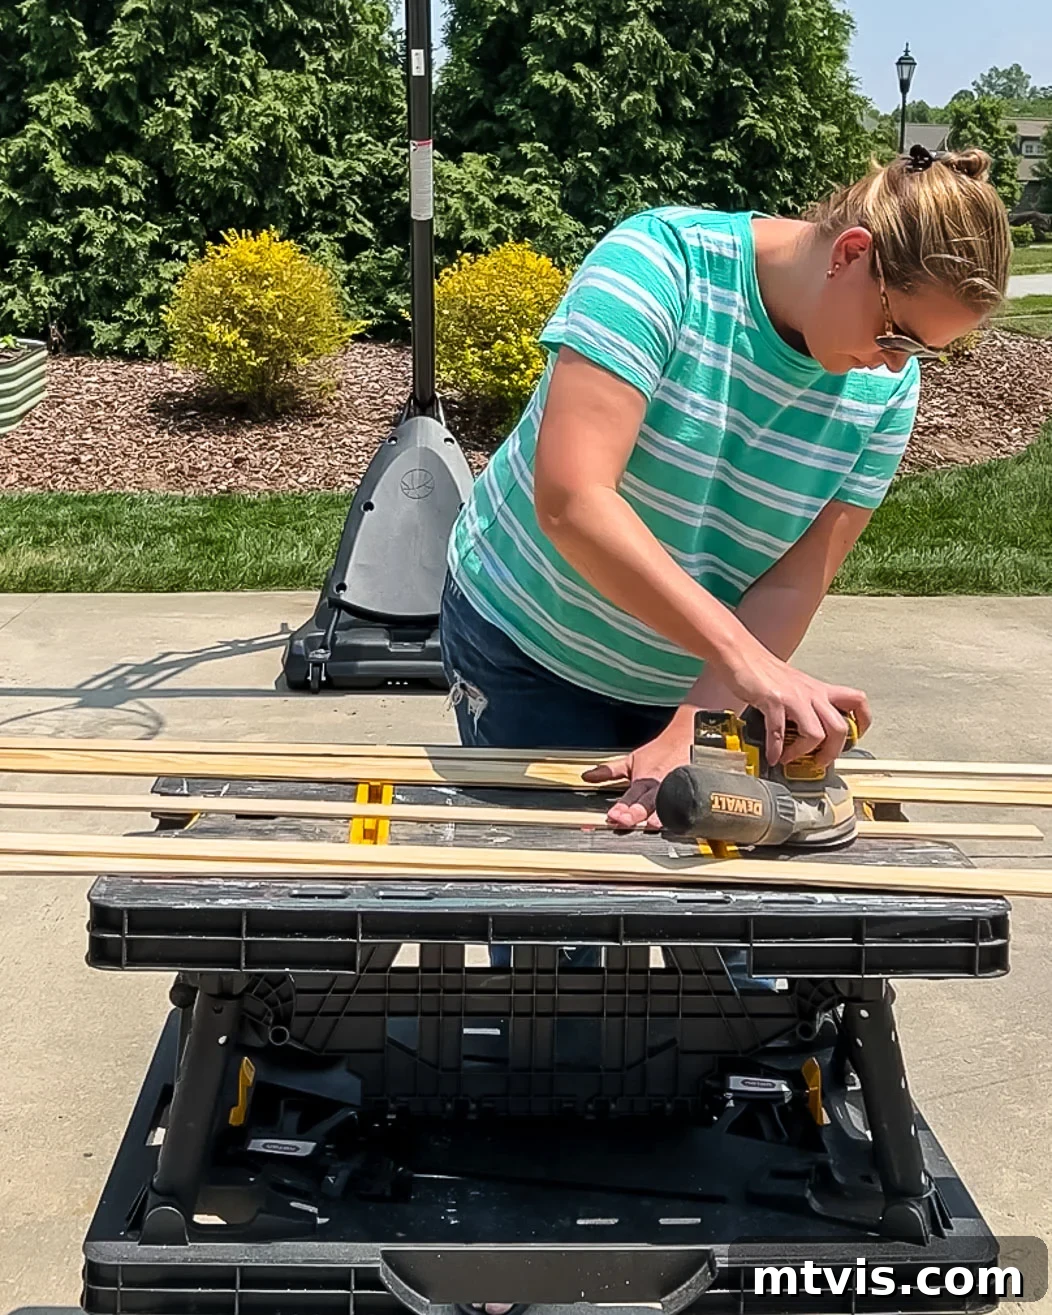
Once the wood filler is completely dry, use sandpaper (starting with a medium grit like 120 and finishing with a finer grit like 220) to sand all surfaces until they are perfectly smooth to the touch. This step is essential for a professional-looking final product, whether you plan to paint or stain.
-
6. Paint or stain your hangers.
Now it’s time to add the finishing touch! I chose to paint only the front faces of our rails with Pure White by Sherwin-Williams, the same color as my office walls, to create a seamless, built-in look. However, the beauty of DIY is customization! You can stain the wood to highlight its natural grain, paint it a bold color to make a statement, or choose a hue that perfectly complements your artwork and room decor. Consider applying a primer first if you’re painting, especially on raw wood, for better adhesion and a more durable finish. Remember to allow adequate drying time between coats and before proceeding to the next step.
-
7. Hang your magnetic poster hangers.
Once your hangers are dry and ready, it’s time to mount them on the wall. I opted for Command picture hanging strips for their damage-free removal, which is ideal for renters or those who like to frequently redecorate. For a more permanent solution, you can use small nails or screws. Regardless of your chosen method, using a laser level or a traditional bubble level is highly recommended to ensure your rails are perfectly straight and level on the wall. This attention to detail will significantly enhance the overall appearance of your displayed artwork.
-
8. Add your posters or art and enjoy!
Finally, the moment you’ve been waiting for – showcasing your chosen art! For long pieces like our six-foot calendar, holding the artwork perfectly straight while simultaneously attaching the top magnetic rail can be tricky with just two hands. A clever trick is to use a tiny amount of sticky putty in the top corners of your poster or calendar to temporarily secure it to the bottom rail. This allows you to position the artwork precisely before snapping the top magnetic rail into place. It works like a charm, making the process smooth and effortless. Step back and admire your beautifully displayed, easily changeable artwork!
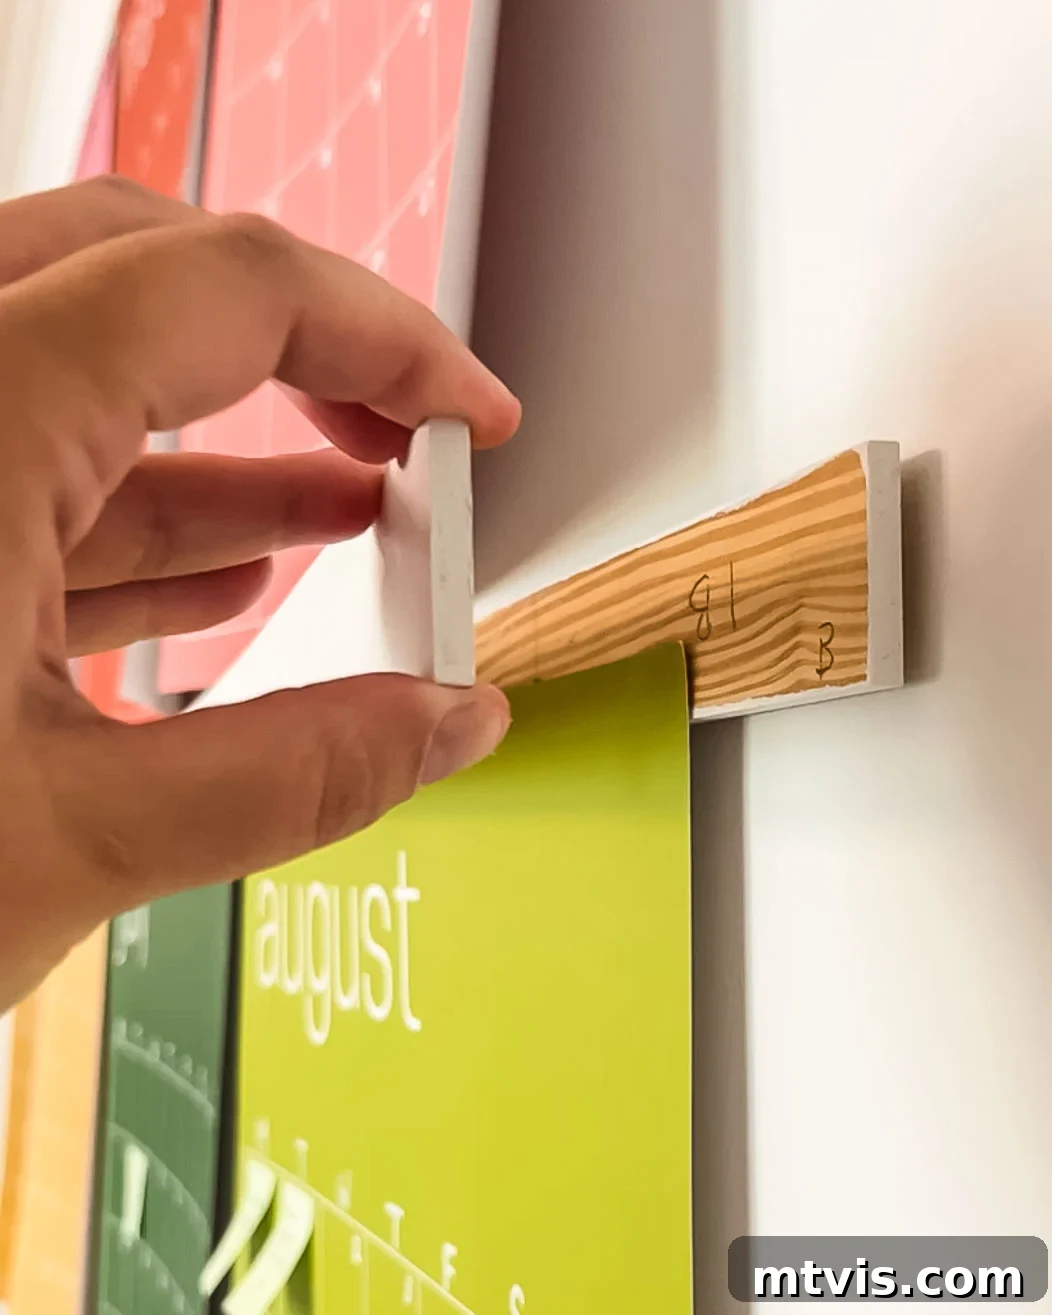
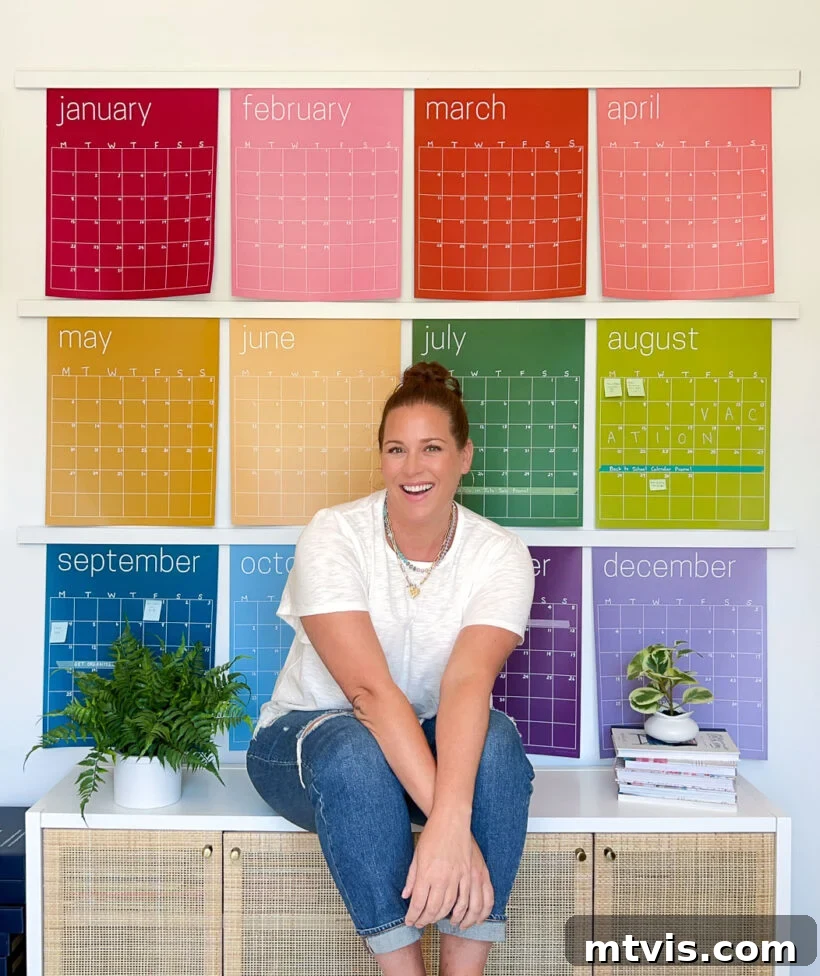
There you have it! I genuinely couldn’t be more pleased with the outcome of our DIY oversized magnetic poster hangers. They’ve proven to be the ideal solution for my large monthly wall calendar, enabling me to effortlessly rotate months and keep the upcoming weeks easily accessible. But their versatility extends far beyond calendars! These magnetic art hangers are perfect for virtually any poster, print, or piece of art you wish to display. They are especially suited for dynamic spaces where you appreciate the freedom to frequently rearrange, update, or swap out your wall decor, making your home truly reflect your evolving style. Imagine changing your children’s artwork as often as they create it, or refreshing your living room’s focal point with a seasonal print—all with magnetic ease!
What are your thoughts on this innovative display solution? I’d love to hear how you might use these in your own home!
More ART & Wall Decor Ideas
SEE ALL art POSTS
-
How to Display Art On Almost Any Smart TV
-
How to Make Faux Oversized Poster Hangers
-
DIY Light Up Wall Art
-
Make Large DIY Picture Frames For Less than $20 Each
-
DIY Magnetic Poster Hangers
-
27 Gallery Wall Ideas + Practical Tips to Inspire You
Curious about my unique approach to transforming rooms and spaces within our home? Discover the strategies and insights behind my design philosophy in Designer in a Binder®. It’s a comprehensive guide designed to empower you to create a home you love, simply and affordably.
For exclusive content, behind-the-scenes glimpses, and the latest DIY and design inspiration, be sure to subscribe to our newsletter before you leave!