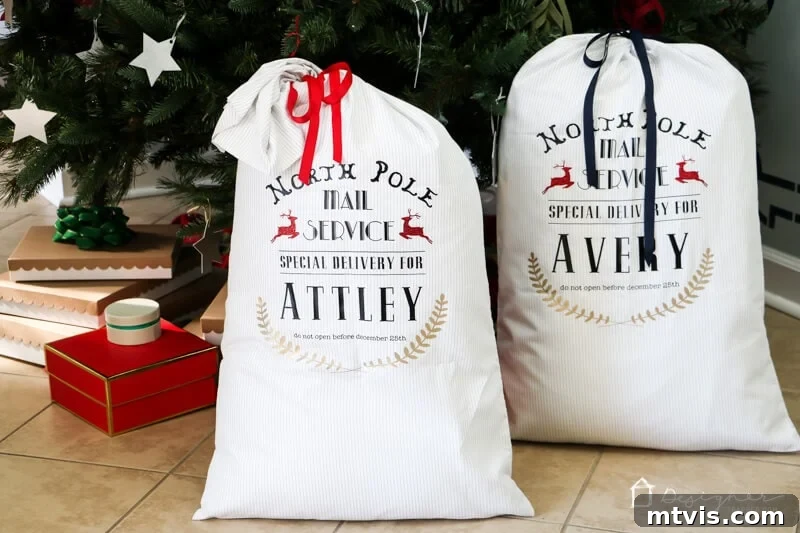
Imagine the pure joy on your children’s faces each Christmas morning as they discover their personalized DIY Santa sacks, brimming with gifts! These custom-made sacks aren’t just beautiful; they become a cherished part of your family’s holiday traditions, creating unforgettable memories year after year. Making them yourself is surprisingly fun and easy, especially with this detailed step-by-step guide. We’ll walk you through everything you need to know to craft these delightful sacks, ensuring they become a festive staple in your home.
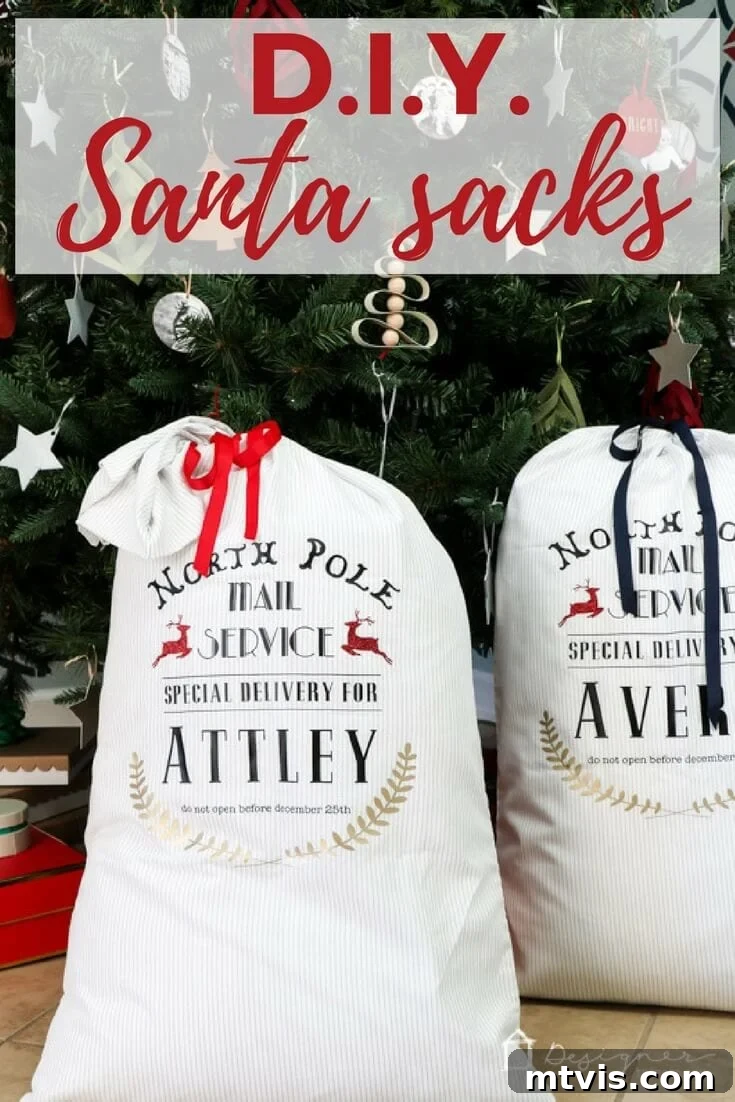
I crafted these adorable DIY Santa sacks for my daughters over five years ago, and they’ve remained a beloved part of our Christmas celebrations every single year! In their younger years, when the magic of Santa Claus was still very real, these sacks held all their special gifts from the North Pole. Now that they’re older, their purpose has delightfully evolved; we use them to hold those wonderfully bulky or awkwardly shaped gifts that are notoriously difficult to wrap. It’s a practical solution that still maintains the holiday spirit! What’s truly remarkable is how well they’ve held up over time – a testament to the quality of a handmade item. They were a joy to create and have truly stood the test of time, becoming more treasured with each passing year. Read on to discover how you can create your very own personalized Santa sacks and start a new, beautiful tradition.
This post contains affiliate links for your convenience. Your support helps keep this content free. Click here for my full disclosure policy.
DIY Personalized Santa Sacks Tutorial
Creating personalized Santa sacks is a fantastic way to add a unique touch to your Christmas decor and gift-giving. This tutorial is designed to be straightforward, guiding you through each step to ensure a successful and satisfying crafting experience. Whether you’re a seasoned crafter or new to using cutting machines, you’ll find these instructions easy to follow, resulting in beautiful sacks that will be cherished for many Christmases to come. Let’s gather our supplies and get ready to infuse some handmade magic into the holiday season!
Materials Needed:
Having the right tools and materials is crucial for any successful DIY project. For these durable and charming Santa sacks, here’s a detailed list of what you’ll need, along with a few tips for selecting each item:
- King-size Pillowcase: Opt for a sturdy, plain pillowcase. Cotton or a poly/cotton blend works best as it holds up well to repeated use and allows for easy iron-on vinyl application. White or natural colors are excellent canvases for festive designs. You can often find these affordably at home goods stores or online.
- Cricut Cutting Machine: Any Cricut machine will be perfect for this project. I personally used my Cricut Maker due to its versatility, but a Cricut Explore or even a Cricut Joy (for smaller designs) will work wonderfully. If you’re new to Cricut and still deciding which machine is right for you, consider reading my post on how to choose the best Cricut machine for your crafting needs.
- Iron-On Vinyl (Heat Transfer Vinyl – HTV): This is what will bring your designs to life on the fabric. I chose a classic combination of black, gold, and glitter red for a traditional Christmas look. When selecting your vinyl, consider varying textures and colors to add depth and visual interest. High-quality HTV ensures durability and a professional finish. You can find a great selection of iron-on vinyl here.
- Cricut EasyPress (or a reliable iron): While a standard iron can work in a pinch, a Cricut EasyPress provides consistent, even heat, which is vital for proper vinyl adhesion and long-lasting results. We’ll delve into why the EasyPress is a game-changer for iron-on projects shortly.
- Blanket or Towel: This serves as a protective pressing mat. A firm, flat surface is essential for applying even pressure during the heat transfer process. Ensure it’s thick enough to protect your work surface from heat.
- Scissors: For trimming vinyl and other minor adjustments. Sharp crafting scissors are always a good investment.
- Weeding Tool: An absolute must-have for removing excess vinyl from your cut designs. A good weeding tool makes the process much faster and less frustrating, especially for intricate patterns.
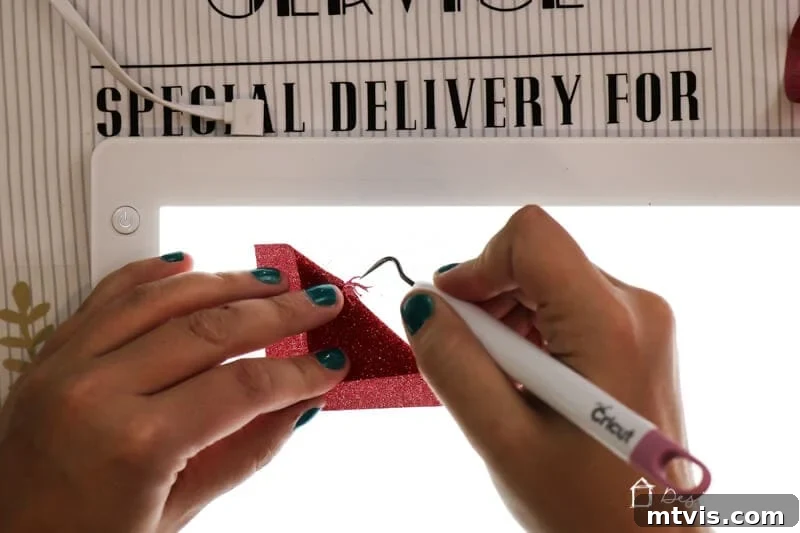
- Optional (but highly recommended) Cricut BrightPad: This illuminated workspace is a true lifesaver, especially when working with glitter iron-on vinyl. The backlight makes it incredibly easy to see cut lines, simplifying the weeding process significantly. If you plan on doing many vinyl projects, the Cricut BrightPad is a worthwhile investment.
Step-by-Step Instructions: Crafting Your Santa Sacks
Let’s dive into the fun part – bringing your personalized Santa sacks to life! This section will guide you through each stage of the creation process, from designing your festive graphics to perfectly adhering them onto your pillowcases. While I encourage you to watch a video overview for a visual guide, these written instructions cover every detail to ensure a smooth crafting experience.
Step 1: Design and Personalization in Cricut Design Space
The first step involves customizing your Santa sack design. Cricut Design Space makes this incredibly simple. You can easily access the base project by clicking HERE. Once the project opens, the real magic begins: personalizing it with your child’s name! Simply select the placeholder text and input your desired name. Remember to size the name appropriately for your king-size pillowcase, ensuring it’s prominent but not overwhelming.
For the font, I used one called “Pottery Barn” which I had installed on my computer. While I’m unsure of its original source, the beauty of Cricut Design Space is that you’re not limited! Feel free to explore the vast library of fonts available within Design Space, or use any font you’ve already installed on your computer. Choose a font that is clear, legible, and embodies the festive spirit you envision for your Santa sacks. A classic serif or a whimsical script font often works wonderfully for this type of project. Don’t forget to ungroup elements if you want to adjust spacing or individual letters for a truly custom look.
Step 2: Cutting and Weeding Your Vinyl Designs
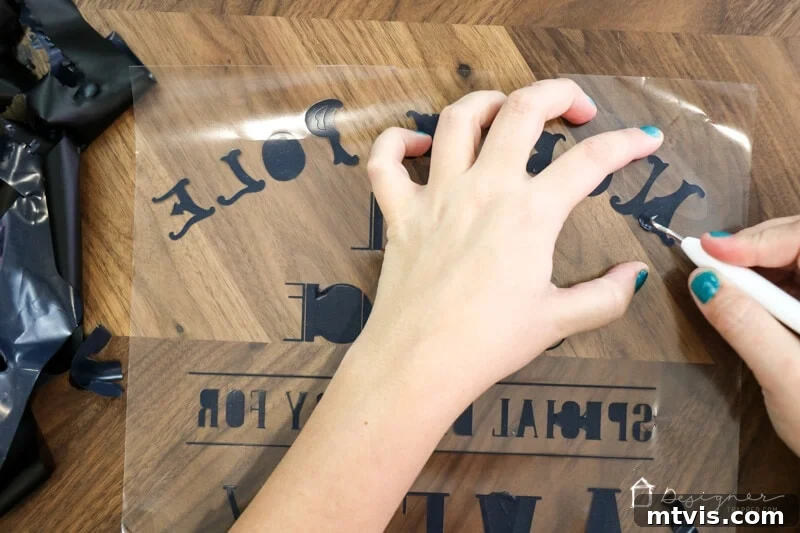
With your design finalized, it’s time to cut your iron-on vinyl. An essential tip for working with iron-on vinyl (HTV) is to always “mirror” your design before cutting. This ensures that when you press it onto the fabric, the design appears correctly. Place your iron-on vinyl shiny side down onto your Cricut mat, select the appropriate material setting (e.g., “Iron-On” or “Glitter Iron-On”), and let your Cricut machine work its magic.
Once your designs are cut, the next crucial step is weeding – carefully removing all the excess vinyl that isn’t part of your design. This process can be a bit tedious, especially with intricate designs or glitter vinyl. This is where a Cricut BrightPad truly shines. The illuminated surface highlights the cut lines, making it significantly easier to identify and remove the tiny pieces of vinyl. Take your time, use your weeding tool to meticulously pick away the unwanted vinyl, leaving only your beautiful design on the clear carrier sheet. Patience here will pay off with a crisp, clean finished product.
Step 3: Applying the Main Design Elements with Heat
Now for the exciting part: transferring your design to the pillowcase! First, lay your pillowcase flat on your pressing surface (a thick blanket or towel works great) and pre-heat the fabric for about 5-10 seconds using your Cricut EasyPress or iron. This removes wrinkles and moisture, ensuring better vinyl adhesion. Then, carefully position the largest part of your design onto the pillowcase. Take your time to center it and ensure it’s straight.
For the poly/cotton blend pillowcases I used, I set my EasyPress to 285 degrees Fahrenheit and applied even heat for 15 seconds. These settings worked perfectly for a durable bond. Always refer to your vinyl’s specific instructions or the Cricut Heat Guide for the most accurate temperature and time settings, as they can vary by vinyl type and fabric. Apply firm, even pressure. After the vinyl has completely cooled (this is a “cool peel” vinyl), gently peel off the clear carrier sheet. If any part of the design lifts, lay the carrier sheet back down and press again for a few more seconds.
I must confess, I had previously given up on iron-on projects due to numerous frustrating failures. I ruined far too many shirts and wasted excessive amounts of material, leading to a lot of discouragement. However, my perspective completely shifted when I discovered that household irons, which I had been using, have incredibly uneven heat distribution. This realization finally explained why my past iron-on results had been so inconsistent and often disastrous.
The Cricut EasyPress deeply intrigued me because of its generous 9″x9″ heated plate and its promise of uniform heat across the entire surface. Despite my past skepticism, I decided to give it a try, and it has not disappointed me once! The consistent heat guarantees professional-looking results every time, and I especially love the built-in countdown timer that beeps when the process is complete. It’s remarkably user-friendly and essentially idiot-proof, which is precisely what I need in a crafting tool! Plus, its compact size is a huge bonus for my crafting space, as I simply don’t have the room or desire for a bulky, traditional heat press machine.
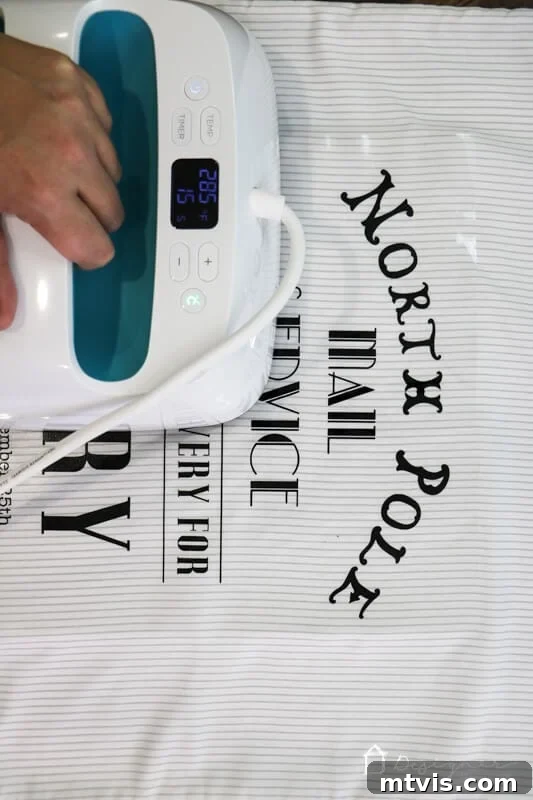
Step 4: Adding Personalization and Finishing Touches
With the main design securely in place, it’s time to add the personalized elements that make these Santa sacks truly special. Carefully position your child’s name directly above or below the main graphic, ensuring it’s centered and aligned. If you have multiple layers or additional elements like reindeer, apply them sequentially, pressing each layer according to the vinyl manufacturer’s instructions.
When applying subsequent layers, try to avoid direct heat on previously applied vinyl if possible, especially if using different types of vinyl (e.g., glitter and regular). You can use a thin sheet of parchment paper or a Teflon sheet to protect already-pressed vinyl. Maintain the same temperature and time settings you used for the main design, unless otherwise specified by your vinyl’s instructions. Once all layers are applied and cooled, gently peel away all carrier sheets. Give your Santa sack a final gentle press over the entire design for a few seconds to ensure everything is perfectly adhered and set.
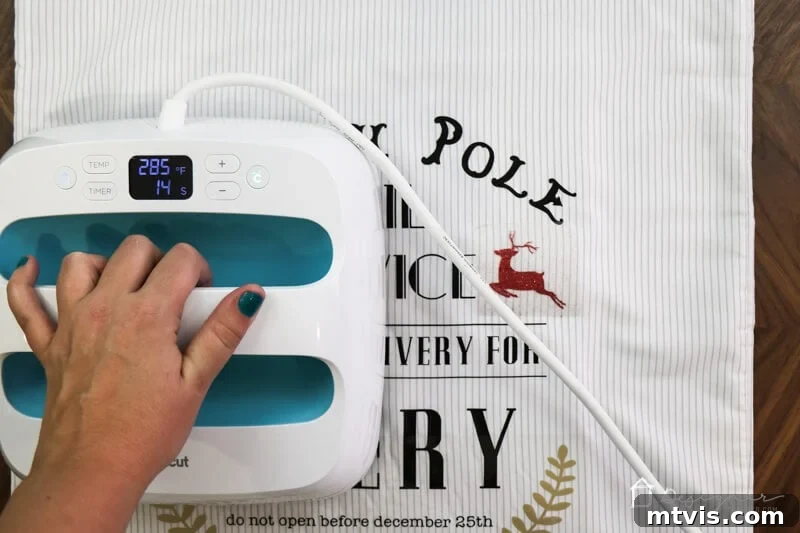
And just like that, you’ve created magnificent, personalized DIY Santa sacks! The crafting process is genuinely rewarding, culminating in beautiful, durable sacks ready for the holiday season. Now, all that’s left to do is fill them to the brim with presents, tie them closed with a festive ribbon, and get ready to witness the magic unfold on Christmas morning. How incredibly cute and special are these custom Santa sacks?
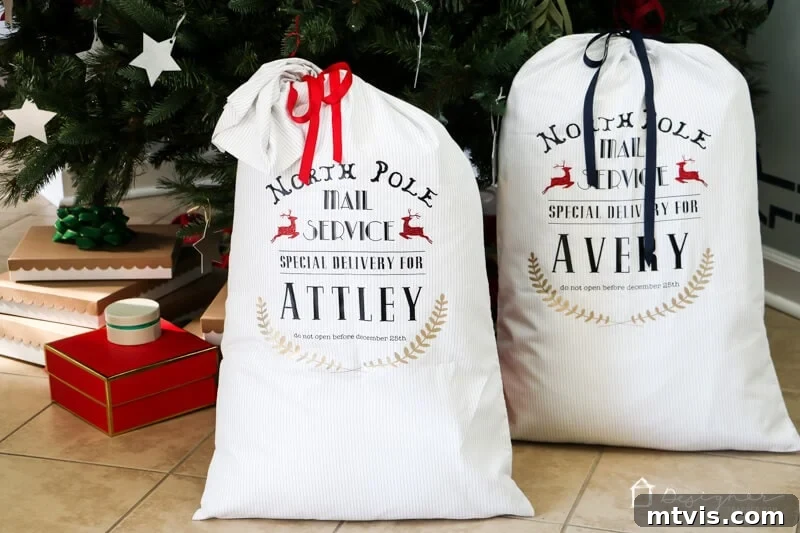
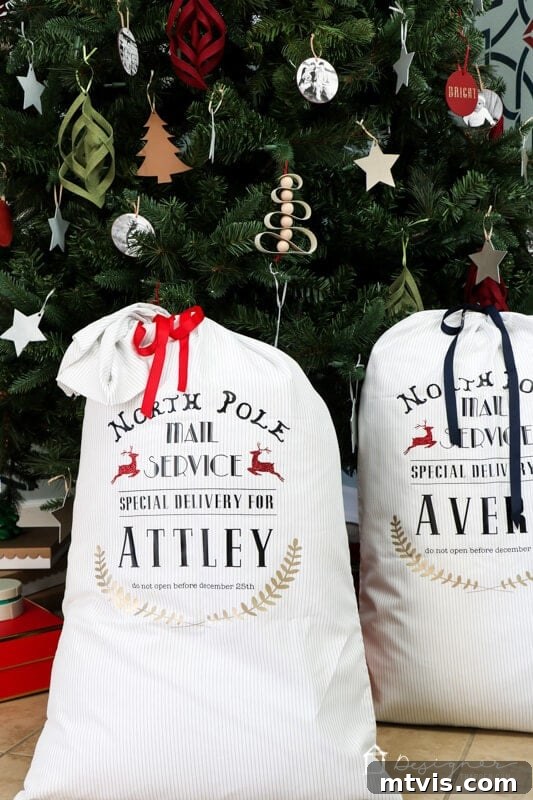
Care Instructions for Your Personalized Santa Sacks
To ensure your personalized Santa sacks last for many Christmases to come, proper care is essential. When it’s time to clean them, always turn the sacks inside out before washing. Use a gentle cycle with cold water and a mild detergent. Avoid bleach and harsh chemicals, as these can damage the vinyl. For drying, either tumble dry on low heat or, ideally, hang them to air dry. If you need to iron out wrinkles, turn the sack inside out and iron on a low setting, avoiding direct contact with the vinyl design. Following these simple care tips will help preserve the vibrant colors and adhesion of your iron-on designs, allowing your family to enjoy these festive sacks for generations.
Further Customization Ideas
While the classic design presented here is charming, don’t hesitate to let your creativity flow! You can further customize your Santa sacks in numerous ways. Consider adding extra embellishments like ribbons, bells, or even small pom-poms around the opening for an extra festive touch. Experiment with different vinyl colors and patterns – perhaps a plaid name, polka-dot reindeer, or metallic accents for a touch of glamour. You could also choose different designs within Cricut Design Space, such as snowflakes, Christmas trees, or even custom messages like “Do Not Open Until Christmas.” The possibilities are endless when it comes to making these sacks truly reflective of your family’s style and holiday spirit.
Don’t forget to save this enchanting idea to Pinterest or share it on Facebook so you can easily find it again next year!
More Seasonal Posts to Inspire You
SEE ALL HOLIDAY POSTS
Wondering how I approach transforming rooms and spaces in our home? Be sure to check out Designer in a Binder®. It’s my proven system for decorating your home affordably and efficiently, helping you achieve a cohesive and beautiful look without the guesswork.
And if you crave exclusive content, behind-the-scenes sneak peeks, and fresh DIY inspiration delivered straight to your inbox, be sure to subscribe to my newsletter before you head out! Join our community of fellow DIY enthusiasts and never miss a project or tip designed to make your home more beautiful and uniquely yours.