DIY Christmas Countdown Calendar: Crafting Holiday Joy for Your Family
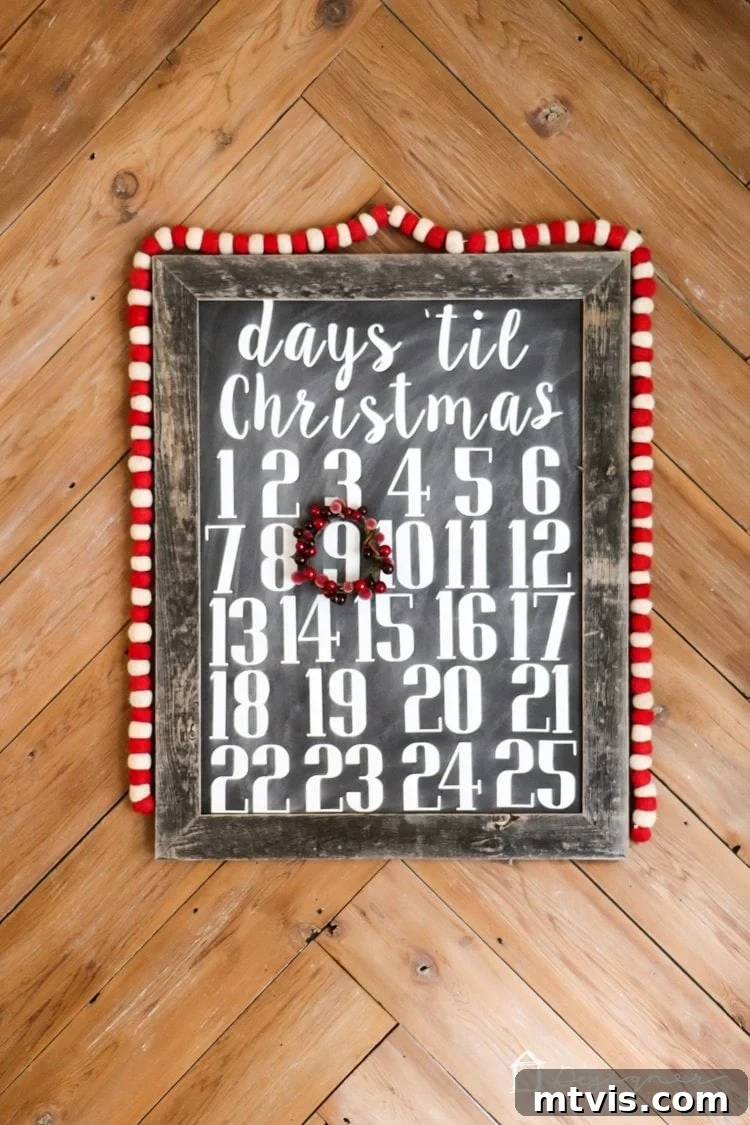
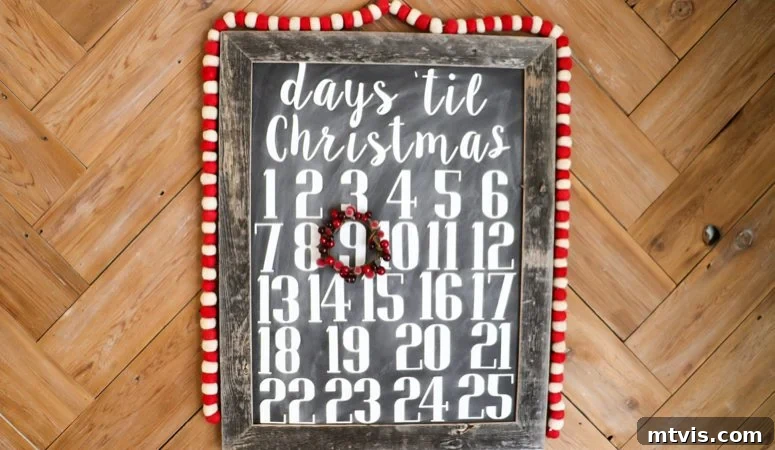
The holiday season holds a special kind of magic, especially when you have children eagerly awaiting Santa’s arrival. The anticipation, the twinkling lights, the festive music—it all builds into a crescendo of excitement leading up to Christmas Day. To make this countdown even more memorable and engaging for my family, I designed a delightful DIY Christmas countdown calendar. It’s become a cherished tradition in our home, with my girls taking turns each morning to move the little wreath to the new day, their faces beaming with joy as Christmas draws nearer. And I must admit, I adore how charming and festive it looks!
Creating a festive atmosphere throughout our home is something we truly enjoy during the holidays. This countdown calendar finds its perfect spot in our kitchen, proudly displayed on our DIY herringbone wall. Paired with our whimsical DIY mini wreaths adorning the cabinets, our kitchen transforms into a truly enchanting and spirited space. It’s these small, personalized touches that truly make a house feel like a home during the most wonderful time of the year.
This project stands out as one of the simplest and most endearing crafts I’ve ever undertaken. The inspiration for this calendar sparked from a lovely Christmas countdown I spotted at Target. While it was charming, I felt the wood tone wasn’t quite right for my aesthetic, and its size was a bit too modest for the statement I wanted to make. So, with a creative spark, I decided to craft my own version, allowing for complete personalization. I’m incredibly pleased with the result; it perfectly captures the spirit of the season and fits seamlessly into our holiday decor.
What makes this DIY Christmas countdown calendar truly special is its incredible versatility and ease of customization. Whether you own a favorite cutting machine or prefer the simplicity of pre-made stickers, you can effortlessly tailor this project to match your unique Christmas color palette and desired font styles. Imagine crafting a calendar that perfectly complements your existing holiday theme, making it not just a countdown tool but also a beautiful piece of decor. Keep reading to discover the simple steps to create this charming and budget-friendly holiday project. You’ll be amazed at how inexpensive and easy it is to bring this festive piece into your home!
This post contains affiliate links for your convenience. Click here for my full disclosure policy.
Craft Your Own Magical DIY Christmas Countdown Calendar
There’s nothing quite like the collective excitement that builds as Christmas approaches. A countdown calendar transforms that abstract wait into a tangible, daily delight. This DIY version offers a timeless, chalkboard-inspired aesthetic that fits seamlessly into almost any home decor style, from rustic farmhouse to modern minimalist. It’s more than just a craft; it’s an opportunity to create a new family tradition and a beautiful keepsake that will be brought out year after year.
Why Choose a DIY Countdown Calendar?
- Personalization: Unlike store-bought options, you have complete control over the design, colors, and fonts, ensuring it perfectly matches your home’s aesthetic.
- Budget-Friendly: Using readily available and inexpensive materials, this project offers significant savings compared to purchasing a similar item.
- Family Activity: Involving children in the crafting process, or simply letting them take turns moving the marker each day, creates lasting memories and heightens their anticipation.
- Unique Decor: This calendar isn’t just functional; it’s a charming piece of holiday decor that adds a handmade touch to your festive arrangements.
Materials You’ll Need for Your DIY Christmas Countdown Calendar
Gathering your materials is the first exciting step in any DIY project. For this charming Christmas countdown calendar, you’ll find that most items are affordable and easily accessible, often found at craft stores or even dollar stores. The beauty of this project lies in its simplicity and the ability to achieve a high-end look without a hefty price tag.
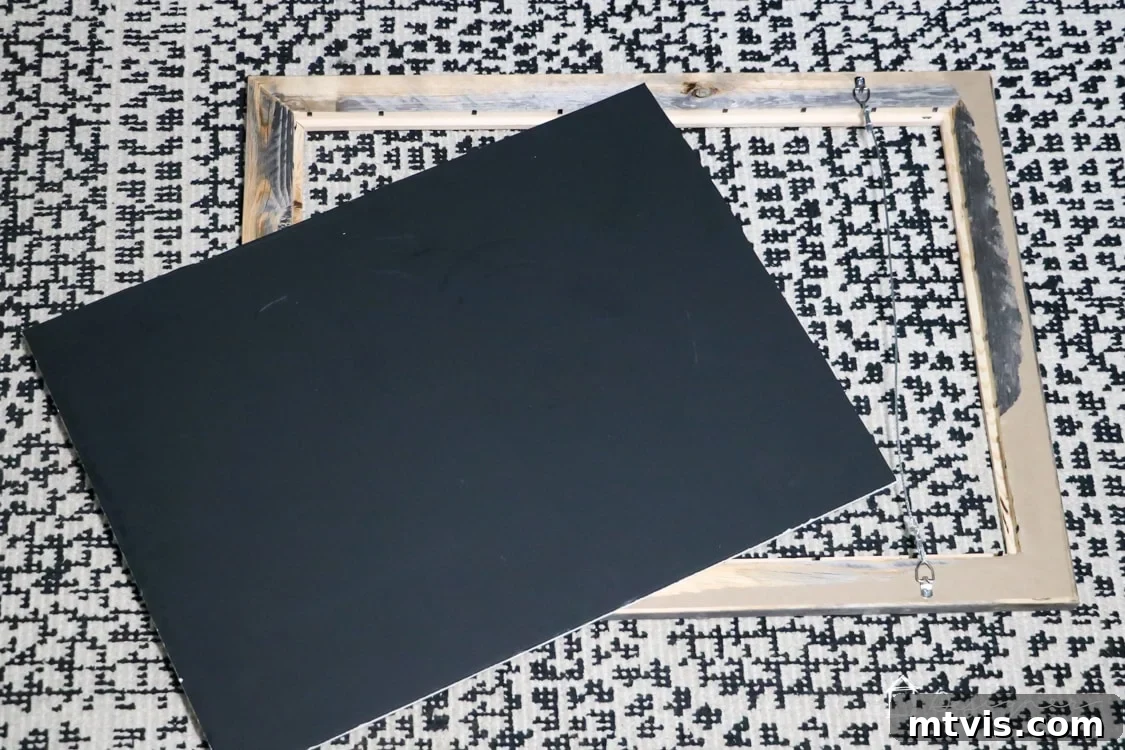
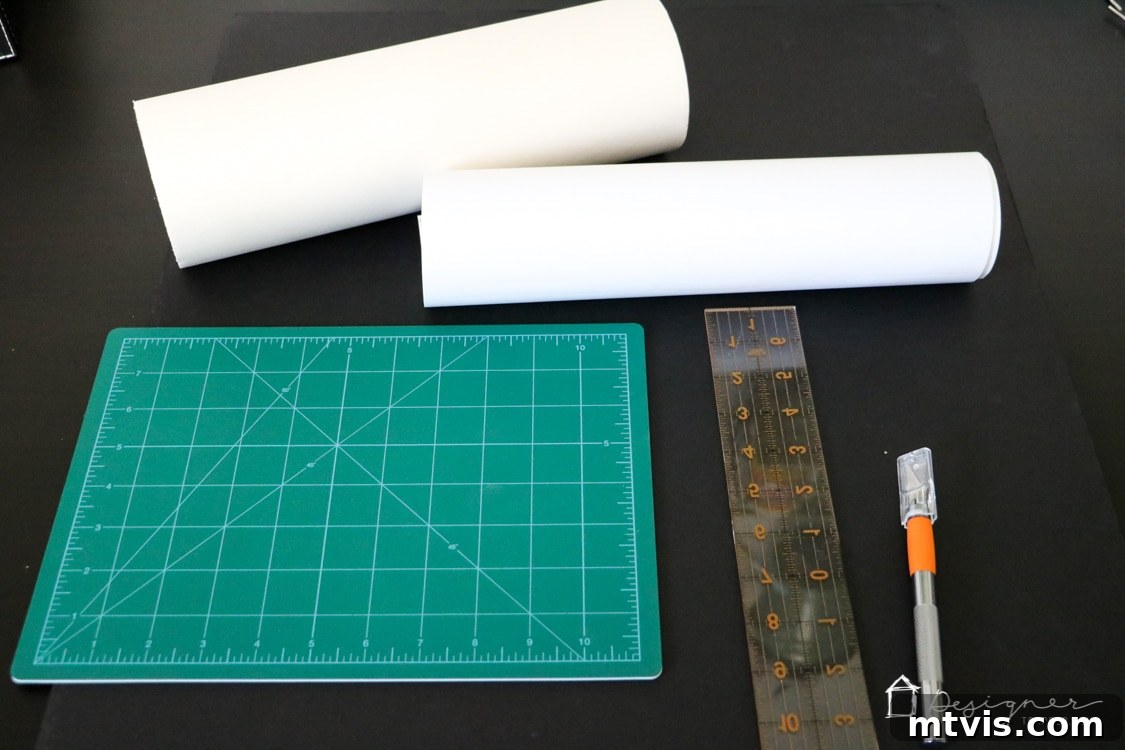
- Black Foam Core Board: This is the foundation of your calendar. I highly recommend picking this up at The Dollar Store for maximum savings. Its lightweight nature makes it easy to cut and hang, while the black provides the perfect backdrop for our chalkboard effect.
- White Vinyl: For the numbers and festive text, white vinyl offers a crisp, clean look against the black foam core. I have a strong preference for Silhouette Brand vinyl because I find it significantly easier to peel the backing paper compared to other brands, which really speeds up the “weeding” process.
- A Cutting Machine (Optional but Recommended): This tool is a game-changer for precision and speed. I personally use the Silhouette CAMEO, but I also have great admiration for the Cricut Explore. If you’re weighing your options, I’ve put together a full review comparing Silhouette vs. Cricut to help you decide.
- Stickers (Alternative to Cutting Machine): If you don’t own a cutting machine, don’t worry! You can easily find suitable white adhesive numbers and letters at any craft store to achieve a similar look. Look for styles that mimic a hand-drawn or chalk font for authenticity.
- Transfer Paper: Essential for transferring your intricate vinyl designs from their backing to the foam core while maintaining perfect spacing. The Silhouette brand offers excellent transfer paper, but I’ve also had great success with less expensive, off-brand options that work just as perfectly.
- Chalk: An ordinary piece of white chalk is all you need to create that authentic, aged chalkboard effect.
- Chalk Eraser or Paper Towel: For evenly distributing the chalk dust across your calendar surface.
- Craft Knife: A sharp craft knife is crucial for cleanly cutting the foam core board to size. Always use it with a cutting mat for safety and precision.
- Wood Frame without Glass: You’ll need a frame to give your calendar a finished, polished look. Look for simple wood frames without glass at most craft stores; the glass isn’t needed for this project and would hinder the interactive nature of the calendar. You can choose a natural wood finish, or paint it to match your decor.
- Small Berry Spray or Mini Wreath: This will serve as your movable marker. A small artificial berry spray from a craft store is ideal, as you can easily shape it into a miniature wreath and add a hook. Alternatively, you can find small decorative items like mini ornaments or felt balls.
 |
 |
Step-by-Step Guide to Making Your DIY Christmas Countdown Calendar
Now that you have all your materials, let’s dive into the fun part: creating your very own Christmas countdown calendar. Each step is designed to be straightforward, ensuring even novice crafters can achieve a beautiful and professional-looking result.
Step 1: Measure and Cut Your Foam Core Board
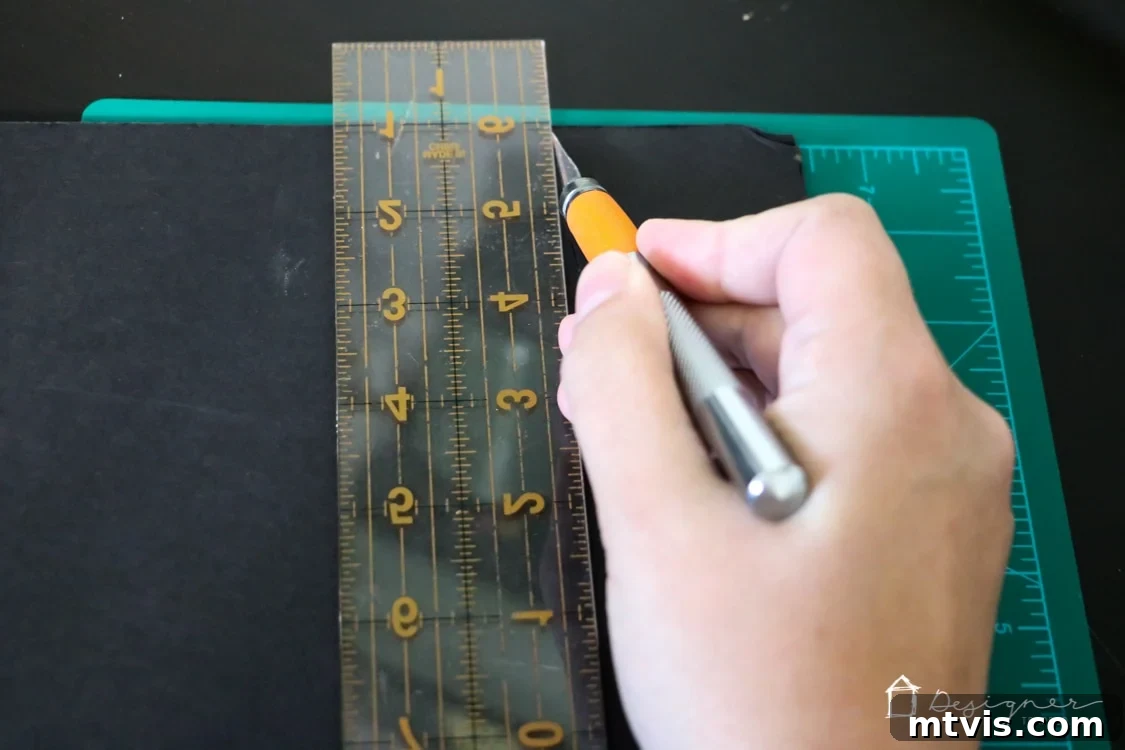
The first crucial step is to prepare the base of your calendar. Begin by carefully measuring the inside dimensions of your chosen wood frame. This measurement will dictate the size of your foam core board. Once you have your precise measurements, use a ruler or straight edge to mark them clearly on your black foam core board. With your craft knife, make steady, clean cuts along your marked lines. Always place a cutting mat underneath your foam core to protect your work surface and ensure a smooth cut. Multiple light passes with the knife are often more effective and safer than trying to cut through in one go, resulting in cleaner edges.
Step 2: Design Your Calendar Layout
This is where your creativity truly shines! Open your cutting machine software (like Silhouette Studio or Cricut Design Space) and begin designing the text and numbers for your sign. Ensure your overall design will comfortably fit within the dimensions of your cut foam core board and frame. For the elegant script at the top of the sign, I used the font “Sugar Plums,” and for all the numbers (1 through 25, or 31 if you prefer a full December calendar), I chose a classic font called “Pottery Barn.” Remember, these are specific fonts I had installed on my computer, so you might need to find similar styles or download them. When arranging your numbers, aim for a clear, grid-like layout that is easy to read and aesthetically pleasing. Consider leaving ample space around each number for the wreath marker. If you’re using stickers instead, lay them out on your foam board first to finalize your spacing before adhering them.
Step 3: Cut Your Vinyl Design
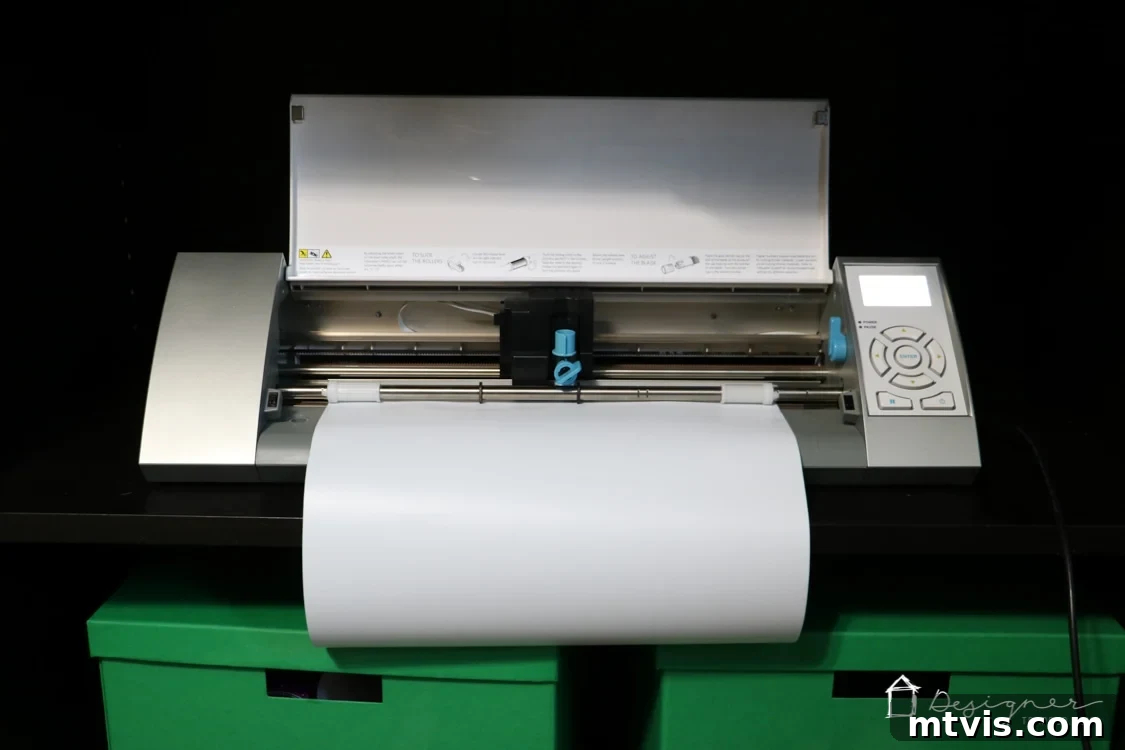
Once your design is perfect in your software, it’s time to send it to your cutting machine. Load your white vinyl onto the cutting mat and ensure your machine settings (blade depth, force, speed) are appropriate for vinyl. Run the cut job. If you’re opting for stickers, simply skip this step and move on to arranging them directly onto your foam core. There are many beautiful sticker sets available that can mimic the look of cut vinyl or hand-drawn chalk, offering a fantastic alternative if you don’t own a cutting machine.
Step 4: Weed Your Vinyl Design
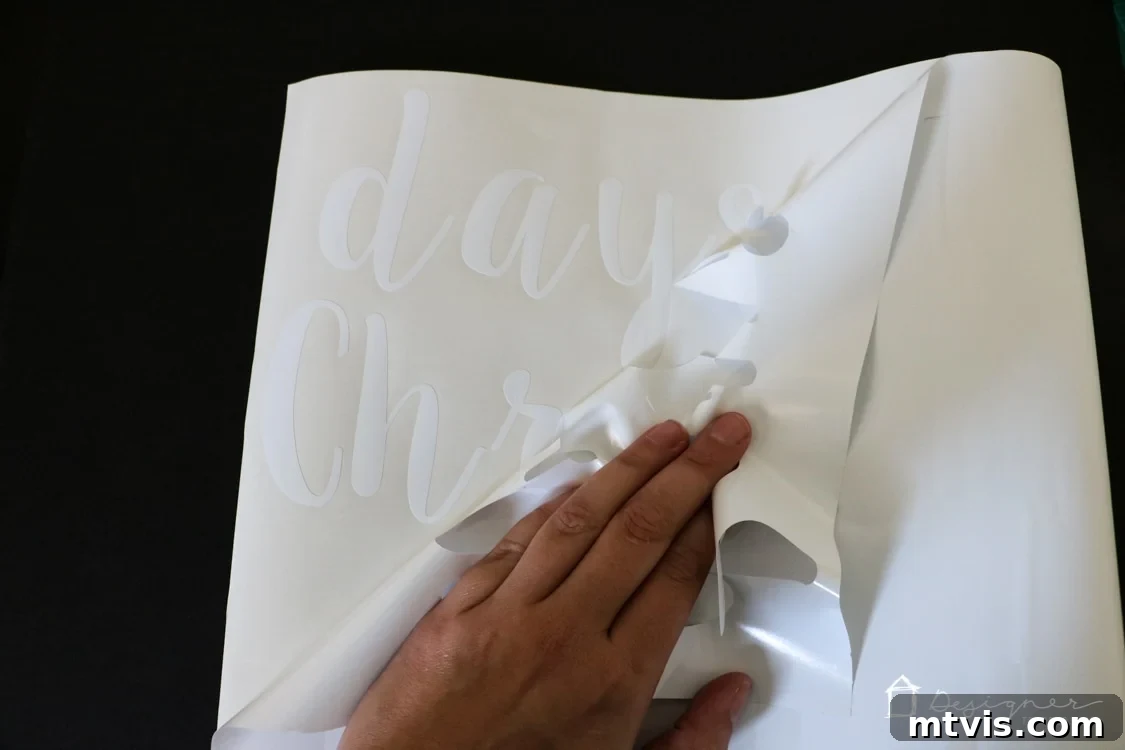
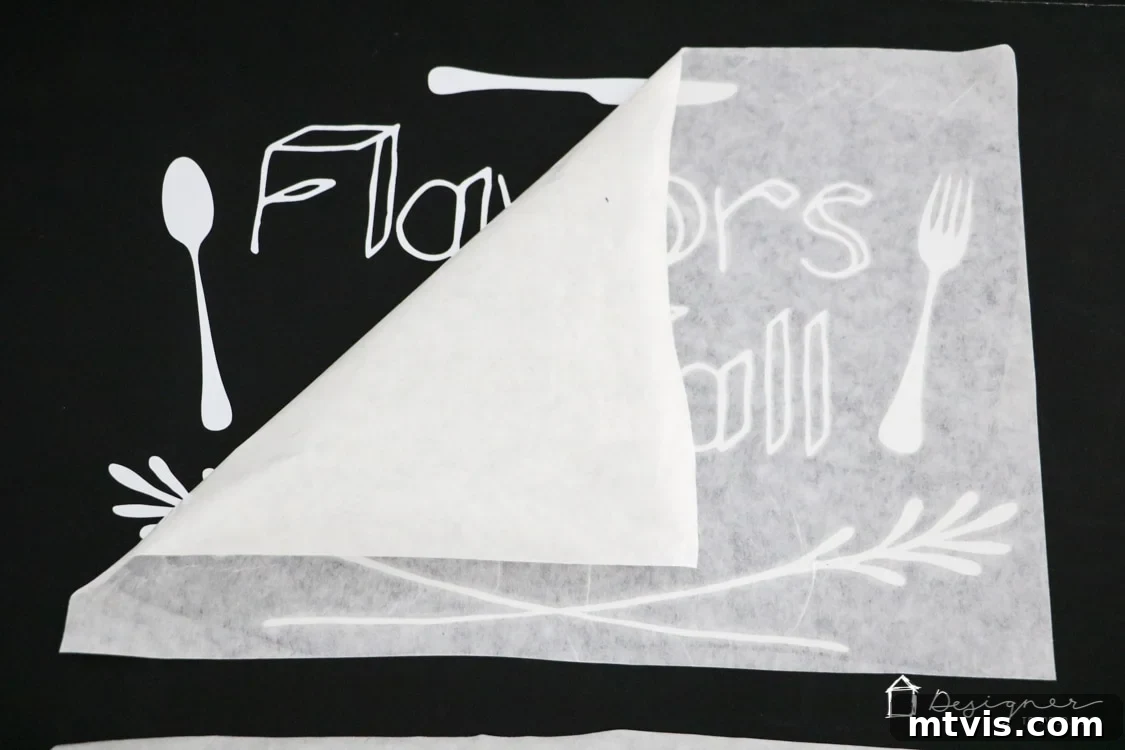
After your cutting machine has finished its work, you’ll need to “weed” your design. This term refers to the process of removing all the excess vinyl that is not part of your final design. Using a weeding tool (a sharp-pointed tool, hook, or even tweezers), carefully peel away the vinyl from around your letters and numbers. Take your time with this step, especially with intricate fonts or small details, to ensure you don’t accidentally lift any part of your desired design. The goal is to be left with only your precisely cut letters and numbers on the vinyl backing, ready for transfer, as shown in the image below.
Step 5: Transfer Your Design to the Foam Board
Now it’s time to apply your vinyl design to the foam core board. I highly recommend using transfer paper for this step, as it allows you to transfer large sections of your design, or even the entire design, at once. This method is crucial for maintaining the precise spacing and alignment of your numbers and text, ensuring your Christmas countdown calendar looks professional and organized. To do this, place the transfer paper sticky-side down over your weeded vinyl design, burnish it well with a credit card or scraper to ensure adhesion, then carefully peel the transfer paper up, bringing your vinyl design with it. Position the design onto your foam core board, press firmly, and then slowly peel back the transfer paper, leaving the vinyl adhered to the board. While using transfer tape for the entire design might use a bit more vinyl, the time saved and the accuracy achieved are well worth it. If you want to conserve vinyl, you can cut your numbers and letters closer together in your design file and apply them in smaller sections, though this requires more careful alignment by hand.
Step 6: Create the Faux Chalkboard Effect
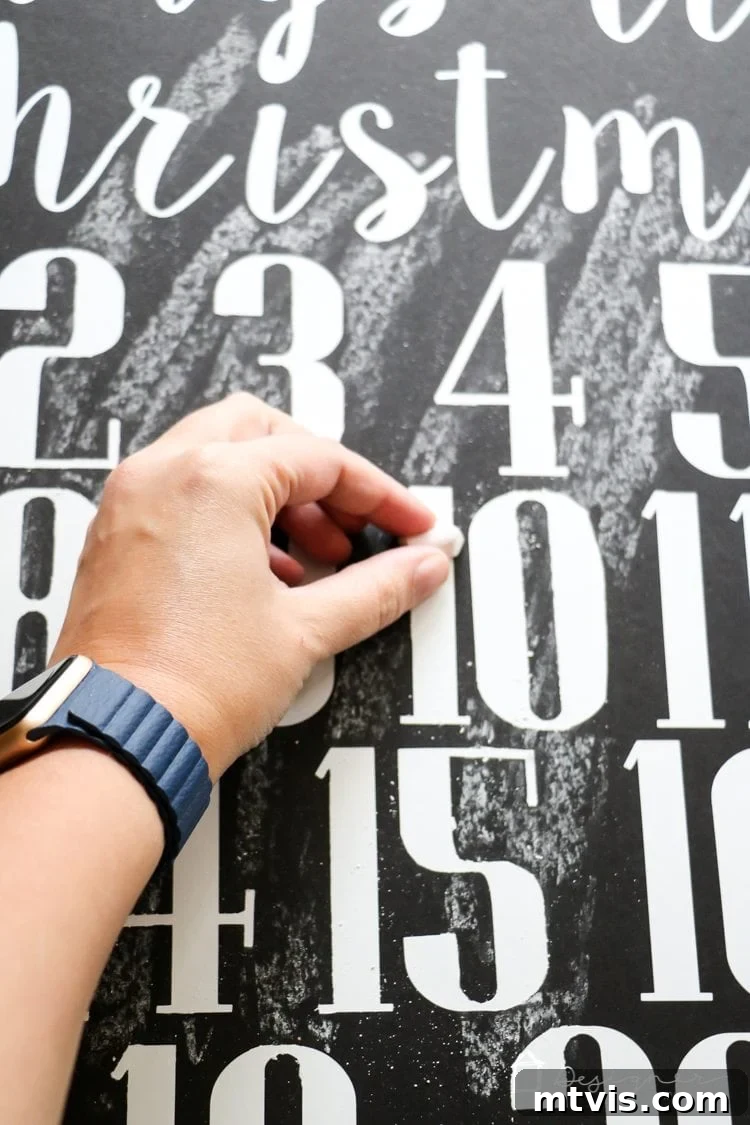
This step is key to achieving that authentic, rustic chalkboard look. With your vinyl design securely in place on the foam core board, take a piece of chalk and gently rub the side of it all over the entire surface of your Christmas countdown calendar. Don’t press too hard; you just want to create a fine layer of chalk dust. Once the entire board is coated, use a paper towel or a dedicated chalkboard eraser to softly buff and spread the chalk dust evenly. This process mutes the stark black of the foam core and gives it that beautiful, soft, well-used chalkboard appearance. It’s a simple step that makes a huge difference in the final aesthetic, so definitely don’t skip it! A crucial note: ensure your vinyl is firmly attached BEFORE doing this, as chalk dust will prevent the vinyl from sticking properly.
Step 7: Prepare Your Mini Wreath Marker
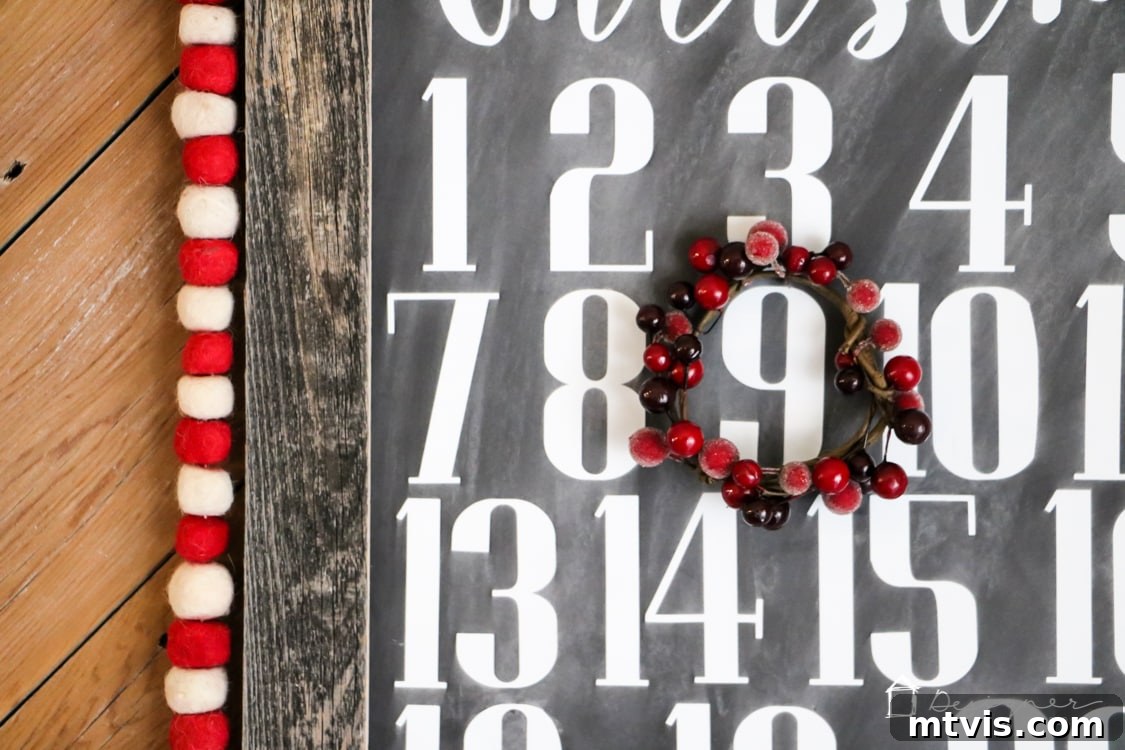
For the movable marker that tracks the days, I opted for a charming mini wreath. I purchased a small spray of artificial berries from a local craft store. Carefully bend and shape the berry spray into a circular wreath, cutting off any excess length to achieve your desired size. To create a hook for hanging, cut a very short piece of the berry stem and bend it into a small “U” or hook shape, ensuring a bit of the wire is exposed at one end. This small wire hook can then be easily pushed into the foam core board, much like a pushpin, allowing you to move your wreath marker from day to day effortlessly. If berries aren’t your style, consider a tiny ornament, a small wooden star, or even a cute felt shape with a small pin attached to the back.
Step 8: Frame and Hang Your Beautiful Calendar!
The final step is to assemble your magnificent Christmas countdown calendar! Carefully place your decorated foam core board into your chosen wood frame. Since you selected a frame without glass, the foam core should fit snugly. Secure the foam core in place with the frame’s existing clips or small brad nails if needed. Once framed, find the perfect spot in your home to hang it. Whether it’s in the kitchen, living room, or a child’s bedroom, this calendar is sure to be a delightful focal point. Watch as your family, especially the little ones, fall in love with this adorable creation. My twin girls are absolutely thrilled, eagerly anticipating December so the countdown can officially begin!
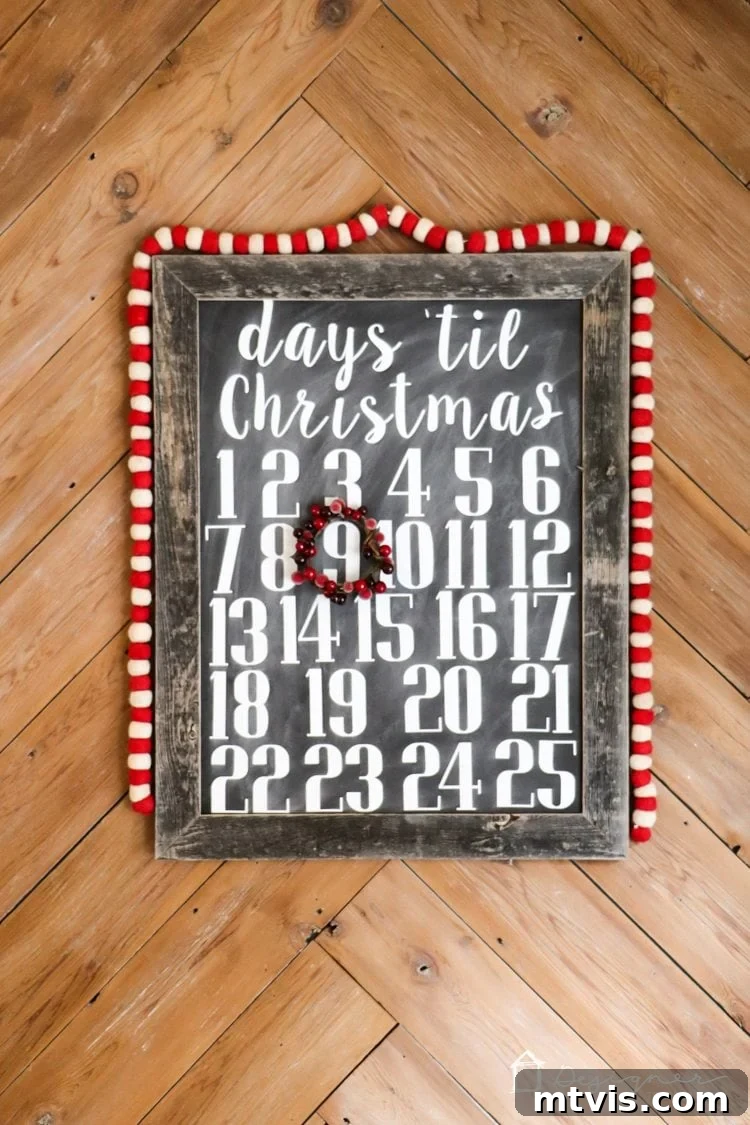
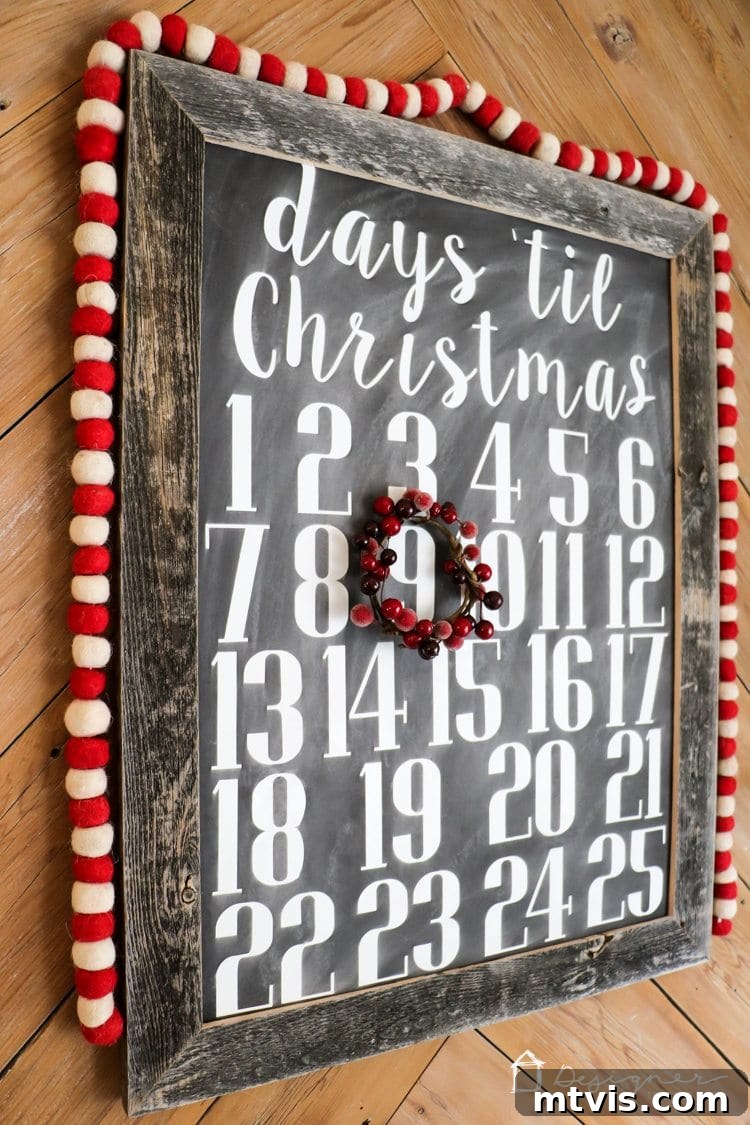
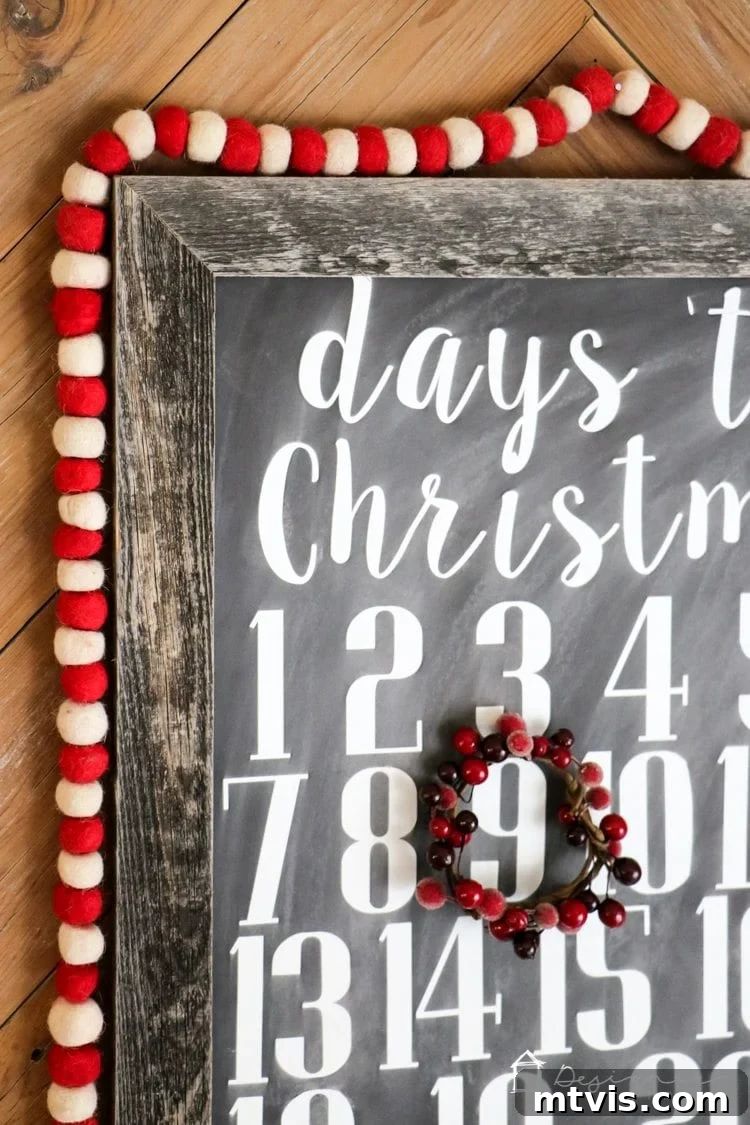
To add even more festive charm, I draped a string of fun felt balls above my calendar. These simple additions enhance the holiday spirit and tie the calendar into the surrounding decor. Don’t hesitate to get creative with your own embellishments! Whether it’s fairy lights, tiny pinecones, or colorful ribbon, tailor your calendar to perfectly suit your family’s style and existing Christmas decor. This personalized touch transforms a simple countdown into a heartwarming part of your holiday traditions, building excitement year after year.
More Holiday Inspiration and DIY Projects
If you loved creating this DIY Christmas countdown calendar, you’ll find plenty more inspiration to deck your halls and craft your way through the holiday season. Explore these other popular posts for festive ideas:
- DIY Magical Christmas Lanterns
- The Most Realistic Faux Garlands for 2022
- DIY Christmas Art That Lights Up
- How to Make a Christmas Reindeer from Logs!
- DIY Santa Sacks Your Kids Will Love
- How to Make a Gift Bag Out of Wrapping Paper
Are you curious about how I approach transforming rooms and spaces in our home, bringing these DIY projects to life within a cohesive design? Discover my streamlined process and actionable strategies by checking out Designer in a Binder®. It’s an affordable and simple way to decorate your home with confidence and style, making every project, big or small, a success.
For exclusive content, behind-the-scenes sneak peeks into my latest projects, and more creative inspiration delivered straight to your inbox, be sure to subscribe before you leave! Join our community and never miss out on new DIY ideas and decorating tips.