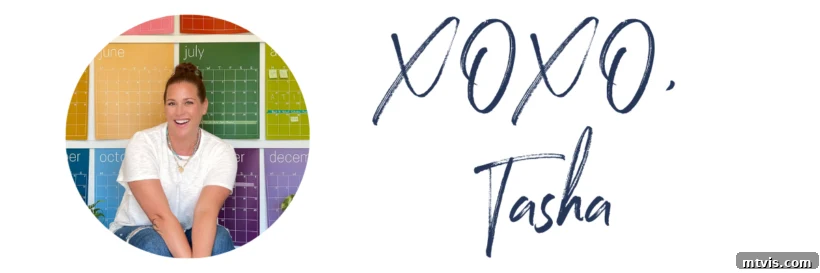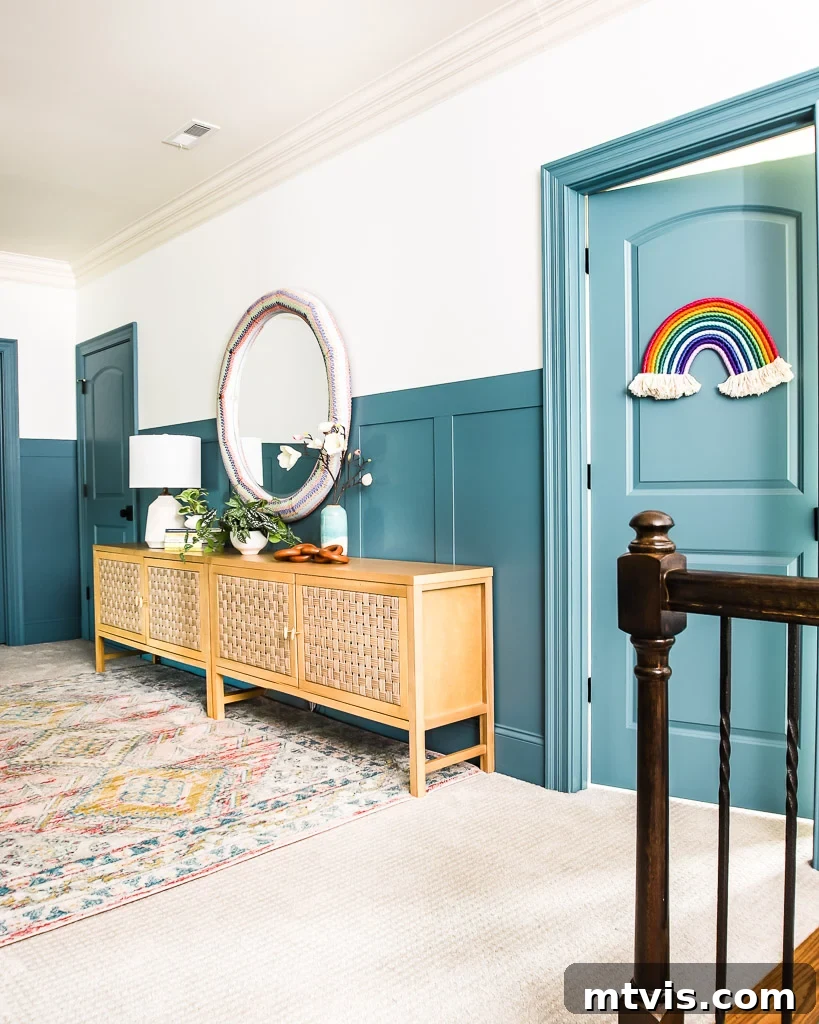
Transform any room in your home with a stunning board and batten accent wall! This comprehensive guide will walk you through an incredibly simple, yet highly effective method for installing board and batten, ensuring professional-looking results that dramatically elevate your space. Whether you’re a seasoned DIY enthusiast or just starting out, our easy-to-follow, step-by-step tutorial is designed to give you the confidence to tackle this popular home improvement project and achieve a sophisticated finish.
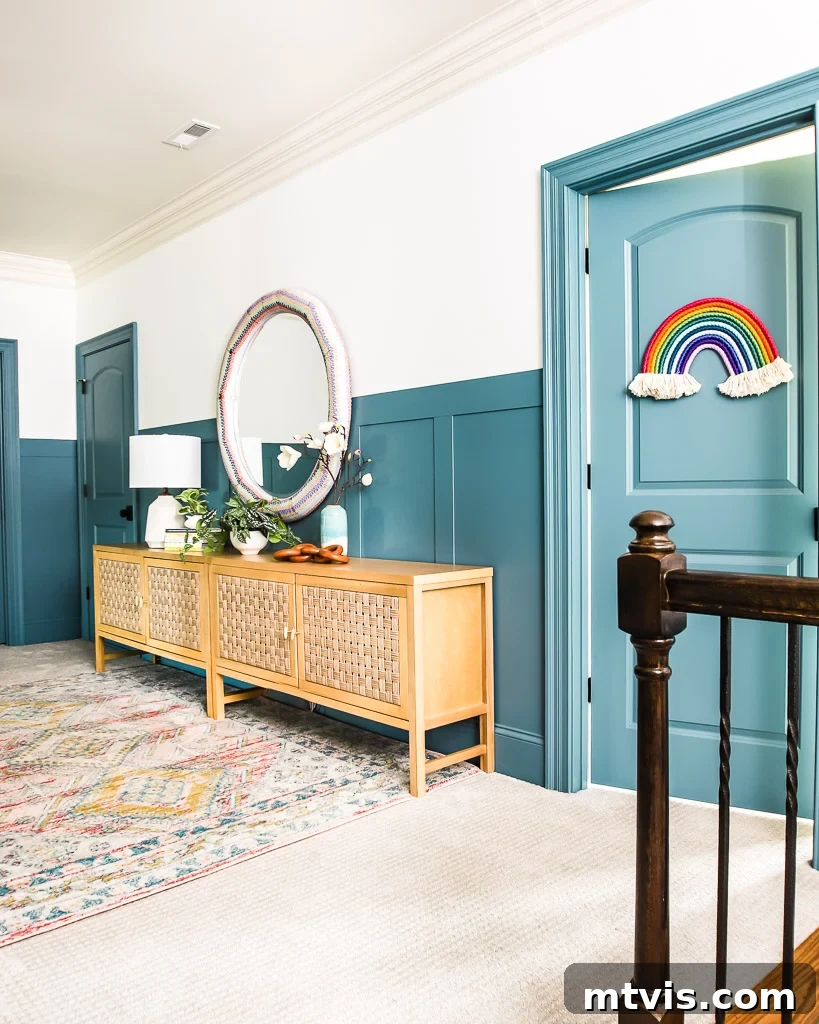
Table of Contents
If you’ve been following my home renovation journey on Instagram, you’ve likely seen the incredible transformation of our upstairs hallway. Accent wall treatments are truly powerful design elements, capable of injecting character and depth into any bland space. We’ve experimented with various accent walls over the years, from a modern DIY plank wall in our old foyer to a unique DIY herringbone accent wall crafted from upcycled fence wood in our kitchen. Each project has brought a unique charm, but surprisingly, a classic board and batten accent wall was a first for us!
This project was undertaken to breathe new life into our formerly uninspired upstairs hallway, and the results were nothing short of spectacular. What truly surprised me was how straightforward the installation process proved to be. A key factor in its ease was our decision to work around our existing baseboards – a tip I highly recommend and will delve into further. Beyond its aesthetic impact, this DIY board and batten project was incredibly cost-effective, making it an accessible upgrade for many homeowners. I’ve gathered all the essential details and practical tips here for you, so let’s get started on creating your own stunning accent wall! You can find a comprehensive source list for the hallway decor in our current home at the end of this post.
Thank you to DAP Products for sponsoring this post. Your support helps us create valuable DIY content.
What is Board and Batten?
Before we dive into the installation, let’s clarify what board and batten actually is. Historically, board and batten refers to a siding and paneling style where narrow strips of wood, known as “battens,” are applied over the joints of wider “boards.” This technique creates a distinctive, classic, and often rustic texture, traditionally seen on farmhouses and exterior sidings. The wider boards typically form the base, with battens strategically placed to cover seams and add architectural interest.
However, modern board and batten interior applications often take a simplified approach. Instead of installing full boards as the base, many DIYers and designers, ourselves included, utilize the existing wall surface as the “board” component. We then apply “batten” strips directly onto the wall to achieve the same beautiful, textured look with significantly less effort and material. This contemporary method not only saves time and cost but also allows for greater flexibility in design, making it an ideal choice for interior accent walls. The result is a crisp, clean, and classic aesthetic that adds architectural detail and visual interest without the complexity of traditional paneling.
Note: If your walls have a prominent texture, you might consider installing thin plywood panels behind your battens. This creates a smooth “board” surface, aligning more closely with the traditional, untextured look of board and batten and ensuring a perfectly polished finish.
Choosing the Right Wood for Your Project
The market offers a vast array of wood types and sizes suitable for creating a board and batten wall, each with its own characteristics and price point. For our hallway project, we meticulously chose 1/4″ plywood, and this decision was driven by several crucial factors that contributed to both the ease of installation and the final aesthetic.
Firstly, a primary goal was to seamlessly integrate the board and batten with our existing baseboards. The top edge of our baseboards measured only 1/4 inch thick. Opting for thicker wood, such as traditional 1x4s, would have resulted in an undesirable overhang, creating a visually unappealing ledge. While some choose to miter or bevel the bottom edge of thicker battens to mitigate this overhang, we found that method often compromises the clean lines we desired. Furthermore, removing our high-quality existing millwork was not an option, making a flush fit with the baseboards paramount.
Secondly, the cost-effectiveness of 1/4″ plywood was a significant advantage. We completed the entire, rather expansive hallway using just two sheets of 4′ x 8′ plywood. At approximately $43.98 per sheet, our total wood expenditure for this impactful project was an incredibly budget-friendly $88. This demonstrates how a luxurious look doesn’t necessarily require a hefty investment, especially when selecting materials wisely.
Lastly, the slim profile of 1/4″ plywood offers practical benefits. With the board and batten being only 1/4 inch thick, hanging artwork, mirrors, or other decorative elements on the wall remains effortlessly straightforward. Thicker wood, by contrast, would cause anything hung on the wall to protrude considerably, creating an awkward and less integrated appearance. This subtle detail ensures that the accent wall enhances the decor without creating any functional limitations.
This post contains affiliate links for your convenience. Click here for my full disclosure policy.
Materials and Tools Needed for Your Board and Batten Accent Wall
Gathering all your materials and tools before you begin will make the installation process much smoother and more efficient. Here’s a comprehensive list of everything you’ll need to create your beautiful board and batten accent wall:
- 1/4 inch plywood: We used two 4′ x 8′ sheets, which was sufficient for our hallway. Adjust quantity based on your wall dimensions.
- Laser level: An indispensable tool for ensuring perfectly straight lines, especially for horizontal pieces. (This is the exact laser level that we have and LOVE for its accuracy and ease of use.)
- Circular saw: Essential for making long, straight cuts (ripping) in your plywood sheets.
- Rip-cut Circular Saw Guide: A crucial accessory for achieving precise, splinter-free rip cuts with your circular saw.
- Pin nailer / Brad nailer: Ideal for attaching the thin plywood strips to the wall with minimal visible nail holes.
- 1-inch pin nails: The appropriate size for securing 1/4 inch plywood without penetrating too deeply.
- Standard level: Useful for double-checking small sections and vertical alignment.
- Compressor: If using a pneumatic pin nailer, a compressor is necessary. (We highly recommend this cordless air compressor for its portability and convenience.)
- Miter saw: Perfect for cutting battens to precise lengths and angles.
- DAP Alex Plus Caulk: My go-to paintable caulk for sealing seams and achieving a professional, finished look.
- Caulk gun: For easy and consistent application of caulk.
- DAP Plastic Wood-X: An excellent wood filler for seamlessly concealing nail holes.
- Tape measure: For all your measuring needs.
- Painter’s tape: Handy for temporarily holding battens in place and for masking off areas during painting.
- Paint roller and brush: For pre-painting your walls and plywood, and for touch-ups.
- Wet rags: Essential for cleaning up excess caulk.
How to Install Board and Batten: A Complete DIY Guide
Before diving into the detailed steps, I highly recommend watching the short video below. It offers a visual overview of the entire project, which can be incredibly helpful in understanding the flow and techniques involved.
Time needed: 2 days
Follow these detailed steps to successfully install a DIY board and batten accent wall that looks professionally done.
- Decide on the Height of Your Top Horizontal Board
This step is largely a matter of personal design preference, but there are some guidelines you can follow. A common design principle is to place the top board at approximately two-thirds the height of your doors or ceiling, creating a balanced aesthetic. I visually assessed our hallway wall and determined that 58 inches from the floor felt like the ideal height for the top edge of our board and batten. This measurement provided a pleasing proportion to the space. Once you’ve chosen your desired height, use a reliable level to mark a precise, straight line across the entire wall space. This line will serve as your guide for stopping your base coat of paint (more on that next) and aligning your top horizontal trim piece.

- Determine the Dimensions for Your Horizontal and Batten Pieces
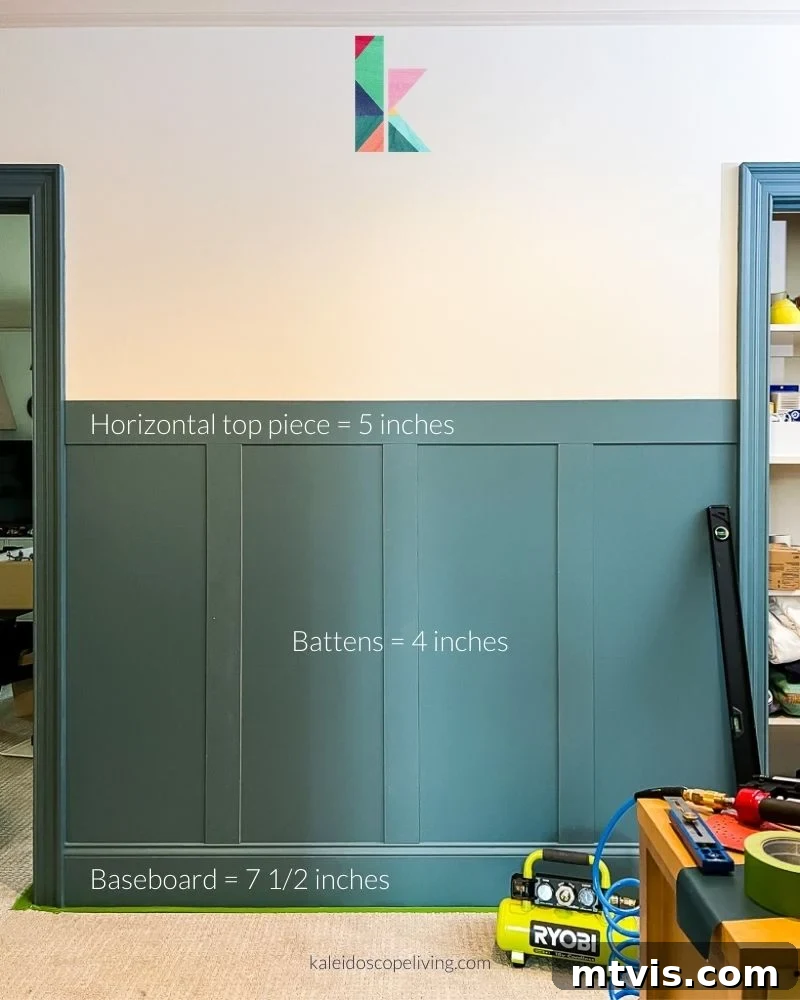
The width of your horizontal trim pieces and vertical battens significantly impacts the overall look of your board and batten wall. While personal preference plays a huge role, a general guideline is to make your top horizontal trim slightly narrower than your existing baseboards, but typically thicker than your vertical battens. This creates a visual hierarchy that feels natural. For our project, we decided on specific measurements that complemented our hallway’s scale and existing trim. Careful consideration of these dimensions will ensure a cohesive and aesthetically pleasing outcome.
- Pre-Paint Your Walls and Plywood
This step is absolutely critical for achieving a clean, professional, and lasting finish. While it might seem counterintuitive to paint before installation, it will save you a tremendous amount of time and effort in the long run. Begin by painting the sections of your wall where the board and batten will be installed, extending up to the guide line you marked in Step 1. Don’t worry about making this paint line perfectly neat, as it will be concealed by the horizontal trim pieces. Next, using a paint roller, apply at least two coats of your chosen paint color to both sides of your 1/4″ plywood sheets BEFORE you cut them. Pre-painting ensures complete coverage, especially in tight corners and edges that would be difficult to reach after installation. It also prevents paint drips and allows for a smoother, more even application.
- Rip Your Plywood Down to Size
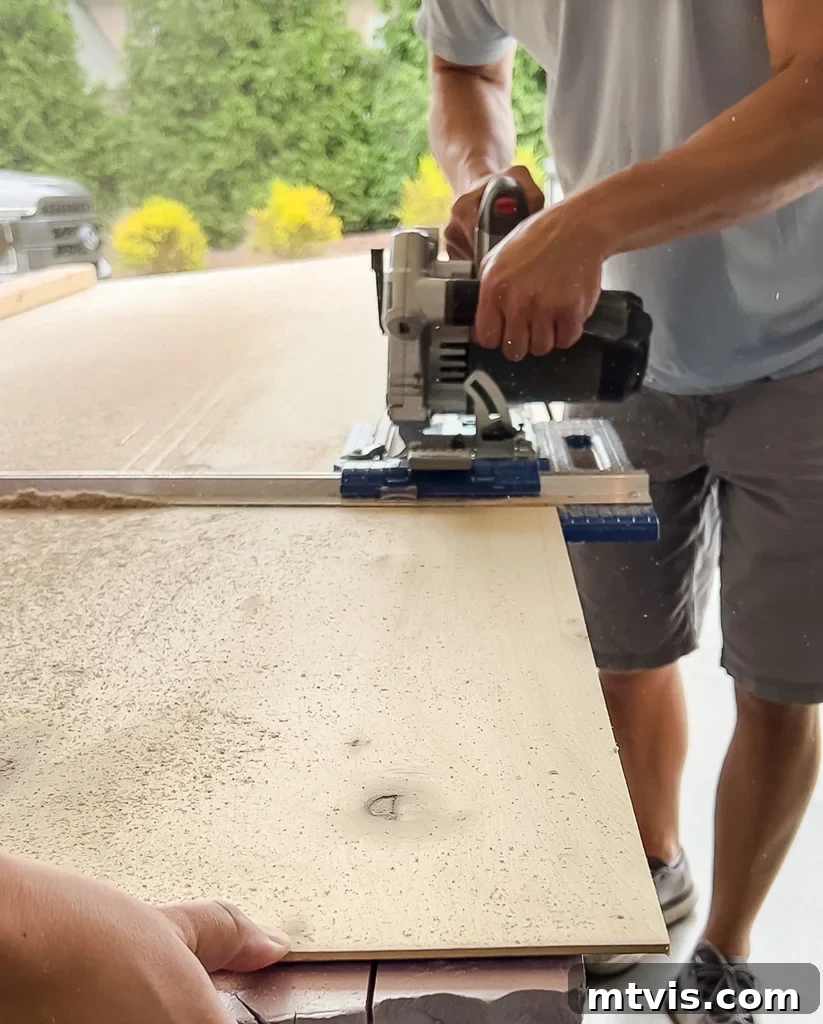
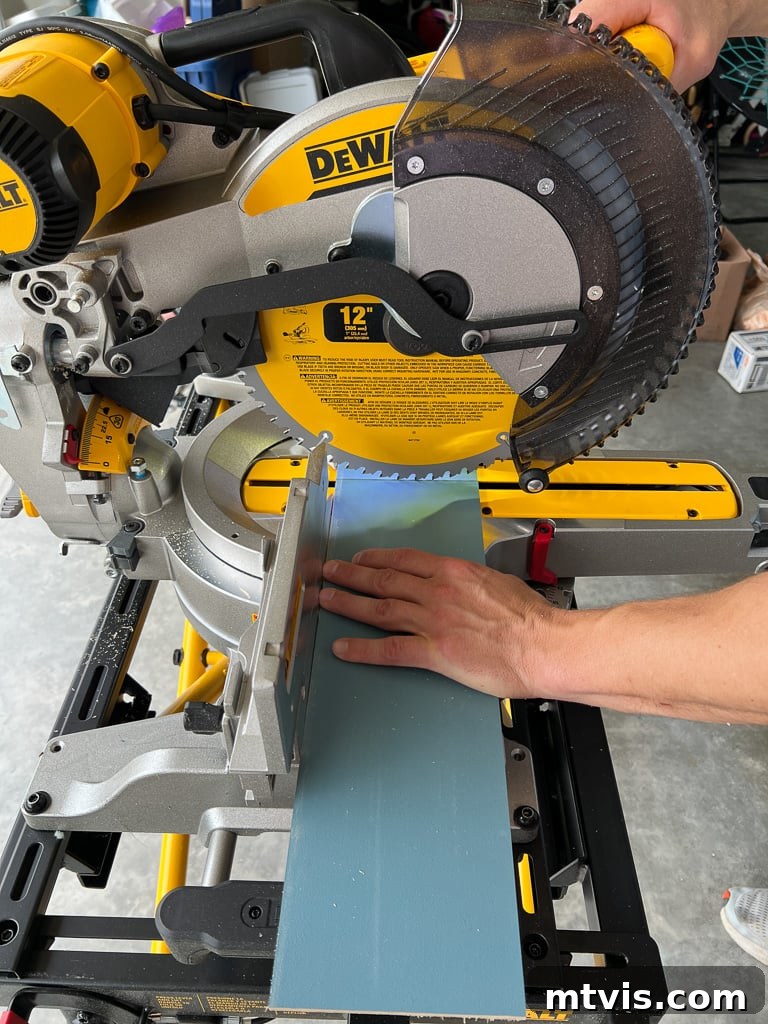
“Ripping” wood refers to making a cut along the grain, usually for lengthwise cuts. This is a fundamental skill in woodworking, and with the right tools, it’s surprisingly simple, even for beginners. You’ll need a circular saw and, most importantly, a rip-cut Circular Saw Guide. This guide attaches to your saw and helps maintain a perfectly straight line, yielding consistent widths for your battens and horizontal pieces. We were able to make all the necessary rip cuts for our hallway in less than 10 minutes. After ripping the plywood into your desired widths for both the horizontal trim and vertical battens, use your miter saw to cut these strips to their precise final lengths. Remember to measure twice and cut once!
IMPORTANT NOTE on Cutting: To minimize “tear-out” or splintering of the wood, especially with plywood, always rip your wood with the “good” or finished side facing DOWN when using a circular saw. However, when trimming pieces to length with a miter saw, ensure the “good” side is facing UP to get a clean cut on the visible surface.
- Install Your Horizontal Trim Pieces
With your wood cut and painted, it’s time for installation. Begin by using your laser level to project a perfectly straight line at the desired height for the top of your horizontal trim pieces. This line acts as your primary guide. Carefully position your pre-painted horizontal pieces along this line and secure them to the wall using your pin nailer or brad nailer. The narrow gauge of pin nails makes them ideal for this step, as they leave minimal holes that are easy to conceal later. A key benefit of this step is that your horizontal trim will effectively cover the potentially messy paint line from your pre-painting, ensuring a crisp transition.
For 1/4″ plywood, which is relatively lightweight, liquid nails or construction adhesive are generally not necessary. Relying solely on pin nails offers a significant advantage: if you ever decide to remove the board and batten in the future, the damage to your drywall will be considerably minimized. Since the individual wood pieces aren’t heavy, you don’t need to be overly concerned with nailing into wall studs for every fastener. For added stability, use a criss-cross nailing pattern (driving nails at slight opposing angles) to create a stronger hold in the drywall.
- Plan the Layout for Your Vertical Battens
This is often considered the most challenging aspect of a board and batten project, and it requires careful planning to achieve a balanced and symmetrical look. Common spacing for vertical battens typically ranges from 12 to 20 inches apart. We aimed for an approximate 18-inch spacing, which offers a classic and appealing proportion.
If you are working on a continuous wall in a large room without interruptions from doors or windows, you can often apply a single spacing formula across the entire length. However, when installing board and batten in a hallway, you’ll encounter numerous doorways, which can complicate a consistent formula. Trying to maintain the exact same batten spacing between every doorway can lead to awkward, uneven gaps or battens ending up in inconvenient locations, such as right next to a door frame or too close to a wall corner. To avoid these issues and ensure a visually appealing result, we adopted a different strategy: we treated each individual section of wall between doorways as an independent unit for calculation. This approach allows for slight variations in spacing from one section to another, which will be imperceptible to the naked eye but will yield a far more harmonious layout overall. This method is highly recommended for hallways or rooms with multiple architectural interruptions.
- Mastering the Batten Spacing Formula
To calculate the optimal spacing for your vertical battens within each distinct wall section, follow this formula. This method ensures your battens are evenly distributed and aesthetically pleasing:
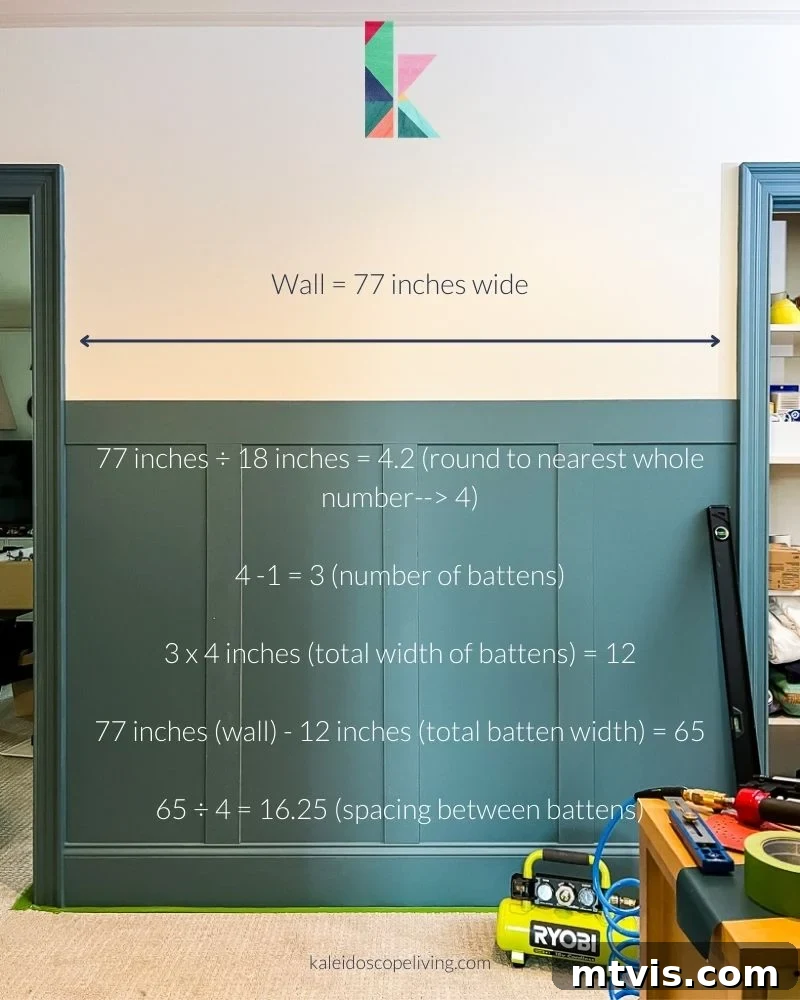
- Measure the wall length: Start by accurately measuring the total length of your specific wall section (e.g., between two doorways). Let’s use 77 inches for our example.
- Estimate number of spaces: Divide the wall length by your desired approximate batten spacing (e.g., 18 inches).
Example: 77 inches ÷ 18 inches = 4.28 - Determine actual number of spaces: Round this number UP or DOWN to the nearest whole number to get the total number of “spaces” you’ll have on that wall section. This decision (rounding up or down) often depends on what will yield a more symmetrical appearance or fit better with existing features.
Example: Round 4.28 down to 4 spaces. - Calculate number of battens: The number of battens will always be one less than the number of spaces.
Example: 4 spaces – 1 = 3 battens. - Calculate total batten width: Multiply the number of battens by the width of each batten (we used 4 inches).
Example: 3 battens x 4 inches/batten = 12 inches of total batten width. - Calculate remaining wall space: Subtract the total batten width from the initial wall length. This is the amount of wall that will NOT be covered by battens.
Example: 77 inches (wall width) – 12 inches (total batten width) = 65 inches of uncovered wall space. - Determine actual space between battens: Divide the remaining uncovered wall space by the number of “spaces” you determined in step 3. This gives you the precise, even spacing between the battens from edge to edge.
Example: 65 inches (uncovered wall space) ÷ 4 (number of wall spaces) = 16.25 inches.
Using our example, the actual spacing between battens on this particular wall section will be 16.25 inches, rather than our initial target of 18 inches. This is perfectly acceptable! The goal is consistency within each section, and to avoid any spacing larger than 20 inches, which can look too wide. By repeating this precise formula for every independent wall section in your hallway, you ensure a uniform and intentional look for each segment. While the exact spacing might vary slightly from one section to the next, this difference will be imperceptible to the naked eye. This customized approach is vastly superior to rigid adherence to a single formula, which often results in battens awkwardly placed next to doors or at inconsistent distances from wall ends. The method guarantees each board and batten section appears perfectly symmetrical and purposefully designed.
- Install Your Vertical Battens
Now it’s time to bring your spacing plan to life. It’s crucial to measure the length of each vertical batten individually, one at a time. This is because, in most homes, floors and baseboards are rarely perfectly level across an entire span. While your top horizontal board was installed with perfect precision using a level, the distance from that board to your baseboard might subtly vary along the wall. Accounting for these minor differences ensures each batten fits snugly.
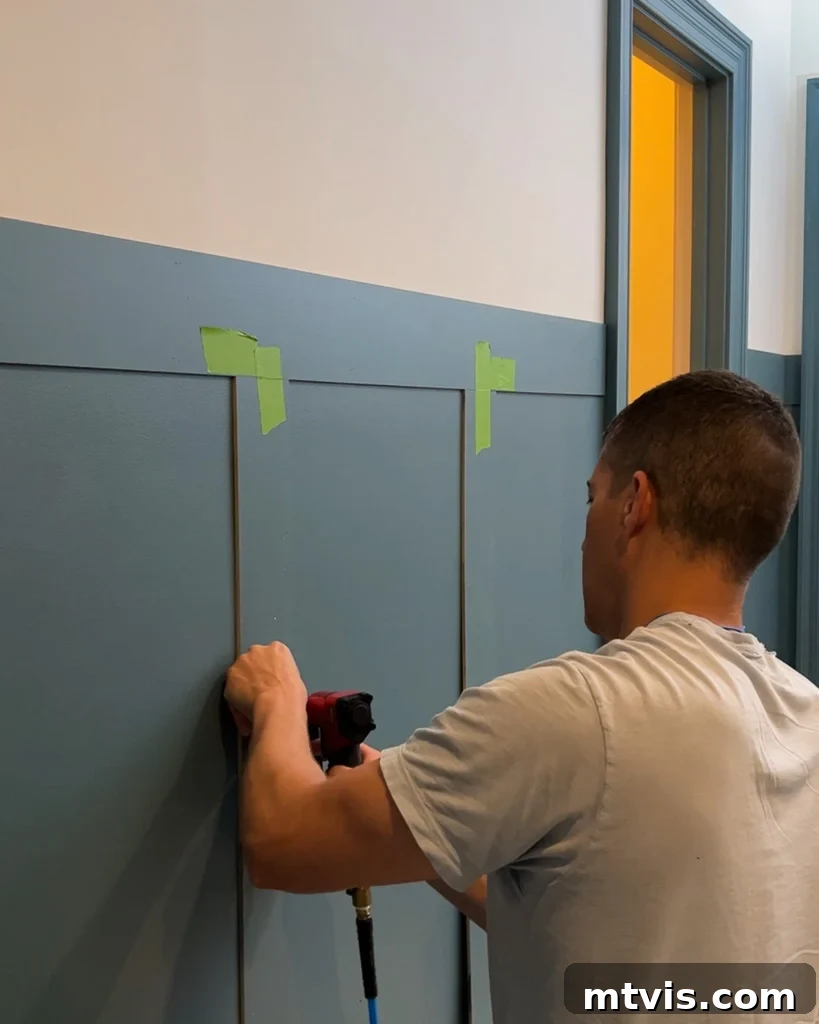
Before permanently securing any batten, we found it incredibly helpful to temporarily tape each cut piece into its intended position. This allows for a final visual check and a double-confirmation of your measurements and spacing before you commit with nails. Once you’re satisfied with the placement, use your pin nailer to attach the vertical battens to the wall. As you nail, continually use your level to ensure each batten is perfectly plumb (straight up and down). If you’re working on this project solo, a helpful trick is to place one nail in the middle of the batten first. Check for level, make any minor adjustments, and then proceed to nail along the rest of the board, working your way up and down from the center nail to secure it firmly.
- Fill Nail Holes, Caulk Seams, and Apply Touch-Up Paint
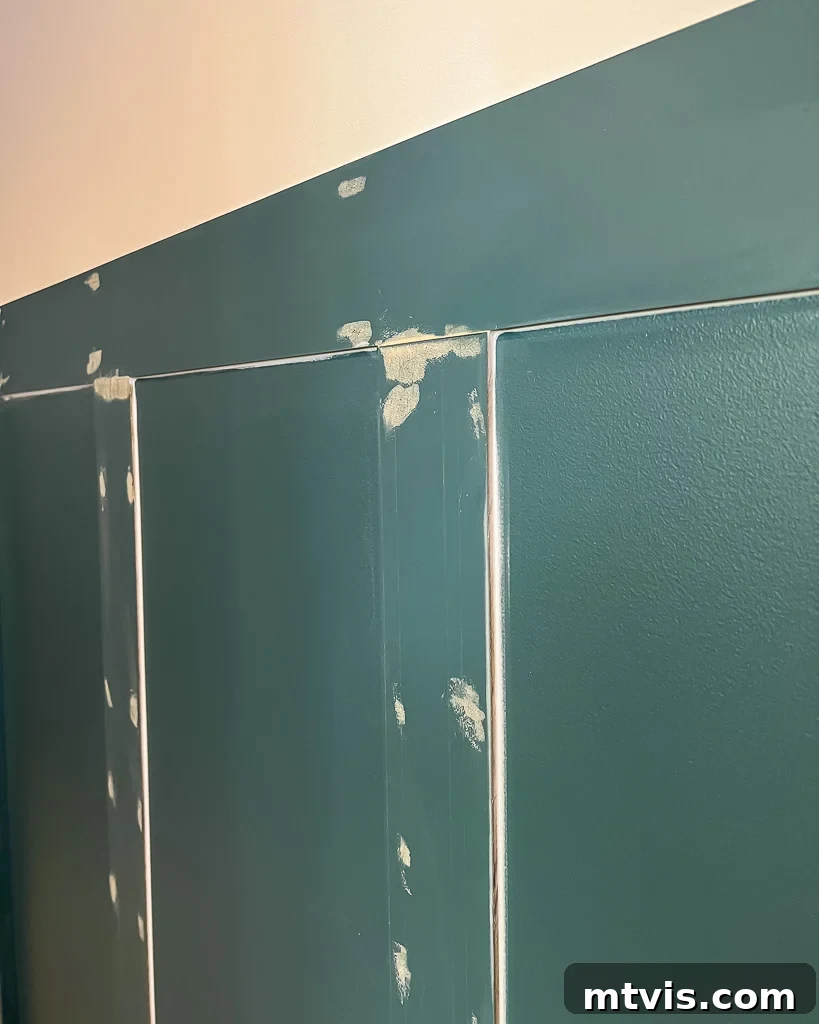
The most intricate part of the installation is behind you! Now, it’s time to focus on the finishing details that will transform your DIY project into a professional-grade accent wall. Start by carefully filling all visible nail holes with DAP Plastic Wood-X. Apply a small amount, ensuring it’s slightly overfilled. Once completely dry, sand the filled areas smooth until they are flush with the wood surface. Take your time with this step, as a smooth finish is crucial for a flawless paint job.
Next, move on to caulking. This step is non-negotiable for a truly polished look. Apply a thin, consistent bead of DAP Alex Plus Caulk along all edges and seams where the wood trim pieces meet your wall. Immediately after applying a bead, smooth it down with a wet finger, wiping any excess onto a very wet rag. Keep a bucket of water and plenty of rags nearby to frequently clean your finger, preventing smudging and ensuring clean, crisp lines. Caulking seals gaps, prevents paint from seeping into cracks, and creates a seamless transition between your wood and the wall.
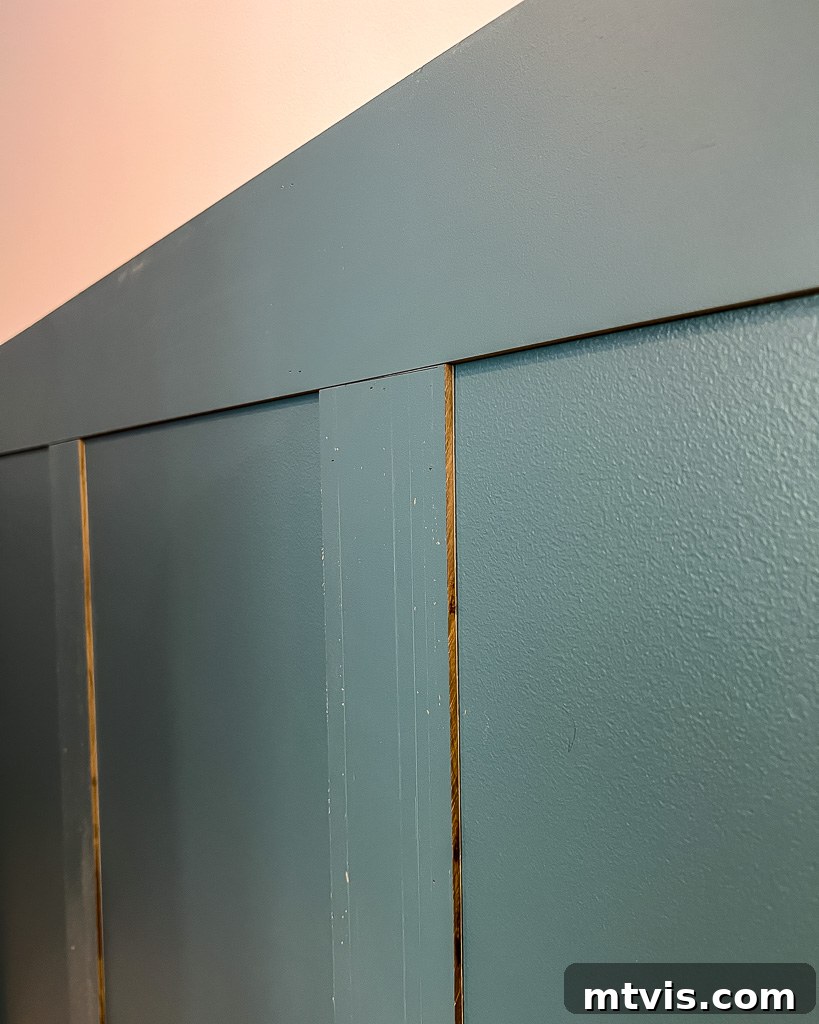
Once the wood filler is sanded and the caulk is dry (check product instructions for drying times), apply touch-up paint over all the filled nail holes and caulked lines. Also, address any other areas that might need a fresh coat of paint. This final painting stage meticulously blends everything together, making your board and batten look like it was always part of your home’s architecture. Do not skip these crucial finishing details if you want your board and batten to look truly professional and high-end!
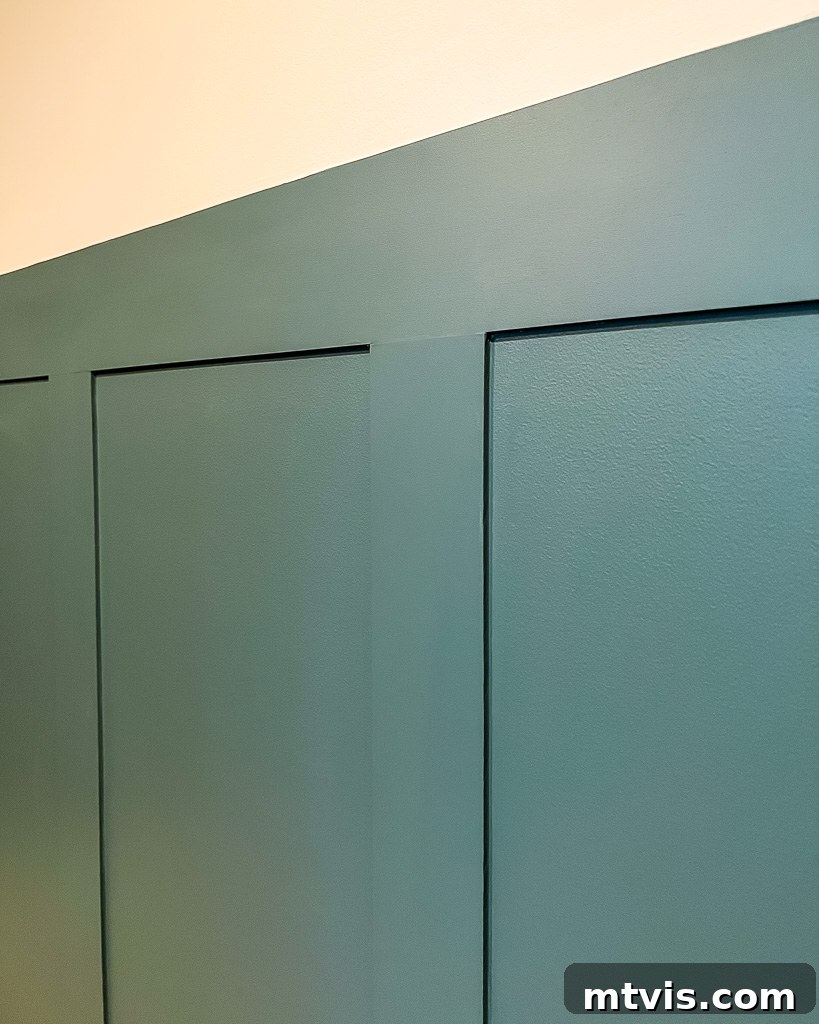
Showcase: The Finished Board and Batten Project
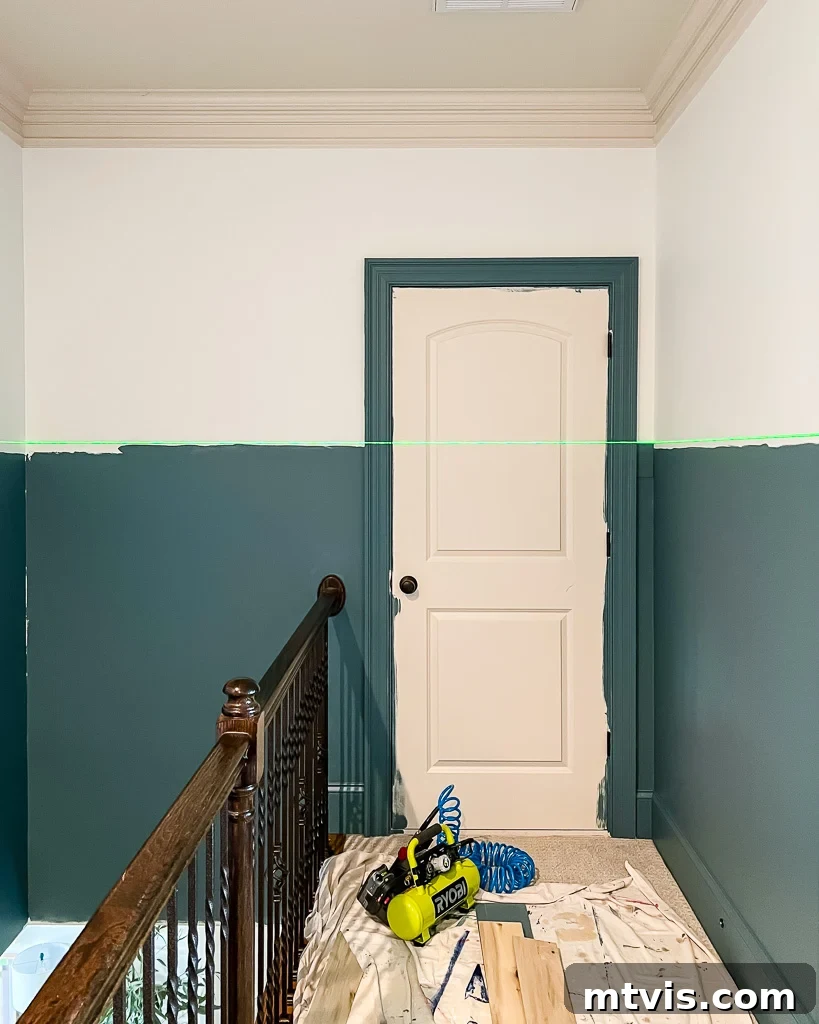
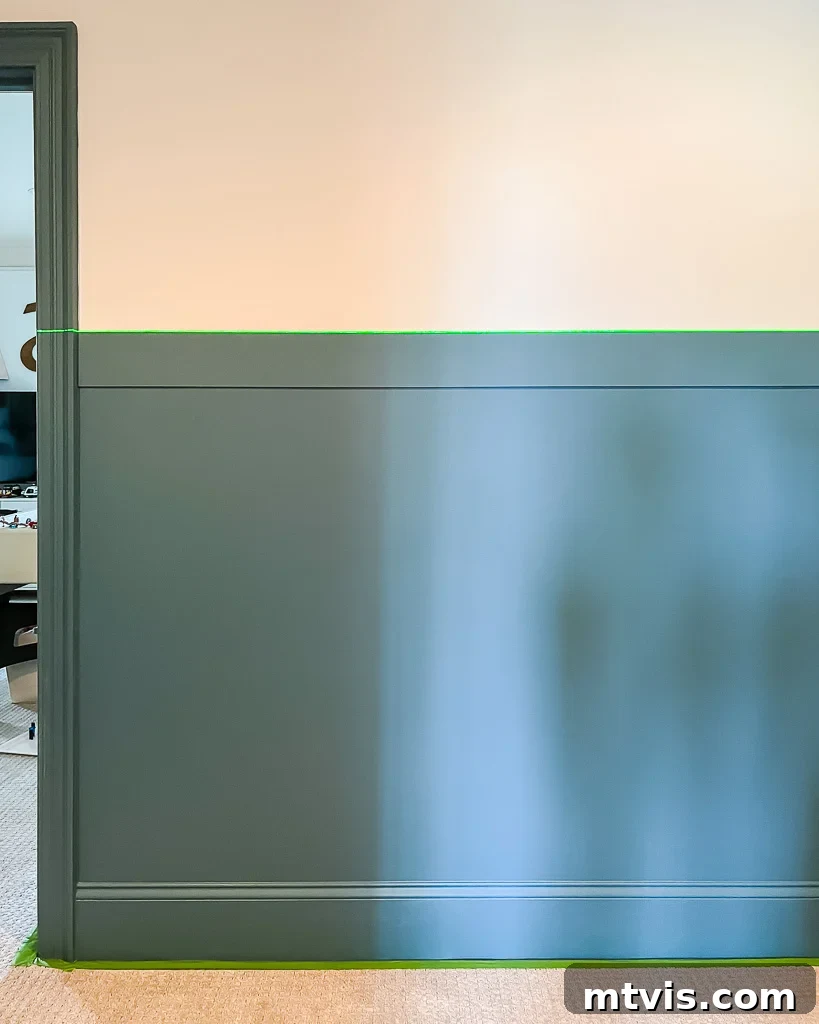
Here it is – the completed board and batten accent wall! We couldn’t be happier with how this project turned out. The once-plain hallway has been completely revitalized, now exuding charm and character. The transformation is even more dramatic thanks to our recently installed Velux Sun Tunnels, which finally flood this space with an abundance of natural light, truly making the board and batten pop.
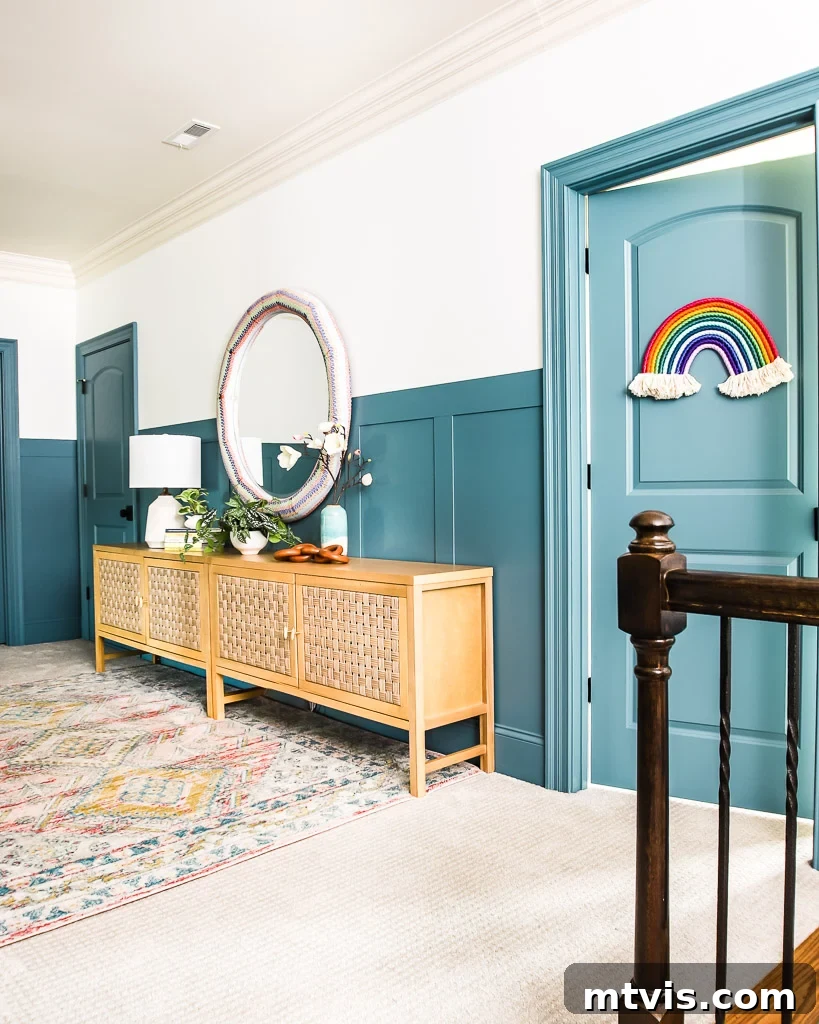
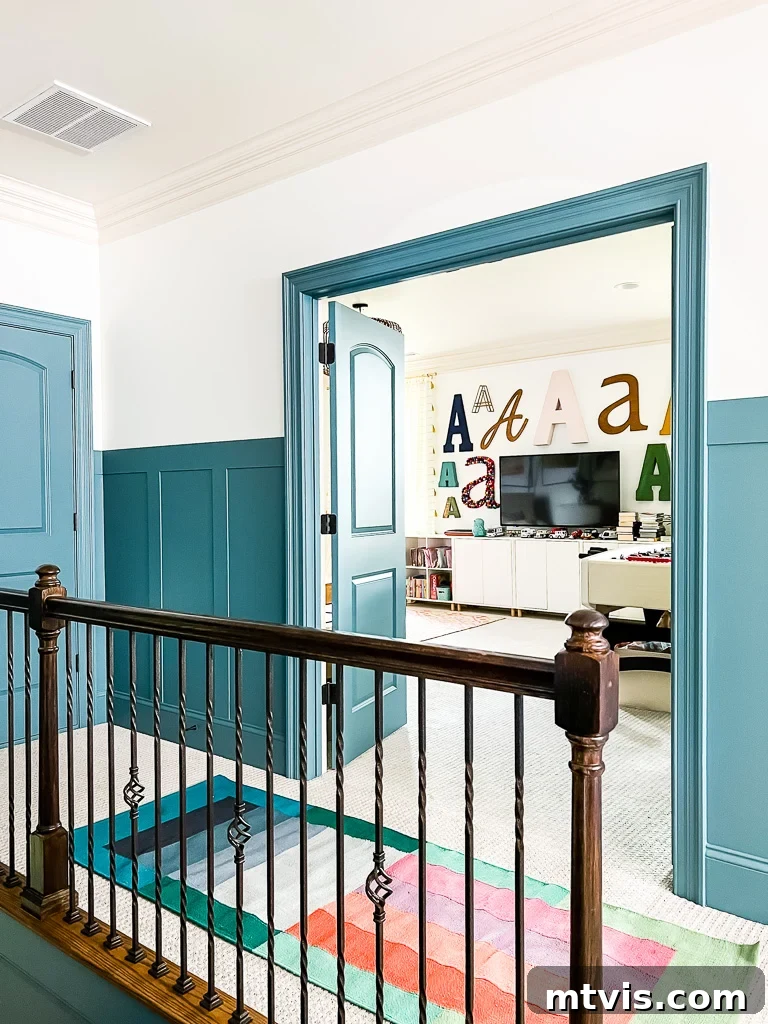
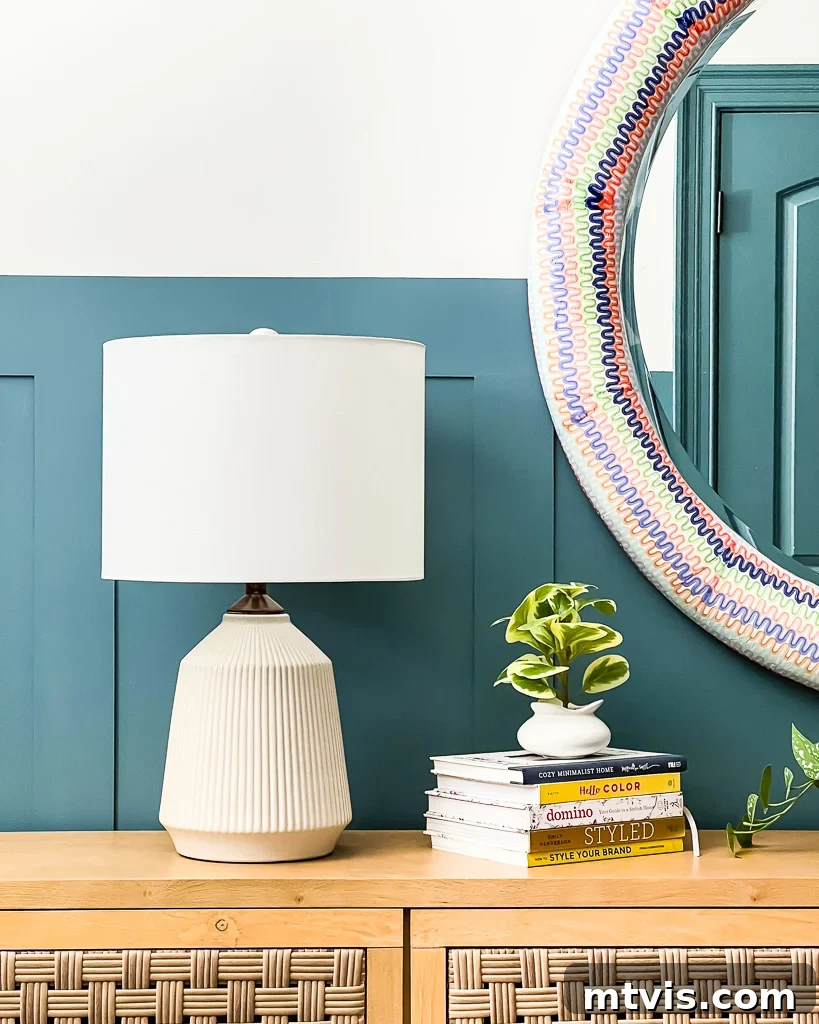
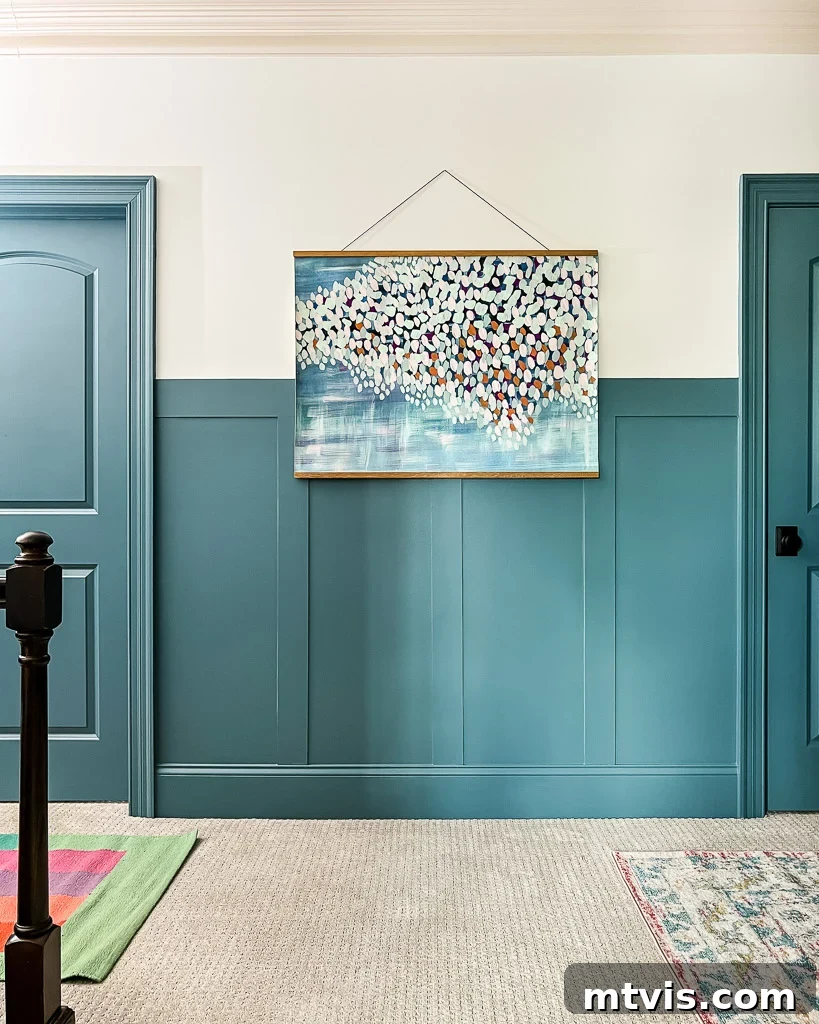
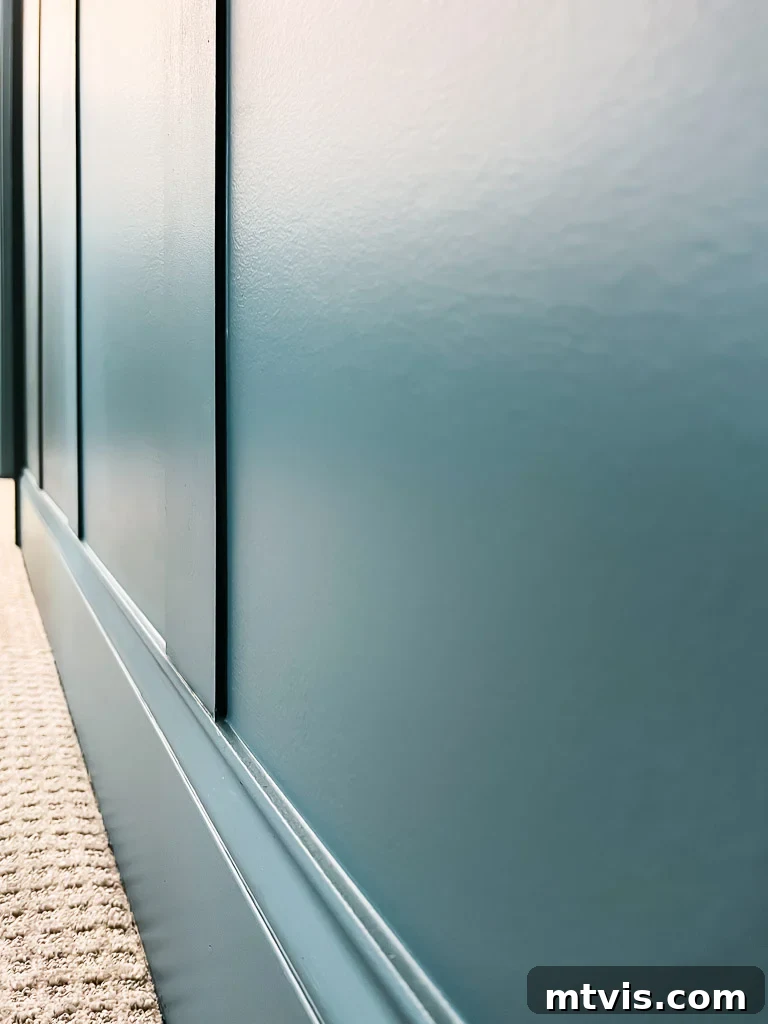
Our decision to use 1/4″ plywood proved to be absolutely brilliant. As you can see, the battens sit perfectly flush with our existing baseboards, creating a seamless and integrated look that truly makes the accent wall appear custom-built for the space. This attention to detail is what elevates a DIY project to a professional standard.
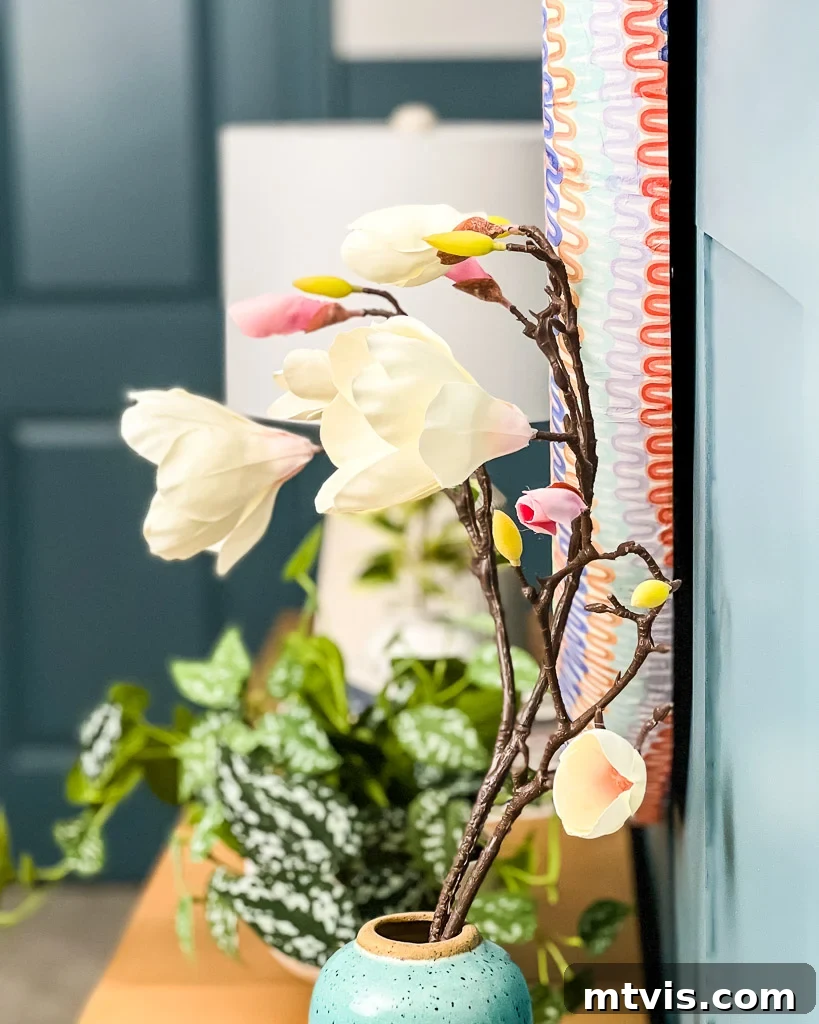
Another fantastic benefit of the 1/4″ thickness is its practicality for everyday living. It allows us to effortlessly hang wall decor, photographs, or art pieces without them protruding awkwardly from the wall. The slim profile maintains a sophisticated, understated elegance, ensuring that your accent wall enhances your decor rather than complicating it.
Frequently Asked Questions About Board and Batten
The cost of a board and batten accent wall can vary significantly based on several factors, including the size of your wall, the type of wood you choose, and the current lumber prices in your region. For our rather large hallway, we were able to complete the entire wood installation for just $88 by using 1/4-inch plywood. When factoring in the additional expenses for paint, caulk, and nail filler, the total cost for this project came out to approximately $150. This demonstrates how a dramatic home upgrade can be incredibly budget-friendly with careful material selection.
For our board and batten accent wall, we chose “Refuge” by Sherwin-Williams, and we absolutely adore the calming and sophisticated hue it brings to the space. When selecting paint colors for your own home, it’s vital to remember that colors appear drastically different depending on the natural and artificial lighting conditions in a particular room. What looks perfect in one space might not in another. I highly recommend following my expert tips for choosing paint colors for your home. Additionally, to truly see how a color will look in your unique environment, I strongly suggest using Samplize peel-and-stick paint samples. They are a game-changer for testing colors without the mess and commitment of traditional paint pots.
While I typically prefer an eggshell finish for general wall surfaces due to its subtle sheen and durability, our board and batten project presented a unique situation. Since we painted not only the accent wall itself but also our existing baseboards, door trim, and doors all in the same unifying color, I opted for a satin paint finish for everything. A satin finish offers a slightly higher sheen than eggshell, making it more resistant to moisture and easier to clean, which is ideal for high-traffic areas like hallways and for trim work. If you’re unsure which paint sheen is best suited for your specific project, consult my detailed guide to choosing the perfect paint sheen. It provides valuable insights to help you make an informed decision for any surface in your home.
Hallway Decor Source List
Many of the decorative elements you see in our finished hallway are linked below for your convenience. Please note that the beautiful mirror featured on the board and batten wall was a special DIY project. You can find the full tutorial to create your own unique piece here: DIY Mod Podge Mirror With Napkins.
Should you have any further questions about this project or anything else, the most direct way to reach me is by sending a direct message via Instagram. I love connecting with you all! And if you decide to use this tutorial to create your own board and batten accent wall, please share your finished project on Instagram and don’t forget to tag me @tasha.kaleidoscope! I can’t wait to see your amazing transformations!
Other inspiring posts you may enjoy:
- Our UNIQUE Hallway Decor + Makeover Reveal
- DIY Board and Batten Wall Ideas
- Stunning Accent Wall Ideas to Transform Any Room
- The Best Way to Test Paint Colors
- DIY Staircase Makeover in 2 Days: Tutorial & Reveal
- How to Replace Balusters to Update Your Stair Railing
- Easy DIY Wood Slat Wall Treatment
Curious about my personal approach to envisioning and transforming rooms in our home? Discover the strategies and insights within Designer in a Binder®. It’s my ultimate guide to decorating your home with confidence and ease.
For exclusive content, behind-the-scenes sneak peeks, and fresh DIY inspiration delivered directly to your inbox, be sure to subscribe to my newsletter before you go!