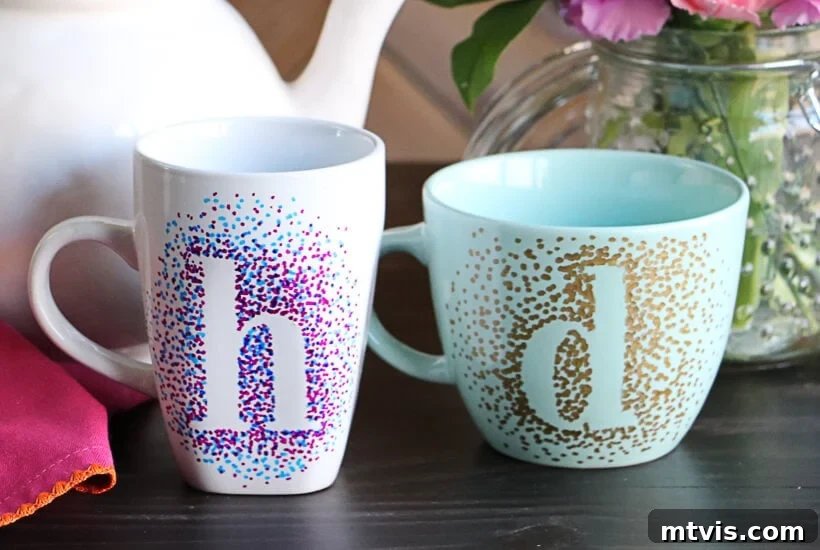
Are you searching for a unique, thoughtful, and budget-friendly gift that truly stands out? Look no further than DIY Sharpie mugs! These personalized creations are not only incredibly easy and inexpensive to make but also offer endless customization possibilities. Imagine gifting a friend a mug adorned with their favorite quote, or surprising a family member with a custom design reflecting their hobbies. Best of all, with the right techniques and materials, your beautifully designed Sharpie mugs can be genuinely washable, ensuring your artistic efforts last for years to come.
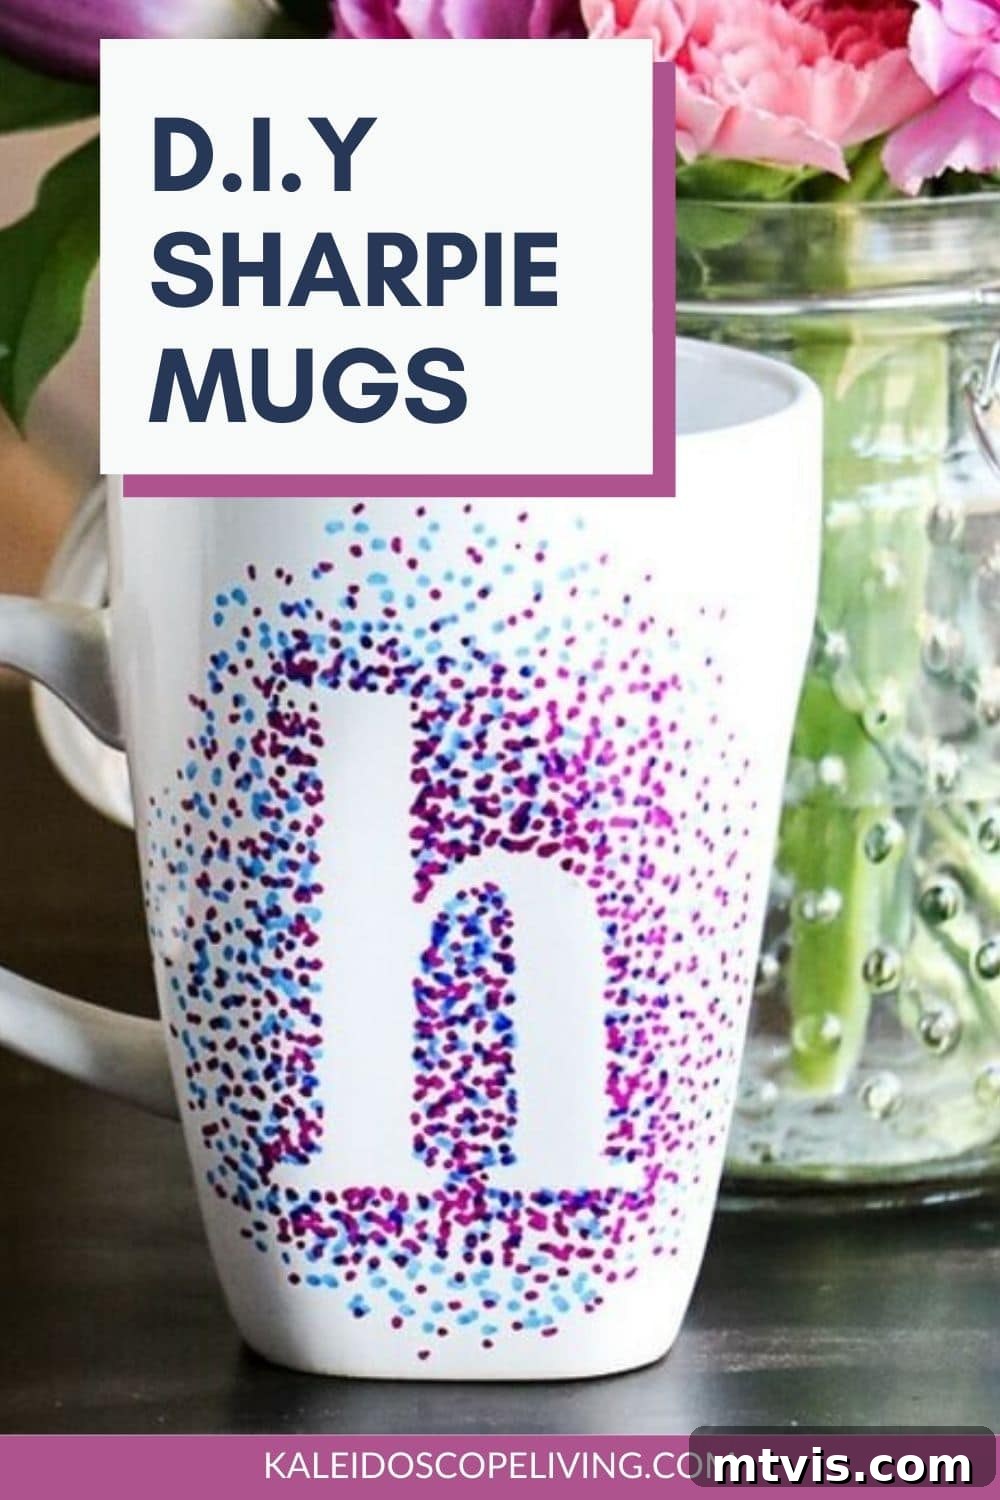
As an avid collector of unique mugs, I understand the joy a special cup can bring to your daily routine. While my collection might be expansive (my husband says “too many,” I say “just enough!”), I’m always mindful of staying within budget. This is precisely why I fell in love with customizing mugs. They serve as incredibly cherished gifts – both for loved ones and, let’s be honest, for myself too! They are a testament to the fact that the most appreciated presents often come from the heart, not from a hefty price tag.
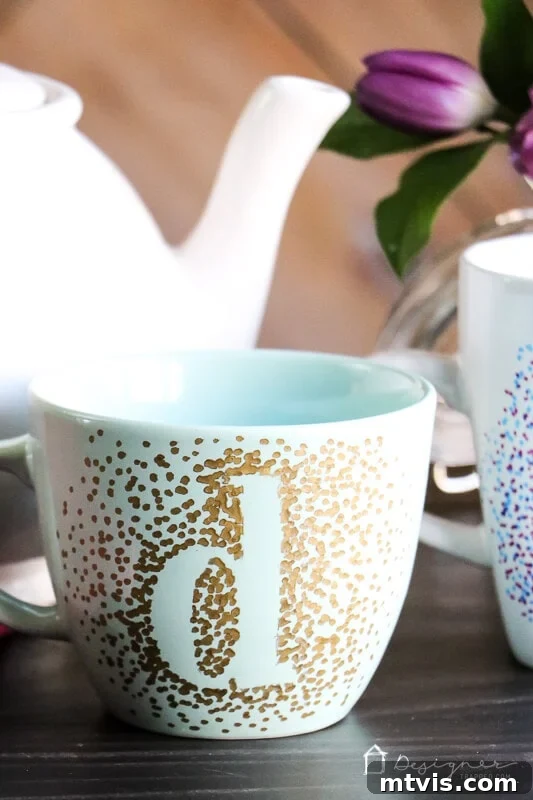
In this comprehensive tutorial, I’ll walk you through the process of creating adorable monogram dotted Sharpie mugs, a simple yet elegant design that showcases the potential of this craft. However, the beauty of this project lies in its versatility. Once you grasp the fundamental principles – especially the crucial role of using the correct type of paint pens – you can unleash your creativity to design virtually anything your imagination conjures. Get ready to learn how to craft your own stunning, washable, and wonderfully affordable custom mugs!
This post contains affiliate links for your convenience. Click here for my full disclosure policy.
The Ultimate Guide to Washable DIY Sharpie Mugs
For those who prefer visual learning, a detailed video tutorial on how to create these delightful Sharpie mugs is embedded below. It provides a real-time walkthrough of each step, ensuring you can follow along with ease. Below the video, you’ll find a complete written guide with even more in-depth tips and tricks.
Essential Materials for Your Washable Sharpie Mugs
To embark on your mug-making journey, gathering the right materials is the first crucial step. The quality and type of your supplies will directly impact the durability and success of your design. Here’s what you’ll need:
- Ceramic Mugs: You can find fantastic deals on plain white or light-colored ceramic mugs at dollar stores, thrift stores, or discount retailers. Look for mugs with smooth, glazed surfaces, as these provide the best canvas for your designs. Avoid mugs with intricate textures or uneven glazes, which can make drawing difficult.
- Oil-based Sharpie Paint Pens: This is arguably the most critical item on your list! Unlike regular Sharpie markers, oil-based paint pens contain actual paint, which adheres much better to ceramic surfaces and can withstand the baking process necessary for durability. Using standard Sharpies will result in a design that washes off almost immediately. Ensure you purchase “oil-based paint pens” specifically. They come in various tip sizes and a wide array of colors, allowing for intricate details or bold statements.
- Large Felt Stickers or Vinyl Letters/Stencils: These will act as your stencils for creating crisp, clean shapes, like the monograms in this tutorial. Felt stickers are easy to apply and remove, while vinyl letters or stencils, especially those cut from contact paper or using a cutting machine, offer more precise and intricate design options. Avoid regular paper stickers, as they can be difficult to remove after painting and may leave residue. Alternatively, you can sketch your own design directly onto the mug with a pencil for a freehand approach.
- An Oven: Essential for heat-setting your design, which makes it permanent and washable. A standard home oven works perfectly.
- Rubbing Alcohol: Crucial for properly preparing your mug surface. It cleans away any oils, dirt, or residues that could prevent the paint from adhering properly.
- Nail Polish Remover and Q-tips: Your best friends for correcting any small mistakes or smudges during the design process. Acetone-based remover is usually most effective.
Step-by-Step Guide to Creating Your Washable Sharpie Mugs
Follow these instructions carefully to ensure your personalized Sharpie mugs are beautiful and built to last:
Time needed: 25 minutes (excluding baking time)
This project is wonderfully quick and satisfying. The hands-on design portion for each mug typically takes about 20 minutes, making it an ideal craft for a creative afternoon.
-
Prepare Your Mug for Design.
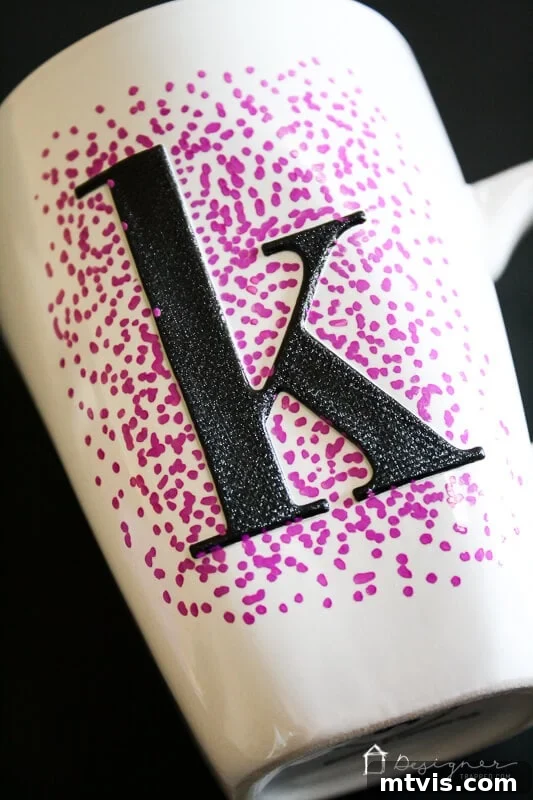
Begin by thoroughly cleaning the surface of your mug. Using rubbing alcohol and a clean cloth or paper towel, wipe down the entire area where you intend to place your design. This step is vital as it removes any fingerprints, oils, or dust that could prevent the oil-based paint from adhering properly. Once cleaned, allow the mug to air dry completely. Then, carefully position your chosen sticker or vinyl letter onto the mug, pressing down firmly to ensure there are no air bubbles or lifted edges, especially around the design’s perimeter. This creates a clean barrier for your paint.
-
Apply Your Custom Design.
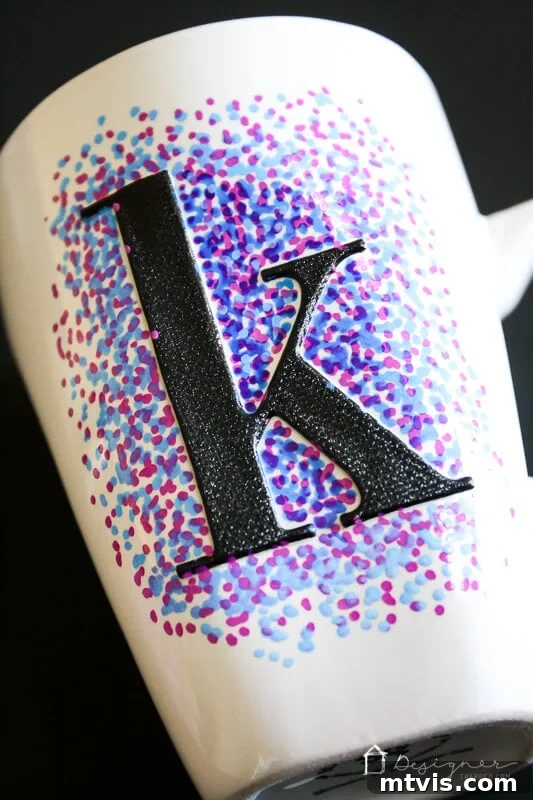
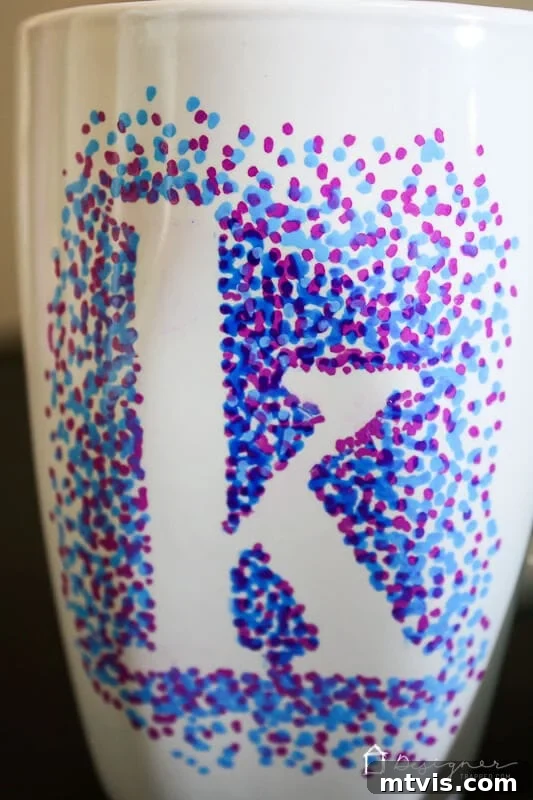
Shake your oil-based paint pens well to mix the paint, then prime the tip by pressing it onto a scrap piece of paper until the paint flows smoothly. Start making dots around the very edge of your sticker, concentrating them heavily to create a dense border. As you move outward, gradually make your dots more sparse, creating a fading or scattered effect. This technique gives the design a professional, ombre-like appearance. You can use a single color for a minimalist look or experiment with multiple colors for a vibrant design. If you choose to use more than one color, allow the first color to dry completely before layering on the next. Oil-based paint typically dries quickly, but patience here will prevent smudging.

Continue building your design, ensuring even spacing and consistent dot size if that’s the look you’re going for. Feel free to vary the pressure to create different dot sizes. Don’t worry too much about perfection at this stage; small mistakes can be corrected later. If layering colors, a good rule of thumb is to let each layer dry for at least 10-15 minutes before applying the next.
-
Allow to Dry and Perform Touch-ups.
Once your design is complete, allow the painted dots to dry completely. This usually takes about 20-30 minutes, but it’s always best to err on the side of caution and let it dry for longer if possible. Once dry to the touch, carefully and slowly peel off your sticker or vinyl stencil. If you notice any imperfections, such as paint that bled underneath the sticker or accidental smudges, dip a Q-tip in a small amount of nail polish remover and gently wipe away the unwanted marks. The precision of the Q-tip makes this process easy and effective, allowing you to refine your design for a flawless finish.
-
Bake Your Custom Mug(s).
This step is crucial for making your design permanent and washable. Place your decorated mugs inside a *cold* oven. It’s important not to pre-heat the oven beforehand, as sudden temperature changes can cause ceramic mugs to crack due to thermal shock. Once the mugs are safely inside, close the oven door and then turn the oven on, setting the temperature to 350 degrees Fahrenheit (approximately 175 degrees Celsius). Allow the oven to reach this temperature, and once it does, “bake” your mugs for a full 30 minutes. For best results and to prevent any potential discoloration from direct contact with hot metal, I recommend placing your mugs upside down directly on the oven grate rather than on a cookie sheet. After the 30-minute baking time is complete, turn off the oven but leave the mugs inside. Allow them to cool down completely with the oven. This gradual cooling process is just as important as gradual heating for preventing cracks and ensuring the paint cures properly. You might notice a slight change in the color of your paint after baking; this is normal and varies depending on the specific color pigments used.
Caring for Your Washable Sharpie Mugs
Now, for the question everyone asks: “Can I really wash them?” The answer is a resounding YES! Thanks to the use of oil-based paint pens and the heat-setting process, your DIY Sharpie mugs are indeed washable. While I personally prefer to hand-wash my custom mugs to maximize their longevity and preserve the vibrancy of the design, I can confirm they can withstand occasional trips through the dishwasher. I’ve run my Sharpie mugs through the dishwasher on a normal cycle when I’ve been short on time, and the designs have held up beautifully without washing off or fading significantly. However, for the ultimate care and to ensure your design lasts as long as possible, gentle hand-washing with mild soap and avoiding abrasive scrubbers is always recommended. Always allow your mug to dry completely after washing.
Troubleshooting Common Issues and Advanced Tips
Even seasoned crafters can encounter a snag or two. Here are some common issues and how to resolve them, along with some advanced tips for taking your mugs to the next level:
- Paint Smearing: If your paint smears while you’re working, it likely means it wasn’t fully dry before you touched it or applied another layer. Patience is key! If a smear occurs, use a Q-tip with nail polish remover immediately to clean it up before the paint fully sets.
- Cracking During Baking: This is almost always due to sudden temperature changes. Always place mugs in a cold oven and allow them to cool down completely inside the oven after baking. Avoid taking them directly from a hot oven to a cool counter.
- Design Washing Off: If your design washes off, the most common culprit is using regular Sharpie markers instead of oil-based paint pens. Double-check your supplies! Also, ensure your mugs were baked at the correct temperature for the full duration and cooled properly.
- Achieving Different Textures: Experiment with different pen tip sizes for varied dot effects. Use a fine-tip pen for intricate details and a broad-tip pen for larger areas or bolder dots.
- Freehand Designs: If you’re confident in your drawing skills, skip the stickers! Use a regular pencil to lightly sketch your design onto the clean mug. The pencil marks will either bake off or be easily covered by your paint.
- Adding Color to the Inside Rim: While most designs are on the exterior, adding a small detail to the inside rim can be a fun touch. Just ensure any paint does not extend too far down into the mug where it might come into contact with beverages frequently.
Creative Gifting Ideas to Elevate Your Handmade Mugs
THAT’S IT! How truly adorable and fun are these DIY Sharpie mugs? They are more than just a craft; they are a heartfelt expression of care. While a custom mug is a wonderful gift on its own, you can easily “step up” your gift by pairing it with other thoughtful items. Imagine presenting a beautiful, personalized mug filled with gourmet coffee beans, a selection of luxurious tea bags, or even a gift card to their favorite coffee shop like Starbucks. For the cozy enthusiast, include packets of hot cocoa and miniature marshmallows. For a gardener, fill it with a small succulent plant or seed packets. For an office worker, it could hold pens and small stationery. Or, consider creating a “mug cake” kit with pre-measured dry ingredients layered inside. These little additions transform a charming craft into an unforgettable gift package, perfect for birthdays, holidays, teacher appreciation, housewarmings, or just because!
More GIFT IDEAS
SEE ALL gift guides
-
The Best Gifts for Crafters, DIYers and Makers
-
The 19 Best Gifts for Grandparents
-
The Absolute Best Housewarming Gift Ideas
-
Thoughtful Mother’s Day Gift Ideas
-
Favorite Things Gift Ideas Under $25
-
Holiday Gift Guide Collection