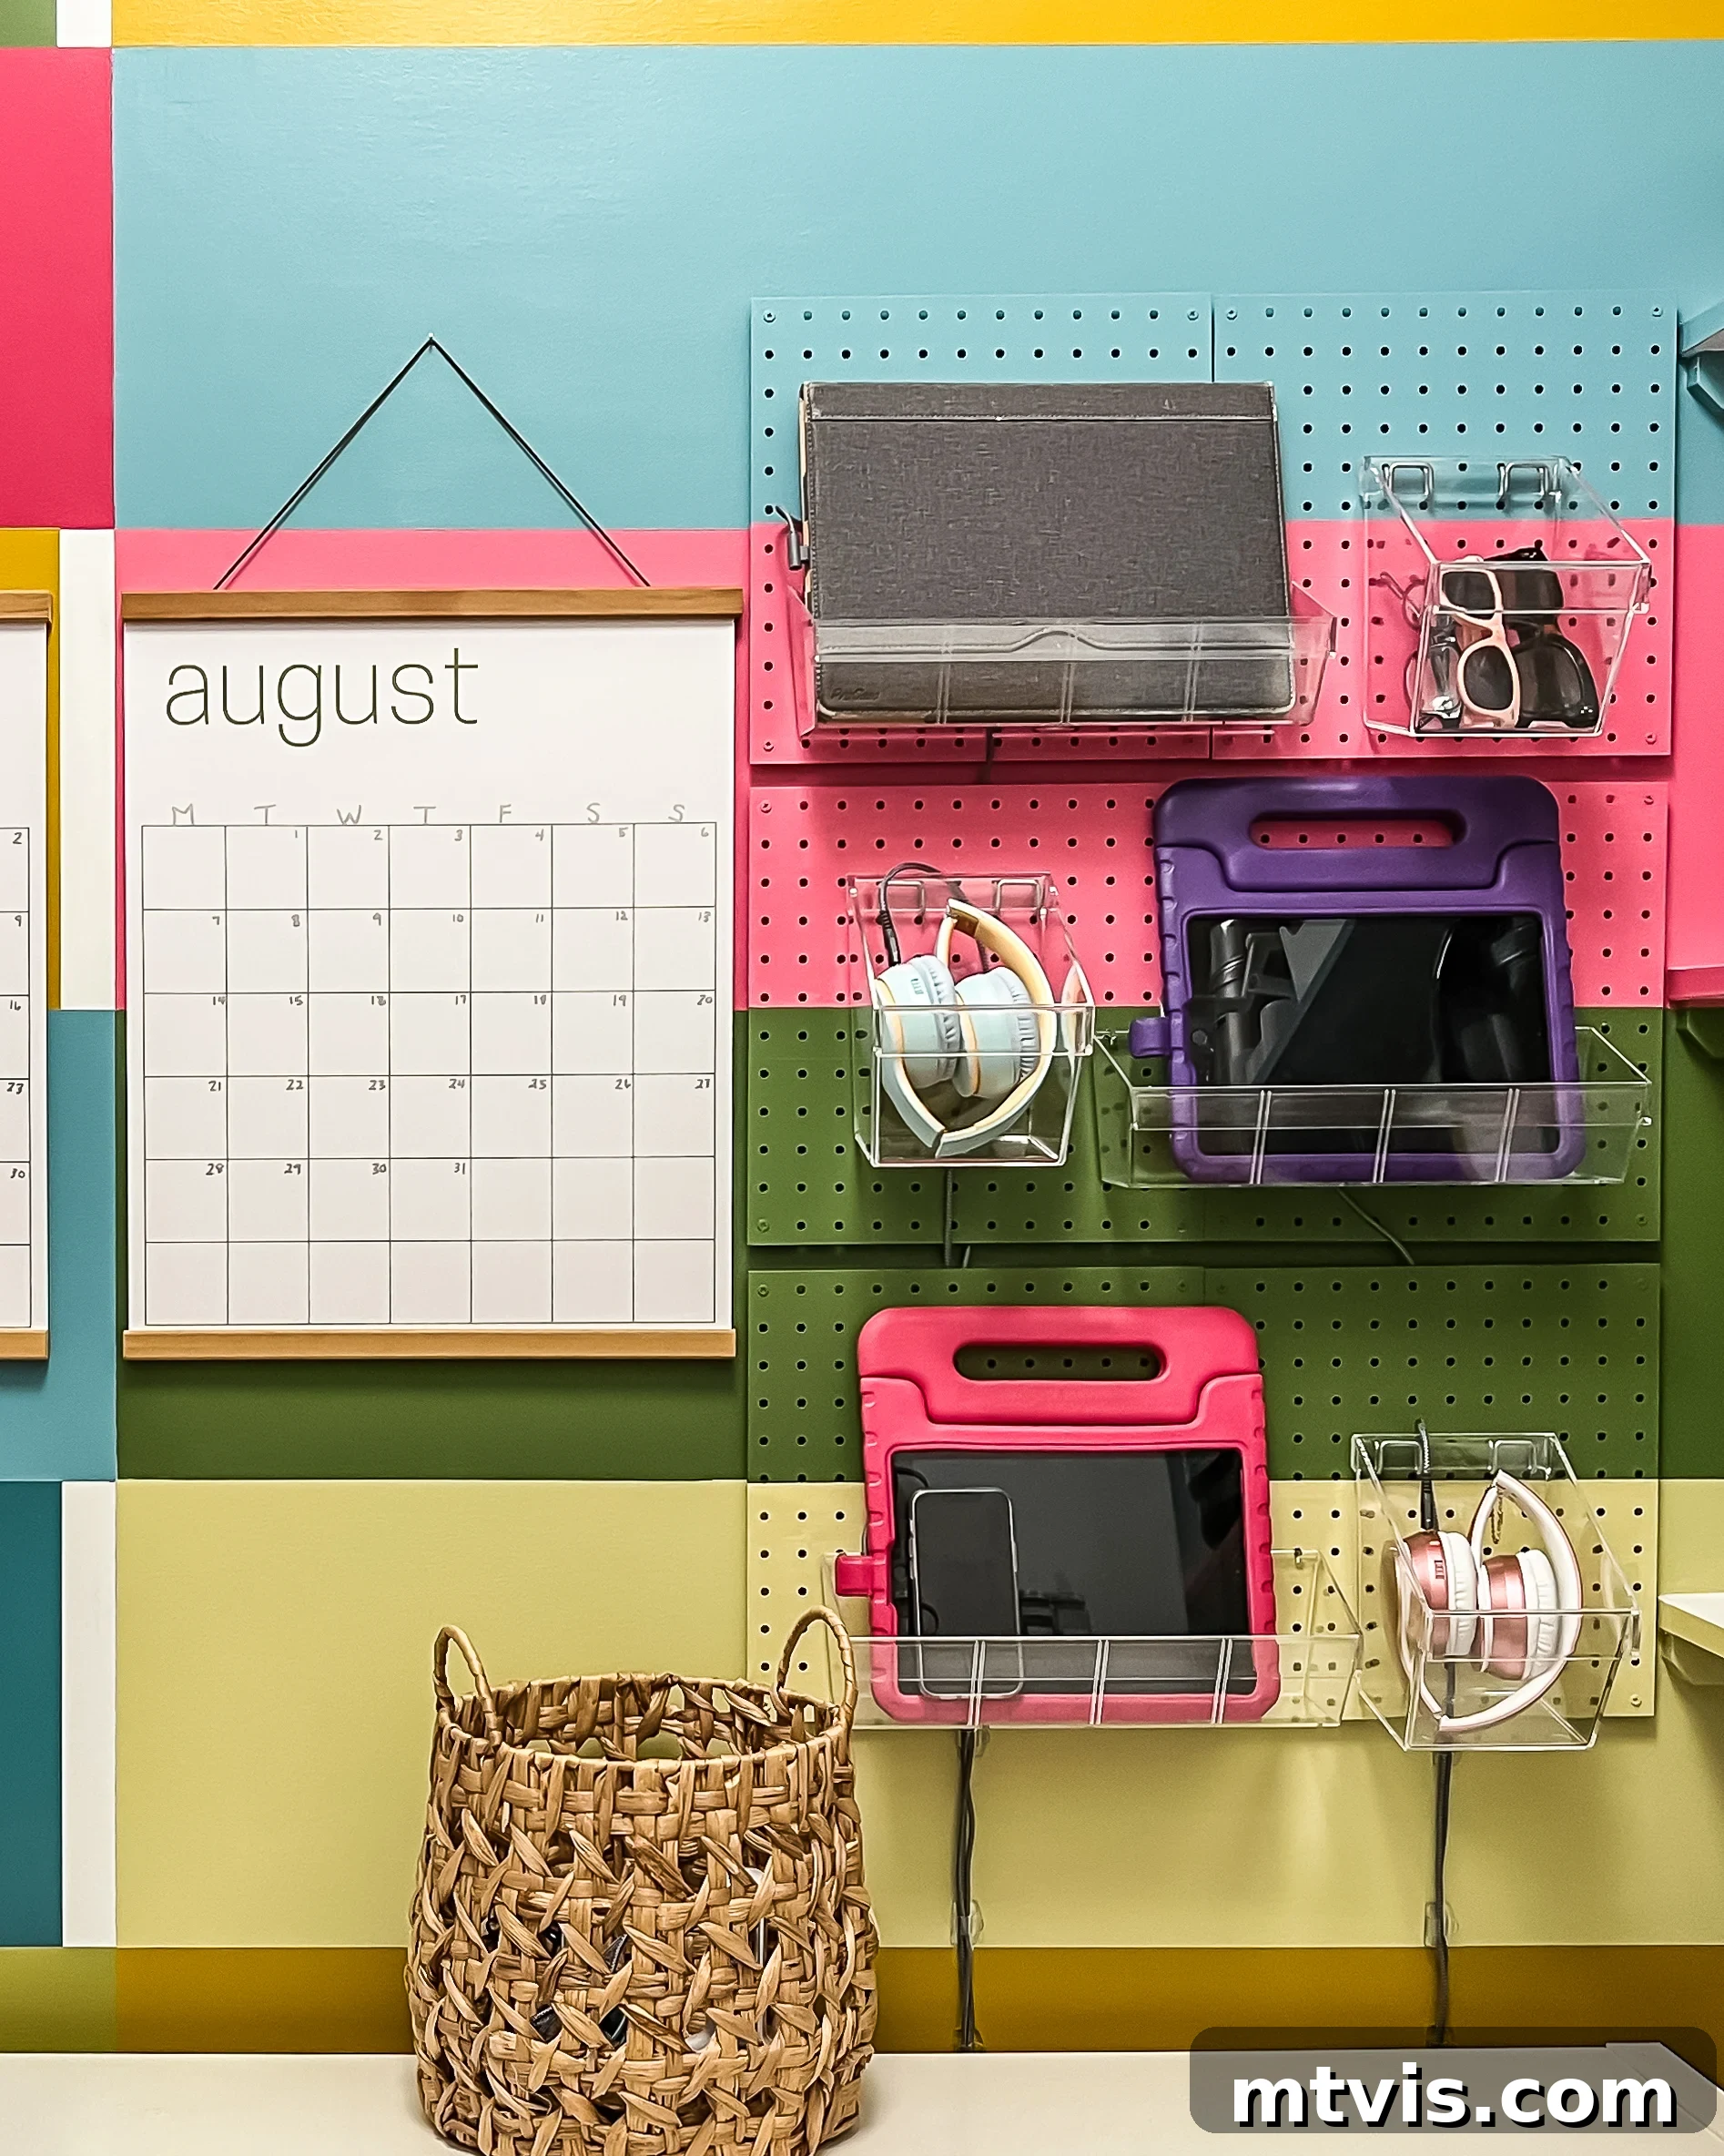
Tired of tangled cables and electronic devices cluttering every available surface in your home? You’re not alone! For years, our household struggled with the ubiquitous mess of charging cords, iPads, phones, and headphones strewn across counters and desks. That’s why creating a dedicated, wall-mounted family charging station has been an absolute revelation – a true game-changer for maintaining a tidy and organized living space. This DIY project isn’t just about functionality; it’s about reclaiming your home from digital chaos with a solution that’s both efficient and aesthetically pleasing. Discover how you can easily implement this transformative pegboard charging station in your own home and experience the calm that comes with perfectly organized tech.
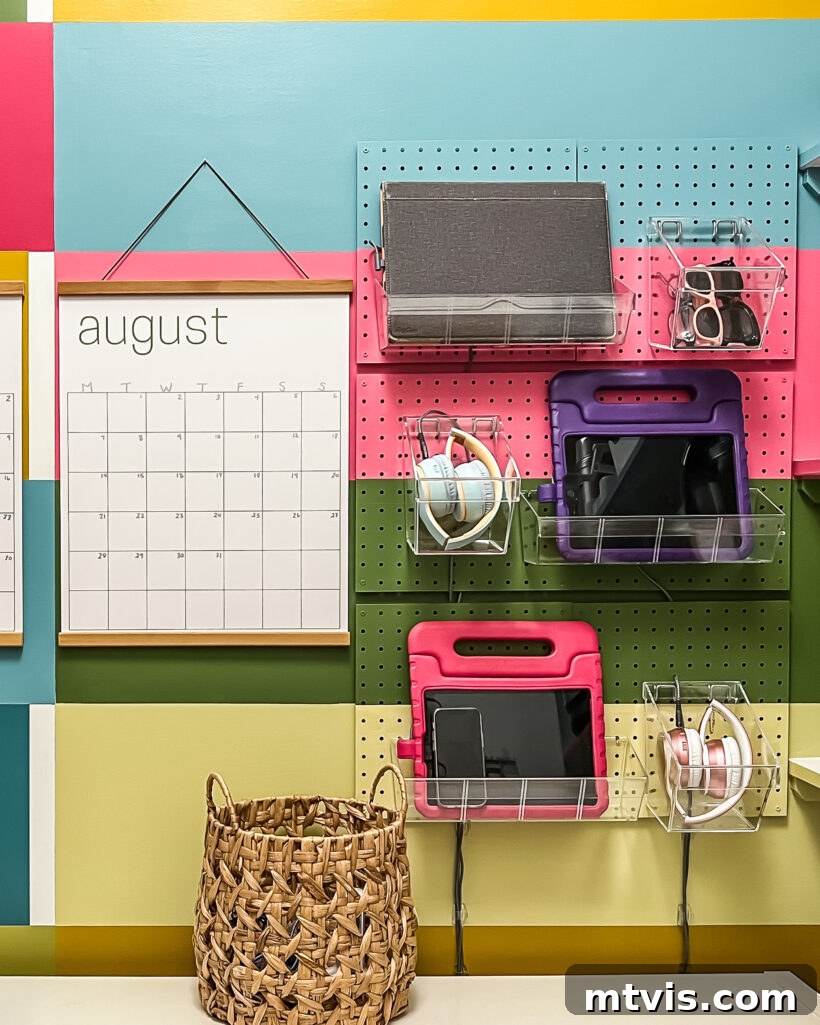
Table of Contents
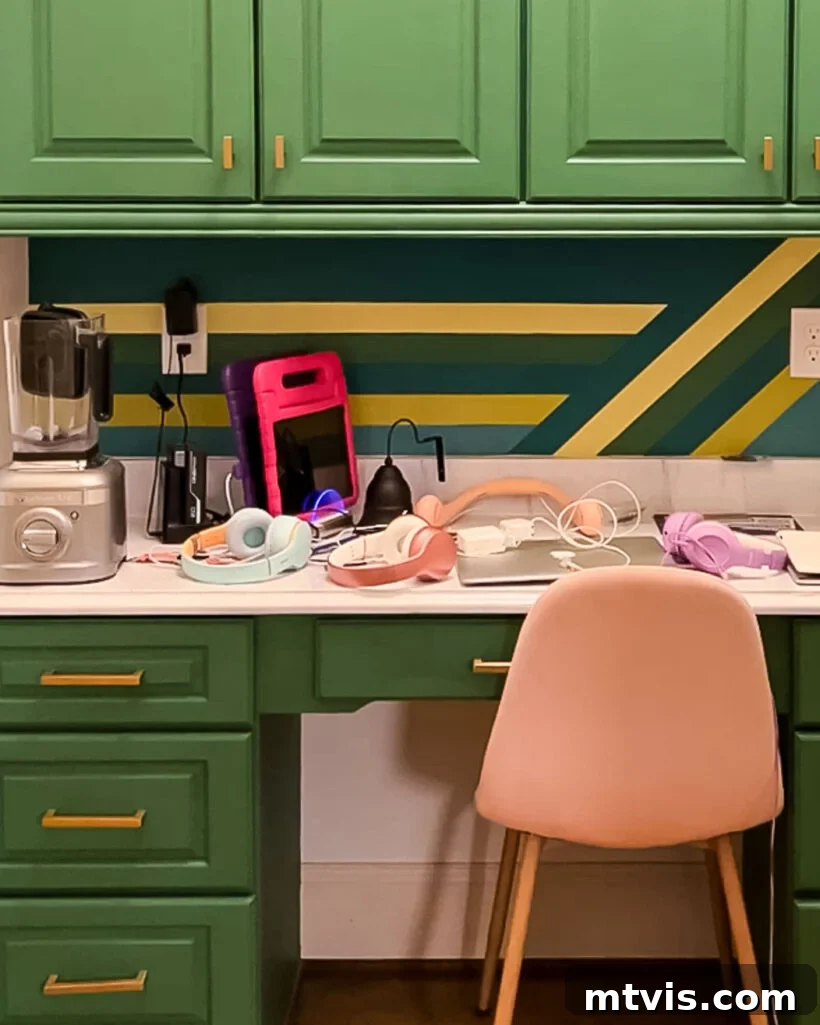
For far too long, our home was plagued by the persistent problem of electronic device clutter and a tangled mess of charging cords. We diligently sought solutions, investing in numerous store-bought charging stations and organizers over the years. While some offered a temporary reprieve, none truly addressed the core issue or fit seamlessly into our home’s aesthetic. They often lacked sufficient space for all our family’s gadgets, forcing us to still leave devices and their accompanying cables scattered across different surfaces. The image below of our old built-in office (now a DIY Butler’s Pantry) perfectly illustrates the challenge. Even with a dedicated charging station, the sheer volume of iPads, phones, and headphones meant we still faced considerable disarray. It was a constant source of frustration and visual clutter.
Beyond simply charging, device storage also plays a crucial role in our household routines. A standing rule dictates that our girls’ iPads and phones are stored downstairs each night before bed. This means that even if a device is fully charged, it still needs a designated, accessible spot. While my husband and I prefer to charge our phones in our bedroom, my iPad finds its nightly home within this new charging station. I am absolutely delighted to report that after six weeks of continuous use, our new vertical charging station has exceeded all expectations. It’s not just working; it’s being happily and consistently utilized by everyone, solving a long-standing organization challenge with ease. This project truly delivers on its promise, and I’m thrilled to share the step-by-step guide with you!
This post contains affiliate links for your convenience. Click here for my full disclosure policy.
Step-by-Step Tutorial: Build Your Own Pegboard Family Charging Station
Transforming your charging chaos into an organized haven is simpler than you might think. This comprehensive guide will walk you through each stage of creating a highly functional and visually appealing vertical charging station using pegboard. From selecting the right materials to clever cord management, we’ll cover everything you need to know to achieve a clutter-free charging solution that your entire family will appreciate.
Essential Materials for Your DIY Charging Hub
Gathering the right tools and materials is the first step towards a successful DIY project. For this pegboard charging station, we’ve carefully selected items that prioritize both durability and aesthetics, ensuring your final product is not only practical but also looks great in your home. The core of this system revolves around robust pegboard panels and functional storage accessories designed to keep your devices secure and your cords out of sight. You can find direct links to all the specific items I used to complete this project, making your shopping experience effortless. Simply click the link HERE or refer to the image below to access my curated list of recommended supplies.
Visual Guide: Project Overview
For those who prefer a visual demonstration, a brief video overview of this project is available. Watching the video first can significantly enhance your understanding of the steps and makes following the written instructions even easier. While the actual video player cannot be embedded directly in this HTML output, you can typically find it linked on the original article or related platforms. This visual aid effectively highlights key processes and gives you a dynamic perspective on how the charging station comes together. The detailed written steps will then provide all the nuanced information needed for a flawless execution of your DIY charging station.
Detailed Steps to Create Your Vertical Charging Hub
Time needed: 1 to 4 hours
This DIY charging station can be completed in as little as one hour if you choose a simple installation. However, if you opt to paint your pegboard for a custom look, as I did, the project may extend to several hours, allowing for proper drying time and detailed finishing. This timeframe gives you flexibility based on your desired aesthetic and commitment to customization.
- 1. Determine the Optimal Size and Placement for Your Charging Station.
Careful planning is crucial for a functional and visually balanced charging station. Begin by assessing the total number of electronic devices your family regularly charges (iPads, phones, e-readers, headphones, etc.). Roughly measure the space you anticipate needing to comfortably accommodate all these items, considering both their physical size and the number of charging spots required. Beyond raw functionality, also consider the aesthetic scale and proportion of the charging station within its chosen location. For instance, if mounted on a tall, expansive wall, a smaller station might appear dwarfed and out of place. Conversely, a large station on a cramped wall could overwhelm the space. (For expert guidance on selecting furniture and decor that perfectly matches the scale and proportion of any room, I highly recommend consulting Designer in a Binder). This initial planning ensures your charging station is both practical and integrates harmoniously with your home’s design.
- 2. Select and Securely Hang Your Pegboard Panels.
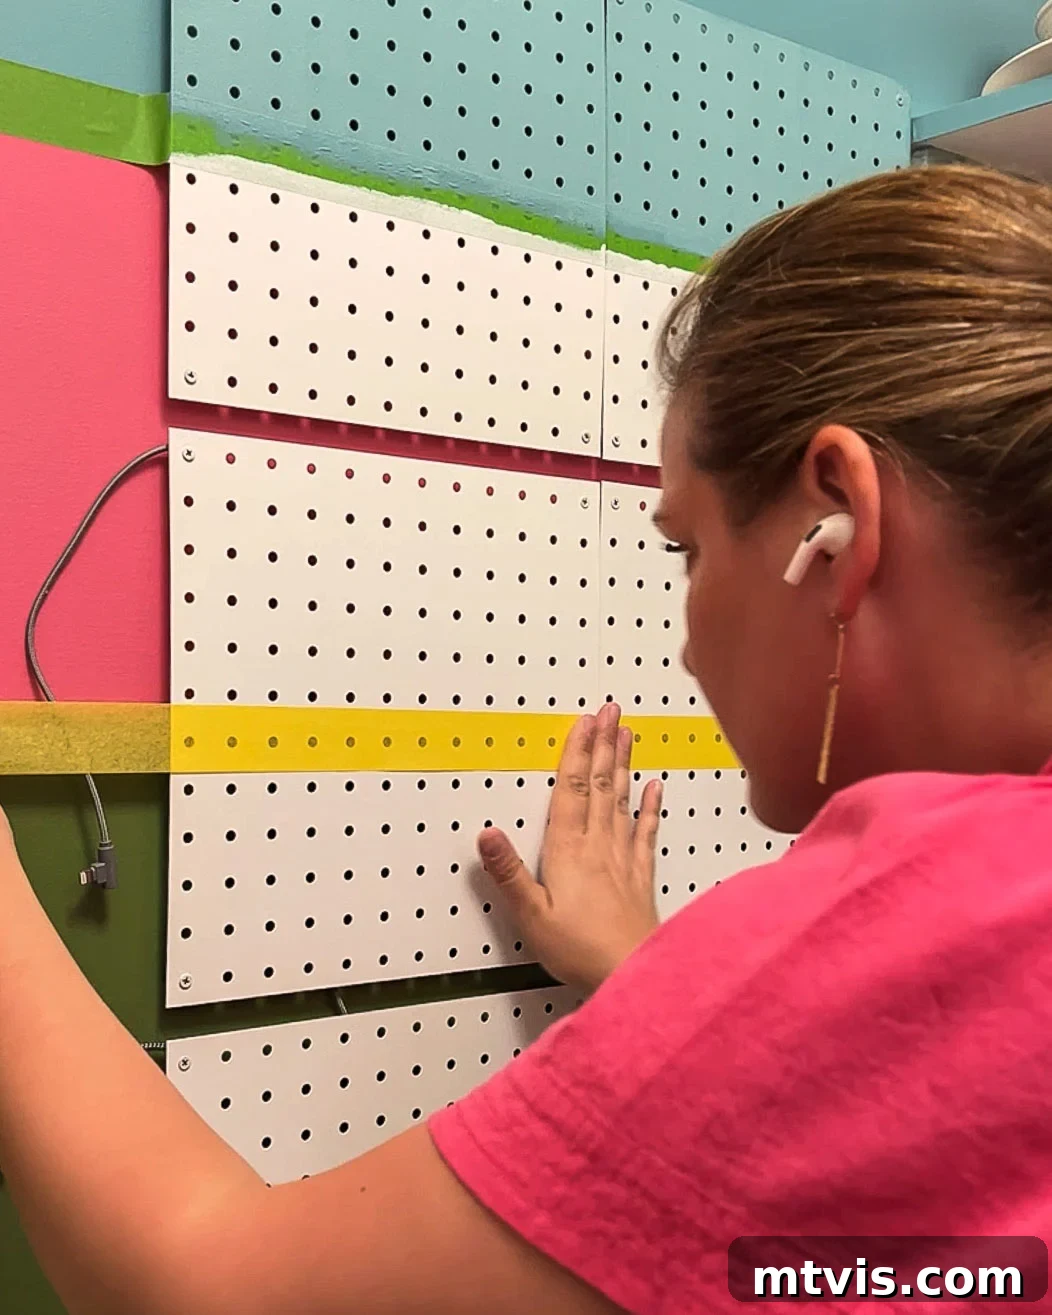
The choice of pegboard can significantly impact both the look and durability of your charging station. We opted for metal pegboard due to its sleek appearance, enhanced sturdiness, and the crisp, clean finish of its holes. Our design incorporates six individual 12-inch square metal panels, resulting in a total pegboard surface measuring approximately 36 inches tall by 14 inches wide. While this meant installing six separate panels, we felt the aesthetic benefits were worth the extra effort. If you prefer a simpler installation, a single large sheet of wood pegboard can be an excellent alternative, requiring only one mounting process. Regardless of your choice, ensure your pegboard system includes wall spacers. These critical components create a necessary gap between the pegboard and the wall, allowing ample space for discreet cord management behind the panels. You’ll notice we strategically left a small horizontal gap between each set of two panels – a design decision that will prove invaluable later for running cords seamlessly.
- 3. Customize Your Pegboard with Paint (Optional).
While painting your pegboard is entirely optional, it offers a fantastic opportunity to personalize your charging station and integrate it more deeply into your existing décor. In our case, I chose to paint the pegboard to perfectly blend with a mural already present on the wall, creating a cohesive and artful look. If you decide to paint, consider using a durable spray paint designed for the material of your pegboard (metal or wood) for an even finish. Multiple thin coats will prevent drips and ensure good coverage. Allow ample drying time between coats and before proceeding to the next steps. This customization step elevates the charging station from a purely functional item to a stylish design element in your home.

- 4. Arrange Your Pegboard Bins, Hooks, and Accessories.
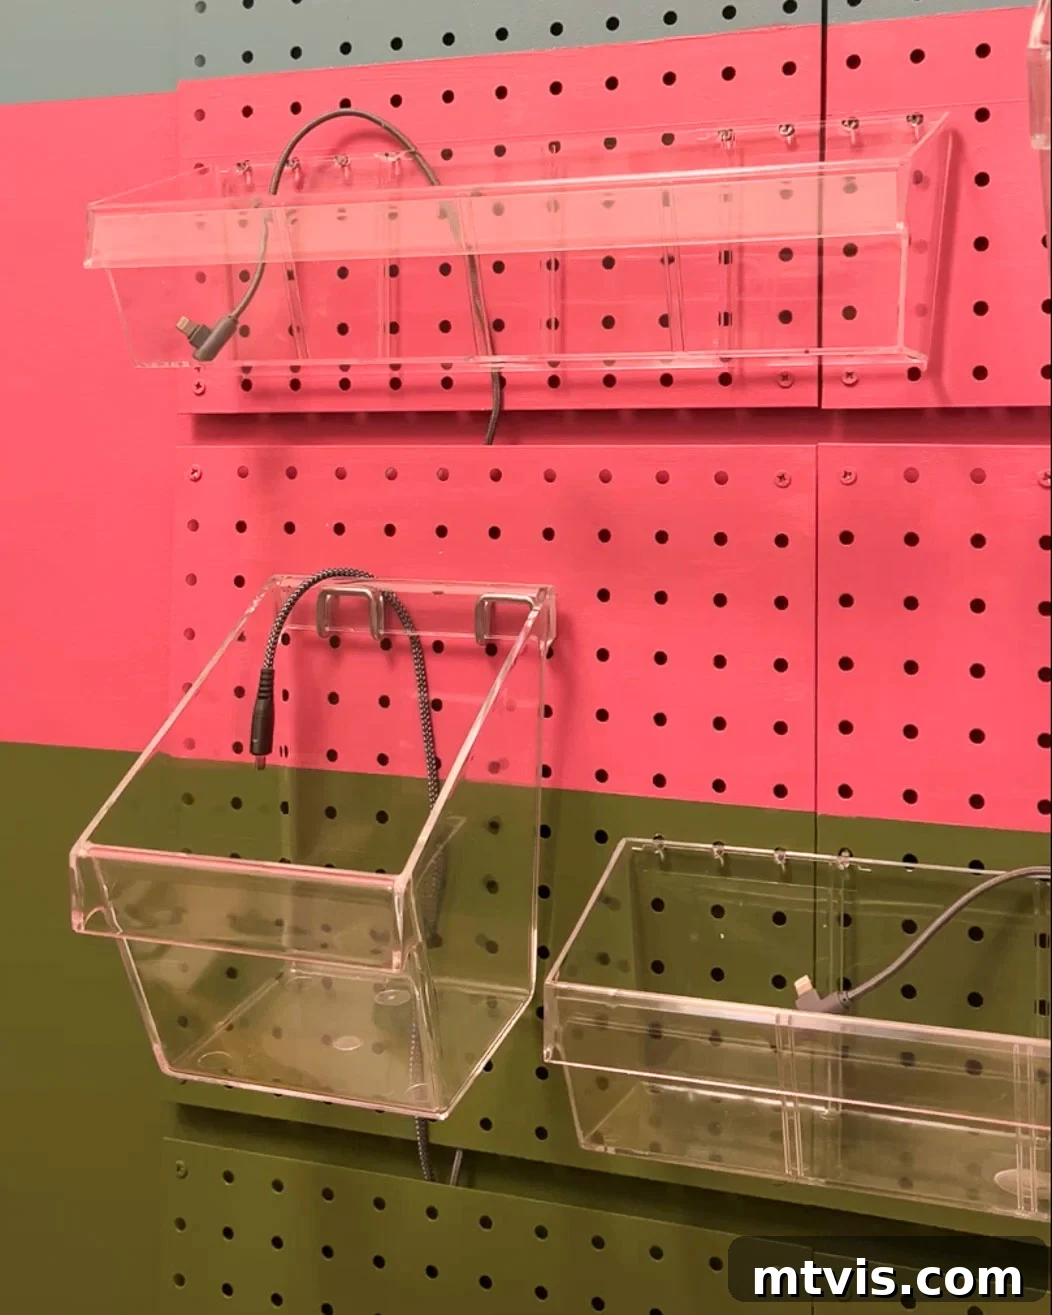
With your pegboard panels securely mounted and painted (if desired), it’s time to equip your station with the necessary storage components. We specifically chose clear acrylic storage bins for several reasons: their sleek, modern aesthetic creates a clean and sophisticated look, and their transparency makes it easy to quickly identify devices. Although they appear high-end, these bins are often sold in multi-packs, making the cost per bin quite reasonable. The market offers a vast array of pegboard storage options, including various hooks, shelves, and baskets in different materials. When making your selections, think about the specific types of devices and accessories your family uses, ensuring that your chosen bins and hooks provide a practical and accessible solution for everything from tablets to wireless headphones. This step is where you tailor the station to your family’s unique organizational needs.
- 5. Integrate a USB Charging Tower into a Dedicated Basket.
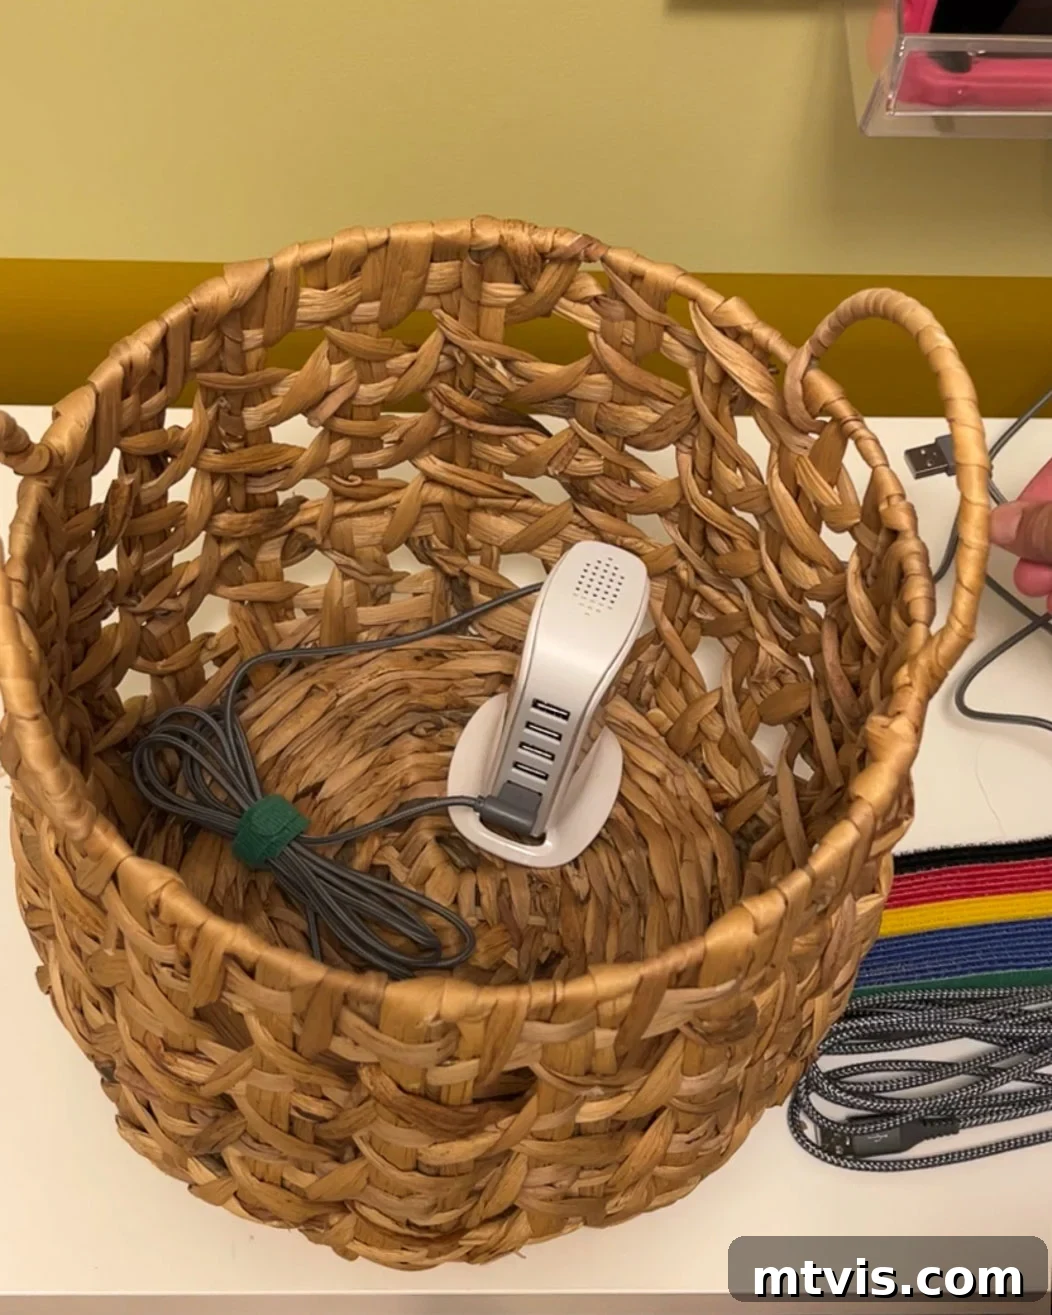
One of the primary goals of this charging station is to minimize visible cord clutter. To achieve this, we incorporated an inexpensive yet highly efficient USB charging tower. This single tower allows multiple devices to charge simultaneously from one power outlet, drastically reducing the number of wall warts and cords radiating from the station. The key to its discreet integration lies in placing it inside a dedicated bin or basket. Select a basket that not only fits the charging tower but also has sufficiently large openings or a weave that allows individual charging cables to be easily threaded through. This strategic placement hides the bulky power adapter and excess cabling of the tower itself, leaving only the necessary device-specific cords visible at their respective bins. This small detail makes a significant difference in the overall neatness of your setup.
- 6. Expertly Route Charging Cords from the Tower to Your Devices.
This step is crucial for maintaining the clean, minimalist aesthetic of your vertical charging station. Once your USB charging tower is positioned within its basket, begin routing the individual charging cords to their respective device bins. Leverage the wall spacers behind the pegboard by running the cords discreetly in this gap. For our metal pegboard setup, we threaded each cord behind the panels and then brought them out through the small horizontal spaces we intentionally left between each set of pegboard panels. This method allows the cords to emerge precisely where needed, feeding directly into the back of each device bin, completely concealing the bulk of the cables. If you are using traditional wood pegboard, a practical alternative is to drill small, strategically placed holes directly through the pegboard panels behind each bin, allowing cords to pass through cleanly. The goal is to minimize visible cords, ensuring a streamlined and organized appearance.
- 7. Organize and Place Your Devices in Their Designated Bins.
With the charging infrastructure in place, it’s time to populate your station with devices. Our system cleverly houses both iPads and phones in the same bin for each of our girls. This works efficiently because they rarely need to charge both devices simultaneously, requiring only a single charging cord per bin. Wireless headphones, however, typically utilize a different type of charger, so each pair is allocated its own dedicated bin and charging cable. For accessibility and convenience, my iPad is stored in the topmost bin, catering to my height. We’ve even found practical uses for any additional square bins, such as a designated spot for sunglasses that aren’t stored in our vehicles. This thoughtful allocation of space ensures every device has its home, simplifying daily routines and eliminating the hunt for chargers and gadgets. Adapt this arrangement to suit your family’s specific devices and usage patterns for maximum efficiency.
- 8. Tidy Any Remaining Visible Cords with Clips.
Even with meticulous routing behind the pegboard, you might find a short section of cord visible underneath the bottom panel, especially the main power cord leading to your wall outlet. This final, optional step significantly enhances the station’s overall neatness and professionalism. Utilizing simple adhesive cord clips, such as Command Cord Clips, allows you to securely fasten these remaining visible cables flush against the wall. This quick and easy addition makes a dramatic difference in polishing the look of your charging station, transforming any lingering mess into a tidy, almost invisible connection. The result is a truly streamlined and organized charging hub that looks impeccably designed.
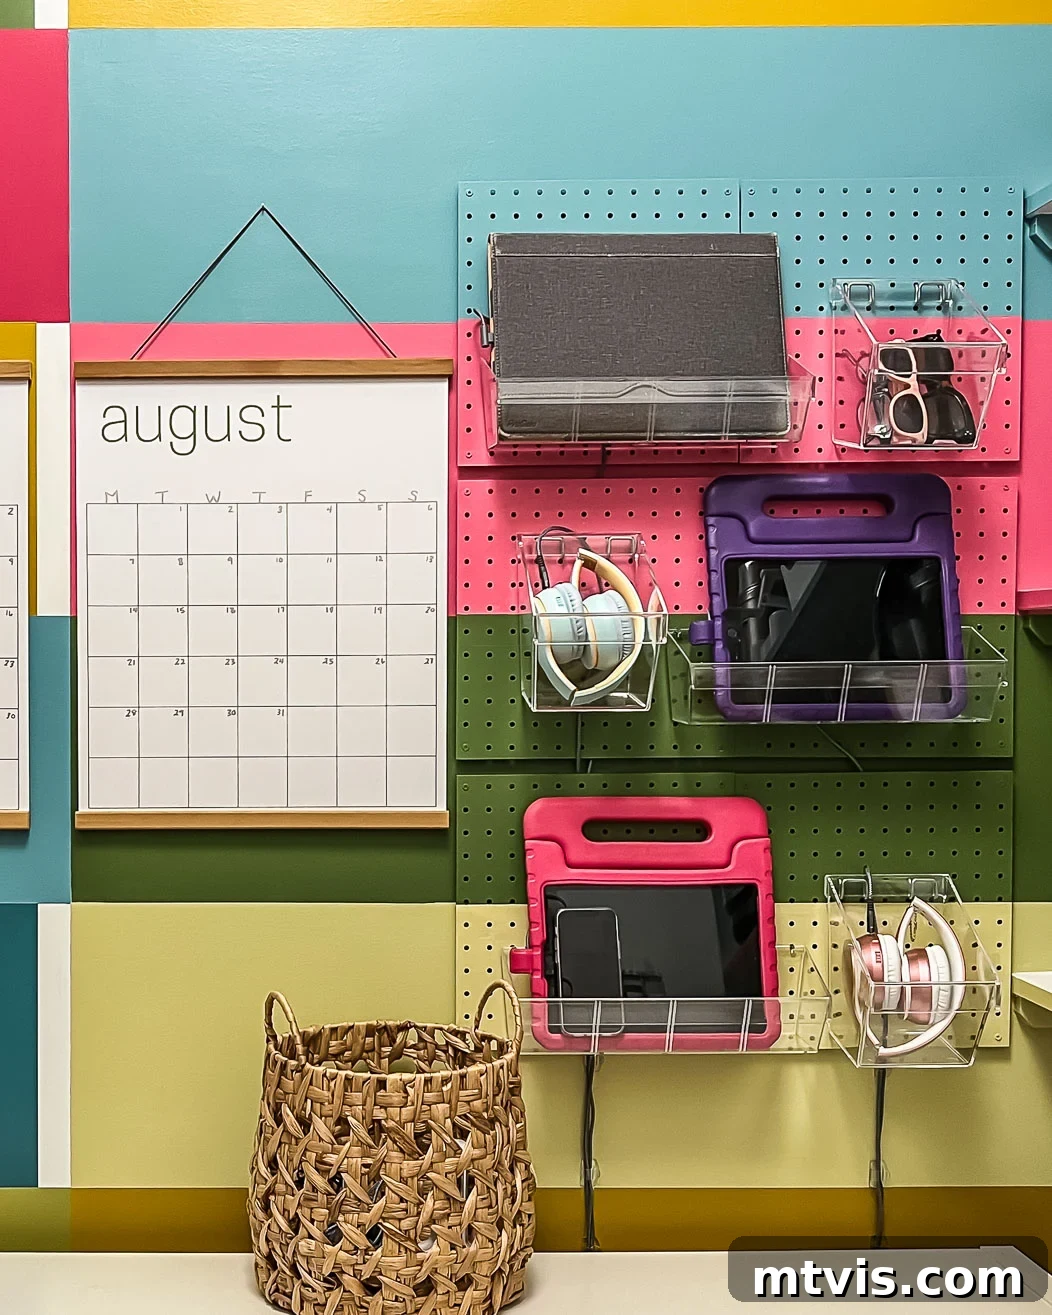
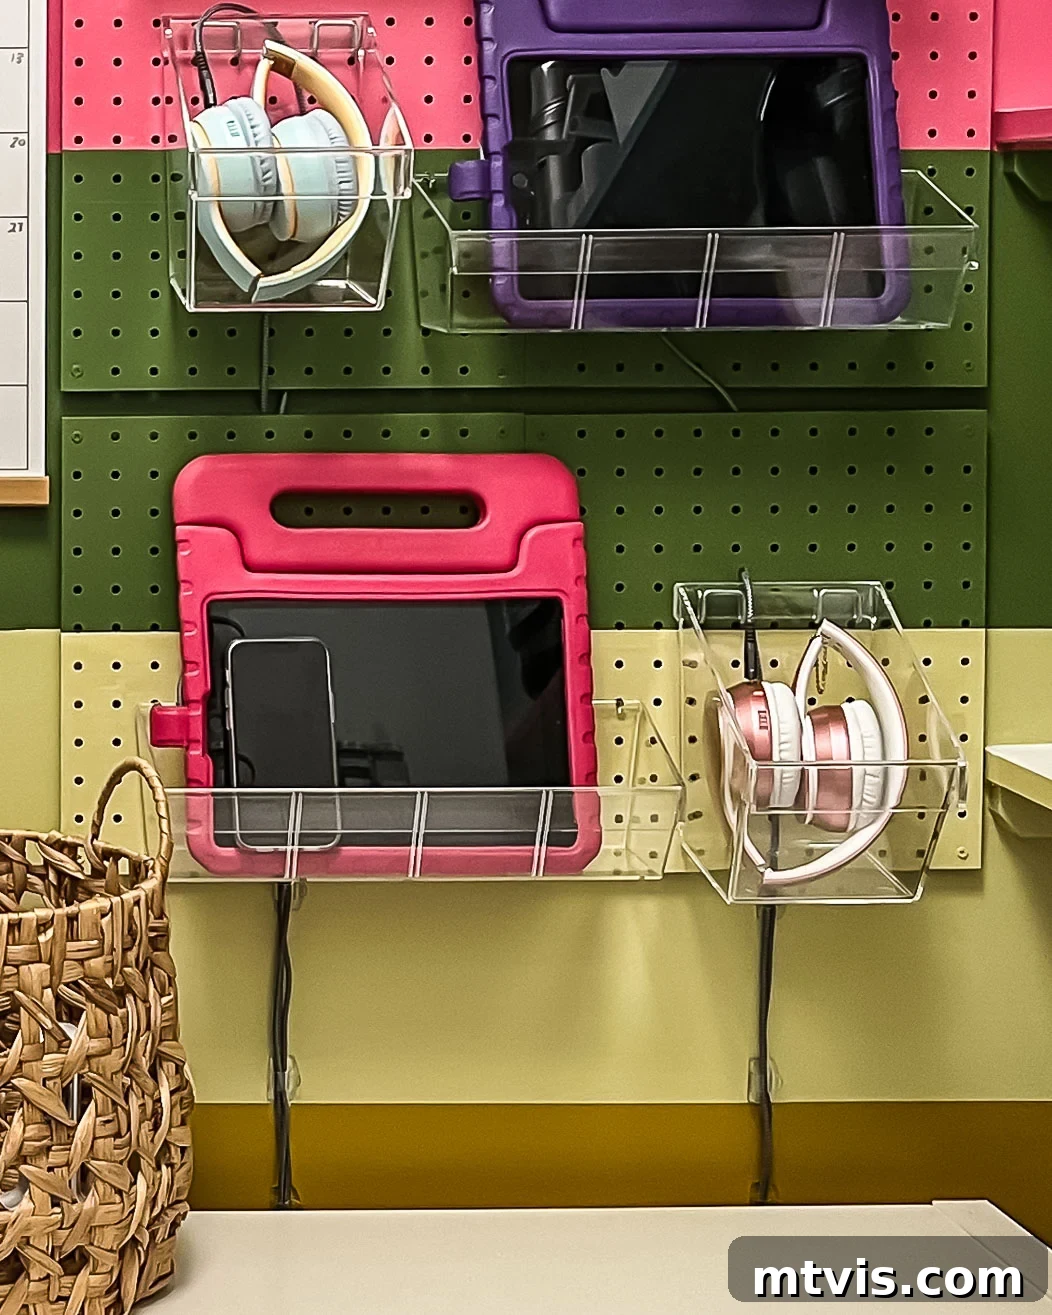
And there you have it! Your ultimate DIY vertical pegboard family charging station is complete. You can now plug in your devices and revel in a newfound sense of order and calm. Gone are the days of frustrating hunts for chargers and untidy tangles of cords hogging your countertops or desks. This systematic approach to electronic organization provides a dedicated home for every gadget, ensuring efficiency and a consistently clean environment. The vertical design maximizes previously unused wall space, making it a brilliant solution for homes of all sizes.
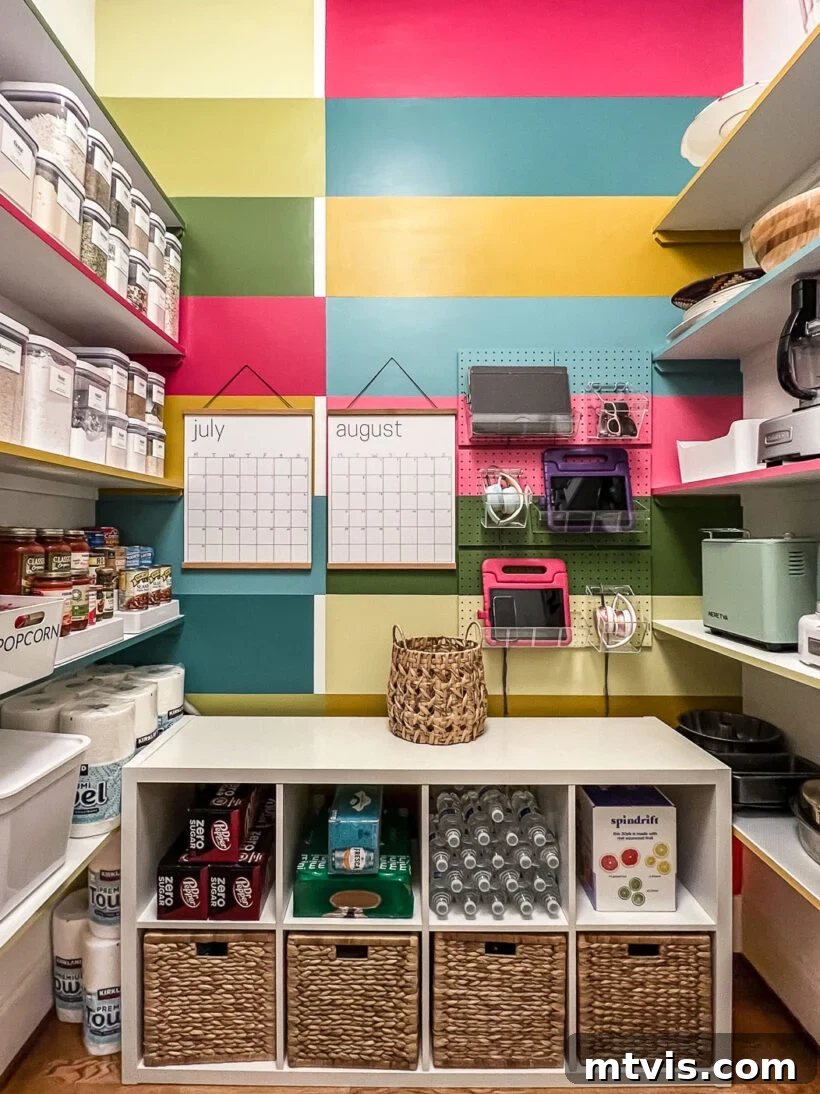
Our decision to go vertical with our family charging station and utilize pegboard storage has proven to be the perfect long-term solution for us, performing flawlessly for over six weeks now. Not only does it effectively manage all our electronic devices and cords, but it also brilliantly repurposes an otherwise unused wall in our pantry. The transformation is remarkable, offering both immense functionality and a polished aesthetic. Does this innovative approach to device organization resonate with your family’s needs? Consider implementing this DIY solution to bring harmony and order to your digital life!
More Family Organizing Solutions
SEE ALL organizing POSTS
If you’ve enjoyed bringing order to your charging cords, you’ll love exploring these other invaluable resources for transforming your home into a sanctuary of organization. From stylish solutions for everyday items to comprehensive guides on decluttering, these articles offer practical tips and inspiring ideas to help every member of your family stay neat, tidy, and stress-free. Dive into more ways to streamline your household and create systems that truly work for you.
-
Stylish and Functional Family Charging Stations
Discover a variety of elegant and practical charging solutions that blend seamlessly with your home decor, proving that functionality doesn’t have to compromise style. Say goodbye to unsightly cords and hello to sophisticated organization.
-
Family Calendar Ideas to Keep You Sane & Organized
Master your family’s busy schedule with brilliant calendar ideas. From digital solutions to aesthetic wall planners, find the perfect system to keep everyone in sync and on track, reducing stress and missed appointments.
-
The Best Family Command Centers for Staying Organized
A family command center is the nerve center of a well-organized home. Explore the top ideas for creating a central hub for schedules, mail, and notes, ensuring smooth daily operations and clear communication for everyone.
-
DIY Family Charging Station for iPads, Phones & More!
If you’re looking for the original article or more details on this specific project, this link will guide you back to the full tutorial for creating this efficient pegboard charging station.
-
Our 7 Closet Makeovers & the DIY Closet Systems We Have Used
Transform your wardrobes with these inspiring closet makeovers, featuring practical DIY closet systems. Learn how to maximize space and create highly functional storage solutions without breaking the bank.
-
Learn How to Declutter Your Home: A Realistic Guide
Embark on a journey to a clutter-free home with this realistic and actionable guide. Learn effective strategies and sustainable habits to declutter your space, one step at a time, creating a more peaceful living environment.
For more in-depth insights into transforming rooms and spaces with thoughtful design, I highly recommend exploring Designer in a Binder®. This invaluable resource provides a structured, affordable, and simple approach to decorating your home, ensuring every design decision is intentional and impactful. It’s perfect for anyone looking to achieve a cohesive and beautiful home aesthetic.
Want to stay ahead with exclusive content, behind-the-scenes sneak peeks, and fresh organizing ideas delivered straight to your inbox? Be sure to subscribe before you leave! Join our community and never miss out on practical tips and inspiring projects to enhance your home.