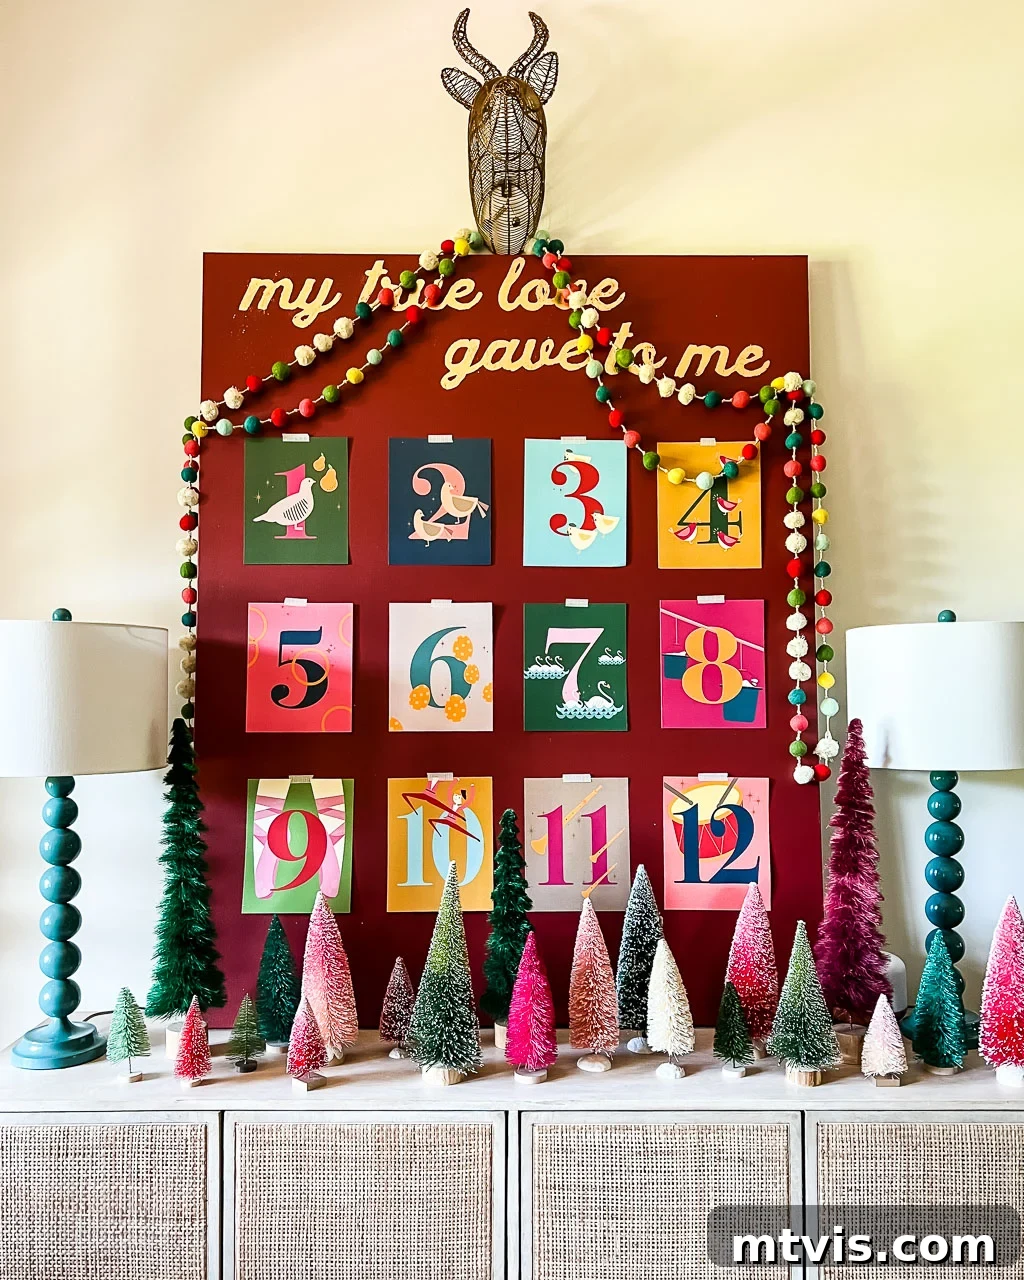
Transform your home this holiday season with a breathtaking DIY Christmas art canvas! This exceptionally easy project creates an enormous visual impact, turning any wall into a festive focal point. Forget small, cluttered frames; a single, grand canvas instantly elevates your holiday decor with a touch of personalized elegance.
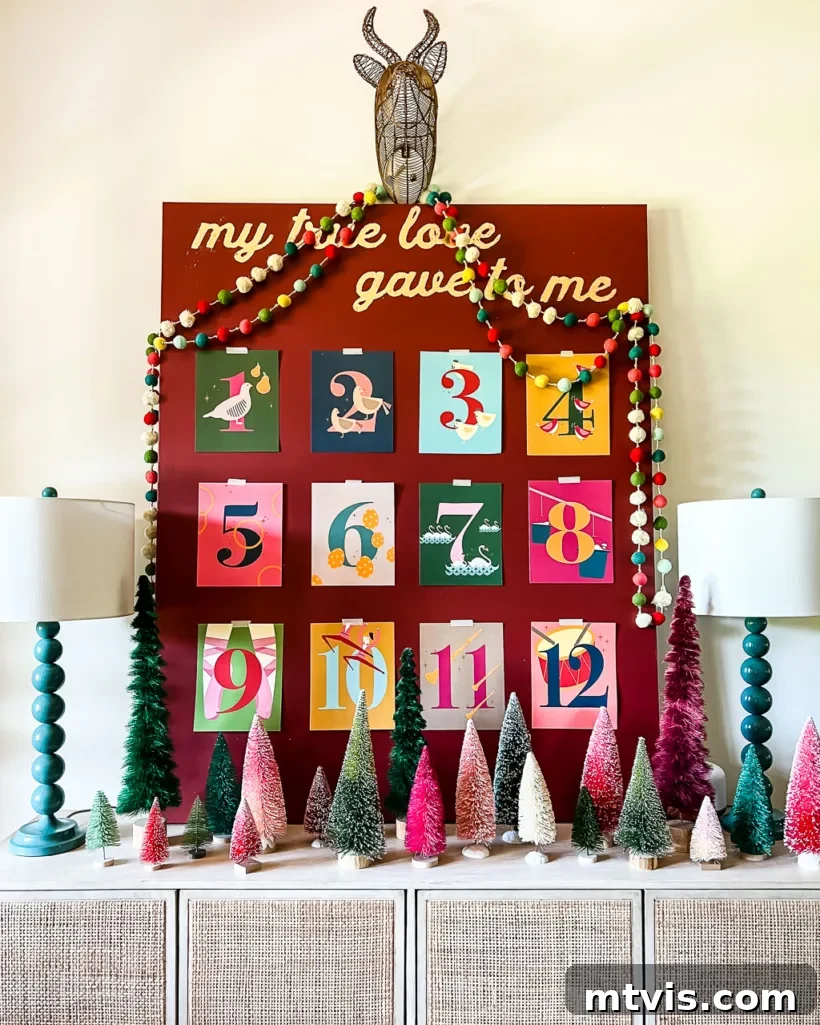
As you may have seen on my Instagram, I crafted a colossal DIY Christmas canvas a couple of years ago specifically to showcase my “12 Days of Christmas” art prints. The idea struck me as a brilliant, creative alternative to traditional framing, especially since I didn’t have twelve matching 8×10 inch frames readily available. More importantly, I knew a single, large-scale art piece would make a far greater statement in our entryway, immediately capturing attention and setting a magical tone for the festive season.
This project is not just about decorating; it’s about infusing your home with unique personality and holiday cheer. Imagine walking into a room and being greeted by a magnificent piece of art that you lovingly created, perfectly tailored to your festive aesthetic. It’s a fantastic way to display treasured prints, family photos, or even meaningful holiday quotes, all while making a grand design statement. Its sheer size means it commands attention, becoming the undeniable centerpiece of any room, from the living area to a grand hallway.
Beyond its stunning visual appeal, this DIY Christmas canvas is incredibly rewarding to create. It’s an accessible project for crafters of all skill levels, offering a wonderful opportunity to channel your creativity into something truly special for the holidays. Plus, it’s a budget-friendly way to achieve high-end decor, allowing you to customize colors, fonts, and prints without the hefty price tag of custom framed art. Read on for a comprehensive guide to crafting your very own impactful holiday masterpiece!
This post contains affiliate links for your convenience. Click here for my full disclosure policy.
DIY Christmas Art Canvas Tutorial: Crafting Your Holiday Masterpiece
Embark on a creative journey to design a stunning, oversized Christmas canvas that will become the star of your holiday decor. This detailed tutorial breaks down each step, making the process enjoyable and straightforward, even for those new to DIY art. Let’s gather our supplies and transform a blank canvas into a festive work of art!
Essential Materials for Your Large Christmas Canvas
Having all your materials organized before you begin will make the DIY process smoother and more enjoyable. Here’s what you’ll need to create your impactful Christmas canvas, along with some tips for selecting the best items:
- A 40 x 60-inch Canvas: The larger the canvas, the more dramatic the impact! I sourced mine from a local art supply store during a 50% off sale, securing it for less than $50. Don’t be afraid to look beyond new canvases; thrift stores like Goodwill often carry large, affordable canvases that can be repurposed. Since you’ll be painting over it, the original artwork or color doesn’t matter, offering fantastic savings. Consider how this grand scale fills your space, making it a focal point.
- Paint: Choose a color that complements your existing holiday decor or creates a striking contrast. I used “Highlander” from Fusion Mineral Paint, known for its excellent coverage and matte finish. These paints are incredibly durable and offer a beautiful, rich depth of color. (Don’t forget to save 10% with code AFFMP10 at checkout!) Ensure you have enough paint for at least two coats, especially on a large canvas.
- Paint Roller and/or Brush: A paint roller is ideal for quickly and evenly covering large surface areas, minimizing brush strokes. A smaller brush will be useful for touching up edges or corners. Have both on hand for optimal coverage.
- “12 Days of Christmas” Art Prints: These colorful, festive prints are the perfect complement to the gilded lettering. You can find beautiful sets like the Kaleidoscope Living collection, or choose any set of prints that evoke the spirit of Christmas for you. Ensure they are a consistent size for a cohesive look.
- Washi Tape: This decorative tape is perfect for securely attaching your art prints to the canvas without causing damage. It comes in a myriad of colors and patterns, allowing you to add another layer of personalization and charm. Choose a design that enhances your overall aesthetic.
- Quake Hold or Poster Hanging Strips (Optional, but Recommended): While washi tape is often strong enough, these additional adhesives provide extra security, ensuring your prints stay perfectly in place throughout the holiday season, especially if your canvas is in a high-traffic area.
- Carbon Paper: Essential for transferring your chosen phrase onto the canvas with precision. This will guide your gilding work, ensuring crisp and accurate lettering.
- Gilding Adhesive: This specialized glue creates the sticky base required for the gold leaf to adhere. It typically becomes tacky quickly, which is crucial for a successful application.
- Gold Leaf: Imitation gold leaf is an affordable and beautiful option for achieving that luxurious metallic look. It comes in thin sheets and is surprisingly easy to work with once you get the hang of it. Choose gold, silver, or copper to match your vision.
- Bristle Brush (Dry, for Gold Leaf Removal): You’ll need a stiff, dry bristle brush to gently “buff” away excess gold leaf, revealing sharp, clean lines for your lettering. This brush should not be used for painting.
Once you have all your materials, you’re ready to create a statement piece that will captivate all your holiday guests!
Step-by-Step Guide to Crafting Your Golden Christmas Canvas
This DIY project is designed to be enjoyable and achievable, transforming a simple canvas into a stunning piece of holiday art. While I recommend watching a video tutorial for visual guidance (search online for “DIY Christmas canvas gold leaf tutorial” for examples), here are the detailed instructions to walk you through each phase of the project:
Step 1: Laying the Foundation with Paint
The first step is to prepare your canvas with a solid, beautiful background color. Using your paint roller, apply thin, even coats of your chosen paint. For a 40×60 inch canvas, a roller is far more efficient than a brush for achieving smooth, consistent coverage without streaks. Aim for at least two coats, allowing ample drying time between each. Fusion Mineral Paint typically dries quickly, but always check the manufacturer’s recommendations. Ensure complete, opaque coverage across the entire canvas, including the edges, to create a professional finish. A consistent base color is crucial for the gold leaf to truly pop.
Step 2: Crafting Your Golden Phrase
Next, it’s time to design the golden phrase that will adorn your canvas. I opted for “my true love gave to me” in a elegant script font, sized around 400 pt, to complement the “12 Days of Christmas” theme. You can use any word processing software (like Microsoft Word or Google Docs) to type and format your desired phrase. Experiment with different script fonts to find one that expresses the right festive sentiment and is easy to trace. Print your phrase across multiple standard printer papers, piecing them together to form the full inscription. This phrase will be the heart of your gilded design, so choose something meaningful and visually appealing.
Step 3: Precise Lettering Transfer
With your canvas painted and dry, and your phrase printed, it’s time to transfer the design. Carefully decide on the perfect placement for your lettering on the canvas. Consider centering it, or placing it strategically where it will interact best with your art prints. Once you’re happy with the positioning, use gentle painter’s tape or washi tape to secure your printed phrase onto the canvas. Now, take your carbon paper. Slip a sheet of carbon paper underneath your printed phrase, carbon-side down, aligning it with the areas you intend to trace. Using a pen or an embossing tool, firmly trace over the outlines of each letter. This will transfer a light, traceable outline onto your canvas, guiding your gilding work. Double-check that all parts of your letters have been transferred before removing the paper.
Step 4: The Art of Gilding
This is where the magic happens! Using a small artist’s brush, carefully paint the traced outlines of your lettering with gilding adhesive. It’s crucial to work methodically and efficiently. As soon as the adhesive becomes tacky – which happens fairly quickly – immediately apply your gold leaf. I found it easiest to work one letter at a time, or even a small section of a letter, to prevent the adhesive from drying out before the gold leaf could be applied. Gently press the gold leaf onto the tacky adhesive. Don’t worry about perfect application at this stage; overlapping is fine, as excess will be removed in the next step. Take your time to ensure the gold leaf covers all areas painted with adhesive, creating a rich, opulent texture.
Step 5: Revealing the Shine
Once the gold leaf has been applied over the adhesive, it’s time to reveal the crisp, shining lettering. Use a clean, dry bristle brush – one not used for painting – to gently “buff” or brush off the excess gold leaf from areas where there was no adhesive. Work slowly and with light pressure. The gold leaf will adhere only where the adhesive was applied, leaving behind beautiful, defined letters. If you notice any small gaps or areas where the gold leaf didn’t fully adhere, simply reapply a small amount of gilding adhesive to those specific spots and press on a fresh piece of gold leaf. Buff again once tacky. This corrective step ensures a flawless, professional finish, making your golden phrase truly stand out.
Step 6: Displaying Your Christmas Art Prints
With your magnificent gilded lettering complete, the final touch is to arrange and attach your “12 Days of Christmas” art prints. Before adhering them permanently, lay out your prints on the canvas to determine the most visually appealing arrangement. Consider spacing them evenly around your golden phrase, creating a symmetrical or asymmetrical balance based on your preference. Once satisfied with the layout, use washi tape to securely affix each print to the canvas. For added peace of mind, especially in high-traffic areas or if you want extra durability, you can apply small dots of Quake Hold or poster hanging strips to the back of each print before applying the washi tape. This ensures they remain perfectly in place throughout the holiday season, completing your stunning DIY Christmas art display.
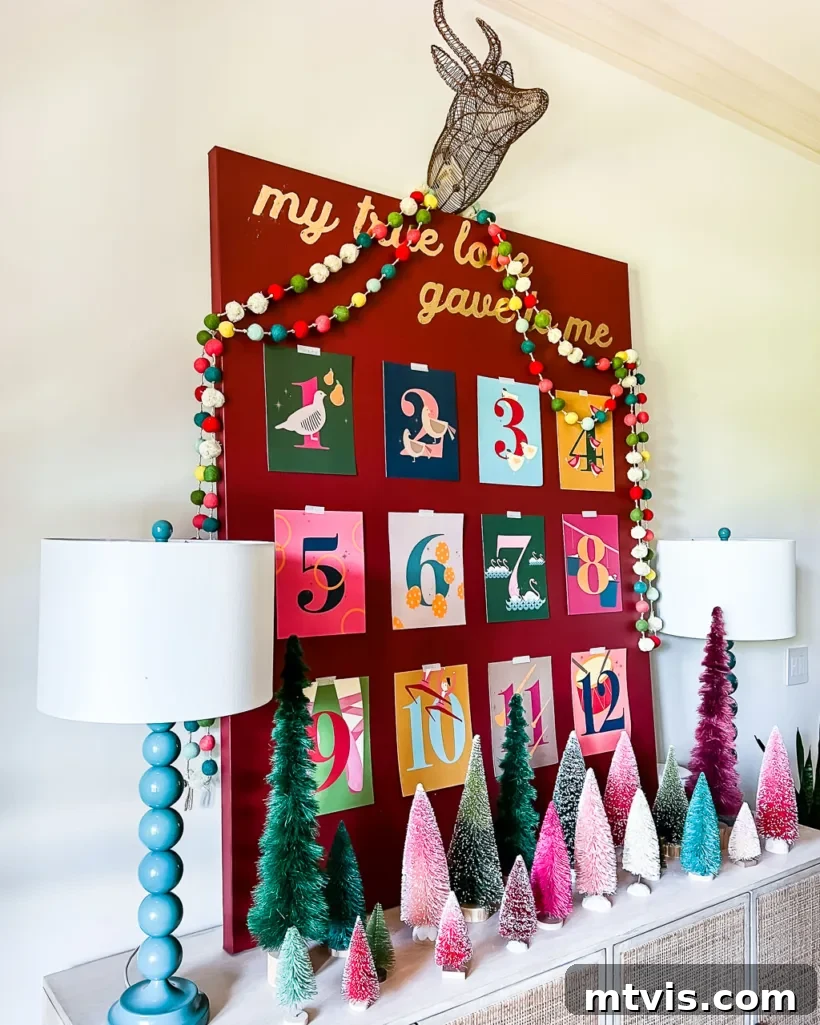
And just like that, you’ve created a truly unique and impactful piece of holiday decor! The beauty of this DIY Christmas art is its versatility. You can style it to fit any aesthetic, from traditional and rustic to modern and whimsical. I paired ours with a vibrant, colorful garland we’ve cherished for years, draped artfully around the top and sides of the canvas. To complete the festive tableau, a charming copper stag head, another long-standing favorite (apologies, no links for these vintage finds!), was placed nearby, adding a touch of rustic elegance. The combination created a warm, inviting, and truly magical atmosphere that we absolutely adore.
Consider enhancing your display with fairy lights, additional festive embellishments, or even surrounding the canvas with other themed decor. A large holiday-themed rug underneath, or a console table adorned with candles and ornaments, could further elevate the entire arrangement. This canvas isn’t just art; it’s a statement, a conversation starter, and a beautiful reflection of your personal holiday style.
What do you think of this magnificent DIY Christmas art project? Share your thoughts and ideas in the comments below – I’d love to hear how you plan to personalize yours!
More Seasonal Posts
SEE ALL holiday POSTS
-
The Most Realistic Faux Garlands for 2025
-
Stunning Light-Up Paper Snowflake Lanterns
-
How to Decorate Bedroom Doors to Look Like Apartment Doors
-
DIY Santa Sacks Your Kids Will LOVE!
-
Magical Light-Up Paper Christmas Lanterns
-
Inspiring Front Porch Christmas Decorations & Tips
Transform Your Home with Confidence
Curious about my unique approach to transforming rooms and spaces within our home? Discover the power of Designer in a Binder®. This revolutionary system provides an affordable and simple way to plan, budget, and execute your home decorating projects with clarity and confidence, ensuring every design decision brings you closer to your dream home.
Stay Connected for Exclusive Insights
Don’t miss out on exclusive content, behind-the-scenes sneak peeks, and fresh DIY inspiration! Be sure to subscribe to my newsletter before you go. Join our community of creative enthusiasts and receive the latest updates directly in your inbox, helping you make your home a beautifully crafted reflection of you, all year round.