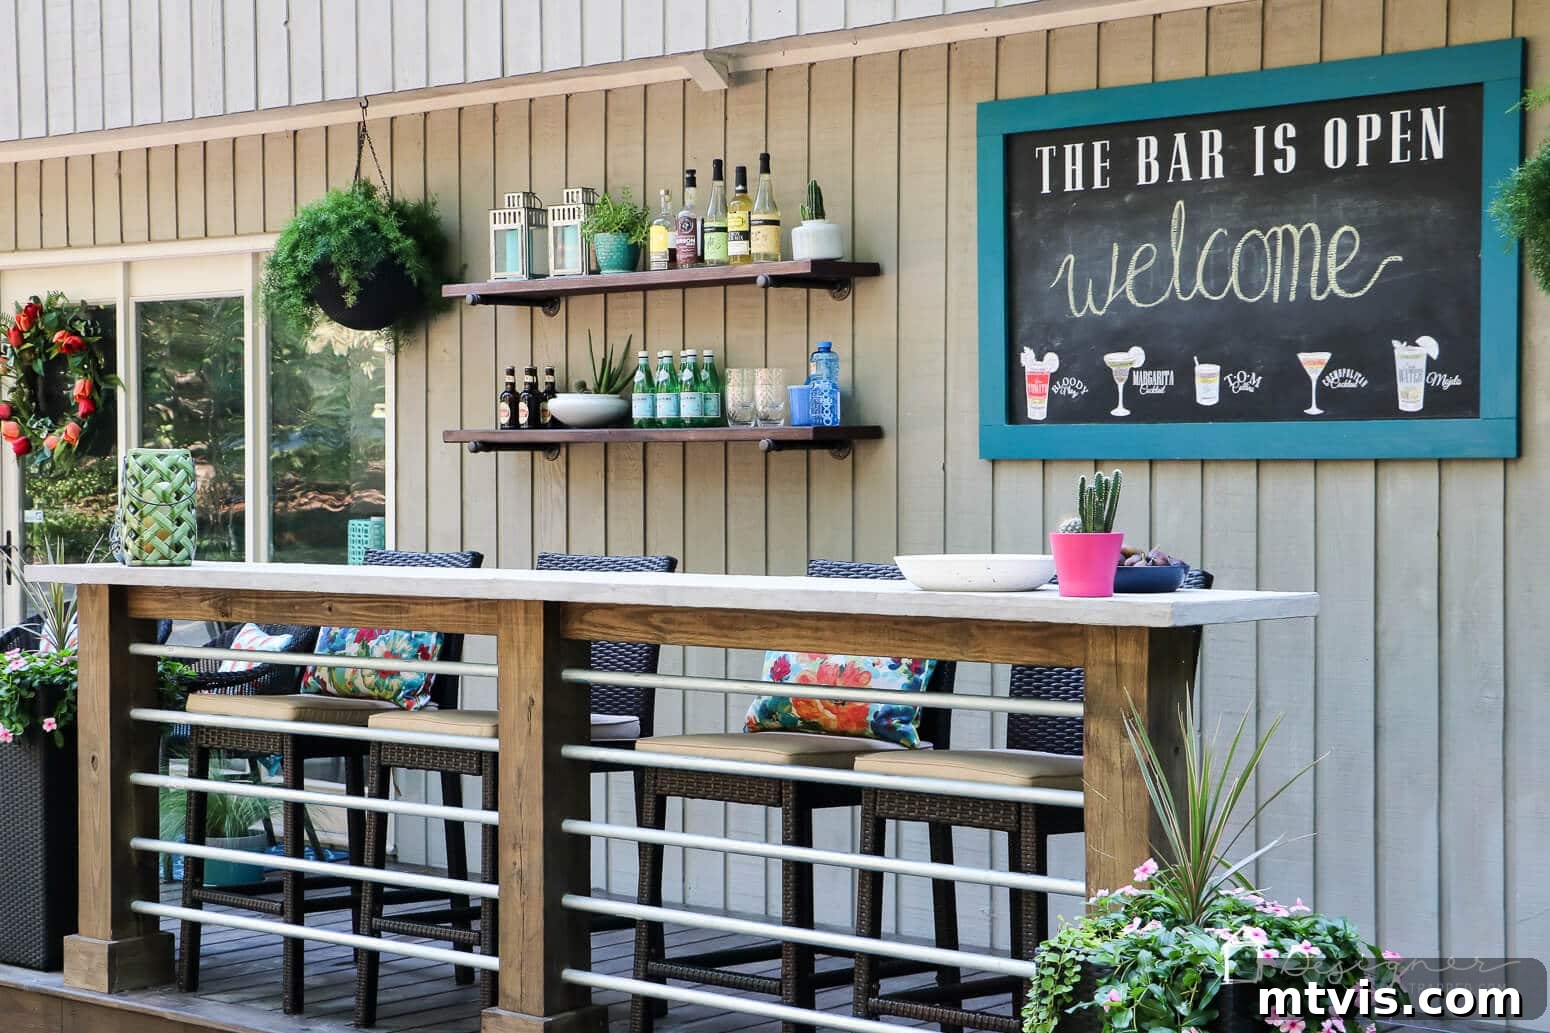
Transform Your Backyard: The Ultimate DIY Outdoor Deck Bar Tutorial
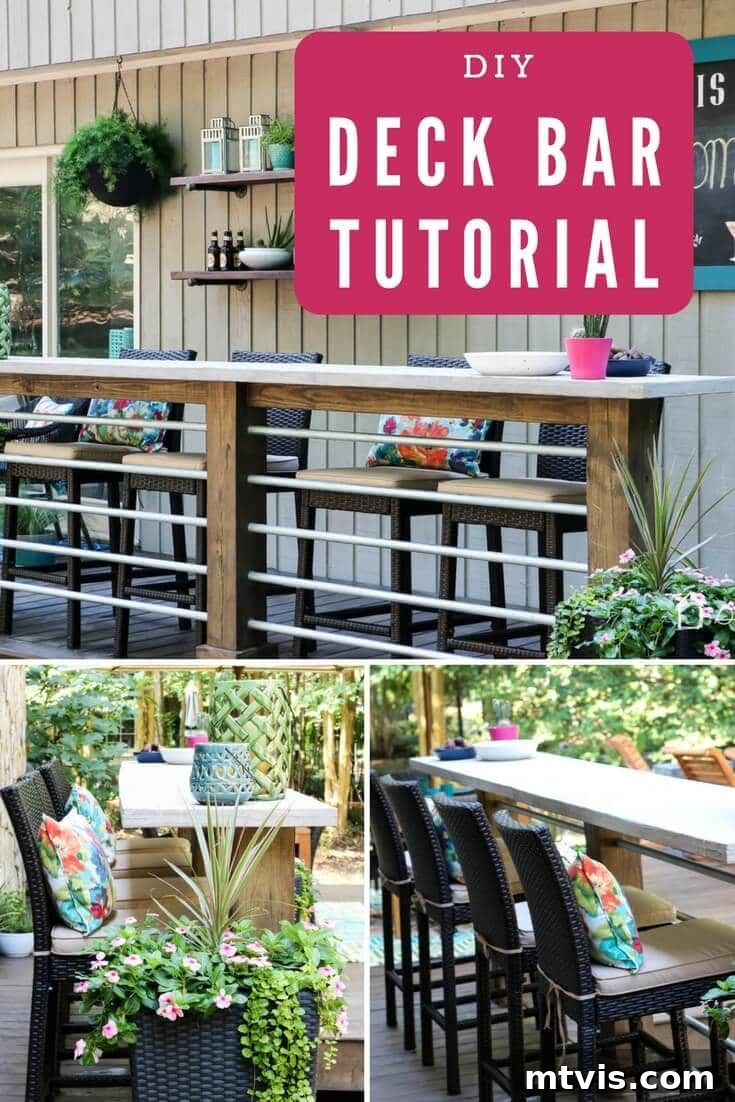
Hello, fellow DIY enthusiasts! If you’re looking to elevate your outdoor living space and create the perfect spot for entertaining, a custom-built outdoor deck bar is an absolute game-changer. We recently completed a significant deck makeover, and without a doubt, the addition of our DIY deck bar stands out as one of the most rewarding features. This isn’t just about adding furniture; it’s about crafting a dedicated space for relaxation, conversation, and making lasting memories with friends and family. Imagine sipping refreshing drinks, hosting lively gatherings, or simply enjoying a quiet evening outdoors – all from the comfort of your very own backyard bar.
Building this bar might seem like a daunting task, but we’re here to show you just how achievable it is. This project requires only a few fundamental materials, readily available at your local home improvement store, making it both accessible and budget-friendly. We’ve meticulously documented every step to ensure you can replicate our success and bring this fantastic feature to your own deck. Get ready to transform your backyard into the ultimate entertainment hub!
A special thank you to DAP Products for sponsoring this insightful post. Their high-quality construction adhesives were integral to the structural integrity and longevity of our outdoor bar. As always, the opinions and detailed instructions shared here are entirely our own. This post also contains carefully selected affiliate links for your convenience. Should you choose to make a purchase after clicking one of these links, we may earn a small commission at no extra cost to you, which helps support our continued efforts to bring you inspiring DIY content. You can explore our full disclosure policy here.
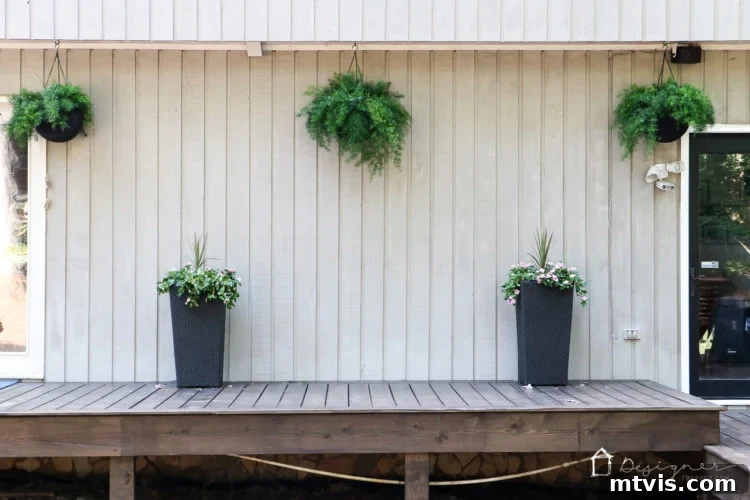
Before diving into the construction details, let’s take a moment to appreciate the transformation. Here’s a glimpse of the exact location where our DIY outdoor bar now proudly stands, showcasing its humble beginnings as just an empty expanse.
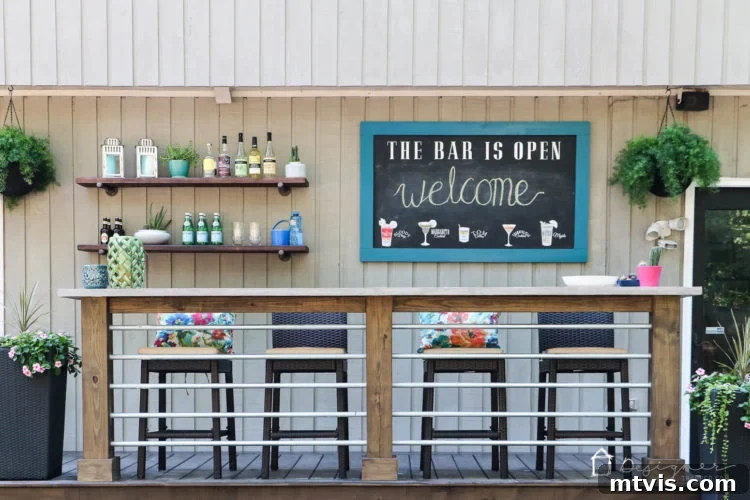
And now, behold the stunning “after” shot! The difference is remarkable, illustrating the incredible potential a DIY deck bar holds for enhancing your outdoor living experience. Continue reading for our comprehensive, step-by-step tutorial, empowering you to build this custom outdoor bar and elevate your own backyard oasis.
DIY Deck Bar Tutorial: Building Your Outdoor Oasis
Creating your very own outdoor bar is a fulfilling project that adds significant value and enjoyment to your home. This section will guide you through the entire process, from gathering your tools and materials to assembling the base and crafting the perfect bar top. We’ll provide detailed instructions, tips, and insights to ensure a smooth and successful build.
Essential Materials & Tools for Your DIY Outdoor Bar
Before you begin, ensure you have all the necessary materials and tools on hand. Having everything organized will streamline your workflow and prevent interruptions during the build. The quantity of some materials will depend on the custom dimensions of your bar, so plan accordingly.
- DAP Dynagrip Heavy Duty Construction Adhesive: Crucial for strong, weather-resistant bonds, especially for the bar top.
- 1 1/4″ Forstner bit: Essential for drilling clean, precise holes for the conduit railings.
- 1 inch metal conduit: The number of lengths depends on your bar’s desired length and the number of railing sections. These will form your stylish bar railings.
- 6 x 6 inch posts: The quantity will be determined by your bar’s length; we used three for a long bar. These form the main support structure.
- 2 x 4s: Used for horizontal support beams underneath the bar top. The number depends on your bar’s dimensions.
- OSB or plywood: For the bar top substrate.
- PRO TIP: In hindsight, we highly recommend using thick plywood over OSB for the bar top. Plywood offers a much smoother, more stable base, which significantly simplifies the application of concrete overlay and results in a superior finish. OSB can be more challenging to work with for a perfectly smooth concrete surface due to its inherent texture and tendency to absorb moisture unevenly.
- Ardex Feather Finish: The concrete overlay material for your bar top, creating a sleek, modern aesthetic.
- Quikrete Concrete Cure And Seal: For protecting and sealing your finished concrete surface from the elements.
- Drywall mud pan: Handy for mixing and holding concrete overlay.
- 8 to 10 inch drywall taping knife: For smooth and even application of the concrete overlay.
- Post brackets (we used these specific ones): For securely anchoring your posts to the deck structure.
- Post level: Indispensable for ensuring your posts are perfectly vertical and level, critical for stability and appearance.
- Deck screws: Various sizes for general assembly and attaching 2x4s.
- Lag bolts: For heavy-duty attachment of post brackets to the deck joists.
- Circular saw: For accurately cutting larger lumber like posts and OSB/plywood.
- Drill driver: For drilling pilot holes and driving screws.
- Hand saw or metal grinder: For cutting the metal conduit to size. A grinder offers faster, cleaner cuts for metal.
- Speed square: For marking accurate, straight lines and angles on your wood.
- Deck stain: Choose a stain that complements your existing deck for a cohesive look. We matched ours perfectly.
- DAP Plastic Wood: For filling gaps and creating a smooth, finished look on wood surfaces.
Building the Sturdy Base of Your DIY Deck Bar
The foundation of your deck bar is crucial for its stability and longevity. Follow these steps carefully to construct a robust and level base that will support your beautiful bar top.
1) Strategic Planning: Determine Bar Length and Post Height. Your first decision involves the overall length of your DIY deck bar. This directly dictates the number of 6×6 posts you’ll need for adequate support. For a long bar like ours, three posts provided optimal stability. Next, consider the desired height of your bar from the ground. This choice is vital for user comfort; a standard bar height is usually around 42 inches, allowing for comfortable standing or stool seating. Plan this carefully, visualizing how it will integrate with your existing deck and outdoor furniture. Measure twice, cut once!
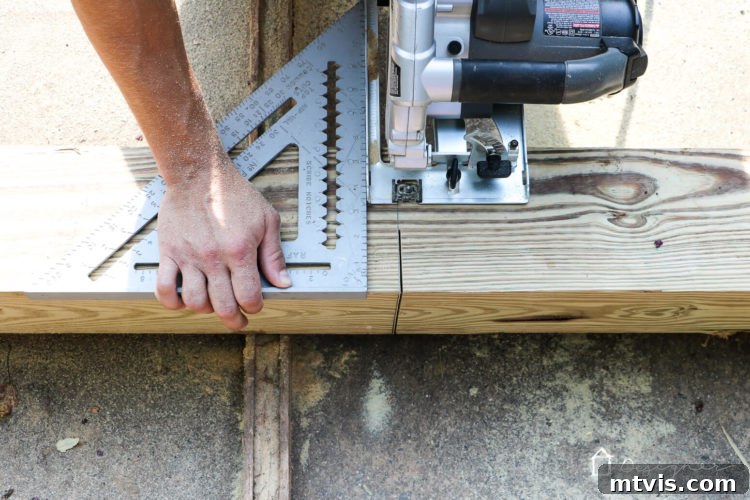
2) Precise Post Cutting. With your height determined, cut your 6×6 posts to the exact length. Due to the thickness of these posts, a circular saw is the most efficient tool. To achieve a clean cut, make a pass halfway through the post, then flip it over and complete the cut from the opposite side. Always use proper safety gear, including eye and ear protection, when operating power tools.
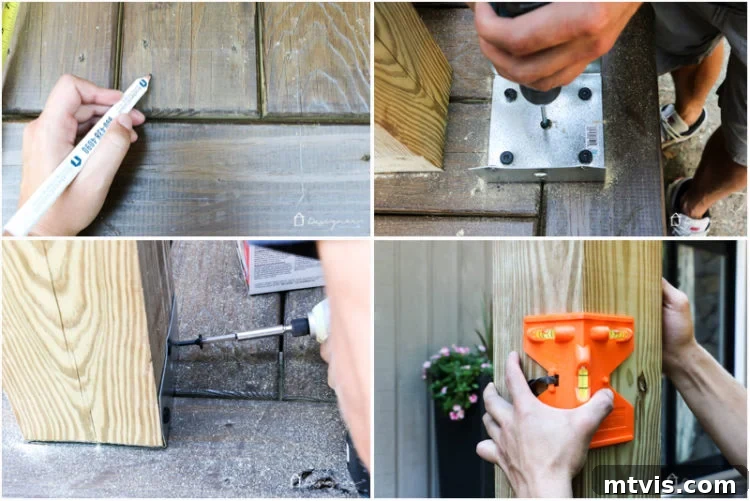
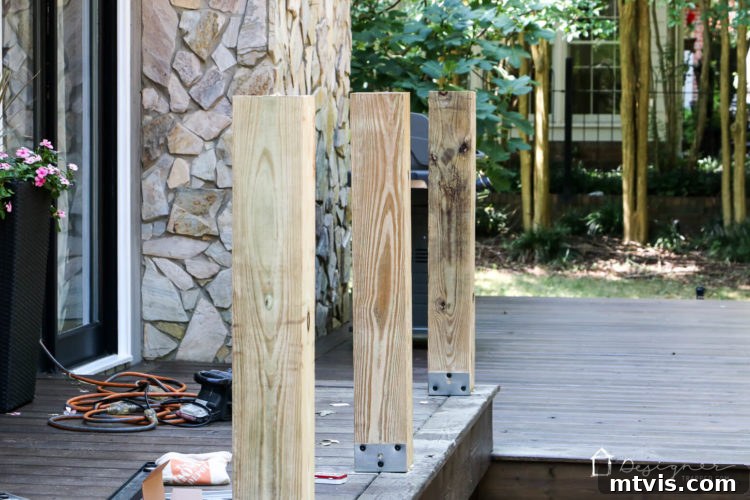
3) Secure Post Installation. Now, establish the precise spacing for your posts along your deck. Mark these positions accurately to ensure even distribution and structural balance. Using high-quality post brackets, fasten them securely to your deck structure with lag bolts, ensuring they are firmly anchored into the deck joists for maximum stability. Once the brackets are in place, insert your cut 6×6 posts and use a post level to ensure each post is perfectly plumb (vertically straight) and level with the others. This step is critical not only for the aesthetic appeal of your bar but also for its overall structural integrity and safety.
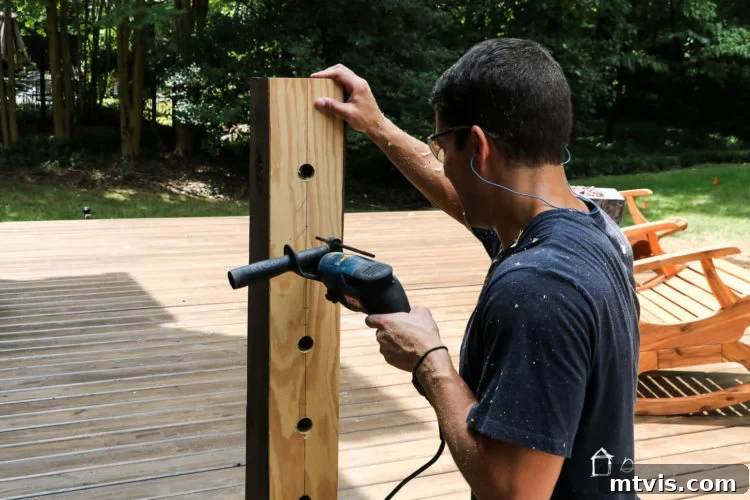
4) Creating Railing Holes with Precision. Next, determine the desired spacing for your metal conduit railings within the posts. For consistent and perfectly level railings, we highly recommend creating a simple wood jig. Use a scrap piece of wood to mark your hole placements, then drill through the jig. This jig can then be held against each post, guaranteeing that every hole drilled with your 1 1/4 inch Forstner bit is in the exact same position. This technique not only saves time but also eliminates inconsistencies, ensuring your railings are perfectly aligned and visually appealing.
5) Measuring and Cutting Conduit Railings. To determine the correct length for your metal conduit railings, accurately measure the distance between the centers of your posts. To this measurement, add an additional 1 1/2 inches. This extra length is essential for the conduit to securely insert into the pre-drilled holes in your posts, providing a strong and stable connection. Once measured, cut the conduit to length using either a hand saw equipped with a metal blade or, for a faster and cleaner cut, a metal grinder. Always wear appropriate safety gear, including gloves and eye protection, when cutting metal.
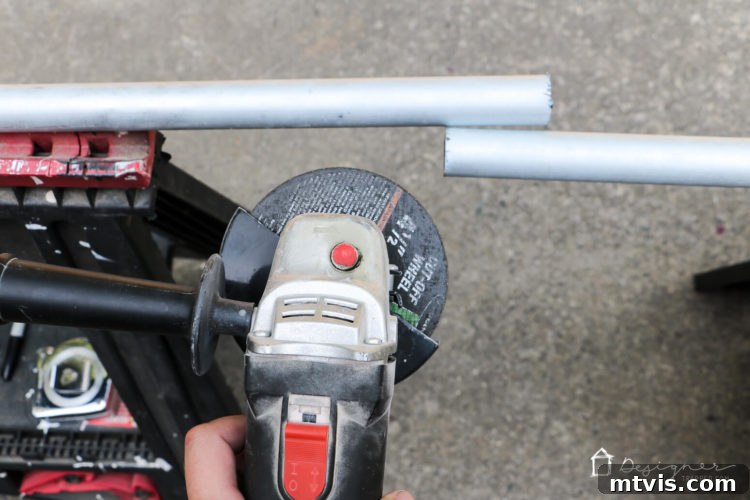
6) Installing the Metal Conduit Railings. This step requires a bit of maneuvering to ensure a snug fit. You’ll need to temporarily remove the outer end posts from their brackets. First, insert one end of a conduit railing into the pre-drilled hole of the central post (which should remain attached to the deck). Then, carefully reposition the corresponding end post, aligning it with the other end of the conduit and gently guiding the conduit into its hole as you re-secure the post. Repeat this process for both sections of your bar. For an even more secure and completely stationary railing that won’t spin, apply a bead of DAP Dynagrip Heavy Duty Construction Adhesive inside each post hole before inserting the conduit. This adhesive provides exceptional grip and durability.
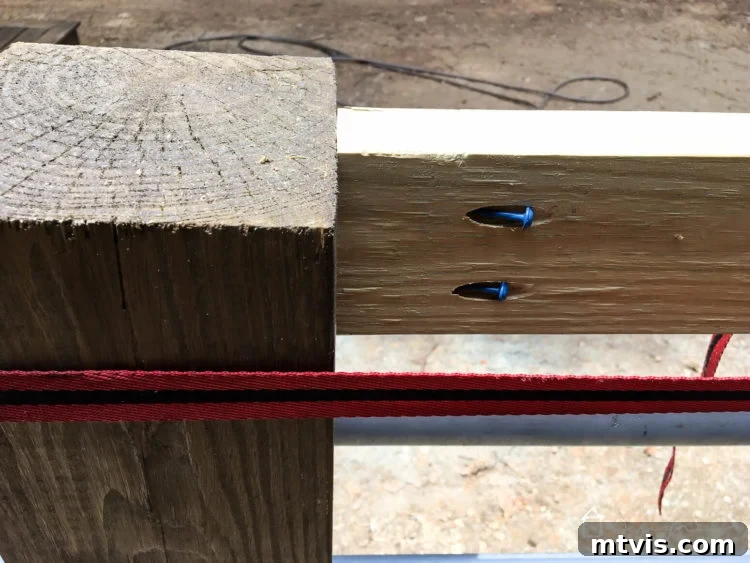
7) Adding Bar Top Support Beams. To adequately support the weight of your bar top and ensure its long-term stability, attach 2x4s horizontally between each of your posts. These 2x4s should be cut to length to fit snugly between the posts and secured using deck screws. It’s crucial that the top surface of these 2x4s is flush with the top of your 6×6 posts. This creates a continuous, level surface for the bar top to rest upon, distributing its weight evenly and preventing any sagging over time.
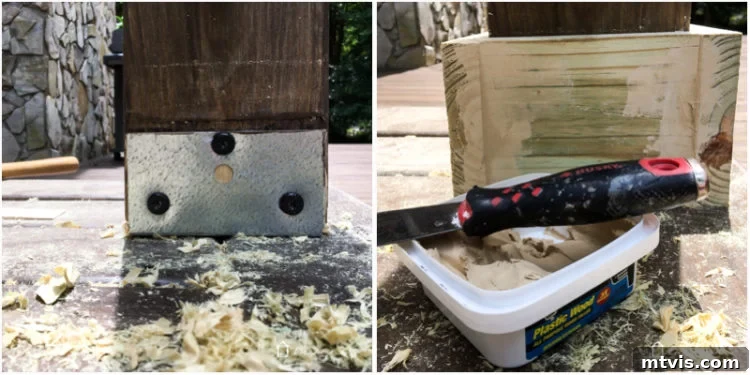
8) Finishing the Base for a Polished Look. To conceal the post brackets and give your bar base a more finished and integrated appearance, we opted to trim the base using leftover decking material. If your decking has rounded edges, you can rip them off with a table saw for a cleaner, flush edge. We used simple butt joints for the trim pieces. To achieve a seamless finish, apply DAP Plastic Wood to fill any gaps or imperfections in the joints. Once the filler is completely dry, sand it smooth for a flawless surface. Finally, stain all the wood pieces of the base with the same deck stain you used for your main deck, ensuring a cohesive and beautifully integrated look for your new outdoor bar.
Crafting the Elegant Top for Your DIY Deck Bar
The bar top is the centerpiece of your outdoor bar, combining functionality with aesthetic appeal. Our choice of a concrete overlay provides a modern, durable, and surprisingly lightweight surface. Here’s how to create it:
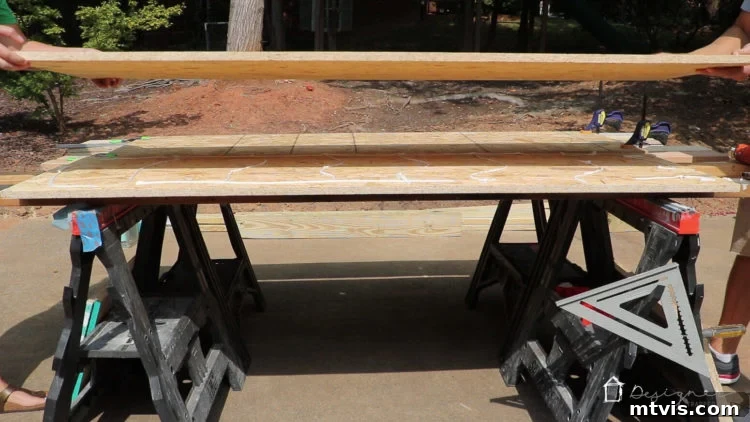
1) Preparing the Bar Top Substrate: OSB vs. Plywood. We began by cutting four sheets of OSB to size for our bar top. Since our bar was quite long, we designed it as two separate pieces that would meet directly over the middle post. To achieve a thicker profile than a single sheet of OSB provided, we sandwiched two pieces together for each section. Critical Lesson Learned: If we were to do this project again, we would unequivocally invest in thick plywood for the bar top. While OSB is more affordable, it presented challenges when applying the concrete overlay. Its uneven surface made achieving a perfectly smooth finish more difficult, and the inherent texture of OSB can be problematic for consistent concrete adhesion. Furthermore, sandwiching two pieces of OSB together created a seam that was harder to flawlessly cover, impacting the final edge. Plywood, despite a slightly higher cost, would have provided a much smoother, more stable, and easier-to-work-with base for the concrete overlay, leading to a superior outcome with less effort.
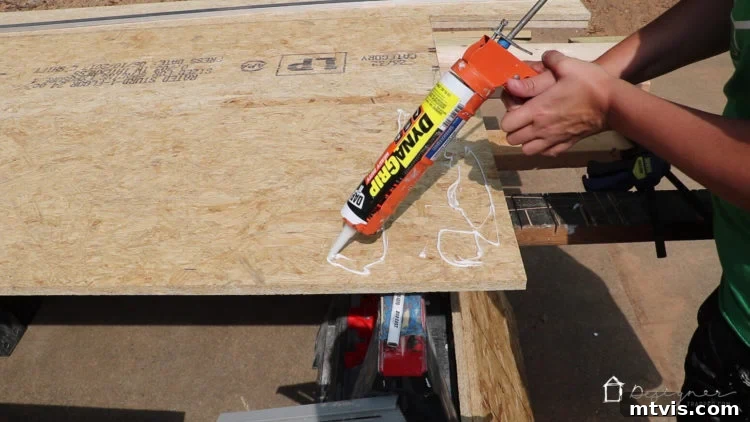
2) Adhering Substrate Layers. After cutting our OSB (or your chosen plywood) to the desired dimensions, we applied DAP Dynagrip Heavy Duty Construction Adhesive generously to the surface of the bottom piece. We then carefully positioned the top piece squarely on top, pressing firmly to ensure good contact. We allowed the adhesive to cure fully according to the manufacturer’s instructions on the tube, ensuring a solid, unified base for the concrete.
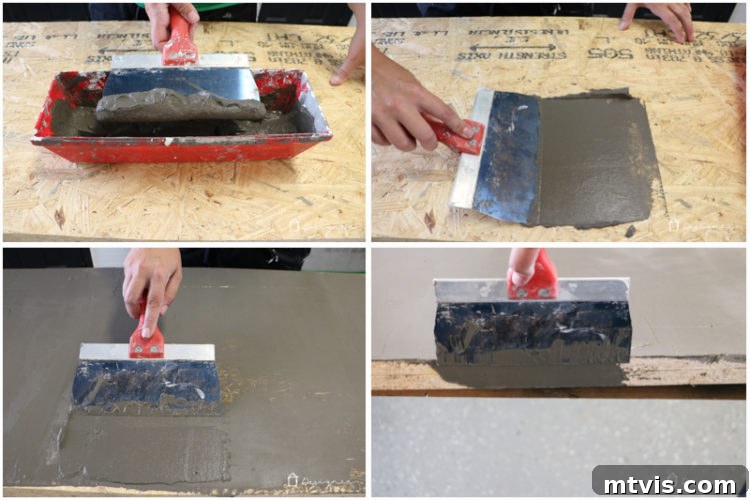
3) Applying the Concrete Overlay. Regardless of whether you chose OSB or plywood, the next transformative step is applying the concrete overlay. For a detailed guide on the technique, you can reference our specific post on applying concrete overlay for a vanity. You can start directly from step #3 in that guide, as the preliminary sanding won’t be necessary for this application. The process involves mixing the Ardex Feather Finish to a smooth, pancake-batter consistency and applying thin, even coats with your drywall taping knife. Working quickly is key, as each subsequent coat dries much faster than the first. We applied a total of four coats to achieve the desired thickness and smooth finish. The images below show me using this exact method on the OSB for our deck bar top, demonstrating the step-by-step application that brings the concrete look to life.
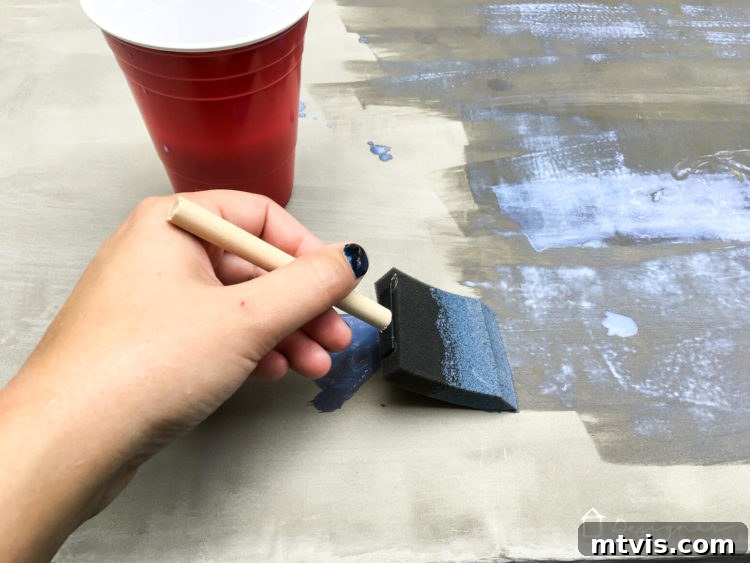
4) Sealing the Bar Top’s Underside. Once your concrete overlay is completely dry and cured, it’s crucial to apply a concrete sealer to the bottom of the bar top *before* you attach it permanently to the posts. We highly recommend using a water-based acrylic concrete sealer with a satin finish; this is the exact sealer we successfully used. This sealer provides a durable, protective layer, guards against moisture, and enhances the concrete’s appearance with a subtle sheen. When applied, the sealer will initially appear milky, but it dries to a perfectly clear finish. Follow the product directions meticulously: apply thin, even coats, avoid creating puddles, and gently smooth out any air bubbles as you go. We applied two coats to ensure comprehensive protection for the underside.
5) Permanently Attaching the Bar Top. After the sealer on the bottom of the bar top has dried, apply a generous amount of DAP Dynagrip Heavy Duty Construction Adhesive to the very top surface of each supporting post. Carefully lift and position your bar top piece (or pieces, if you’ve made two) onto these adhesive-covered posts. While clamps can be used to hold it in place while the adhesive cures, we found it unnecessary due to the bar top’s substantial weight and the exceptional instant grab properties of DAP Dynagrip Heavy Duty. IMPORTANT: DO NOT use screws to attach the bar top through the concrete overlay! This will almost certainly cause the concrete to crack. Construction adhesive, especially a high-performance product like DAP Dynagrip Heavy Duty, is the only appropriate method for securing your concrete bar top, ensuring a strong, flexible, and crack-free bond.
6) Optional: Blending the Center Seam. If your bar top, like ours, required two pieces to achieve the total length, you might consider applying one final, thin coat of concrete overlay across the entire top surface after both pieces are securely in place. This extra step helps to seamlessly blend the central seam where the two pieces meet, creating the appearance of a single, continuous concrete slab. While not strictly crucial for functionality, it significantly enhances the aesthetic appeal and gives your bar top a more polished, monolithic finish.
7) Final Sealing for Durability. To complete your bar top, apply three robust coats of your chosen concrete sealer (the same one used on the bottom) to the entire top surface and all exposed edges of the bar. This comprehensive sealing is vital for protecting the concrete from moisture, UV damage, stains, and general wear and tear from outdoor exposure. Ensure each coat dries thoroughly according to the product’s instructions before applying the next, building up a resilient protective layer.
And there you have it! The concrete overlay technique is an ingenious solution for bar tops. It provides the coveted, industrial-chic look of solid concrete without the impossible weight, making installation much more manageable. We had considered pouring a traditional concrete slab, but we are immensely glad we chose this overlay method instead; a solid slab would likely have necessitated additional structural support posts to bear the immense weight. However, please note an important characteristic: your bar top may exhibit some darker spots when exposed to rain or heavy moisture. This is almost an unavoidable reality due to the intricate nature of sealing an overlay with various joints and seams. The good news is these darker spots typically dry out and disappear once the sun returns. This minor aesthetic variation doesn’t bother us, but if you are a meticulous perfectionist, a pre-cast concrete slab might be a more suitable (albeit heavier and more expensive) alternative. Additionally, while this DIY bar top is durable and cost-effective, we don’t anticipate it will last two decades like a professional-grade slab. Given its affordability, we’re perfectly content with the understanding that it may need eventual replacement or refurbishment down the line.
So, what’s your verdict? Isn’t this outdoor bar utterly fantastic?! Take a final look at our finished DIY deck bar, ready for countless hours of enjoyment.
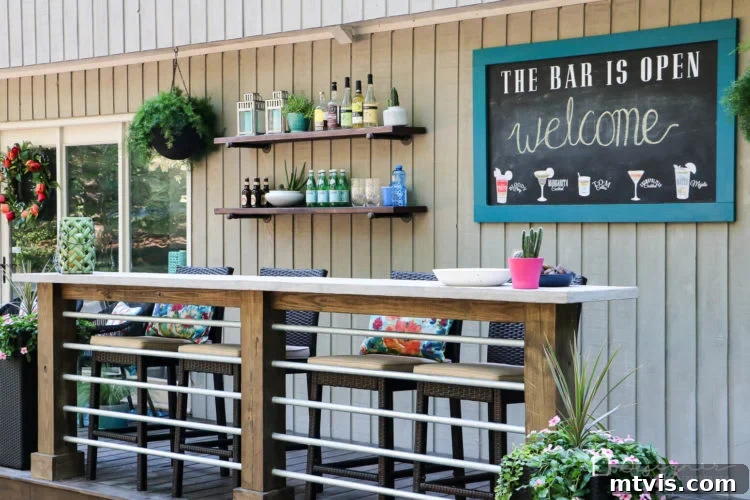
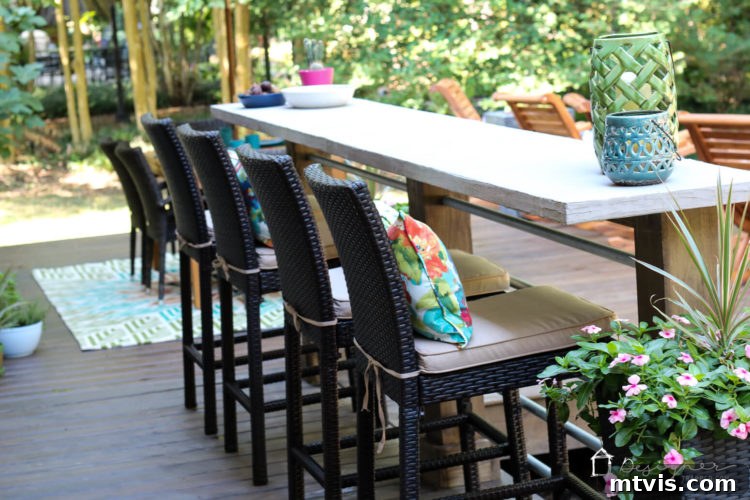
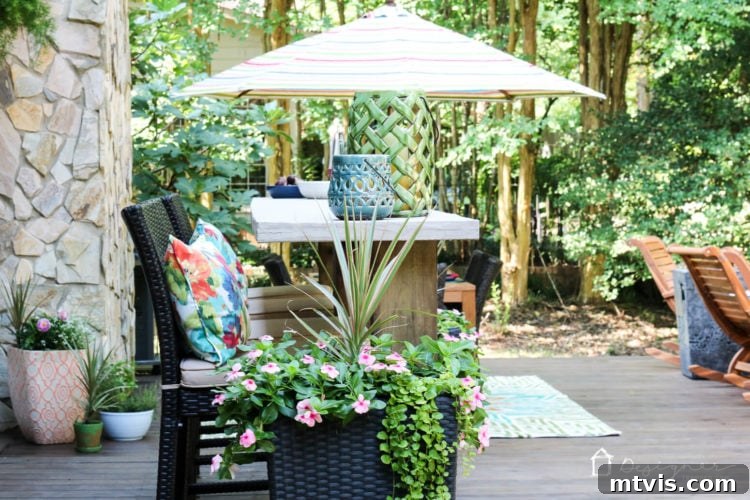
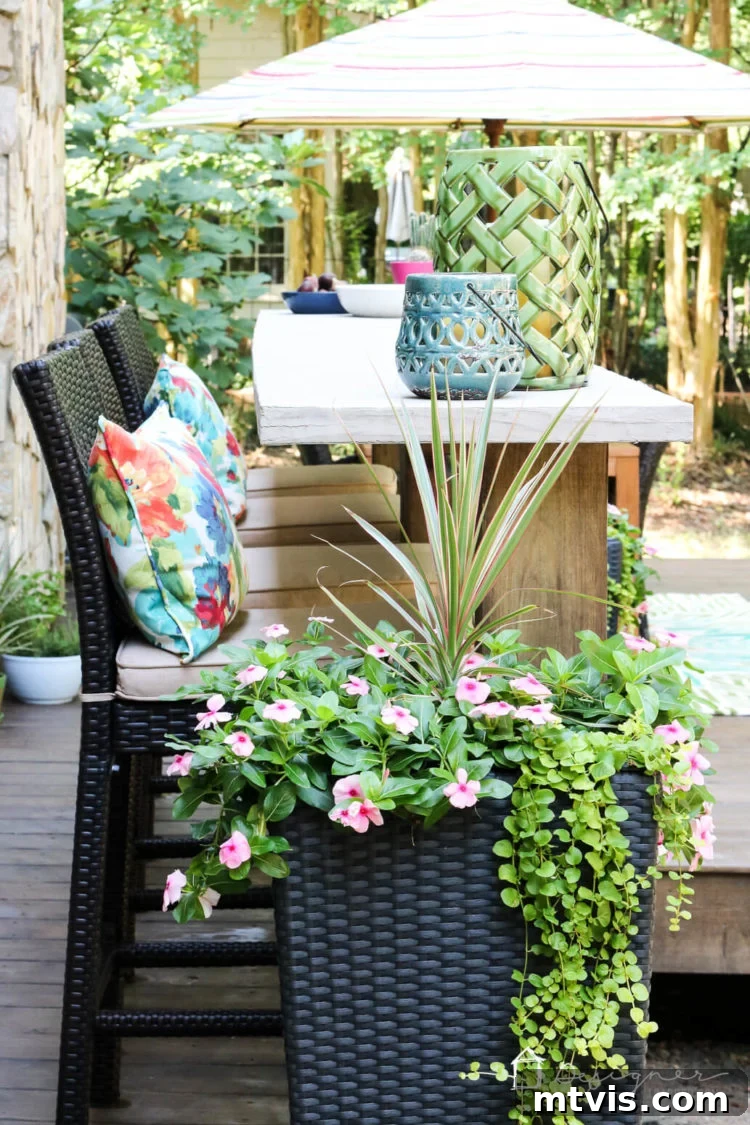
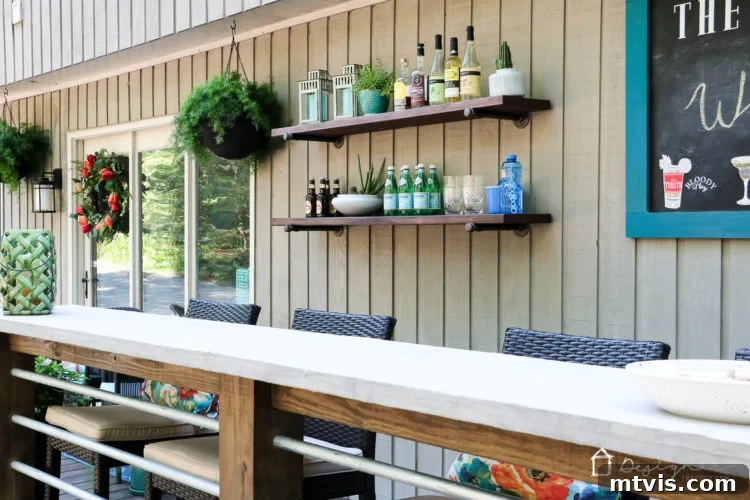
We are truly overjoyed with the final result! This deck bar has not only added immense functionality to our outdoor space but has also become a stylish focal point. It’s a testament to how accessible and rewarding DIY projects can be. If you’re eager to see how this bar fits into the bigger picture, you can explore the full scope of our deck makeover and reveal in this detailed post. We hope this tutorial has inspired you to take on your own outdoor bar project. If you’ve found this DIY outdoor bar project helpful and inspiring, please consider saving it to Pinterest or sharing it on Facebook so others can discover and enjoy it too!
More OUTDOOR IDEAS
SEE ALL outdoor POSTS
-
Fire Pit Ideas for Every Outdoor Space
-
How to Make a DIY Outdoor Chandelier
-
Modern DIY Garden Trellis
-
DIY Outdoor Electrical Box Cover
-
DIY Diamond Wire Trellis for a Vine
-
A Complete Review of Vego Garden Beds: Pros, Cons, and Everything In-between
Are you wondering how I approach transforming rooms and spaces throughout our home, consistently achieving these kinds of stunning results? Discover my proven method in Designer in a Binder® – it’s a simple, affordable, and incredibly effective way to decorate your home like a pro.
For exclusive content, behind-the-scenes sneak peeks, and even more home decor and DIY inspiration, be sure to subscribe to our newsletter before you leave! Join our community and never miss out on our latest projects and expert tips.