
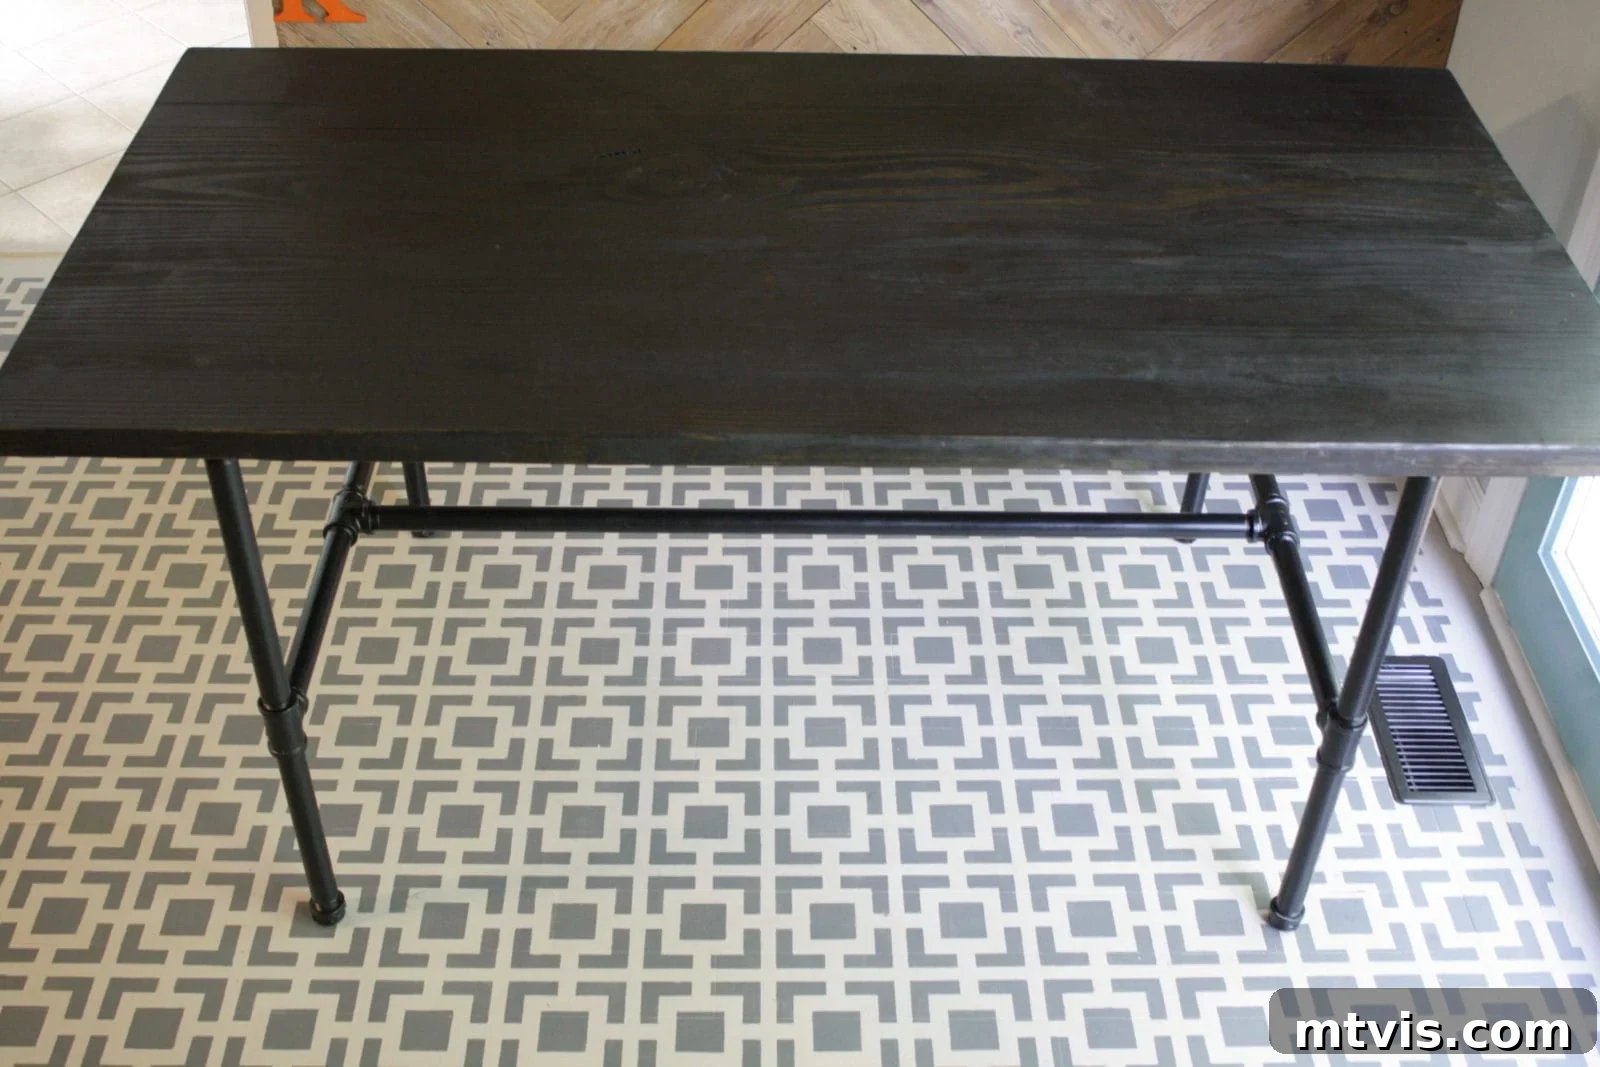
Build Your Own High-End Industrial Pipe Dining Table & Save Big!
Welcome, DIY enthusiasts! We’ve been absolutely delighted by the overwhelming compliments on the custom industrial pipe table we crafted for our new eat-in kitchen area. Today, we’re thrilled to share every detail of how we brought this vision to life. If you’re dreaming of a stylish, durable, and completely personalized dining table that rivals high-end designs but comes with a budget-friendly price tag, you’re in the right place. This comprehensive guide will walk you through each step of building your own magnificent industrial pipe table.
The Inspiration: Achieving Luxury Design Without the Luxury Price
Like many who appreciate quality craftsmanship and elegant design, I often find myself admiring pieces from renowned furniture retailers. Our inspiration for this particular project came from one of my absolute favorite stores: West Elm. I instantly fell in love with their Workshop Table, a piece that beautifully blended raw industrial charm with sophisticated modern aesthetics. Its robust construction and minimalist design seemed perfect for our evolving kitchen space, promising to be both functional and a stunning focal point.
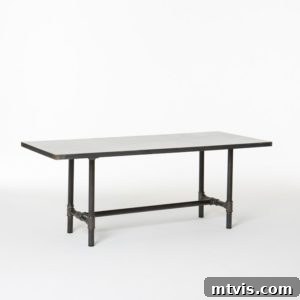
However, the reality of its price tag quickly set in. The large size of the West Elm Workshop Table retailed for an eye-watering $1,999.00. While the quality and design were undeniably appealing, this cost was simply not sustainable for our budget-conscious kitchen renovation. We firmly believe that a beautiful home doesn’t require an exorbitant spend. This realization fueled our determination to replicate that coveted high-end look through a DIY approach, proving that with a little creativity and effort, significant savings are achievable without compromising on style or quality.
Your Custom Industrial Pipe Table: High-End Look, Astounding Savings
Undeterred by the price, we embarked on building our own custom industrial pipe table, and the outcome exceeded all expectations. Not only did we successfully capture the sophisticated aesthetic we admired, but we did so for an incredible cost of less than $200.00 – approximately $180.00, to be exact! This staggering saving of about $1,800.00 is a powerful testament to the value of DIY. It allows you to invest your savings elsewhere, perhaps in other home improvements or experiences.
Despite a few minor setbacks and learning curves during our process (which we’ll openly share to help you avoid them!), we can confidently say that this project is surprisingly accessible. It’s a fantastic undertaking for intermediate DIYers and even confident beginners looking to challenge themselves. By following our detailed instructions, you’ll create a durable, stylish, and completely unique industrial dining table that will serve as a cherished centerpiece in your home for years to come. The satisfaction of saying, “I made that!” is truly priceless.
Please note: This post contains some affiliate links. Click here for my full disclosure policy. These links are provided for your convenience and help support our blog at no additional cost to you, should you choose to make a purchase through them. We only recommend products and tools we have personally used and trust.
Comprehensive DIY Industrial Pipe Table Tutorial
Essential Materials & Tools for Your Custom Pipe Table:
Gathering all your materials and tools before you begin is a crucial step for a smooth and efficient building process. Here’s everything you’ll need to create your high-end industrial pipe table:
- Kreg Jig: This indispensable tool is used to create strong, concealed pocket-hole joints, ensuring a seamless and sturdy connection for your tabletop boards without visible fasteners.
- Galvanized pipe: This forms the robust industrial base of your table. While we used galvanized pipe for its distinctive silver-grey aesthetic, black iron pipe is an excellent alternative if you prefer a darker base without the need for painting.
- Black spray paint: If you opt for galvanized pipe but desire a dark, industrial look, a high-quality, rust-resistant matte or satin black spray paint will achieve this.
- (4) 2 x 10 x 8 pine boards: These boards will form your tabletop. Pine is a popular choice for its affordability, workability, and ability to take stains beautifully, allowing for a wide range of finishes. Other wood types like oak or maple can also be used for different grain patterns and increased durability.
- Wood stain: Essential for customizing the look of your tabletop. We achieved a rich, sophisticated dark finish using this black wood stain, which perfectly complements the industrial pipe base.
- Wood screws: Various lengths will be needed for assembling the tabletop components and securely attaching the finished top to the pipe base.
- Table saw {or circular saw and straight edge}: Critical for making precise, straight “rip” cuts along the length of your wood boards, ensuring perfectly square edges for tight, seamless joints.
- Miter saw {or circular saw and straight edge}: Used for making accurate cross-cuts to precisely size your tabletop boards to the desired length.
Detailed Cut List for Your Industrial Pipe Table Base:
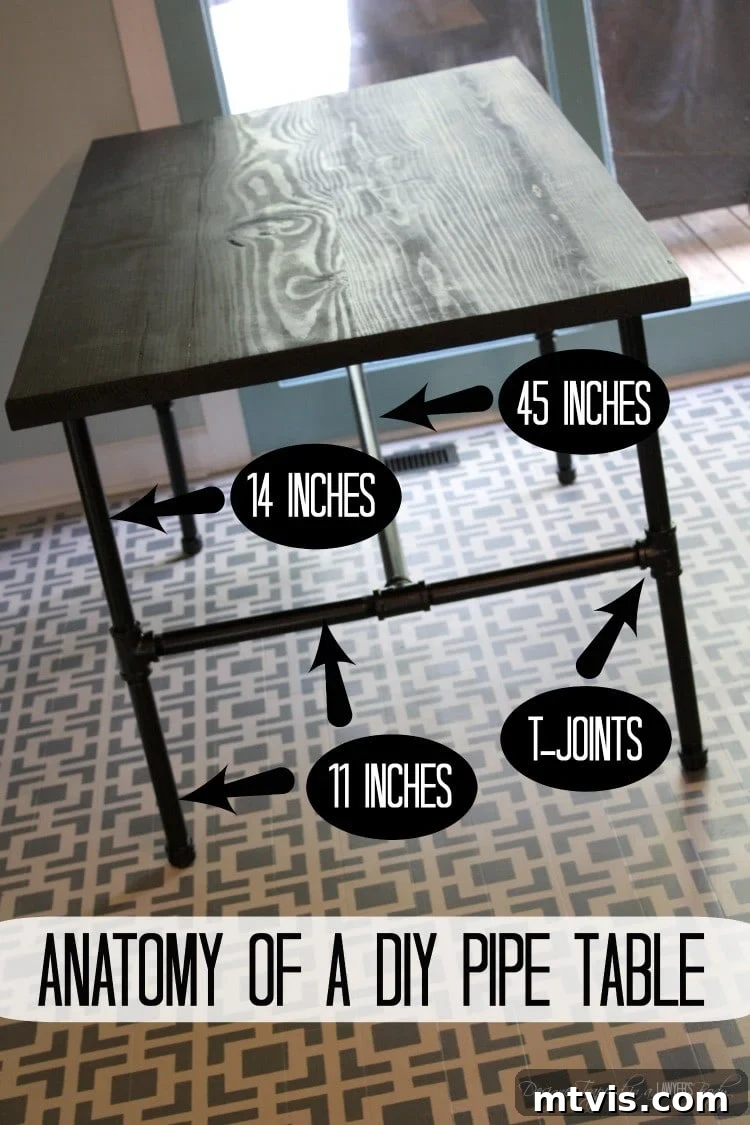
All plumbing components specified below are 1 inch in diameter, which provides exceptional stability and a substantial, authentic industrial appearance. It is vital to note that all pipe lengths listed *already include* the length consumed by threading into the fittings. You do not need to add any extra length to account for the threaded portions. Precision in these measurements is paramount for a perfectly balanced and structurally sound table base.
- (8) 11-inch lengths of pipe: These pieces will form the vertical connectors and horizontal cross-supports within your leg assemblies.
- (4) 14-inch lengths of pipe: These will primarily serve as the main vertical posts for the table legs, contributing to the overall height.
- (1) 45-inch length of pipe: This longer piece will act as the central horizontal spine, connecting the two main leg structures and providing crucial stability.
- (6) T-joints: These fittings are essential for creating the branched connections required for the table’s leg design.
- (4) Floor flanges: These wide, flat circular fittings will be mounted at the very top of each leg, providing a stable and secure surface for attaching the wooden tabletop.
- (4) Galvanized iron caps: These decorative caps will be threaded onto the very bottom of each leg, offering a finished look and protecting your floors from the pipe edges.
**Important Advice on Pipe Sourcing: Navigating the Cutting & Threading Process:**
One of the most crucial, yet often underestimated, steps in building your industrial pipe table is acquiring the pipes cut to your precise lengths and, most importantly, correctly threaded. Major home improvement stores like Home Depot or Lowe’s typically offer this service, but it’s vital to approach it with patience and strategy.
Our own experience highlights potential challenges. Joe’s trip to Home Depot for pipe cutting turned into an unexpected three-hour marathon. First, the store’s threading machine experienced a malfunction, requiring repairs. Once fixed, a significant number of the “correctly” threaded pipes still didn’t fit properly when he tested them with a t-joint – a foresight that saved us immense frustration later. This necessitated multiple re-threading attempts. Our key takeaway and advice to you:
- **Allow Ample Time:** Do not rush this step. Plan to spend a considerable amount of time at the store, especially if you have many cuts and threads.
- **Go During Off-Peak Hours:** Weekday mornings or late evenings are often less busy, potentially reducing wait times.
- **Test On-Site:** This is non-negotiable. Bring one of each type of fitting (a t-joint, a flange, a cap) with you. As each pipe is threaded, immediately test it by screwing a fitting onto it. Ensure it threads smoothly and securely. If it doesn’t, politely ask for it to be re-threaded until it does. This simple step can save you countless headaches and wasted trips back to the store.
- **Communicate Clearly:** Provide your cut list to the associate clearly, and double-check their understanding before they begin cutting.
A little patience and diligence at this stage will guarantee a much smoother assembly process for your table base.
DIY Industrial Pipe Table Base Assembly Steps:
With your pipes expertly cut and threaded, assembling the base is a satisfying process, much like building a large-scale construction set. Follow these steps for a sturdy and well-constructed foundation.
1) Clean Your Pipe Components Thoroughly:
Before you begin threading anything, it is absolutely essential to meticulously clean all grime, oil, and protective grease off every single pipe and fitting. Industrial pipes often come coated with a heavy, oily residue that can make assembly messy, attract dirt, and severely impede paint adhesion if you plan to color your base. Use a strong degreaser (like mineral spirits, rubbing alcohol, or a heavy-duty household cleaner) and plenty of durable rags. This step is critical for achieving a clean, professional finish, especially if you’ll be painting. Allow everything to dry completely before proceeding.
2) Assemble the Pipe Structure Systematically:
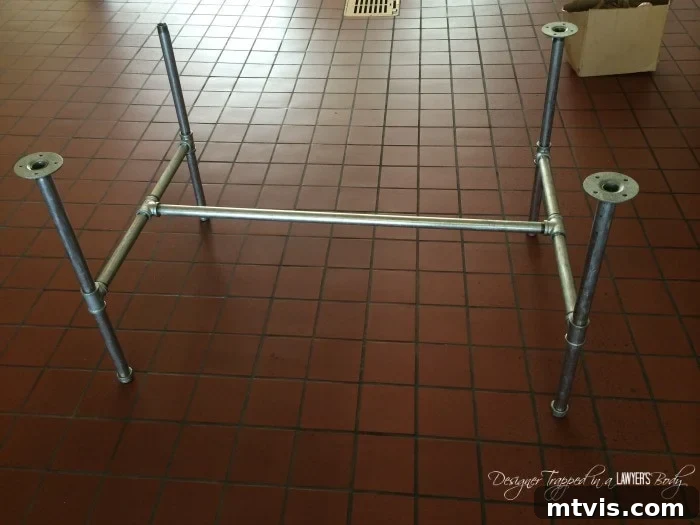
The assembly process for the pipe base is intuitive, resembling an adult-sized building block project. For guidance, you can reference the “Anatomy of a DIY Pipe Table” diagram below, which illustrates where each specific pipe length and fitting connects. Begin by loosely threading all your pieces together. This initial loose assembly allows for flexibility and minor adjustments to ensure everything aligns correctly before final tightening.
**Crucial Orientation Tip:** It’s important to visualize the final structure from the outset. The **floor flanges** are designed to be at the *top* of your table’s leg structure. These broad, flat fittings provide the stable surface onto which your wooden tabletop will be securely fastened. Conversely, the **galvanized iron caps** will be threaded onto the *bottom* of the legs, offering a clean, finished appearance and protecting your floor surfaces. This orientation might seem counter-intuitive at first glance, but it’s essential for the table’s stability and how the tabletop is anchored.
3) Finishing Your Pipe Base (Optional Painting & Durability):
If you’ve chosen galvanized pipe but prefer the sleek, dark aesthetic of a black industrial base, this is the ideal stage to spray paint your fully assembled pipe structure. We opted for this approach to achieve our desired look. However, based on our experience after three years of daily use, including enthusiastic bumps from metal kitchen chairs, we’ve observed some chipping of the paint.
For superior durability and a truly authentic dark industrial finish that won’t chip, we strongly recommend using black iron pipe if your budget and availability allow. It naturally provides a dark finish. If you proceed with painting galvanized pipe, invest in a high-quality metal-specific primer and a robust, rust-inhibiting spray paint designed for metals. Applying multiple thin, even coats, with adequate drying time between each, will yield the best adhesion and longevity. For extreme durability, you might consider professional powder coating, though this adds significantly to the cost.
Crafting Your DIY Industrial Pipe Tabletop: Steps for a Beautiful & Durable Surface
The tabletop is the visual anchor of your industrial pipe table, and crafting it with care will ensure a stunning, long-lasting surface. Here’s how to achieve a professional-looking wood finish.
1) Precision Wood Board Preparation:
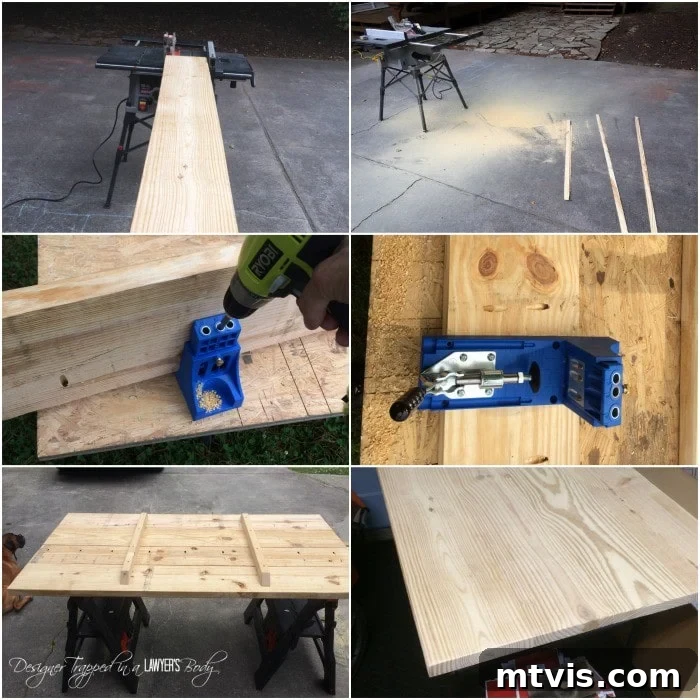
Achieving a seamless, gap-free tabletop begins with perfectly straight and square edges on your wood boards. Using your table saw (or a circular saw paired with a reliable straight-edge guide), you’ll need to “rip” down one side of each of the *outer* tabletop boards. For any *middle* board(s) in your design, you’ll rip down both long sides. This meticulous process eliminates factory rounded edges and creates pristine, square mating surfaces. This step is absolutely crucial for ensuring that when the boards are joined, they fit together tightly and beautifully, contributing to both the structural integrity and the polished aesthetic of your finished tabletop. While we encountered a few “user errors” here initially, patience and careful setup will lead to excellent results.
2) Accurate Board Length Cuts:
Once your edges are perfectly prepared, it’s time to cut your boards to their final length. Using a miter saw (or a circular saw with a straight edge), carefully measure and cut all your boards to the desired dimension. Our tabletop boards were cut to a generous 66 inches long, providing ample dining space. Ensure all cuts are perfectly square and consistent across all boards for a neat, cohesive tabletop. Take your time with measurements – “measure twice, cut once” is excellent advice here.
3) Join Your Tabletop Boards Securely:
For a robust and virtually invisible joint system, we highly recommend using a Kreg Jig. This ingenious tool allows you to drill pocket holes at an angle into the edges of your boards, creating exceptionally strong screw joints that pull the wood tightly together. We spaced our pocket holes approximately every 6-8 inches along the joining edges for maximum strength and stability. As an additional layer of reinforcement, we also integrated two braces made from scrap wood. Joe carefully ripped these pieces down to size, cut them to length, and then screwed them directly to the underside of the tabletop, spanning across the joints. This extra bracing significantly enhances the tabletop’s stability and helps prevent any potential warping or cupping over time.
4) Sanding and Staining Your Tabletop for a Flawless Finish:
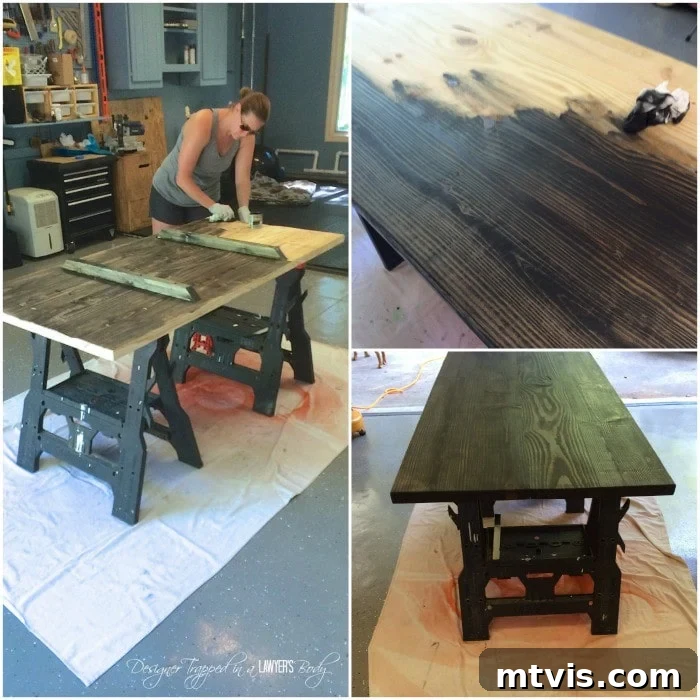
Once your tabletop is fully assembled and braced, a thorough sanding process is crucial to achieve a smooth, professional finish and prepare the wood for staining. Begin with a medium-grit sandpaper (e.g., 100 or 120-grit) to remove any glue squeeze-out, minor imperfections, or machine marks. Gradually progress to finer grits (e.g., 150, 180, and finally 220-grit) for a silky-smooth surface that is perfectly receptive to stain. Always sand with the grain of the wood.
For the stain, we achieved our desired rich, dark finish using Minwax Polyshades Gloss Wood Stain in Classic Black. This product is a fantastic choice as it combines stain and polyurethane finish into one, significantly reducing the number of steps and overall drying time. We applied two thin, even coats, ensuring ample drying time between each coat as per the manufacturer’s instructions. Always test your chosen stain on a scrap piece of the same wood first to confirm you achieve your desired color and finish before applying it to your tabletop.
5) Final Assembly: Securely Attach Tabletop to Base:
Once your stain has fully dried and completely cured (this can take anywhere from 24-72 hours, depending on humidity and product, so always follow product guidelines), it’s time for the final assembly. Carefully position your beautifully finished tabletop onto your assembled pipe base. Ensure the tabletop is perfectly centered and aligned, with the four floor flanges on the pipe legs evenly distributed underneath it. Using sturdy wood screws of appropriate length (be careful not to use screws that are too long and will pierce through the top of your table!), attach the tabletop securely to each of the four floor flanges. Pre-drilling small pilot holes into the wood will prevent any splitting. Double-check that all connections are tight and stable, giving your table its final robust form.
The Finished Masterpiece: Your Custom Industrial Dining Table!
And there you have it! Your incredibly stylish, robust, and completely custom DIY industrial pipe table is complete. We absolutely adore our finished table; it’s more than just a piece of furniture—it’s a proud testament to what can be achieved with thoughtful planning, a little effort, and a desire to create. The dimensions we chose are absolutely perfect for our kitchen space, creating a comfortable, inviting, and highly functional eat-in area that serves our family beautifully.
Beyond its aesthetic appeal, the finish on the wood top has proven to be amazingly durable. Considering it’s a high-traffic surface that undergoes multiple cleanings every single day, it has held up exceptionally well against spills, scratches, and the inevitable wear and tear of daily life. This level of durability makes it an ideal choice for busy families and frequent entertaining, ensuring it remains a beautiful and practical addition to your home for many years.
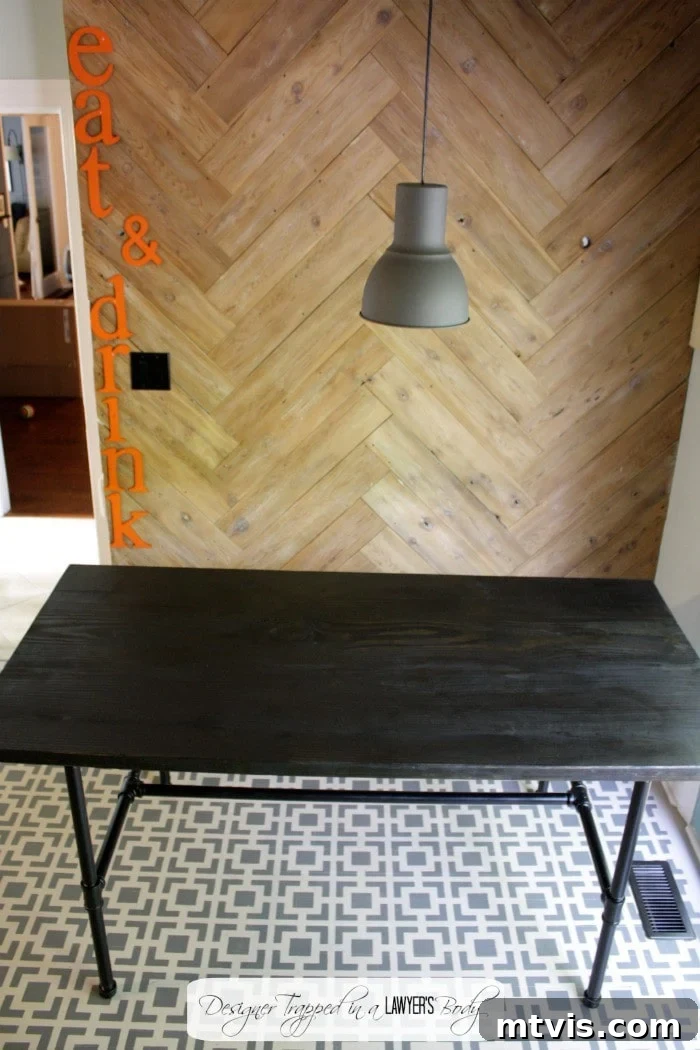
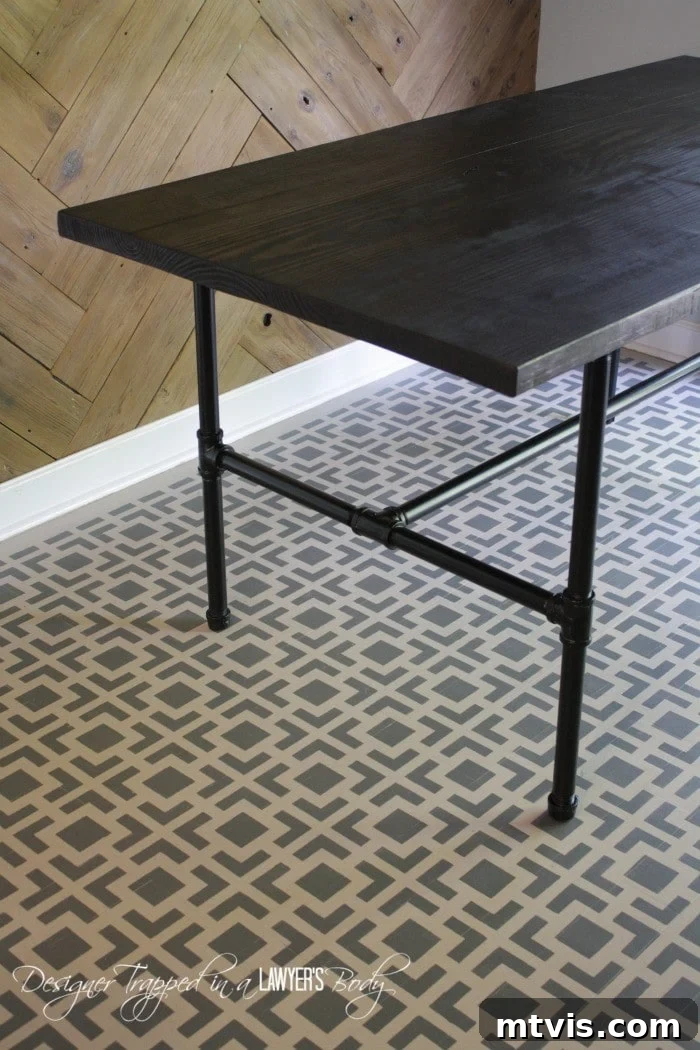
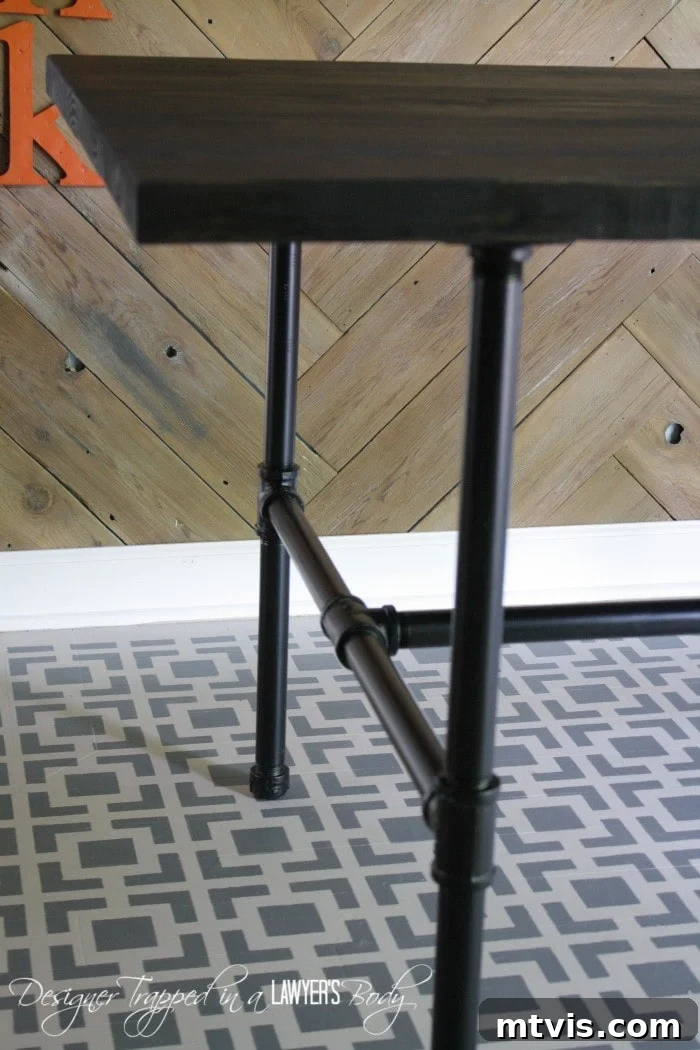
By taking on this DIY project, we proudly saved an incredible $1,800.00 compared to purchasing the West Elm table that inspired us! This custom-built industrial pipe table became the perfect final flourish for our entire kitchen makeover, a renovation that itself was completed for less than $700.00. If you’re eager to see the full transformation of our budget-friendly kitchen, you can explore Part 1 of the reveal here and Part 2 here.
Furthermore, if you’re currently planning a kitchen refresh, don’t miss our detailed, money-saving guide on how we successfully painted our kitchen cabinets without the tedious steps of sanding or priming! (And for an updated look at our absolutely stunning, fully renovated kitchen in its current splendor, you can see it here.)
What are your thoughts? Are you feeling inspired to take on this rewarding DIY project and create a gorgeous, custom industrial pipe table that perfectly complements your home? We’d absolutely love to hear about your plans and, even better, see your finished creations!
Before you embark on your next amazing DIY adventure or home design project, be sure to become a VIP for FREE! You’ll gain exclusive, instant access to our comprehensive digital library filled with design guides, practical tips, and resources, all meticulously crafted to help you design spaces you truly adore and achieve your home decor dreams. Subscribe today to unlock all these benefits and elevate your home design journey!

[mv_create key=”1″ type=”list” title=”Most Popular Projects” thumbnail=”