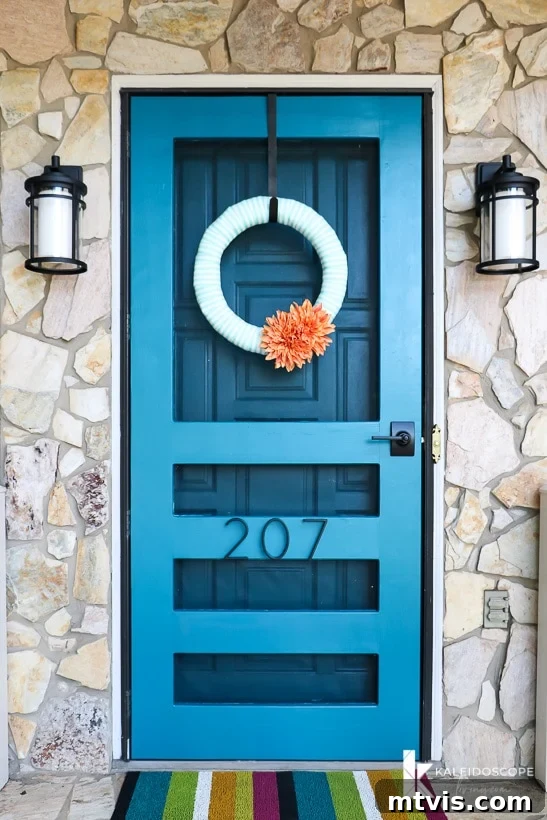
Screen doors are more than just functional barriers; they are an invitation for fresh air, natural light, and a touch of charm to your home. They expertly keep unwanted pests out while allowing cool breezes to flow in, creating a more comfortable and inviting indoor environment. Beyond their practical benefits, a well-designed screen door can significantly enhance your home’s curb appeal, adding character and visual interest to your entryway. However, finding the perfect screen door in stores can often be a frustrating experience. You might be constrained by a limited budget, or simply unable to find a design that truly complements your home’s unique style.
The good news is that you don’t have to compromise! You can design and build your very own custom DIY screen door. This project empowers you to create a door that is not only prettier and sturdier but also more affordable than many mass-produced options. In this comprehensive guide, we’ll walk you through the step-by-step process of constructing a high-quality wooden screen door that will stand the test of time and perfectly match your aesthetic preferences.
Table of Contents
With spring in full swing and summer just around the corner, now is the perfect time to consider adding a high-quality screen door to your home. Imagine being able to throw open your main door, welcoming in the invigorating fresh air and natural sunlight, all without the annoyance of insects, leaves, or other outdoor debris making their way inside. A custom screen door allows you to truly embrace indoor-outdoor living, enhancing your comfort and enjoyment during warmer months.
Our own experience led us down the DIY path. We desperately wanted to enjoy the refreshing spring air, but our old, dilapidated storm door was simply not up to the task. When we embarked on finding a high-quality, aesthetically pleasing screen door for our historic home, we quickly realized the limitations of retail options. The doors we liked the look of often felt flimsy and cheaply made. Conversely, the sturdy options were typically unattractive, lacking the style we envisioned for our home’s entryway. This dilemma solidified our decision: we would build our own custom screen door.
The result? A beautiful, robust, and perfectly tailored screen door that we absolutely adore. This project is ideal for those with some basic woodworking knowledge and a few DIY projects under their belt. While it’s considered an intermediate-difficulty build, we’re confident that with this detailed tutorial, you’ll be able to tackle it successfully and create a stunning addition to your home.
This post contains affiliate links for your convenience. Click here for my full disclosure policy.
How to Build a Custom DIY Screen Door
(Note: Any previously available printable instructions or forms have been removed to adhere to the HTML-only output request. Please follow the detailed steps below.)
Materials and Tools You’ll Need
Before you begin your DIY screen door project, gathering all the necessary materials and tools is crucial. Having everything on hand will ensure a smooth and efficient building process. Here’s a comprehensive list of what we used, along with some insights to help you make informed choices:
- (3) 2x6x8 Lumber Pieces: These form the main frame components. For outdoor projects, consider rot-resistant wood like cedar, redwood, or pressure-treated pine. Ensure the pieces are straight and free from major warping or knots for the best results.
- (1) 2x8x8 Lumber Piece: This will be used for the wider bottom rail of your screen door, providing extra durability and a classic look.
- Screening Material: Choose a durable type such as fiberglass (most common and flexible), aluminum (more rigid), or pet-resistant screen for homes with animals. Measure your opening accurately to determine the amount needed, allowing extra for stretching and trimming.
- Screen Molding: We highly recommend purchasing ready-made 1/4 x 3/4 inch screen molding from your local home improvement store. This will save you significant time and effort compared to routing your own molding.
- Wood Putty or Spackle: Essential for filling any minor gaps, imperfections, or screw holes for a smooth, professional finish.
- Sandpaper: Various grits (e.g., 80-grit for initial shaping, 120-grit for smoothing, 220-grit for fine finishing) to prepare the wood for painting.
- Staple Gun and Staples: For securely attaching the screening material to the door frame. An electric or pneumatic staple gun will make this task much easier.
- Table Saw: Ideal for ripping (cutting along the grain) boards to specific widths, ensuring precise and consistent dimensions for your door frame.
- Circular Saw or Miter Saw: For making accurate crosscuts (cutting across the grain) to achieve the correct lengths for all your wood pieces. A miter saw offers excellent precision for angled cuts if needed, though most cuts here are straight.
- Router (with a Rabbeting Bit): Necessary for creating the rabbet groove on the back side of the door, which will house the screening and molding. A 3/8-inch or 1/4-inch rabbeting bit is commonly used.
- Kreg Pocket Hole Jig and Kreg Pocket Hole Screws: These tools create strong, concealed joints, resulting in a cleaner and more professional-looking door frame.
- Kreg Wood Plugs: Used to hide the pocket holes after assembly, ensuring a flawless surface for painting.
- Utility Knife: Indispensable for trimming excess screening material.
- Wood Glue: For extra strength at all joints, creating a more robust and lasting door.
- Measuring Tape and Pencil: For accurate measurements and markings.
- Clamps: Essential for holding wood pieces securely in place during assembly, ensuring squareness and tight joints.
- Chisel: For squaring off the corners of the rabbeted groove after routing.
- Painter’s Tape: To protect the screening material when painting the back of the door.
- Exterior-Grade Paint and Primer: Choose a color that complements your home’s exterior.
- Door Hardware: Hinges, a handle or doorknob, and any desired decorative elements like address numbers.
Step-by-Step DIY Screen Door Tutorial
Time needed: 5 hours (excluding drying time)
Follow these detailed steps to craft your own beautiful and durable custom screen door!
- 1. Determine Your Door Dimensions
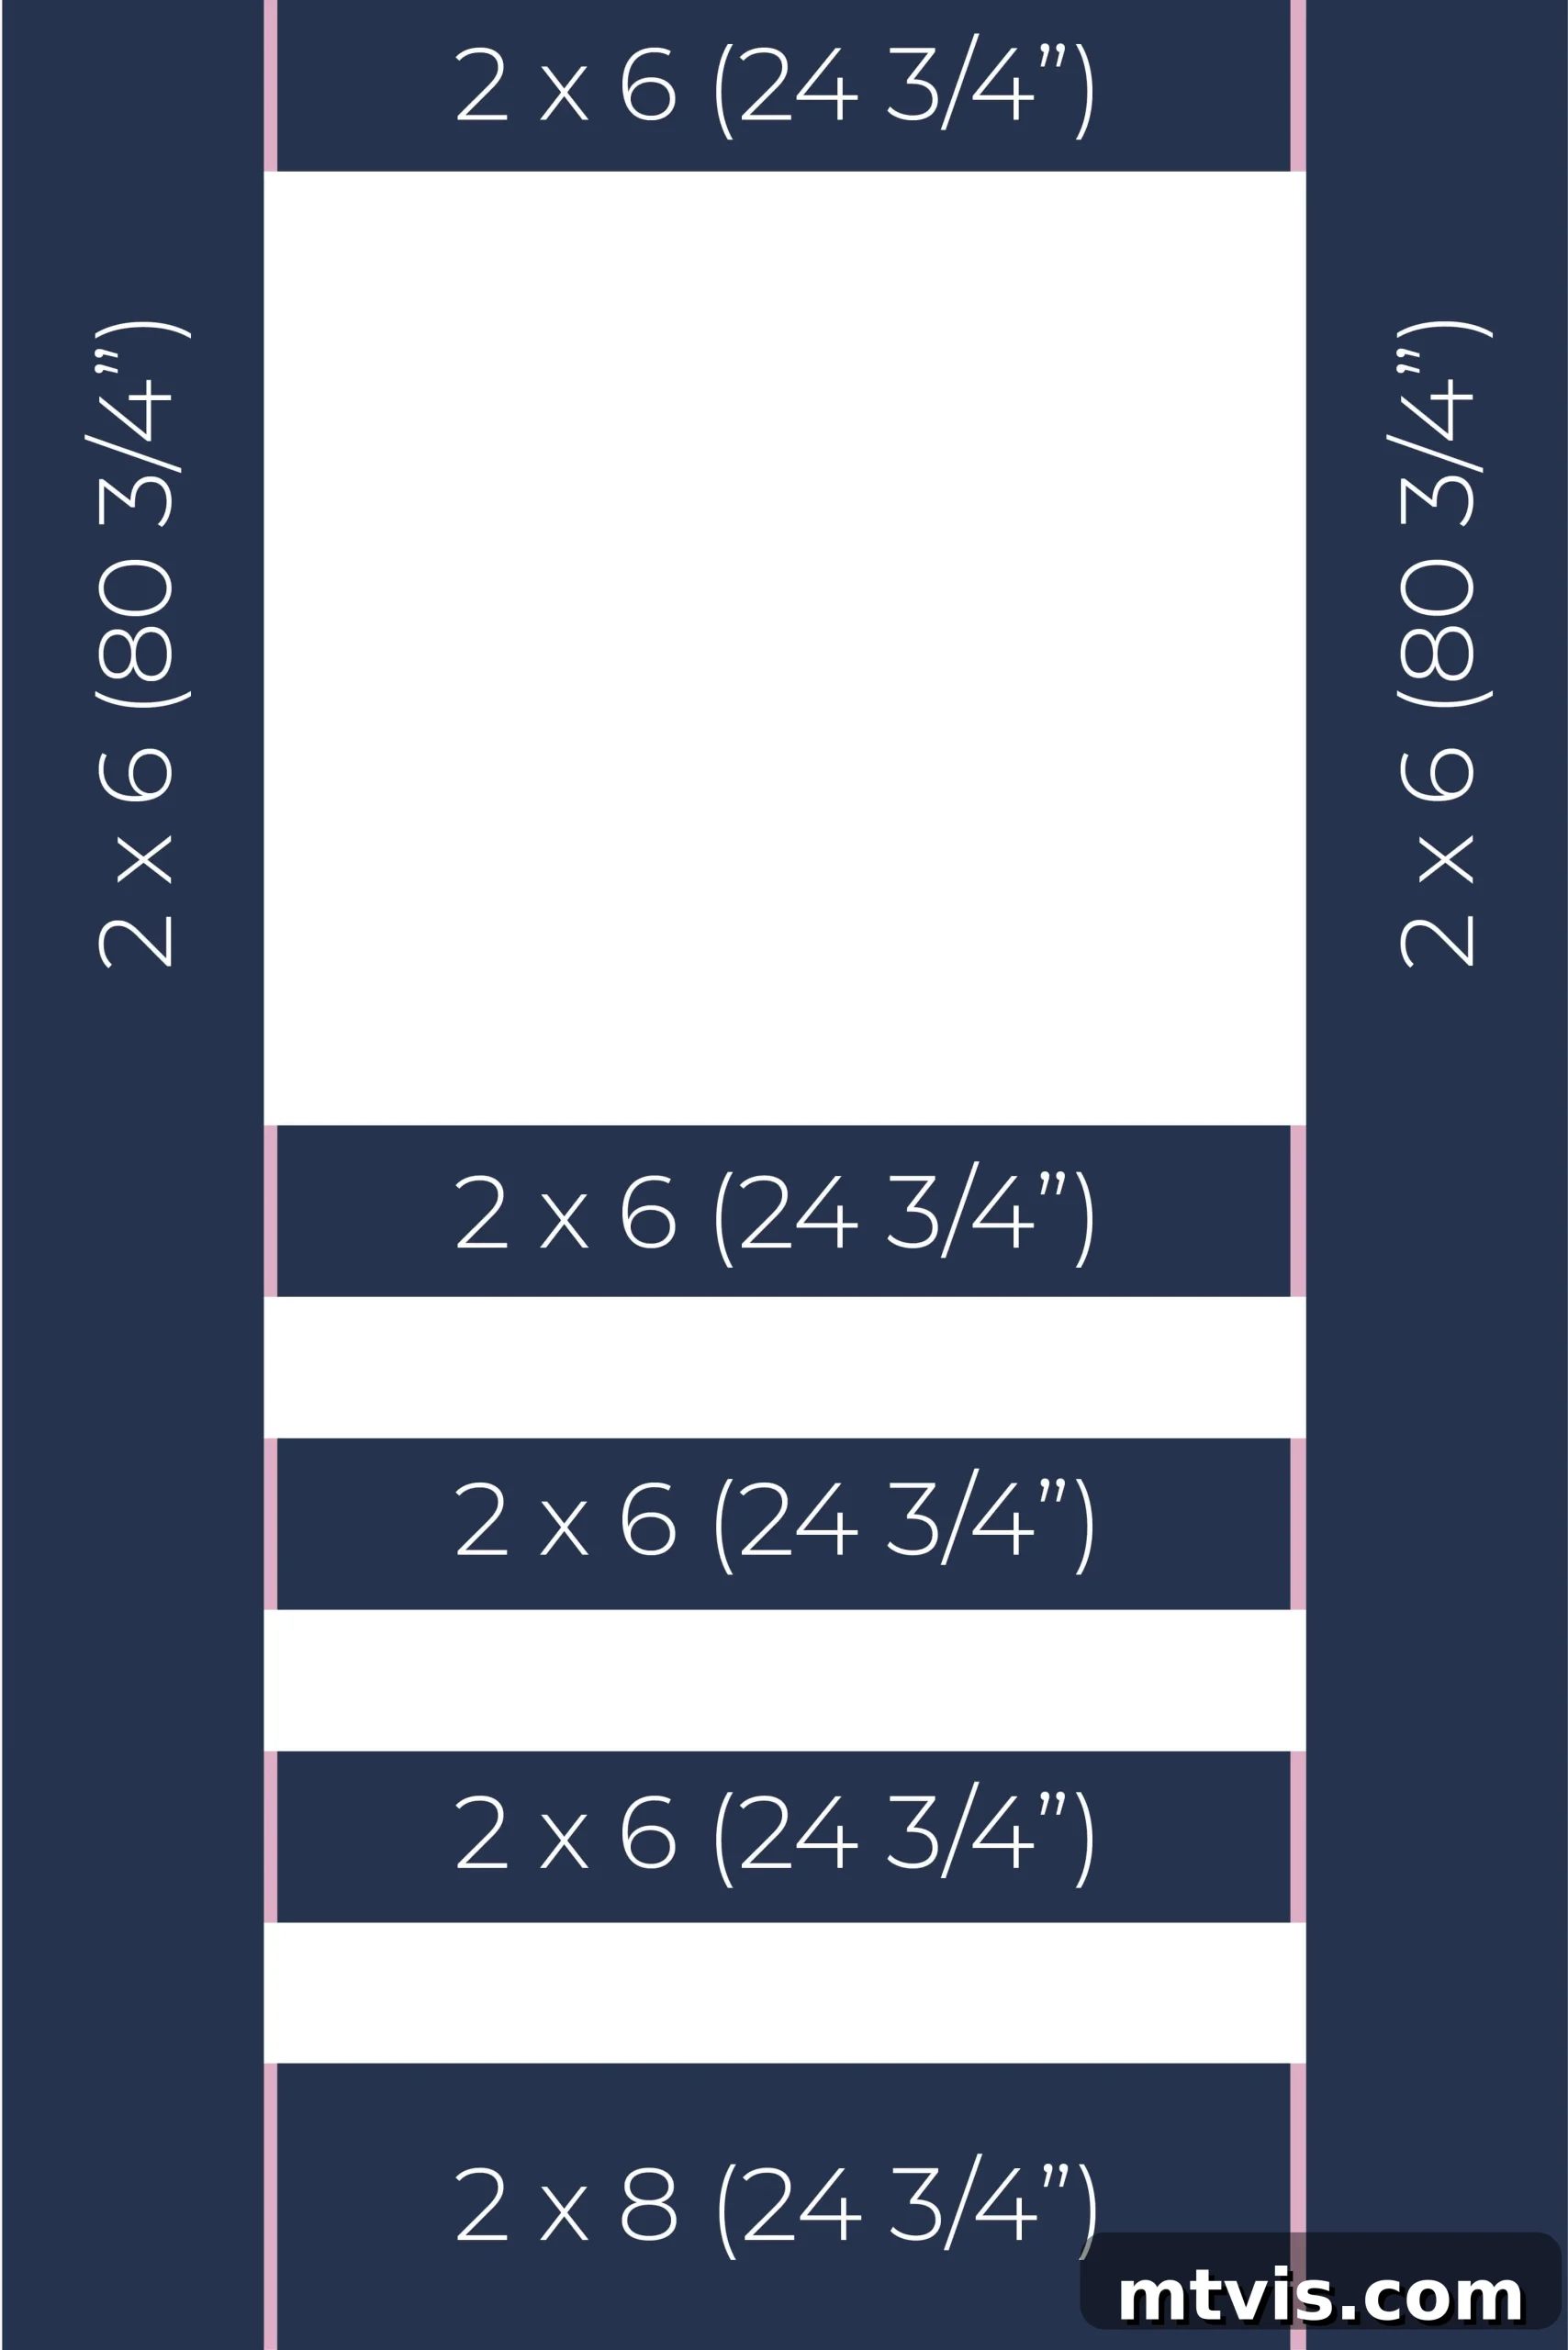
Accurate measurements are the foundation of a successful screen door. Begin by carefully measuring the exact height and width of your existing door frame opening. Standard door sizes are common, but slight variations can occur, so always measure your specific opening. Take at least three measurements for both height and width (top, middle, bottom for width; left, middle, right for height) and use the smallest measurement to ensure your door will fit without binding. Remember to account for any existing door sweep or threshold clearance. Our door measured 35 1/4 inches wide by 80 3/4 inches tall, which is a common size. Below, you’ll find a diagram (NOT to scale) illustrating where each wood piece will be used and its corresponding cut length. The pink lines indicate where the pieces join, simplifying your cutting process with mostly straight cuts.

- 2. Cut Your Wood to Size
With your dimensions finalized, it’s time to cut your lumber. Use a circular saw or miter saw to cut all your wood pieces to the precise lengths determined in Step 1. Always double-check your measurements before making a cut and prioritize safety by wearing appropriate eye and ear protection. To minimize material waste, we first cut our 24 3/4-inch length of 2×8 for the bottom rail. Then, we efficiently ripped the remaining 2×8 down to the same width as our 2×6 pieces (typically 5.5 inches wide for a nominal 2×6) using a table saw. This ensures all vertical and horizontal frame members, except the bottom rail, maintain a consistent width.
- 3. Assemble the Outer Frame of Your Door
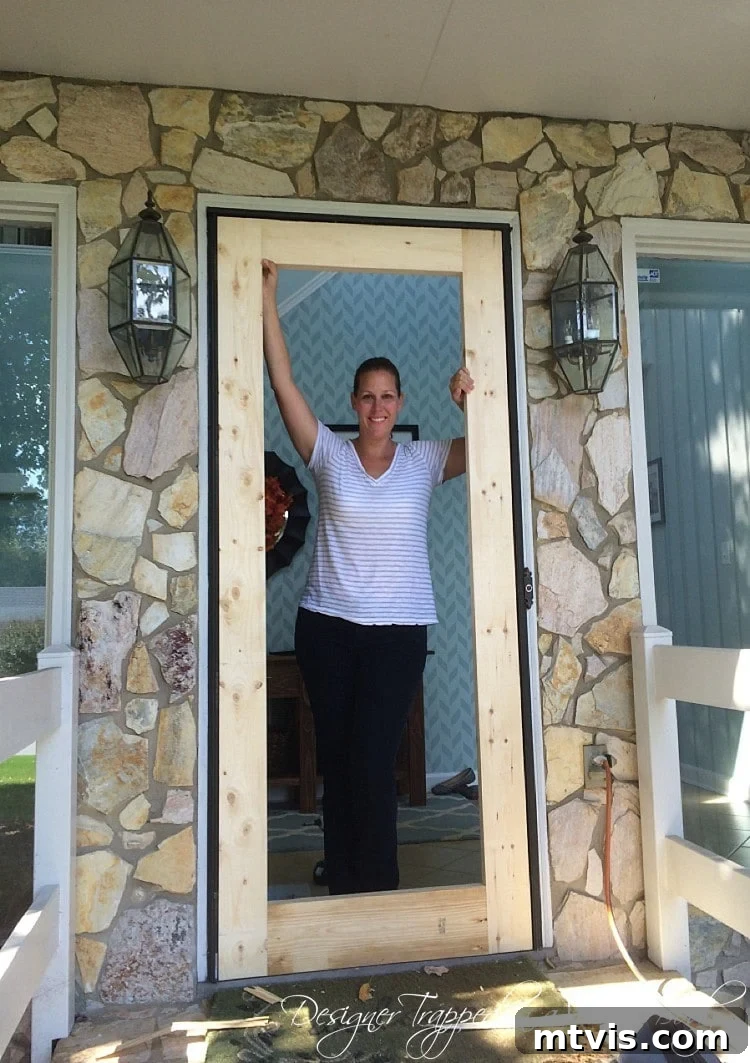
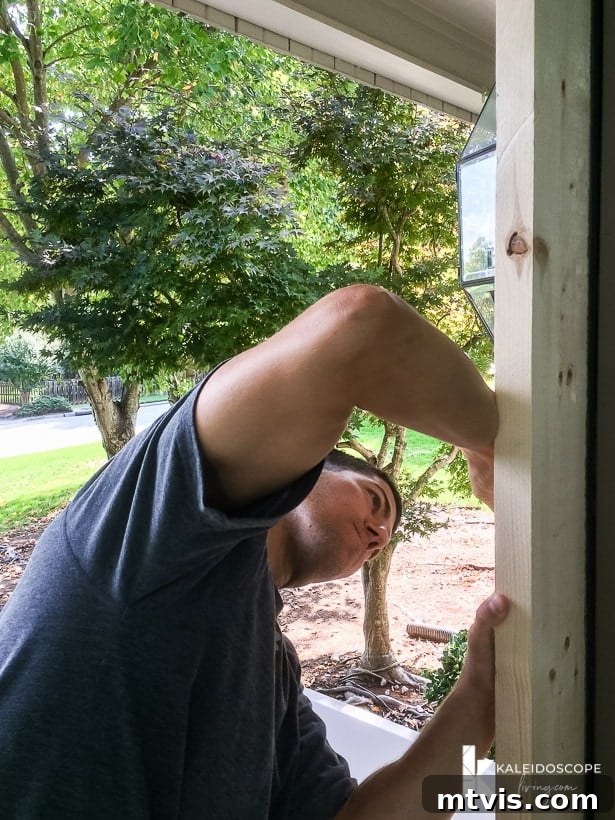
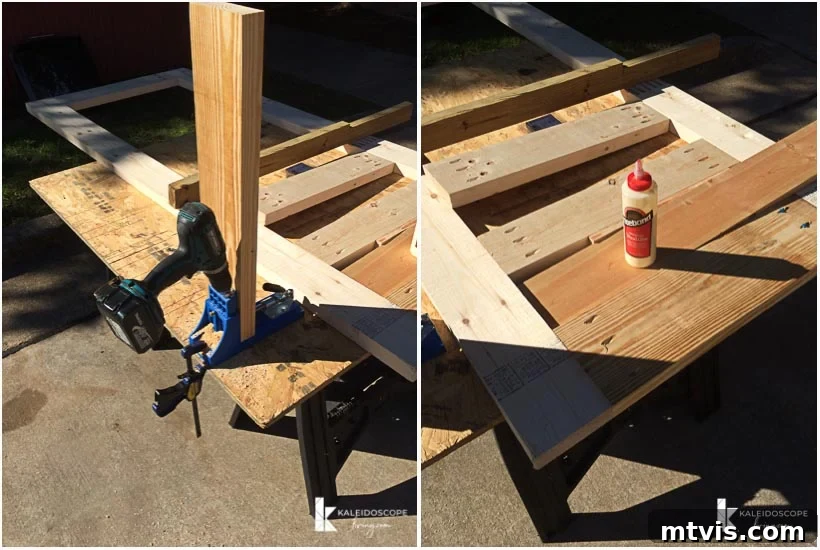
Once all your wood pieces are accurately cut, you can begin assembling the outer frame. This is where your Kreg pocket hole jig comes in handy. Create pocket holes on the ends of your horizontal frame pieces (top and bottom rails) where they will join the vertical stiles. Apply a small amount of wood glue to each joint for added strength before securing them with Kreg pocket hole screws. Assemble the outer frame first, ensuring it is perfectly square using a speed square or framing square. Before proceeding, perform a crucial “dry fit” by temporarily placing the assembled outer frame into your door frame opening. This allows you to verify that it fits correctly and makes any necessary adjustments before the full assembly.
- 4. Mark Your Hinge Placement
For this project, we were replacing an old storm door, which made hinge placement straightforward. We simply used the existing hinge locations on the door frame. During the dry fit of your outer frame (from Step 3), carefully mark where your hinges will be attached to the screen door’s vertical stile. This ensures perfect alignment with your existing door frame or allows you to plan new hinge placements precisely. Consider using butt hinges for a clean look, and if desired, you can chisel out a shallow mortise for a flush installation.
- 5. Complete the Screen Door Assembly
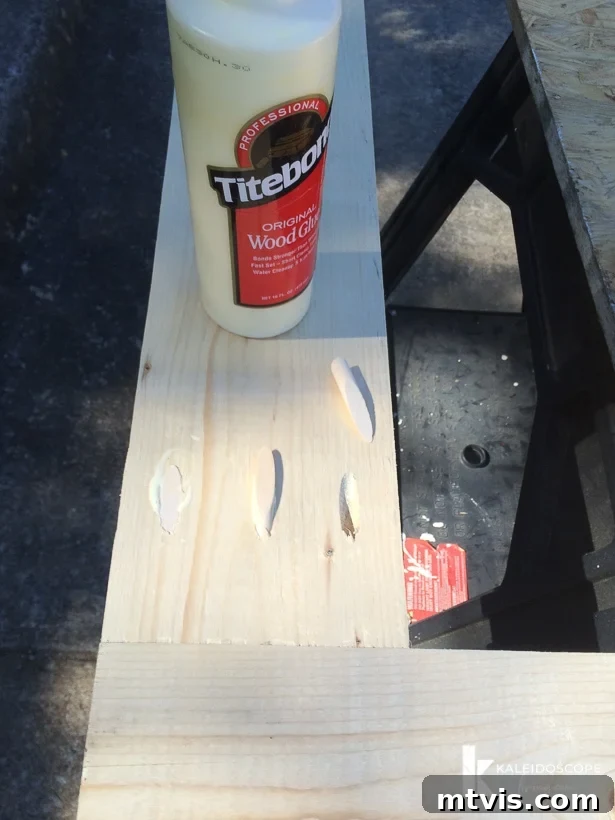
Once you’ve confirmed that the outer frame fits perfectly in your door opening, proceed with attaching the interior horizontal pieces. Use your Kreg jig to create pocket holes on the ends of these pieces. Apply wood glue to the joints before securing them to the outer frame with Kreg screws. Ensure all pieces are flush and the entire frame remains square as you assemble. This step solidifies the door’s structure and prepares it for the screening material.
- 6. Fill All Holes and Gaps
For a flawless, professional finish, it’s essential to address any imperfections in your woodworking. Use wood putty or spackle to meticulously fill in any visible gaps between the joints, ensuring a seamless appearance. Next, insert Kreg wood plugs into all the pocket holes created by your screws. These plugs are designed to fit snugly and hide the fasteners. After the putty and plugs have fully dried, sand the entire door frame thoroughly until it is completely smooth to the touch. Start with a medium-grit sandpaper (e.g., 120-grit) to remove any major bumps, then finish with a finer grit (e.g., 220-grit) for a silky-smooth surface, perfect for painting.
- 7. Create a Rabbet Groove for Your Screening Material
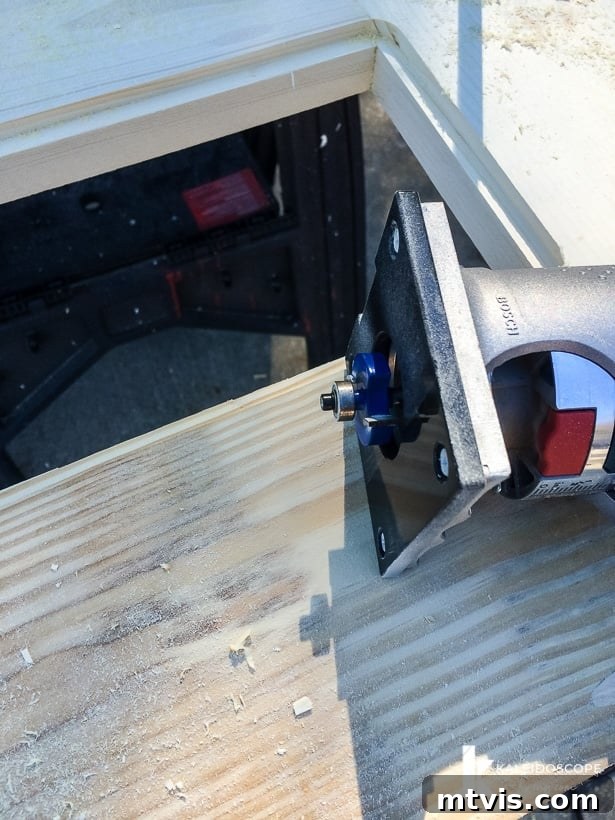
This step is crucial for neatly installing your screen. Using a router fitted with a rabbeting bit, create a continuous groove (a rabbet) on the back side of the door frame. This groove will be where your screening material and subsequent screen molding will sit flush. We initially used a 3/8-inch routing bit to create a 1/2-inch deep rabbet. However, based on our experience, we strongly recommend routing out a 1/4-inch deep rabbet instead. This specific depth allows you to use readily available 1/4 x 3/4 inch screen molding sold at most home improvement stores, saving you the extra work and time of creating custom molding. After routing, you’ll need to use a chisel to square up the rounded corners of the rabbeted area, ensuring a clean fit for your screen and molding.
- 8. Paint the Front of Your Screen Door
It’s much easier to paint the front side of your screen door before the screening material is attached. Apply an exterior-grade primer first, especially if using raw wood, to ensure better paint adhesion and durability. Then, apply two coats of your chosen exterior paint color to the front of the door frame. This method prevents you from having to meticulously work around the screen later, which can be messy and time-consuming. Allow adequate drying time between coats as recommended by the paint manufacturer.
- 9. Attach Your Screening to the Back Side of Your Screen Door
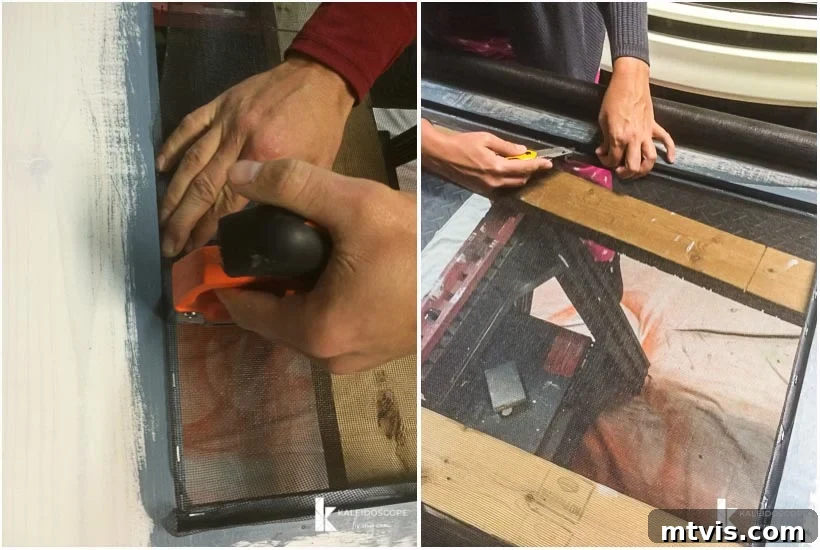
Now it’s time to install the screening. Lay your door frame flat, back side facing up. Unroll your chosen screening material over the rabbeted area, ensuring it extends slightly beyond the groove on all sides. Begin by stapling one edge of the screen into the rabbet groove, starting from the middle and working your way outwards. Then, move to the opposite side, pulling the screen taut but not overly tight (to avoid tearing). Staple it securely, again working from the center outwards. Repeat this process for the remaining two sides. Having a second person to help pull the screen taut can make this step much easier and prevent wrinkles. Once all sides are stapled, use a sharp utility knife to carefully trim away any excess screening material, leaving a clean edge.
- 10. Cut and Add Screen Molding
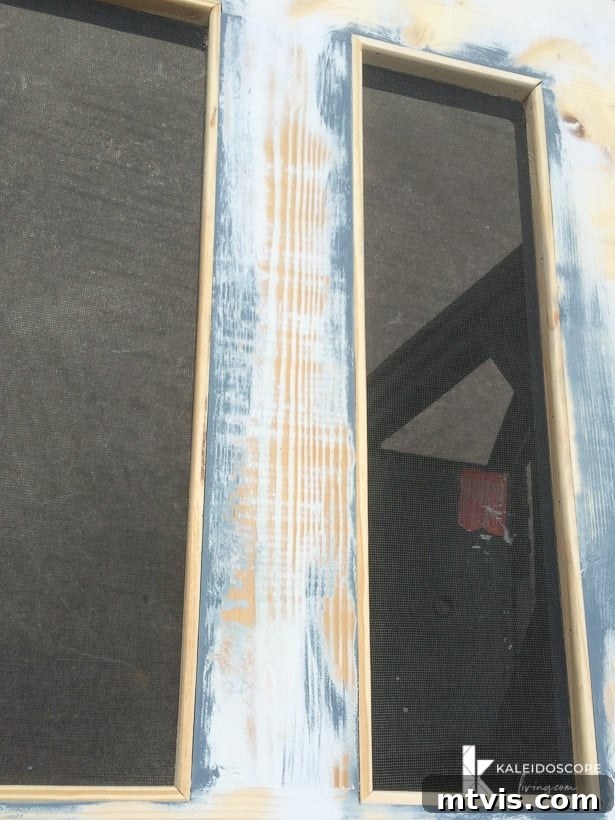
Once your screening is securely attached, you’ll want to cover the staples and provide a finished edge. This is where screen molding comes in. As mentioned in Step 7, we highly recommend purchasing ready-made 1/4 x 3/4 inch screen molding from your home improvement store. Trust us, making your own is an unnecessary amount of extra work! Carefully measure and cut the molding pieces to fit precisely within your rabbeted groove, using miter cuts at the corners for a clean, professional appearance. Attach the molding using small brad nails or staples, ensuring it firmly presses the screen into the groove.
- 11. Paint the Back Side of Your Screen Door
With the screen and molding in place, you can now paint the back side of your door. Before painting, meticulously tape off your screening material with painter’s tape. This vital step will prevent any accidental paint splatters or overspray on the screen, ensuring a clean and tidy finish. Apply an exterior-grade primer followed by two coats of your chosen paint, allowing proper drying time between applications.
- 12. Hang Your Screen Door
Once all paint is dry, attach your hinges to the screen door, aligning them with the marks you made in Step 4. Carefully position the door in your frame and secure the hinges to the door jamb. It’s often helpful to have another person assist you during this step to hold the door steady, making installation smoother and ensuring a proper swing and closure.
- 13. Attach Door Hardware
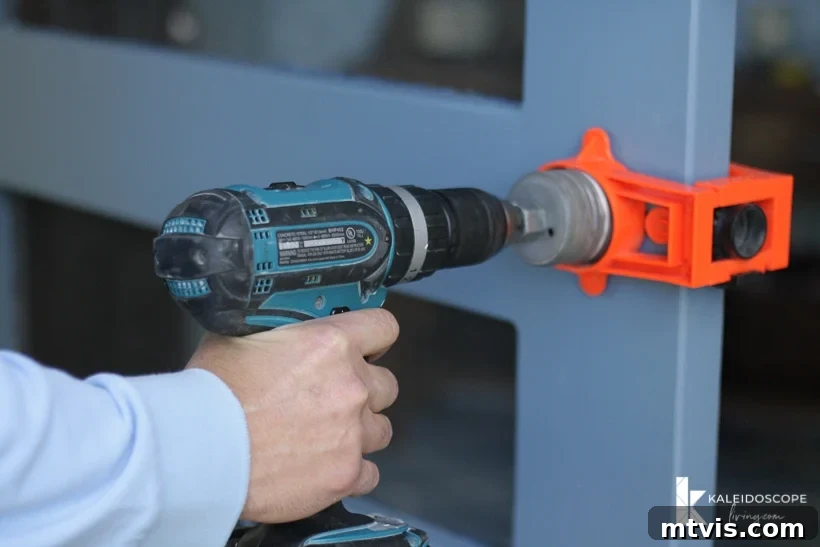
The final touch! Install your chosen door handle or doorknob. We found a doorknob installation kit to be incredibly helpful for a simple and precise setup. If desired, you can also add decorative elements like address numbers or kick plates to personalize your new screen door further.
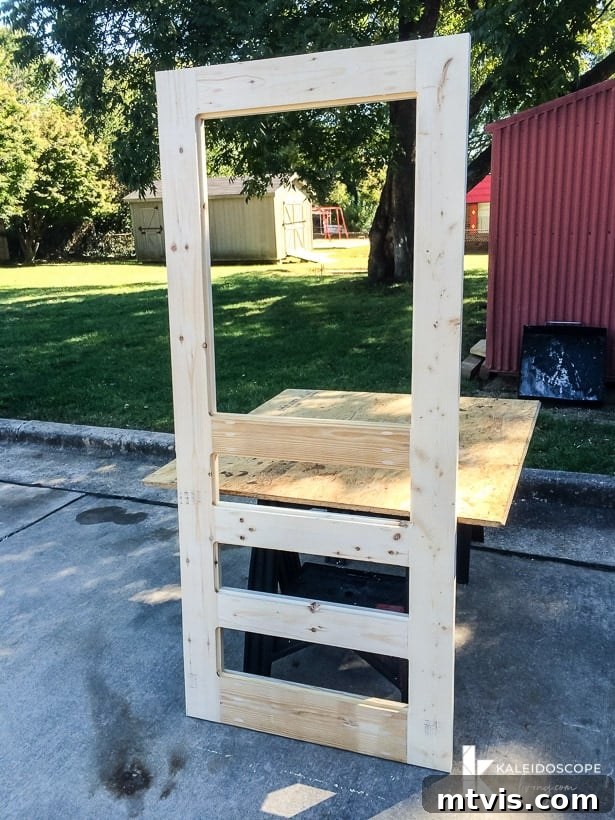
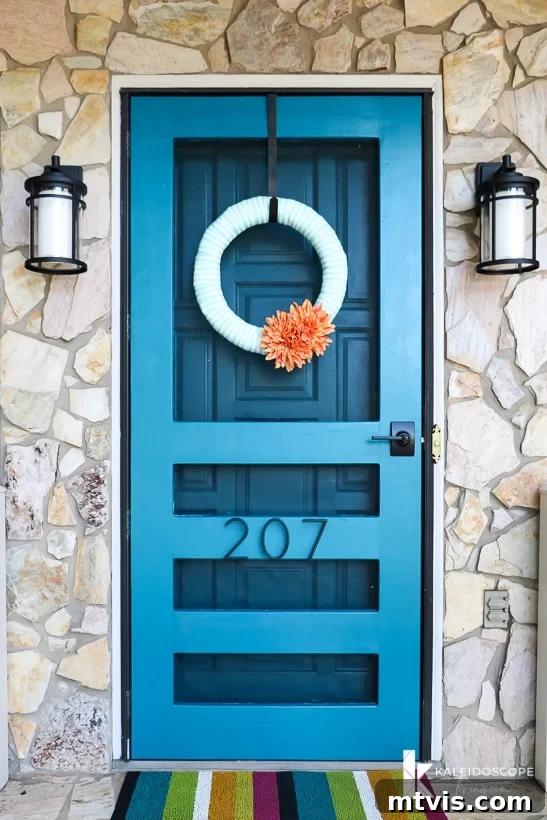
And there you have it! We couldn’t be happier with how our DIY screen door turned out. It perfectly combines functionality with the aesthetic we desired, a testament to the power of custom building. UPDATE: Since its initial construction, we’ve repainted the screen door in a beautiful hue called Velvet Curtains by Valspar. This new color perfectly harmonizes with our front door, and we honestly love it even more now! This demonstrates how a simple change in color can refresh and revitalize your DIY project.
Time and Cost to Build Your Screen Door
Unlike some DIY endeavors that promise massive savings, our primary motivation for building this screen door wasn’t purely about cutting costs. Instead, it was about achieving a specific vision – a high-quality, stylish, and perfectly fitted screen door that simply wasn’t available off the shelf. That being said, there were still some financial benefits to going the DIY route.
The total cost for lumber was approximately $32.00, and the screening material added another $10.00. While these savings might not seem astronomical compared to a basic store-bought screen door (which can range from $75 to $100), the true value lies in the superior quality and custom design. Our DIY screen door is significantly more robust and durable than most pre-fabricated options at that price point, offering long-term value and aesthetic appeal that off-the-shelf models simply cannot match. The cost can vary depending on the type of wood you choose (e.g., pine is cheaper than cedar or redwood), the quality of your screening, and whether you already own the necessary tools.
The construction process itself took us around 5 hours, not including the crucial drying time required for paint and wood putty. While this is an investment of your time, the satisfaction of creating something beautiful and functional with your own hands is immeasurable. The ability to craft a door that perfectly integrates with your home’s architecture and personal style makes the effort well worth it.
By following this detailed step-by-step tutorial, you can confidently create a DIY screen door that boasts exceptional quality, perfectly matches your desired aesthetic, and truly enhances your home. So, gather your tools, acquire your materials, and embark on building your unique, custom screen door today!
More OUTDOOR IDEAS
SEE ALL outdoor POSTS
-
Fire Pit Ideas for Every Outdoor Space
-
How to Make a DIY Outdoor Chandelier
-
Modern DIY Garden Trellis
-
DIY Outdoor Electrical Box Cover
-
DIY Diamond Wire Trellis for a Vine
-
A Complete Review of Vego Garden Beds: Pros, Cons, and Everything In-between
Other posts you may enjoy:
- 4 Steps to Restoring Teak Furniture
- 5 Steps to Prepare Your House for Exterior Paint
- Porch Decorating Ideas and Designer Tips
Curious about how I approach transforming rooms and spaces in our home? Be sure to explore Designer in a Binder® for an affordable and simple way to decorate your home with confidence.
For exclusive content, behind-the-scenes sneak peeks, and more DIY inspiration, be sure to subscribe to our newsletter before you go!
(Note: Any previously available subscription forms have been removed to adhere to the HTML-only output request.)