
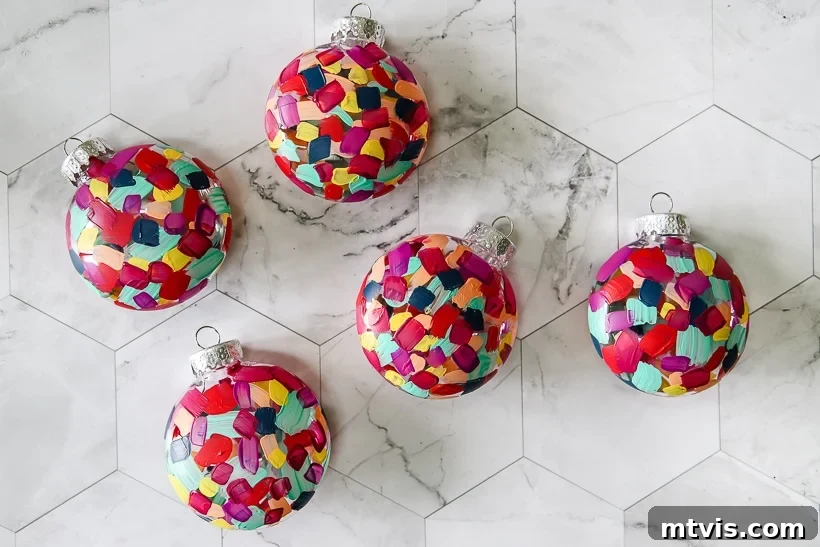
Craft Your Own Masterpiece: Easy DIY Hand Painted Christmas Ornaments with a Brushstroke Technique
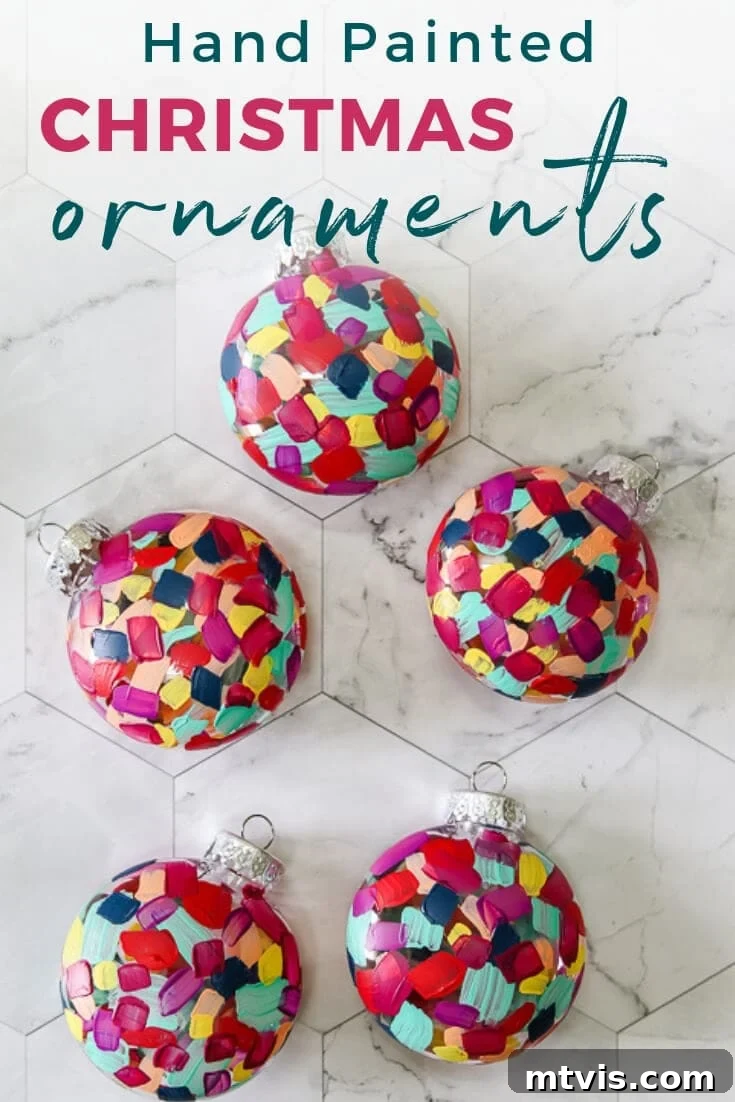
The holiday season is a magical time for creating cherished memories and adding personal touches to our homes. What better way to infuse your festive decor with charm and individuality than by crafting your own DIY Christmas ornaments? This year, we’re diving into a delightfully simple yet stunning project: hand-painted Christmas ornaments using an effortless brushstroke technique. Whether you’re a seasoned crafter or just looking for a fun, creative activity to do with the family, this guide will show you how to transform plain plastic ornaments into vibrant, eye-catching decorations that truly sparkle on your tree.
A while back, I stumbled upon a fantastic deal – inexpensive plastic ornaments marked down 70% from their already low price. It was one of those “too good to pass up” moments, even though I didn’t have a specific plan for them at the time. They sat in my craft stash, patiently awaiting their festive transformation.
Then, inspiration struck! I’d been wanting to experiment with brushstroke painting, a technique I felt confident I could master with virtually no prior artistic experience. It’s incredibly forgiving and yields beautiful, abstract results, making it perfect for a low-pressure crafting session. So, I gathered an assortment of colorful acrylic paints, just in case the creative spark ignited.
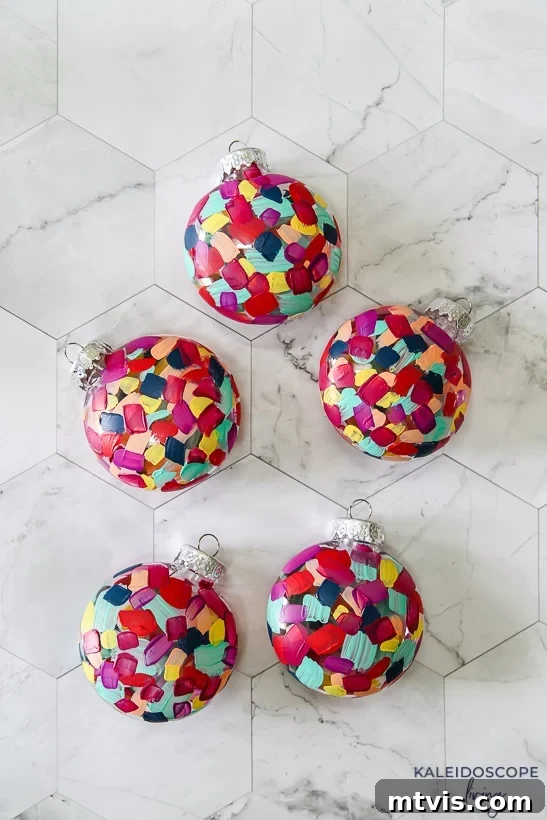
The very next day, with the winter chill setting in and a desire to avoid another screen-time session, my daughters and I decided it was the perfect opportunity to bring those forgotten ornaments to life. We embarked on a colorful journey, armed with brushes and a rainbow of paints. The results were absolutely delightful! While I adore all our handmade ornaments, there’s something uniquely captivating about these brushstroke beauties. They instantly became a family favorite, proving that sometimes, the simplest techniques create the most beloved treasures.
This project is not only incredibly fun and easy but also highly customizable. You can choose any color palette to match your existing decor or create a vibrant new theme. Let’s gather our supplies and get ready to add a burst of personalized color to your holiday season!
This post contains some affiliate links for your convenience. Click here to read my full disclosure policy.
DIY Hand Painted Christmas Ornaments: A Step-by-Step Tutorial for Stunning Holiday Decor
Creating these hand-painted Christmas ornaments is an enjoyable and relaxing activity suitable for all ages. The beauty of the brushstroke technique lies in its simplicity and the freedom it offers. There’s no right or wrong way to apply the paint; every stroke adds to the unique charm of your ornament.
Materials Needed:
- Inexpensive Plastic Ornaments: (These are the ones we used) Plastic ornaments are perfect for this project, especially if you’re crafting with children, as they are durable and shatterproof. They also provide a smooth, non-porous surface that readily accepts acrylic paint. Look for a variety of shapes and sizes to add visual interest to your collection.
- Acrylic Paints in Assorted Colors: (We used this paint in a bunch of different colors) Acrylic paints are ideal because they are vibrant, fast-drying, and easy to clean up. Choose a range of colors that appeal to you – whether it’s traditional reds and greens, a frosty palette of blues and silvers, or a bold and modern mix. Consider metallic or glitter acrylics for an extra festive shimmer.
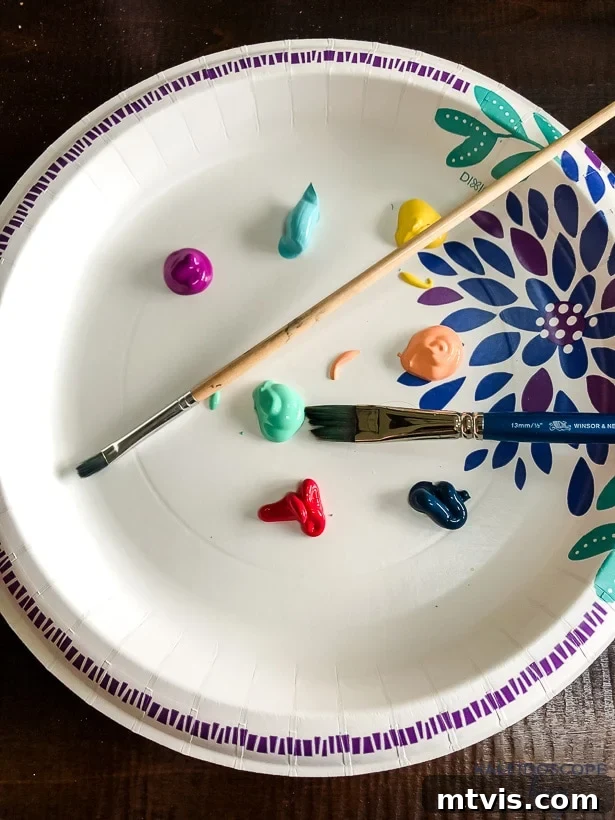
- Paper Plates: These serve as an excellent palette for squeezing out your paints and later as a drying rack for your painted ornaments, preventing smudges.
- Small Artist Brushes: (Any quality will do – they don’t need to be anything special) You’ll want a variety of small to medium-sized brushes to create different types of strokes. A flat brush is great for broader strokes, while a round brush can be used for smaller details or a more controlled look. Don’t invest in expensive brushes for this project; basic craft brushes work perfectly.
Detailed Steps to Create Your Hand-Painted Ornaments:
Crafting these brushstroke ornaments is a truly meditative and rewarding process. Take your time, enjoy each step, and watch your plain ornaments transform into personalized works of art.
1) Prepare Your Ornaments: The first step is to gently remove the metal hanger and cap from the top of your plastic ornament. This will give you a clean, unobstructed surface to paint. Set the hangers aside in a safe place so they don’t get lost. It’s also a good idea to lightly wipe down each ornament with a damp cloth or rubbing alcohol to remove any dust or oils, ensuring the paint adheres beautifully.
2) Set Up Your Palette: Squeeze out small blobs of your chosen acrylic paints onto a paper plate. This makes it easy to dip your brush and prevents contamination between colors. Don’t squeeze out too much at once, as acrylics dry relatively quickly; you can always add more if needed. Consider arranging your colors in a pleasing order if you plan to use them sequentially.
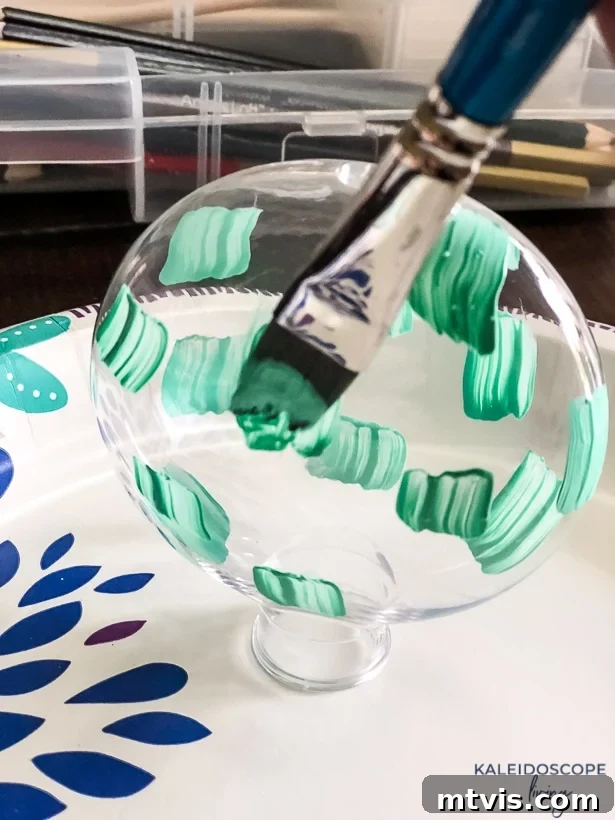
3) Apply Your First Layer of Brushstrokes: Dip your brush into your first chosen color. Begin painting random brush strokes all over the outside of your ornament. The key here is not perfection, but expression! Experiment with different pressures and directions – short, quick strokes; long, sweeping motions; thin lines; thicker dabs. Embrace the abstract nature of the brushstroke technique. Don’t worry about perfect coverage at this stage; you’ll be layering colors. Once you’re satisfied with your first color, allow the paint to dry completely. A great tip for drying without smudging is to place your ornaments upside down on a clean paper plate or on a piece of parchment paper. This allows air circulation and prevents sticky mishaps.
4) Layer with Additional Colors: Once the first layer is thoroughly dry to the touch (this usually takes 10-20 minutes for acrylics, depending on thickness), repeat the process with as many other colors as you desire. The magic happens as you layer the colors. You can overlap them slightly, leave small gaps to let previous colors peek through, or create distinct blocks of color. Each new color adds depth and dimension to your ornament. Remember, patience is key: allow each color to dry completely before applying the next. Rushing this step can lead to muddy colors or smudging, which we want to avoid for crisp, vibrant results.
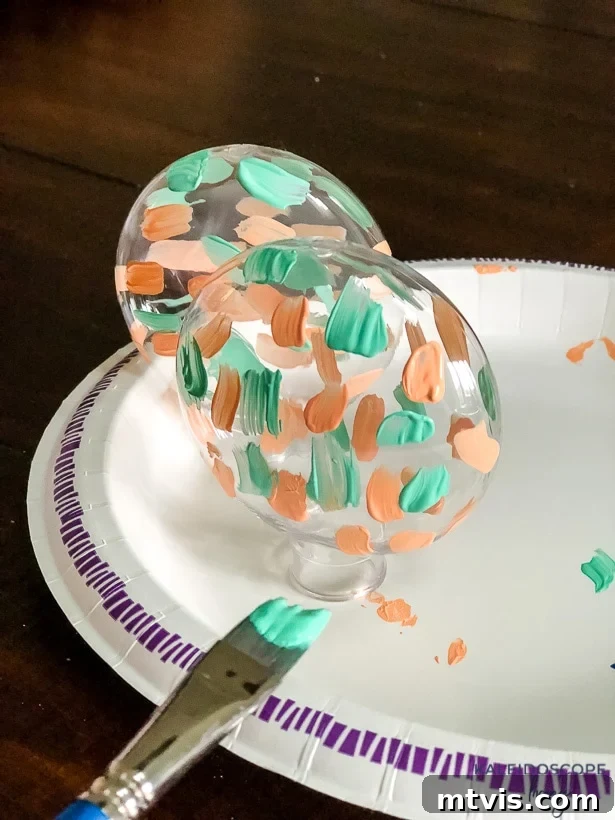
5) Build Coverage and Character: Continue adding layers of brushstrokes until your ornament is almost entirely filled with color. I personally like to let some of the original clear ornament peep through for a subtle effect, but you might prefer full coverage. The amount of space you leave between colors, or whether you aim for complete opacity, is entirely up to your artistic preference! Don’t be afraid to go back over areas with more strokes to intensify colors or to create texture. This stage is where your ornament truly takes on its unique character.
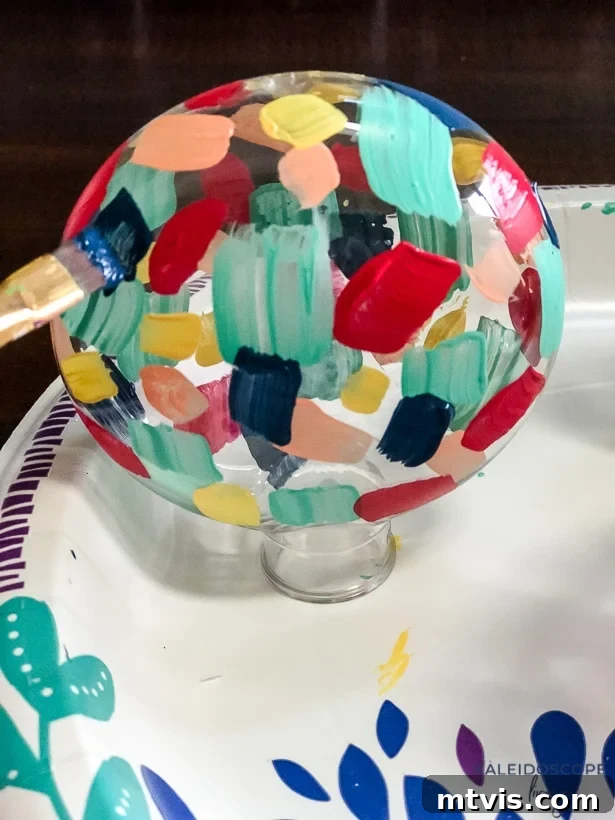
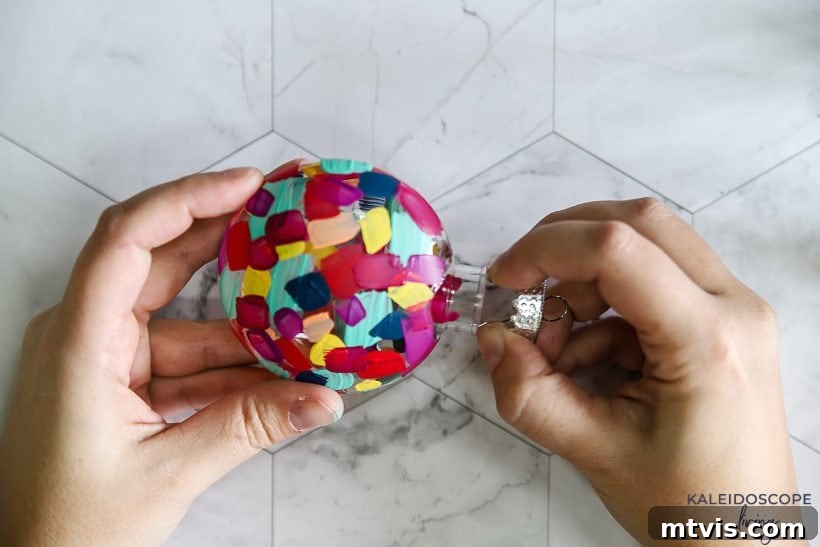
6) The Finishing Touch: Once you are completely satisfied with your painting and all layers of paint have dried thoroughly – this might take several hours or even overnight, depending on the paint thickness and humidity – it’s time to reattach the ornament hanger. Carefully insert the metal cap back into the top of the ornament. For added durability and to protect your beautiful artwork, you can also apply a clear sealant (like a clear acrylic spray or brush-on varnish) to the finished ornament. This will prevent chipping and give it a polished look.
Tips for Success and Creative Variations:
- Experiment with Color Palettes: Don’t limit yourself to traditional Christmas colors. Try a monochrome scheme with varying shades of one color, a vibrant rainbow, or a sophisticated metallic blend.
- Involve the Kids: This project is incredibly kid-friendly! Let them choose their favorite colors and express themselves freely. The less “perfect” they try to be, the more charming their ornaments will turn out.
- Vary Your Strokes: Use different brush sizes and apply varying pressure to create a dynamic texture. You can also try dabbing with a sponge for a different effect.
- Add Extra Sparkle: Before the final layer of paint dries, sprinkle some fine glitter over wet areas for a touch of shimmer. Alternatively, use glitter glue or metallic paint pens for accents once the ornament is dry.
- Personalize Them: Use a fine-tip paint pen to add names, dates, or small festive messages to the dried ornaments. This makes them wonderful keepsakes or personalized gifts.
- Consider Sealing: For ornaments that will be handled frequently or stored for years, a clear acrylic sealant will protect the paint from chips and fading.
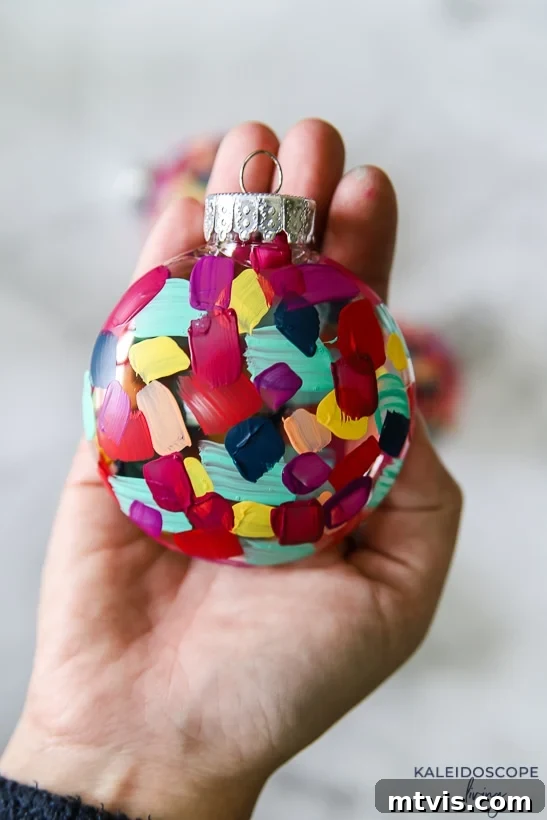
That’s it! You’ve just created a vibrant, personalized piece of holiday decor. Each ornament is like a little color party, bursting with your unique creativity. I’m absolutely smitten with how these turned out – they add such a joyful, handmade touch to our Christmas tree. What do you think?
Why Handmade Ornaments Make the Best Holiday Memories
Beyond simply decorating your home, engaging in DIY Christmas ornament projects offers a wealth of benefits. First and foremost, they infuse your holiday decor with unparalleled personalization. Unlike mass-produced ornaments, each hand-painted piece tells a story, carrying the unique imprint of its creator. When you hang these on your tree year after year, they become tangible reminders of shared family moments, laughter, and creativity.
This particular brushstroke technique is especially wonderful for families. It’s an activity that spans generations, allowing children to develop their fine motor skills and artistic expression, while adults can unwind and tap into their inner artist without the pressure of perfection. The results are always charming and unique, fostering a sense of accomplishment for everyone involved.
Moreover, creating your own ornaments can be a remarkably budget-friendly way to refresh your holiday decor. By purchasing inexpensive blank ornaments and a few tubes of acrylic paint, you can produce a stunning collection that looks far more expensive than it actually cost. It’s also an eco-conscious choice if you decide to repurpose old, plain ornaments that need a facelift.
Finally, these handmade ornaments make incredibly thoughtful gifts. Imagine presenting a loved one with a set of personalized, hand-painted ornaments that you crafted yourself. It’s a gift that speaks volumes about care and effort, far exceeding the value of anything store-bought. They’re perfect for teachers, neighbors, friends, or as stocking stuffers, each one a mini work of art destined to be treasured.
So, as you prepare for the festive season, consider setting aside some time for this delightful DIY project. You’ll not only end up with beautiful, vibrant decorations but also with lasting memories and a deeper appreciation for the simple joy of creating with your own hands. Get ready to transform your tree into a colorful, brushstroke masterpiece!
Before you head out, be sure to grab a FREE gift for yourself 🙂
