DIY Personalized Mason Jars: Craft Unique Gifts for Any Occasion
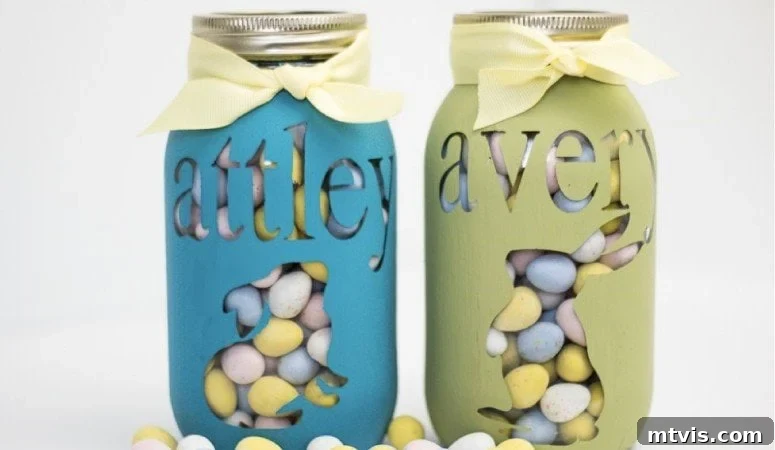
There’s something truly special about giving a gift that’s not only beautiful but also deeply personal. As someone who absolutely adores finding creative and memorable ways to present gifts, especially to my loved ones, I’m always on the lookout for unique ideas. My twin girls, with their love for all things pretty and carefully wrapped, inspired me to explore beyond traditional gift packaging this year. While elegant wrapping paper and delicate ribbons certainly have their charm, I wanted to craft something truly distinctive for their Easter treats. What I ultimately created was a delightful surprise: custom-designed, personalized mason jars that are both easy to make and incredibly charming. They’re perfect not just for Easter, but for any special event or holiday throughout the year!
This project is wonderfully straightforward, requiring minimal time and effort, yet it yields stunning results. Whether you’re a seasoned crafter or just starting, you’ll find this DIY personalized mason jar tutorial incredibly rewarding. Not only does it allow for immense creative freedom, but it also transforms a simple glass jar into a treasured keepsake. Get ready to impress with your handmade touch!
This post contains affiliate links for your convenience. Please click here to read my full disclosure policy.
Your Guide to Creating DIY Personalized Mason Jars
Why Personalized Gifts Make a Lasting Impression
In a world of mass-produced goods, a personalized gift stands out. It shows thoughtfulness, care, and an understanding of the recipient’s unique identity. A personalized mason jar isn’t just a container; it’s a testament to the effort you put into making someone feel cherished. For Easter, it transforms a simple candy delivery into an exciting, bespoke experience. For birthdays, holidays, or any celebratory moment, it becomes a memorable piece that can be reused and treasured long after the original gift is enjoyed. This approach to gifting fosters a deeper connection and leaves a lasting, warm impression.
The Enduring Charm and Versatility of Mason Jars
Mason jars have transcended their original purpose as canning containers to become a beloved staple in crafting and home decor. Their simple, classic design offers a rustic elegance that suits a variety of styles. They are incredibly versatile, affordable, and readily available, making them the perfect canvas for countless DIY projects. For this tutorial, we specifically opt for smooth-sided mason jars. This choice is crucial because it provides an untextured surface, allowing your vinyl designs and paint to adhere perfectly and peel away cleanly, ensuring a professional and polished finish. The smooth surface is key to achieving that crisp, personalized look we’re aiming for.
Materials You’ll Need for Your Custom Mason Jar Project
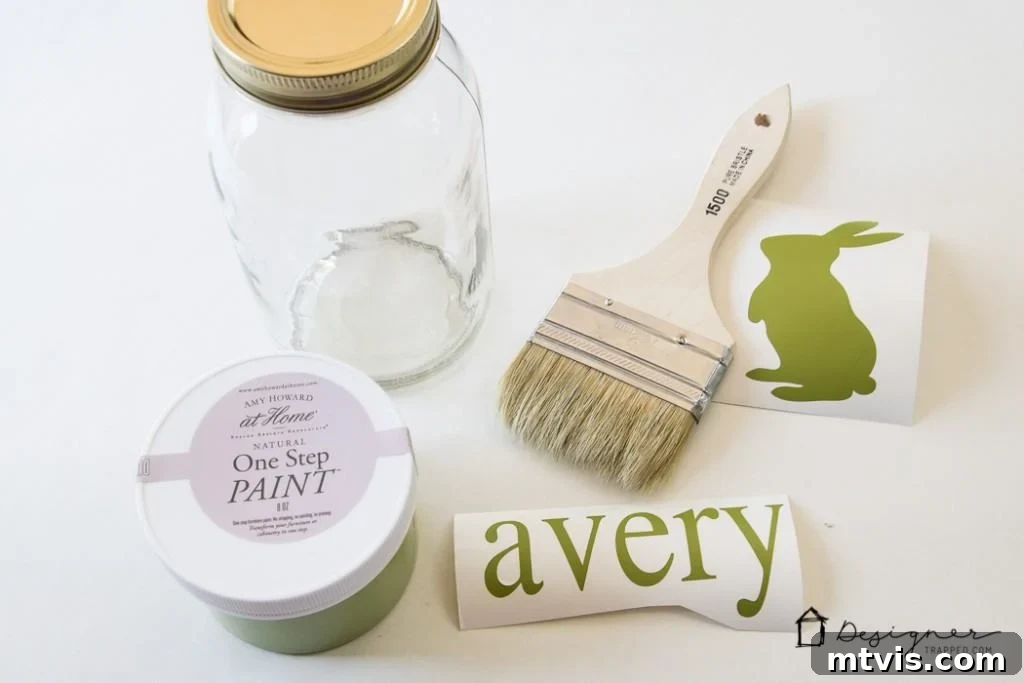
Gathering your supplies is the first exciting step in any DIY adventure. For these personalized mason jars, you’ll find that the materials are quite accessible. Here’s a detailed list, along with some insights into why each item is important:
- Smooth Glass Mason Jar: As mentioned, smooth jars are essential for clean vinyl application and paint removal. Look for brands known for their consistent quality. These jars are typically found in various sizes, allowing you to choose the perfect capacity for your gifts.
- Consider these smooth-sided mason jars for best results.
- Chalk Paint: Chalk paint is a fantastic choice for this project due to its excellent adhesion properties on glass without the need for extensive priming. It dries quickly, offers a beautiful matte finish, and is relatively easy to work with. You’ll need two coats for opaque coverage.
- For a vibrant green jar, I recommend Amy Howard At Home One Step Paint in a shade like Dunavant Green.
- For a serene blue, Americana Decor Chalky Finish Paint in Treasure offers a stunning hue.
- Pro Tip: Experiment with various chalk paint colors to match holiday themes or personal preferences. Pastels are lovely for Easter, reds and greens for Christmas, or bold colors for birthdays.
- Paint Brush: A good quality synthetic paint brush will provide a smooth, even application. Choose a brush size appropriate for the size of your jar to ensure full coverage without excessive brush strokes.
- Vinyl and Cutting Machine OR Vinyl Craft Stickers: This is where the personalization magic happens.
- Option A (Cutting Machine): A vinyl cutting machine (like the Silhouette CAMEO machine) allows you to cut intricate designs, names, or custom shapes from adhesive vinyl. This offers the highest level of personalization and precision.
- Option B (Vinyl Craft Stickers): If you don’t own a cutting machine, don’t worry! High-quality vinyl craft stickers are an excellent alternative. They come in a wide array of fonts and shapes, making personalization simple and accessible.
- Browse a selection of vinyl craft stickers here.
- Important Note: It is crucial to use only vinyl stickers. Traditional paper-based stickers with adhesive backing will not peel off cleanly after painting, potentially ruining your project. Vinyl is designed to be temporary and removable, leaving no residue.
Step-by-Step Tutorial: Crafting Your Personalized Mason Jar
Now that you have all your materials, let’s dive into the fun part! Follow these simple steps to create your own stunning personalized mason jars:
Step 1: Design and Prepare Your Vinyl Stencil or Select Stickers
The first step involves creating or choosing the design that will make your jar truly personal. This design will act as a stencil, reserving the clear glass underneath. If you’re using a cutting machine (like a Silhouette CAMEO or Cricut), this is where your creativity shines.
- Using a Cutting Machine: Open your design software and create your desired text (like a name) and shapes (such as an Easter bunny, a heart, a star, or a monogram). Ensure the font is legible and the design isn’t too intricate if you’re new to vinyl work. Size your design appropriately for your mason jar. Cut the design from adhesive vinyl. Once cut, carefully “weed” the excess vinyl, leaving only your desired shape or text on the backing. For more complex designs, transfer tape can be helpful to lift and apply the vinyl smoothly.
- Using Vinyl Craft Stickers: If you don’t have a cutting machine, browse a variety of vinyl craft stickers. Look for bold fonts and clear designs that will stand out. Choose letters for names, or shapes that fit your theme. Remember, these are not ordinary paper stickers; they are specifically designed for crafting and clean removal.
Tip for Success: Before cutting or selecting, consider the overall aesthetic. Do you want a whimsical script, a bold block font, or a charming icon? Planning ahead ensures your final product is exactly what you envision.
Step 2: Precisely Apply Your Vinyl Design to the Mason Jar
Applying the vinyl is a crucial step for achieving crisp, clean lines. A little precision here goes a long way.
- Clean Your Jar: Begin by thoroughly cleaning the exterior of your smooth glass mason jar. Use rubbing alcohol and a lint-free cloth to remove any fingerprints, dust, or grease. This ensures optimal adhesion of the vinyl.
- Apply the Vinyl: Carefully peel your vinyl cutout or sticker from its backing. Position it precisely on the smooth surface of the mason jar. Take your time to align it perfectly. Once placed, use a credit card or a craft squeegee to firmly press down on the vinyl, smoothing out any air bubbles and ensuring it adheres completely to the glass. Pay special attention to the edges of your design to prevent paint from seeping underneath. The goal is a perfectly sealed stencil.
Insider Tip: If you’re using multiple stickers or letters for a name, lightly mark guide points with a washable marker on the jar to ensure even spacing and alignment before applying.
Step 3: Paint Your Mason Jar with Chalk Paint
Now comes the transformative part: adding color! Chalk paint is incredibly forgiving and creates a lovely finish.
- First Coat: Using your paint brush, apply a thin, even coat of chalk paint over the entire jar, completely covering the vinyl stickers. Don’t overload your brush; thin coats are better for preventing drips and ensuring even coverage. Allow this first coat to dry completely, which typically takes about 15-30 minutes, depending on humidity.
- Second Coat: Once the first coat is dry to the touch, apply a second coat of chalk paint. This will ensure an opaque, rich color that beautifully contrasts with the clear glass. Again, allow this coat to dry fully. For a more distressed look, you could stop at one coat or lightly sand after drying. However, for a vibrant, personalized gift, two solid coats usually work best.
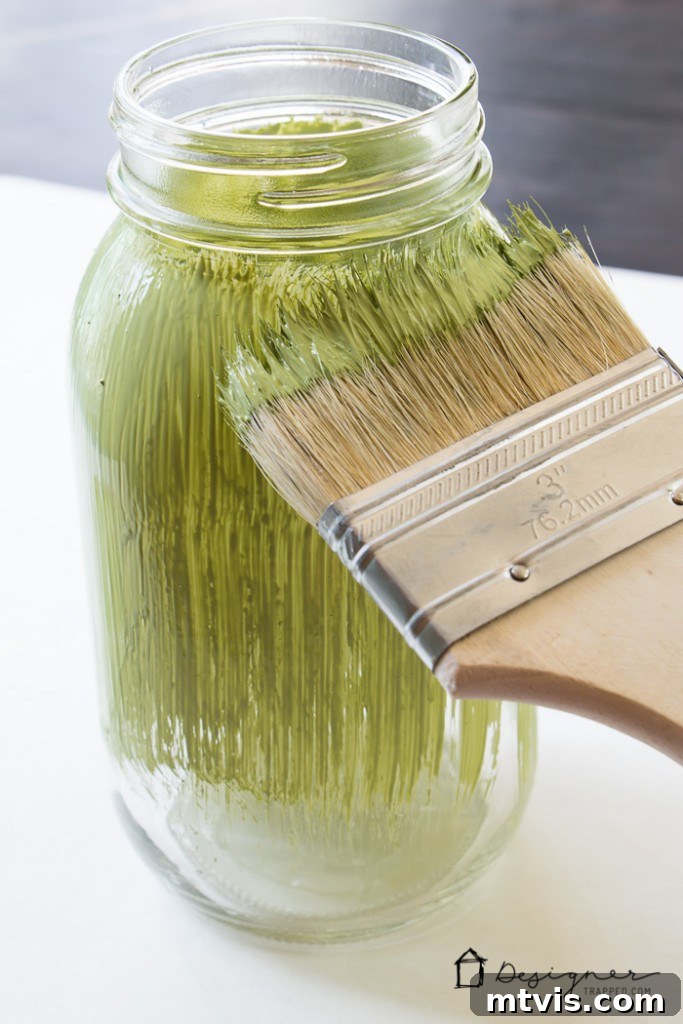
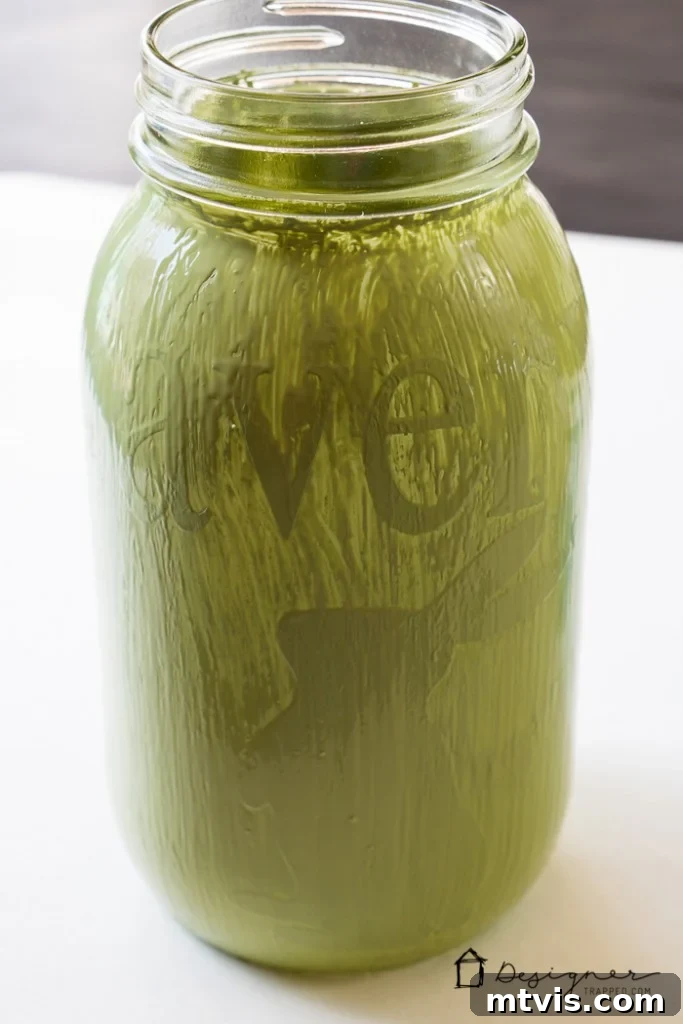
Drying Time: While chalk paint dries quickly, allow ample time between coats and before proceeding to the next step. Rushing can lead to smudges or paint lifting prematurely.
Step 4: Reveal Your Masterpiece and Add Finishing Touches
This is arguably the most satisfying part – the grand reveal!
- Careful Peeling: Once the paint is completely dry (usually a few hours, or even overnight for best results), carefully peel the vinyl off the jars. Gently lift an edge of the vinyl with your fingernail or a craft knife and slowly pull it away. You’ll reveal the clear glass underneath, creating your personalized design. If the paint seems to be lifting with the vinyl, try peeling very slowly and at a sharp angle against the surface of the jar.
- Final Touches: After the vinyl is removed, inspect your jar for any small imperfections. A damp cotton swab can gently clean up minor smudges. Once satisfied, it’s time to fill your beautiful personalized mason jar with treats! For Easter, candy is perfect. For other occasions, consider small toys, bath bombs, craft supplies, or homemade goodies. Finish it off with a charming ribbon tied around the neck of the jar or a small decorative bow.
Can you believe how incredibly easy and impactful this project is? Just look at the adorable finished products! These personalized mason jars offer a fabulous and heartfelt way to present a gift to someone you cherish, adding an unforgettable handmade touch to any celebration.
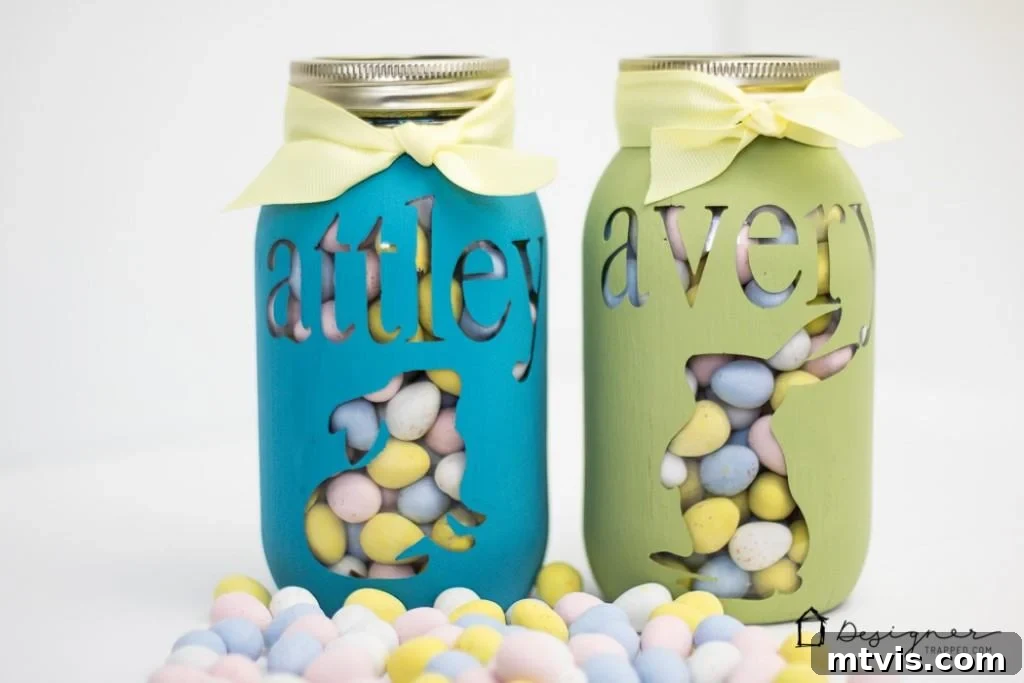
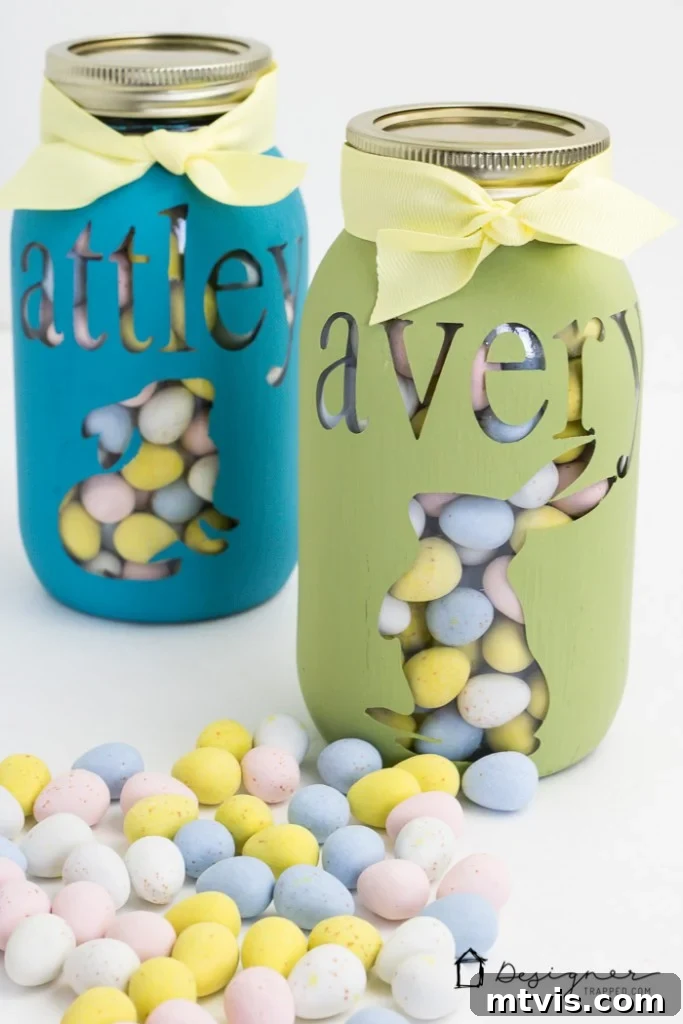
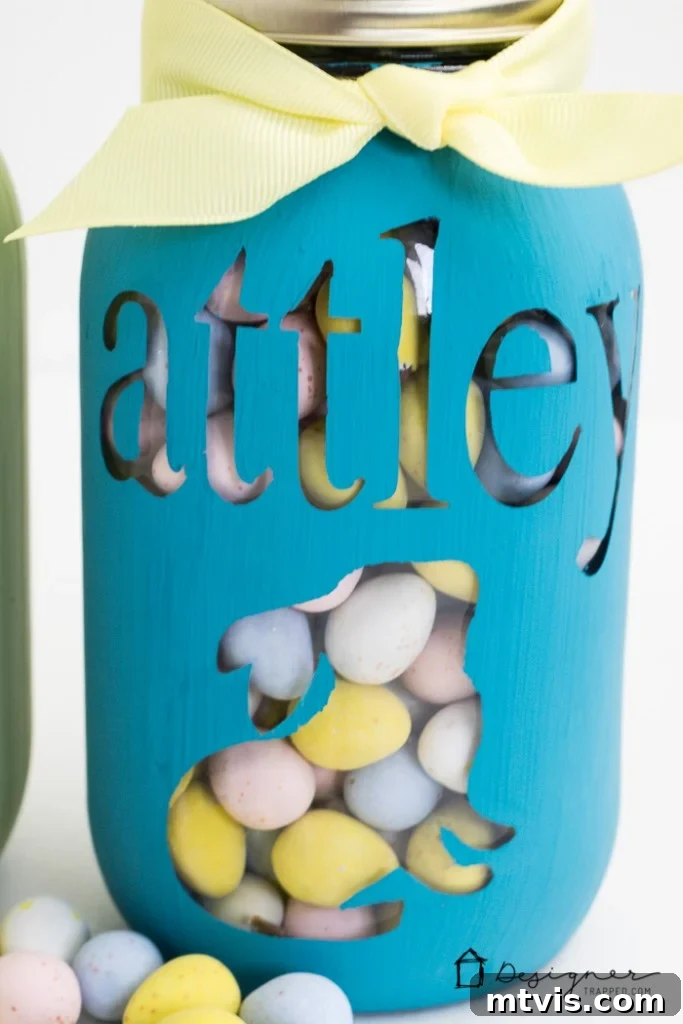
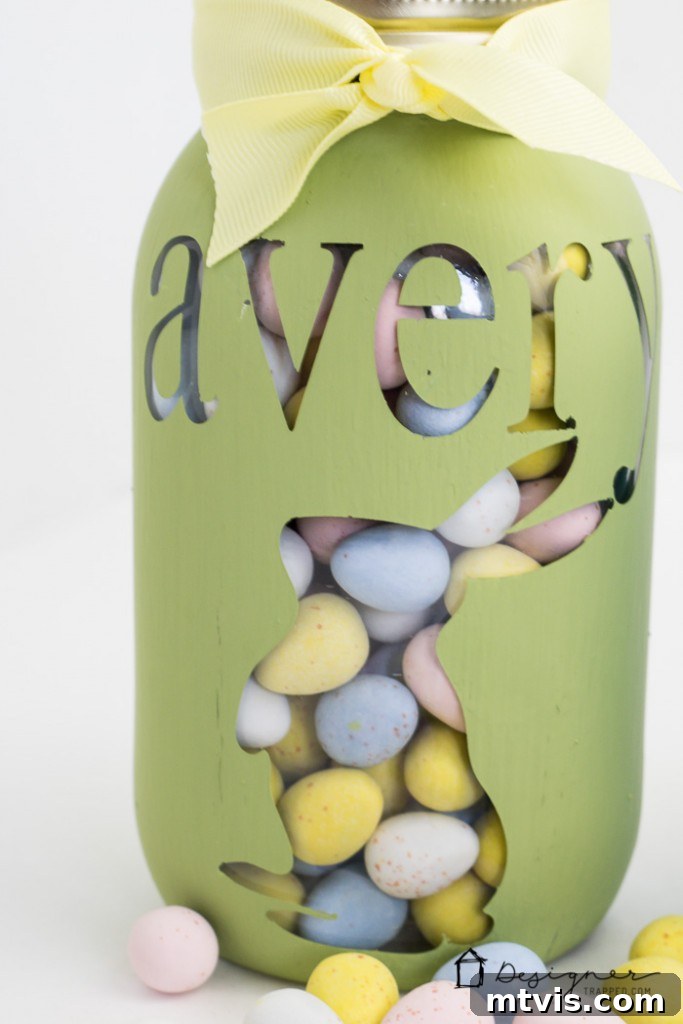
Creative Ideas & Variations for Your Personalized Mason Jars
The beauty of this DIY project lies in its incredible adaptability. Once you master the basic technique, the possibilities for customization are endless. Don’t limit yourself to Easter; these personalized mason jars can be tailored for virtually any celebration or purpose.
Beyond Easter: Occasions to Personalize Mason Jars
- Birthdays: Customize with the recipient’s name and age, filled with their favorite candies or small gifts.
- Mother’s Day/Father’s Day: Add a heartfelt message or a custom design, perhaps filled with spa items for mom or tools for dad.
- Valentine’s Day: Use romantic colors like red or pink, with heart-shaped cutouts and sweet messages, filled with chocolates.
- Christmas: Create festive jars with snowflakes, reindeer, or holiday greetings, perfect for homemade cookies or hot cocoa mixes.
- Teacher Appreciation: A personalized jar filled with school supplies or a gift card makes a thoughtful end-of-year present.
- Wedding Favors: Imagine mini personalized mason jars with the couple’s initials and wedding date, filled with small treats for guests.
- Home Decor: Use them as charming vases for fresh flowers, holders for craft supplies, or even unique kitchen storage for staples like sugar or coffee.
Design and Color Palettes
Experiment with different chalk paint colors and vinyl designs to match your theme:
- Seasonal Themes: Fall leaves, summer fruits, spring blossoms, winter snowscapes.
- Monograms & Initials: A classic and elegant way to personalize.
- Patterns: Simple geometric shapes, polka dots, or stripes can add a modern touch.
- Ombre Effect: Gradually blend two or more chalk paint colors for a beautiful gradient.
What to Fill Your Jars With
The contents can be as creative as the jar itself:
- Edible Treats: Candies, cookies, homemade granola, hot chocolate mix, nuts, spices.
- Spa & Self-Care: Bath bombs, miniature lotions, homemade scrubs, cotton balls.
- Craft Supplies: Buttons, beads, ribbons, glitter, small spools of thread.
- Desk Essentials: Pens, paper clips, mini notebooks.
- Small Gifts: Jewelry, keychains, small toys, gift cards.
- Live Elements: A small potted succulent or fresh flowers can turn your jar into a beautiful mini planter or vase.
Pro Tips for Flawless Results
To ensure your personalized mason jars turn out perfectly every time, keep these expert tips in mind:
- Surface Preparation is Key: Don’t skip cleaning your jars with rubbing alcohol. Any residue can prevent vinyl from adhering properly or paint from sticking evenly.
- Patience with Drying: While chalk paint dries quickly to the touch, it needs time to fully cure. Rushing the peeling process can cause paint to lift or tear. Allow at least a few hours, or even overnight, before carefully removing the vinyl.
- Thin Coats are Better: Apply multiple thin coats of paint rather than one thick coat. This reduces drips, provides better coverage, and allows for more even drying.
- Quality Vinyl Matters: Invest in good quality adhesive vinyl. Cheaper vinyl might not cut cleanly or adhere well, leading to frustration.
- Consider a Top Coat/Sealer: For added durability, especially if your jar will be handled frequently or used for something other than decor, consider applying a clear, non-toxic sealer (like a clear chalk paint wax or a spray sealant) over the painted areas. Ensure it’s safe for use with chalk paint and allows the design to remain clear.
- Store Properly: Keep your finished jars in a cool, dry place until gifting to prevent any accidental damage.
Care and Maintenance for Your DIY Personalized Mason Jar
To preserve the beauty of your custom-painted mason jar, hand washing is recommended. Gently wash the exterior with mild soap and water, avoiding harsh scrubbing or abrasive cleaners over the painted areas. These jars are not typically dishwasher safe, as the high heat and strong detergents can damage the chalk paint finish and design. With proper care, your personalized mason jar will remain a beautiful and functional item for years to come.
If you’ve loved this simple yet impactful DIY idea, be sure to pin it to your favorite crafting or gift-giving boards so you can easily refer back to it whenever inspiration strikes! Happy crafting!
Other Posts You May Enjoy for More Inspiration:
- Unique Easter Basket Gift Ideas
- Delightful Easter Egg Carrot Cupcakes Recipe
- My Favorite DIY Easter Decorations + More Creative Crafts
- Easy Dotted Sharpie Easter Eggs Tutorial
- Decorating Easter Eggs With Dots and Glitter
Curious about how I approach transforming rooms and spaces in our home, making interior design accessible and enjoyable? You might find immense value in exploring Designer in a Binder®. It’s my comprehensive system designed to guide you through decorating your home with confidence and clarity, without the need for an expensive professional.
And if you’re eager for exclusive content, behind-the-scenes sneak peeks into my latest projects, and first access to new ideas, be sure to subscribe to my newsletter before you head out! Join our creative community and never miss out on inspiration.