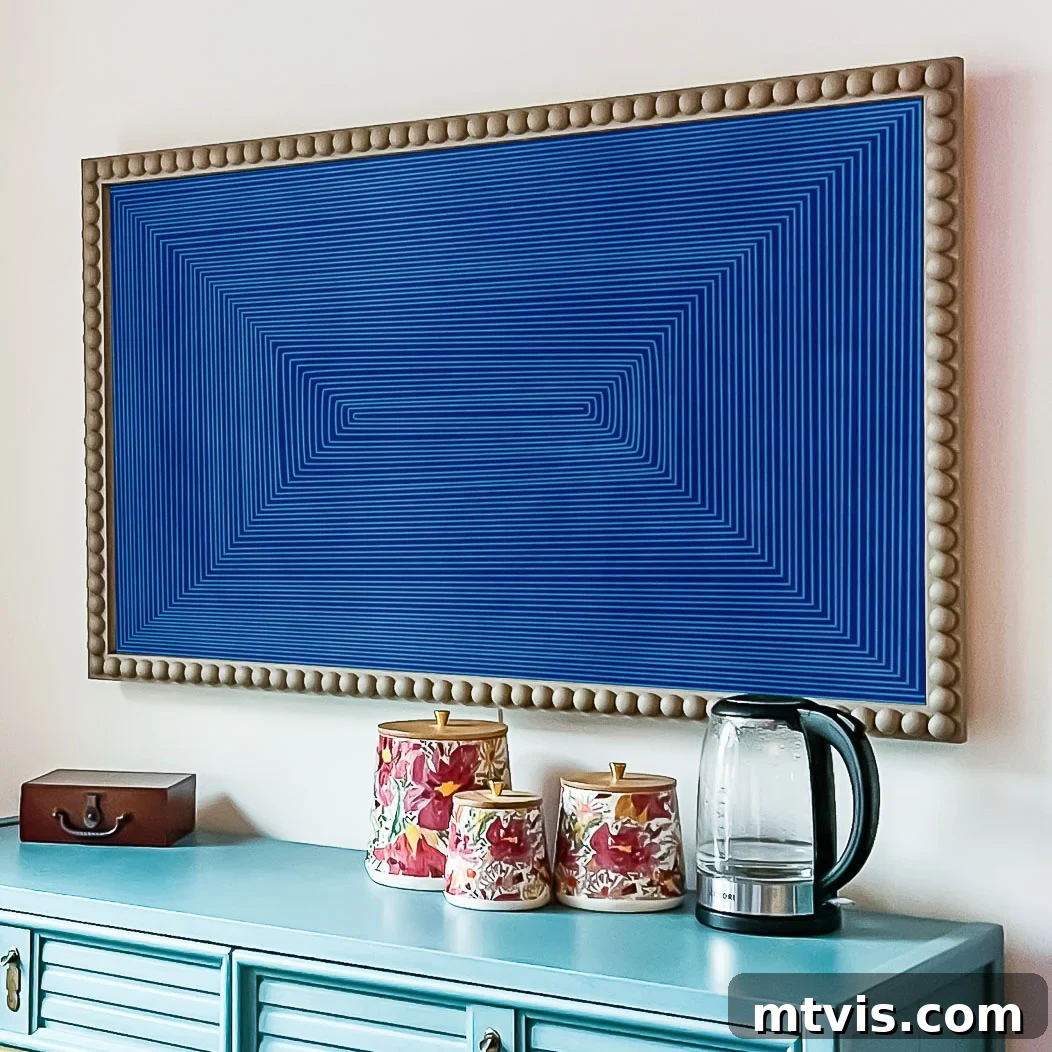
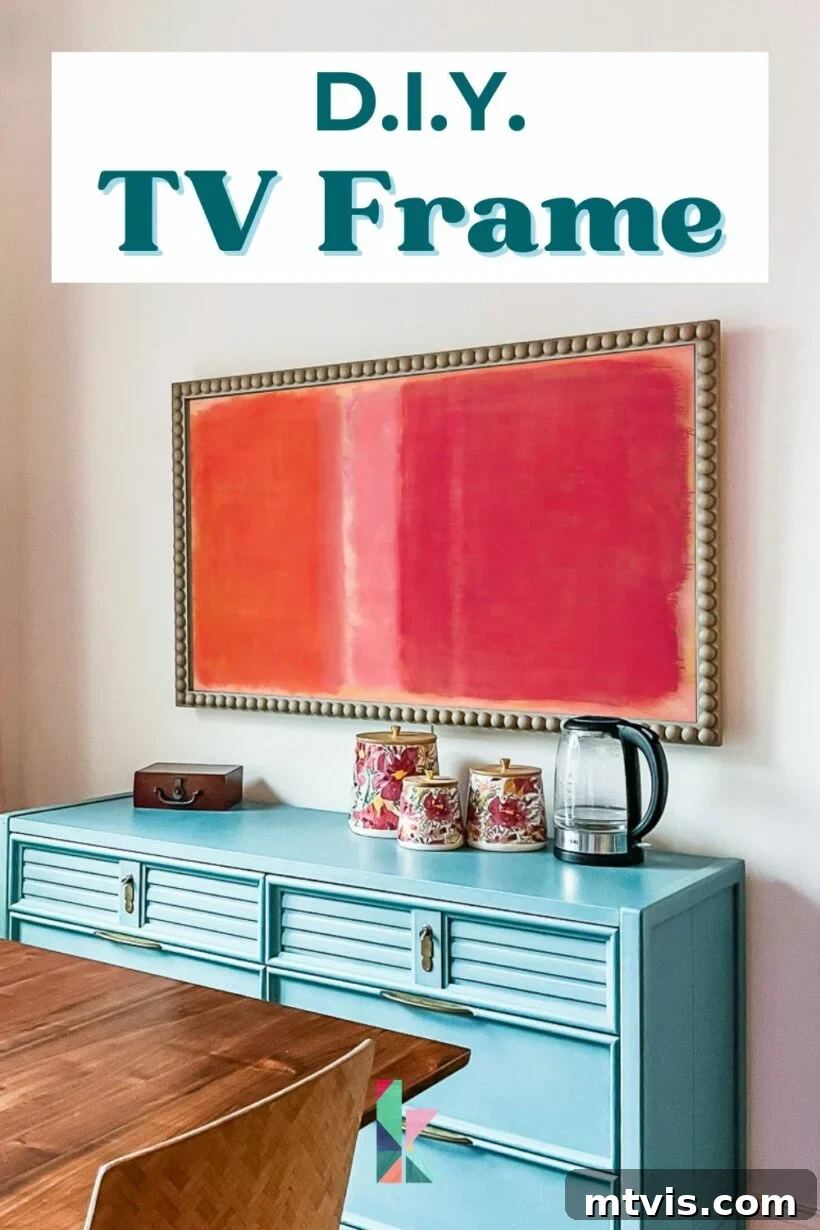
Are you looking to enhance the aesthetic of your living space? If you own a Samsung Frame TV, or any other sleek flat-screen television mounted on your wall, you know how a large black rectangle can sometimes detract from your meticulously designed room. The good news is, you can effortlessly transform this functional necessity into a beautiful focal point by crafting a custom DIY frame! Not only will you be amazed by the elevated look it brings to any space, but this handmade option is also significantly more budget-friendly than the often costly frames and bezels available online for the Samsung Frame TV. This tutorial is designed to be straightforward and accessible, proving that you can achieve stunning results even without a full suite of power tools. Let’s embark on this exciting DIY journey and create something truly special!
Thank you to DAP Products for sponsoring this post. This post contains affiliate links for your convenience. Click here for my full disclosure policy.
Transform Your TV: A Journey to Seamless Integration
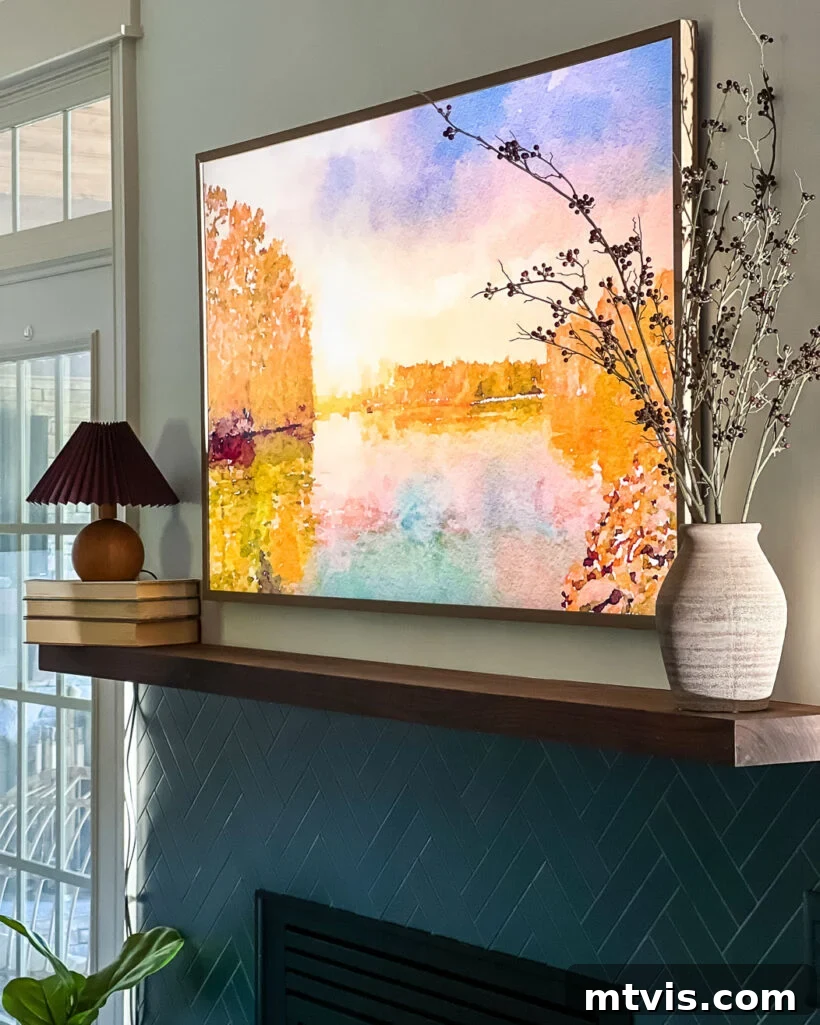
It’s widely acknowledged that maximizing the aesthetic appeal of televisions is a game-changer for interior design. I’ve always been passionate about integrating technology into living spaces in the most beautiful way possible. In our bedroom, I successfully upgraded a basic smart TV, figuring out how to display digital art on any smart TV, allowing it to blend perfectly with our gallery wall. A few years ago, we even invested in a Samsung Frame TV for our family room, specifically so it would appear as stunning artwork above our fireplace, truly transforming the space.
My unbiased review of the Samsung Frame TV candidly shared my perspective: while not always worth the premium cost for every room (I wouldn’t personally buy one for a bedroom), its unique features certainly justify the expense in highly visible areas. Thus, when we decided to introduce a TV into the eat-in kitchen area of our home, the choice was clear: another 55″ Samsung Frame TV.
For the TV in our family room, we had purchased a Samsung Frame TV Bezel. While it does the job, it wasn’t exactly inexpensive (now around $250), and I often wished it felt more substantial. Initially, I planned to order another one for our new Frame TV, but to my dismay, the specific size and style we wanted were completely sold out, with no restock date in sight. Many people rave about Deco TV Frames, so I explored that option. However, at roughly $600 for a 55″ frame, and a style that didn’t quite align with our vision, it simply wasn’t the right fit. It was clear then: a custom DIY solution was the answer.
This led us to the exciting decision to craft our own DIY bobbin frame for the TV! The total cost for this project came in at an astonishingly low $80. The result? A frame that I absolutely adore, surpassing the quality and style of any pre-made option we considered. It feels wonderfully substantial, and the unique bobbin design perfectly complements our desired aesthetic. This project was a resounding success and a true win-win!
Will This DIY Frame Work for Any Flat-Screen TV? Absolute Versatility!
While our specific project focused on creating a bespoke frame for our Samsung Frame TV, the beauty of this tutorial lies in its incredible adaptability. This method can truly be applied to construct a stylish frame for virtually any slim or thin flat-screen television that is mounted on a wall. Whether you have an LG, Sony, Vizio, or any other brand, as long as it has a relatively flat profile against the wall, you can follow these steps to give it a custom, high-end look. The key is simply taking precise measurements of your specific TV and its bezel dimensions, allowing you to tailor the frame perfectly.
Why Bother Framing a TV? Elevating Aesthetics and Functionality
You might be asking why go to the trouble of framing a TV at all, especially when modern televisions are designed to be sleek. The answer is simple: an unframed TV, particularly when wall-mounted, often stands out as a stark, modern appliance. When turned off, it becomes a large, dark rectangle—an uninspiring void in an otherwise beautifully decorated room. Who wants a prominent black box as a central feature? Not us!
A thoughtfully designed frame instantly transforms your television from a mere screen into a cohesive element of your interior design. It softens the hard edges, adds architectural interest, and allows the TV to blend seamlessly or even become an intentional decorative statement. Taking it a step further, integrating digital art on your smart TV (even if it’s not a Frame TV) truly elevates its presence to another level. When framed and displaying captivating artwork, your TV transitions from an electronic device to a dynamic piece of art, enhancing the overall ambiance of your home. It’s an easy way to inject personality and style into a functional item.
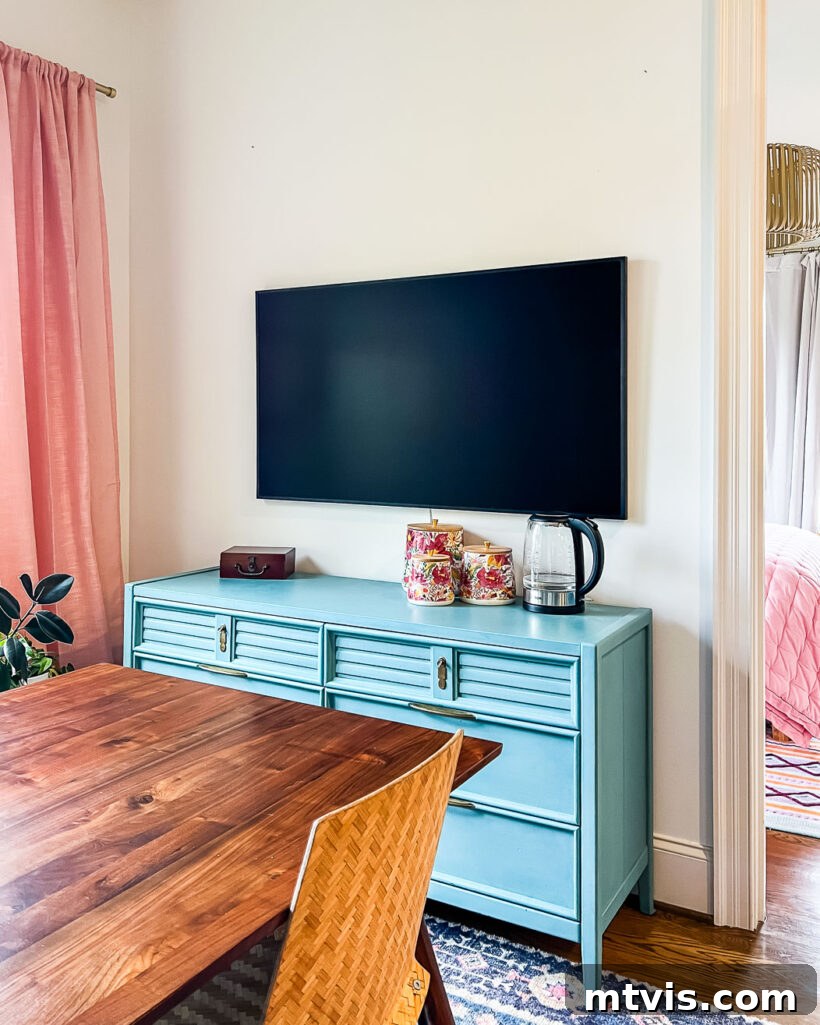
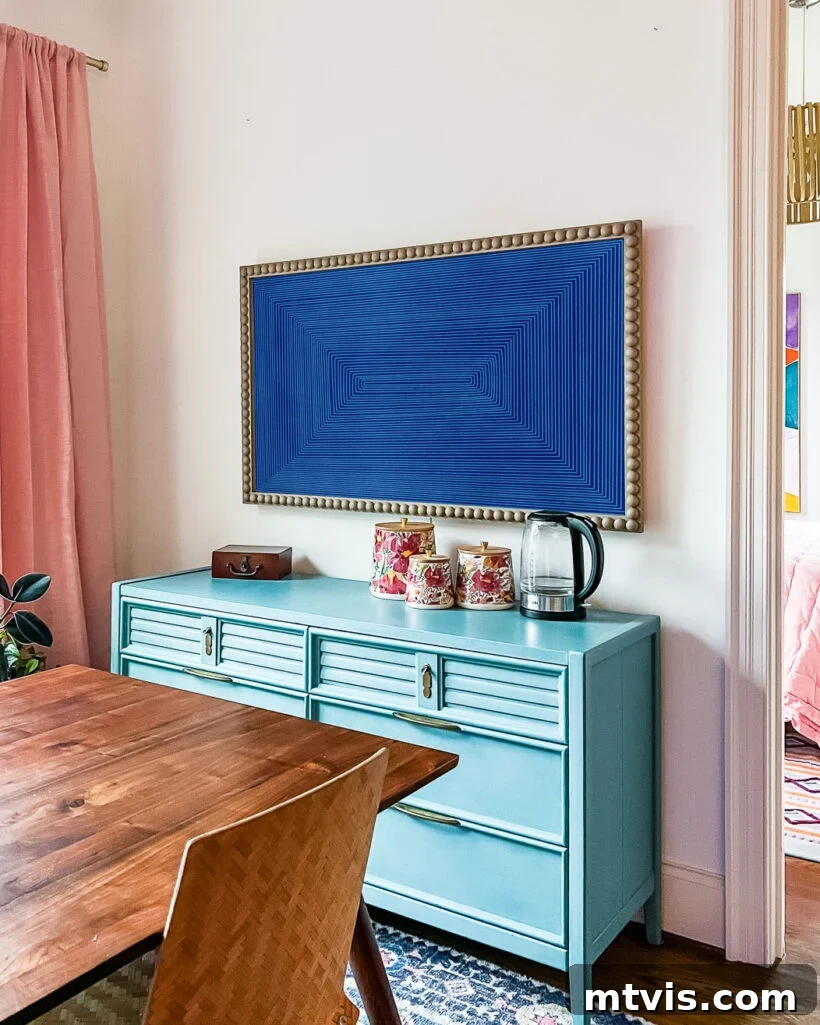
How to Make a DIY Bobbin Frame for Your TV: A Step-by-Step Guide
To give you a better understanding of the entire process, I highly recommend watching a quick video overview before diving into the detailed written instructions below. This visual context will clarify many steps and ensure a smoother DIY experience.
(Video placeholder: Please refer to the original source for the instructional video.)
Materials & Tools Needed for Your Custom TV Frame Project
Gathering all your supplies before you start is crucial for a smooth and efficient DIY process. Here’s everything you’ll need to create your beautiful bobbin TV frame:
- Tape measure: Essential for accurate measurements of your TV and wood cuts.
- 1 x 2 inch pine boards: These will form the main face of your frame. For our 55″ Frame TV, we utilized three 8-foot boards. Always buy a little extra just in case!
- 1/2-inch thick x 11/16-inch wide pine lattice molding: This thinner molding will create the side profile of your frame that hugs the TV. We also used three 8-foot lengths for our 55″ TV.
- 1.25″ / 30mm half wood balls: These charming elements are key to achieving the distinctive bobbin or beaded look. I ordered three bags of 50 balls and had about 20 left over, so plan accordingly based on your TV size.
- Measuring gauge: (Optional, but highly recommended) A tool like a Kreg measuring gauge makes precise measurements of the TV’s plastic bezel much easier and more accurate, ensuring a perfect fit for your frame.
- Paint: Choose a color that complements your room’s decor. A neutral shade offers versatility for displaying various digital art.
- DAP Weldwood Instant Adhesive: This quick-setting glue is a lifesaver for impatient DIYers, drastically reducing drying times between steps.
- DAP Premium Wood Filler: Essential for smoothing out nail holes and any minor gaps in your mitered joints, achieving a flawless finish.
- Sandpaper: Various grits for preparing wood surfaces and smoothing filler.
- Miter saw: (Or hand saw and miter box) A miter saw offers precision and speed for angled cuts, but a hand saw with a miter box is a perfectly viable alternative for those without power tools.
- Nail gun: (Or small finishing nails and hammer) For securing corners. A nail gun speeds up the process, but a hammer and finishing nails work just as well for a budget-friendly approach.
DIY Bobbin Frame Cost Breakdown: Achieve High-End Style on a Budget
One of the most appealing aspects of this project is its affordability. We were able to keep our costs incredibly low because we already had several supplies on hand from previous projects, including the glue, wood filler, and paint. Even if you need to purchase all these materials from scratch, you can expect to complete this DIY TV frame for well under $150, a significant saving compared to commercial options.
- Wood: Approximately $51 (for the pine boards and lattice molding)
- Wood half balls: Approximately $30 (for the decorative bobbin elements)
- Estimated Total (excluding existing supplies): ~$81
- Estimated Total (if buying all new supplies): ~$120-$150 (depending on paint and tool costs)
This breakdown clearly demonstrates how economical it is to create a custom frame that looks far more expensive than it actually is, offering incredible value and a truly personalized touch to your home decor.
Anatomy of This DIY TV Frame: Understanding the Structure
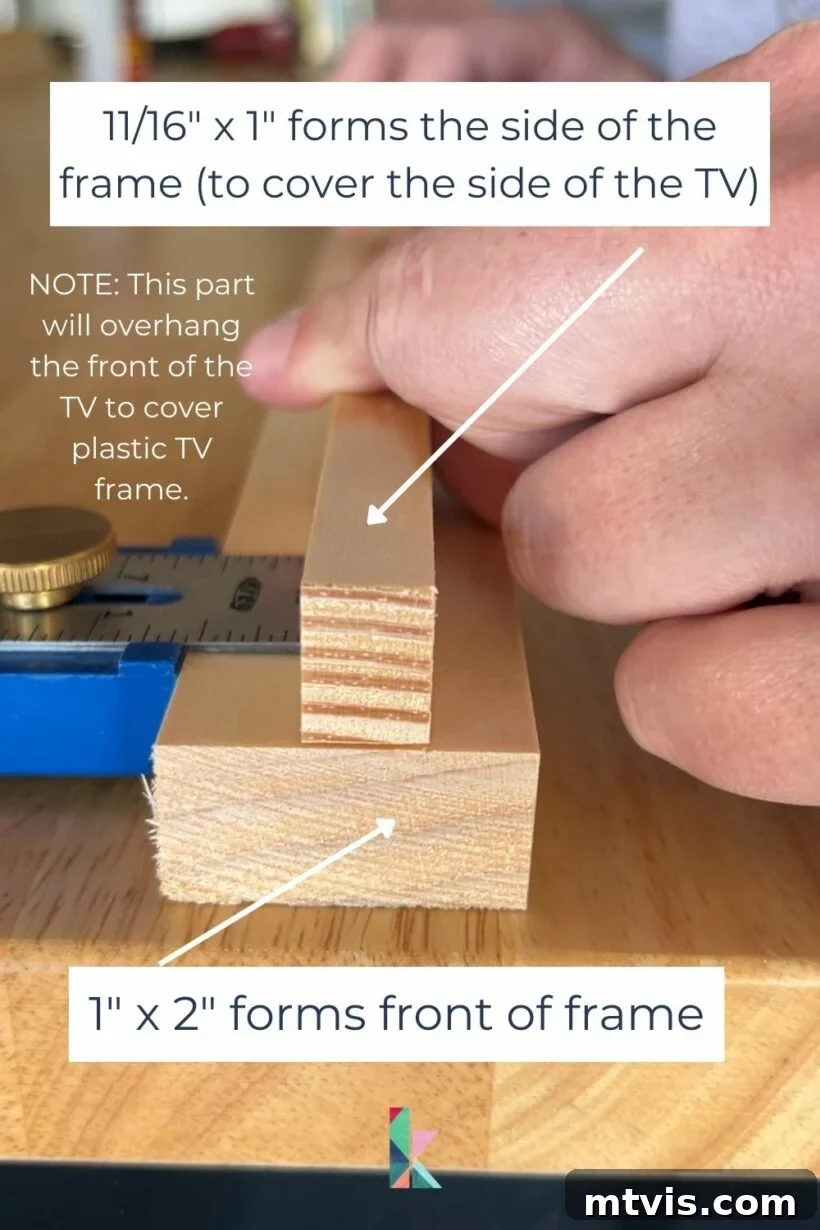
Before you delve into the step-by-step instructions, it’s incredibly helpful to visualize the structure of this DIY TV frame. The diagram below illustrates how we ingeniously combined the two different wood sizes – the wider pine boards and the narrower lattice molding – to create a perfectly fitting and aesthetically pleasing frame for our Samsung Frame TV. Understanding this basic assembly will make the upcoming instructions much clearer and easier to follow.
Time needed:
Follow these detailed steps to learn how to make this DIY TV frame for under $150 (even if buying all new supplies) in approximately 4 hours, transforming your television into a stunning design feature!
-
Step 1: Precisely Measure Your TV and Determine Overhang.
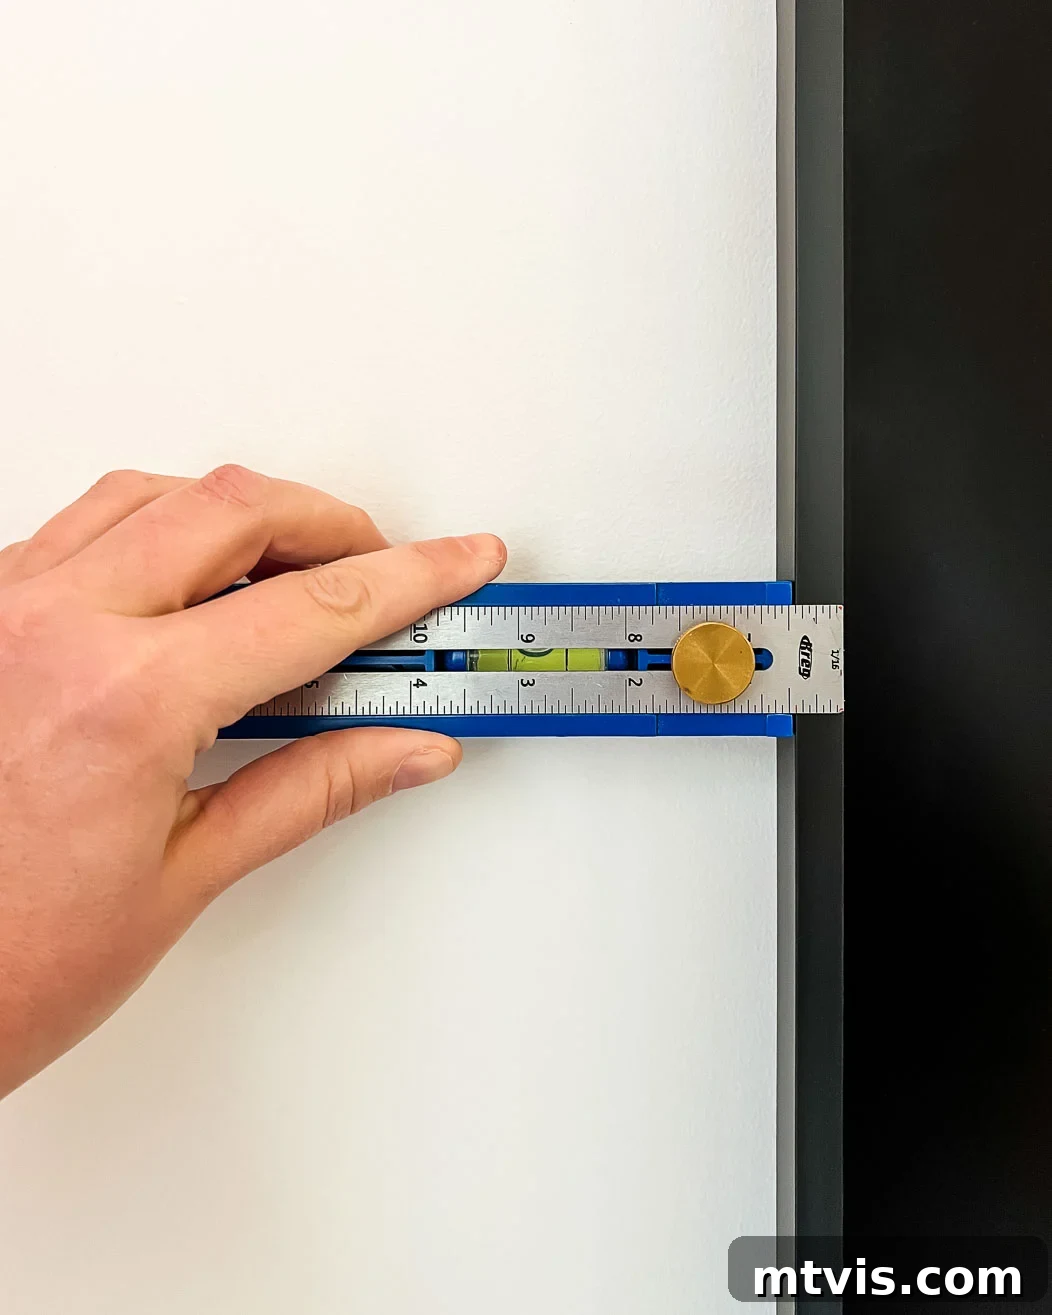
Accurate measurements are the foundation of a successful project. Begin by taking precise measurements of both the length and width of your television screen. These dimensions will dictate the length of your main frame pieces. Crucially, you also need to determine the ideal overhang for your frame – that is, how much the frame will extend over the front of your TV without ever obscuring any portion of the actual screen. All flat-screen TVs feature a plastic bezel or frame around the screen itself. This is the area your DIY frame should cover. We found this measuring gauge incredibly helpful for precisely measuring both the width and depth of our TV’s plastic frame, ensuring a perfect, snug fit without any visual interference.

-
Step 2: Glue Your Wood Pieces Together Before Cutting.
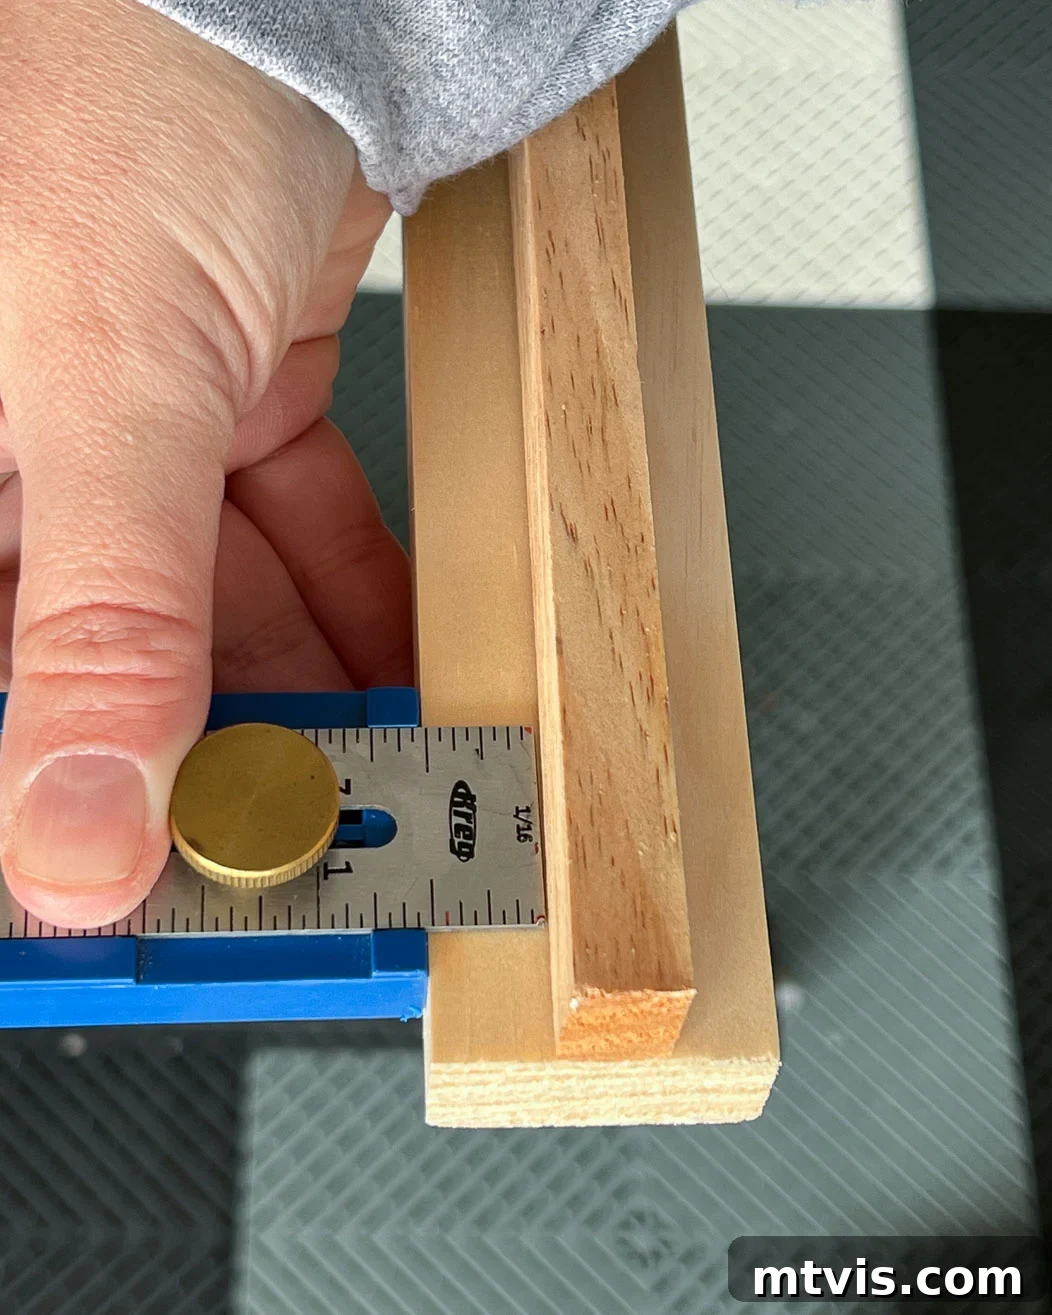
A smart trick to simplify your workflow and ensure cleaner miter joints later on is to glue the primary frame components together before making any cuts. For our design, the 1″ x 2″ pine boards form the visible front of the frame, while the thinner lattice molding creates the side profile, effectively covering the side edge of the TV. If you’re unsure about this configuration, refer back to the “Anatomy of this DIY TV Frame” diagram above. Given that the plastic frame around our TV was exactly 1/2″ wide, we used DAP Weldwood Instant Adhesive to meticulously glue the lattice molding to the back of the front 1×2 pieces, positioning it precisely 1/2″ from the edge. This careful alignment guarantees that the finished frame will only obscure the TV’s plastic bezel, leaving the screen completely clear and unobstructed.
-
Step 3: Miter Cut Your Glued Wood to Length.
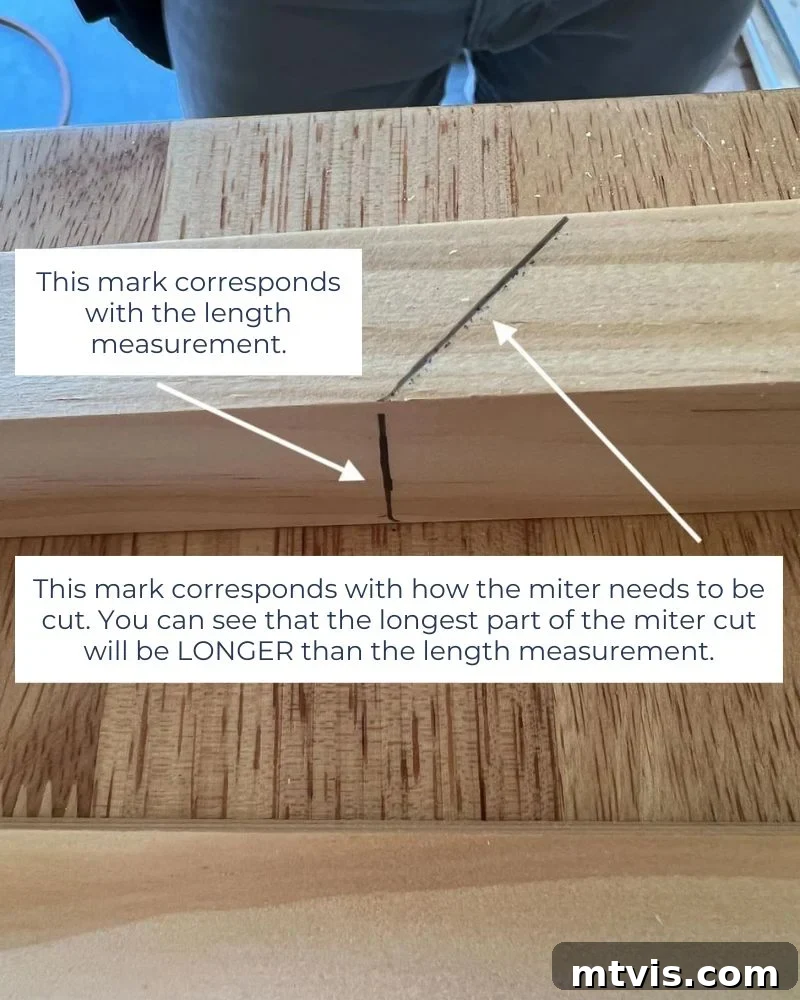
Once all your wood pieces are securely glued together and the adhesive has fully set, you’re ready for the cutting stage. This step requires careful attention, especially when making mitered cuts for the corners. Remember this crucial rule: when measuring for mitered cuts, the shortest part of your mitered edge must correspond precisely to the external length of your TV. A common mistake is to measure and cut so that the longest portion of the mitered wood matches the TV’s length, which will inevitably result in a frame that is too short. To avoid this frustration, always mark the TV’s measurement directly onto the wood, then draw your miter cut line before engaging the saw. Trust me, visually marking the length and then freehanding the miter can lead to costly errors (I speak from experience!). Double-check your measurements and angles for perfect 45-degree cuts at each corner.
-
Step 4: Assemble and Glue Your Frame Corners.
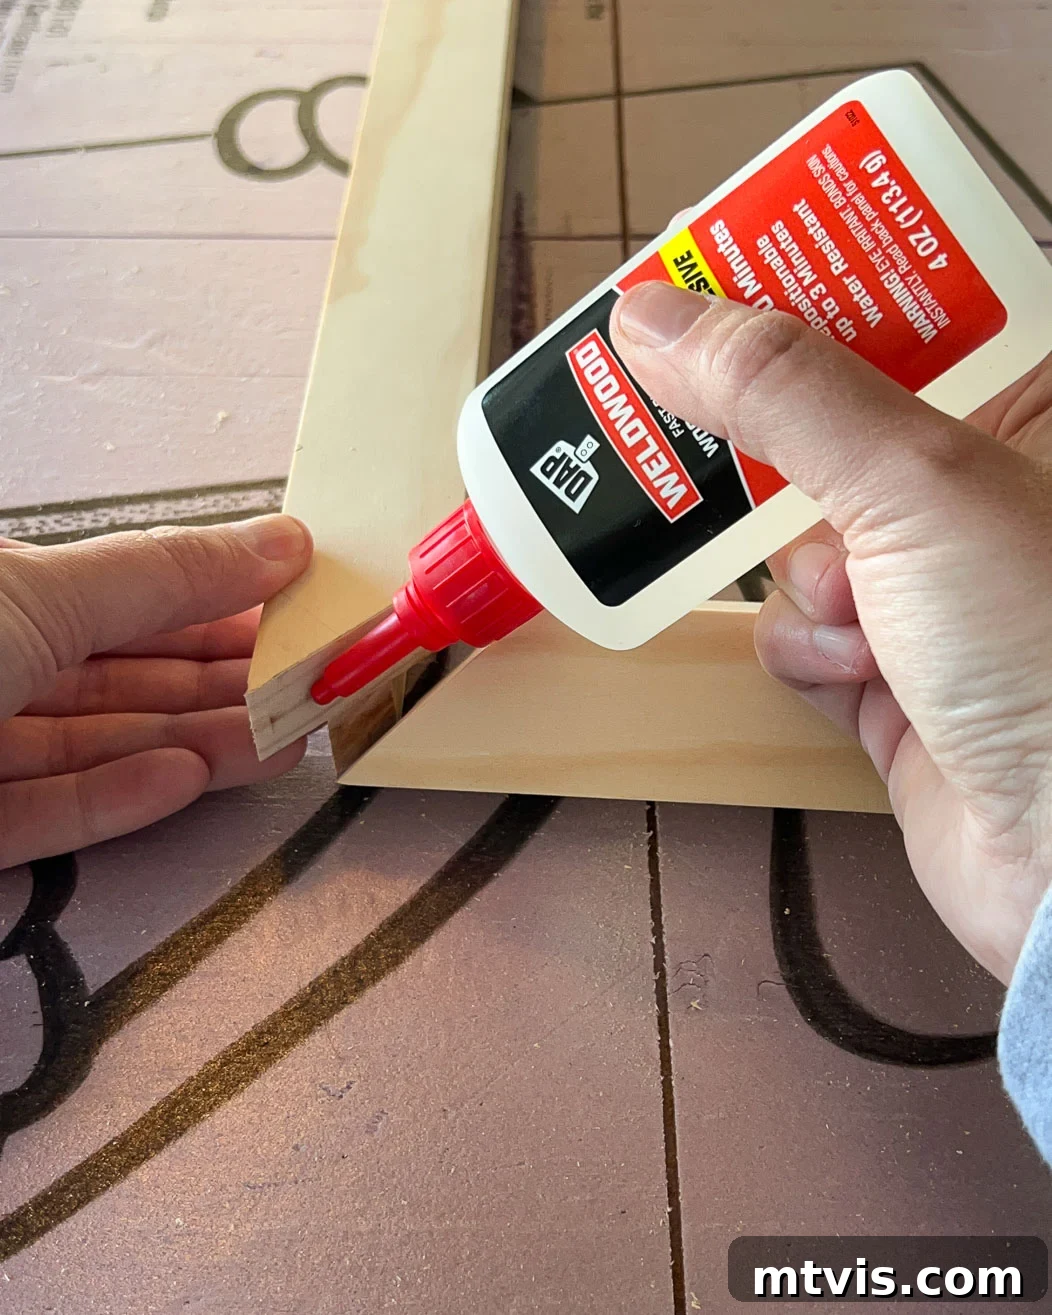
With all your wood pieces expertly cut to length, it’s time to assemble the frame. Apply a generous amount of DAP Weldwood Instant Adhesive to each mitered edge, then carefully press the corners together to form your rectangular frame. To secure the joints while the glue sets, we used 1-inch, 23-gauge pin nails with a nail gun. These small nails provide strong reinforcement without being overly visible. If you don’t have a nail gun, small finishing nails driven by hand with a hammer, or even robust clamps, will work effectively to hold the corners tightly. I personally prefer the instant adhesive for its rapid curing time, which significantly speeds up the project and satisfies my DIY impatience!
-
Step 5: Fill Nail Holes and Any Gaps for a Seamless Finish.
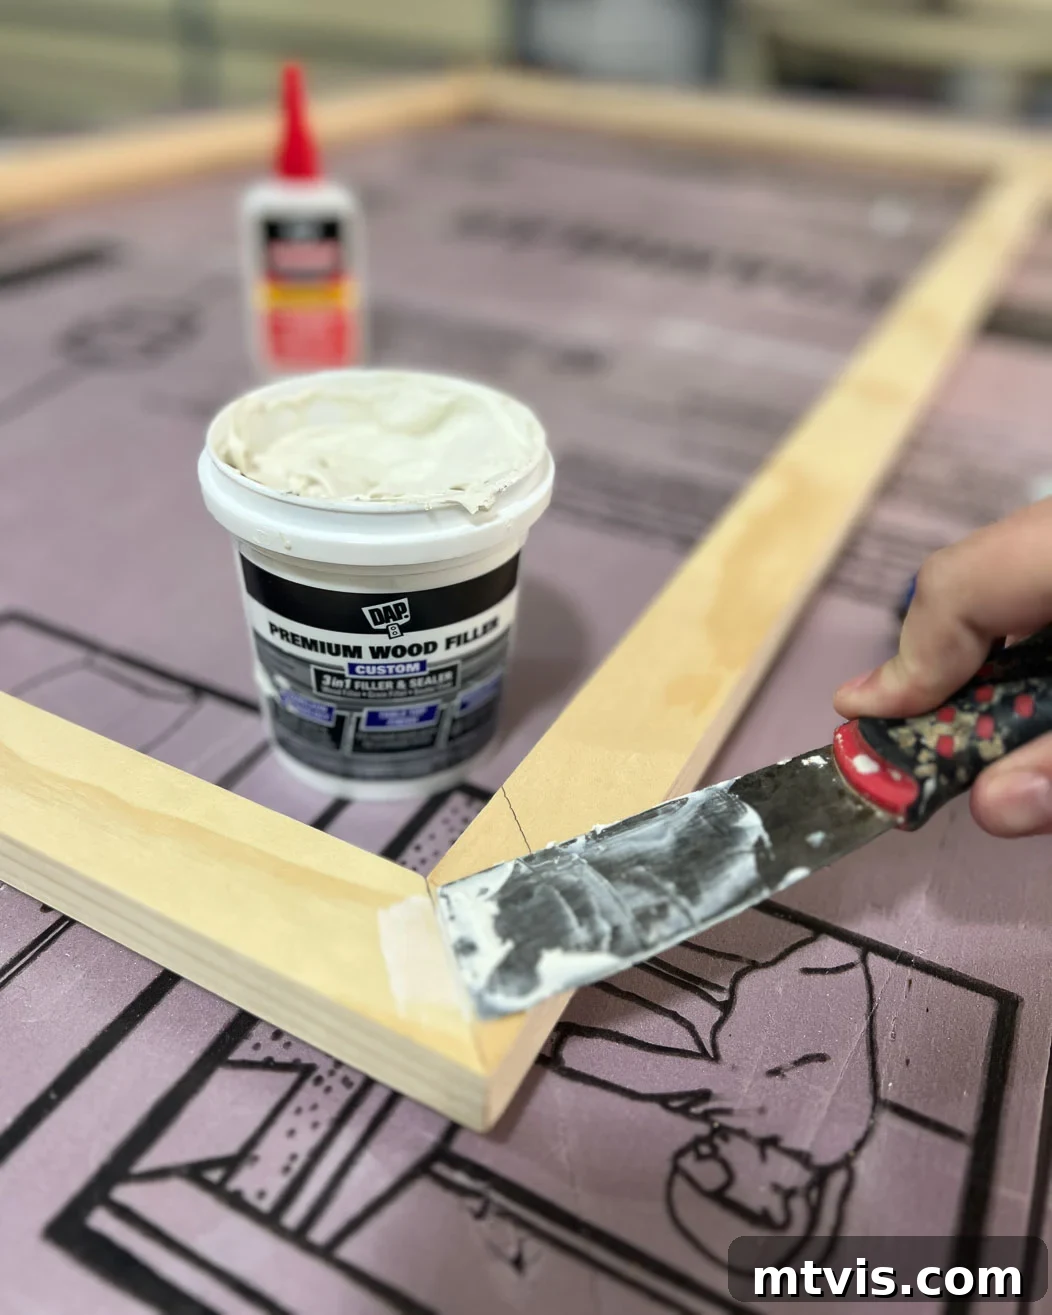
Once your frame assembly is complete and the glue has fully cured, it’s time to perfect the surface. Use DAP Premium Wood Filler to meticulously fill all visible nail holes. Additionally, carefully inspect your mitered joints for any small gaps that might have formed during assembly. Apply wood filler to these areas to create a smooth, continuous surface. Allow the wood filler to dry completely according to the product instructions. Once dry, sand all filled areas thoroughly until they are perfectly smooth and flush with the surrounding wood, ensuring a professional and high-end appearance before painting.
-
Step 6: Paint Your Frame its Base Color.
Now for the fun part – adding color! With the frame sanded smooth, it’s ready for paint. I opted for Algonquin by Fusion Mineral Paint, a beautiful, versatile shade that complements a wide range of decor styles. Even at this stage, before adding any decorative elements, the framed TV already began to look incredibly sophisticated and complete. However, to truly elevate its design and achieve that bespoke, high-end feel I envisioned, I knew I wanted to incorporate the trendy bobbin (or sometimes called beaded) style, which I absolutely adore. Painting the base now makes subsequent steps much easier for achieving full coverage.
-
Step 7: Make Any Adjustments for Your TV Sensor (If Necessary).
This step is crucial for maintaining your TV’s full functionality and might vary depending on your specific television model. For a Samsung Frame TV, the sensor is not merely for the remote control; it also intelligently detects ambient light conditions and motion in the room. These functions are vital for the TV’s “Art Mode” to operate correctly, adjusting brightness and turning off when no one is present. Therefore, before proceeding, carefully identify the location of your TV’s sensor. In our case, we needed to meticulously chisel out a small, precise section of our frame to ensure it would not obstruct the sensor. This small adjustment guarantees that your TV’s smart features remain fully operational.
-
Step 8: Plan the Precise Spacing of Your Half-Wood Balls.
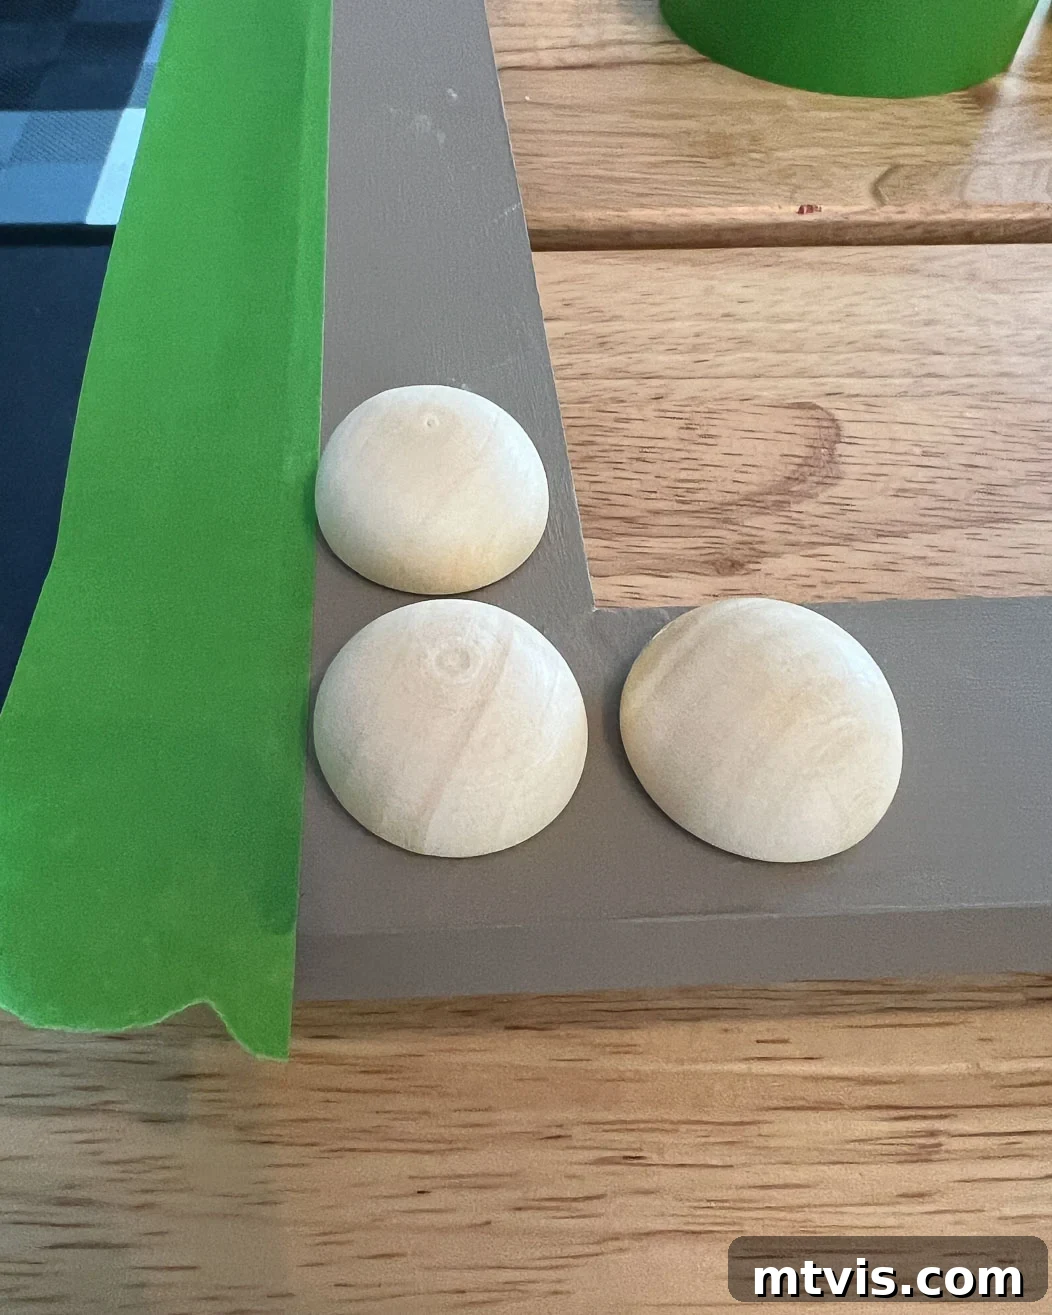
While the painted frame alone was already looking fantastic, I was determined to add that extra special touch by creating a bobbin, or beaded, effect. Having admired this style on Pinterest, I sourced some half-wood balls to replicate the look myself. The first step was strategic placement: I knew I wanted one ball perfectly centered in each of the four corners of the frame. After gluing these corner pieces in place, I dry-fitted the next balls. To determine the optimal spacing for the remaining balls, I then placed one ball on each side of the corner balls, carefully centering them on the width of the wooden frame. Painter’s tape proved invaluable here for maintaining consistent spacing along the face of the frame. I continued to dry-fit the rest of the balls along each side, adjusting until I achieved a visually balanced and pleasing pattern. This dry-fit stage is critical to avoid mistakes before permanent adhesion.
-
Step 9: Securely Glue the Wood Balls into Place.
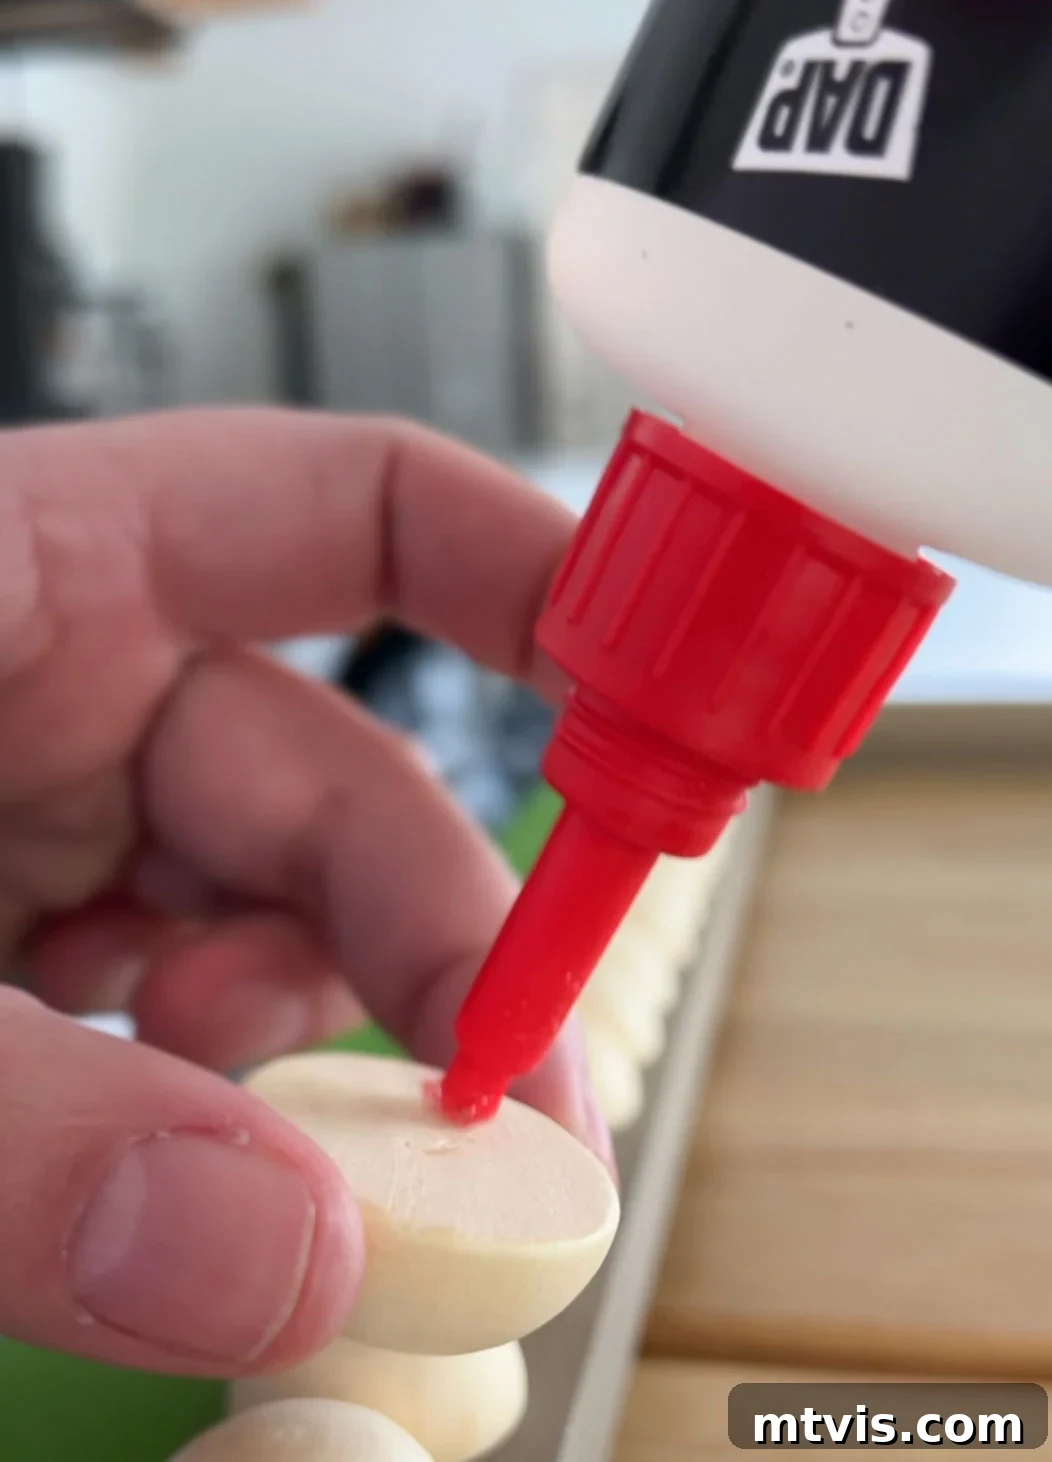
Once you are completely satisfied with the dry-fitted spacing and arrangement of your half-wood balls, it’s time for permanent attachment. To ensure consistent alignment, I found it incredibly helpful to run a strip of painter’s tape along the outer edge of the frame. This created a visual guide, assisting me in perfectly centering each half-ball on the front face of the frame. Then, one by one, I applied a small amount of glue to the flat back of each wood ball and pressed it firmly into its designated spot. Again, I used DAP Weldwood Instant Adhesive because its rapid drying time allowed me to work efficiently without long waits between applications. Take your time with this step to ensure each ball is straight and securely attached.
-
Step 10: Apply a Final Coat of Paint.
After all the half-wood balls are securely glued in place and the adhesive has fully dried and cured, it’s time for the final coat of paint. This step ensures that the entire frame, including the newly added bobbin elements, has a cohesive and flawless finish. While it can be a bit tedious to paint around each individual ball, the effort is well worth it for the unified look. I was very glad I applied the initial base coat to the frame before attaching the balls, as it would have been significantly more challenging to achieve full, even coverage on the underlying wood once the balls were in place. Take your time, using a small brush for detailed areas, to ensure every surface is beautifully coated.
-
Step 11: OPTIONAL: Staple Elastic onto the Back of Your Frame for Security.
For most installations, if your frame is built correctly and fits snugly, it should stay put. However, if you have any concerns about your custom TV frame accidentally shifting or falling off the television (perhaps due to playful pets, children, or placement in a high-traffic area), there’s a simple optional step to add extra security. Many DIY enthusiasts suggest stapling lengths of sturdy elastic banding onto the back of the frame at key points. These elastic bands can then be stretched over the top and bottom of your TV, effectively holding the frame firmly in position. This provides peace of mind without altering the front-facing aesthetics of your beautiful new frame.
-
Step 12: Position the Frame onto Your TV and Enjoy!
Congratulations, you’ve made it to the final step! With your stunning new bobbin frame complete and perfectly cured, it’s time to bring your vision to life. Carefully slide the finished frame onto your wall-mounted television, ensuring it sits flush against the screen’s bezel. Once in place, step back and admire the incredible transformation. To truly complete the effect, activate your TV’s art mode (or display digital art if it’s a regular smart TV). Your once plain screen is now an exquisite art piece, beautifully integrated into your home decor. Enjoy your customized, high-end TV display!
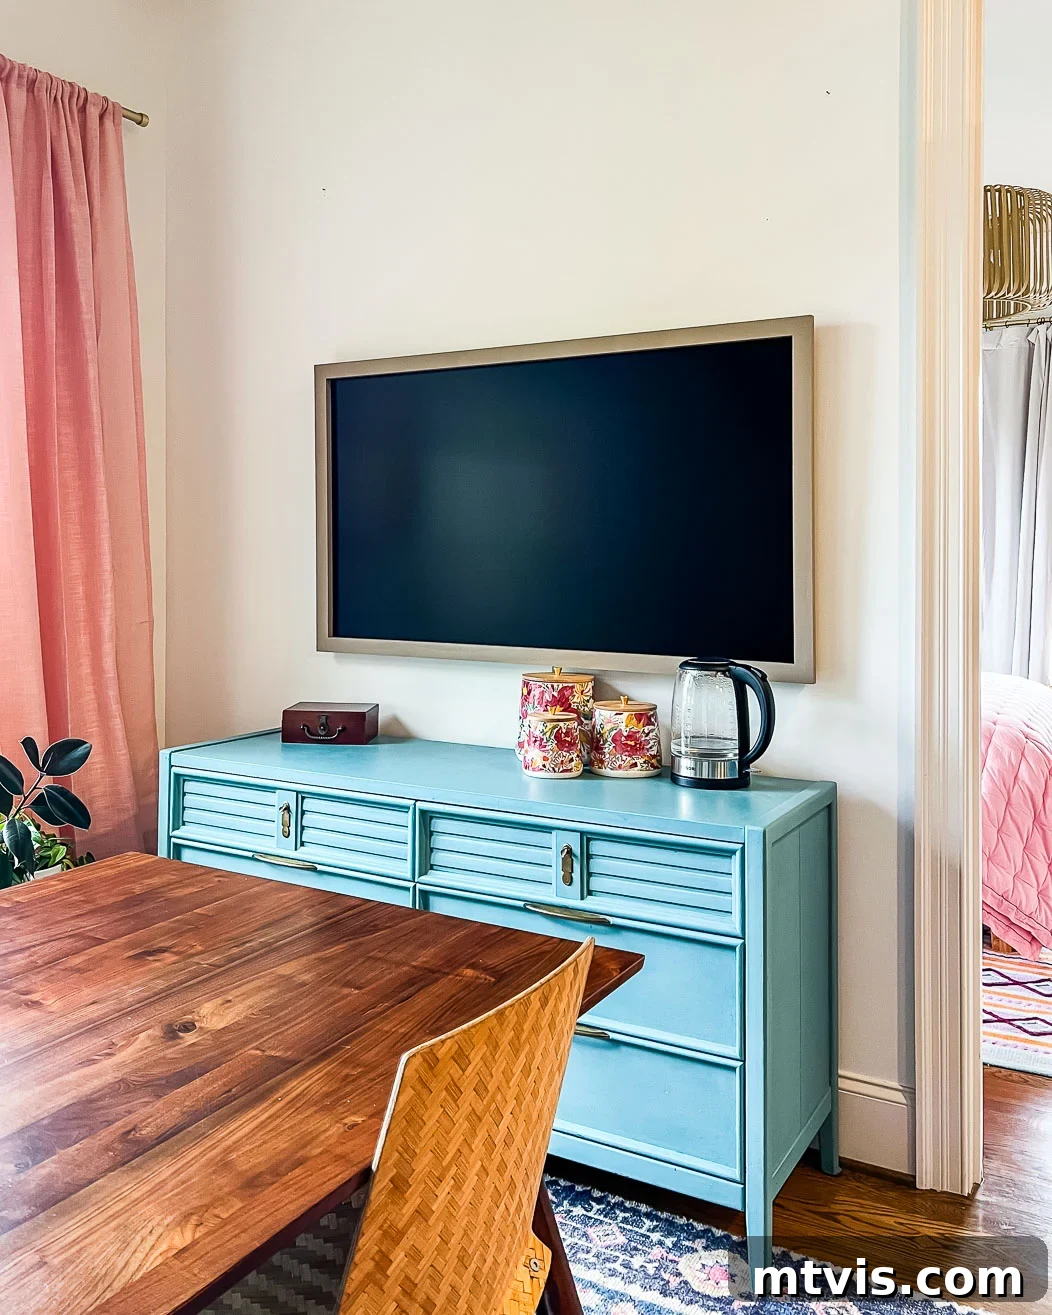
That’s it! Your TV now boasts a dramatically more finished and high-end appearance. You might be surprised that I opted for a neutral paint color, but there’s a thoughtful reason behind it: I intend to display a diverse range of vibrant, colorful digital art on the TV. A neutral frame offers unparalleled versatility, ensuring that the frame color never clashes with or restricts my artistic choices. Keep an eye out for updates – I’m excited to be creating an entire gallery wall around this newly framed TV very soon, showcasing how seamlessly it integrates into a larger artistic display.
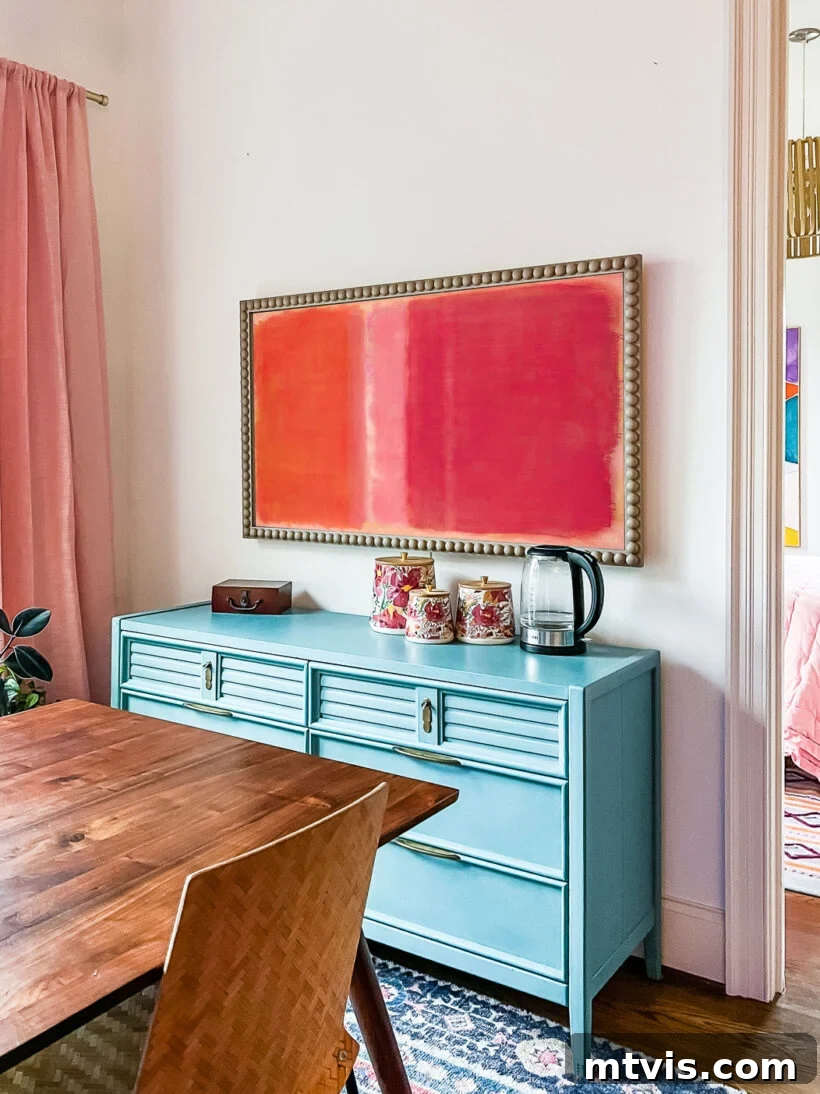
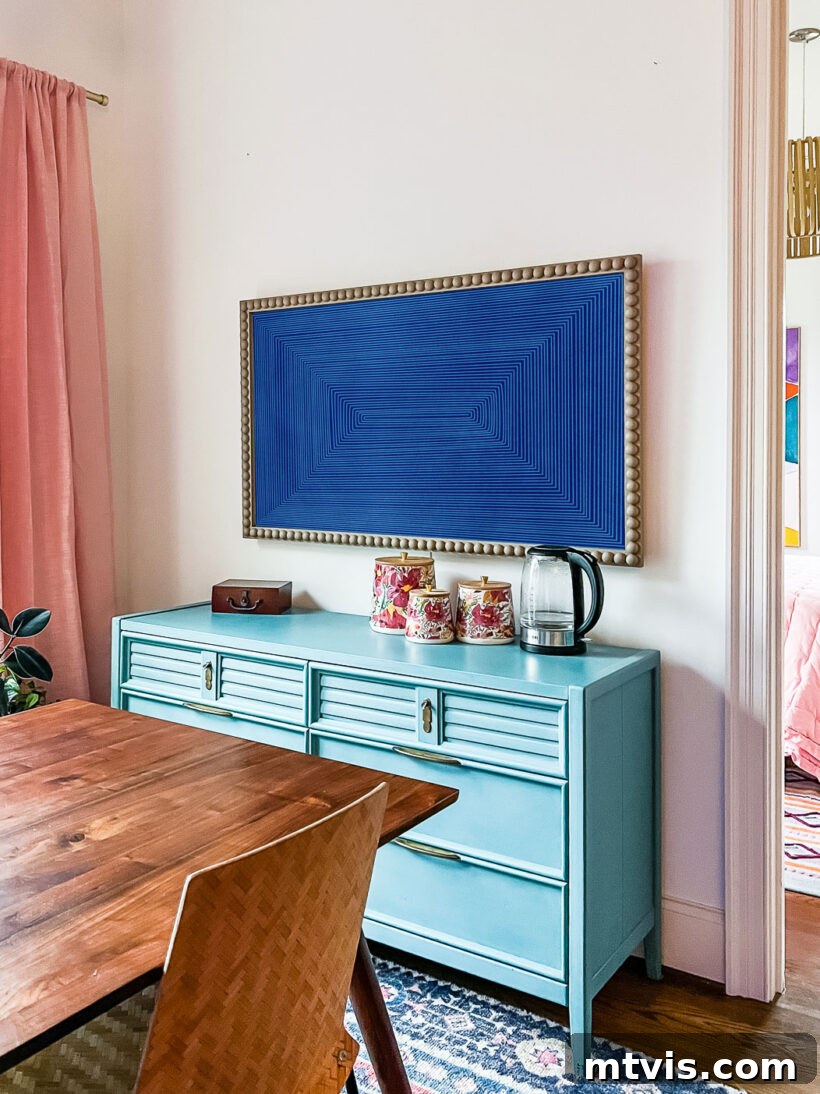
The total investment for this project was incredibly modest, coming in at under $85, a stark contrast to the hundreds of dollars typically required for commercial frames. What’s even better is that I genuinely prefer this custom-made frame to the one we purchased for our family room TV. Just look at the difference: our DIY bobbin frame offers a much more substantial and luxurious feel compared to the standard Samsung Frame TV Bezel. The custom craftsmanship and unique style truly stand out.
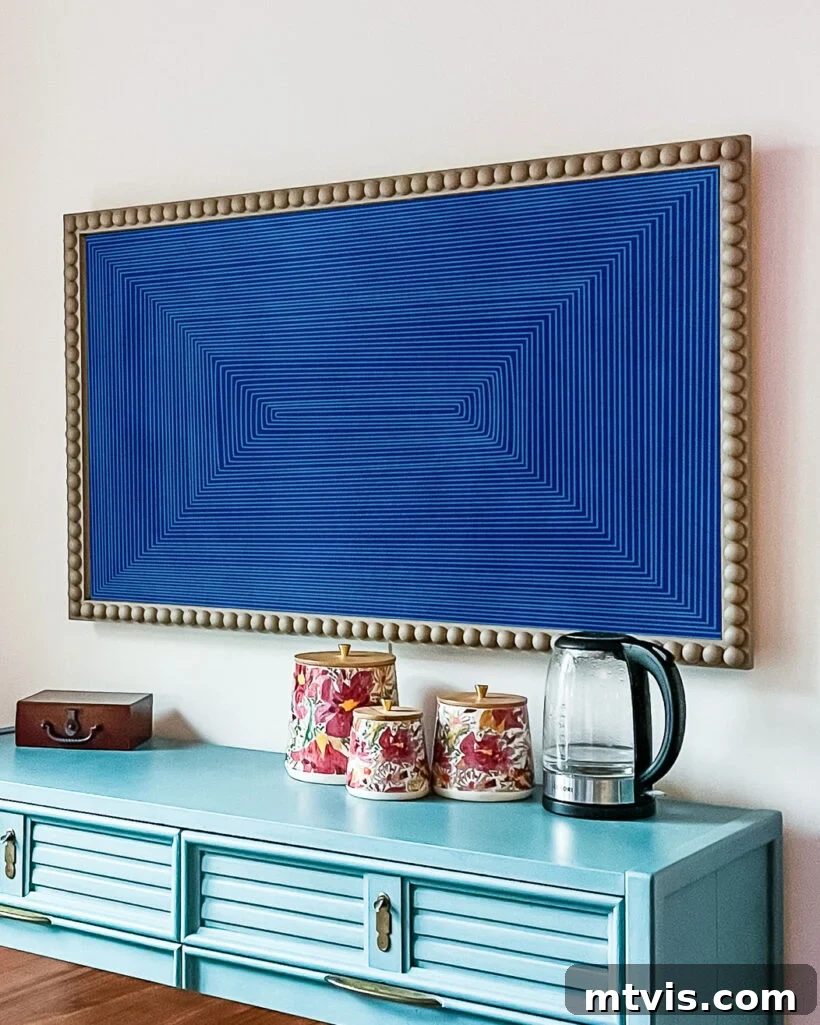
And there you have it! I truly hope this comprehensive guide has left you feeling inspired and confident to create your very own DIY custom frame for your television. It’s a rewarding project that significantly elevates your home decor without breaking the bank. If you embark on this DIY adventure, please share your beautiful creations! I would absolutely love for you to DM or tag me on Instagram (@tasha.kaleidoscope) so I can see how your custom TV frame turned out. Happy crafting!
More ART & Wall Decor Ideas
SEE ALL ART POSTS
-
How to Display Art On Almost Any Smart TV
-
How to Make Faux Oversized Poster Hangers
-
DIY Light Up Wall Art
-
Make Large DIY Picture Frames For Less than $20 Each
-
DIY Magnetic Poster Hangers
-
27 Gallery Wall Ideas + Practical Tips to Inspire You
Curious about my unique approach to transforming rooms and spaces within our home? Dive into Designer in a Binder®, my comprehensive guide that simplifies the design process and empowers you to create spaces you love, efficiently and affordably.
For exclusive content, behind-the-scenes sneak peeks, and fresh inspiration delivered straight to your inbox, be sure to subscribe to my newsletter before you go!
(Newsletter Sign-up Placeholder: Please visit the original site to subscribe for exclusive content.)