Welcome to a stunning reveal that redefines what’s possible in a bathroom makeover! We’re thrilled to share how we transformed Avery’s once incredibly beige and uninspiring bathroom into a vibrant, fun, and truly beautiful sanctuary. The best part? We achieved this remarkable transformation without breaking the bank or undertaking any messy, costly demolition. This project stands as a testament to the power of smart design, creative solutions, and a budget-conscious approach.
Embarking on a bathroom makeover can often feel like a daunting task, but this particular journey was an absolute whirlwind, culminating in a result we couldn’t be prouder of. While this isn’t our first rodeo when it comes to transforming bathrooms, it certainly holds a special place in our hearts. In our previous home, we embarked on a full-scale DIY bathroom remodel for our girls’ bathroom, tackling everything from gutting to rebuilding ourselves. More recently, we gave our primary bathroom a super affordable refresh just before moving. However, Avery’s budget-friendly bathroom transformation might just be my all-time favorite.
If you followed along with our initial planning post detailing the aspirations for Avery’s bathroom makeover, you’ll know that I had a substantial amount of work ahead of me – all without the luxury of ripping everything out and starting anew. My initial, perhaps overly optimistic, estimate was to complete the entire project in a single day. Spoiler alert: that didn’t quite happen! The makeover actually stretched over two and a half days, partly due to an unexpected delay in the cabinet paint’s arrival. A huge thank you to everyone who offered their encouragement and cheered me on via my Instagram stories – your support truly made the process more enjoyable!
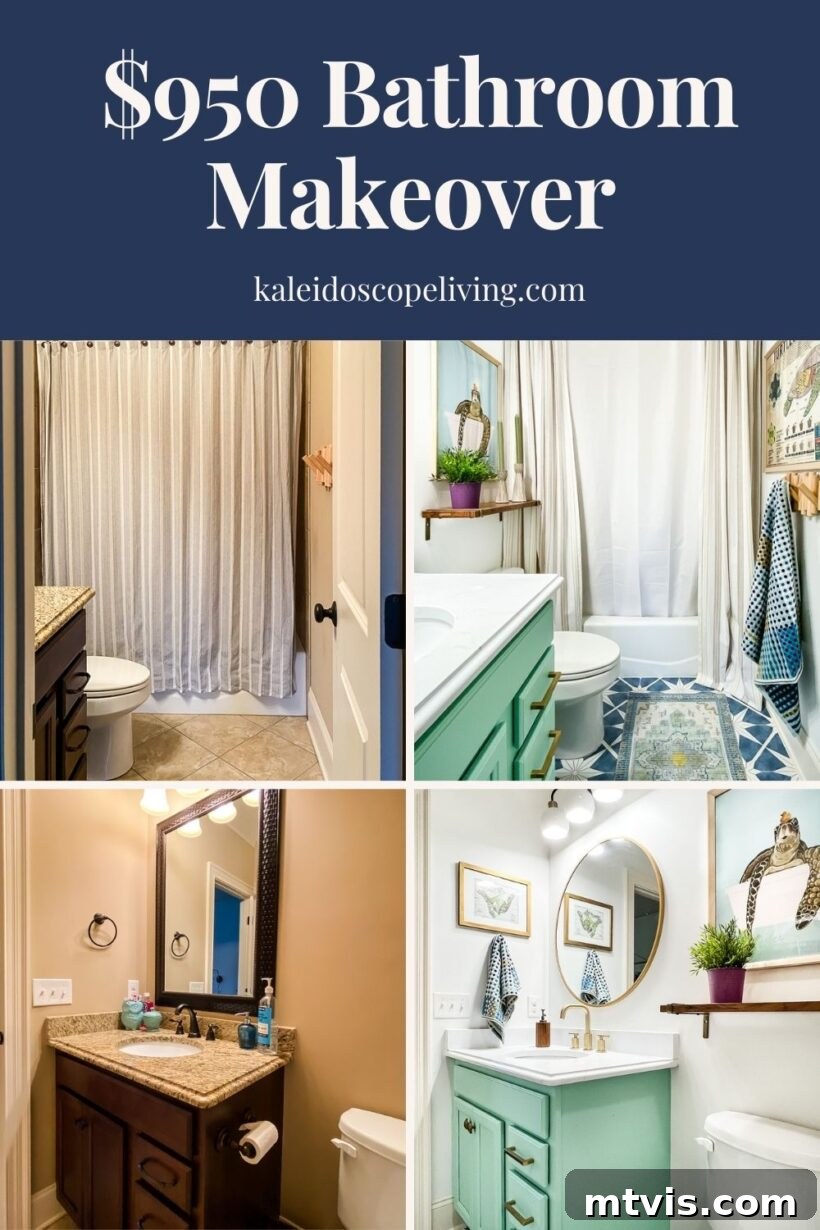
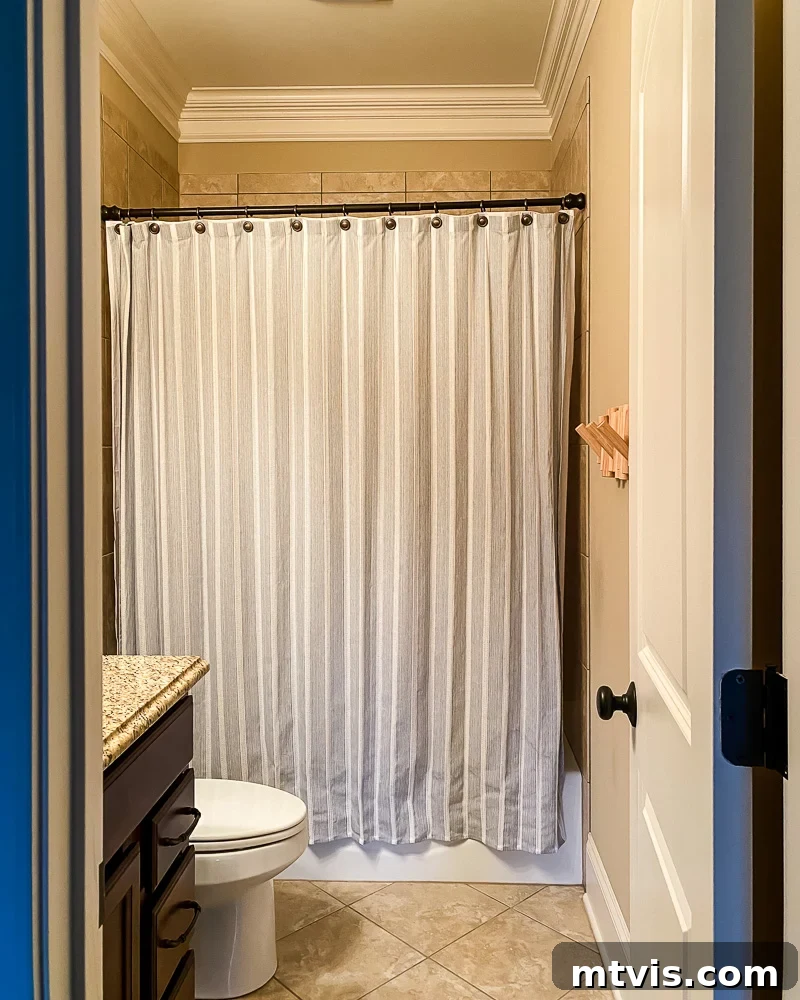
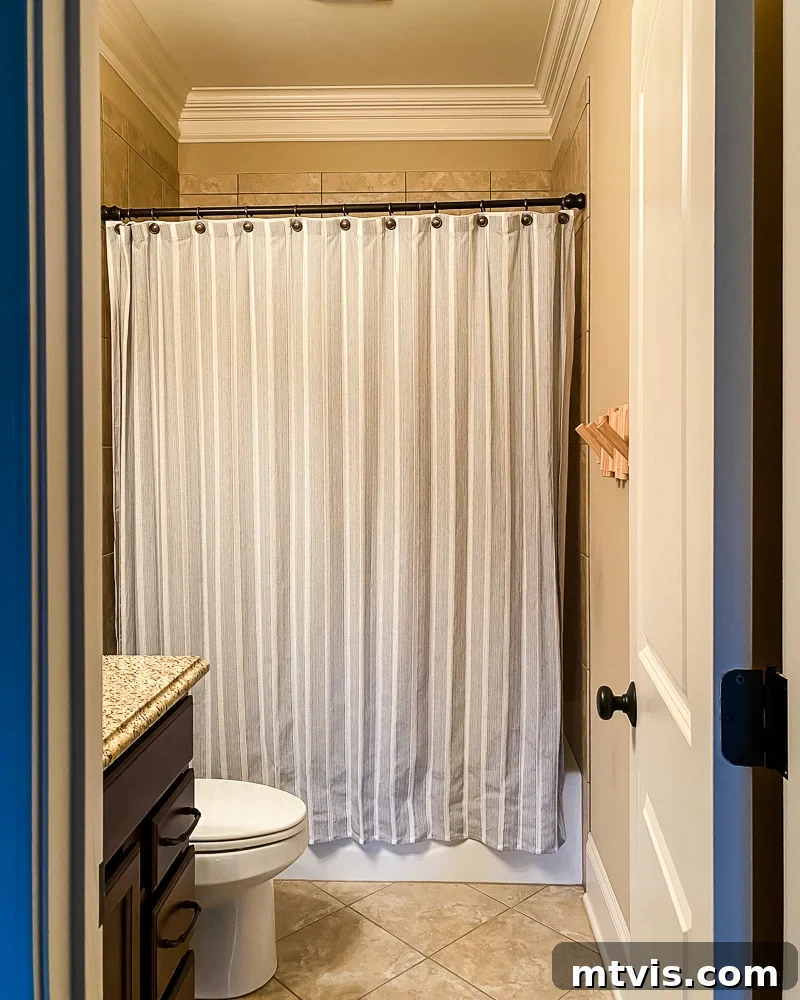
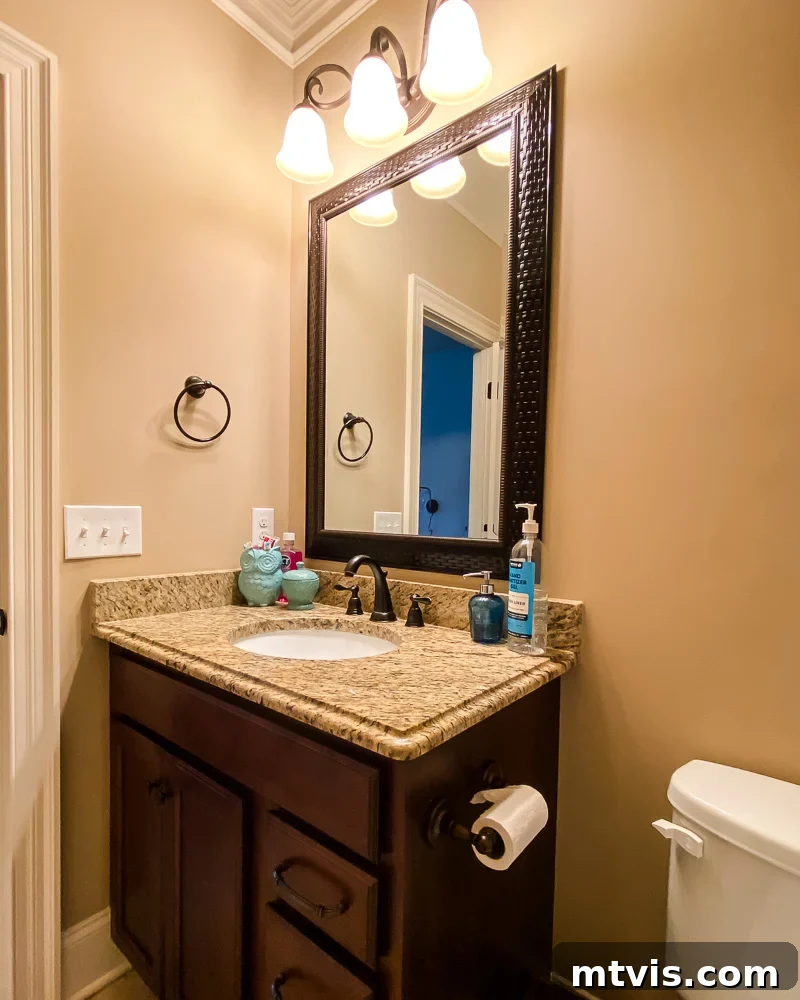
For those just catching up, our core decision for Avery’s bathroom was to work harmoniously with all the existing elements. While the space was undeniably outdated, there were no fundamental issues. The layout was perfectly functional, there were no pesky leaks, and not a single cracked tile in sight. The bathtub, sink, and vanity were all in excellent condition, simply lacking modern aesthetic appeal. The thought of tearing everything out felt not only financially irresponsible but also incredibly wasteful from a material standpoint. Our goal was a complete aesthetic overhaul, transforming a space that, just a few days prior, looked like this:
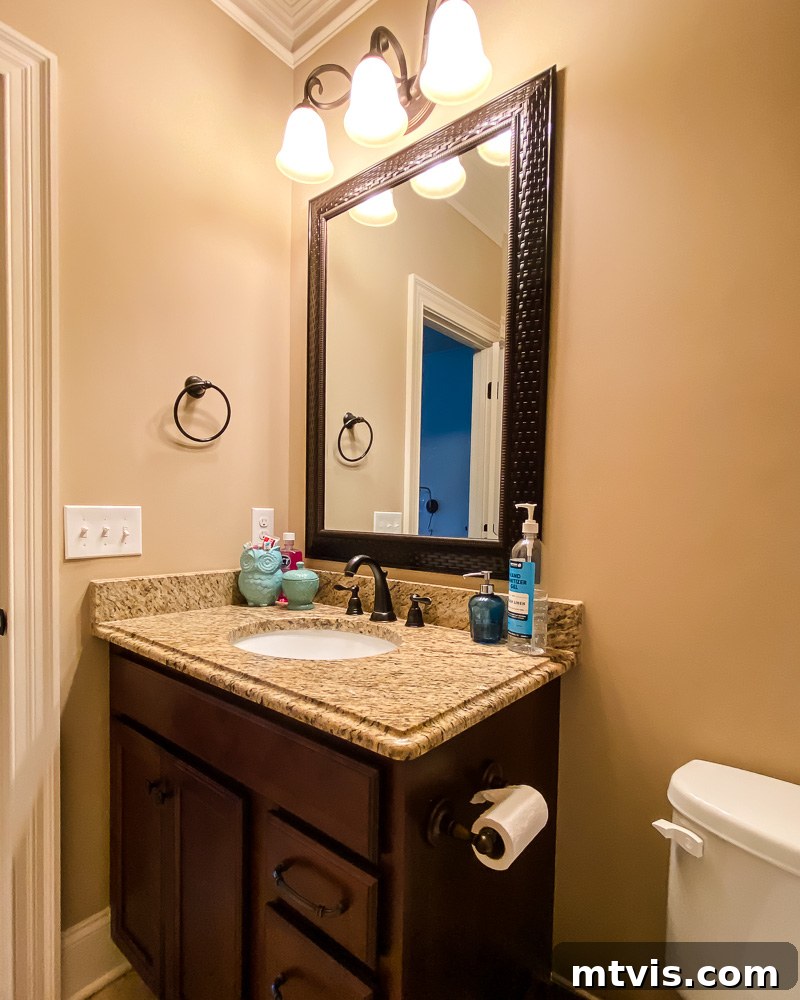
With a clear vision in mind, I developed a detailed design plan and immediately set to work. This plan focused on high-impact, low-cost changes that would dramatically alter the room’s character. You’ll find a comprehensive source list for all the products used at the conclusion of this post. Our philosophy for this transformation was simple: identify the elements that detract from the space and find creative, affordable ways to update or conceal them, rather than expensive replacements.
This post contains affiliate links for your convenience. Click here for my full disclosure policy.
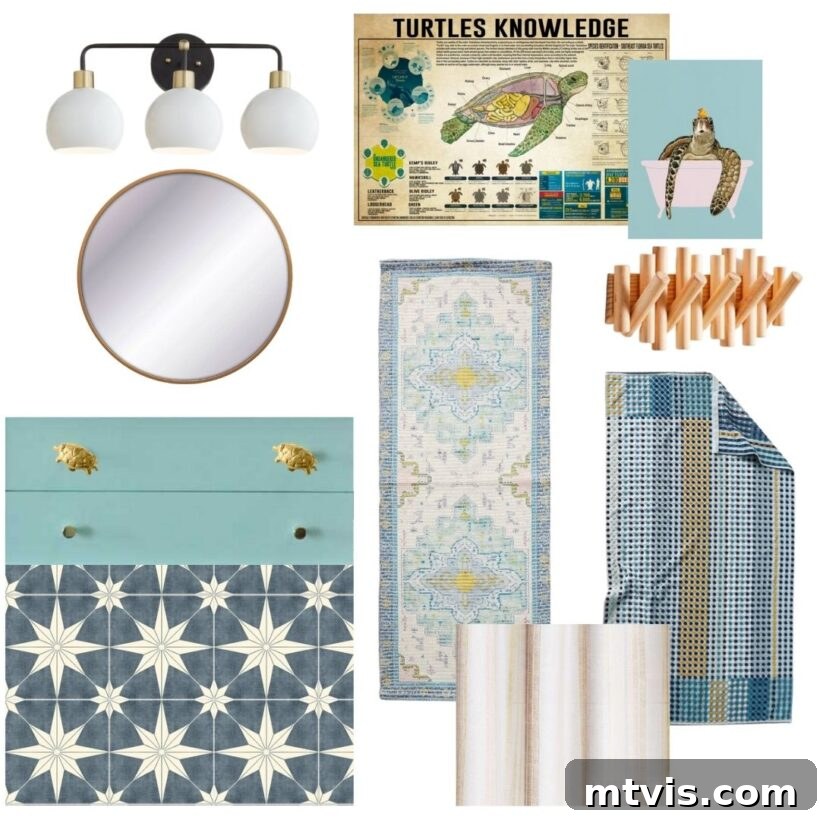
Click on any image below for full product details.
The Budget-Friendly Bathroom Makeover Reveal: A Fresh New Look
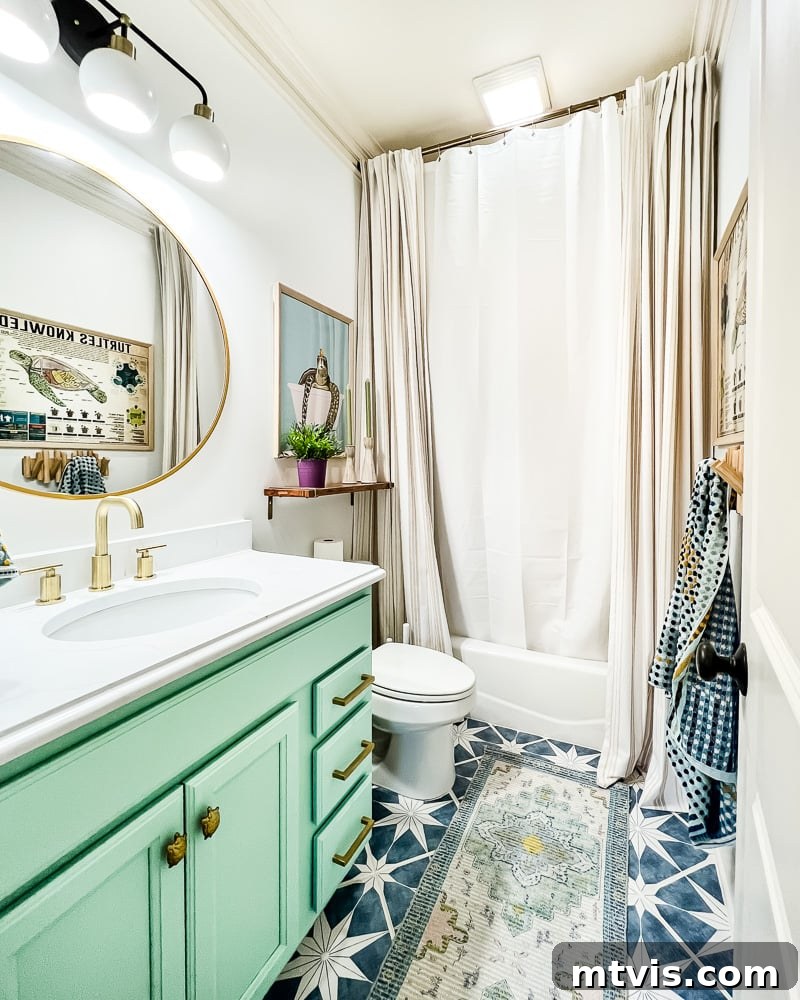
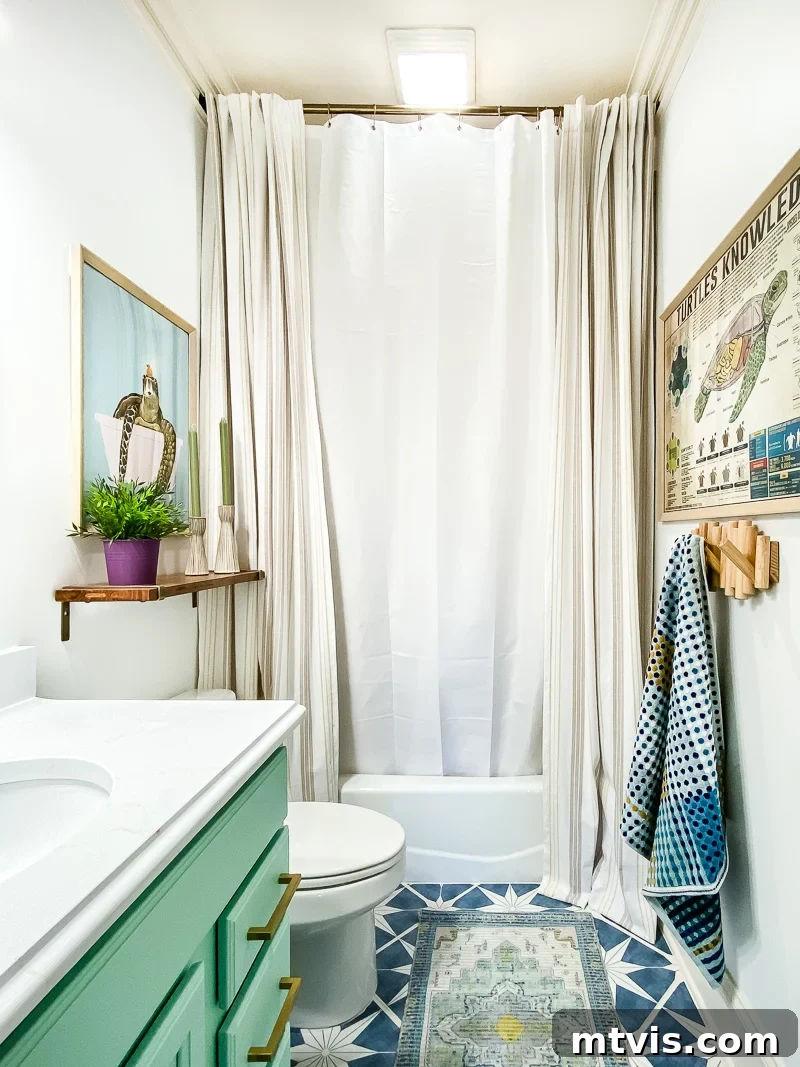
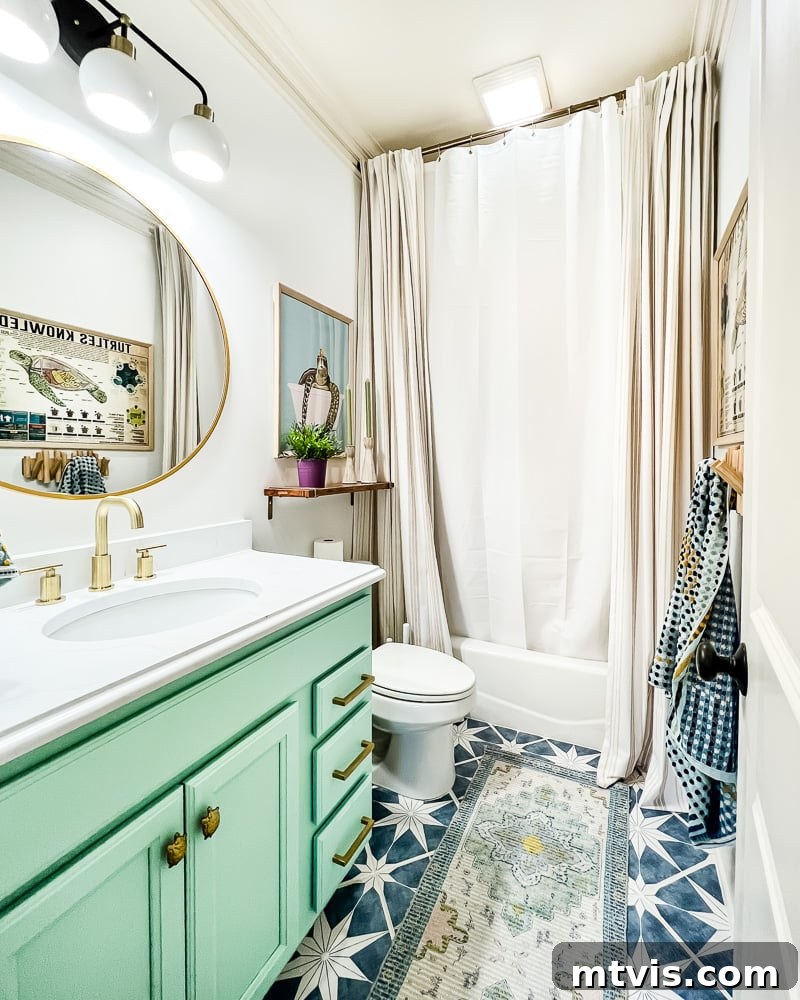
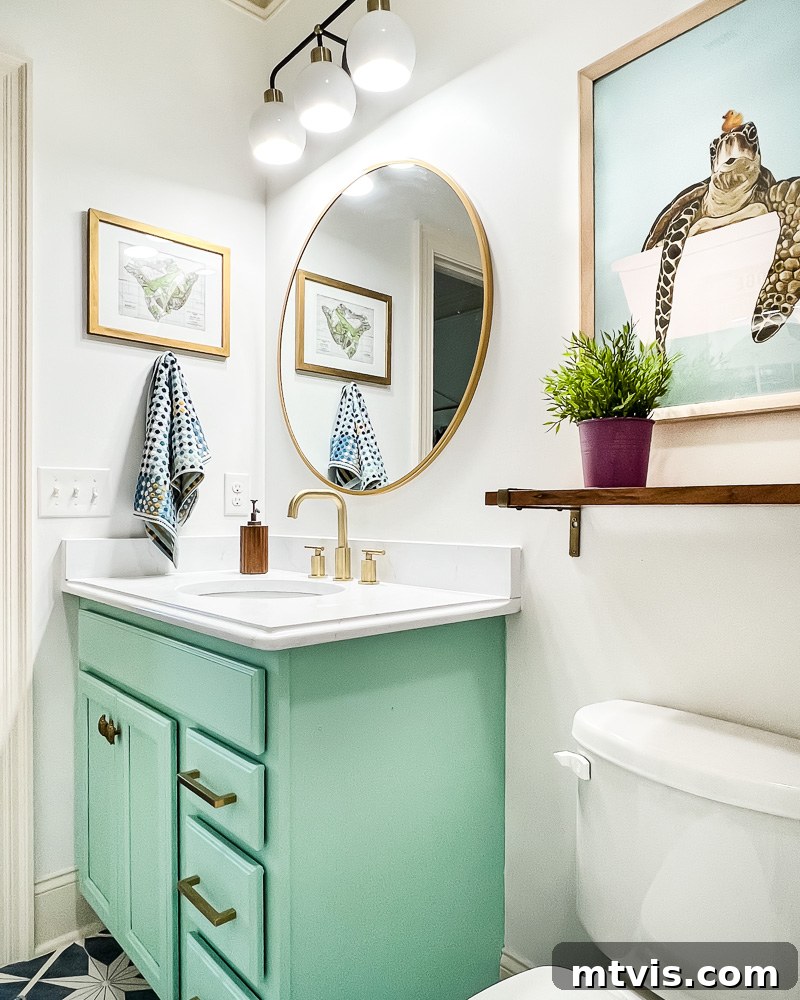
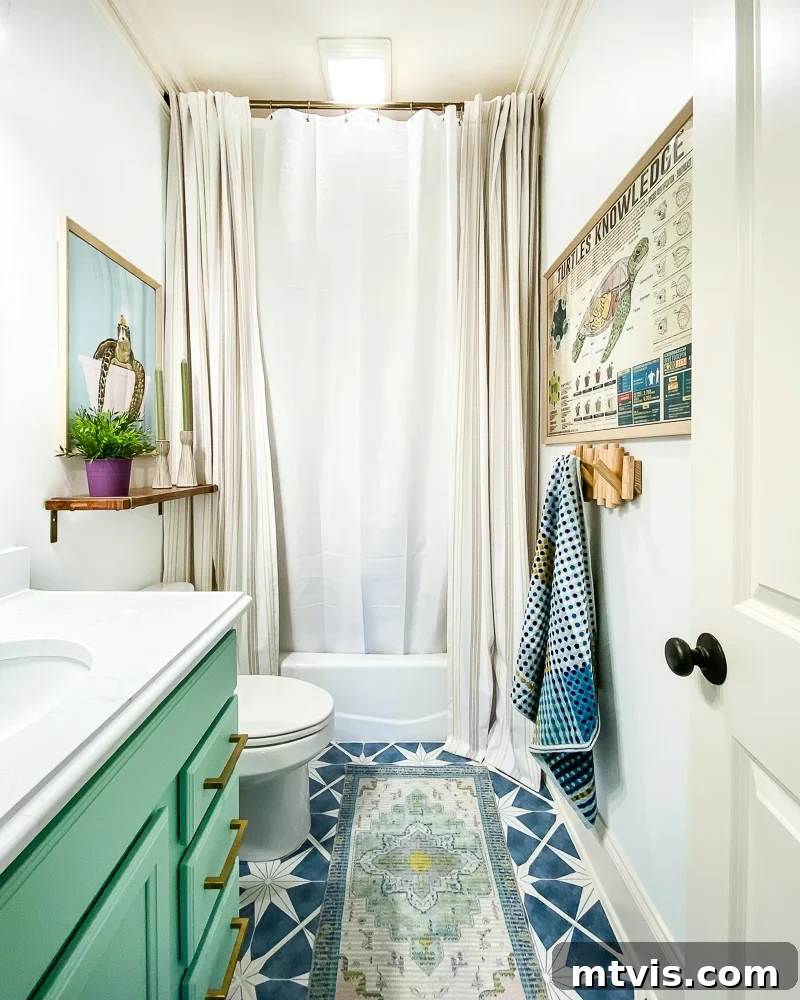
We are absolutely delighted with the outcome of this budget-friendly bathroom makeover. The transformation is genuinely remarkable, especially considering the constraints. A significant challenge with Avery’s bathroom was its lack of natural light, which often made the space feel dim and unwelcoming. However, we recently addressed this by installing a VELUX Sun Tunnel. Now, the bathroom is gloriously flooded with invigorating natural light, making it feel larger, brighter, and infinitely more cheerful. It’s truly incredible what a difference a simple source of natural light can make. Take a moment to see how it all came together!
A Recap of the Work: High-Impact DIYs for an Outdated Bathroom
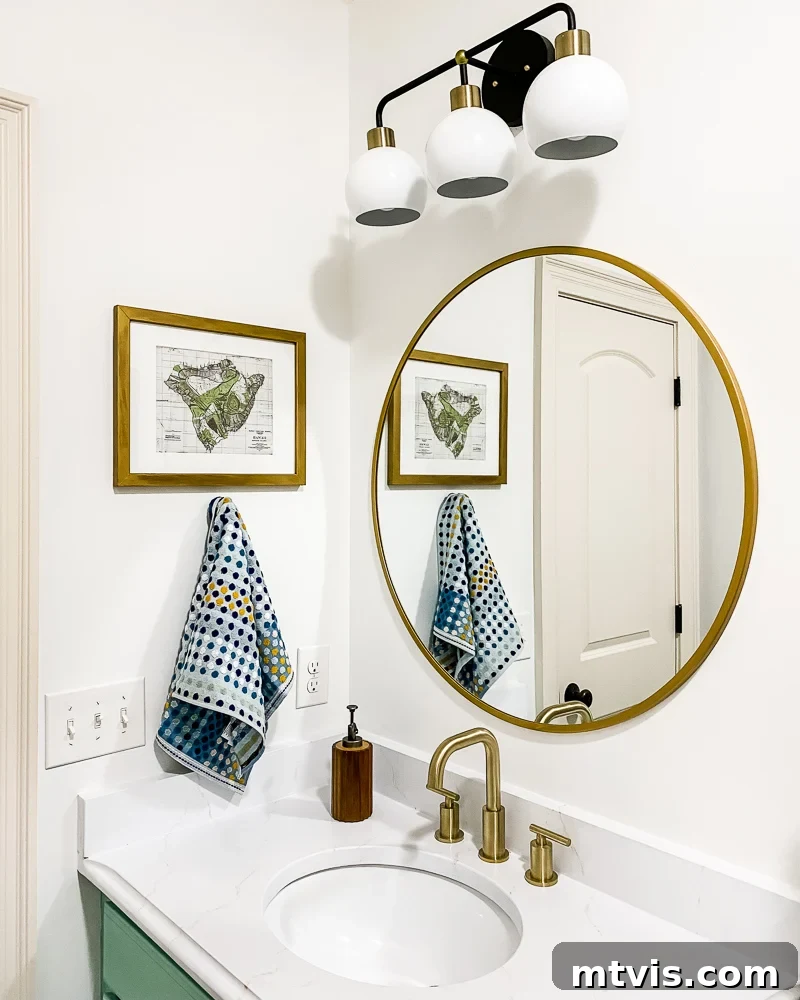
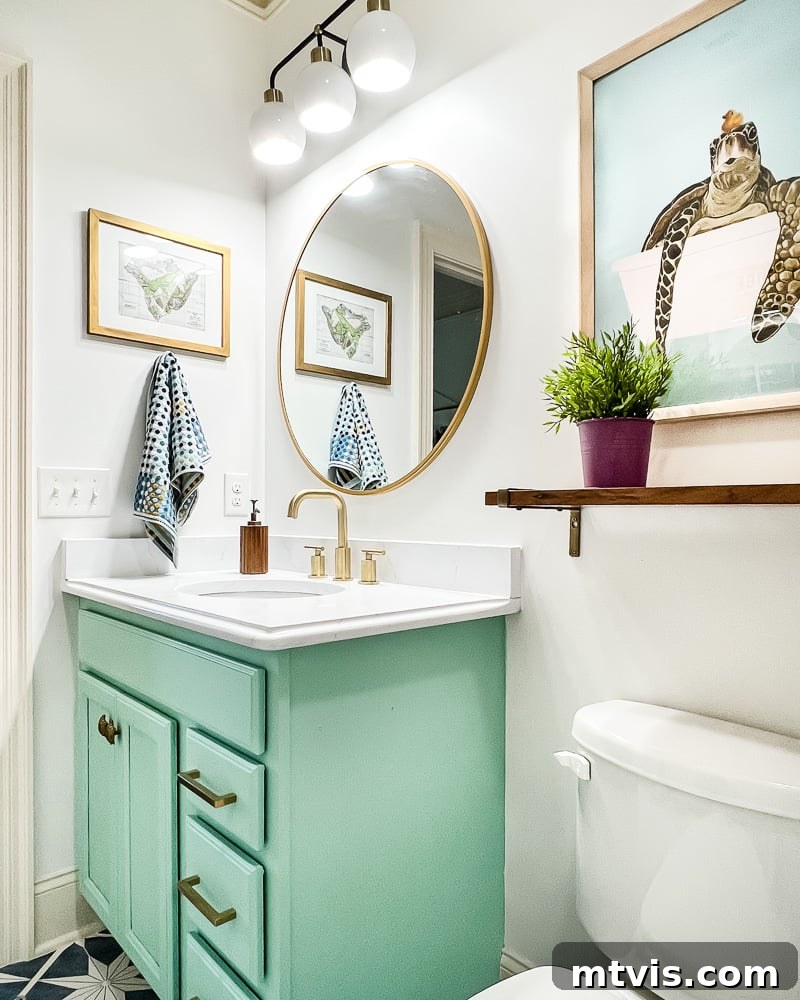
The transformation journey began with arguably the most impactful change: a fresh coat of paint. I banished the dated brown walls, replacing them with a crisp, clean white (specifically, Pure White by Sherwin-Williams). This simple step instantly brightened and modernized the entire space. Next, attention turned to the vanity area, where I swapped out the old, builders-grade mirror for a more contemporary option. The existing light fixture was also updated with a beautiful, more stylish piece, and the faucet was replaced with a sleek, modern design. These seemingly small updates collectively made a significant difference in the bathroom’s overall aesthetic.
One of the most exciting and cost-effective changes was the application of these gorgeous tile stickers over the existing floor tiles. You might recall that we successfully used tile stickers in our laundry room several months prior, so I was confident in their transformative power and durability. While tile stickers are fantastic for floors, it’s generally not advisable to use them directly inside a shower enclosure due to constant water exposure. This meant we were “stuck” with the original brown shower tiles. I considered painting them using a specialized method, but ultimately decided against it. The process is quite time-consuming, and honestly, I didn’t want white tiles inside the shower. For those curious about the installation, you can see how easily tile stickers are applied in the short video below.
And if you’re wondering about their long-term performance, rest assured! You can watch the video below to see how these amazing tile stickers have held up after more than 16 months of daily use. Their resilience truly makes them a fantastic option for a budget bathroom refresh.
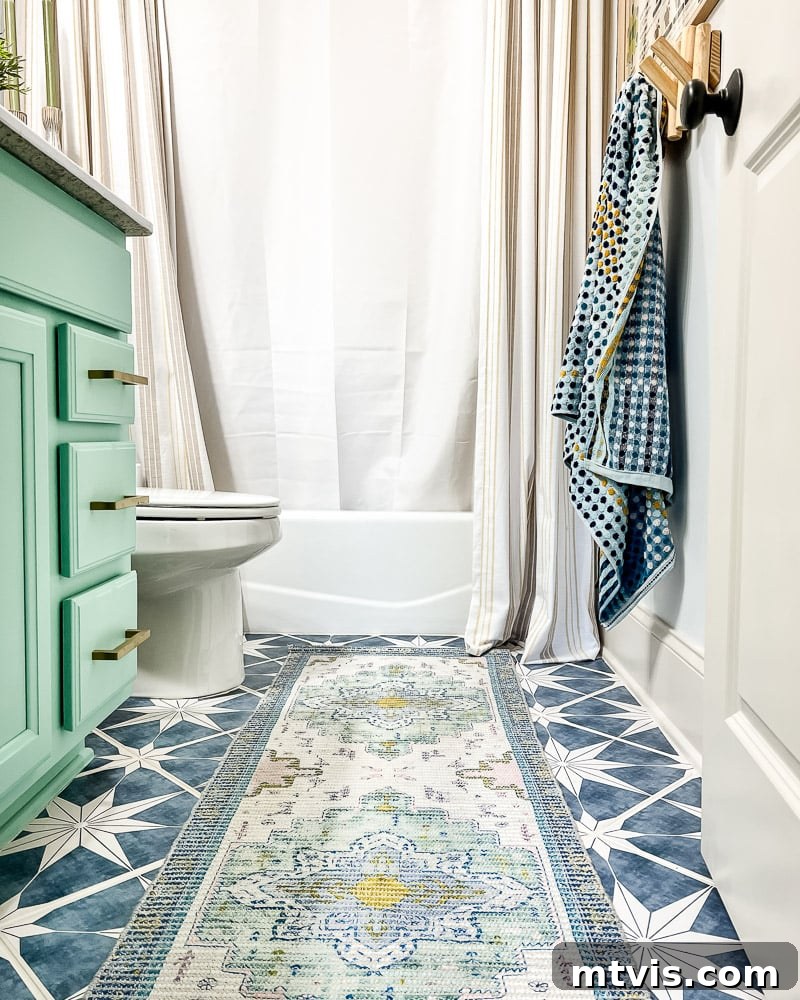
To cleverly address the brown shower tiles without undergoing a full replacement, I opted for a creative solution: hanging long, elegant curtains. I hung these beautiful 9-foot curtains on either side of the shower opening, with a coordinating 9-foot shower curtain in the middle. This strategic placement ensures that the brown tiles are largely concealed unless you’re actually inside the shower, effectively hiding them from view and contributing to the bathroom’s new, cohesive look.
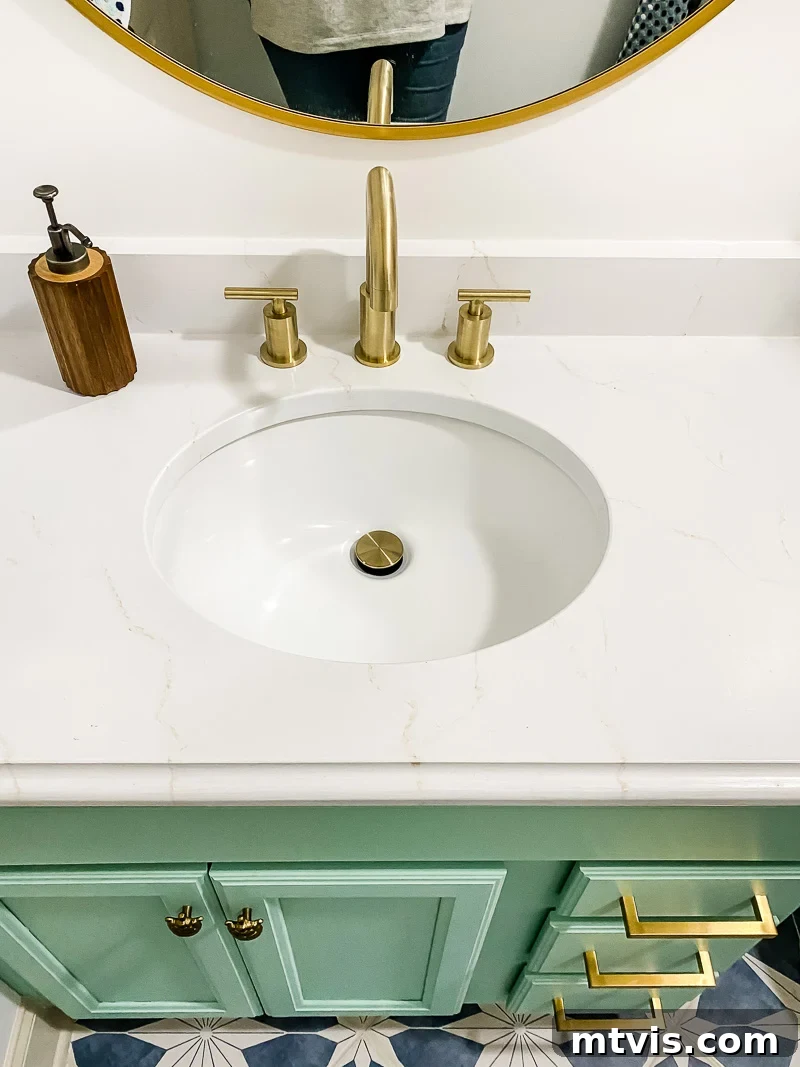
The vanity, a central feature of any bathroom, also received a complete overhaul. I painted the cabinet base using a proven method for cabinet painting, which yielded a durable and fresh finish. But the real game-changer was painting the granite countertop to mimic the luxurious look of marble. This DIY countertop transformation is an incredibly budget-friendly way to achieve a high-end aesthetic. To complete the vanity’s new look, I replaced the outdated hardware with stylish, inexpensive drawer pulls and, most adorably, these charming turtle knobs that Avery absolutely adores. The result is a vanity that looks entirely different, completely integrated into the updated design.
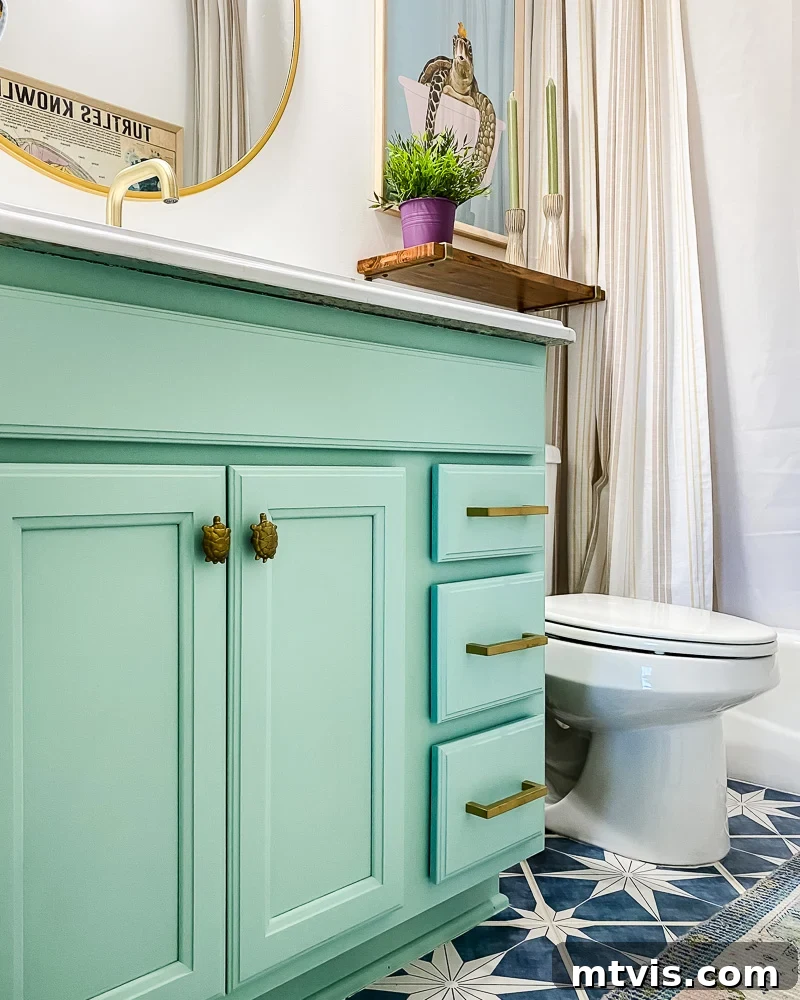
Finally, to infuse Avery’s personality into the space, I carefully selected artwork and accessories that celebrate her undeniable love for turtles. The “Turtles Knowledge” poster (I chose the 24 x 36 size) and the charming print of a Sea Turtle in the bathtub were perfect additions. Both were framed in an inexpensive poster frame, making them an accessible way to add character. These thoughtful touches tied the entire room together, creating a playful yet stylish environment that truly feels like Avery’s own.
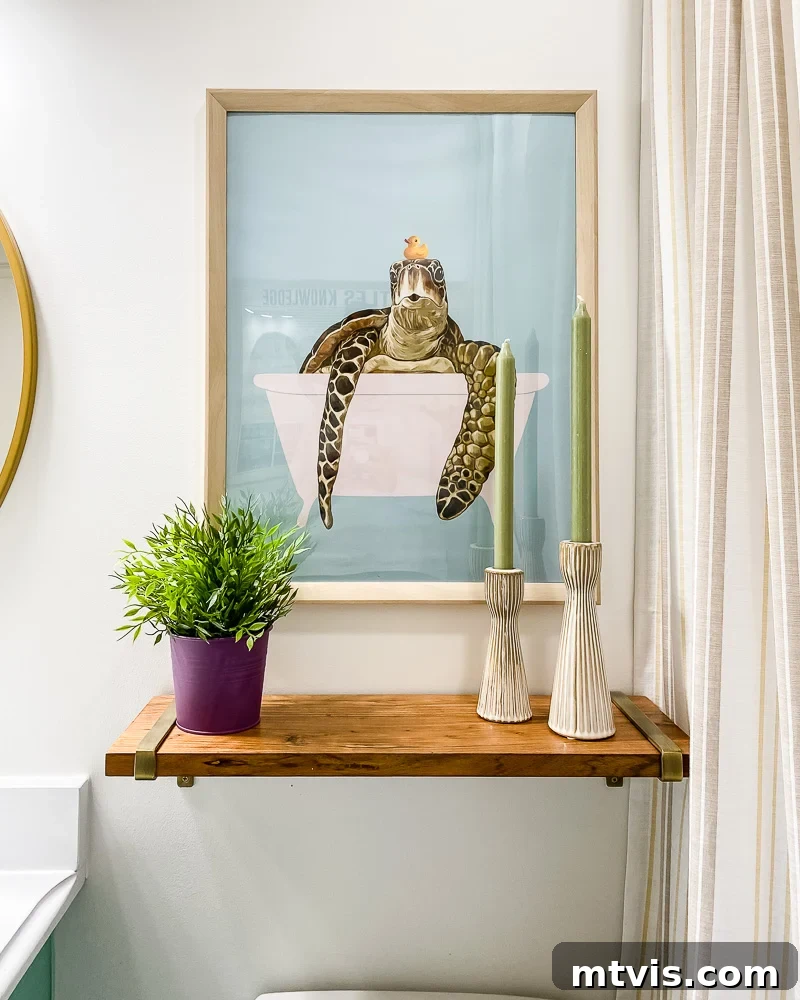
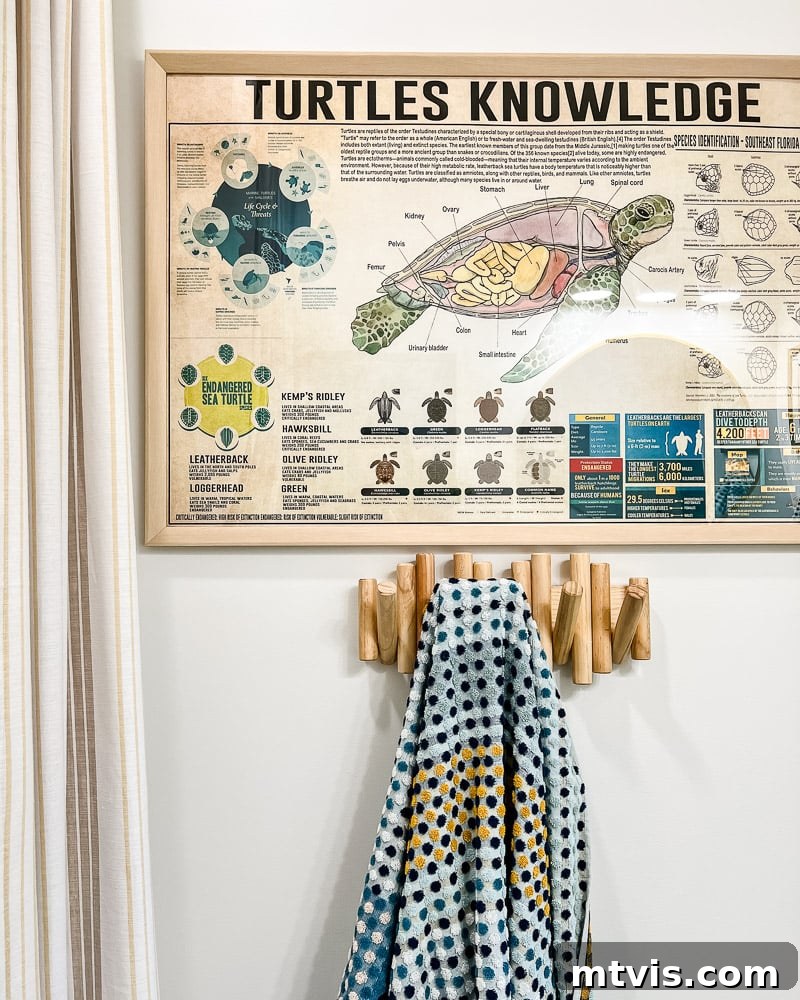
What do you think of this dramatic transformation? I absolutely adore it, but more importantly, Avery is completely head over heels for her new bathroom! This project truly demonstrates that a stunning bathroom makeover doesn’t require an exorbitant budget or extensive demolition. By creatively working with the existing elements, such as tile and vanities, you can achieve a dramatic and personalized transformation. I think we can all agree that this space looks dramatically different from its “before” state, right? For a truly striking comparison, take a look at these side-by-side images.
This post contains affiliate links for your convenience. Click here for my full disclosure policy.
Budget Breakdown: Achieving a High-End Look for Less
One of the most frequently asked questions about any home renovation, big or small, is “how much did it cost?” We believe in transparency, especially when demonstrating that stunning results don’t require an unlimited budget. Below, you’ll find a detailed breakdown of the expenses for Avery’s bathroom makeover, proving that strategic spending can lead to incredible value:
- Tile stickers (pack of 24): $105 – An incredibly cost-effective way to refresh outdated flooring without the mess or expense of new tile.
- New vanity light: $259 – A modest investment for a significant impact on both function and style.
- New mirror: $90 – Replaced a basic mirror with a more decorative piece to elevate the vanity area.
- New sink faucet: $85 – An essential upgrade for modern aesthetics and improved functionality.
- Pair of 9-foot curtains: $78 – Crucial for concealing the shower tiles and adding a touch of softness and elegance.
- 9-foot shower curtain: $18 – A simple, functional addition that complements the side curtains.
- 1-gallon wall paint: $60 (paint prices are HIGH right now) – The foundational element for transforming the room’s entire mood.
- Cabinet paint: $22 – A small price for a dramatic change to the vanity’s appearance.
- Countertop paint: We used leftovers for free, but a new kit would cost $44. All you need to achieve this marble-look countertop is this white base coat and this for the veining, followed by polycrylic sealant.
- Polycrylic: We used leftovers for free, but a new can would cost $10 – Essential for protecting the painted countertop.
- New cabinet hardware: $26 – Small details like these turtle knobs can make a huge difference in personalization.
- Inside curtain rod mounting brackets: $5 – Practical hardware to ensure a clean, integrated curtain look.
- Curtain rod: $32 – Chosen to complement the new fixtures and provide sturdy support.
- Decor (bath mat, art, frames, towels, hooks, etc.): $170 – The final touches that pull the design together and add personality.
Our out-of-pocket cost for this entire bathroom makeover was an incredible $950. Even if we hadn’t had any leftover materials from previous projects, the total would have been a still-impressive $1,044. Compare this to the national average cost of a bathroom renovation, which typically hovers around $8,098, and you can truly appreciate the incredible value achieved through smart DIY and strategic updates!
Bathroom Source List: Recreate This Look
Inspired to tackle your own bathroom refresh? Here’s a curated list of the key products and finishes used in Avery’s budget-friendly bathroom makeover. These selections were chosen for their style, affordability, and ability to make a significant impact on the space:
- Wall color: Pure White by Sherwin-Williams – A bright, clean white that instantly modernizes any room.
- Trim and ceiling color: Divine White by Sherwin-Williams – A subtle, complementary off-white for architectural details.
- Cabinet paint – Specifically chosen for its durability and smooth finish on cabinetry.
- “Turtles Knowledge” poster (I chose the 24 x 36 size) – A fun, educational piece that adds personality.
- Turtle knobs – The adorable detail that Avery absolutely adores, bringing a whimsical touch to the vanity.
All other products featured, for which I could find direct links, are conveniently listed below. Simply click on any image for full product details to help you in your own design journey!
Other posts you may enjoy: Dive into More DIY & Design Inspiration
If you loved this budget-friendly bathroom transformation, you’ll find plenty more inspiration and practical advice in these related articles:
- Sun Tunnels: Are They Right for Your Home? – Explore how to bring natural light into dark spaces.
- How to Install a Toilet: A Step-by-Step Guide for Beginners – A detailed guide for a common bathroom DIY.
- Attley’s Affordable Bathroom Makeover – Another example of a stunning transformation on a budget.
- Affordable Master Bathroom Remodel REVEAL – Ideas for revamping your primary bathroom without overspending.
- The Easy Way to Update Bathroom Tile Without Replacing It! – More creative solutions for refreshing existing tiles.
- Bathroom Art: Top Designer Picks – Find the perfect artwork to complete your bathroom’s look.
- 25 Stunning Powder Room Makeovers – A gallery of inspiring ideas for smaller bathroom spaces.
As always, every design decision in this bathroom makeover, from the overall theme to the smallest decorative detail, was guided by the systematic approach I apply to all our home projects. I pulled out my trusty Designer in a Binder® and meticulously moved through each step. (If you’re already a Designer in a Binder® customer and curious about our process, the bathmat served as the “crucial element” for Avery’s bathroom – it made all subsequent design choices incredibly easy and cohesive!). This method ensures that every room transformation, whether a full renovation or a budget-friendly refresh, results in a perfectly curated and harmonious space.
Curious about my proven methodology for transforming rooms and spaces throughout our home? Discover the power of structured design planning with Designer in a Binder®. It’s the ultimate tool for simplifying your decorating process and achieving professional-looking results every time.
For even more exclusive content, behind-the-scenes sneak peeks into our latest projects, and expert design tips delivered straight to your inbox, be sure to subscribe to our newsletter before you go. Join our community of DIY enthusiasts and design lovers!
We hope this detailed look into Avery’s bathroom makeover inspires you to see the potential in your own spaces. Remember, with a little creativity and strategic planning, you can achieve a dream bathroom that’s both beautiful and kind to your wallet. Happy decorating!