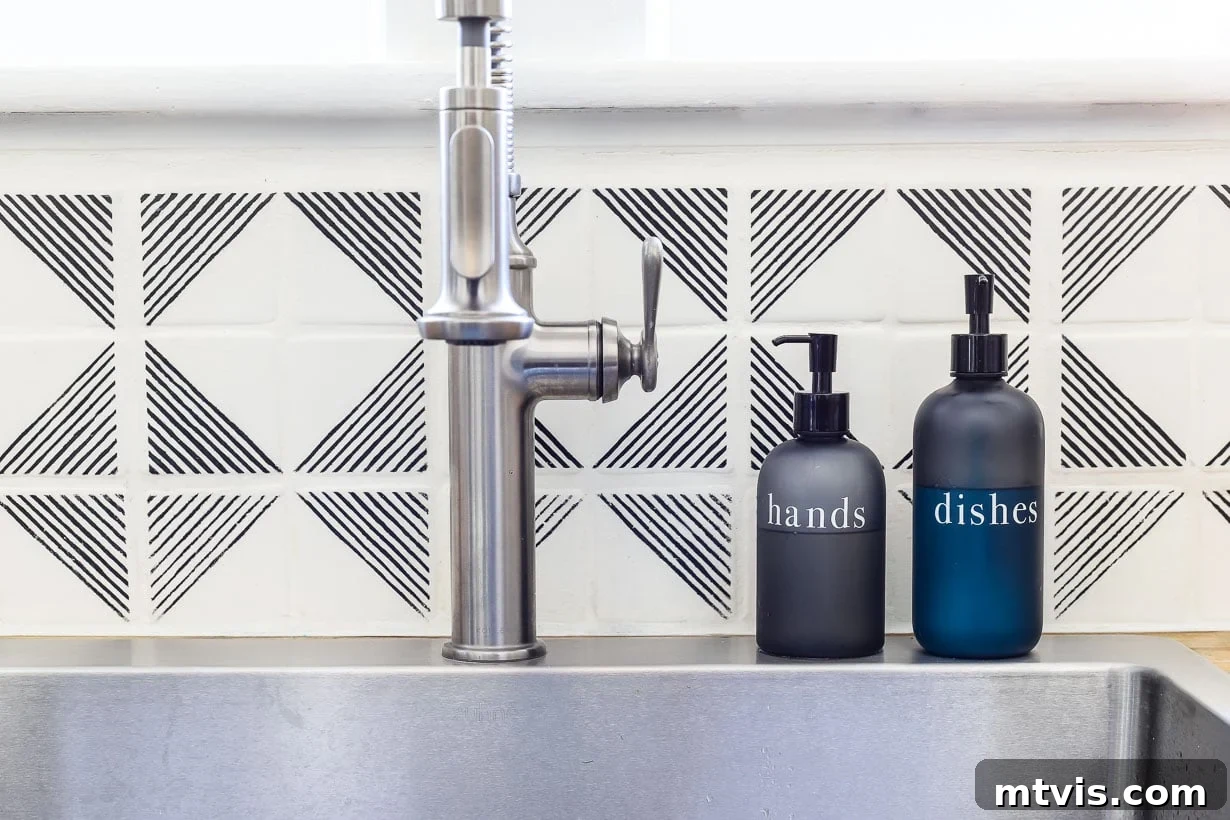
Are you tired of your outdated kitchen backsplash but dread the thought of a costly, messy replacement project? If so, you’re not alone! Many homeowners find themselves asking, “can you paint a tile backsplash?” The resounding answer is YES! Painting your tile backsplash is an incredibly simple, remarkably affordable, and surprisingly durable way to completely transform your kitchen’s aesthetic. Forget expensive renovations; this DIY approach empowers you to achieve a fresh, modern look without breaking the bank. This comprehensive guide will walk you through the entire process, demonstrating exactly how to paint your tile backsplash in just a few easy steps, ensuring a beautiful and lasting finish you’ll love.
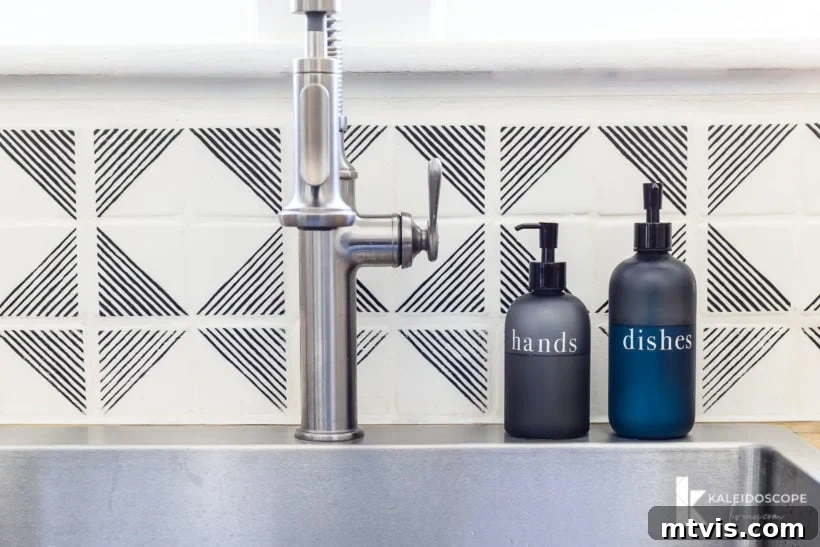
Table of Contents
Can You Paint a Tile Backsplash? Absolutely!
Yes, you absolutely can paint a tile backsplash, and it’s a fantastic DIY project for transforming your kitchen without the hassle or expense of demolition and new tile installation. In fact, painting a kitchen backsplash is significantly easier and less demanding than tackling other tile painting projects, such as painting floor tiles or painting shower tiles. The primary reason for this ease is that backsplashes don’t endure the same foot traffic or constant moisture exposure as floors and showers. This means you won’t need specialized, heavy-duty epoxy paints that often come with strong fumes and require precise application techniques. Instead, a good quality primer, a durable acrylic paint, and a protective topcoat are all you need to achieve a beautiful, long-lasting finish. It’s a project that is both enjoyable and rewarding, offering a dramatic visual update with minimal fuss.
What Kind of Tile Backsplashes Can You Paint?
The beauty of this method is its versatility. You can successfully paint a wide variety of tile backsplashes using the techniques outlined in this guide. Personally, I’ve had excellent results painting both ceramic tiles and travertine tiles (a type of natural stone). This method is equally effective on other common backsplash materials such as porcelain tiles, subway tiles, and even quarry tiles. The key to success lies not in the specific tile material, but in proper surface preparation and the use of high-adhesion paint and primer. As long as the surface is clean, dull, and properly primed, the paint will adhere beautifully, offering a durable and vibrant new look. While some unique, highly polished or glazed tiles might require specific bonding primers, the general principles remain the same for most kitchen backsplashes.
Why I’ve Painted Three Different Tile Backsplashes: A Testament to Durability and Value
My confidence in painting tile backsplashes comes from extensive personal experience. I’ve personally painted no fewer than three different backsplashes, each time proving that this DIY approach is a fantastic alternative when a full tile replacement isn’t feasible or within budget. Each project was driven by a desire to transform an outdated, unappealing backsplash into something beautiful and modern, all while maintaining a tight budget.
The first time I attempted this project was in our old home. The kitchen backsplash was truly an eyesore – a relic from a different era that clashed with everything. At that point, the idea of painting tile was relatively new, and reliable guidance was scarce. It felt like a significant leap of faith, but I reasoned that the existing backsplash was so bad, a painted one couldn’t possibly make it worse. To my delightful surprise, the results were not only immediately transformative but also incredibly durable. That painted backsplash held up flawlessly, without any chipping or peeling, for years before we eventually moved! It was a true testament to the method’s effectiveness. We even tackled painting our kitchen cabinets without priming or sanding as part of that same budget-friendly makeover.
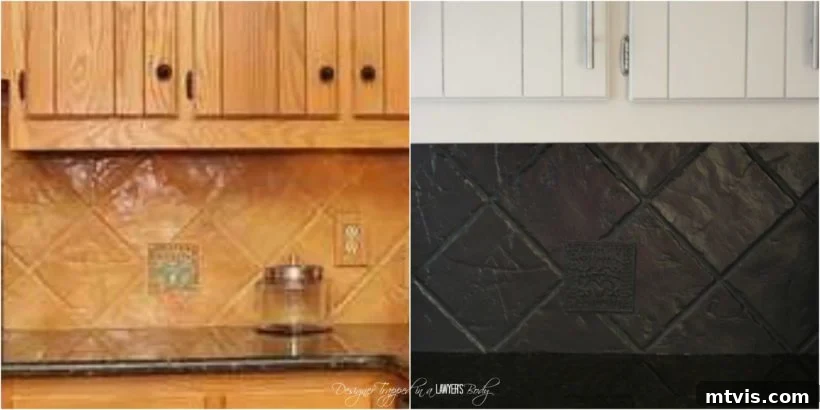
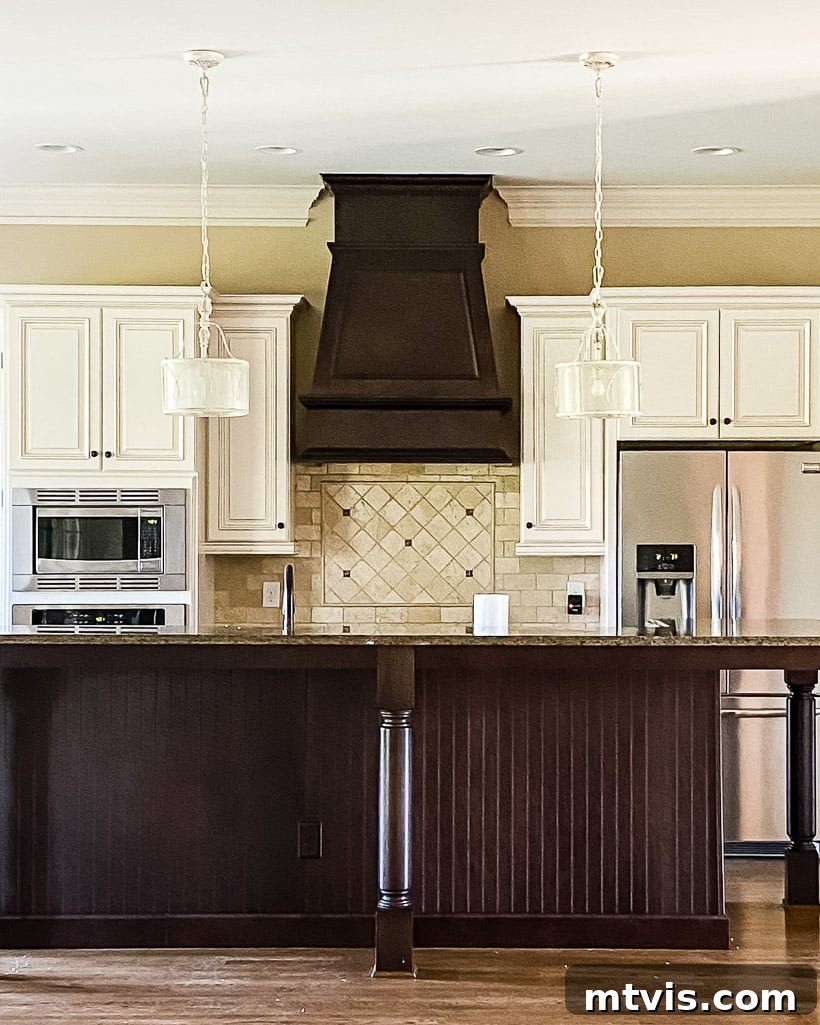
Years later, after moving into our current home, I found myself facing another uninspiring backsplash – this time, an outdated travertine. Though different in style, the solution was the same. Applying the very same painting method, I transformed our kitchen’s backsplash into a fresh, inviting focal point. This project was part of a larger kitchen overhaul where I also painted the countertops to resemble marble, showcasing the power of paint to revitalize an entire space.
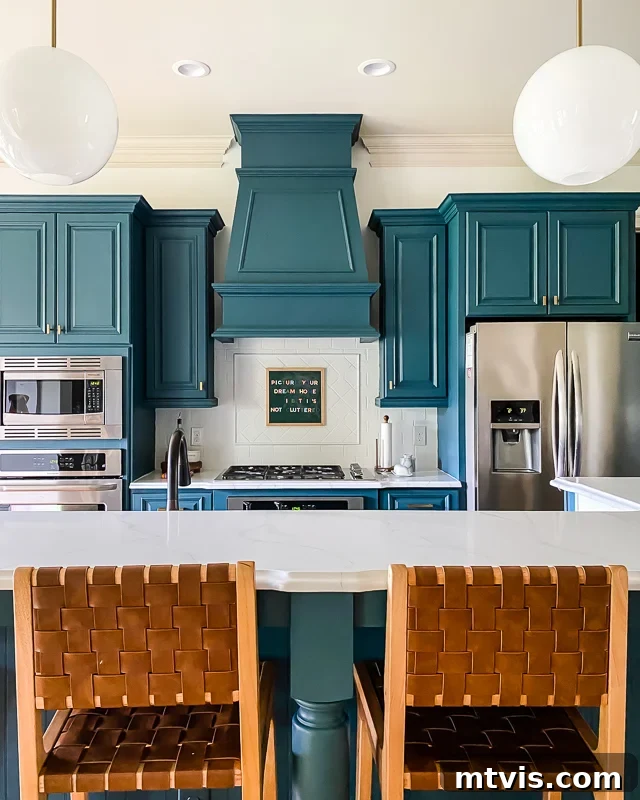
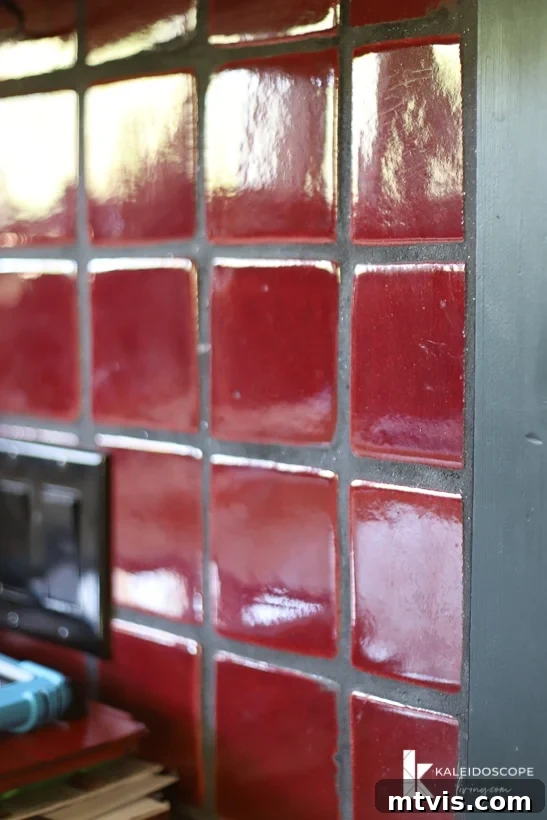
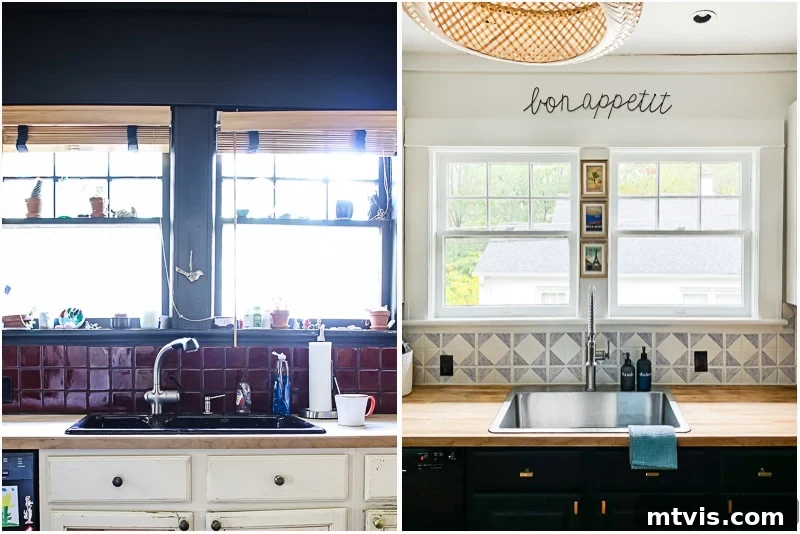
My third and most recent project involved helping a friend, Thea, with her incredible $1,000 kitchen makeover. Her kitchen featured a bright red tile backsplash that she detested. With an extremely tight budget, even options like tile stickers were too expensive, meaning every surface had to be transformed creatively. So, for the third time, I applied the exact same DIY painted tile backsplash process I first used in 2014. This time, however, we added a stylish geometric stencil detail to elevate the design and give it a truly custom, high-end look. The before-and-after transformation was astonishing.
Below is a glimpse of Thea’s backsplash tile before we began. The dramatic change truly highlights the power of paint!
Now, let’s get into the details of this budget-friendly and impactful DIY project!
Please note: This post may contain affiliate links, meaning I may earn a small commission if you make a purchase through these links, at no extra cost to you. Click here to read my full disclosure policy.
How to Paint a Tile Backsplash: A Detailed Guide
Painting a tile backsplash is a surprisingly straightforward home improvement project. It doesn’t require specialized skills, just a bit of patience and the right supplies. The real magic happens in the preparation and the quality of the products you choose. Let’s gather everything you need and then dive into the easy-to-follow steps.
Essential Supplies Needed
- T.S.P. (Trisodium Phosphate) or a strong degreaser: This heavy-duty cleaner is essential for thoroughly removing grease, grime, and residue, ensuring optimal paint adhesion.
- High-Quality Primer: A general-purpose bonding primer is crucial. We used a reliable Sherwin-Williams general purpose primer. This ensures the paint adheres strongly to the slick tile surface.
- General Finishes Milk Paint: This is the ONLY paint I recommend for backsplashes due to its extraordinary adhesion and durability. Choose your preferred color; we achieved a custom shade by mixing Snow White with a touch of Antique White.
- Quantity: One quart is more than sufficient for most kitchen backsplashes.
- Why this paint? It’s a high-quality acrylic paint known for its superior bonding capabilities and smooth finish, eliminating the need for sanding between coats in many cases.
- General Finishes High-Performance Water-Based Topcoat: This topcoat provides crucial protection, sealing the paint and making the backsplash resistant to splashes, stains, and wear. We opted for a satin finish, but gloss or semi-gloss are also excellent choices for a shinier tile look.
- Small Foam Roller: Ideal for achieving a smooth, even finish across the tile surfaces and reducing brush marks.
- High-Quality Angled Paintbrush: Perfect for cutting in around edges, corners, and detailed areas.
- Painter’s Tape (e.g., FrogTape or ScotchBlue): For protecting adjacent surfaces like countertops, cabinets, and walls.
- Drop Cloths or Old Sheets: To cover countertops and flooring, protecting them from drips and spills.
- Fine-Grit Sandpaper (e.g., 220-grit): Optional, but useful for lightly scuffing extremely glossy tiles before priming if extra adhesion is desired.
- Clean Rags or Microfiber Cloths: For cleaning and wiping down surfaces.
- Safety Gear: Gloves, and potentially a mask if you are sensitive to paint fumes, though water-based paints are generally low-VOC.
- Stencil (Optional): If you desire a patterned look. We used this exact stencil in a custom 7″ size.
- Stencil Brushes (Optional): Specifically designed for stenciling, allowing for controlled application and crisp lines.
Time needed: 8 hours (actual working time, excluding drying intervals)
Transform your kitchen with a beautifully painted and stenciled tile backsplash. Follow these detailed steps to achieve a durable and stylish update. Note that opting for a solid color without stenciling will significantly reduce the project time.
-
Step 1: Thoroughly Clean the Tile Backsplash
Preparation is paramount for any successful paint job, and painting a tile backsplash is no exception. Begin by meticulously cleaning your entire tile backsplash. Use T.S.P. (trisodium phosphate) or a powerful degreaser, following the manufacturer’s instructions for mixing and application. This step is critical for removing all traces of grease, food splatters, dirt, and any other residues that could hinder paint adhesion. Even seemingly clean backsplashes can harbor invisible grease films. Pay close attention to the grout lines and corners, as these areas often collect the most grime. Rinse the backsplash thoroughly with clean water multiple times to ensure no cleaning solution residue remains, then allow it to dry completely. We’ve successfully used this method on ceramic, terra cotta, and travertine tiles, proving its effectiveness on various tile surfaces.
-
Step 2: Prime the Tile Surface for Optimal Adhesion
Before applying any primer, carefully mask off adjacent surfaces with painter’s tape, such as countertops, cabinets, and walls. Lay down drop cloths or old sheets to protect your countertops and floor from any drips. If you plan to refinish your countertops later, like we did when refinishing butcher block countertops, you might be less concerned about drips. Once your area is protected, apply a thin, even coat of a high-quality general-purpose bonding primer to your entire tile backsplash. Use a small foam roller for the main tile surfaces and a paintbrush for the grout lines and edges. The primer acts as a crucial bonding agent, creating a surface that paint can effectively adhere to. Don’t be alarmed if it looks patchy or a bit terrible at this stage – this is perfectly normal for primer. Allow the primer to dry completely according to the manufacturer’s instructions. Depending on the tile’s original color and finish, a second thin coat of primer might be beneficial for extremely dark or glossy tiles, but often one good coat is sufficient.

-
Step 3: Apply Your Chosen Paint Color
The type of paint you choose for your tile backsplash is incredibly important for durability and adhesion. Avoid using regular latex wall paint. Instead, you need a high-quality acrylic paint with exceptional bonding properties. While enamel-based paints can also work, they are oil-based, making cleanup and application more challenging due to their strong fumes and slower drying times. My absolute top recommendation is General Finishes Milk Paint. This high-quality acrylic paint is renowned for its superior adhesion to a multitude of surfaces, making it perfect for tile. We mixed Snow White with a hint of Antique White for a custom soft white. A single quart of this paint will easily cover most backsplashes, as it offers excellent coverage.
Using your small foam roller, apply thin, even coats of paint to the entire backsplash, including the grout lines. For corners and tricky spots, switch to your paintbrush. The key to a professional finish is multiple thin coats, rather than one thick, heavy coat, which can lead to drips and uneven drying. Apply enough coats until you achieve full, opaque coverage. With General Finishes Milk Paint, the dry time between coats is remarkably fast (often around 5-10 minutes), which significantly speeds up the project. We applied three thin coats to achieve our desired depth and coverage. You’ll notice a significant improvement even after just the first coat!
-
Step 4: Add a Stencil (Optional for Unique Design)
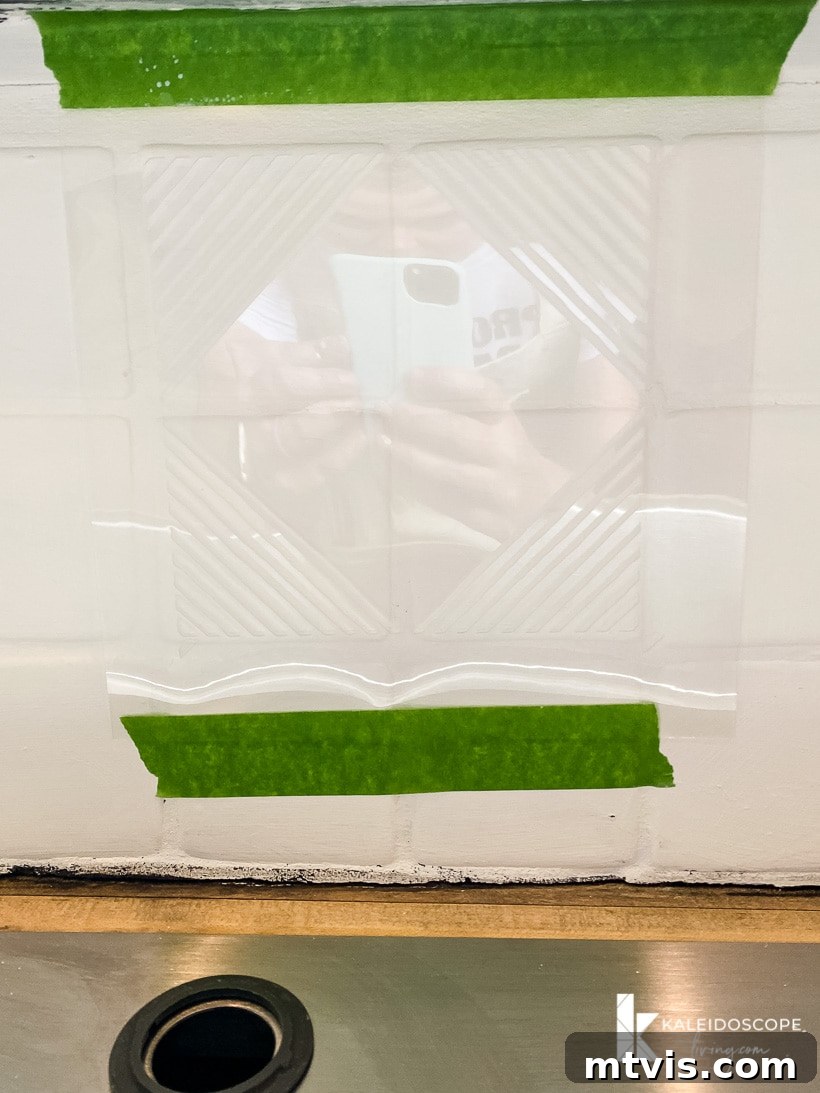
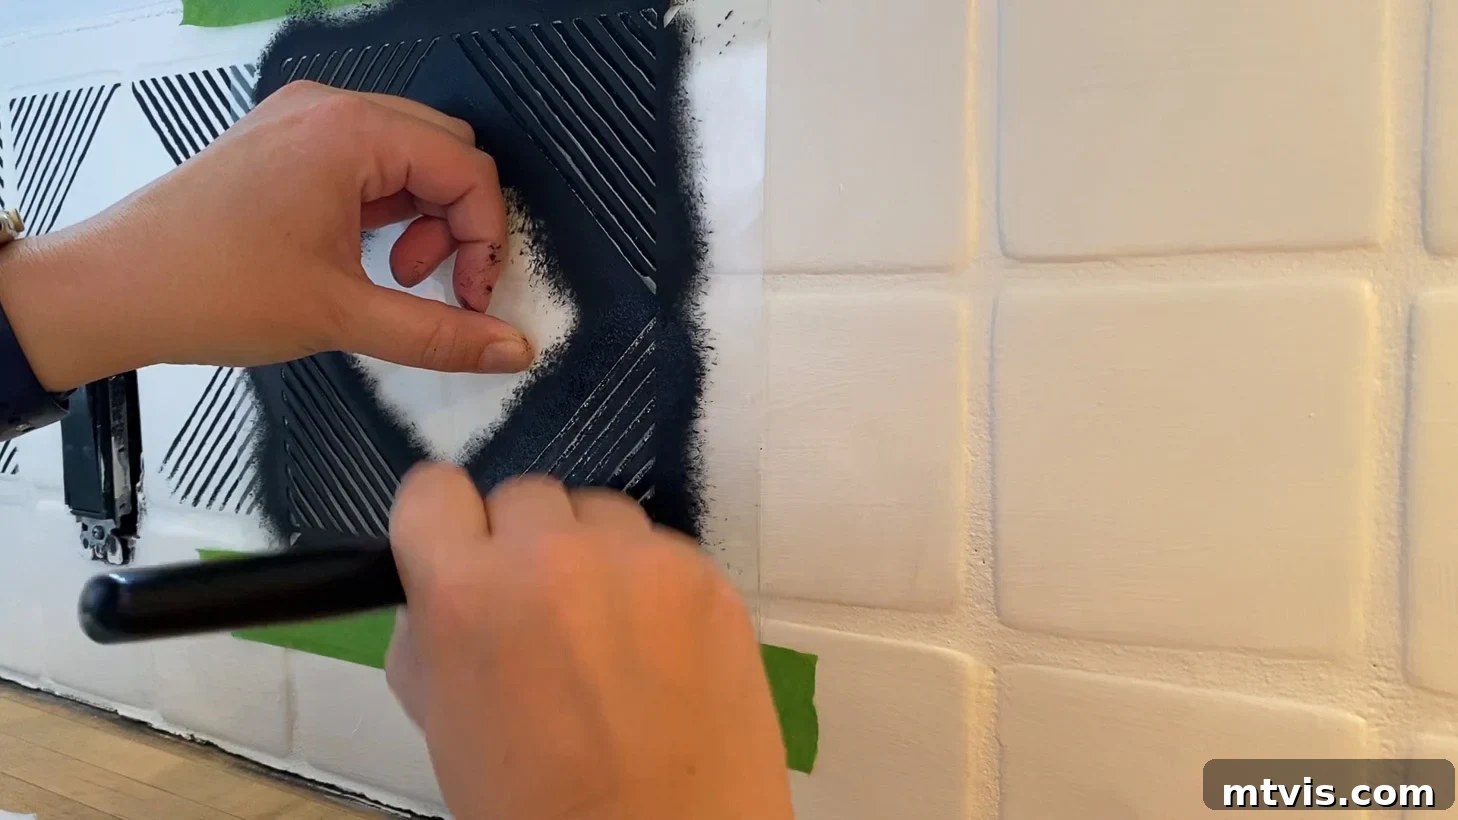
If you want to introduce a pattern or custom design to your backsplash, this is the stage to apply your stencil. For Thea’s kitchen, we used this stencil, ordering it in a custom 7-inch size to perfectly align over four of her 3.5-inch square tiles. Before you start, ensure your painted base coats are completely dry. Secure your stencil to the backsplash using painter’s tape, making sure it’s perfectly level and aligned. Using a stencil brush, apply paint in a dabbing motion, starting with very little paint on your brush. It’s better to apply several thin layers than one thick layer to prevent bleeding under the stencil. Gently lift the stencil to reveal your pattern. Repeat this process, carefully aligning the stencil for each section of your backsplash. This step requires patience and attention to detail, but the payoff is a beautifully customized and high-impact design that looks far more expensive than it is. Take your time, and don’t rush the process for crisp, clean lines.
-
Step 5: Apply a Durable Top Coat for Protection
Once all paint (including any stencil work) has thoroughly dried – I highly recommend allowing it to dry overnight to ensure maximum curing – you are ready for the final, crucial step: applying a protective topcoat. The only topcoat I can wholeheartedly recommend for this project is General Finishes High-Performance Water-Based Topcoat. Its excellent performance and ease of application make it an ideal choice for high-traffic areas like a kitchen backsplash.
This topcoat is available in various finishes, allowing you to customize the final look. We used a satin finish to give the backsplash a subtle sheen, mimicking the natural slight gloss of many tiles. If you prefer a more pronounced shine, gloss or semi-gloss options are also available. Apply the topcoat using a high-quality bristle brush in thin, even coats. Avoid using a foam brush, as it can sometimes introduce tiny air bubbles. The topcoat dries even faster than the paint, making the application quick and efficient. Refer to the instructions on the can for recommended drying times between coats. We applied two coats everywhere, adding a third coat in areas prone to more wear and tear, such as directly behind the kitchen sink, for enhanced protection against moisture and splashes. This final layer is what truly ensures the long-term durability and cleanability of your newly painted backsplash.
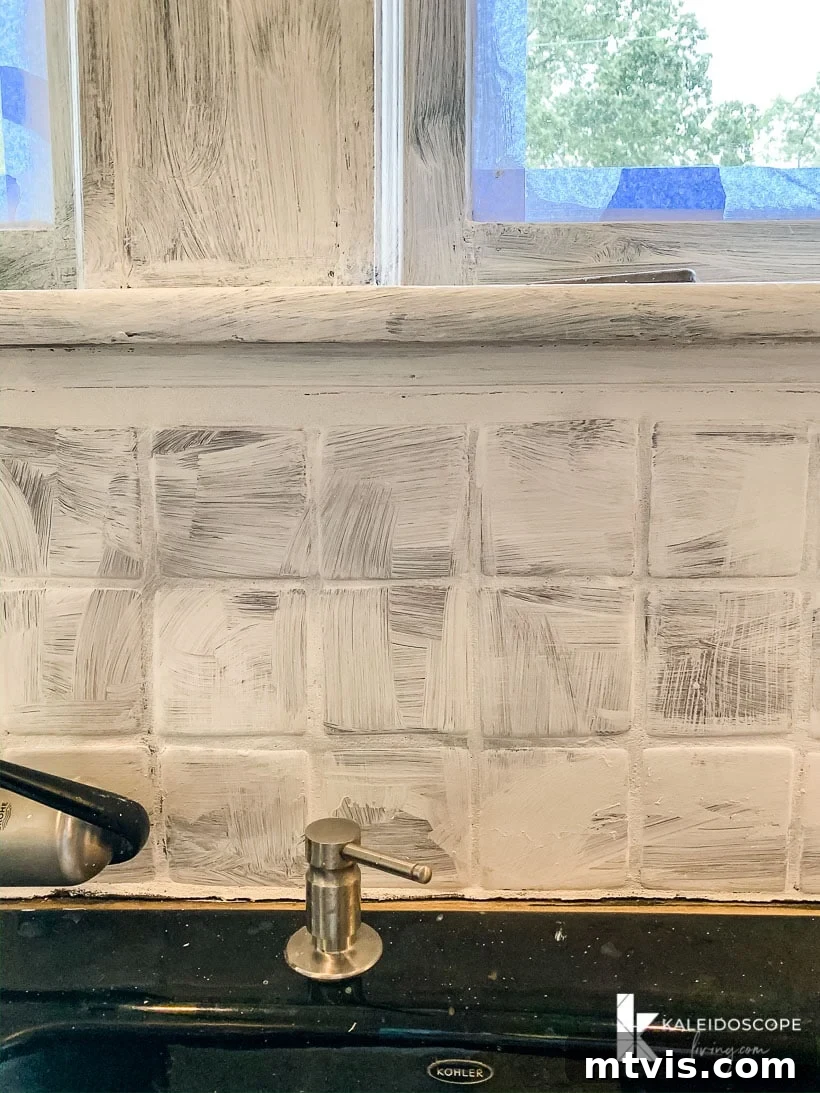
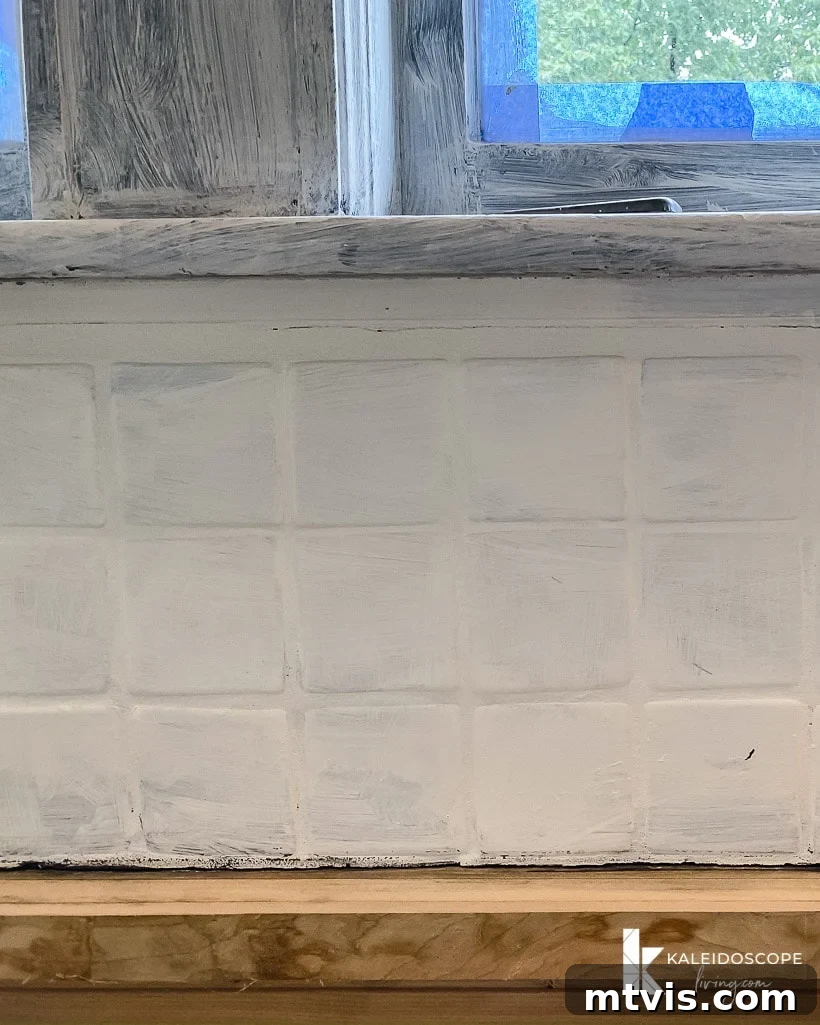
That’s it! This truly is a straightforward and accessible DIY project that yields incredible results. While adding a stencil will undoubtedly extend the project time, the process itself remains simple and manageable. The transformation is remarkable!
Frequently Asked Questions: Painting a Tile Backsplash
The durability of a properly painted tile backsplash is surprisingly excellent! Both our current kitchen backsplash and Thea’s kitchen backsplash, painted using this exact method, have maintained their pristine appearance for over two years now, showing absolutely no signs of chipping, peeling, or fading. My very first painted backsplash, in our old house, looked perfect for approximately 18 months before we eventually removed it to install a laminate backsplash as part of a different renovation phase. The key factors contributing to this longevity are thorough surface preparation (cleaning and priming), using high-quality paint with excellent adhesion, and applying a durable protective topcoat. As backsplashes aren’t subject to the same wear and tear as floors or countertops, they are ideal candidates for this painting technique.
Contrary to popular belief, you generally don’t need a product specifically labeled “tile paint” for a backsplash. This is a common misconception, often arising because projects like painting shower tiles or floor tiles indeed require specialized, often two-part epoxy products due to extreme moisture and abrasion. However, for a kitchen backsplash, the requirements are different. What you *do* need is a high-quality bonding primer to ensure the paint adheres to the non-porous tile surface, followed by a durable, high-adhesion acrylic paint. Finally, a robust topcoat is essential for sealing and protecting the painted surface. This combination provides excellent durability without the complexity or strong fumes associated with specialized “tile paints.”
Based on extensive personal experience and consistent, flawless results, I strongly recommend avoiding regular latex wall paint. Instead, opt for a high-quality acrylic paint known for its superior adhesion. While enamel-based paints can technically be used, their oil-based composition makes them less user-friendly due to strong fumes, longer drying times, and more difficult cleanup of brushes. My top choice is General Finishes Milk Paint. This exceptional acrylic paint bonds incredibly well to almost any surface, including slick tiles, and provides a smooth, durable finish. For the crucial protective topcoat, I wholeheartedly recommend General Finishes High-Performance Water-Based Topcoat. It’s easy to apply, offers excellent protection against moisture and wear, and comes in various sheens to achieve your desired look. It’s important to note that these are not sponsored recommendations; I genuinely advocate for these products because of their consistent, high-quality performance in my own DIY projects.
Cleaning a painted tile backsplash is remarkably easy and convenient. Thanks to the protective topcoat, it behaves much like any other durable, painted surface. For everyday spills and grime, simply wipe it down with a damp cloth or a common kitchen cleaner like a Clorox wipe. The sealed surface makes it resistant to stains and easy to maintain. However, it’s advisable to avoid using harsh abrasive cleaners, scrubbing pads made of steel wool, or highly acidic/alkaline cleaning solutions, as these could potentially dull the finish or, in extreme cases, compromise the topcoat over many years. Gentle cleaning with standard kitchen wipes or a soft cloth and mild soap and water will keep your painted backsplash looking fresh and new for years to come.
Before you go, take a moment to appreciate a few more views of Thea’s stunning kitchen after we completed the entire $1,000 kitchen makeover. It’s clear that the painted and stenciled backsplash truly steals the show, offering a bespoke and elegant touch that dramatically elevates the space.
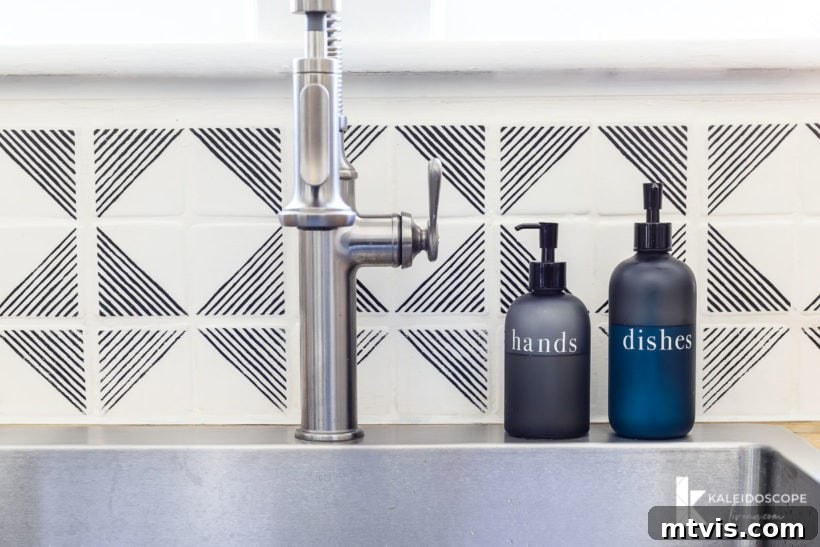
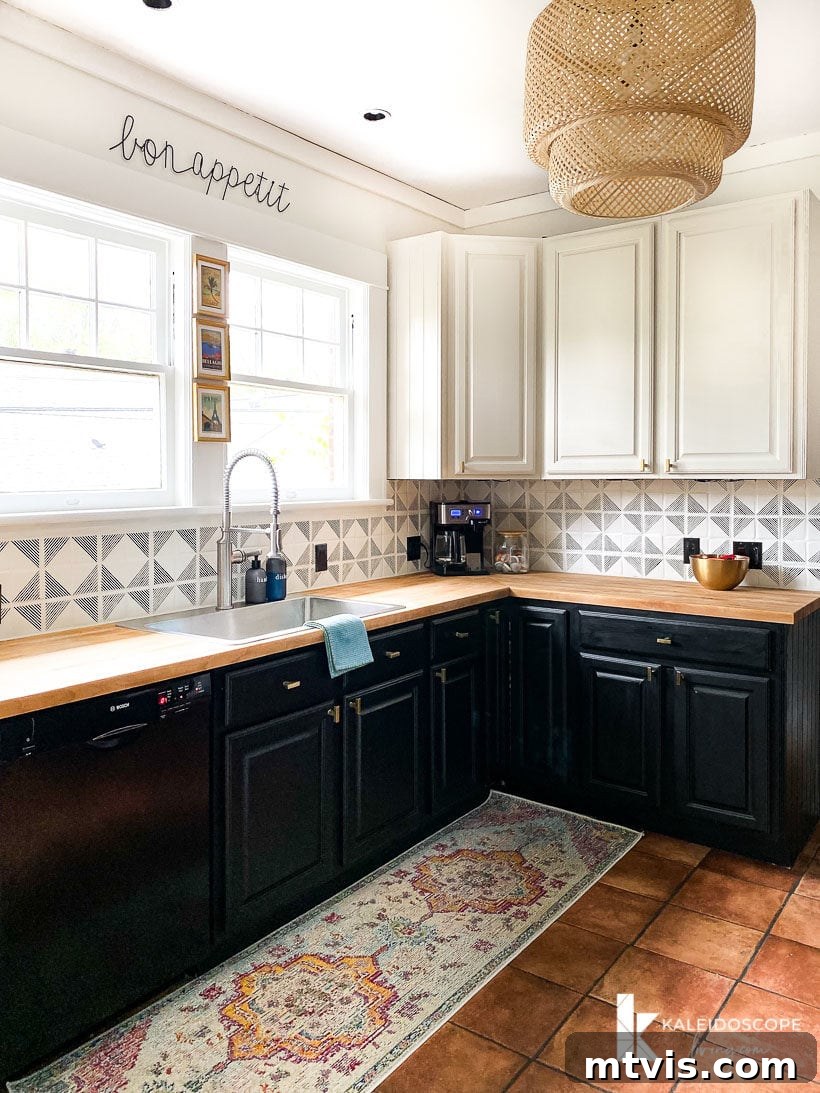
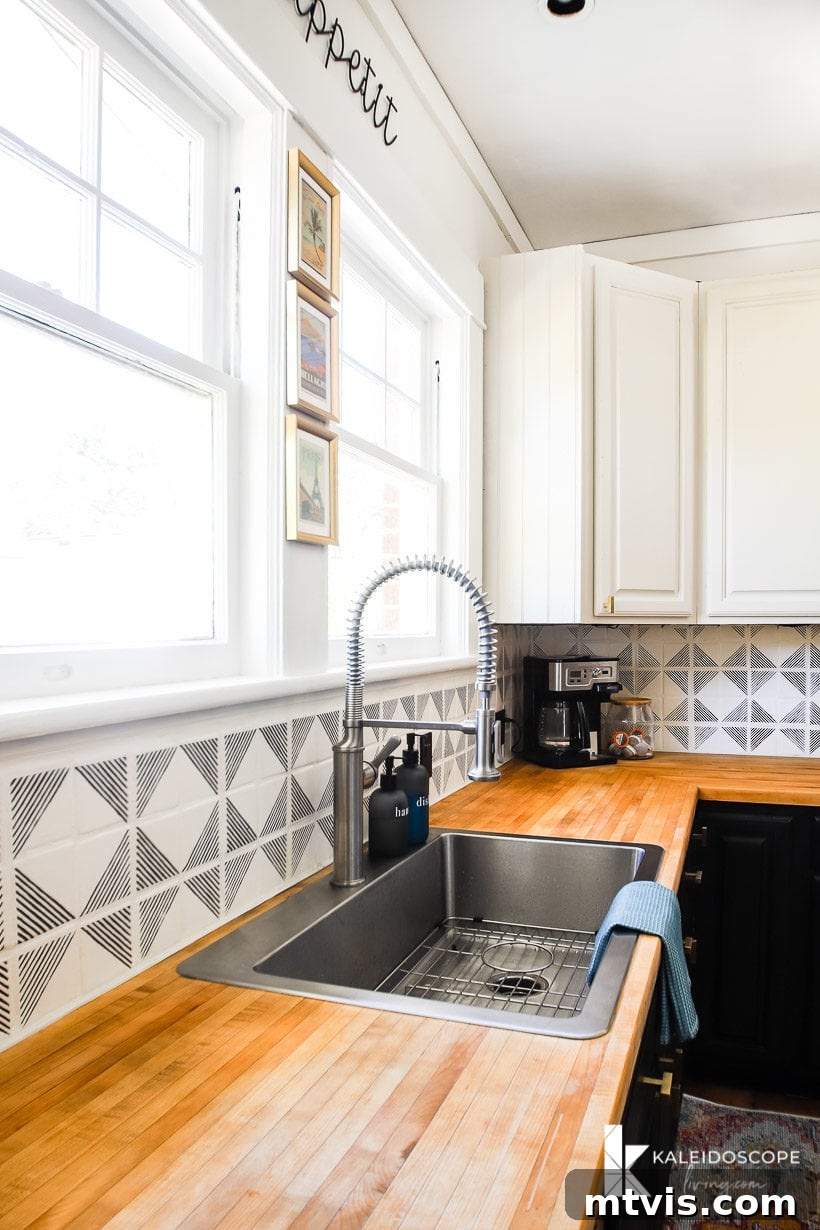
What do you think? The transformation is incredible, isn’t it? It just goes to show how much impact a creative, budget-friendly DIY project can have on a space!
Stay tuned for more exciting tutorials from Thea’s budget-friendly kitchen makeover. And if you haven’t already, make sure to explore the full reveal of Thea’s complete $1,000 kitchen makeover to see every detail of this stunning transformation.
And if the idea of stenciling feels too daunting, rest assured that simply painting your backsplash a solid color will still create a beautiful and dramatic update. The bottom line is this: regardless of whether you choose a bold pattern or a classic solid hue, painting a tile backsplash is an incredibly effective way to give your kitchen a fresh, modern look with minimal effort and financial investment. It’s a DIY project that truly delivers a high return on investment, transforming your space into something you’ll love for years to come.
Related Kitchen DIY Tutorials
- Budget-Friendly Kitchen Makeover Reveal
- How to Paint and Seal Kitchen Cabinets without even removing the doors
- How to Sand and Refinish Butcher Block Countertops
Other posts you may enjoy for inspiring home projects:
- How to Install a Tile Backsplash (the easy way)
- How to Paint Kitchen Cabinets the Easy Way (2 days, no packing)
- 15 Affordable DIY Countertops That Will Blow Your Mind
- Gorgeous But Cheap Flooring Ideas for Every Room
- 18+ Budget-Friendly DIY Backsplash Ideas to Inspire Your Next Project
- The Easy Way to Update Bathroom Tile Without Replacing It!
Curious about how I approach transforming rooms and spaces in our home from start to finish? Discover the simple yet effective strategies in Designer in a Binder® – your ultimate guide to decorating your home with confidence and ease.
For exclusive content, behind-the-scenes sneak peeks, and more DIY inspiration delivered straight to your inbox, be sure to subscribe before you head out!