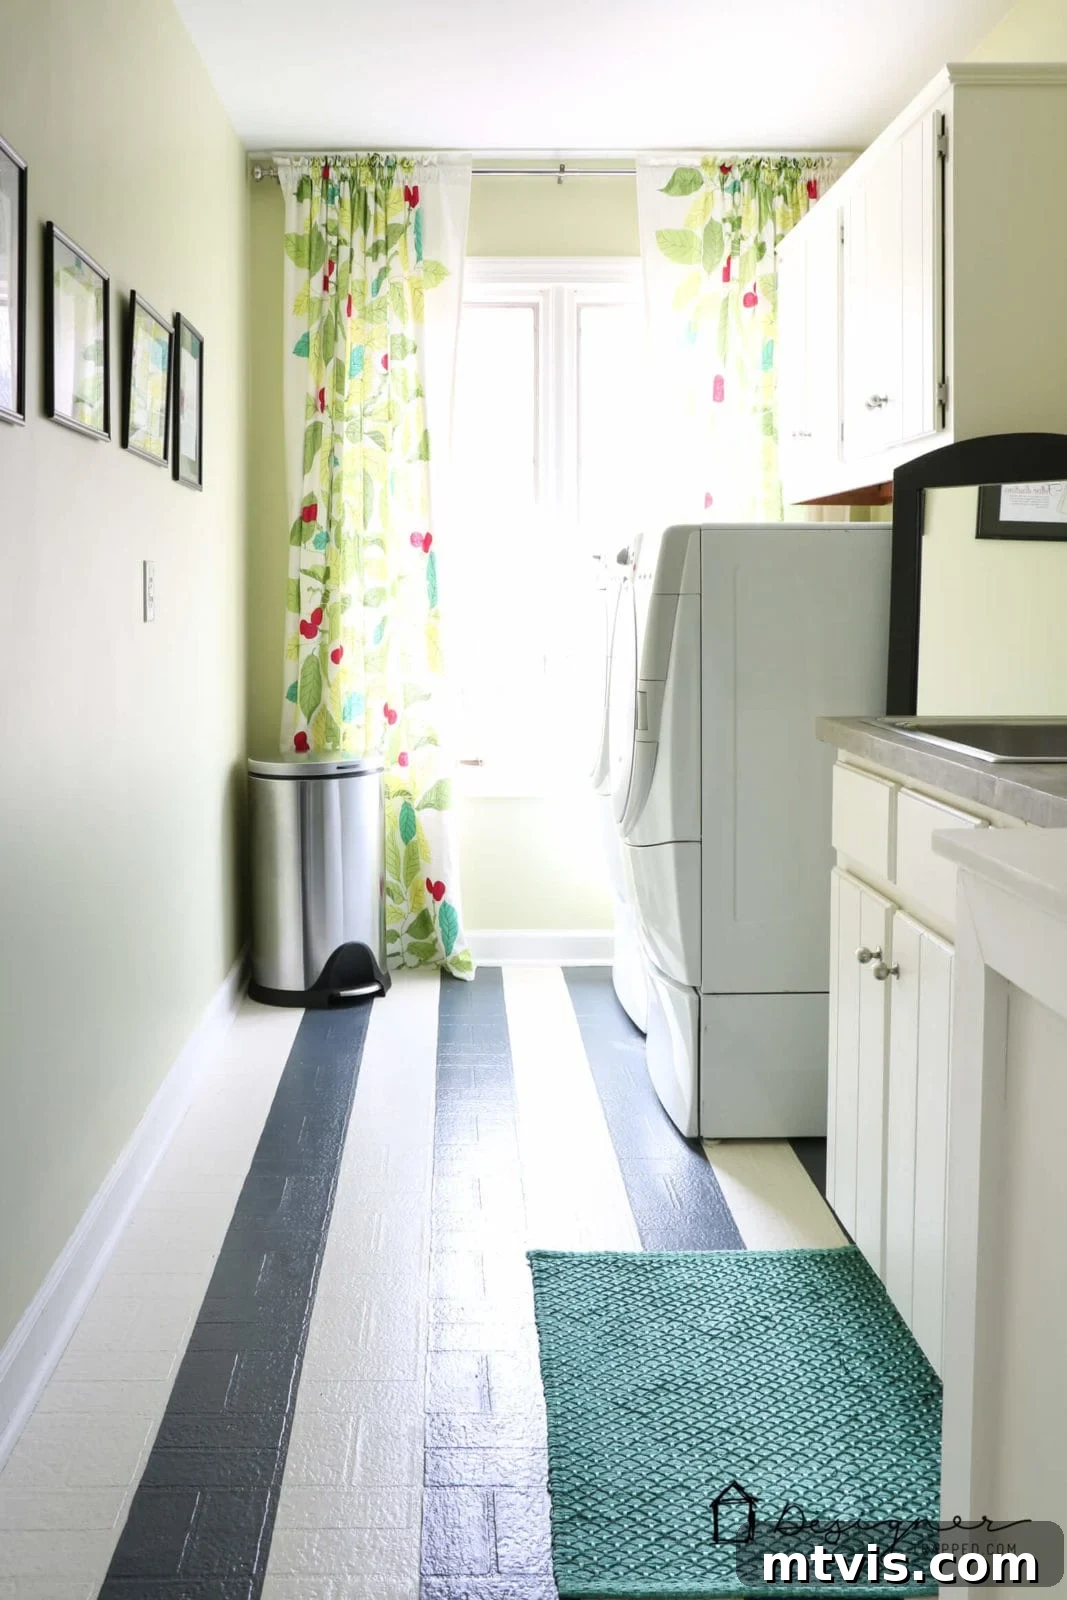
Transform Your Laundry Room on a Dime: A Stunning DIY Makeover for Just $71!
Prepare to be amazed! I’m thrilled to share a secret that will revolutionize your perception of home renovation: you can achieve a truly spectacular laundry room makeover for an astonishingly low cost. My recent DIY project transformed our dreary laundry space into a vibrant, functional, and aesthetically pleasing room, all for a mere $71.00!
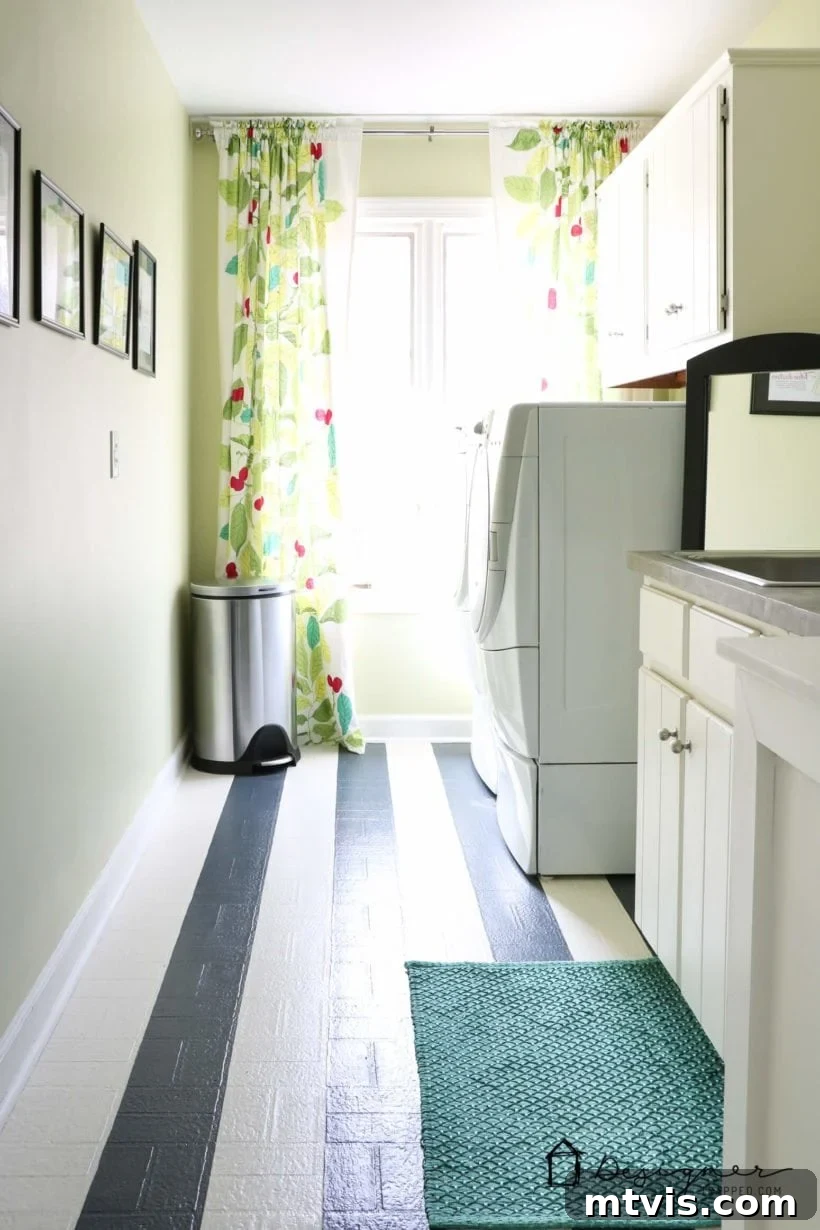
It might sound a bit unconventional to be so utterly thrilled about a laundry room, but believe me, this isn’t just any laundry room. This is a testament to the power of creativity, resourcefulness, and a strong desire to elevate an often-overlooked space. What once felt like a necessary chore zone, where joy went to diminish, is now a bright, inviting area that I genuinely adore. And the best part? This complete transformation took just a few days and cost me less than a hundred dollars out of pocket!
From Drab to Fab: The Unforgettable “Before”
Before we dive into the exciting details, let me paint a picture of the “before.” Imagine a space that exemplified neglect. It was more than just utilitarian; it was truly uninspired. The walls were bland, the floors were unappealing vinyl, and the general atmosphere was one of utilitarian despair. We took no pride in this room whatsoever, treating it as nothing more than a passthrough. I mean, the blinds were perpetually crooked – a detail that would have taken mere seconds to fix, yet we never bothered. We simply hurried in, tossed clothes in the machine, and rushed out, eager to escape its uninviting embrace.
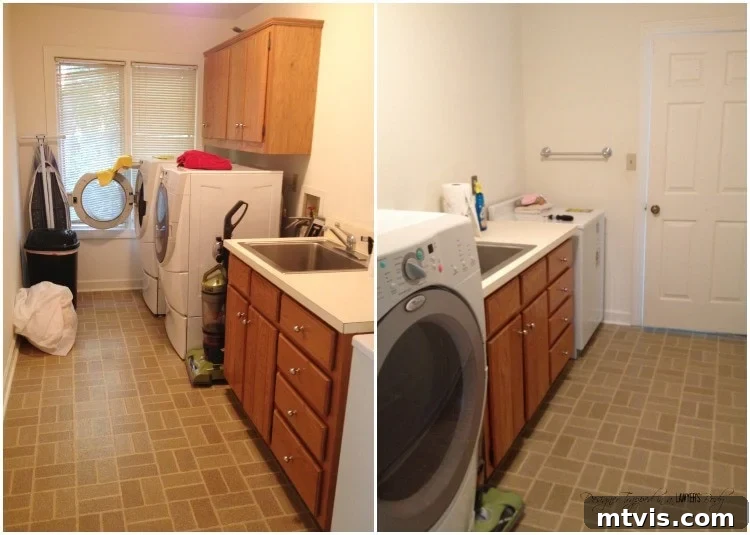
But now? The transformation is nothing short of miraculous! It’s brimming with color, light, and a palpable sense of happiness. It’s proof that even the most functional rooms in your home can be infused with style and personality without breaking the bank.
The Art of “Shopping Your Own Home” for a Budget Makeover
This DIY laundry room renovation perfectly illustrates a concept I love: “shopping in your own house.” We all accumulate items over time – leftover paint from previous projects, accessories that no longer suit another room, or decorative pieces tucked away in storage. Before you head to the hardware store or home goods aisle, take an inventory of what you already own. You might be surprised by the treasures you uncover!
For me, the entire design concept for this laundry room makeover stemmed from a beautiful set of curtains I already owned but weren’t currently in use. They had a lovely pattern and color scheme that instantly sparked inspiration. From there, I meticulously “shopped” my house for paint, decor, and other items that would complement them, ensuring a cohesive and thoughtfully designed space.
This post contains some affiliate links. Please click here to read my full disclosure policy.
The DIY Journey: Step-by-Step Laundry Room Transformation
So, how did I achieve such a dramatic change with such a minimal budget? Here’s the breakdown of every step I took, demonstrating how clever choices and repurposing led to this incredible result:
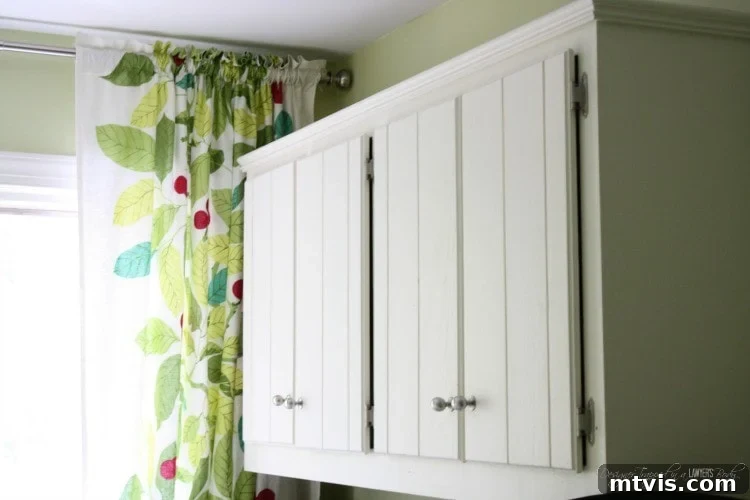
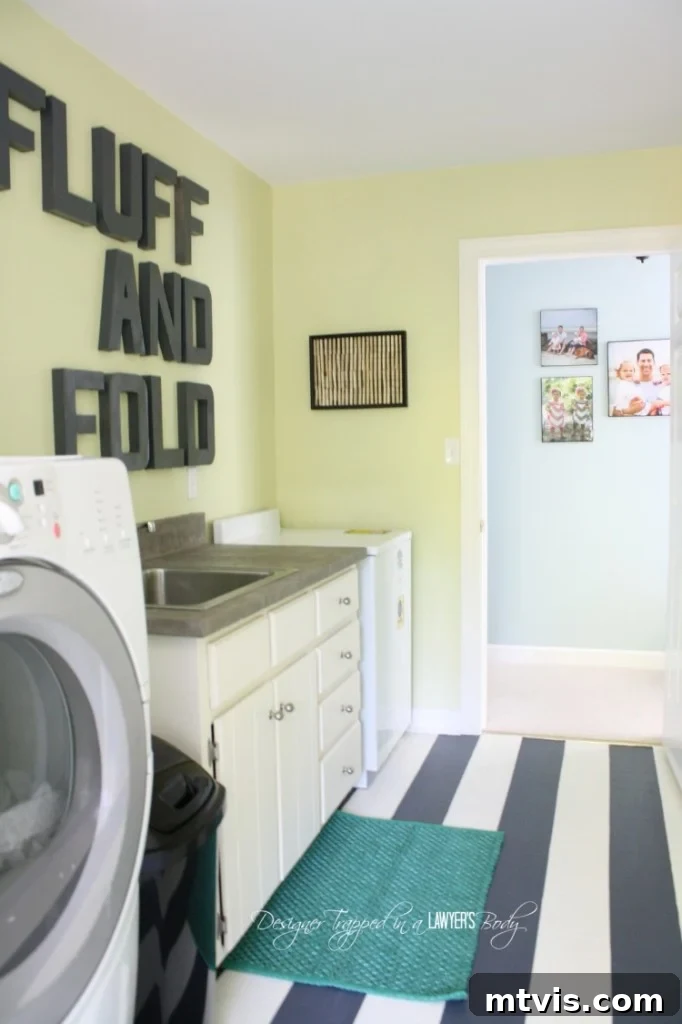
- Painted the cabinets: The existing cabinets were dull and uninspiring. I gave them a fresh, clean look using an antique white paint that was leftover from a previous home project. Luckily, I also had primer on hand. This simple step made an enormous difference, instantly brightening the space and making it feel more modern. Cost: $0
- Painted the walls: Continuing with the “use what you have” philosophy, I used leftover paint from my girls’ room to refresh the laundry room walls. Choosing a cheerful color instantly lifted the mood of the entire space. It’s amazing how a coat of paint can completely alter the perception of a room. Cost: $0
- Painted the floors: This was, without a doubt, the most impactful and surprisingly easy transformation in the room. Instead of investing in costly new flooring, I opted to paint the existing vinyl. We purchased two quarts of durable porch paint – one in a versatile grey and another in an off-white – which provided ample coverage. The effect was immediate and dramatic, transforming the entire feel of the room. This project has proven incredibly popular, having been pinned over 40,000 times! If you’re considering this for your own home, you can find a detailed, step-by-step tutorial on how to paint your vinyl floors here. Cost: $30
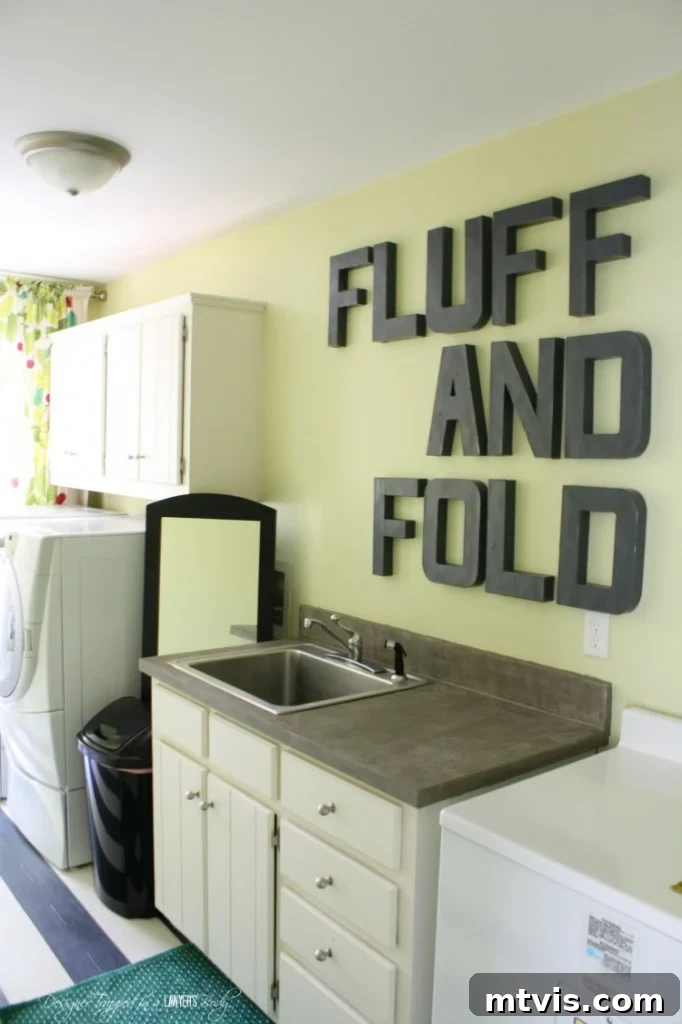
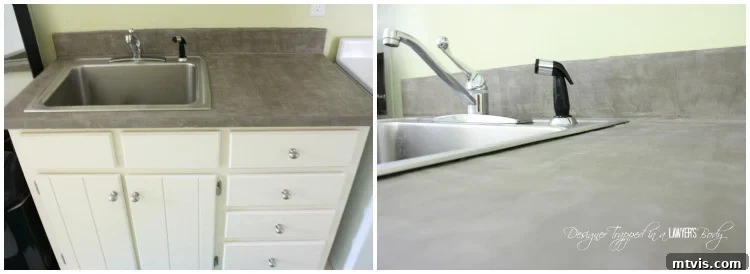
- DIY Concrete Countertop: The original laminate countertop was an eyesore. I covered it with Ardex Feather Finish, a product I had leftover from another DIY project. This material is truly incredible for creating a seamless, modern concrete look over existing surfaces. It’s incredibly forgiving and a totally achievable DIY task for anyone willing to try. The resulting concrete countertop not only looks high-end but also provides a durable, stylish surface. For a comprehensive guide on how to apply it, check out our detailed tutorial here. If Ardex Feather Finish isn’t available locally, you can easily purchase it on Amazon. This step alone elevated the entire aesthetic of the room without any out-of-pocket cost! Cost: $0
- Added decorative details: Personalizing the space was key to making it feel truly mine. I hung the playful “FLUFF AND FOLD” paper mache letters, which I spray painted for a cohesive look (total cost for letters + paint = $35). To add warmth and softness, I placed a small rug from Pier One in front of the sink. I had a gift card, making the out-of-pocket cost $0 (though its “actual” cost was $19). Furthermore, I repurposed an old, shabby shadow box, adding $6 worth of clothespins to create unique, decorative art hanging by the door. These small, thoughtful additions tie the room’s elements together beautifully.
- Hung curtains: Remember those inspirational curtains? They finally found their perfect home! I already owned these beauties, which had been stored in a chest, patiently waiting for their moment to shine. Their pattern and colors brought immediate life and softness to the room, perfectly complementing the newly painted surfaces. Cost: $0
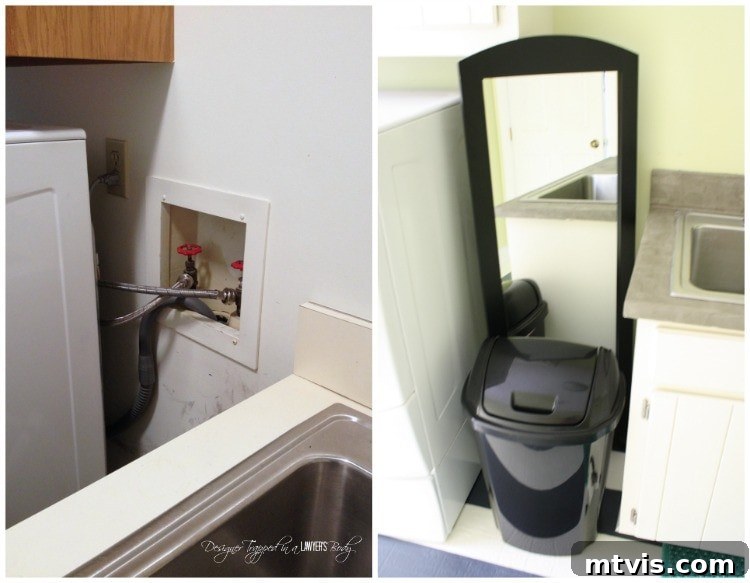
- Creatively placed a mirror to hide all the ugly plumbing connections: Every room has its challenges, and our laundry room was no exception with its unsightly plumbing. I ingeniously used a mirror I already owned (a gift previously stored away) to conceal these connections. Not only did it hide the utilitarian elements, but it also reflects light, making the small room feel larger and more open. It was a perfect, practical, and pretty solution! Cost: $0
The Unbelievable Bottom Line: $71.00 for a Complete Transformation!
GRAND TOTAL OUT OF POCKET COST: $71.00
Beyond the minimal financial investment, this makeover was also remarkably efficient in terms of time. The entire project took me a total of just 12 hours. I completed all the work myself, with the exception of my husband kindly helping to put new hinges on the cabinet doors and rehang them one day while I was at work. So, we’re talking about maybe a total of 13 man-hours. That’s incredibly efficient for such a dramatic overhaul!
Of course, a DIY project is never truly “finished,” and I do still have a few finishing touches to attend to. For example, the large blank wall opposite the washer/dryer and sink still awaits its perfect decorative accent. But for now, the room is functional, beautiful, and a joy to be in.
What do you think of this budget-friendly DIY laundry room makeover? What was your favorite part of the transformation? Was it the surprisingly easy painted vinyl floors, the chic DIY concrete countertop, or perhaps one of the clever decorative details? Share your thoughts in the comments below!
More INTERIOR Design Tips
SEE ALL DESIGN POSTS
-
Designer Tips for Choosing Perfect Kitchen Rug Runners
-
How to Make a Small Room Look Bigger: 9 Simple Tricks
-
Stylish Boob Light Alternatives to Elevate Your Home
-
How to Choose the Best Rug Size for Your Living Room
-
Is the Samsung Frame TV Worth It? Maybe Not.
-
6 Tips for Decorating With Color When You Are Used to Neutrals
Curious about my personal approach to transforming rooms and spaces throughout our home? You can discover my full methodology and design principles in Designer in a Binder® – a comprehensive guide to decorating your home with confidence and clarity.
And if you’re eager for exclusive content, behind-the-scenes sneak peeks of my latest projects, and valuable home design tips delivered straight to your inbox, be sure to subscribe to my newsletter before you go! Join our community of DIY enthusiasts and design lovers.