Are you looking to replace an old, outdated, or leaking toilet with a brand-new, efficient model? The thought of tackling a plumbing project like toilet installation can be daunting, even for seasoned DIY enthusiasts. Many people feel overwhelmed by the idea of removing the old fixture and ensuring the new one is installed correctly, especially if it’s the only toilet in the house!
However, what if we told you that installing a toilet yourself is far simpler than you might imagine? You don’t need extensive plumbing experience or specialized DIY skills. With a clear, step-by-step guide and the right tools, anyone can successfully complete this home improvement task. It’s a hugely satisfying project that can save you money on professional labor and give you a real sense of accomplishment.
This comprehensive guide will walk you through every stage of the process, from safely removing your old toilet to ensuring your new one is perfectly installed, leak-free, and securely caulked. We’ll cover everything you need to know, making sure you feel confident and prepared. Get ready to transform your bathroom and discover the ease of DIY toilet installation!
Thank you to DAP for sponsoring this post. This post contains some affiliate links for your convenience. Click here to read my full disclosure policy.
Tools & Supplies Needed to Install a Toilet
Before you begin your toilet installation project, gathering all necessary tools and supplies is crucial. Having everything on hand will ensure a smooth and efficient process. Here’s a detailed list of what you’ll need and why:
- Hacksaw: Essential for neatly trimming excess closet bolts after securing the toilet to the floor.
- Wax Ring: This creates a watertight seal between the toilet and the flange. Consider an extra-thick wax ring if you have thick flooring, such as tile, to ensure a proper compression and seal. Some wax rings come with a built-in horn for better sealing and alignment.
- Toilet Flange Repair Ring (if needed): If your existing floor flange is cracked or damaged, a repair ring is necessary to provide a stable and secure mounting surface for your new toilet. These come in metal or plastic versions, so choose one compatible with your current flange material.
- Adjustable Pliers and/or Wrenches: You’ll need these for disconnecting the old water supply line, removing tank bolts, and tightening new connections. A variety of sizes might be helpful.
- Drill Driver/Hand-Held Screwdrivers: Useful for any flange repair, securing a new flange repair ring, or tightening bolts on your new toilet.
- Putty Knife: Ideal for scraping off the old, messy wax ring from the flange and the base of the old toilet.
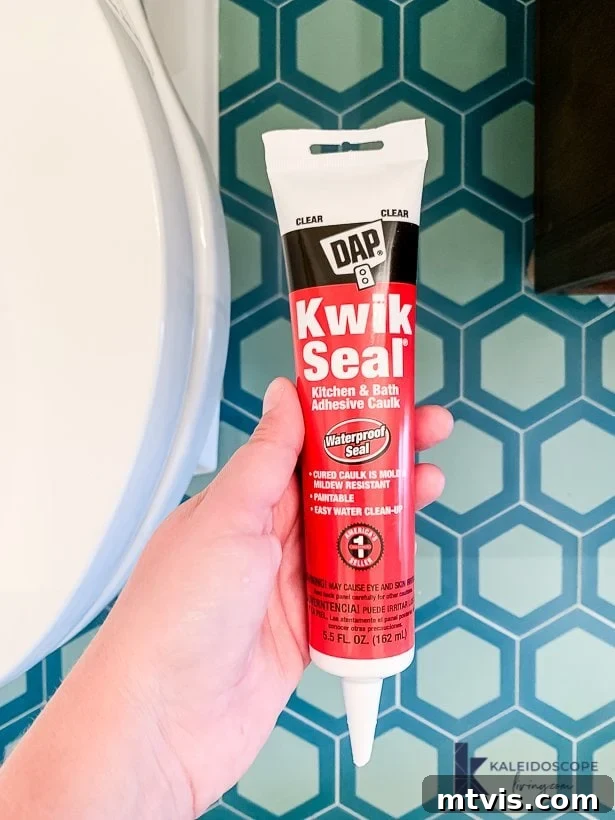
- DAP Kwik Seal Caulk (or similar bathroom-grade caulk): Used to seal the base of the toilet to the floor, preventing water from seeping underneath and offering a clean, finished look. Choose a clear or color-matching caulk.
- Toilet Shims (if needed): Small plastic wedges used to stabilize the toilet if it rocks on an uneven floor, preventing stress on the porcelain and potential wax seal failure.
- An Old Rag: Essential for plugging the drain hole to prevent sewer gas from escaping during the installation process, and for general cleanup.
- Towels/Sponges: For soaking up any residual water during toilet removal and for cleaning up spills.
- Toilet Plunger: Used to remove any remaining water from the toilet bowl before removal, making the old toilet lighter and less messy to handle.
- Gloves: Highly recommended for hygiene when dealing with an old toilet, wax rings, and general cleanup.
- New Toilet: Of course! Ensure you have unpacked it and inspected it for any damage before starting the process.
- New Water Supply Line (optional but recommended): While you might reuse the old one, installing a new, flexible supply line during replacement is good practice to prevent future leaks.
How to Install a Toilet: A Step-by-Step Guide
This detailed guide will take you through each critical step, ensuring your new toilet is installed correctly and efficiently. While the focus is on installing the new fixture, we’ll start with essential instructions for removing your old toilet, as this is often the first hurdle.
Time needed: 2 hours
Learn exactly how to install a new toilet following these easy-to-understand, step-by-step instructions. No prior DIY skills required!
- 1. Remove the Old Toilet Safely
The first crucial step is to safely remove your old toilet. This minimizes mess and prevents potential damage. Begin by locating the shutoff valve for your toilet, usually found on the wall or floor directly behind or beside the toilet. Turn this valve clockwise until the water flow stops completely. Once the water is off, flush the toilet to drain the tank. Don’t worry if there’s still some water in the bowl; use a toilet plunger to force out as much residual water as possible down the drain. This trick helps significantly reduce spillage when you lift the toilet.
Next, use an adjustable wrench to disconnect the water supply line from the fill valve on the underside of the toilet tank. Have a small bucket or towel ready to catch any drips. If your toilet consists of a separate tank and bowl, you’ll need to detach the tank. Look for the tank bolts connecting the tank to the bowl from underneath; use your adjustable wrench to loosen and remove these nuts. Carefully lift the tank off the bowl and set it aside.
Now, focus on the base of the toilet. Remove the decorative caps covering the closet bolts (often referred to as toilet bolts) at the base. Use pliers or an adjustable wrench to loosen and remove the nuts securing the toilet to the floor. With the bolts disconnected, you’re ready to lift the toilet bowl. This is the heaviest part, so lift straight up with a firm, steady motion. Try to keep it as upright as possible to prevent any remaining water from spilling. Have old towels or sponges nearby for immediate cleanup.
- 2. Plug the Drain Hole
Once the old toilet is removed, you’ll see the open drain pipe in the floor. Immediately stuff an old rag or towel firmly into this hole. This serves two important purposes: it prevents unpleasant sewer gases from entering your home, and it stops any small tools or debris from accidentally falling into the plumbing system. Remember this critical step, and don’t forget to remove the rag just before you set the new toilet in place!
- 3. Remove the Old Wax Ring and Clean the Area
The old wax ring will be stuck to either the floor flange or the base of the old toilet. This material is designed to be sticky and creates a tight seal. Using a putty knife, carefully scrape away all remnants of the old wax. This can be a bit messy and unhygienic, so wearing gloves is highly recommended. Ensure the flange and the surrounding floor are completely clean and free of old wax, dirt, or debris. A clean surface is essential for the new wax ring to form a proper, watertight seal.
- 4. Inspect Your Toilet Flange
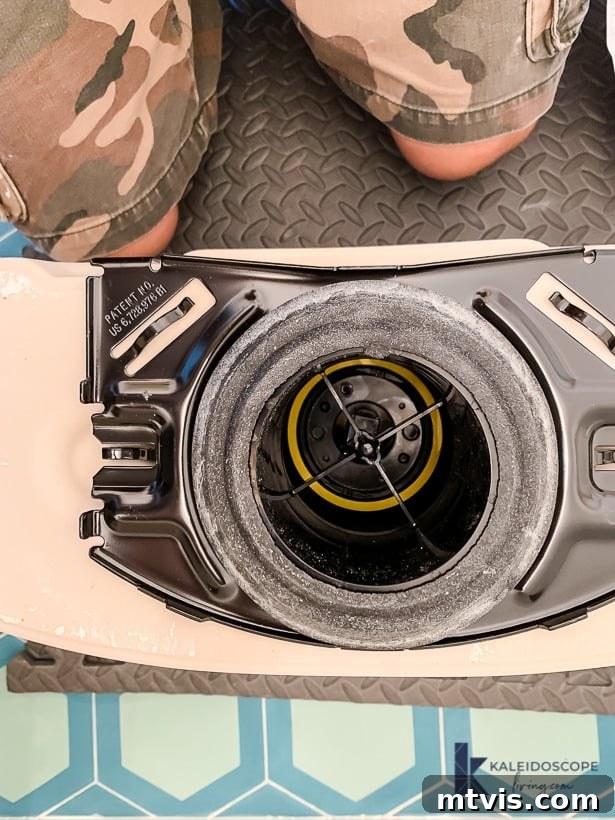
With the old wax ring removed, you’ll have a clear view of the toilet flange – the critical component that connects the toilet to the drain pipe and secures it to the floor. Take a moment to thoroughly inspect its condition. Look for any cracks, corrosion, or signs of damage. A healthy flange should be firmly attached to the floor and perfectly level. Also, check its height relative to your finished floor. Ideally, the flange should sit slightly above or flush with the finished floor surface. If it’s too low, the wax ring might not compress correctly, leading to leaks.
If your flange appears to be in good condition, you simply need to replace the old closet bolts with the new ones that come with your new toilet. These bolts slide into slots in the flange and will hold the new toilet securely.
- 5. Repair or Replace Your Flange (If Necessary)
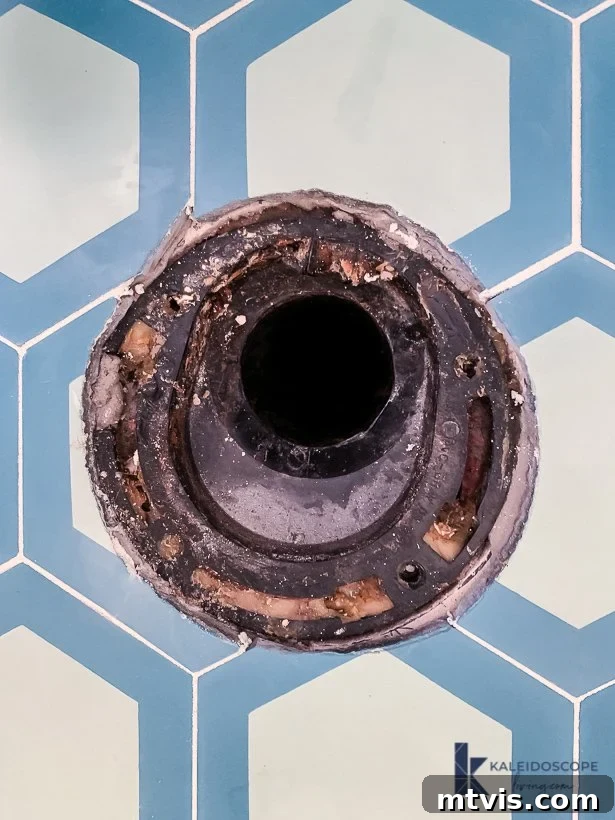
If your flange shows signs of damage, such as cracks or severe corrosion, don’t panic – it’s a common issue and easily repairable. You can use a flange repair ring (also known as a flange extender or reinforcement ring). These rings fit over your existing damaged flange and provide a new, sturdy surface for your toilet. They come in various materials (metal, plastic) and designs, so it’s wise to take a photo of your existing flange before heading to the hardware store to ensure you purchase a compatible repair ring. If unsure, show the photo to a plumbing expert at the store for assistance.
In our experience, a cracked flange looked like this after removing the old wax ring:

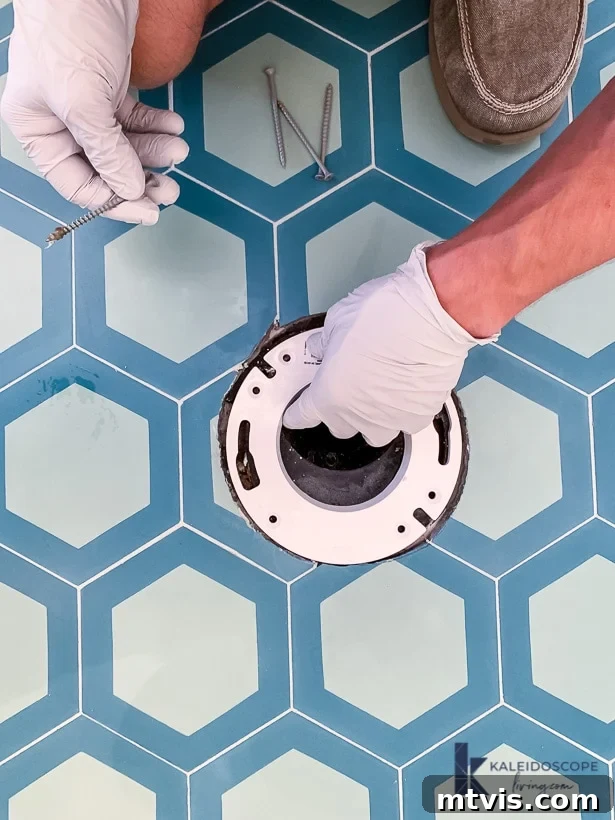
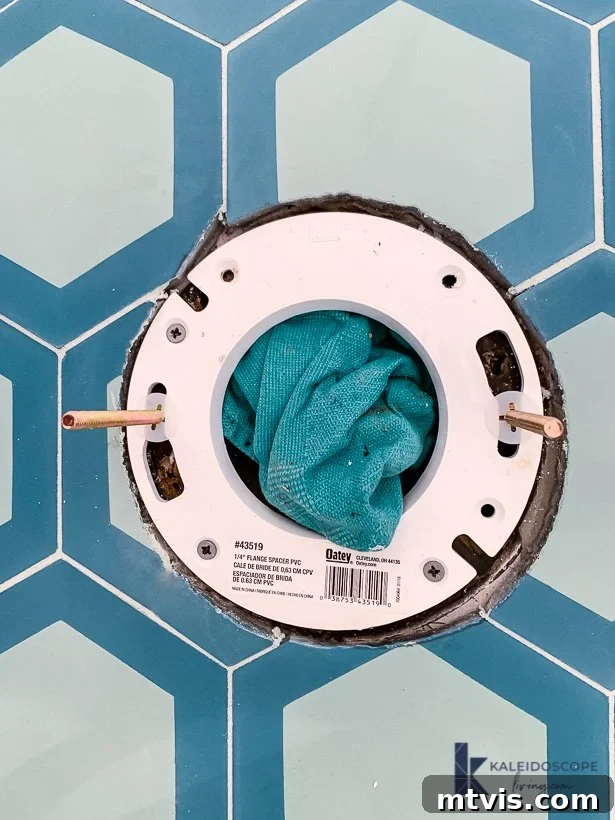
We successfully installed a flange repair ring (the white ring shown below) directly over the existing damaged flange and secured it to the subfloor using appropriate screws.
Once your flange is repaired or determined to be in good shape, position the new closet bolts correctly. These bolts should be set directly opposite each other, equidistant from the drain hole, to ensure the toilet will be aligned straight. Ensure they are standing upright and secure in their slots. You can see our bolts positioned in our flange repair ring here:
- 6. Install a New Wax Ring for a Perfect Seal
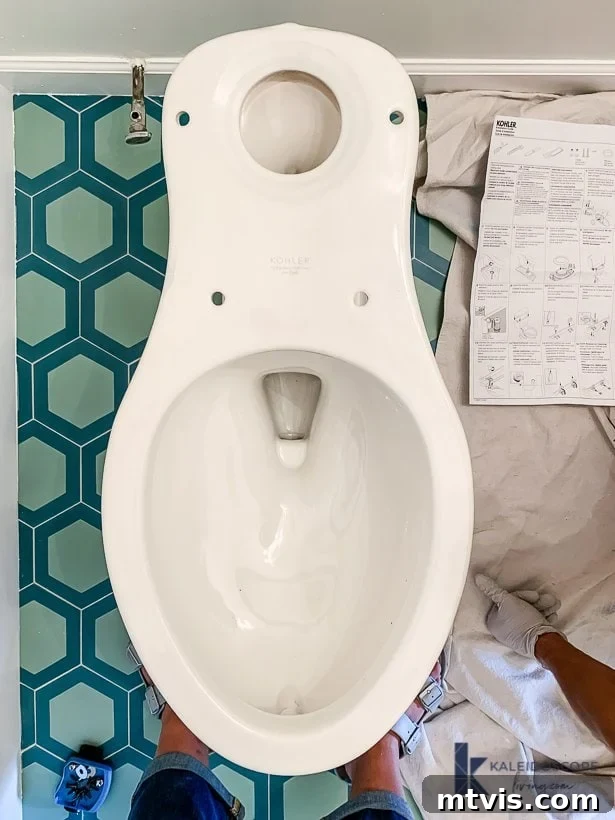
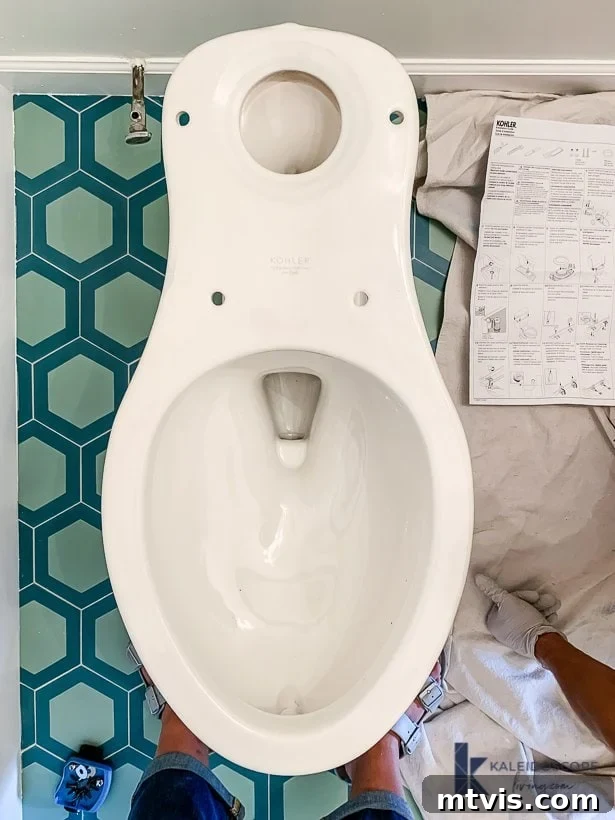
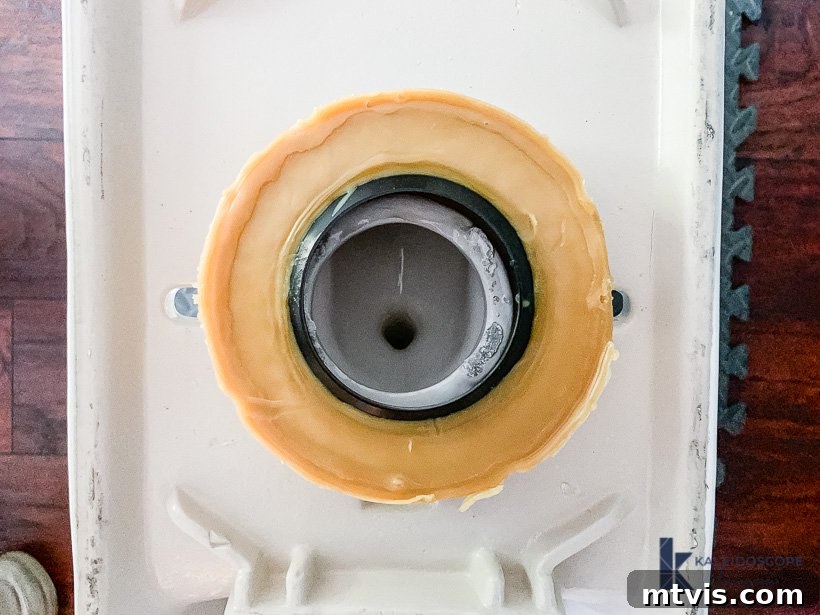
Now it’s time to install your new wax ring, which is crucial for a leak-free toilet. You have two main options for placement: directly onto the flange or onto the base of the toilet bowl. We highly recommend placing the wax ring onto the bottom of the toilet bowl. To do this, carefully turn the toilet bowl upside down, perhaps on some soft foam mats or a sturdy towel to protect the porcelain. Press the wax ring firmly onto the bottom of the toilet bowl, centering it around the drain opening.
This method ensures the wax ring is perfectly positioned before you attempt to lower the heavy toilet onto the flange, significantly reducing the risk of misalignment or damaging the seal. Given our thick cement tile flooring, we opted for an extra-thick wax ring to guarantee adequate compression.
- 7. Carefully Place the Toilet Bowl on the Flange
This is a critical moment. Before you place the toilet, remember to remove the rag you stuffed into the drain hole! Now, carefully lift the toilet bowl and position it directly over the flange, making sure the closet bolts line up perfectly with the holes in the toilet base. Lower the toilet straight down, without rocking or twisting, until it rests firmly on the floor. Once it’s in place, apply firm, even pressure downwards on the toilet bowl to compress the wax ring and create a tight seal. Avoid any lateral movement or tilting after this point, as it could break the wax seal and lead to leaks. The wax ring will conform to the shape, providing an impenetrable barrier against water and odors.
- 8. Secure the Toilet Bowl
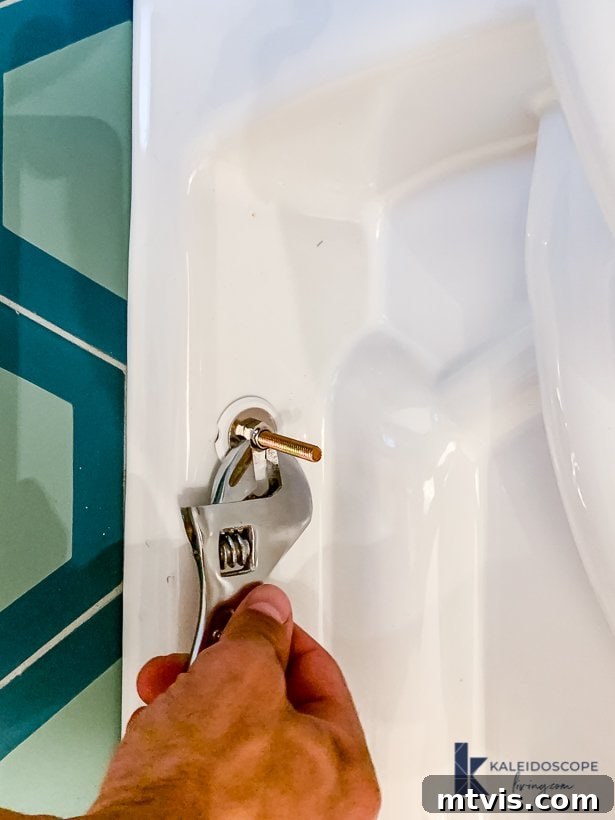
With the toilet bowl firmly seated, it’s time to secure it to the floor. Place a washer and then a nut onto each closet bolt. Hand-tighten them initially, then use an adjustable wrench to tighten them securely. It’s crucial not to overtighten, as this can crack the porcelain, leading to costly damage. Tighten each nut gradually and alternately, moving from one side to the other, to ensure even pressure and prevent stress on the toilet base. The toilet should feel snug but not overly compressed.
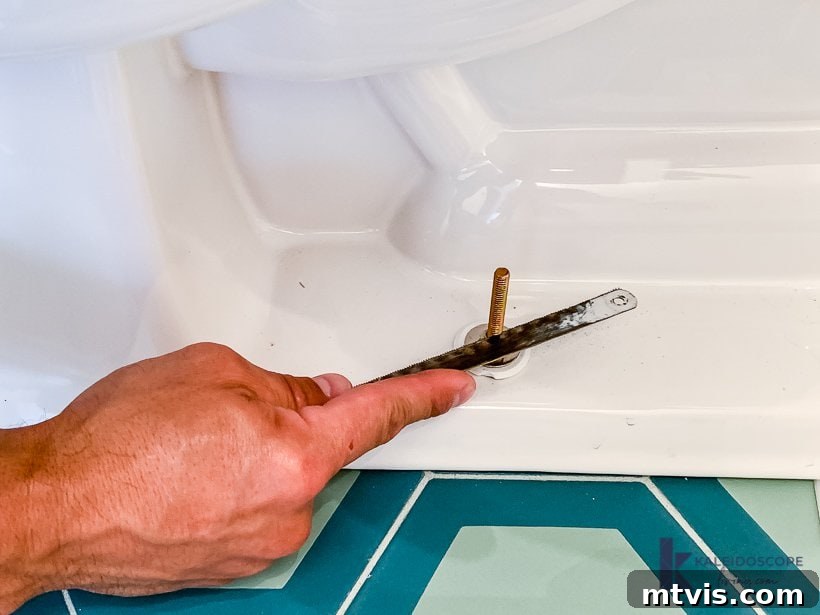
Once the nuts are tightened, you’ll likely have excess bolt material sticking up. Use a hacksaw to carefully trim these bolts down. You want them short enough so that the decorative plastic bolt caps can snap firmly into place, providing a clean, finished look and protecting the bolts from corrosion.
- 9. Attach the Toilet Tank
If your toilet comes in two separate pieces (most common residential models do), your next step is to attach the tank to the bowl. While specific instructions may vary slightly by manufacturer, the general process involves installing the “tank-to-bowl” gasket and inserting the tank bolts and washers from inside the tank. This gasket is crucial for a watertight seal between the tank and the bowl.
Once the gasket and bolts are in place, carefully align the tank bolts with the corresponding holes in the back of the toilet bowl. Gently lower the tank into position. Secure it by tightening the nuts from underneath the toilet bowl. Again, tighten these nuts gradually and alternately to ensure even pressure and prevent cracking the porcelain. The tank should feel stable and securely attached to the bowl.
- 10. Connect the Water Supply Line & Test for Leaks
With the tank securely in place, you’re ready to reconnect the water supply line. Use your adjustable wrench to attach the flexible supply line to the fill valve on the underside of the tank and to the shutoff valve on the wall or floor. Ensure these connections are hand-tightened first, then give them a gentle turn with the wrench to ensure a snug, leak-free fit. Be careful not to overtighten, as this can damage the plastic threads.
Now comes the moment of truth: testing for leaks. Slowly turn the water shutoff valve counter-clockwise to restore water flow to the toilet. The tank will begin to fill. Watch closely for any signs of water dripping from the supply line connections, around the tank bolts, or where the tank meets the bowl. Once the tank is full, flush the toilet several times. Carefully inspect the entire toilet, paying close attention to the area where the tank and bowl connect, the base of the toilet where it meets the floor (around the wax ring), and all supply line connections. If you spot any leaks, tighten the relevant connections slightly until the dripping stops. If a leak persists, you may need to recheck your wax ring or gasket seals.
- 11. Shim and Caulk the Base of the Toilet for Stability and Hygiene
Your final steps involve ensuring stability and a polished finish. First, check if your toilet rocks at all. If the floor is perfectly level and the toilet is firm, you’re in great shape. However, if it wobbles even slightly, this can put stress on the porcelain and the wax seal, potentially leading to cracks or leaks over time. To fix this, insert plastic toilet shims into any low spots under the base until the rocking motion is completely resolved. Once stable, use a utility knife to carefully trim the shims flush with the toilet base for an invisible look.
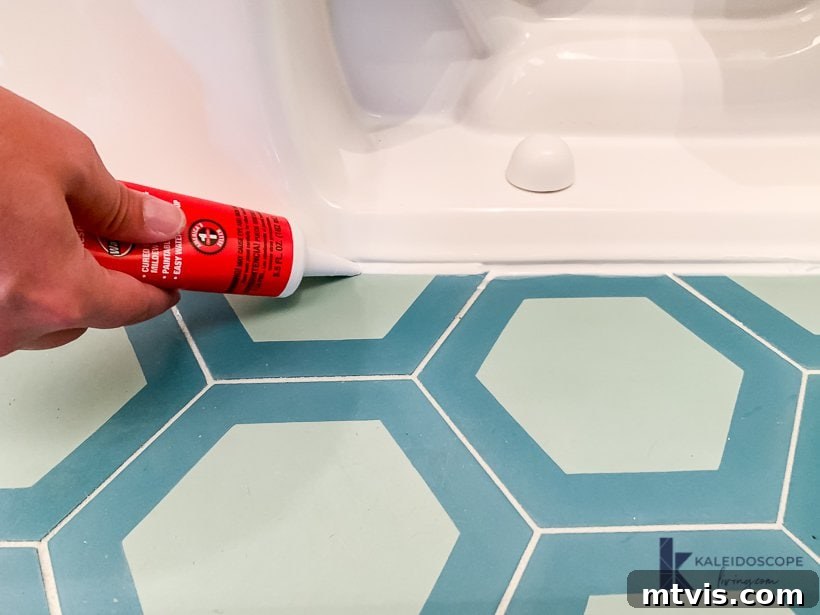
Finally, it’s time to caulk the base of the toilet. Caulking serves several important purposes: it prevents dirty water from seeping under the toilet (improving hygiene), provides a finished aesthetic, and helps further stabilize the fixture. We highly recommend using a high-quality bathroom-specific caulk, such as DAP Kwik Seal Kitchen and Bath Adhesive Caulk in Clear, known for its durability and mold resistance.
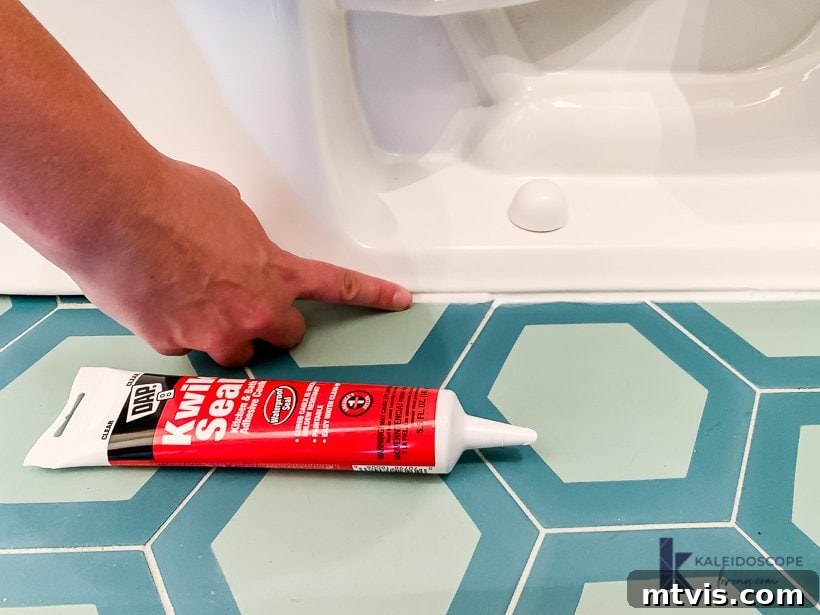
Apply an even bead of caulk around the entire perimeter where the toilet base meets the floor. Maintain a consistent pressure on the caulk gun for a smooth line.
Immediately after applying, use a wet finger or a caulking tool to smooth out the bead of caulk. This creates a professional, clean finish. If you use clear caulk, don’t be surprised if it appears white when wet; it will dry to a transparent finish within a few days. Once cured, your caulk will provide a durable, waterproof seal, completing your toilet installation.
Congratulations! Your fabulous new toilet is now installed, secure, and ready for use. You’ve successfully completed a plumbing task that many homeowners outsource, proving that with a little guidance and confidence, you can achieve impressive results. Take pride in your newly upgraded bathroom and enjoy the satisfaction of a job well done!
This toilet installation was part of a larger renovation. Be sure to check out the full modern bathroom remodel to see the incredible transformation!
Further Reading & Inspiration for Your Home:
If you enjoyed this DIY project, you might find inspiration in these other popular posts for transforming your home:
- SUPERAffordable Master Bathroom Makeover
- The Easy Way to Update Bathroom Tile Without Replacing It!
- DIY Vanity Makeover: Concrete Overlay
- 25 Stunning Powder Room Makeovers
- Attley’s Budget-Friendly Bathroom Renovation
- Avery’s Budget-Friendly Bathroom Makeover
- The Best Colorful Shower Curtains
Discover more about our approach to transforming rooms and spaces in your home with our signature guide: Designer in a Binder®.
For exclusive content, behind-the-scenes sneak peeks, and more DIY inspiration, be sure to subscribe to our newsletter before you go!