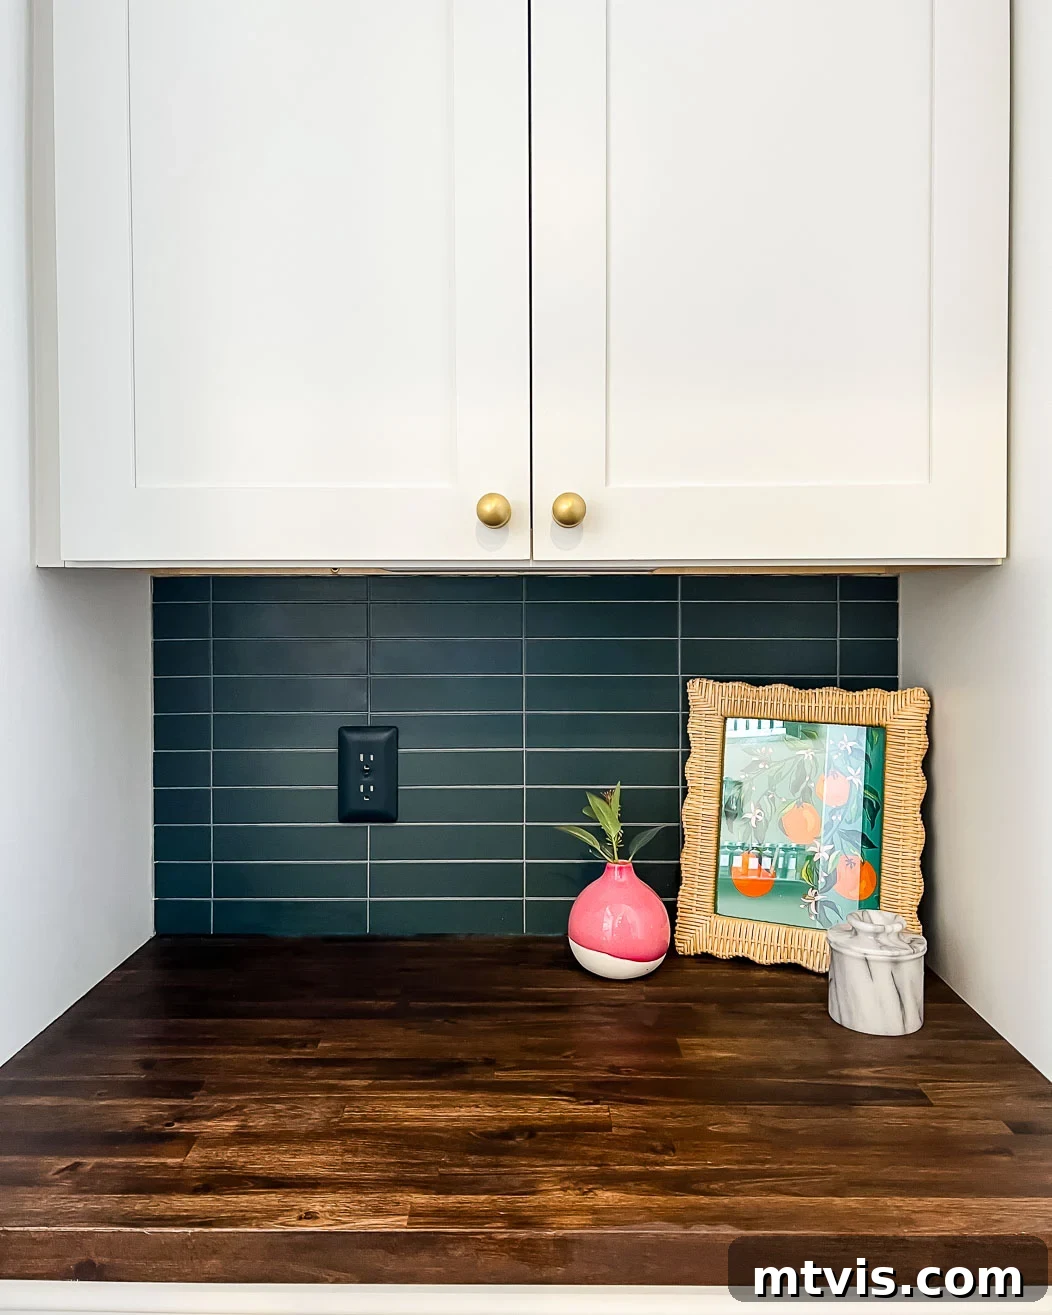
Don’t underestimate the transformative power of a tile backsplash. Far more than just a protective layer, a well-chosen tile backsplash can dramatically elevate the aesthetics and functionality of your kitchen, butler’s pantry, or home bar. It serves as a striking focal point, injecting personality and style into your space while safeguarding your walls from splashes and stains. The sheer variety of options available for kitchen backsplash tiling is immense, offering everything from elegant marble mosaic tiles on mesh backing to classic ceramic subway tiles, and even convenient peel-and-stick solutions. Whatever your design preference or budget, there are countless budget-friendly DIY backsplash ideas to explore.
Having undertaken tile backsplash installations multiple times, I can confidently attest that it is a remarkably straightforward and beginner-friendly DIY project. The process is much less intimidating than you might imagine, and the satisfaction of a professionally finished look achieved with your own hands is truly rewarding. This comprehensive guide will walk you through the simple steps of installing a tile backsplash directly over drywall, ensuring a smooth and successful project from start to finish. Get ready to learn how to install tile the easy way!
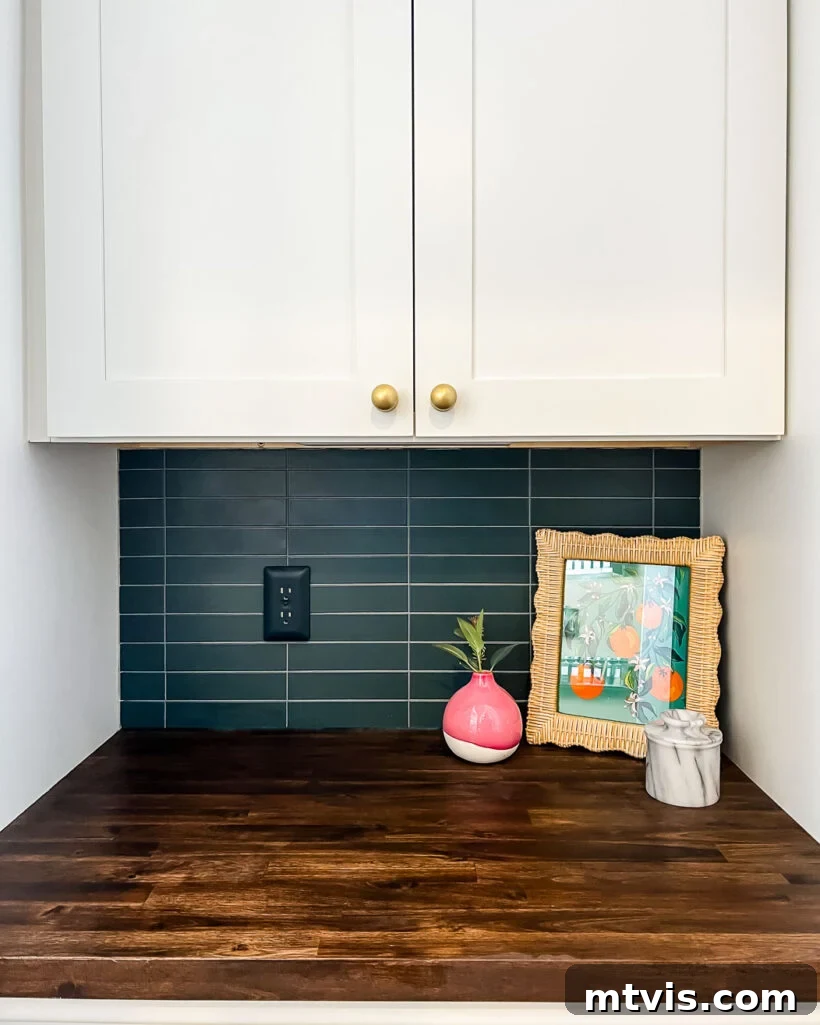
Table of Contents
Toggle
If you’ve followed my recent Instagram stories, you might have caught a glimpse of the ceramic tile backsplash installation in our brand new Butler’s Pantry, a space ingeniously repurposed from an unused built-in office area. What many observed was the surprising speed and ease with which the backsplash came together! This project truly highlights that even complex-looking home improvements can be tackled by DIY enthusiasts with the right guidance.
For this project, we were fortunate to use leftover tile from our fireplace makeover. Not only did this eliminate the need to purchase new materials, saving us money, but we also adore the tile’s aesthetic. We opted for a simple, timeless stacked tile pattern, but rest assured, the techniques shared in this tutorial are universally applicable, regardless of the tile pattern you choose. Whether you prefer herringbone, basketweave, or a classic running bond, these steps will guide you to a flawless finish.
How to Install a Tile Backsplash the Easy Way: Your Complete Guide
Embarking on a tile backsplash project can seem daunting, but with the right preparation, tools, and a clear step-by-step guide, it’s a highly achievable DIY endeavor. This section will break down the entire process, making it simple for even first-time tilers. We’ll start with the essential materials you’ll need and then move on to the detailed installation steps.
Materials Needed for a DIY Tile Backsplash
Gathering all your supplies before you begin is crucial for a smooth installation process. Here’s a comprehensive list of what you’ll need:
- Tile of your choosing: Select a tile that complements your space. Consider factors like material (ceramic, porcelain, glass, natural stone), finish (matte, glossy), size, and color. For reference, this is the pacific blue 2×8 tile we used for our project. Ensure you purchase at least 10-15% more than your measured area to account for cuts and potential breakage.
- Level: An essential tool for ensuring your tile lines are perfectly straight, preventing a crooked appearance. A 2-foot or 4-foot level is ideal.
- Measuring tape: For accurate measurements of your backsplash area and individual tile cuts.
- Tile cutting tool: Depending on your tile type and volume of cuts, you’ll need either a wet tile saw (for precise cuts on ceramic, porcelain, or stone), or a manual tile cutter and tile nippers (sufficient for softer tiles and smaller jobs).
- MusselBound tile adhesive mat or Thinset Mortar: This tutorial highlights the ease of using an adhesive mat, which significantly reduces mess and drying time. If you opt for traditional thinset, ensure you have a notched trowel and mixing bucket.
- Utility knife: Crucial for cutting the adhesive mat and for various other tasks.
- Grout: Choose a color that complements your tile and design. We highly recommend pre-mixed, pre-sealed grout for ultimate convenience. We used Pearl Gray, which provides excellent contrast.
- Large sponge: For cleaning excess grout from your tiles.
- Bucket: For water when cleaning grout, rinsing sponges, and potentially mixing traditional thinset.
- Grout float: A rubber-faced tool essential for applying grout into the tile joints.
- Tile spacers: These small plastic cross-shaped pieces ensure consistent spacing between your tiles, creating uniform grout lines. We used 1/16 inch spacers.
- Caulk: A flexible sealant for the expansion gaps where your tile meets countertops, cabinets, and corners. Choose a color that matches your grout for a seamless look.
- Painter’s tape & plastic/paper: To protect your countertops, cabinets, and surrounding surfaces from grout, adhesive, or debris.
- Safety Glasses and Gloves: Always prioritize safety when working with tools and chemicals.
Time needed: 4 hours
Learn how to install a tile backsplash following these simple steps for a professional finish!
- 1. Prepare Your Walls for Tile Installation
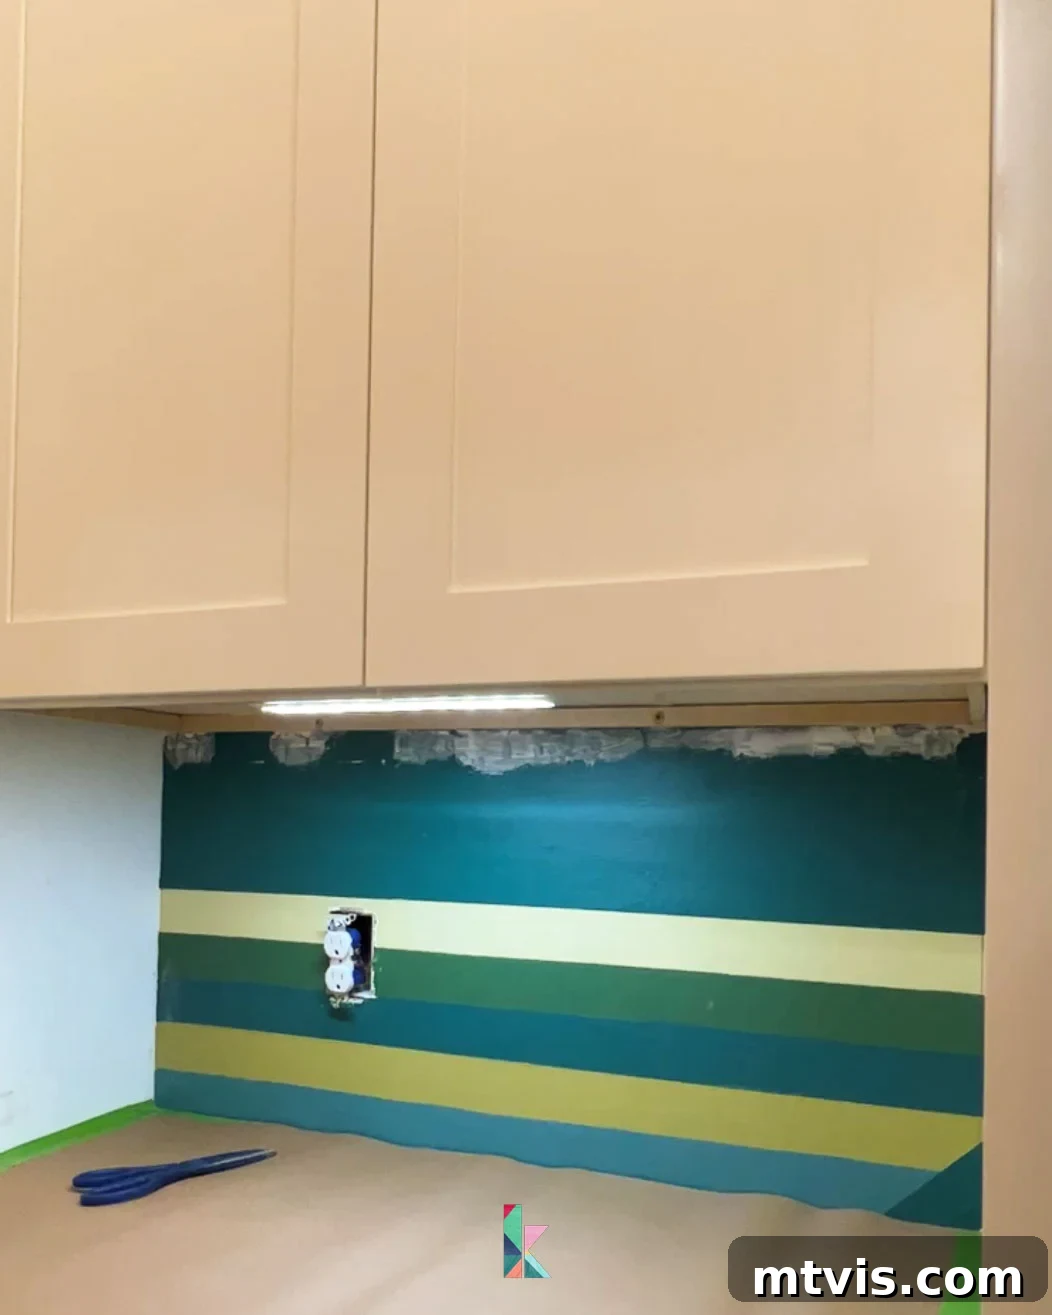
Proper wall preparation is the foundation of a successful tile backsplash. Begin by clearing your workspace of any items that might obstruct the tiling process. Next, meticulously inspect your drywall for any imperfections such as holes, gouges, or uneven areas. It’s crucial to repair any drywall damage thoroughly, ensuring a smooth and stable surface for the adhesive. Once repairs are complete and dry, clean your walls meticulously to remove dust, grease, and grime – a clean surface ensures optimal adhesion. If your backsplash area includes electrical outlets or light switches, always prioritize safety: turn off the power to these circuits at your breaker box. Then, carefully remove all outlet covers and switch plates from the area slated for tiling. Finally, use painter’s tape and plastic sheeting or paper to meticulously protect your countertops, cabinets, and any adjacent surfaces from accidental grout splatters or adhesive residue. Taking the time for these preparatory steps will save you considerable effort and frustration later on. Our wall, for instance, had a previously painted design and required minor drywall repair below the new upper cabinet we installed, as seen here:

- 2. Verify Levelness and Install a Ledger Board (If Necessary)
The levelness of your first tile row is paramount, as it dictates the alignment of your entire backsplash. Begin by checking your countertop with a reliable level. We were lucky our countertop was perfectly level! If your countertop is not perfectly level, you have two primary options. You can draw a perfectly level line on the wall, using it as a visual guide. Alternatively, and often more effectively, you can attach a ledger board – essentially a thin, straight strip of wood – to the wall along this level line. This ledger board will serve as a temporary support, preventing your first row of tiles from sagging or shifting downward until the adhesive has fully cured. This is especially critical if you’re tiling an area without a countertop below, such as behind a freestanding range or in a section where appliances will sit, as the ledger board provides essential support and ensures a consistent, level start.
- 3. Thoughtfully Plan Your Tile Layout
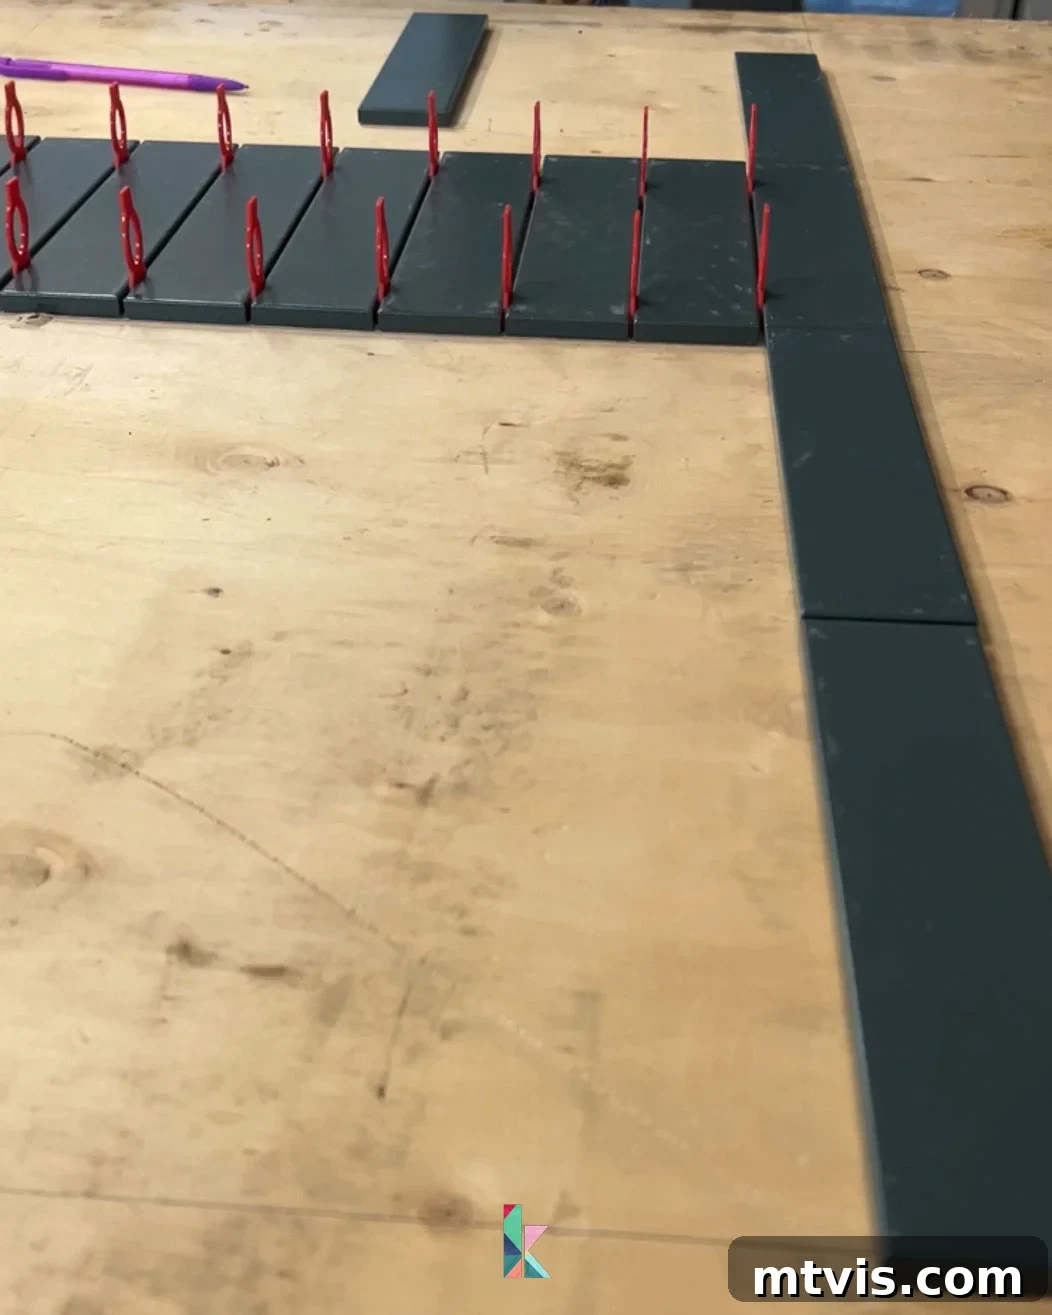
Careful planning of your tile layout is a critical step that ensures a professional and aesthetically pleasing result. Start by precisely measuring the entire length and height of your backsplash area. For a visual aid, you can sketch this area on a piece of scrap wood or paper. To achieve a balanced look, especially with patterns like a stacked or subway tile, locate the center of your measured area and mark a vertical line. Many tile patterns look best when radiating outwards from a central point. The next crucial step is to “dry lay” your tile design. This means arranging your tiles on the floor or a large flat surface exactly as they will appear on the wall, using the same tile spacers you intend to use for installation. This allows you to visualize the pattern and, more importantly, to identify any areas where you might be left with awkward, tiny slivers of tile that are difficult to cut and often look unprofessional. Begin by dry-laying your tile vertically, using your chosen spacers, to confirm that the vertical layout works without resulting in excessively small cuts at the top or bottom. Then, dry lay your tile horizontally, again incorporating your spacers, and check the ends. If any pieces would need to be cut too narrow at the edges, adjust your starting point slightly to ensure balanced cuts on both sides. This iterative planning prevents frustrating surprises during installation.
- 4. Apply Your Chosen Adhesive to the Wall
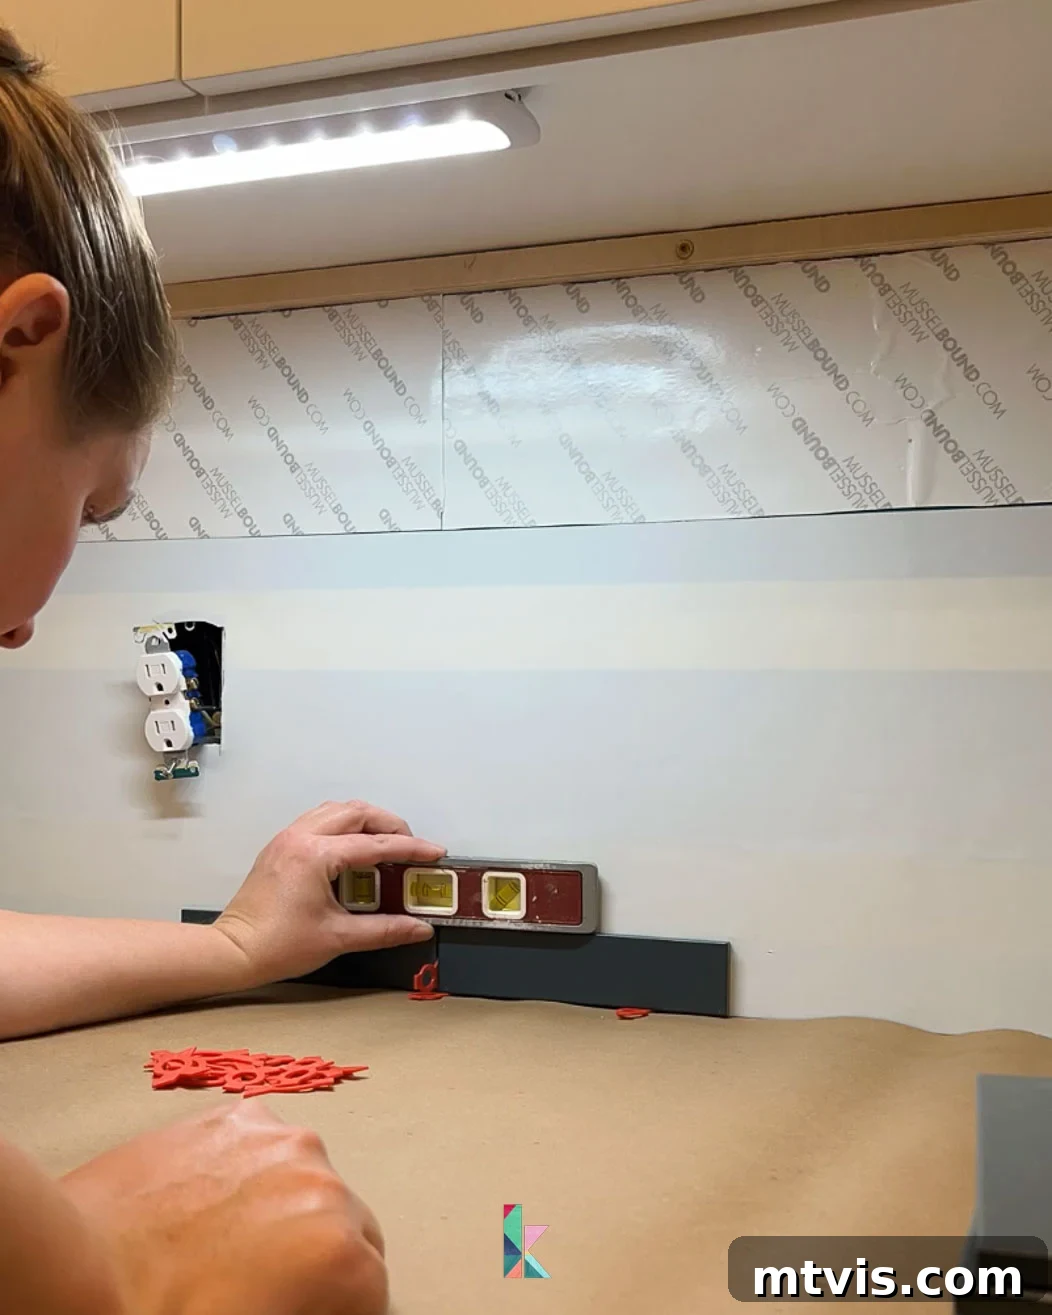
Once you’ve finalized your tile layout and are confident in its design, it’s time to apply the tile adhesive to the prepared wall. While traditional thinset mortar is a common choice, I highly recommend using the MusselBound tile adhesive mat for its incredible ease of use and reduced mess. We’ve utilized this innovative mat successfully on several projects, including our fireplace makeover and a DIY tile headboard, always appreciating how it simplifies the installation process compared to working with wet thinset. The primary advantage of the MusselBound mat is its peel-and-stick application, which eliminates the need for mixing and the associated cleanup. However, it’s important to note one crucial characteristic: once a tile touches the mat, the adhesion is incredibly strong, making it very difficult to “scoot” or reposition. Precision is key! If a tile is misplaced, you’ll likely need to carefully pry it off, which can be challenging. Despite this, the convenience and cleanliness of the mat often outweigh this minor drawback, especially for DIYers. To apply, simply cut the adhesive mat to size using a utility knife and firmly press it onto your wall. Use your utility knife to accurately cut around any obstacles like electrical outlets or light switches, ensuring full coverage of the tiling area.
- 5. Begin Installing Your First Row of Tiles
With the adhesive mat in place, carefully peel back the protective paper to expose the sticky surface. Now, it’s time for the moment of truth: installing your first tile. Begin by firmly pressing your first tile into position, remembering to leave a 1/8-inch expansion gap where it meets your countertop. This gap is vital for accommodating natural expansion and contraction of materials, preventing cracking. For a balanced look, we started our installation from the center of the backsplash area and worked our way outwards. Even if you’ve confirmed your countertop is level, it’s absolutely crucial to continuously check the levelness of your first row as you work. Use your level frequently to ensure each tile is perfectly aligned. A wonky first row will unfortunately lead to a wonky entire tile backsplash, making it impossible to correct later on. Take your time, be precise, and ensure this foundational row is impeccable.
- 6. Continue Installing the Remaining Tiles
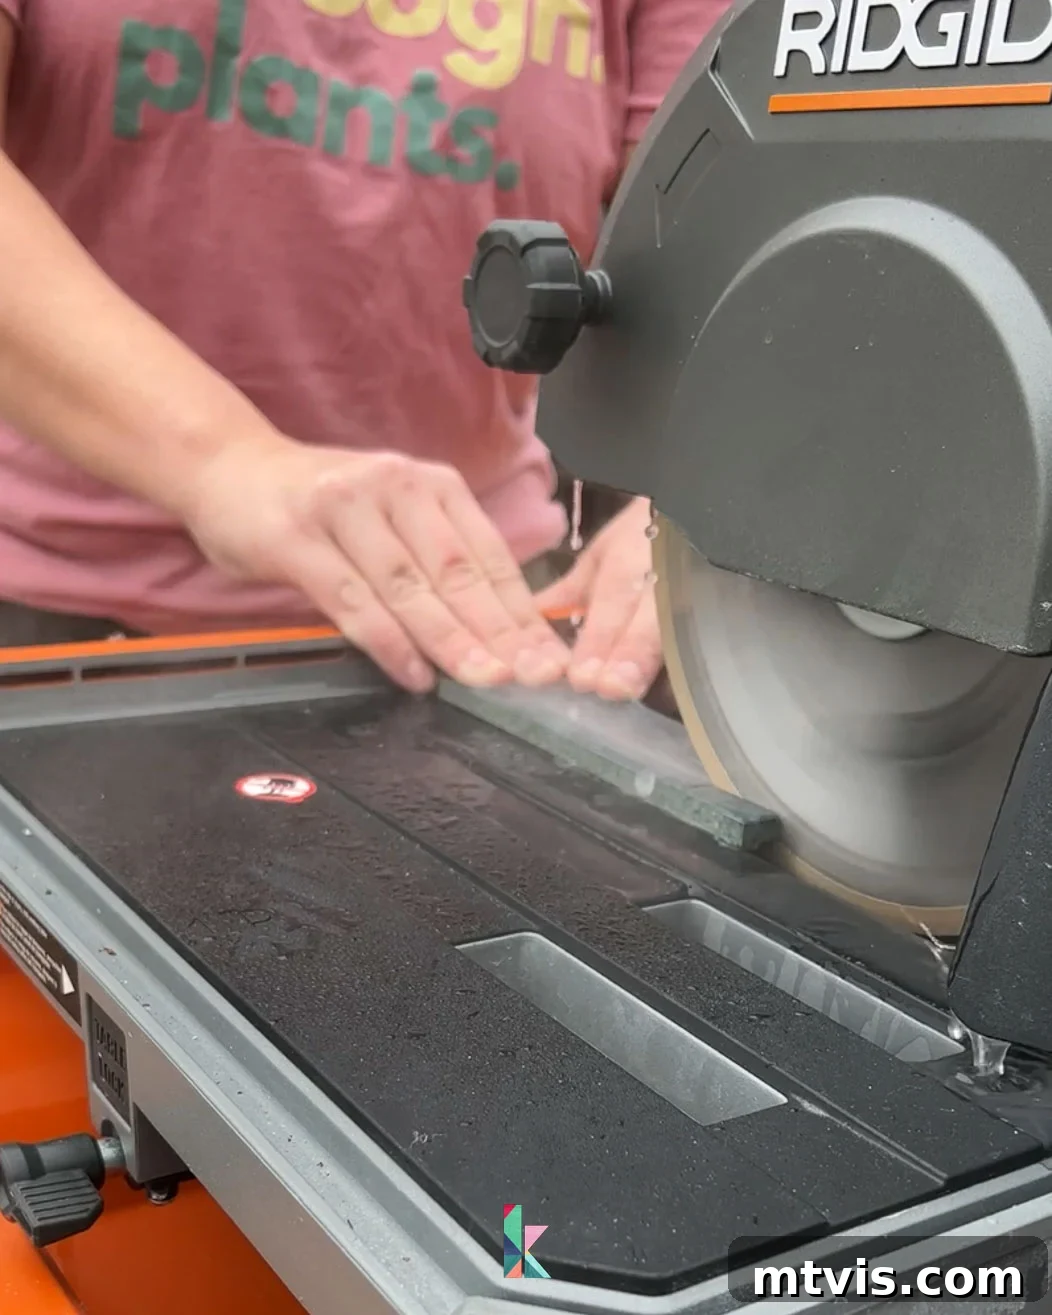
After establishing your perfectly level first row, continue placing the rest of your tiles, meticulously using tile spacers between each one. These spacers are your best friend for achieving perfectly even grout lines and a professional, uniform appearance across your entire backsplash. I typically prefer to install all full, uncut tiles first. Once all full tiles are in place, you can then proceed to measure and mark each tile that requires cutting to fit along edges, corners, or around outlets. For cutting, we have a wet tile saw, which offers precise and clean cuts, especially useful for harder tiles like ceramic or porcelain. However, don’t feel intimidated if you don’t own one; a manual tile cutter and/or tile nippers can absolutely get the job done, particularly for softer tiles or less complex cuts. A wet tile saw might seem daunting, but it’s generally considered one of the least intimidating power tools, making it accessible for many DIYers. Always wear appropriate safety gear when operating any cutting tool.
- 7. Expertly Apply Your Grout
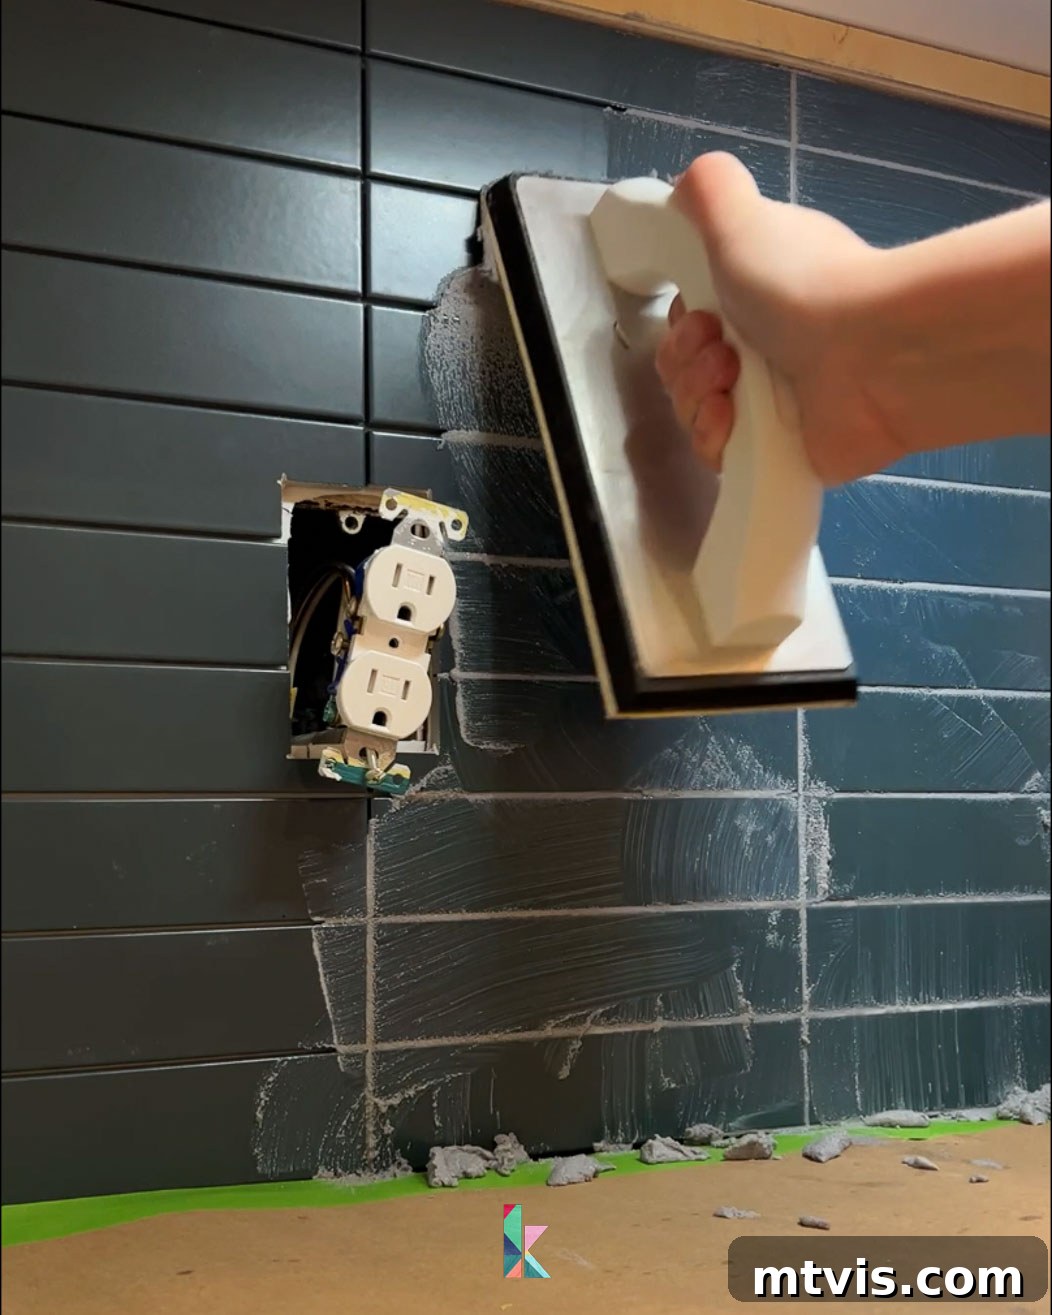
Once all your tiles are installed and the adhesive has had sufficient time to cure (check manufacturer instructions for your specific adhesive), it’s time for grouting. For maximum ease and durability, I strongly recommend using a pre-mixed and pre-sealed grout. This type of grout eliminates the messy process of mixing powders and water, and crucially, it negates the need for a separate grout sealer application later, saving you time and effort. Grouting can be a bit messy, but it’s far from difficult. Using a rubber grout float, scoop a generous amount of grout and begin working it into all the tile joints (grout lines). Hold your rubber float at a 45-degree angle to the tile surface, pressing firmly to ensure the grout penetrates deeply into every space between the tiles. Work in small sections, making sure to fully fill all joints and scraping off excess grout with the float as you go. This technique minimizes waste and makes subsequent cleaning easier.
- 8. Clean and Dehaze Your Tile Surface
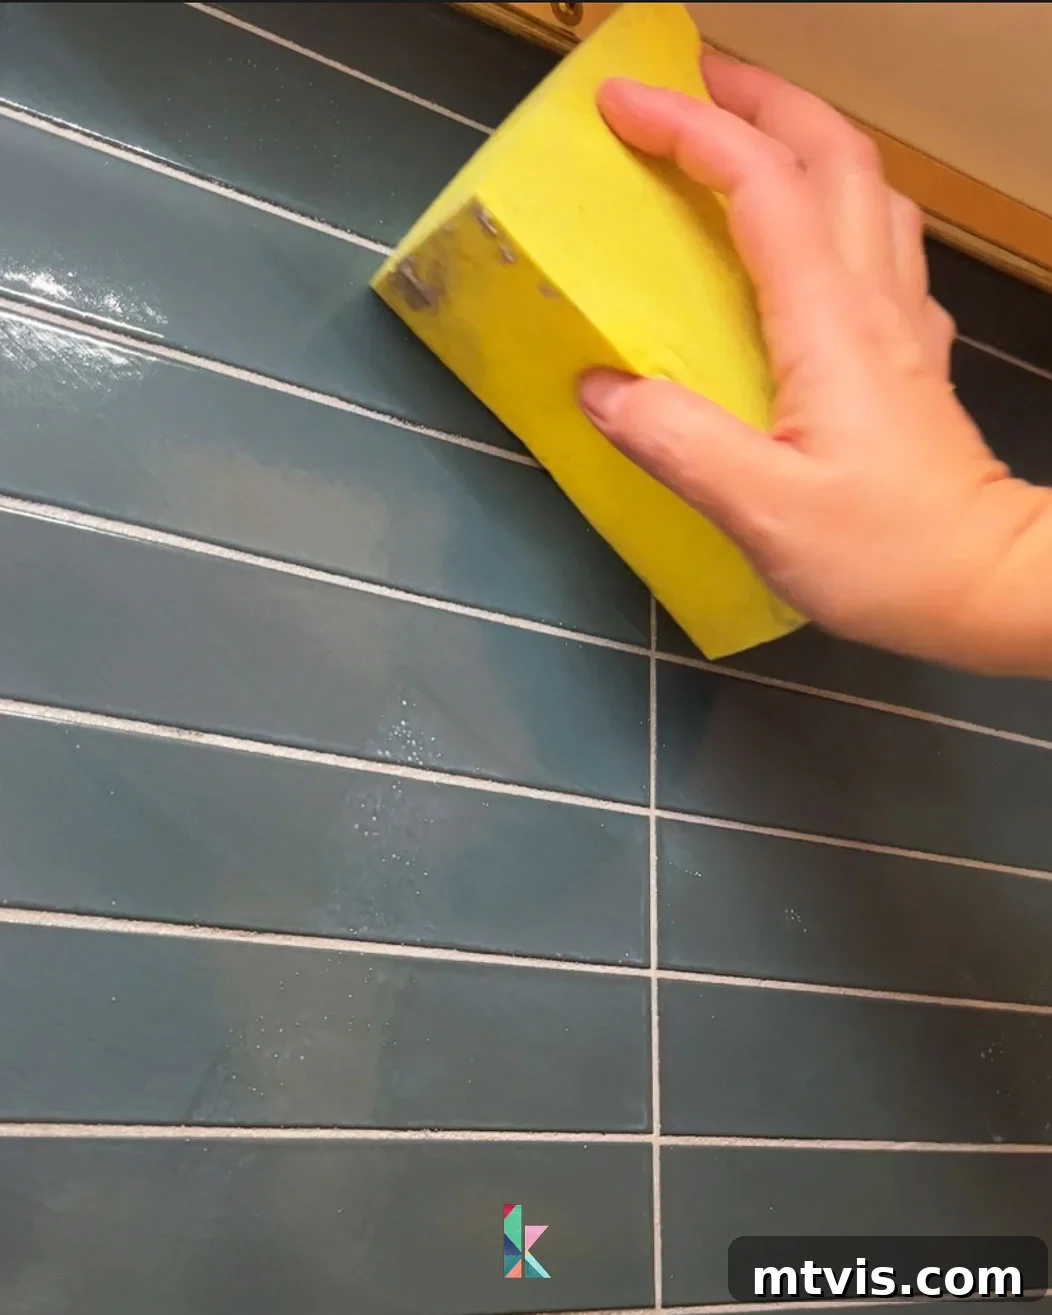
After applying all the grout, refer to the manufacturer’s instructions for your specific grout product for the recommended waiting period. This “set time” is critical before you begin cleaning. Once the recommended time has passed, use a large, damp (not soaking wet) sponge to carefully wipe away any excess grout from the tile faces. It’s essential to rinse your sponge frequently in a bucket of clean water as you work to avoid spreading grout haze. Change your water often to keep it clean. After all the major excess grout has been removed, allow your grout to dry for another specified period (again, consult your grout’s instructions) before performing a final cleaning. At this stage, you might notice a slight hazy film on your tiles – this is normal grout haze. A final wipe-down with a clean, damp sponge, or a specialized haze remover if the haze is stubborn or you accidentally waited too long, will reveal the true beauty of your tile. Don’t rush this step, as a clean finish is key to a polished look.
- 9. Install Outlet Extenders and Replace Covers
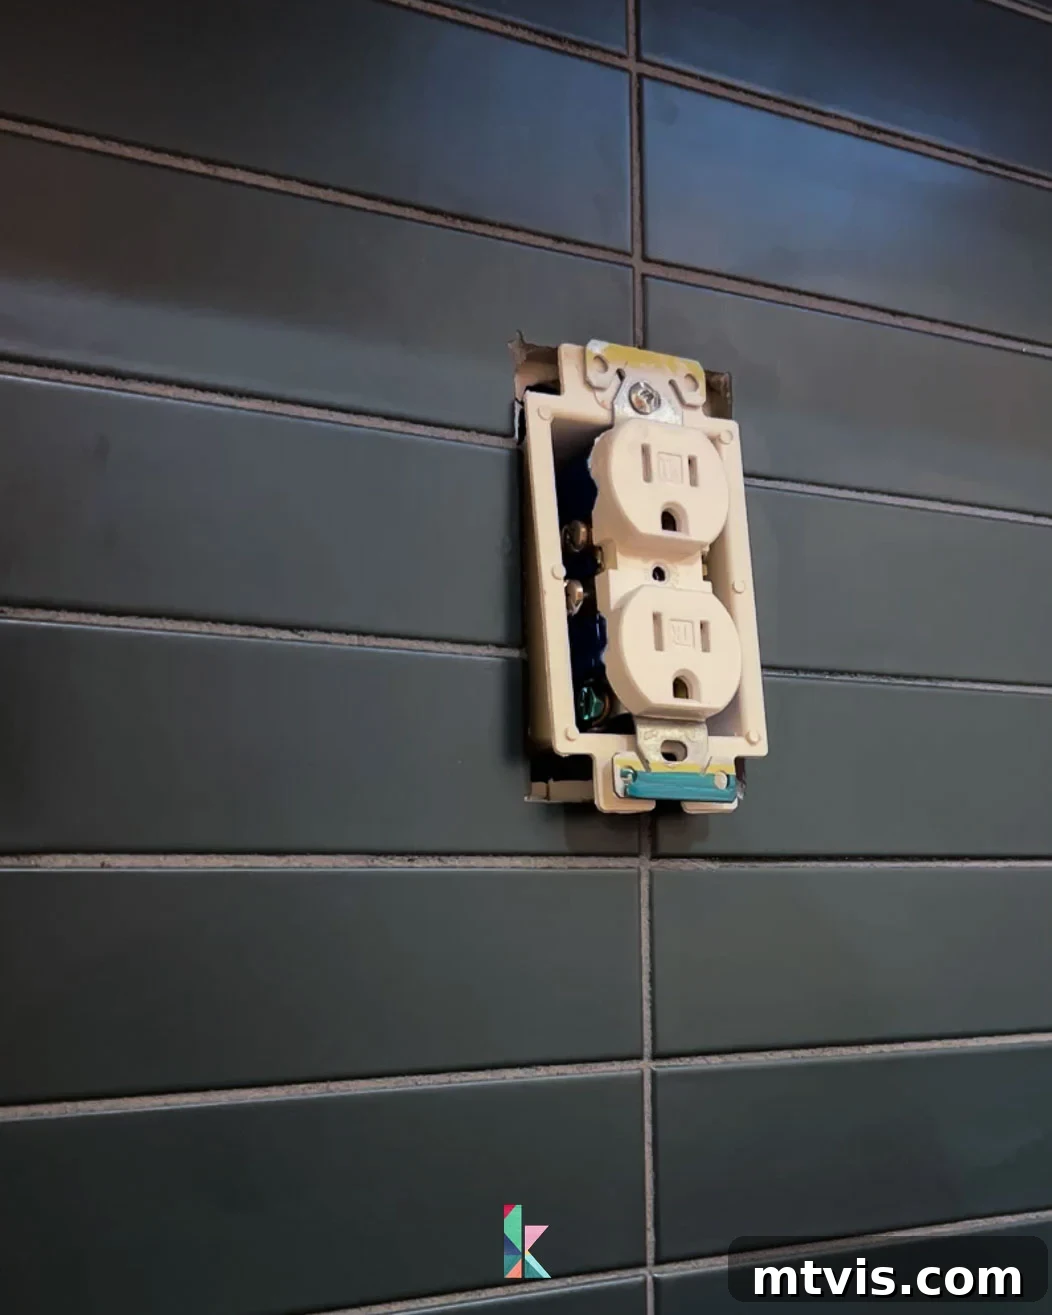
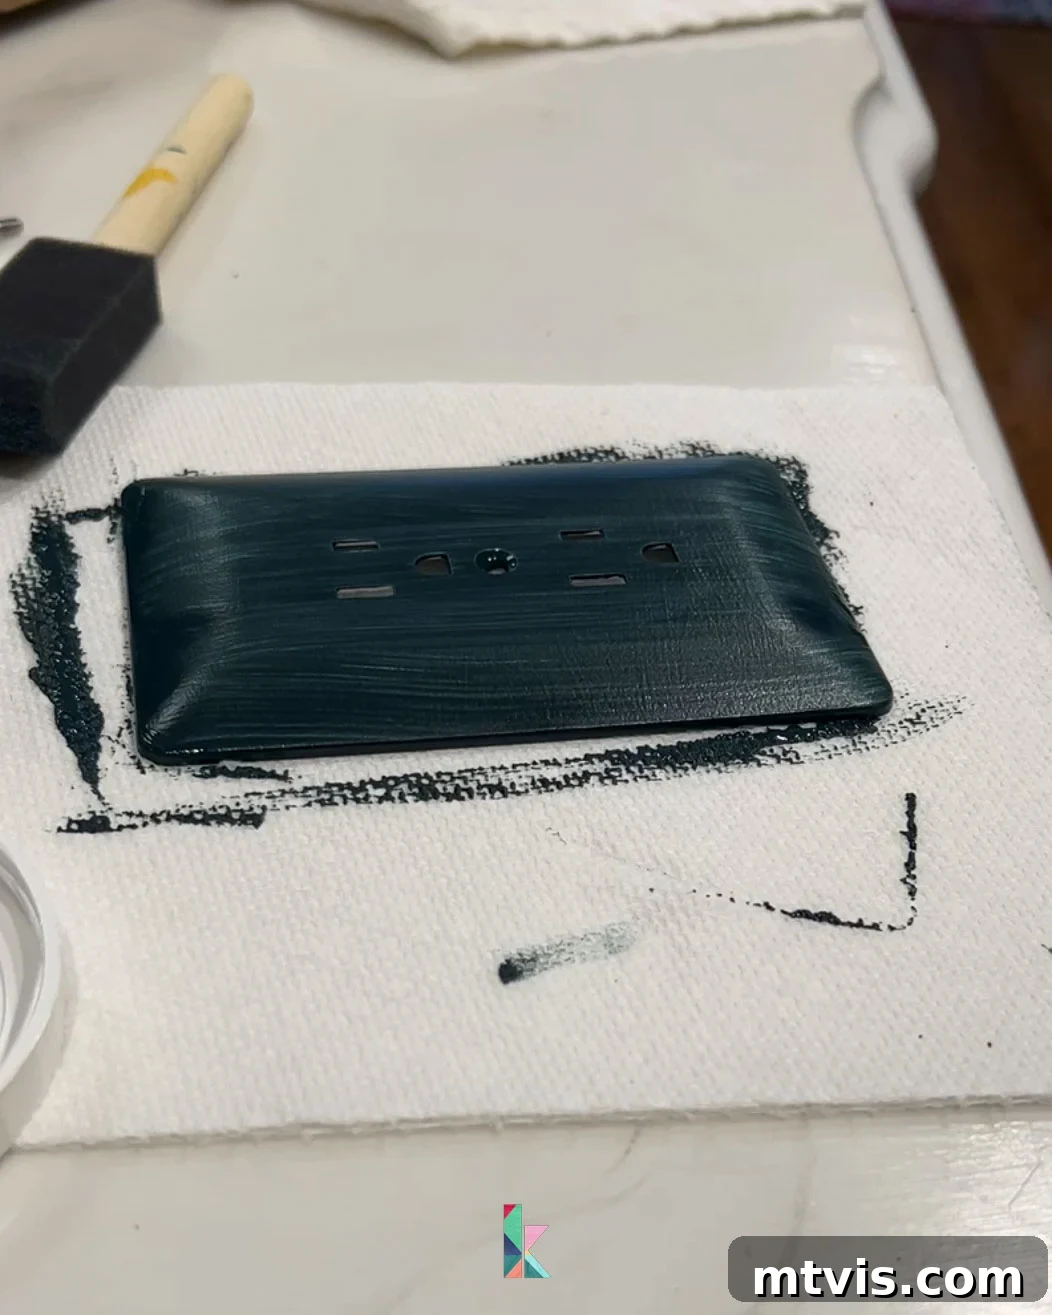
With your tile and grout cured and cleaned, it’s time to address the electrical components. Because the tile adds thickness to your wall, your original outlets and switches will now be recessed. To ensure they sit flush and safely with your new tile backsplash, you must install electrical box extenders. These extenders are crucial for both functionality and safety, bringing the outlet or switch box forward to meet the tile surface. Once the extenders are securely in place, you can safely replace your outlet and switch covers. For an extra touch of customization and seamless integration, consider purchasing paintable outlet covers. I opted for this solution and painted my outlet cover to perfectly match our backsplash tiles. This simple trick allows the outlets to blend into the background rather than standing out as a distracting element, elevating the overall aesthetic of your finished backsplash. Remember to always ensure the power is off before handling any electrical components.
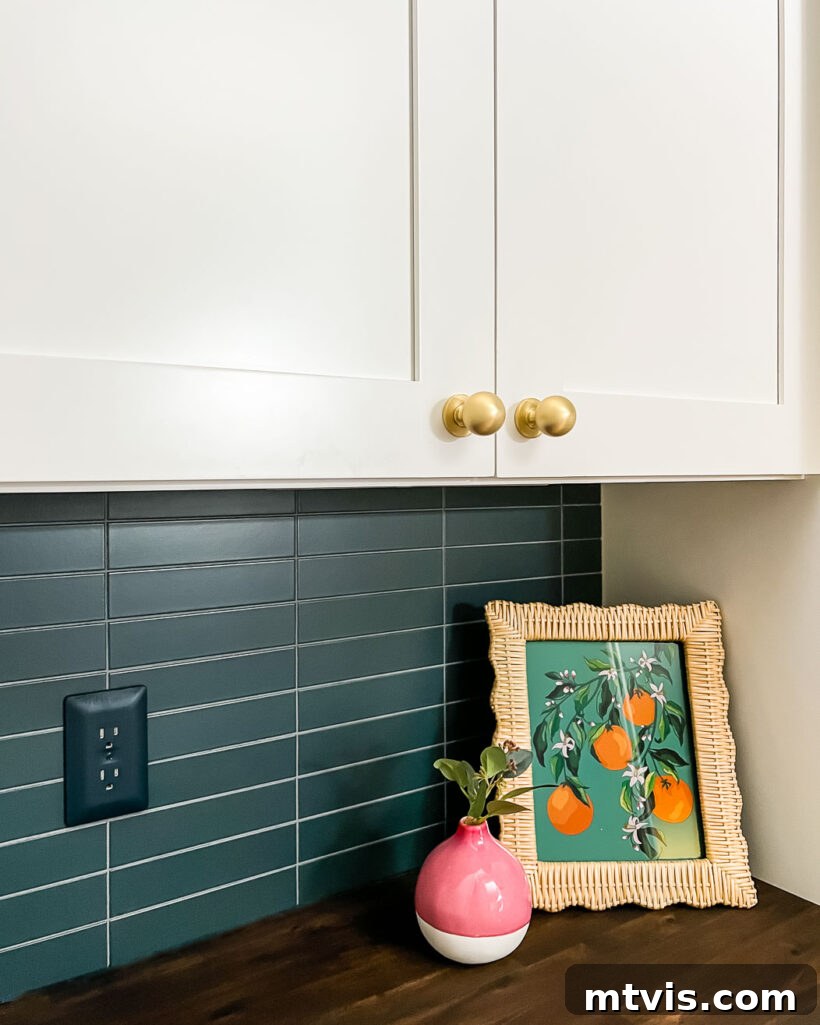
The result is a clean, integrated look where the outlets nearly disappear into the tiled surface. It’s a small detail that makes a significant difference in the final polish of your DIY project.
- 10. Caulk Your Joints for a Professional Finish
The final, often overlooked, step to achieving a truly professional and durable tile backsplash is proper caulking. It’s essential to caulk the expansion gap between your countertop and the bottom edge of your tile backsplash. This joint needs a flexible sealant because the countertop and wall can expand and contract independently, and rigid grout would eventually crack. Use a high-quality caulk that matches your grout color for a seamless transition. Additionally, it’s good practice to caulk any inside corners where two tiled walls meet. Caulk provides a waterproof seal, preventing moisture from seeping behind your tiles, and offers a clean, finished edge that enhances the overall appearance of your installation. Apply the caulk smoothly and evenly, tooling it with your finger or a specialized caulk tool for a perfect bead. Allow the caulk to fully cure according to manufacturer instructions before exposing it to moisture.
And that’s it! With these detailed steps, you’ll have a stunning, professional-looking tile backsplash installed in no time. We couldn’t be happier with how our new butler’s pantry backsplash turned out, a true testament to the simplicity and effectiveness of this DIY method.
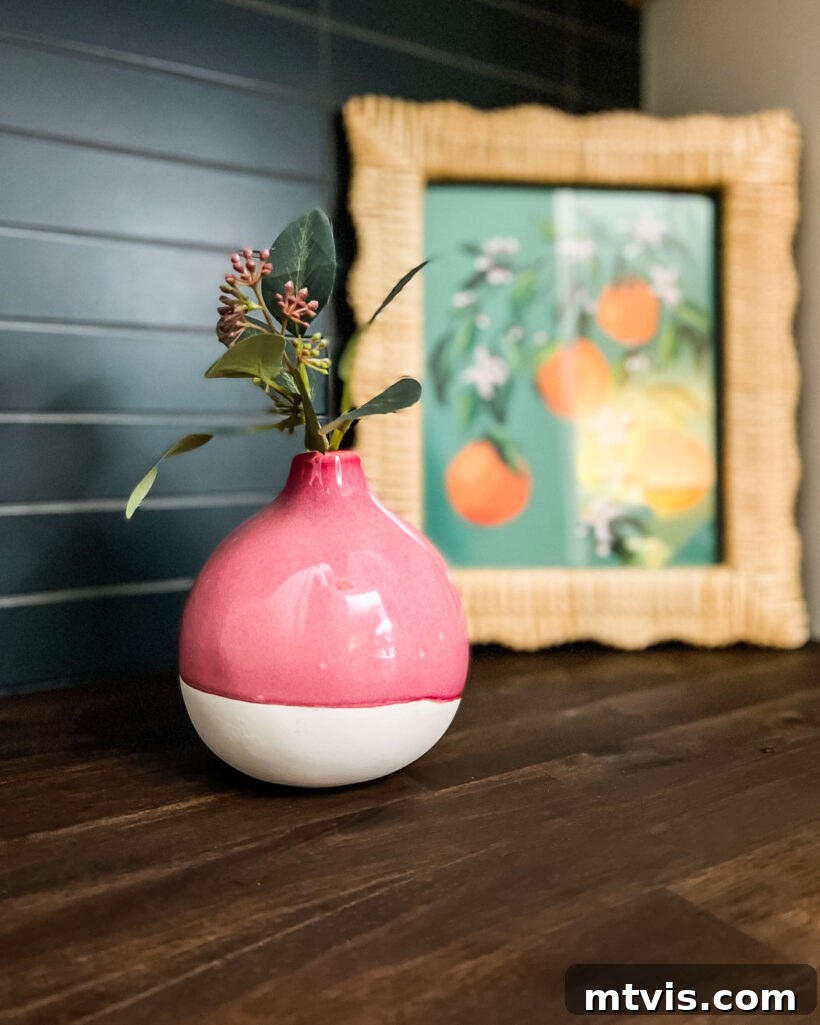
While this tutorial focused on a smaller area in our new butler’s pantry, it’s important to note that this same reliable method was employed for the two much larger backsplash areas when we undertook a complete kitchen remodel in our old home. For that project, we used a larger, glossy ceramic tile, but our preference for the horizontally stacked tile pattern remained consistent. And yes, can you tell we’re also big fans of this beautiful blue color?! It’s safe to say, we know what we like and it consistently delivers a stylish impact!
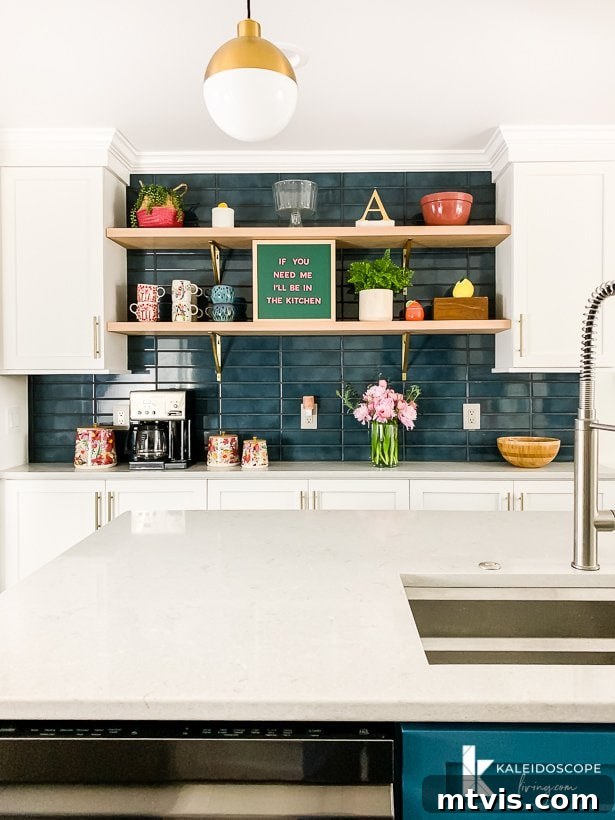
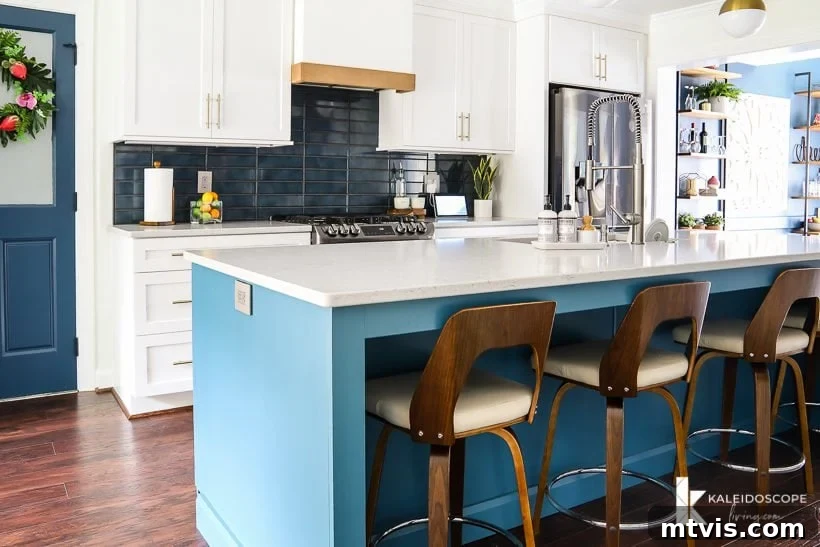
If the idea of tiling a backsplash still feels a bit daunting, remember that there are fantastic alternatives to explore. For instance, you can always paint your existing tile backsplash! I’ve successfully painted outdated tile backsplashes on several occasions, and each time the results have been wonderfully refreshing and transformative, offering a budget-friendly way to update your space without the full commitment of a tile installation.
Other helpful DIY posts you may enjoy:
- How To Paint Kitchen Cabinets Without Sanding or Priming
- Our Budget-Friendly Kitchen Makeover REVEAL!
- Affordable DIY Countertops That Will Blow Your Mind
- How to Paint Countertops & What You NEED to Know First
- The Easy Way to Update Bathroom Tile Without Replacing It!
- How to Install a Floating Tile Floor
Curious about my comprehensive approach to transforming rooms and spaces within our home? Dive into the strategies and insights shared in Designer in a Binder®, my ultimate guide to decorating with confidence and achieving stunning results on any budget.
For exclusive content, behind-the-scenes sneak peeks, and more DIY inspiration delivered straight to your inbox, be sure to subscribe to our newsletter before you leave!