
Revitalize Your Furniture: A Master Guide to Flawless Wood Repair with Epoxy Wood Filler
There’s an undeniable thrill in transforming old, worn-out furniture into cherished pieces that breathe new life into your home. This journey of restoration often presents unique challenges, especially when confronting significant wood damage like extensive rot or large imperfections. While these issues might seem daunting at first, mastering the application of epoxy wood filler can turn even the most distressed items into masterpieces. This comprehensive guide will walk you through the simple yet effective steps to achieving perfect, durable wood repairs, empowering you to tackle projects with confidence and ease.
Our Journey to Beautifully Restored Storage
Hey there, fellow DIY enthusiasts! If you’ve been following my adventures on Instagram, you’ll know I’ve been immersed in a significant project: reimagining the “playroom” section of our family room. For a couple of years, we’ve enjoyed the practicality of our DIY pipe table, which served as an excellent art station. However, the open storage solution we initially embraced for art supplies like pens and markers eventually proved less than ideal. Living with the constant visual clutter made it clear: we desperately needed some closed storage solutions to maintain a sense of calm and order in our space.

Our quest began for pieces that offered both functionality and character, without breaking the bank. With a major kitchen renovation on the horizon, every penny counted. So, I meticulously scoured local thrift shops and the digital marketplace on Facebook Marketplace. After some diligent searching, I stumbled upon a pair of beauties that immediately caught my eye. Structurally, they were incredibly sturdy and well-built, promising years of use. However, their surfaces told a different story; they were crying out for some serious tender loving care, displaying noticeable damage and imperfections that required a professional touch – or, in our case, a confident DIY approach!
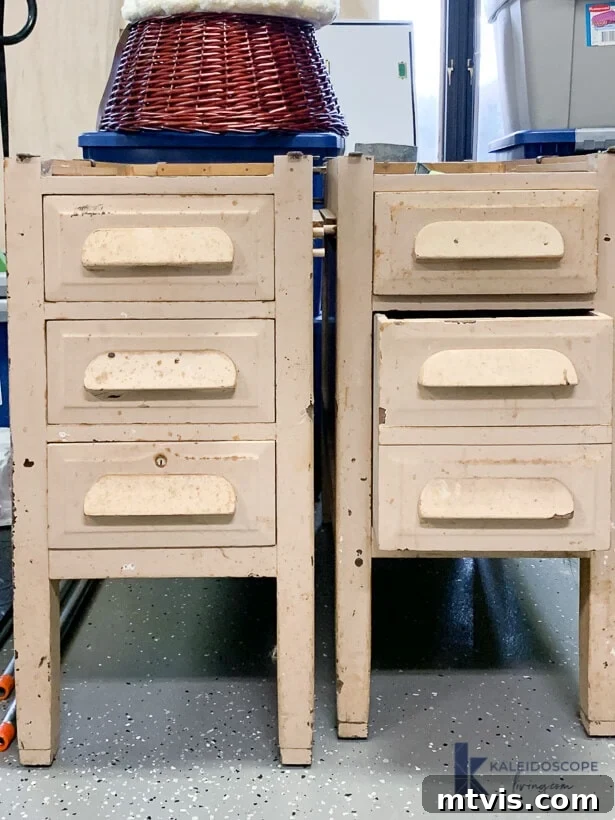
I’ve always embraced a good challenge, especially when it comes to bringing forgotten furniture back to life. These nightstands, destined to become our new storage units, presented the perfect opportunity to demonstrate the power of epoxy wood filler. You don’t need years of woodworking experience or a specialized skill set to achieve incredible results. I pinky promise that with this guide, you’ll learn exactly how I tackled the repairs, transforming these worn pieces into functional works of art.
Thank you to Mohawk Consumer Products for sponsoring this post. As always, all opinions are 100% my own based on my experience with the products used. This post also contains some affiliate links for your convenience. Click here to read my full disclosure policy.
Mastering Wood Repair: How to Use Epoxy Wood Filler
Before diving into the steps, it’s crucial to understand the immense versatility of epoxy wood filler. While I’ll be demonstrating its application on damaged drawer bases – a common scenario in furniture restoration – its utility extends far beyond. We’ve successfully used it to seamlessly fill a large hole left by old hardware on our front door, which was part of a complete front door overhaul that also included adding an easy DIY kick plate. It’s also proven invaluable for securing old screw holes that have lost their grip, preventing further loosening and damage.
But the true power of epoxy wood filler shines in its ability to repair areas prone to significant deterioration, such as wood rot. This includes critical outdoor elements like exterior trim, window sills, and even exterior doors, where moisture and pest damage are common threats. Unlike traditional wood fillers that can shrink, crack, or absorb moisture, epoxy provides a durable, waterproof, and incredibly strong bond. It essentially creates a new, incredibly robust wooden structure that can withstand the elements and rigorous use. The possibilities for restoration are truly endless, making it an indispensable tool for any serious DIYer or woodworker.
Why Choose Epoxy Wood Filler? Unrivaled Strength and Versatility
Many traditional wood fillers are designed for small nail holes or minor surface imperfections. They often lack the structural integrity, water resistance, and bonding strength required for significant damage like wood rot, large gouges, or areas exposed to moisture. Epoxy wood filler, however, is a two-part system (resin and hardener) that, when mixed, creates a chemical reaction forming an incredibly strong, rigid, and durable material. Here’s why it stands out:
- Exceptional Durability: Once cured, epoxy wood filler becomes harder than most wood, capable of resisting impacts, abrasions, and general wear and tear.
- Superior Adhesion: It creates a strong, permanent bond with the surrounding wood, ensuring repairs don’t crack or fall out over time.
- Waterproof and Rot-Resistant: Unlike conventional fillers that can absorb water and exacerbate rot, epoxy seals and protects the wood, making it ideal for exterior applications or areas prone to moisture.
- Fills Large Voids: Its unique formulation allows it to fill deep holes, large cracks, and even missing sections of wood without shrinking or sagging.
- Moldable and Carvable: While still pliable, it can be shaped and molded to match the original contours of the wood, and once cured, it can be sanded, drilled, stained, and painted just like natural wood.
Essential Materials for Your Epoxy Wood Repair Project
Gathering the right tools before you begin is key to a smooth and successful repair. Here’s what you’ll need:
Materials needed:
- Mohawk Epoxy Putty Stick (I opted for a versatile putty color, but these sticks are available in a range of wood-matching shades. If you’re working with stained wood, selecting a color as close to your wood as possible can significantly ease the finishing process.)
- A leveler card or an old credit card (This is crucial for achieving a perfectly flush and smooth surface.)
- A small dish of soapy water (This acts as a non-stick agent for your fingers and tools during application.)
- A sharp knife (For precisely cutting off the required amount of epoxy putty.)
- Sandpaper (Various grits, from medium to fine, for smoothing the cured epoxy and blending it with the surrounding wood.)
- Optional: Gloves (While not strictly necessary with soapy water, gloves can provide an extra layer of protection and cleanliness.)
Steps for Repairing Wood with Epoxy Wood Filler: A Detailed Guide
Achieving a professional-quality repair with epoxy wood filler is simpler than you might imagine. Follow these detailed steps to ensure a flawless and durable finish:
Step 1: Prepare Your Workspace and the Damaged Area
Before you begin, ensure your workspace is clean, well-ventilated, and protected. Lay down drop cloths or old newspapers. The most critical part of any successful repair is preparation. Use a stiff brush or a chisel to remove any loose debris, crumbling wood, or existing rot from the damaged area. If dealing with wood rot, make sure to remove all soft, punky wood until you reach solid, healthy wood. The area must be completely dry before applying epoxy. For deeper repairs, you might consider pre-treating the area with a wood hardener (often an epoxy consolidant) to solidify any remaining soft wood, though for most applications, the epoxy putty stick provides ample strength on its own.
Step 2: Mixing the Epoxy Putty Stick
1) Start by preparing your soapy water mixture: simply mix a small amount of liquid soap (dish soap works perfectly) into about 2 ounces of water in a shallow dish. This will be your secret weapon against stickiness.
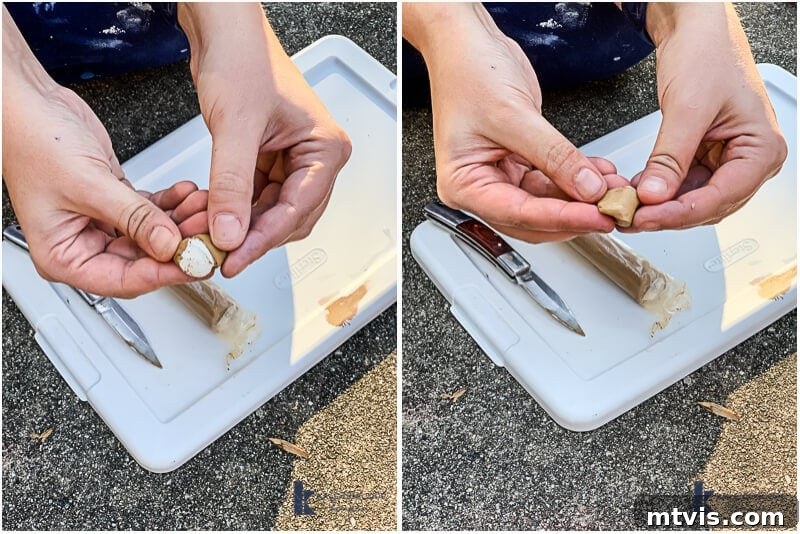
2) Next, using your sharp knife, cut a small, manageable piece of your Epoxy Putty Stick. The amount you cut will depend on the size of the repair; it’s better to start with a smaller piece as you can always mix more. Begin kneading the putty with your fingers. You’ll immediately notice a distinct inner and outer color. Continue kneading vigorously until the color is totally uniform throughout the putty – this indicates that the resin and hardener are thoroughly mixed. During this process, you will feel the epoxy getting noticeably warm in your fingers; this is a sign that the chemical reaction has begun. If the epoxy starts to stick to your fingers, simply dip your fingers lightly into the soapy water mixture and continue kneading. Remember, the working life of most epoxy putties is relatively short – typically around 6 minutes after mixing – so work efficiently!
Step 3: Applying and Shaping the Filler
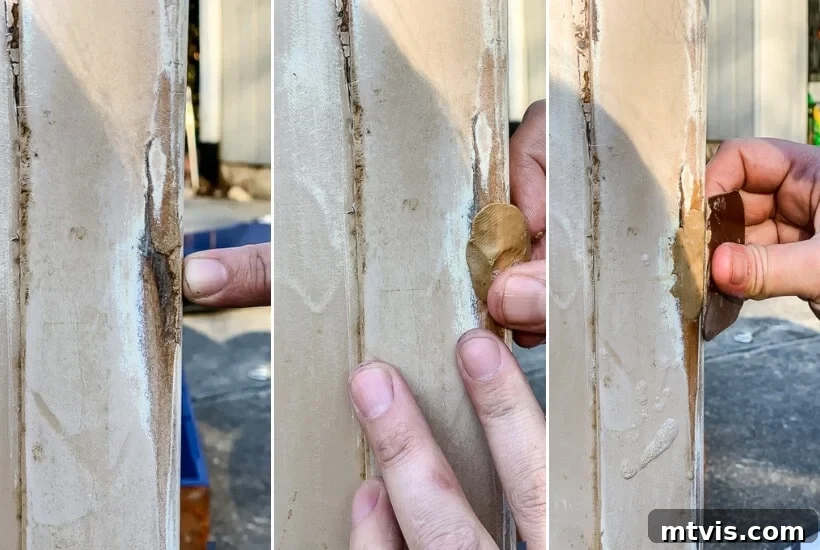
3) Once your epoxy putty is a perfectly uniform color, indicating proper activation, it’s time for application. Firmly push the mixed epoxy putty directly into the area you are repairing. Use your fingers to really press it into every crevice and void, ensuring there are no air bubbles. For larger areas or holes, build up the epoxy slightly proud of the wood surface. Immediately after application, use your leveler card or old credit card to scrape away any excess epoxy putty, ensuring it is flush with or slightly above the surrounding wood surface. The goal is to achieve as smooth a finish as possible at this stage to minimize sanding later. If the epoxy starts sticking to your card or fingers during this shaping process, a light rub with your soapy water mixture will allow for easy manipulation and a clean finish.
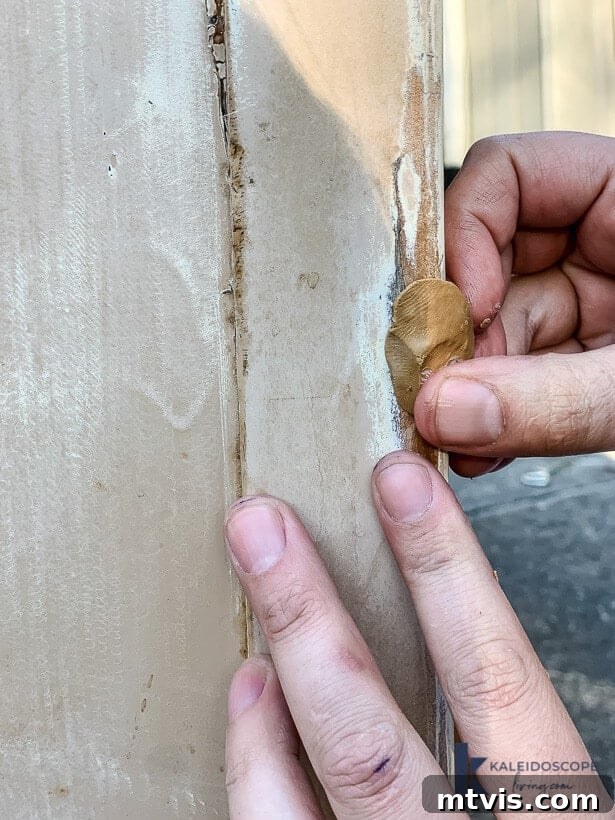
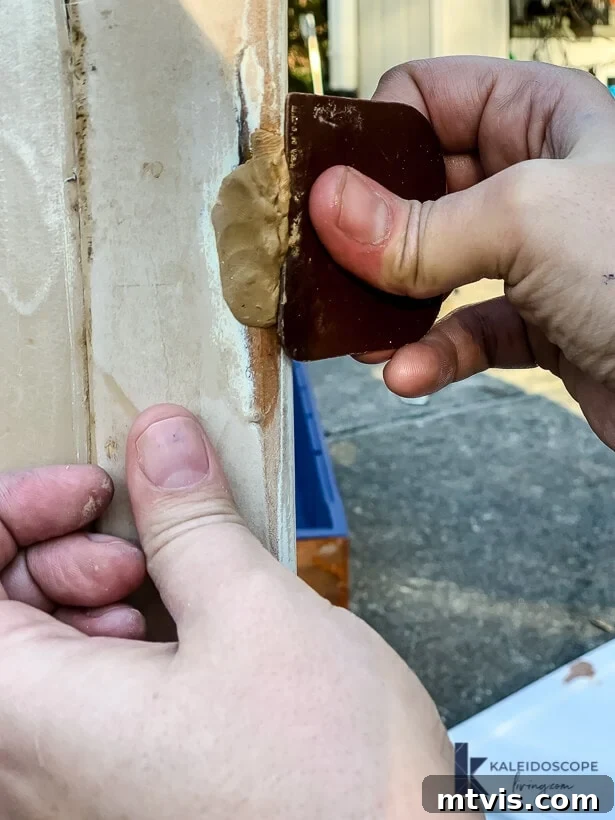
Step 4: Curing for Maximum Strength
4) Now, for the critical step of curing. Allow the filled area to cure completely. While it might be touch-dry in a shorter period, for optimal strength and durability, it’s best to allow at least 20 minutes before attempting to sand or put any pressure on the repair. The truly remarkable aspect of epoxy putty lies in its composition: it’s a synergistic blend of a resin and a hardener. This unique chemical reaction creates an incredibly dense and stable material, making it the perfect moldable putty for tackling substantial repairs like large holes, areas compromised by wood rot, or even replicating broken molding. Once fully cured, the epoxy surface doesn’t just mimic wood; it becomes significantly harder and more resilient than the original wood itself. This means that after application and proper curing, the repaired surfaces are ready to be sanded, drilled, stained, or painted, just like any other part of your wooden piece.
Step 5: Finishing Touches – Sanding and Beyond
5) After the epoxy putty has fully cured and hardened, it’s time for the final touches. Begin sanding the repaired area using medium-grit sandpaper (around 120-150 grit) to quickly bring the epoxy flush with the surrounding wood surface. Work your way up to finer grits (220 grit or higher) to achieve a perfectly smooth finish that is ready for priming, painting, or staining. If your project involves staining, remember that epoxy will not absorb stain in the same way natural wood does, so you may need to use a wood-graining tool or gel stain to blend the repair seamlessly. For painted projects, a good quality primer will ensure excellent adhesion and a uniform finish.
Common Mistakes to Avoid for a Flawless Finish
To ensure your wood repair project goes smoothly, be mindful of these common pitfalls:
- Improper Mixing: This is the most crucial step. If the resin and hardener aren’t uniformly mixed, the epoxy won’t cure properly, leaving a soft or sticky repair that will fail.
- Rushing the Cure Time: While it may feel solid, the epoxy needs its full cure time to reach maximum hardness. Sanding or working on it too soon can compromise its strength.
- Inadequate Surface Preparation: Failing to clean the damaged area thoroughly or remove all rotten wood will result in poor adhesion and a less durable repair.
- Applying Too Much at Once: While epoxy is great for large holes, try to build it up in stages if the area is exceptionally deep, ensuring each layer cures fully.
- Ignoring Soapy Water: Without it, the epoxy can be incredibly sticky and difficult to work with, leading to a messy and uneven application.
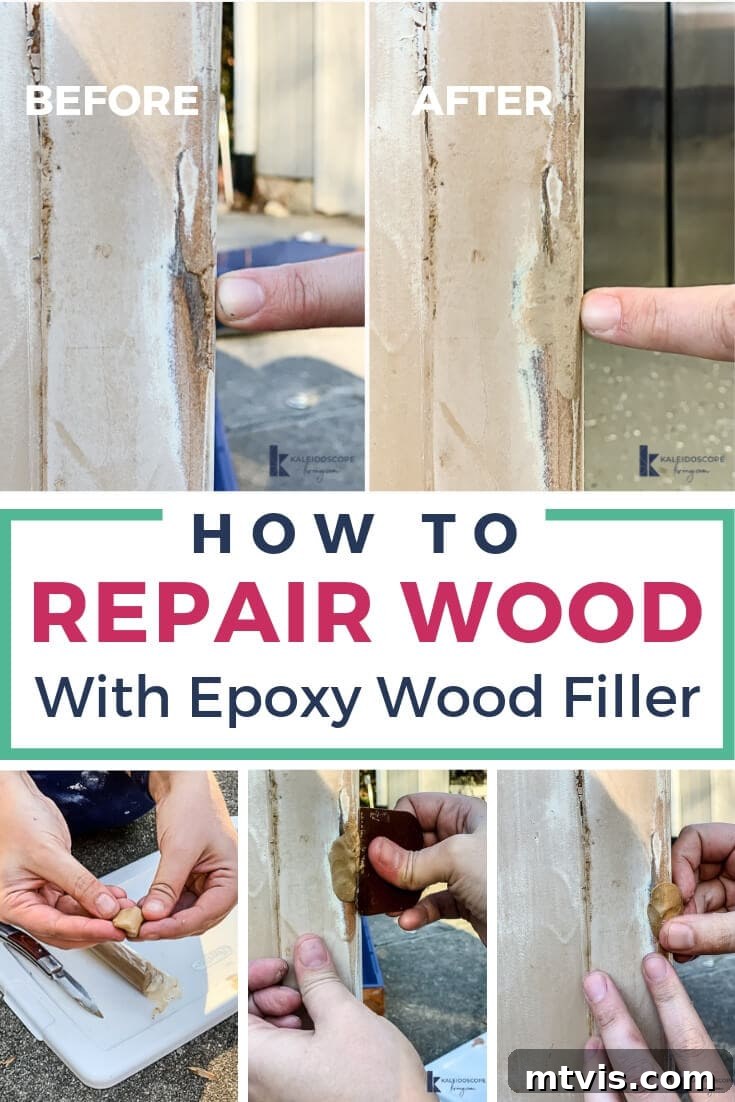
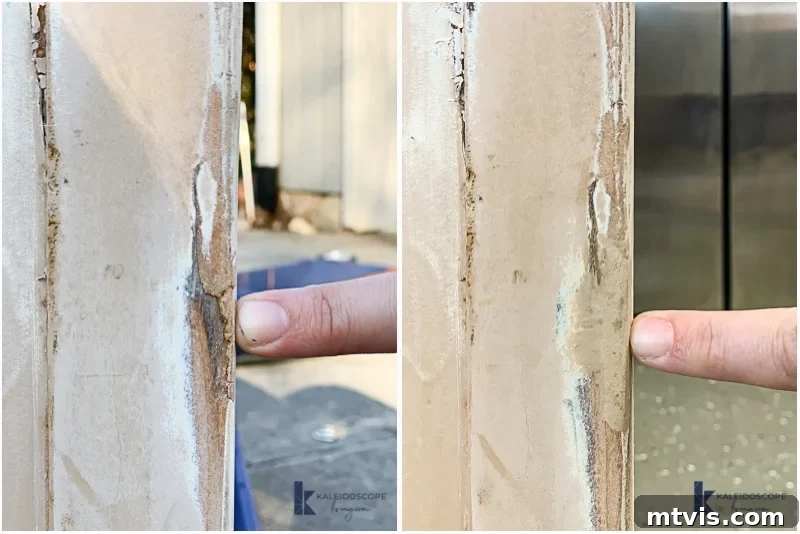
Check out the incredible before and after transformation of the damaged area. The difference is truly remarkable, and the entire repair process was surprisingly quick and straightforward.
Beyond the Repair: Prepping for Paint and Future Projects
That’s it for the repair! With the damaged areas flawlessly restored, these drawer bases are now perfectly prepped for their next stage: a beautiful paint finish. Soon, I’ll be sharing my best general tips for preparing furniture for paint, unveiling the ultimate transformation of these pieces, and showcasing just how stunning they turned out as our new playroom storage. I genuinely hope this comprehensive tutorial has demystified the process of repairing even extensive damage in wood. There’s truly nothing to be intimidated by when you have the right tools and techniques at your disposal!
If you’re a visual learner and prefer to see the process in action, you can watch yours truly demonstrating this exact method on a piece of scrap wood in the video below. It’s a great way to grasp the nuances of mixing and applying the epoxy putty.
