Unlock Your Dream Bathroom: The Ultimate Guide to DIY Remodeling on a Budget
Bathroom remodeling often seems like a daunting task, immediately conjuring images of exorbitant costs and endless complications. From knowing where to begin to navigating complex renovations and keeping expenses in check, the journey can feel overwhelming. However, embarking on a DIY bathroom remodel offers an incredibly rewarding alternative, allowing you to completely transform your space without draining your savings. This comprehensive guide will share the most effective and budget-friendly DIY bathroom remodel ideas, empowering you to tackle these projects with confidence and creativity. Get ready to revitalize your bathroom, boost your home’s value, and enjoy a fresh new look, all on your terms.
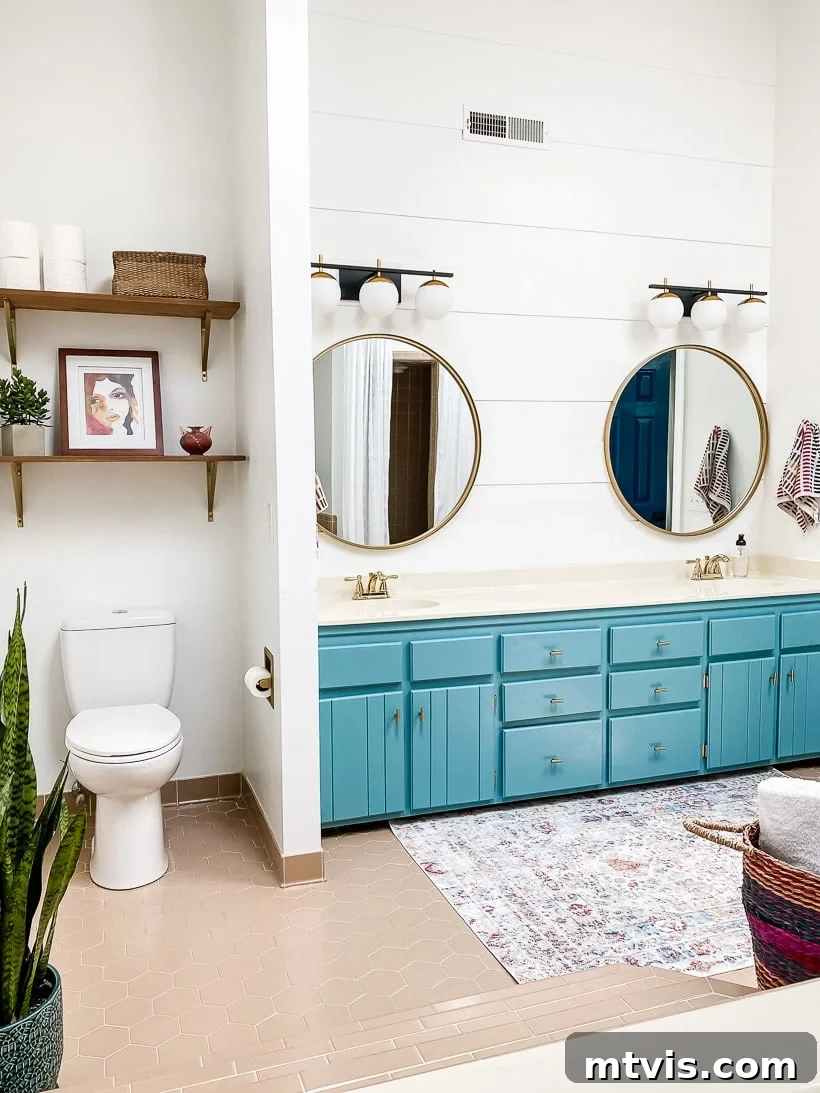
Table of Contents
What is a Realistic Budget for a Bathroom Remodel?
Understanding the financial scope of a bathroom remodel is crucial before you start. According to 2023 data from the reputable home-improvement platform Angi, the average cost for a professionally executed bathroom remodel in the United States stands at approximately $11,365. This figure can vary significantly, typically ranging from $6,621 to $16,773, depending on a multitude of factors.
The total cost of your bathroom renovation is influenced by several key elements. These include the size of your bathroom, the quality and type of materials you select, the extent of the remodel (are you simply refreshing or undertaking a complete overhaul?), and whether you opt for professional contractors or choose a DIY approach. Notably, labor costs constitute a significant portion of any professional renovation, often making up between 40 to 65 percent of the total budget. This means that by choosing to DIY your bathroom remodel, you can achieve substantial savings, potentially cutting your expenses by thousands of dollars and making your dream bathroom more accessible.
Is a DIY Bathroom Remodel Worth It?
The resounding answer is almost always YES! A DIY bathroom remodel offers incredible value, both in terms of financial return and personal satisfaction. According to Zillow, bathroom remodels consistently deliver some of the highest returns on investment when it comes to boosting your home’s resale value. For even minor cosmetic enhancements, you can expect to see an increase of $1.71 in home value for every dollar you invest. When you undertake the remodel yourself, avoiding costly labor charges, your return on investment becomes even more impressive. Not only will you enjoy a more functional, aesthetically pleasing, and updated bathroom tailored to your tastes, but you’ll also likely recoup a significant portion of your expenses, or even profit, when you eventually decide to sell your home. A beautifully remodeled bathroom is a major selling point that can attract potential buyers and expedite your home’s sale.
Having navigated numerous bathroom transformations, from complete gut renovations to budget-friendly cosmetic updates, we’ve honed our skills in creating stunning bathrooms without breaking the bank. We’ve successfully renovated two full bathrooms and breathed new life into three others with more affordable makeovers. Our extensive experience confirms that every single DIY bathroom remodel we’ve undertaken has been immensely worthwhile. We’ve saved thousands upon thousands of dollars while simultaneously creating spaces we genuinely love and enjoy using daily. You can delve into the specifics of our five DIY bathroom remodel projects by clicking here to jump to the end of the post. To illustrate the potential savings, consider these examples:
- We completely gutted and renovated a bathroom in our previous home for just $5,000, along with considerable sweat equity, saving well over $5,000 in professional labor costs.
- A different bathroom received a refreshing glow-up for only $1,700, translating to savings of at least $8,000 compared to the average remodel cost.
- Another impressive transformation cost us a mere $950 for a complete bathroom makeover.
Since hiring a contractor for a full-scale bathroom remodel is often beyond the budget for many homeowners, we’ve curated a collection of the best DIY bathroom remodel ideas designed to help you achieve a stunning new look for your bathroom without the hefty price tag.
Transformative DIY Bathroom Remodel Ideas
Refresh Cabinets with Paint and New Hardware
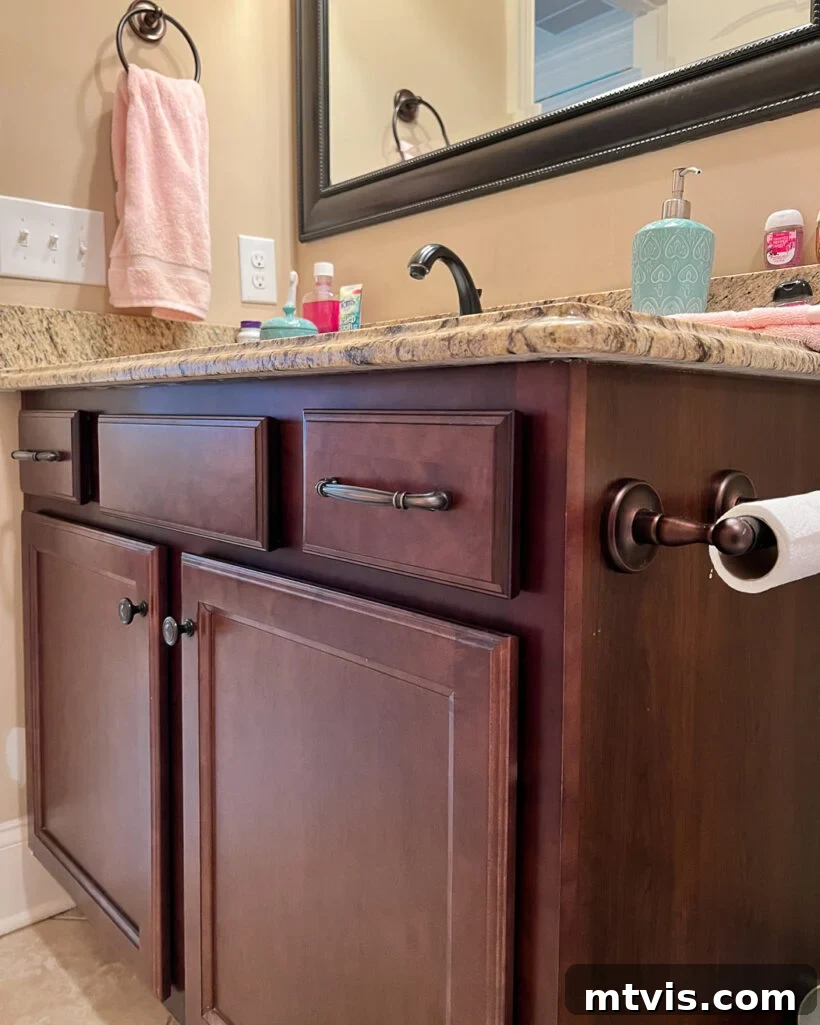
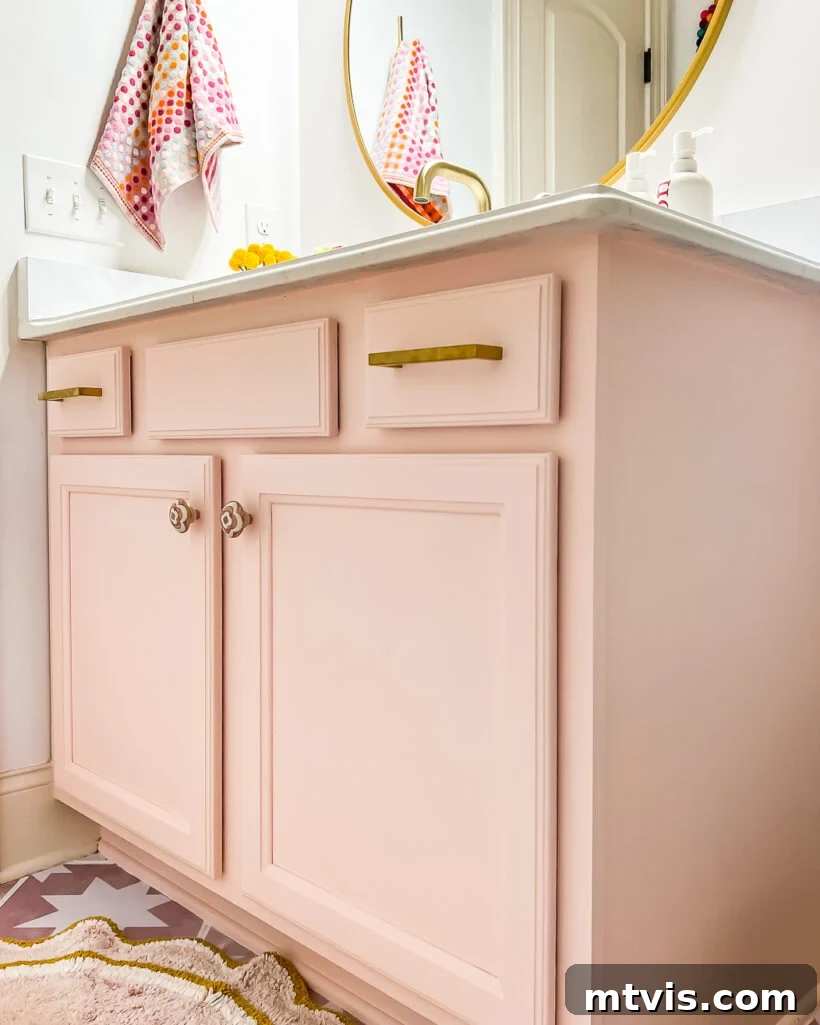
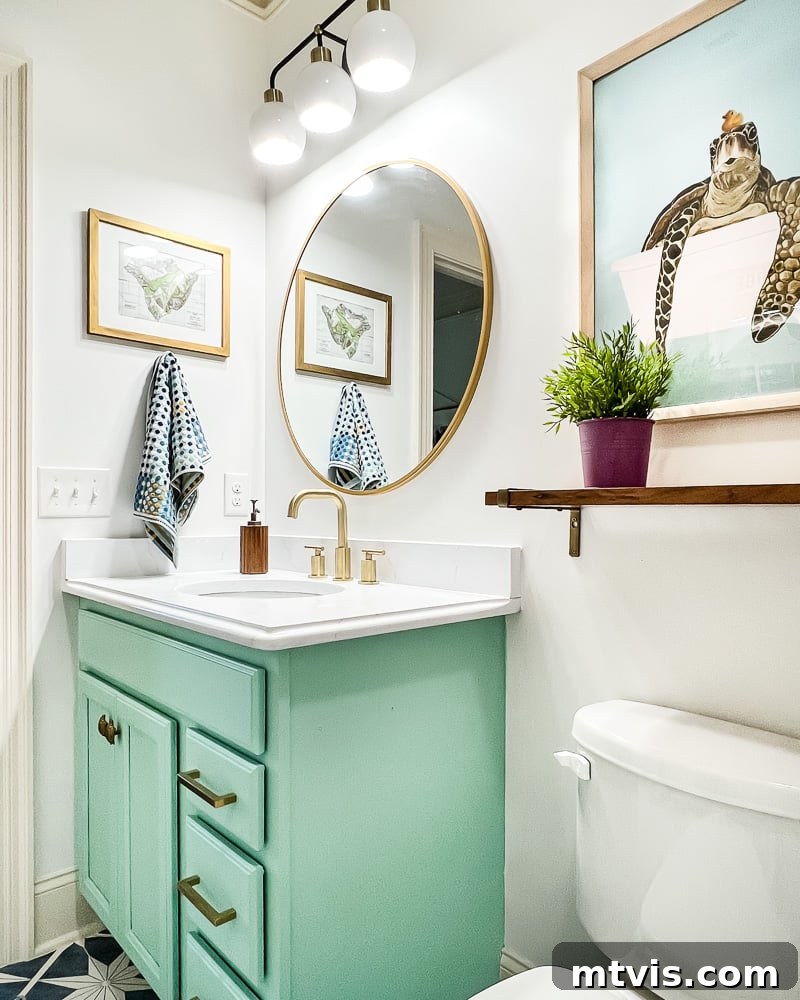
One of the most impactful yet affordable DIY projects for your bathroom is updating your existing cabinets with a fresh coat of paint and new hardware. This simple transformation can drastically alter the look and feel of your bathroom vanity, giving it a modern or classic aesthetic without the expense of a full replacement. You have the freedom to choose a paint color that perfectly complements your overall bathroom décor, from subtle neutrals to bold statement hues. Coupled with new hardware—be it sleek matte black pulls, elegant brass knobs, or rustic bronze handles—this project allows for significant personalization to match your unique style. It’s a remarkably easy undertaking that can typically be completed over a weekend, and the dramatic improvement in your bathroom’s appearance will undoubtedly make the effort worthwhile. We personally revitalized the vanities in both of our girls’ bathrooms using this method, achieving stunning results. Our favorite quick and easy cabinet painting tutorial proved invaluable for these projects.
Craft Your Own Bathroom Vanity
For those seeking a truly unique and budget-conscious bathroom vanity, consider repurposing an old dresser. This creative DIY project involves transforming a pre-loved piece of furniture into a functional and stylish vanity. The process typically includes carefully cutting a hole in the dresser’s top to accommodate a sink basin and then integrating the necessary plumbing fixtures. By giving an old dresser a new life, you not only save money but also infuse your bathroom with distinctive character and charm that off-the-shelf vanities simply can’t offer. You have complete control over the final aesthetic, with options to paint or stain the dresser to perfectly complement your bathroom’s color scheme and décor style. When undertaking this project, ensure you meticulously seal the top surface of the dresser. This critical step protects the wood from water damage and ensures the longevity of your beautiful, custom-made vanity.
Paint Your Countertop to Mimic Marble
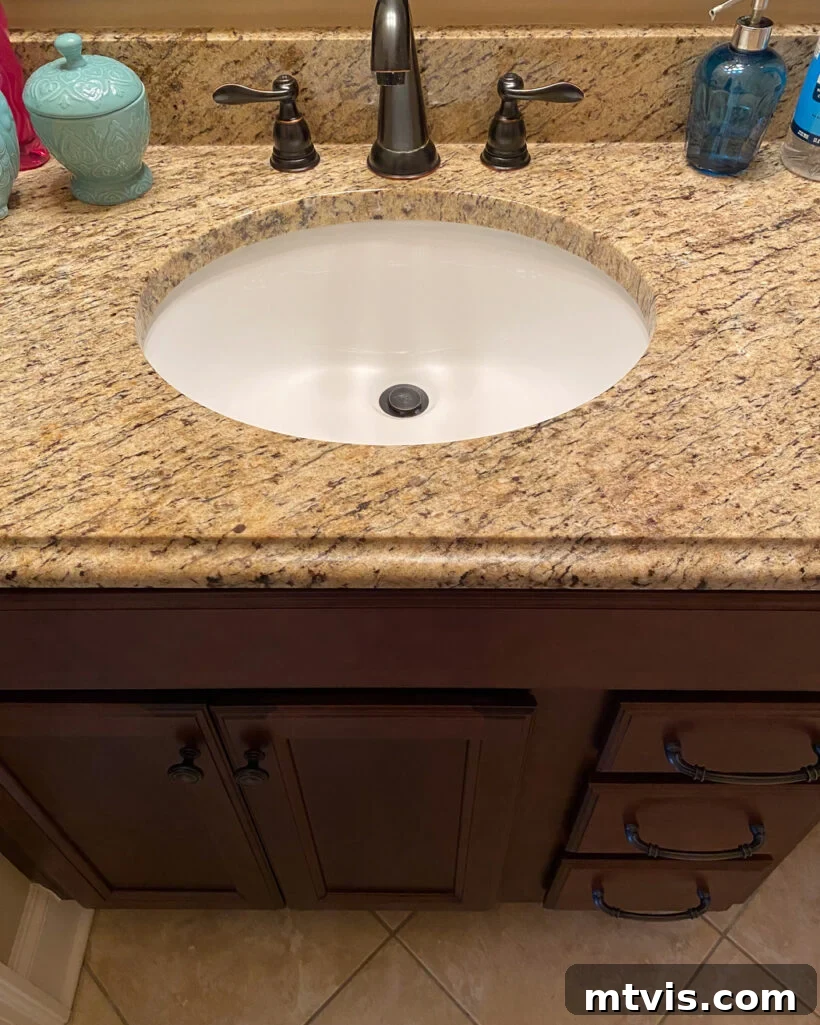
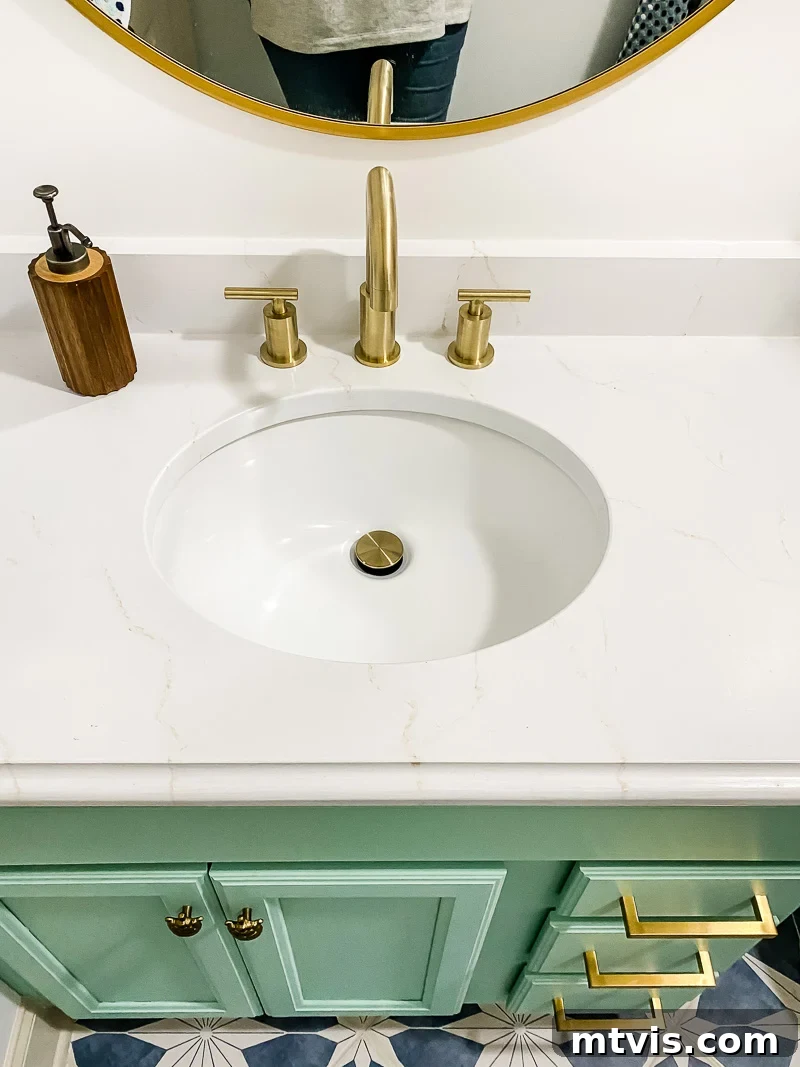
Who says you need expensive slab marble to achieve a luxurious look in your bathroom? A truly cost-effective and surprisingly durable DIY solution is to paint your existing countertops to resemble the elegance of marble. Once we successfully painted our kitchen countertops to look like marble, we became advocates for this technique. The results were so impressive and long-lasting that we applied the same method to the brown granite countertops in our girls’ bathrooms. Years later, they continue to hold up beautifully, showcasing the longevity and aesthetic appeal of this innovative approach. This project requires careful preparation and a steady hand, but the visual impact is profound, transforming an outdated or plain surface into a high-end focal point. Special countertop painting kits are available that include all the necessary tools and instructions to achieve a realistic marble effect, making this an accessible project for most DIY enthusiasts.
Update Your Sink and Counter with Concrete Overlay
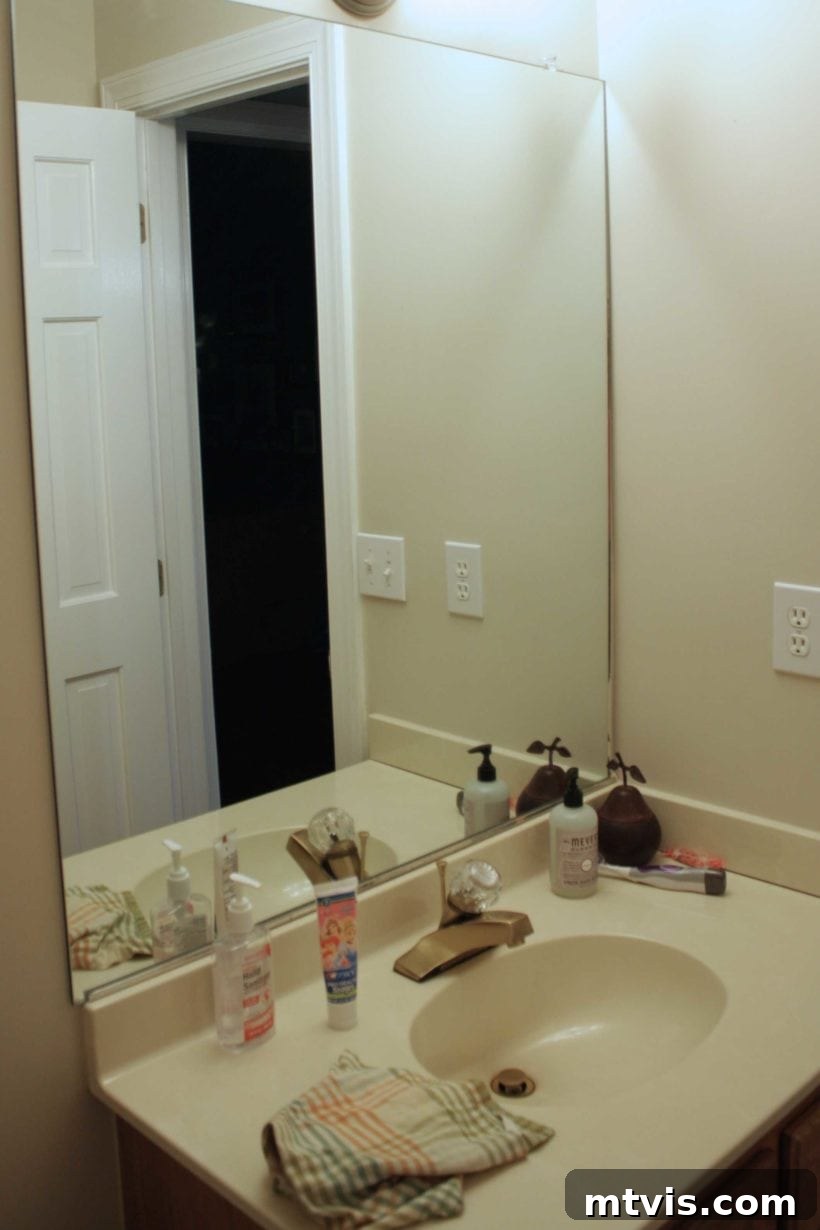
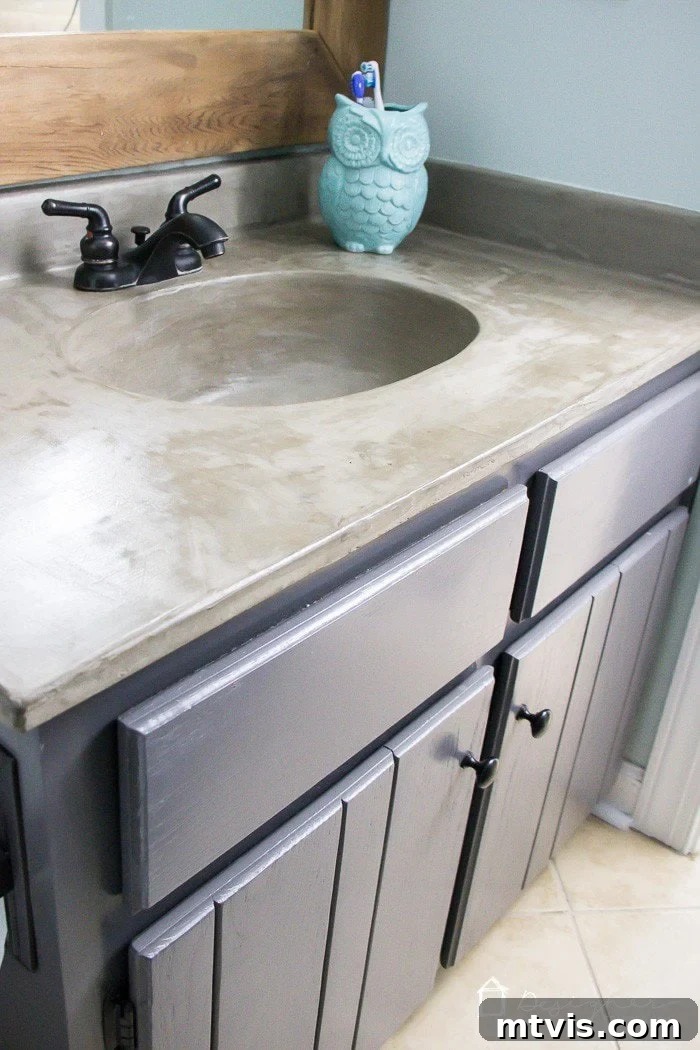
When faced with the challenge of updating an antiquated 1980s half-bath on an extremely tight budget, we turned to an unconventional but highly effective solution: a concrete overlay. Instead of replacing the unattractive cultured marble vanity and sink, we opted for a DIY concrete application, which cost us less than $50. This innovative approach involved applying a thin layer of concrete over the existing surfaces, instantly transforming their appearance. Doubts lingered about its longevity, but the concrete overlay held up remarkably well for five years until we eventually undertook a full demolition and remodel of that bathroom. This method proved its durability and aesthetic appeal. Thousands of individuals worldwide have since replicated this project using our detailed guide, a testament to its success and accessibility. If you’re looking for an affordable, modern, and industrial-chic update, you can find the complete tutorial for the DIY concrete vanity top here, alongside our strategy of painting the cabinet without sanding or priming.
Reimagine Your Bathroom Walls
Transforming your bathroom walls is one of the most effective ways to make a significant visual impact without a major renovation. If you’re looking to infuse your space with personality, color, and intricate patterns, consider wallpapering your bathroom walls. Wallpaper has the remarkable ability to dramatically elevate and transform even the smallest of spaces, like a powder room or half bath, turning it into a true design statement. Modern peel-and-stick options make this DIY project more accessible and less permanent than ever before, allowing for creative experimentation.
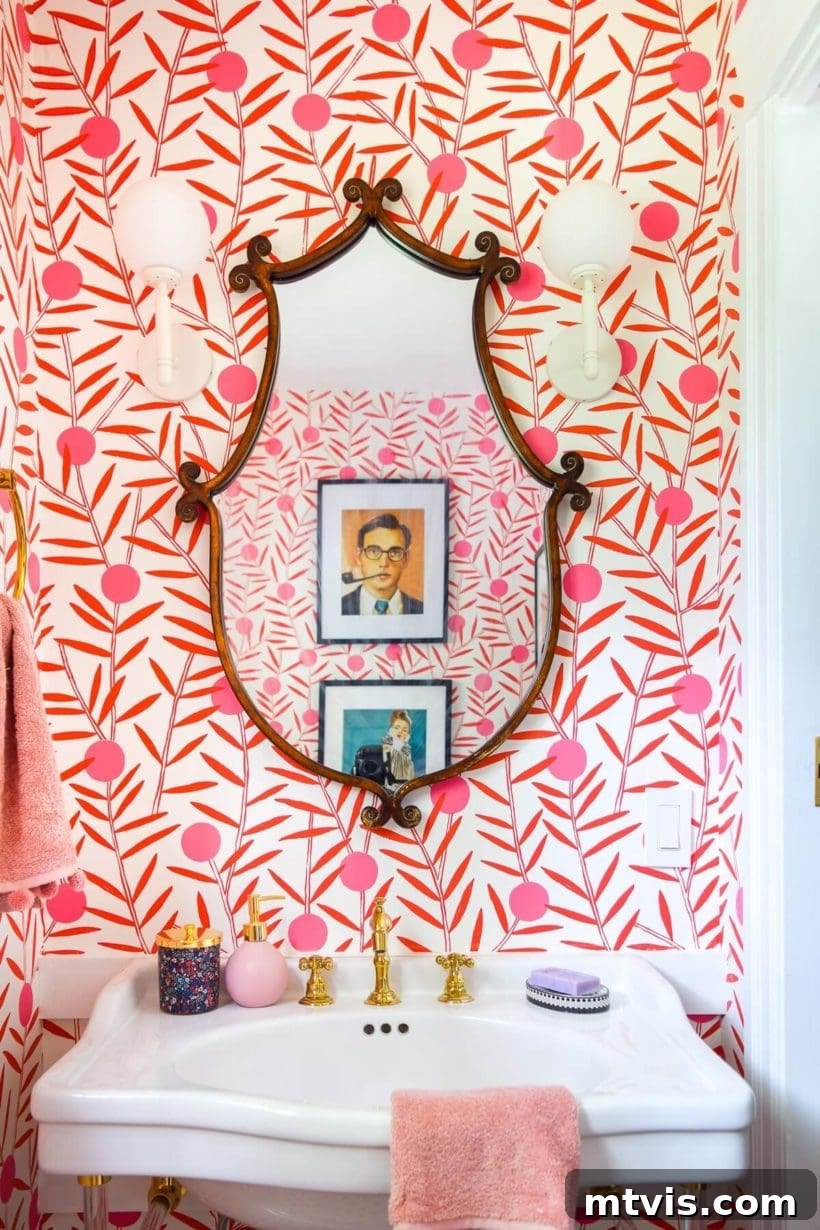
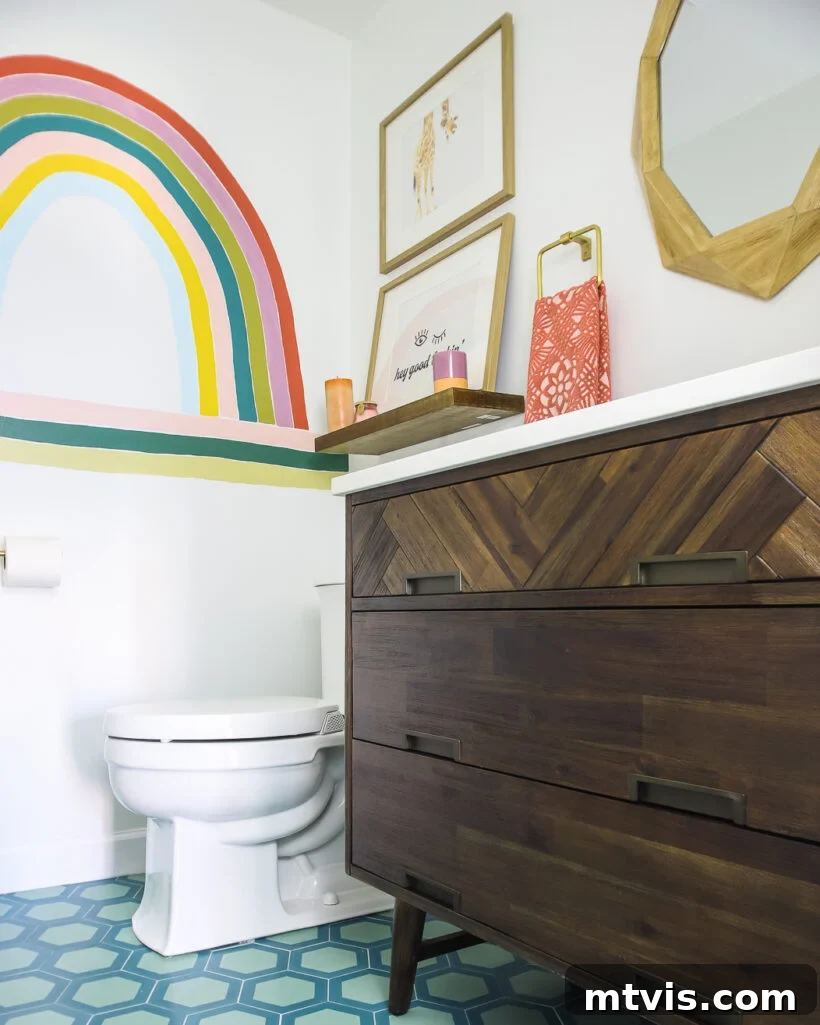
Beyond wallpaper, a fresh coat of paint remains one of the easiest and most economical ways to update your bathroom walls. Paint not only revitalizes a space but can also make it feel cleaner, more inviting, and visually larger. Opt for light and bright color palettes to create a sense of spaciousness and airiness, especially in smaller bathrooms. The beauty of painting is that it’s a completely DIY-friendly task that yields immediate and impressive results. In our last home, I even painted a vibrant and playful mural in the half bath we remodeled. This unique artistic touch created a massive impact at a fraction of the cost of traditional wallpaper.
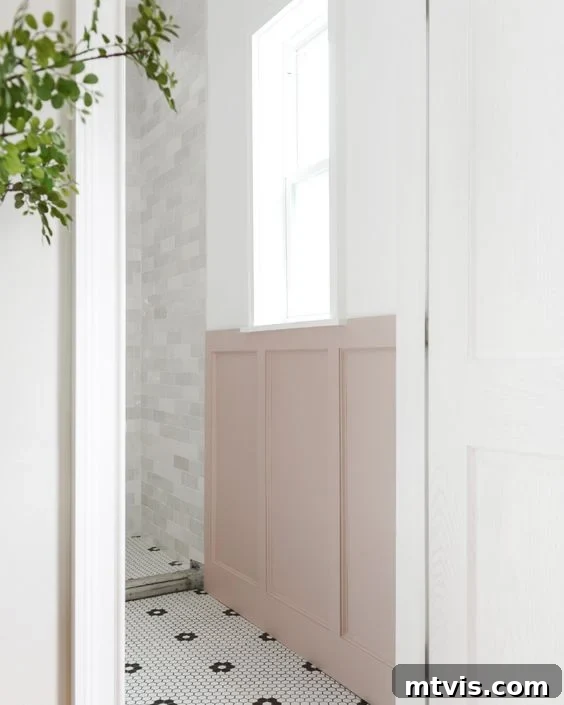
For a more textured and architectural wall treatment, consider installing board and batten. This classic detail adds significant character, depth, and a bespoke feel to any bathroom. It’s a surprisingly straightforward DIY project that is also very budget-friendly, requiring basic carpentry skills and materials. The board and batten wall treatment, as seen in Yellow Brick Home’s stunning pink example during their DIY bathroom renovation, beautifully illustrates how this simple addition can create a luxurious and detailed backdrop.
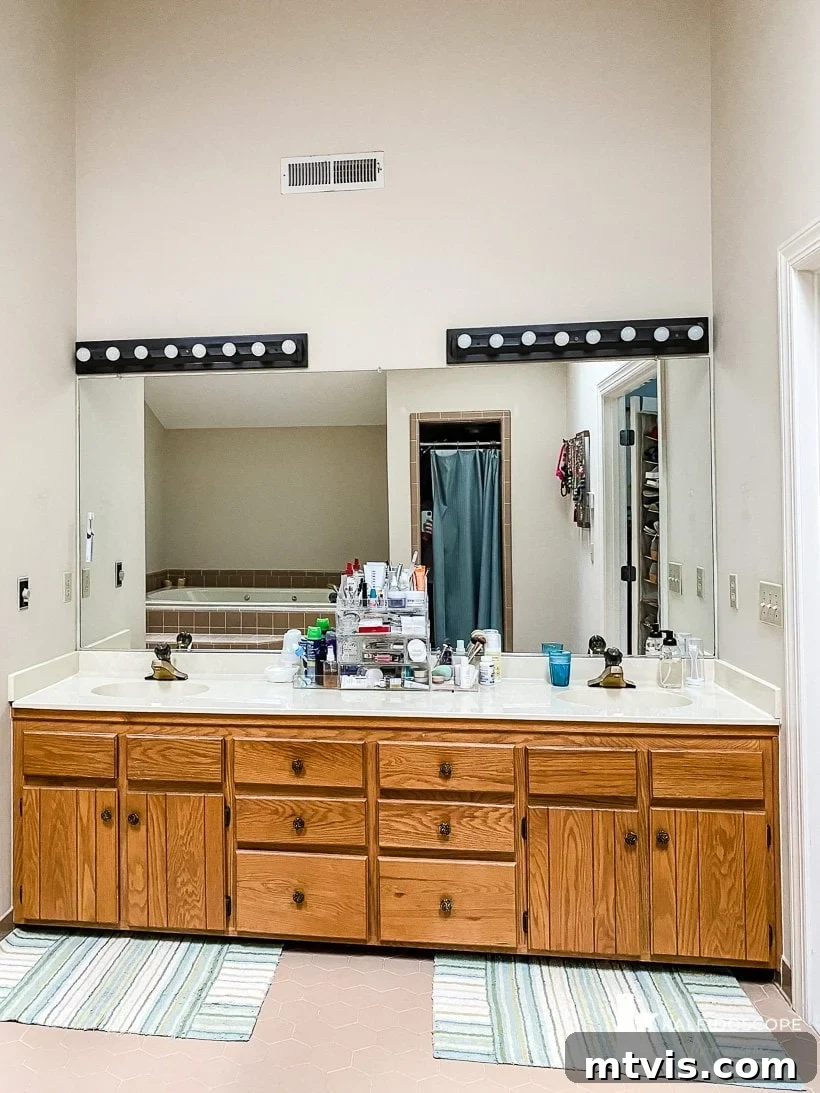
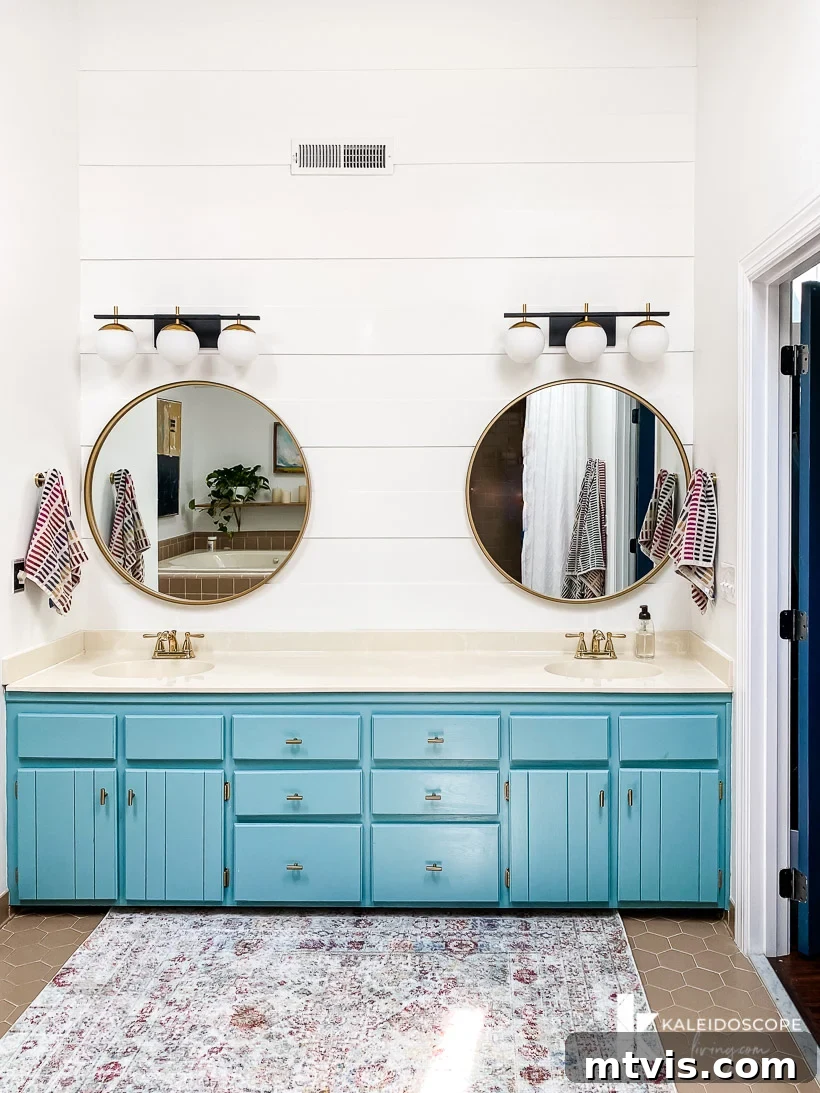
Alternatively, opt for an even simpler, yet effective, wall treatment like the modern plank wall we installed in our old master bathroom. This space had remained untouched since the 1980s, and we needed an affordable makeover before listing the home for sale. The plank wall offered a clean, contemporary update that significantly enhanced the bathroom’s appeal without extensive cost or effort, proving that subtle changes can make a big difference.
Upgrade Your Light Fixtures
The lighting in your bathroom plays a pivotal role in its overall ambiance and functionality. Swapping out old, outdated light fixtures for new, modern alternatives can dramatically impact the look and feel of your space. Updated fixtures can instantly brighten your bathroom, create a more welcoming atmosphere, or even introduce specific mood lighting with dimmable options. Beyond aesthetics, modern lighting often offers improved energy efficiency, contributing to lower utility bills. Replacing light fixtures is a surprisingly straightforward DIY task that most homeowners can manage. Always remember to prioritize safety by turning off your home’s main electricity supply to the relevant circuit before beginning any electrical work, and carefully follow the manufacturer’s installation instructions. We observed a remarkable difference after adding new light fixtures to both of our girls’ bathrooms; this simple change alone significantly elevated their updated spaces.
Replace Old Faucets and Shower Heads
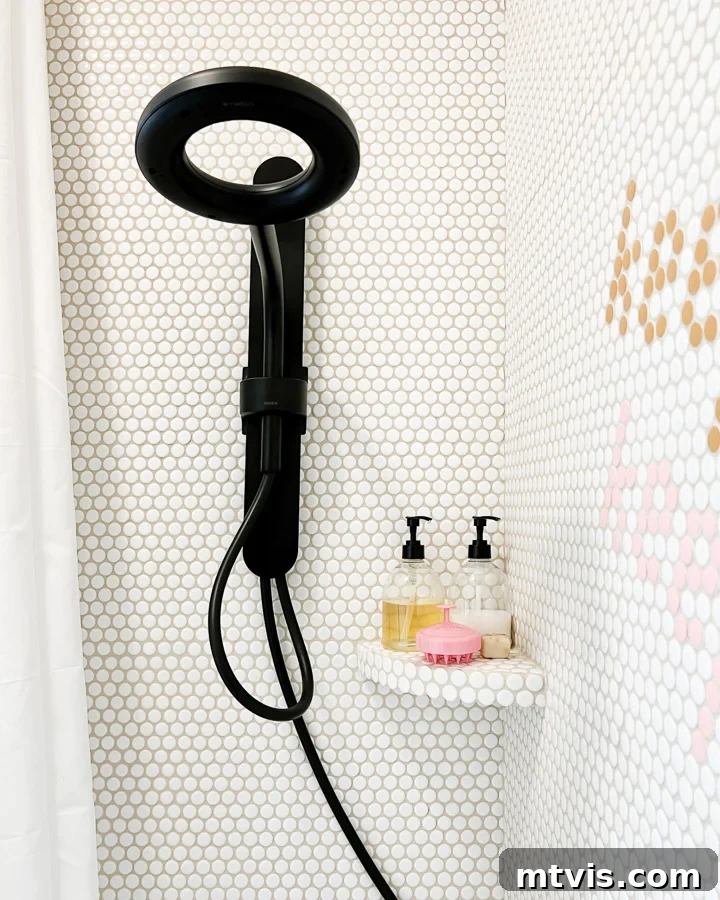
Another high-impact, low-cost DIY project for your bathroom remodel is upgrading your old and outdated faucets and shower heads. These seemingly small changes can have a substantial effect on the overall aesthetic, making your space feel instantly more modern, cohesive, and luxurious. Beyond the visual appeal, newer fixtures often come with improved water-saving technology, which can lead to reduced water consumption and lower utility bills over time. There’s a vast array of budget-friendly options available both online and in physical stores, allowing you to choose finishes like sleek matte black, classic brushed nickel, or polished chrome to match your desired style. The good news is that replacing these fixtures is typically a straightforward task that most DIY enthusiasts can accomplish without needing to call in a professional plumber. With a few basic tools and a careful read of the installation instructions, you can easily revitalize your sink and shower areas, adding a fresh sparkle to your bathroom.
Install New Bathroom Flooring or Revitalize Existing Tiles
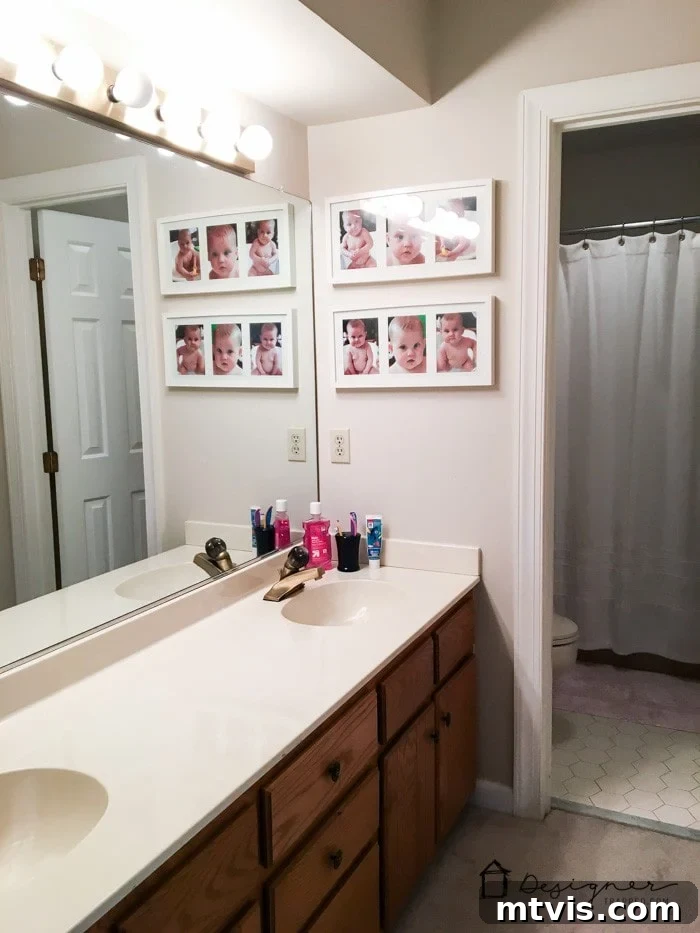
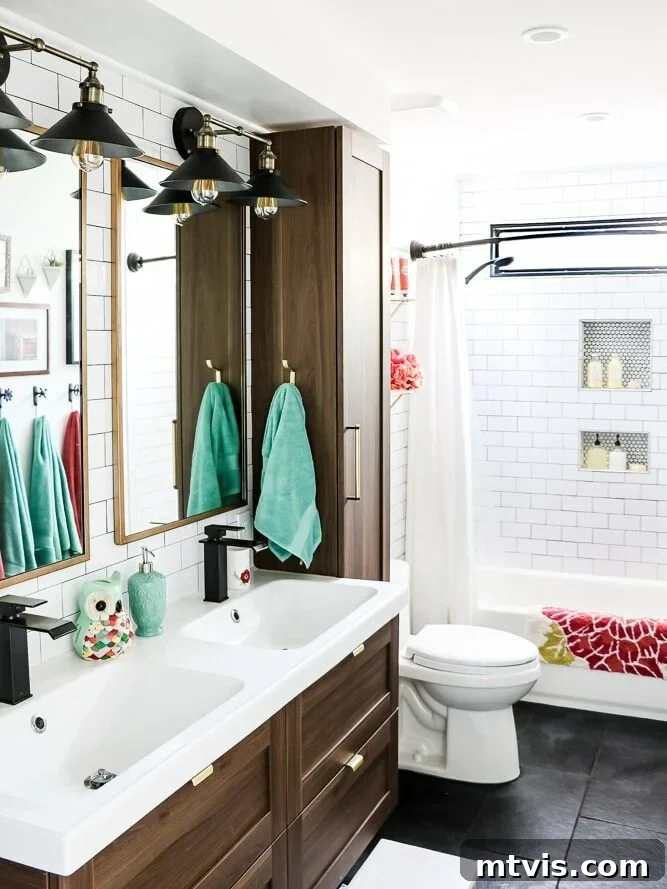
The flooring in your bathroom endures daily wear and tear, and if it’s looking tired or outdated, installing new flooring can provide a dramatic and refreshing update. Several affordable and DIY-friendly options are available that can completely transform the look of your space. Luxury vinyl plank (LVP) and laminate flooring are excellent choices for bathrooms due to their durability, water resistance, and ease of installation. You might also consider incredibly easy-to-install floating tile floors, which offer the aesthetic of traditional tile without the complex grouting process. While installing traditional tile can be more challenging and time-consuming, it offers unparalleled durability and significantly adds to your home’s value. When we undertook the gut renovation of the shared bathroom in our old home, we bravely removed the old carpet (yes, carpet in a bathroom!) and existing tile. Replacing these with natural stone tile provided one of the most significant impacts, creating a clean, cohesive, and modern foundation for the entire space, which also involved removing a wall and adding a transom window.
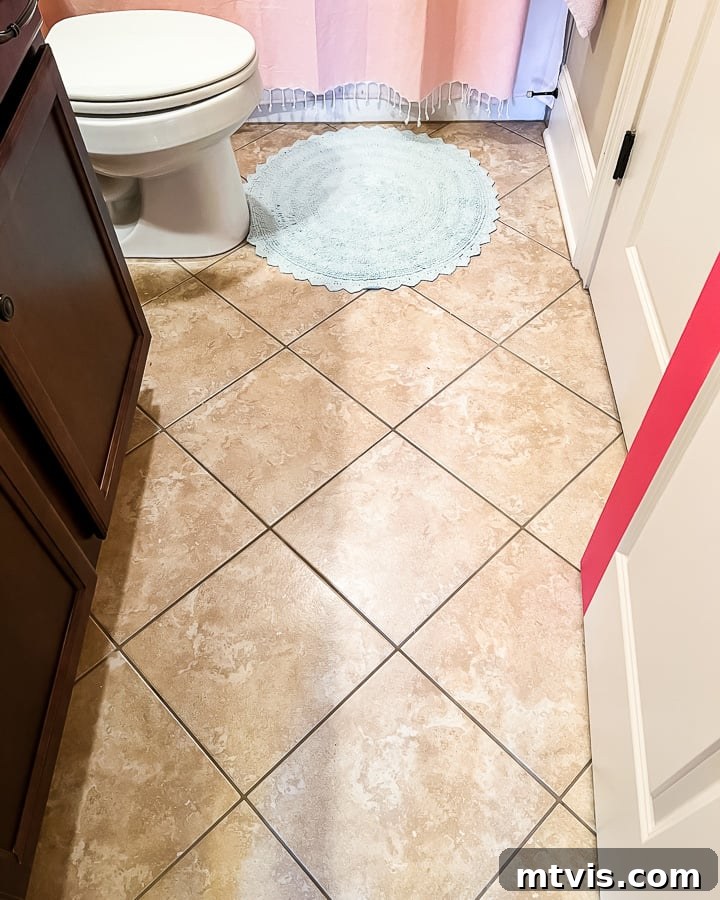
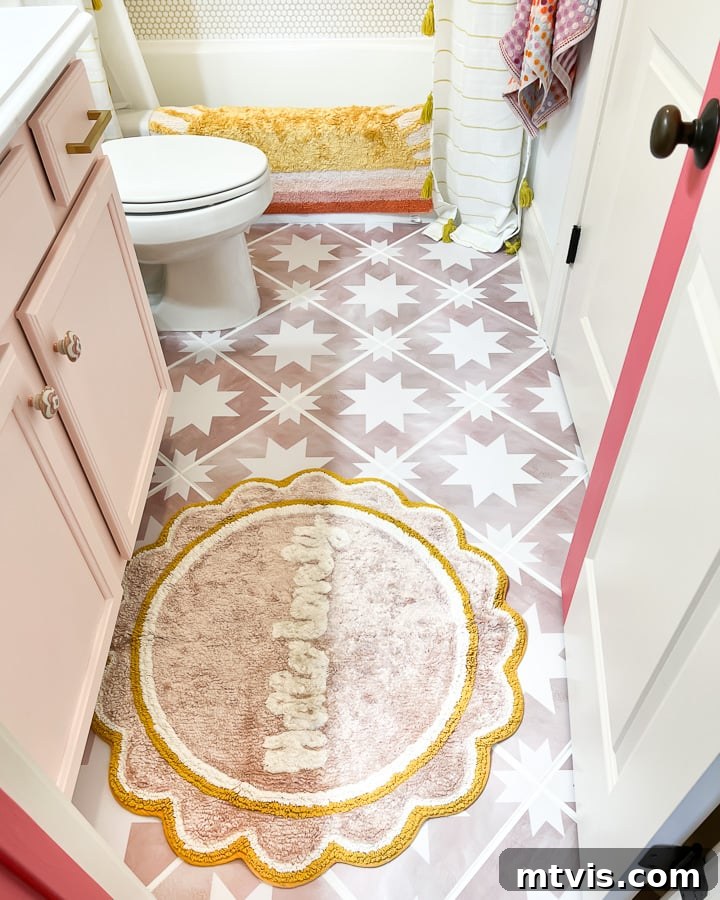
If installing entirely new flooring isn’t feasible due to time or budget constraints, consider updating your existing tile with innovative solutions like tile stickers. When our girls’ bathrooms needed a refresh, but new floors weren’t in the plan, we ingeniously applied tile stickers to their outdated tiled floors. These stickers are incredibly durable, waterproof, and offer a fantastic, budget-friendly way to instantly change the look of your tiles. They come in a vast array of patterns and colors, allowing for endless customization. You can see how well ours have held up over a year later and learn all about the magic of tile stickers here. We are truly big fans!
Conceal an Outdated Shower with Full-Length Curtains
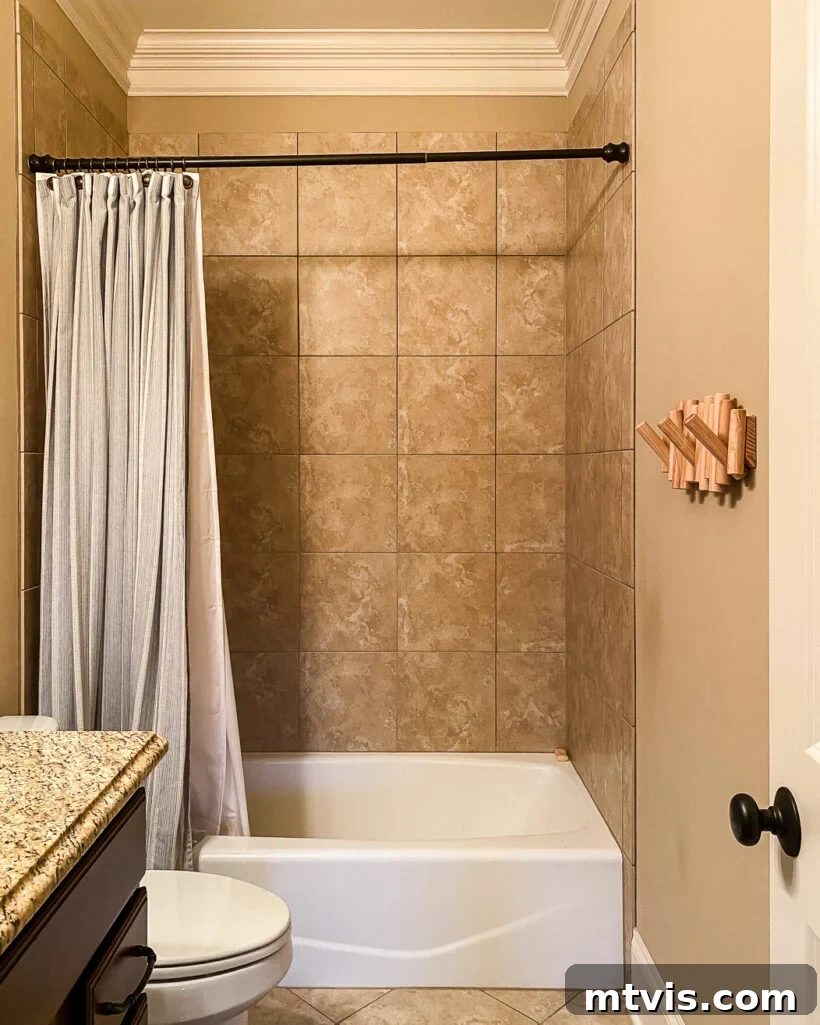
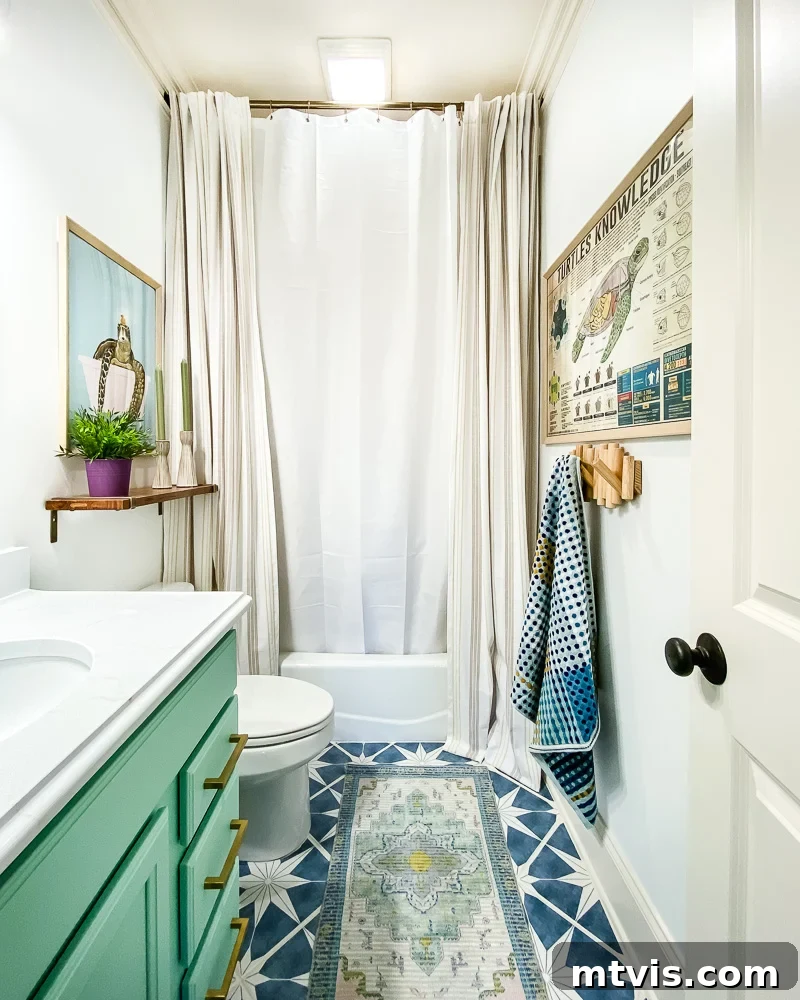
Sometimes, the most creative solutions are also the simplest and most budget-friendly. When faced with an outdated shower, complete with brown tiles that weren’t in our renovation budget, we devised an ingenious way to “hide” it: extra-long shower curtains. Instead of replacing the tiles, we opted for a clever visual trick. We hung 9-foot curtains (yes, standard window curtains!) on either side of our daughter’s shower, flanking a central 9-foot shower curtain. All three panels were mounted together on a single curtain rod, secured with discreet inside mounting brackets. The result is a beautifully draped effect that largely conceals the dated tiles, making them visible only when one is actually inside the shower. This method provides a soft, elegant look while effectively diverting attention from elements you wish to update later, serving as a perfect temporary or long-term solution for an outdated shower.
Paint Your Walk-In Shower Doors
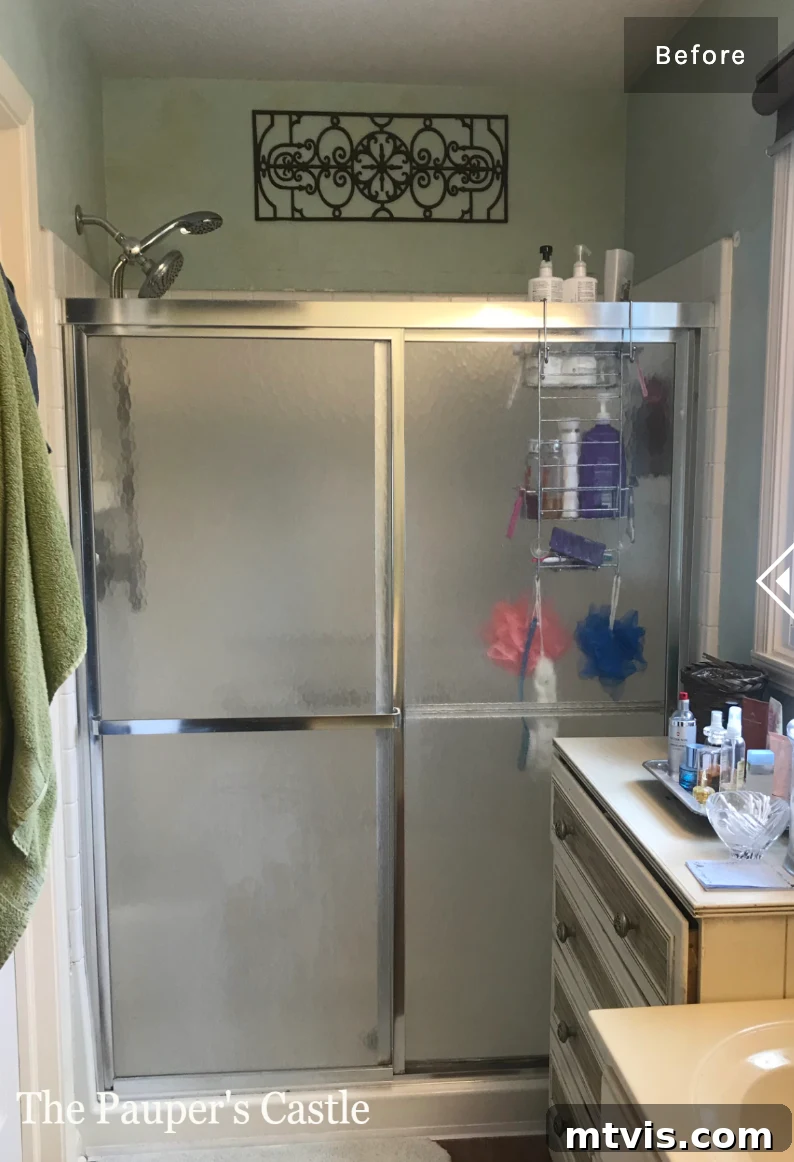
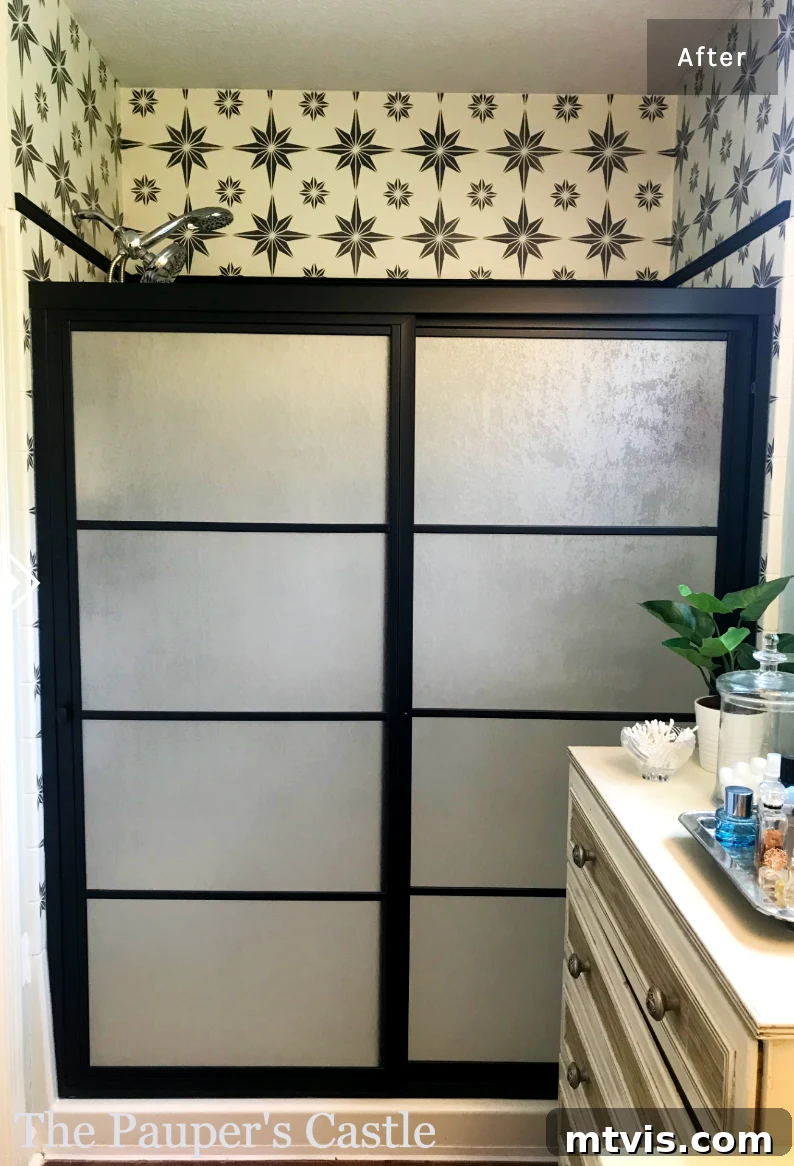
Outdated walk-in shower doors, particularly those with dated metal frames or frosted glass, can be an eyesore in an otherwise refreshed bathroom. Fortunately, you don’t need to completely replace them to achieve a modern aesthetic. A remarkable DIY solution involves painting your existing shower doors and, if desired, adding decorative wood grids to mimic popular contemporary styles. This transformation can give your sliding glass shower doors a fresh, sleek, and high-end look with surprisingly little effort. The process typically involves thoroughly cleaning and priming the glass and metal components, then applying a durable paint specifically designed for use in humid environments. The addition of custom-cut wood strips, painted to match, can create a stylish grid pattern that instantly updates the doors. For a comprehensive, step-by-step guide on how to achieve this stunning makeover, consult the detailed tutorial from The Pauper’s Castle here.
Paint Your Shower Tiles
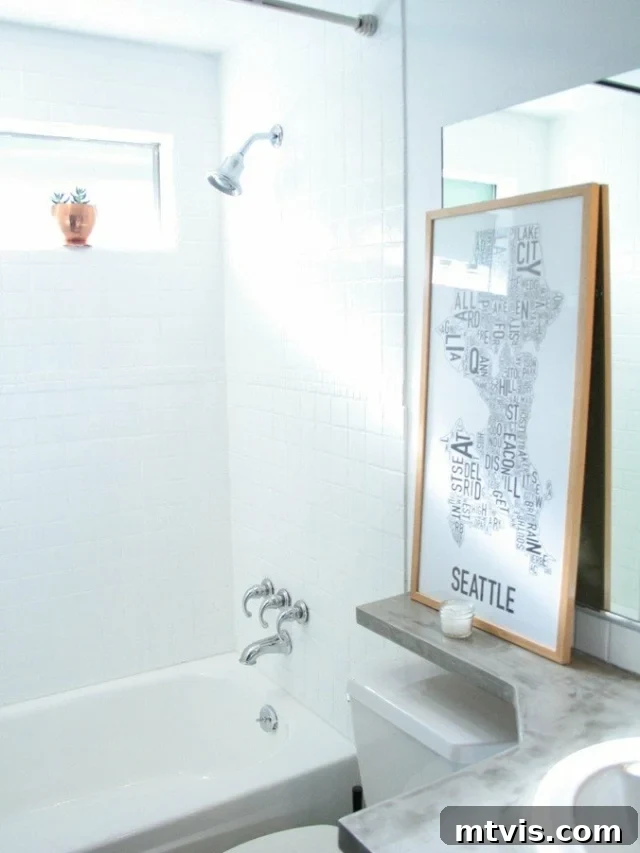
If you’re grappling with dingy or dated shower tiles but a full re-tiling project isn’t in your budget or timeframe, painting your shower tiles offers an incredibly cost-effective and surprisingly durable solution. This DIY project can give your shower a sparkling, fresh, and completely new appearance without the significant expense, mess, and hassle typically associated with tile replacement. The key to success lies in meticulous preparation: ensure your tiles are thoroughly cleaned, degreased, and free of any soap scum or mildew before applying paint. Furthermore, it is absolutely essential to use specially formulated epoxy-based paints that are designed for use in high-moisture environments like showers. These paints create a hard, waterproof, and long-lasting finish that can withstand daily use. They come in various colors, allowing you to completely change your shower’s aesthetic. Our full tutorial on how to paint shower tiles white details the process. As an example of its effectiveness, the shower tiles pictured below were originally a drab brown and were completely transformed into a pristine white using a specialty kit, proving the power of this budget-friendly update.
Tile Over Existing Tile: What to Know
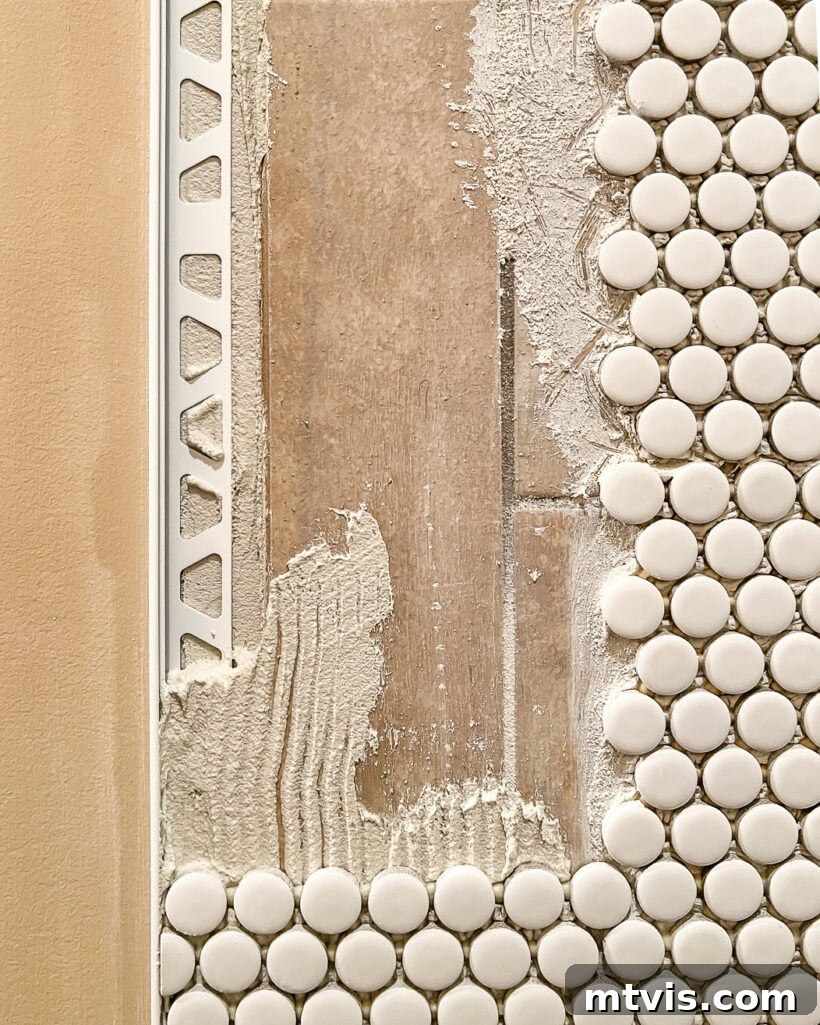
Are the outdated tiles in your kitchen or bathroom a constant source of frustration? Do you yearn to refresh your space but feel daunted by the prospect of removing old, stubborn tiles? Here’s some good news: in certain situations, you can indeed tile directly over existing tile, saving you considerable time, effort, and expense associated with demolition. However, this approach is not always advisable and comes with important caveats. The success of tiling over existing tile hinges on the condition of the original surface. It must be perfectly clean, level, structurally sound, and free from any cracks, loose tiles, or moisture issues. If the existing tile has any significant problems, tiling over it will only exacerbate those issues, leading to an unstable and short-lived new floor or wall. Our comprehensive post, “How to Tile Over Tile,” delves into the specific criteria for when this method is a viable option (spoiler alert: it’s often not the ideal solution) and provides a detailed, step-by-step tutorial for how to correctly execute it when conditions are favorable. Make sure to consult this guide before embarking on such a project to ensure a successful and lasting result.
Focus on Non-Demolition Changes
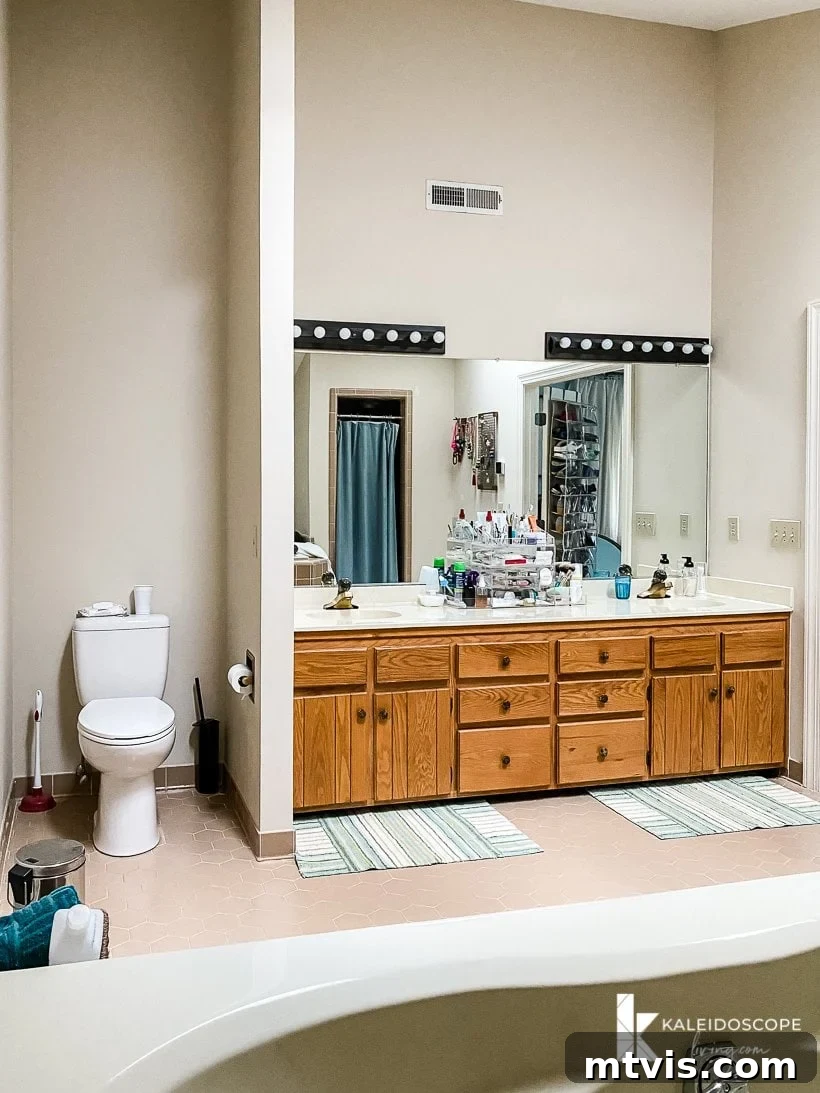
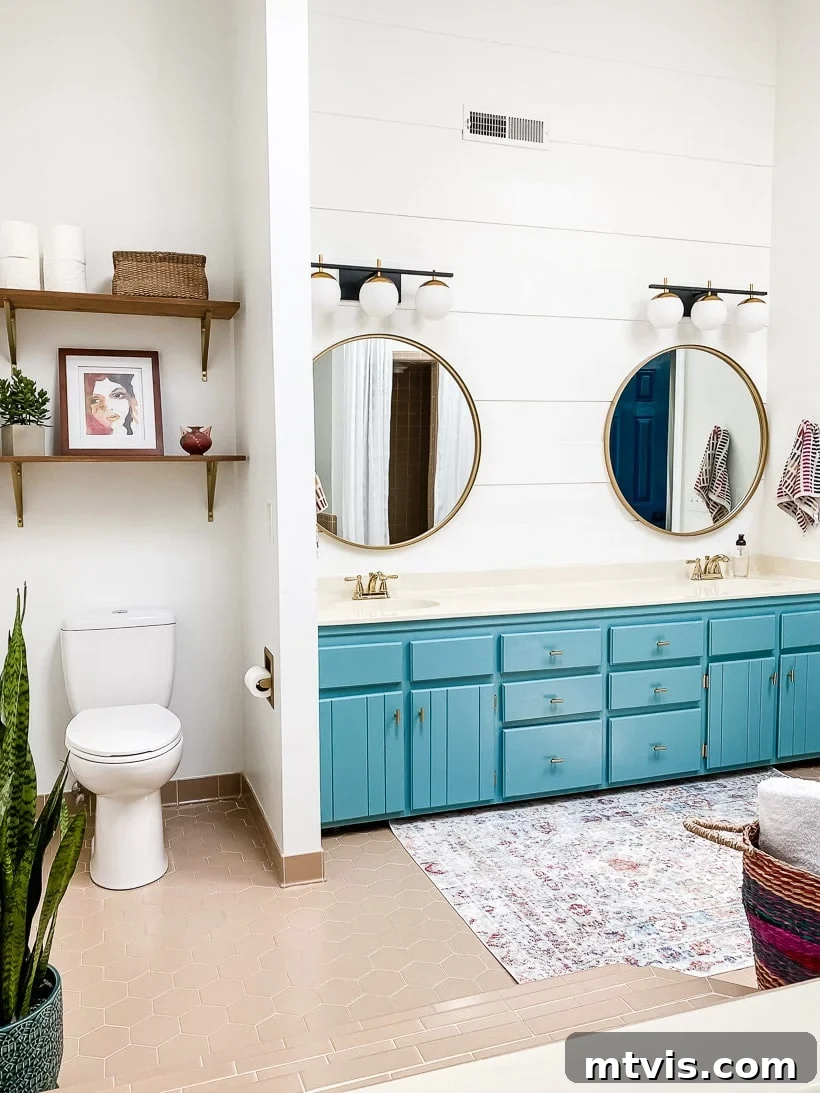
One of the most powerful and budget-friendly strategies for a bathroom makeover is to focus on cosmetic changes that don’t involve messy, costly, or time-consuming demolition. Never underestimate the transformative power of strategically applied paint, thoughtful décor, and well-chosen accessories. These elements can personalize your bathroom, making it feel inviting, stylish, and truly your own. Consider adding functional yet decorative shelving to enhance storage and display personal items. Incorporate striking artwork or vibrant prints that inject color and personality. Upgrading your mirrors can instantly refresh a vanity area, making the space feel larger and brighter. Other impactful items include luxurious towels, stylish soap dispensers, and plants that bring a touch of nature indoors. In our own home, we completely revamped our old master bathroom, which hadn’t seen an update since the 80s, without any demolition. We achieved this by painting the walls and the double vanity, installing new light fixtures, and strategically adding a variety of décor. This included a large, appealing rug that effectively distracted from the outdated brown floor tiles, proving that a focus on aesthetics can yield stunning results without structural changes.
Refinish Your Tub & Tub Surround Instead of Replacing Them
Replacing an entire bathtub and its surrounding tiles can be one of the most expensive and labor-intensive aspects of a bathroom remodel. A fantastic and more sustainable alternative is to refinish or reglaze your existing tub and tile surround. This process can give your worn, discolored, or outdated fixtures a brand-new appearance at a fraction of the cost. We successfully had the tub and tile surround in an outdated bathroom of our third home reglazed, and the results were incredibly satisfying. Not only does refinishing save you a significant amount of money, but it’s also an environmentally friendlier option as it prevents perfectly functional items from ending up in a landfill.
The reglazing process typically involves thoroughly cleaning, repairing any minor chips or cracks, and sanding the surface of your tub and tiles. Following this, a durable new coating—often an epoxy-based product—is meticulously applied, creating a smooth, glossy, and fresh finish. While this process can be undertaken by a professional refinisher for optimal results, DIY bathtub refinishing kits are also available for those confident in their abilities. It’s important to understand that while reglazing offers excellent durability, it may not be a permanent solution; depending on usage and care, you might need to repeat the process every few years to maintain its pristine appearance. Nevertheless, for anyone seeking a significant bathroom update without the cost, mess, and disruption of a full replacement, refinishing your tub and surround is an outstanding and highly effective option.
Install Your Own Toilet
While the idea of installing a new toilet might seem intimidating at first glance, it is actually a very manageable DIY project for most homeowners with a decent set of tools and a bit of patience. A brand-new, modern toilet can dramatically refresh a tired-looking bathroom, instantly making it feel cleaner and more updated. Beyond aesthetics, newer toilets often boast improved flushing mechanisms and water efficiency, leading to potential savings on your water bill. The installation process typically involves disconnecting the old toilet, preparing the flange, setting the new wax ring, carefully placing the new toilet, securing it, and finally connecting the water supply. Although it requires attention to detail and a willingness to get a little dirty, numerous online tutorials and guides can walk you through each step. To ensure a smooth and successful installation, refer to our comprehensive guide on how to install a new toilet here.
We hope these DIY bathroom remodel ideas have illuminated creative and practical ways to save money while transforming your own bathroom. Remember, many of the most impactful changes you can make in a bathroom are well within the capabilities of a dedicated DIY enthusiast. So, roll up your sleeves, gather your tools, and embark on the exciting journey of creating the bathroom of your dreams without the nightmare of a hefty bill!
Our 5 DIY Bathroom Remodel Projects
For those who have been inspired by this post and wish to dive deeper into the specific details of our personal bathroom makeovers and remodels, including sourcing materials and discovering our exact processes, you can find comprehensive information below:
Affordable Master Bathroom Remodel REVEAL
Think you can’t completely transform a master bathroom on a budget? Think again! This affordable master bathroom remodel completely transformed the space without changing any of the major elements! If you follow me over on Instagram you know that we have been giving our seriously outdated master bathroom a makeover. It’s the perfect example of how strategic updates can yield amazing results without a full gut job.
Avery’s Budget-Friendly Bathroom Makeover REVEAL
We successfully transformed Avery’s once beige and uninspiring bathroom into a fun and beautiful space, all without breaking the bank or requiring any demolition. This whirlwind makeover was a testament to clever design and smart material choices, proving that stunning results are achievable on a budget. While not our first bathroom transformation, it showcases how much impact can be made with strategic cosmetic changes.
Attley’s Budget-Friendly Bathroom Makeover REVEAL
We embarked on another exciting bathroom transformation, turning a very beige and boring bathroom into a vibrant, colorful, and beautiful space. By employing creative solutions and strategic DIY techniques, we managed to avoid spending a fortune (the national average for a bathroom renovation can be upwards of $8,100) and eliminated the need for costly demolition. This project underscores our belief that beautiful design doesn’t have to come with an outrageous price tag.
The REVEAL of Our Colorful DIY Bathroom Remodel
It’s REVEAL DAY for our colorful DIY bathroom remodel! We are absolutely thrilled with how this project turned out – it’s modern, vibrant, and incredibly cheerful, truly a space we adore. Completing this powder room renovation marks a significant milestone: the entire first floor of our home is now fully renovated! It has been a labor of love over many years, culminating in a cohesive and stylish living space.
DIY Bathroom Remodel REVEAL
Y’all, we survived our intensive DIY bathroom remodel, and we couldn’t be happier to share the reveal! If you’ve been following our journey here on the blog, you know the immense effort, dedication, and countless hours we poured into this project week after week. Reaching the finish line brings a sense of profound relief and satisfaction, and despite the exhaustion, I can unequivocally say that all the hard work was incredibly worth it.
More Inspiring Bathroom Ideas
SEE ALL bathroom POSTS
-
Tips for a Budget Bathroom Makeover + Attley’s Bathroom Reveal
-
Charming Bathroom Signs for Your Doors & Walls
-
25 Genius Powder Room Ideas
-
Tiling Over Existing Tile: What You NEED To Know
-
15+ DIY Bathroom Remodel Ideas to Save You Money
-
Everything You Need to Know About Tile Stickers
Curious about our overarching approach to transforming rooms and spaces throughout our home? Discover the methodologies and design principles that guide our projects by checking out Designer in a Binder® – your affordable and simple solution to decorating your home with confidence.
For exclusive content, behind-the-scenes glimpses into upcoming projects, and insider tips, be sure to subscribe to our newsletter before you leave!