DIY Apple Candles: The Ultimate Guide to Easy Fall & Holiday Centerpieces
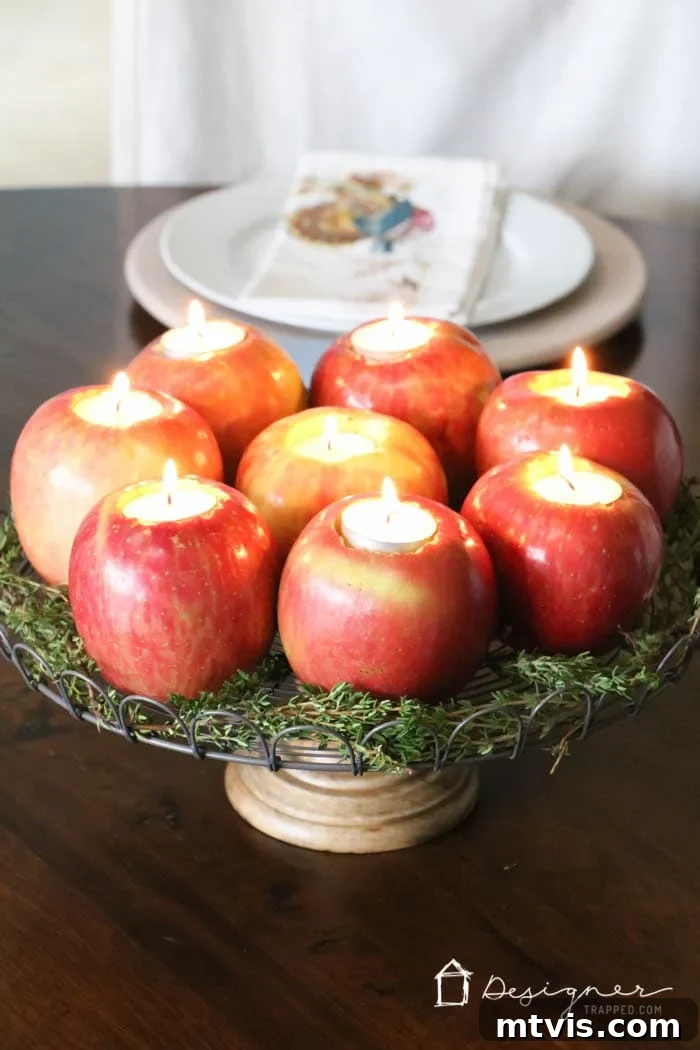
Looking for a captivating yet effortless way to elevate your seasonal decor? Imagine a centerpiece that’s not only breathtakingly beautiful but also incredibly simple and budget-friendly to create. Introducing DIY Apple Candles – your perfect solution for a festive fall, a warm Thanksgiving, or a magical Christmas table. These charming apple candle holders, glowing softly with tea lights, embody rustic elegance and seasonal cheer. You can bring this stunning tablescape to life in about 10 minutes and for roughly $10!
Table of Contents
As a passionate DIY enthusiast, I firmly believe that the most enchanting home decor often comes from handmade projects. And what better time than the festive season to infuse your home with personalized charm? I’m thrilled to share one of my absolute favorite DIY fall decor and holiday craft ideas: these delightful apple candles. They are currently gracing our Thanksgiving table as a stunning centerpiece, but trust me, they’d be equally magnificent as a Christmas centerpiece. The best part? This entire project took me less than 10 minutes and cost around $10. It’s incredibly easy, wonderfully effective, and utterly captivating.
This post contains some affiliate links for your convenience. Click here to read my full disclosure policy.
Why Choose DIY Apple Candles?
In a world full of mass-produced decorations, there’s something incredibly special about incorporating natural elements into your home. DIY apple candles offer a unique blend of rustic charm and sophisticated elegance. They’re not just beautiful; they also subtly infuse your space with the fresh, crisp scent of apples, especially as they warm up. These handmade candle holders are a conversation starter, showcasing your creativity and appreciation for natural beauty. Perfect for fall harvest celebrations, intimate Thanksgiving dinners, or sparkling Christmas feasts, they bring a touch of seasonal magic that store-bought items simply can’t replicate. Their simplicity ensures they complement any existing decor style, from modern minimalist to traditional farmhouse.
Materials Needed for Your Apple Candle Craft
Gathering your supplies is the first step to creating this enchanting apple candle centerpiece. The beauty of this project lies in its minimal requirements, making it accessible for everyone. Here’s what you’ll need:
- Apples: You’ll need about 5-7 medium-sized apples for a standard centerpiece. While I personally love Fuji apples for their beautiful blend of red and green hues, feel free to choose any variety that appeals to your aesthetic. Consider Gala for a bright red, Honeycrisp for a rich red-orange, or even Granny Smith for a vibrant green contrast. The most important tip here is to select apples with flat bottoms. This ensures stability and prevents your candle holders from wobbling on your chosen stand.
- Drill: A standard electric drill will make quick work of creating the perfect indentation for your tea lights. If you don’t own a drill, consider borrowing one or, for a more manual approach, a sturdy apple corer or a sharp knife (exercise extreme caution if using a knife) could potentially work, though less precisely.
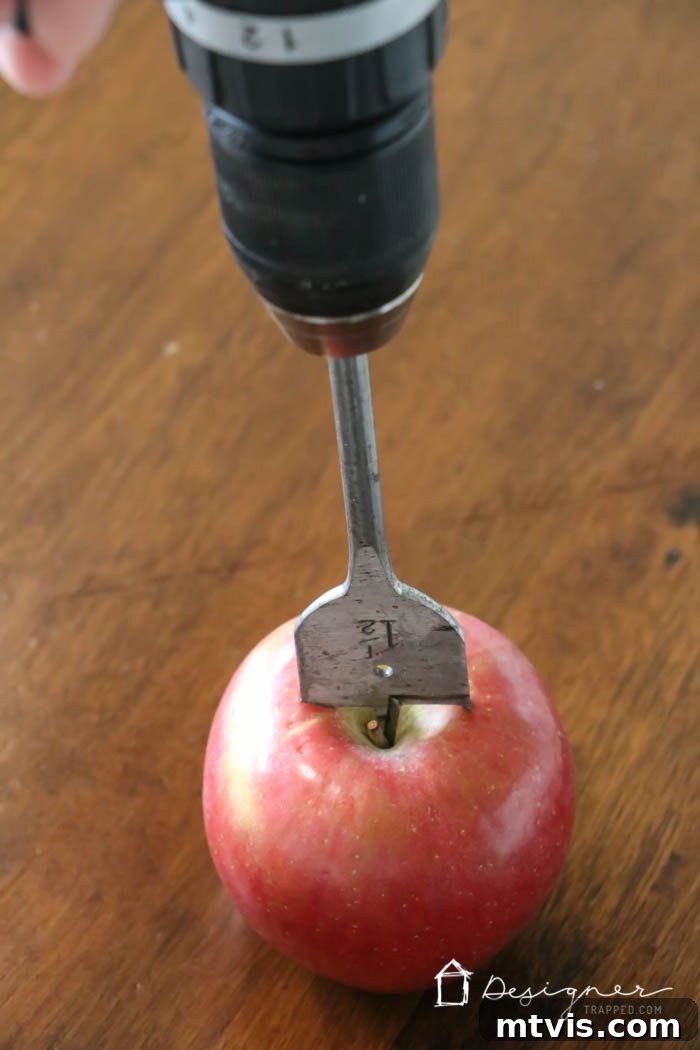
- 1 1/2 inch Paddle Bit: This specific drill bit size is ideal for creating a snug fit for most standard tea lights. It carves out a clean, wide, and shallow hole. Make sure your paddle bit is sharp for the best results.
- Tea Lights: You’ll need one tea light per apple. Both wax and battery-operated LED tea lights work wonderfully. For safety, many prefer LED tea lights, especially if children or pets are present. If using traditional wax tea lights, opt for unscented ones to let the natural apple aroma shine, or choose a fall-inspired scent like cinnamon or pumpkin spice for an added layer of fragrance.
- Fresh Herbs: Thyme and rosemary are my go-to choices for their delightful fragrance and earthy green color, which beautifully complements the apples. Other excellent options include sage, bay leaves, or even sprigs of pine or cedar for a more wintry feel. These herbs aren’t just decorative; they add another layer of natural aroma to your tablescape.
- Pedestal Stand or Cake Stand: An elevated base adds height and drama to your centerpiece. A classic cake stand is perfect, but you can also use a rustic wooden tray, a decorative platter, a tiered stand, or even a small overturned crate. Choose something that matches your personal style and the overall theme of your decor.
Step-by-Step Guide to Making Apple Candles
Creating your DIY apple candles is astonishingly simple and quick. Follow these easy steps, and you’ll have a stunning centerpiece ready in minutes:
1. Prepare the Apples by Drilling the Holes
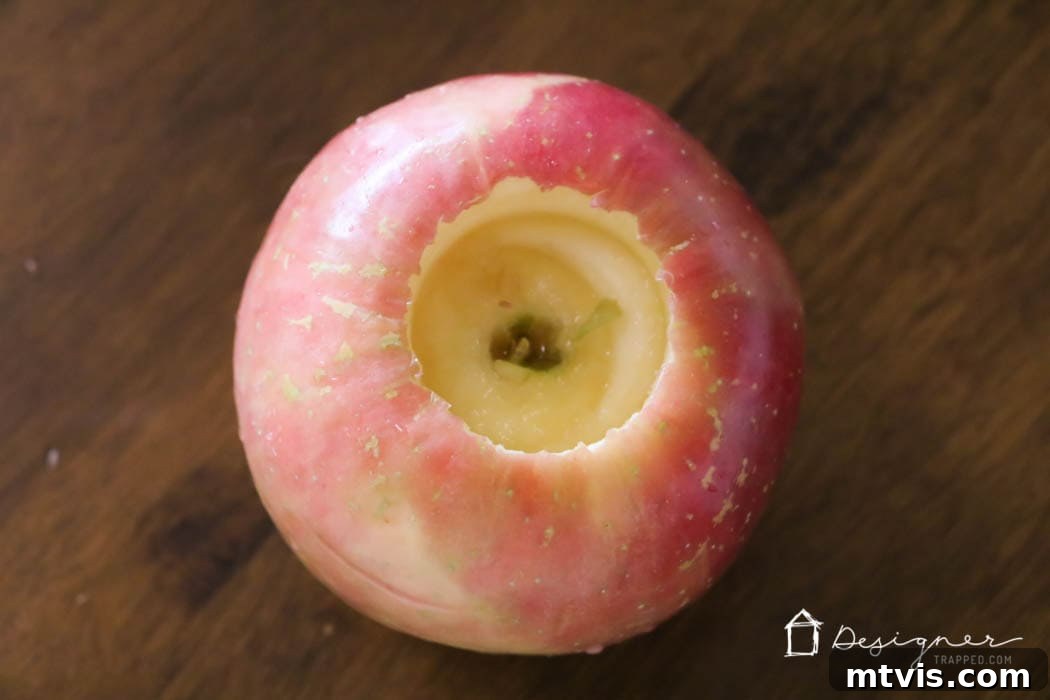
Carefully take your drill equipped with the 1 1/2 inch paddle bit. Position the bit directly in the center of the top of each apple. Begin drilling, applying gentle, steady pressure. It’s crucial not to drill too deeply; the hole only needs to be deep enough to comfortably hold your tea light, typically about 1/4 to 1/2 inch. You want the tea light to sit flush or slightly recessed, creating a clean, integrated look. Always exercise caution when using power tools and ensure your apple is stable on a flat surface to prevent it from rolling or slipping.
2. Insert the Tea Lights
Once you’ve drilled all the necessary holes, gently press a tea light into each one. Ensure it fits snugly and sits securely within the carved-out space. If the fit is a little loose, you can add a tiny piece of paper or a dab of florist’s putty underneath for extra stability. This step is incredibly satisfying as your apples begin to transform into charming candle holders.
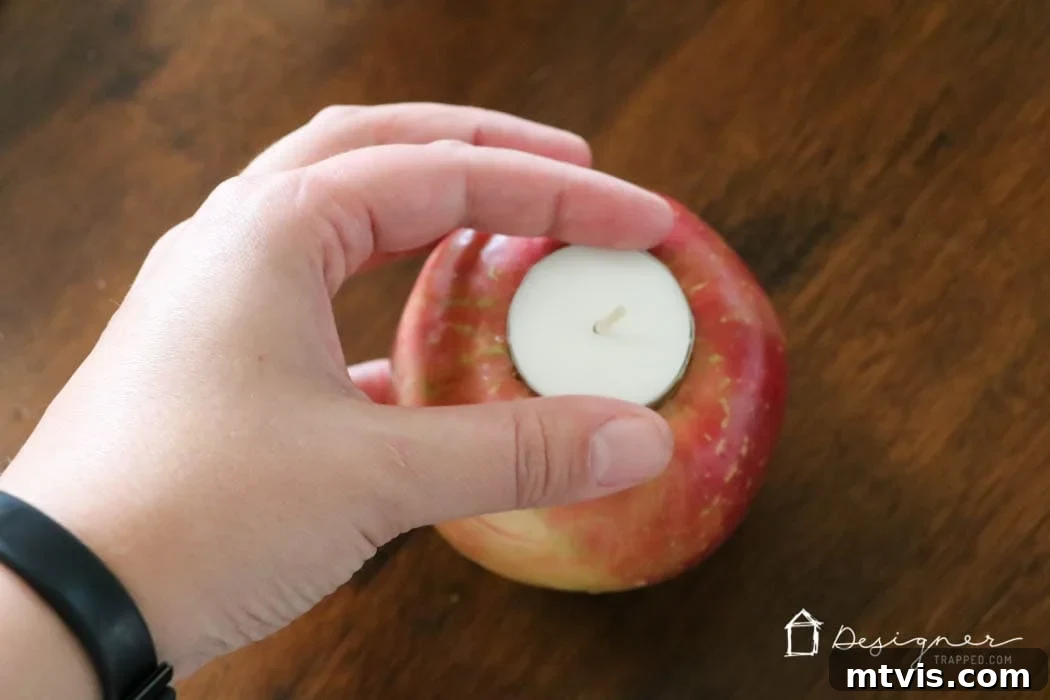
3. Arrange Your Apple Candles on an Elevated Stand
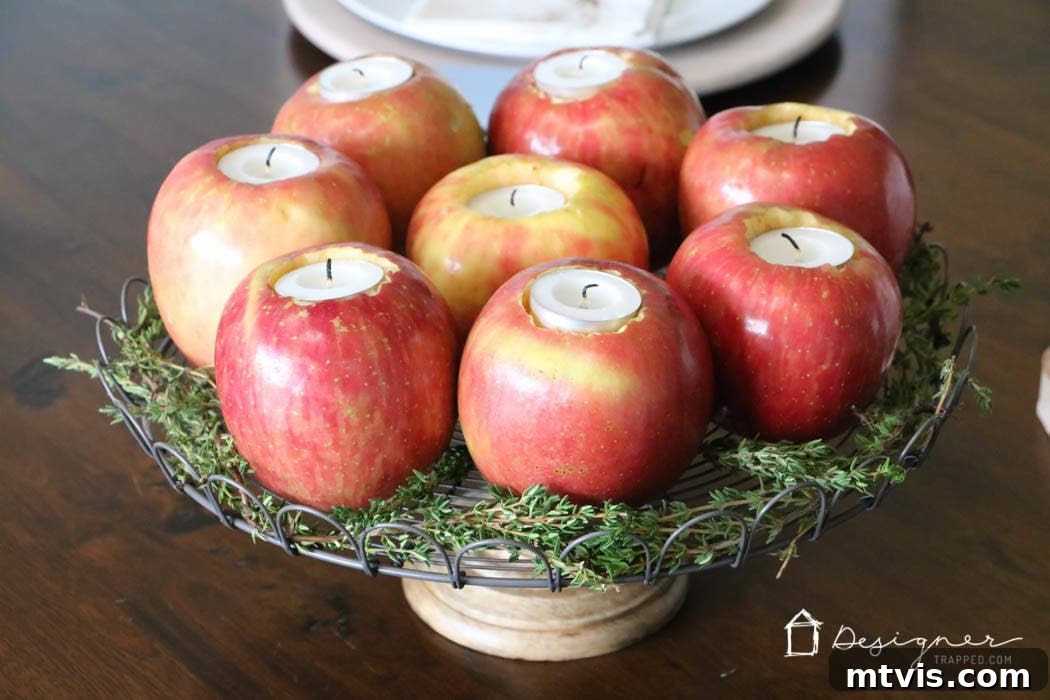
Now for the creative arrangement! Place your newly crafted apple candles on your chosen pedestal or cake stand. Experiment with different layouts. You might arrange them in a neat row, a natural cluster, or a symmetrical pattern, depending on the shape of your stand and the number of apples you have. Elevating the apples adds visual interest and creates a more dynamic and striking centerpiece. Consider using varying heights of stands for an even more dramatic effect if you have multiple.
4. Embellish with Fresh Herbs and Other Natural Elements
This final step adds the finishing touch that truly elevates your apple candle centerpiece. Artfully arrange fresh herbs like thyme, rosemary, or sage around the perimeter of your stand and weave them in between the apples. Don’t be afraid to tuck in other natural elements that evoke the season: small pinecones, vibrant cranberries, autumn leaves, or even a few sprigs of cinnamon sticks can add texture, color, and additional aroma. This creates a lush, organic feel that is both visually appealing and delightfully fragrant.
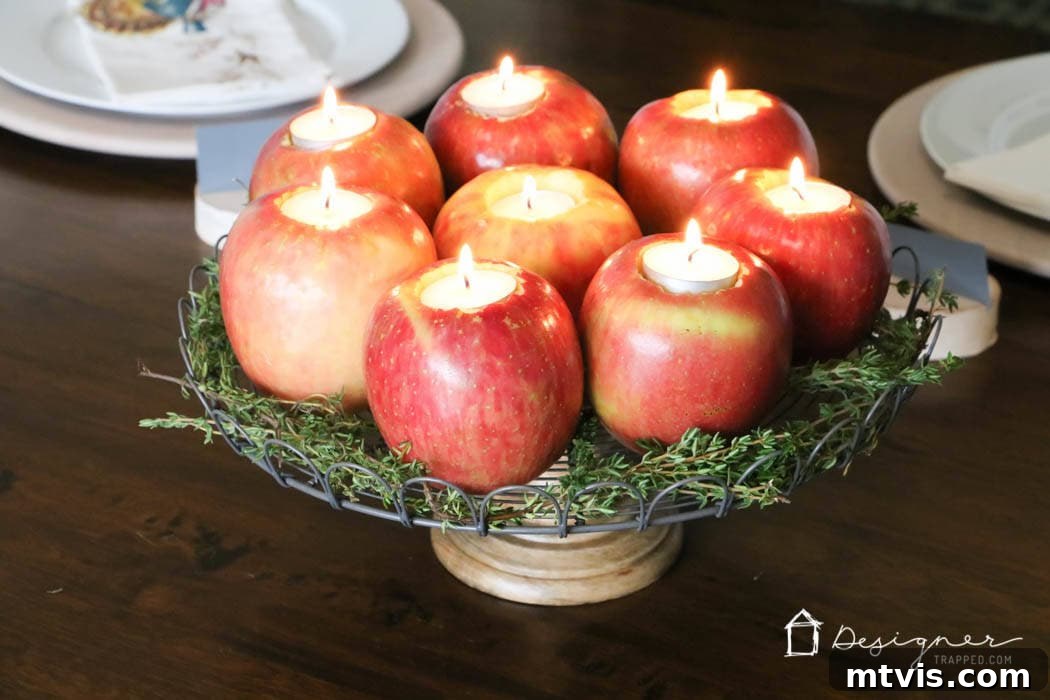
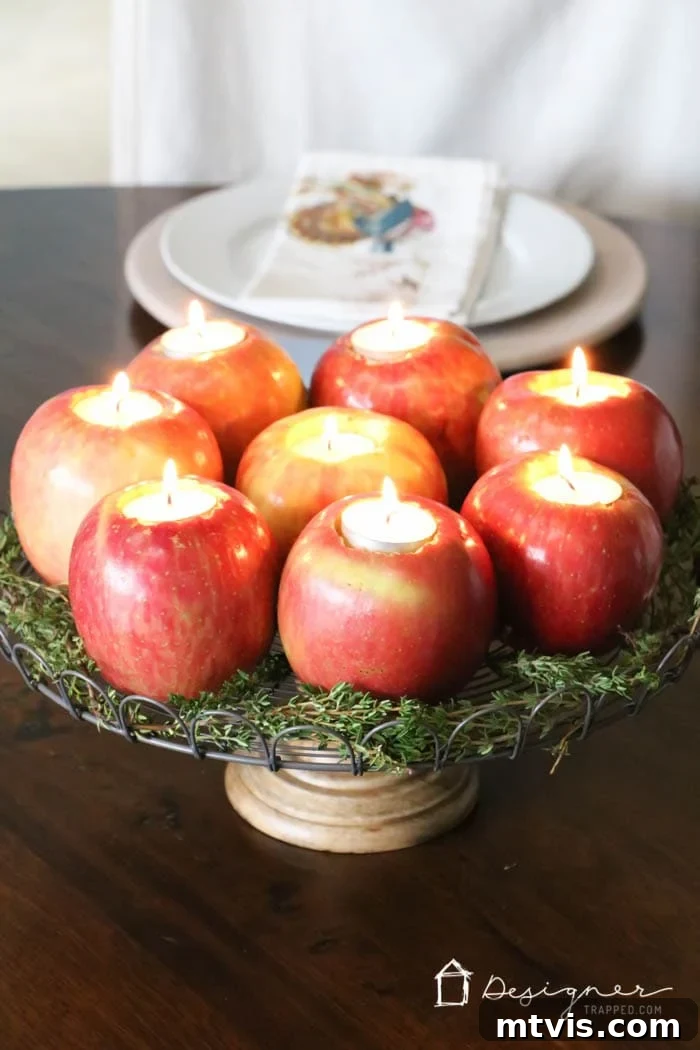
And just like that, your enchanting DIY apple candle centerpiece is complete! It’s truly one of the simplest and most rewarding craft projects you can undertake. The total cost for the apples, herbs, and tea lights was roughly $10, proving that stunning decor doesn’t have to break the bank. Take a moment to admire your finished creation, then prepare to receive compliments from all your guests.
Creative Variations for Your Apple Candle Centerpiece
While the basic apple candle design is beautiful on its own, don’t hesitate to experiment and personalize your centerpiece for different occasions or to match your specific decor:
- Beyond Apples: While apples are classic, consider other fruits like pears or even small gourds for a unique twist. Pears offer a different shape and texture, while gourds can be perfect for a rustic fall aesthetic.
- Aromatic Enhancements: For an extra fragrant experience, try adding a drop or two of essential oils (like cinnamon, clove, or orange) to the apple’s surface, away from the flame. You can also press whole cloves into the apples or tie small cinnamon sticks around them with twine for a visually appealing and fragrant touch.
- Holiday Specific Touches:
- Thanksgiving: Incorporate miniature pumpkins, dried corn, or small bundles of wheat alongside your apple candles.
- Christmas: Add sprigs of holly, fresh pine branches, pinecones dusted with faux snow, or even a touch of glitter around the edges of the apple holes for a festive sparkle. Red berries also provide a beautiful pop of color.
- General Fall: Scatter colorful fall leaves, acorns, or small branches around the base.
- Varying Heights: Instead of just one stand, use a mix of different height stands or even a multi-tiered tray to create a visually interesting display with more depth.
Safety Tips for Burning Apple Candles
Whenever you’re working with open flames, safety should be your top priority. While apple candles are generally safe, a few precautions will ensure your centerpiece remains beautiful without incident:
- Never Leave Unattended: Always supervise burning candles. If you need to leave the room, extinguish them first.
- Keep Away from Flammables: Ensure your apple candles are placed on a stable, non-flammable surface, away from curtains, paper decorations, and other combustible materials.
- Use Votives or LED: While tea lights work, using small glass votive inserts (if they fit) can offer an extra layer of protection. Alternatively, LED tea lights are a fantastic, flameless option that provides the same cozy glow without any fire risk, perfect for homes with children or pets.
- Monitor Apples for Deterioration: As fresh produce, apples will eventually soften and rot. Keep an eye on your apples and replace them when they start to show signs of decay to maintain stability and hygiene.
- Proper Ventilation: Ensure the area where candles are burning is well-ventilated, especially if using multiple wax candles.
How to Make Your Apple Centerpiece Last
Since your beautiful apple candles are made from fresh fruit, they won’t last forever, but you can certainly extend their charm for several days:
- Choose Firm Apples: Start with firm, unblemished apples to begin with. Soft spots can lead to quicker decay.
- Refrigerate When Not in Use: If you’re not displaying your centerpiece constantly, you can carefully remove the tea lights and refrigerate the apples to slow down the ripening process.
- Lemon Juice Treatment: Before inserting the tea lights, you can lightly brush the cut edges of the holes with lemon juice (or a solution of lemon juice and water). This natural antioxidant can help prevent browning and keep the apples looking fresher longer.
- Swap Out Regularly: For extended use throughout a holiday season, plan to replace the apples every 3-5 days, or as soon as you notice them softening or browning significantly.
Beyond the Dining Table: Versatile Apple Decor
While these DIY apple candles make an undeniably stunning dining table centerpiece, don’t limit their beauty to just one spot! Their versatility allows them to enhance various areas of your home:
- Entryway Console: Greet guests with a warm, festive glow by placing a small arrangement of apple candles on your entryway table.
- Mantlepiece: Arrange them along your fireplace mantle, interspersed with garlands, pinecones, and other seasonal accents for a cozy and inviting display.
- Coffee Table: A smaller grouping of apple candles can add a charming touch to your living room coffee table, perfect for quiet evenings.
- Bathroom Vanity: For a spa-like, seasonal touch, place a single apple candle on a bathroom vanity or shelf (ensuring it’s far from any water splashes).
- Kitchen Island: Brighten up your kitchen space with a simple line of apple candles, bringing natural beauty to your culinary hub.
Their natural simplicity means they can blend seamlessly into almost any room, offering a subtle nod to the season without overwhelming the existing decor.
So, what do you think? Are you ready to add this incredibly easy, beautiful, and affordable DIY apple candle centerpiece to your Thanksgiving table, Christmas decor, or general fall festive arrangement? I promise, once you create one, you’ll be looking for excuses to make more!
Curious about transforming other rooms and spaces in your home with smart, accessible design principles? Discover the secrets with Designer in a Binder® – your guide to creating a home you love, effortlessly.
And for exclusive content, behind-the-scenes sneak peeks, and more creative home decor inspiration delivered straight to your inbox, be sure to subscribe to our newsletter before you go!