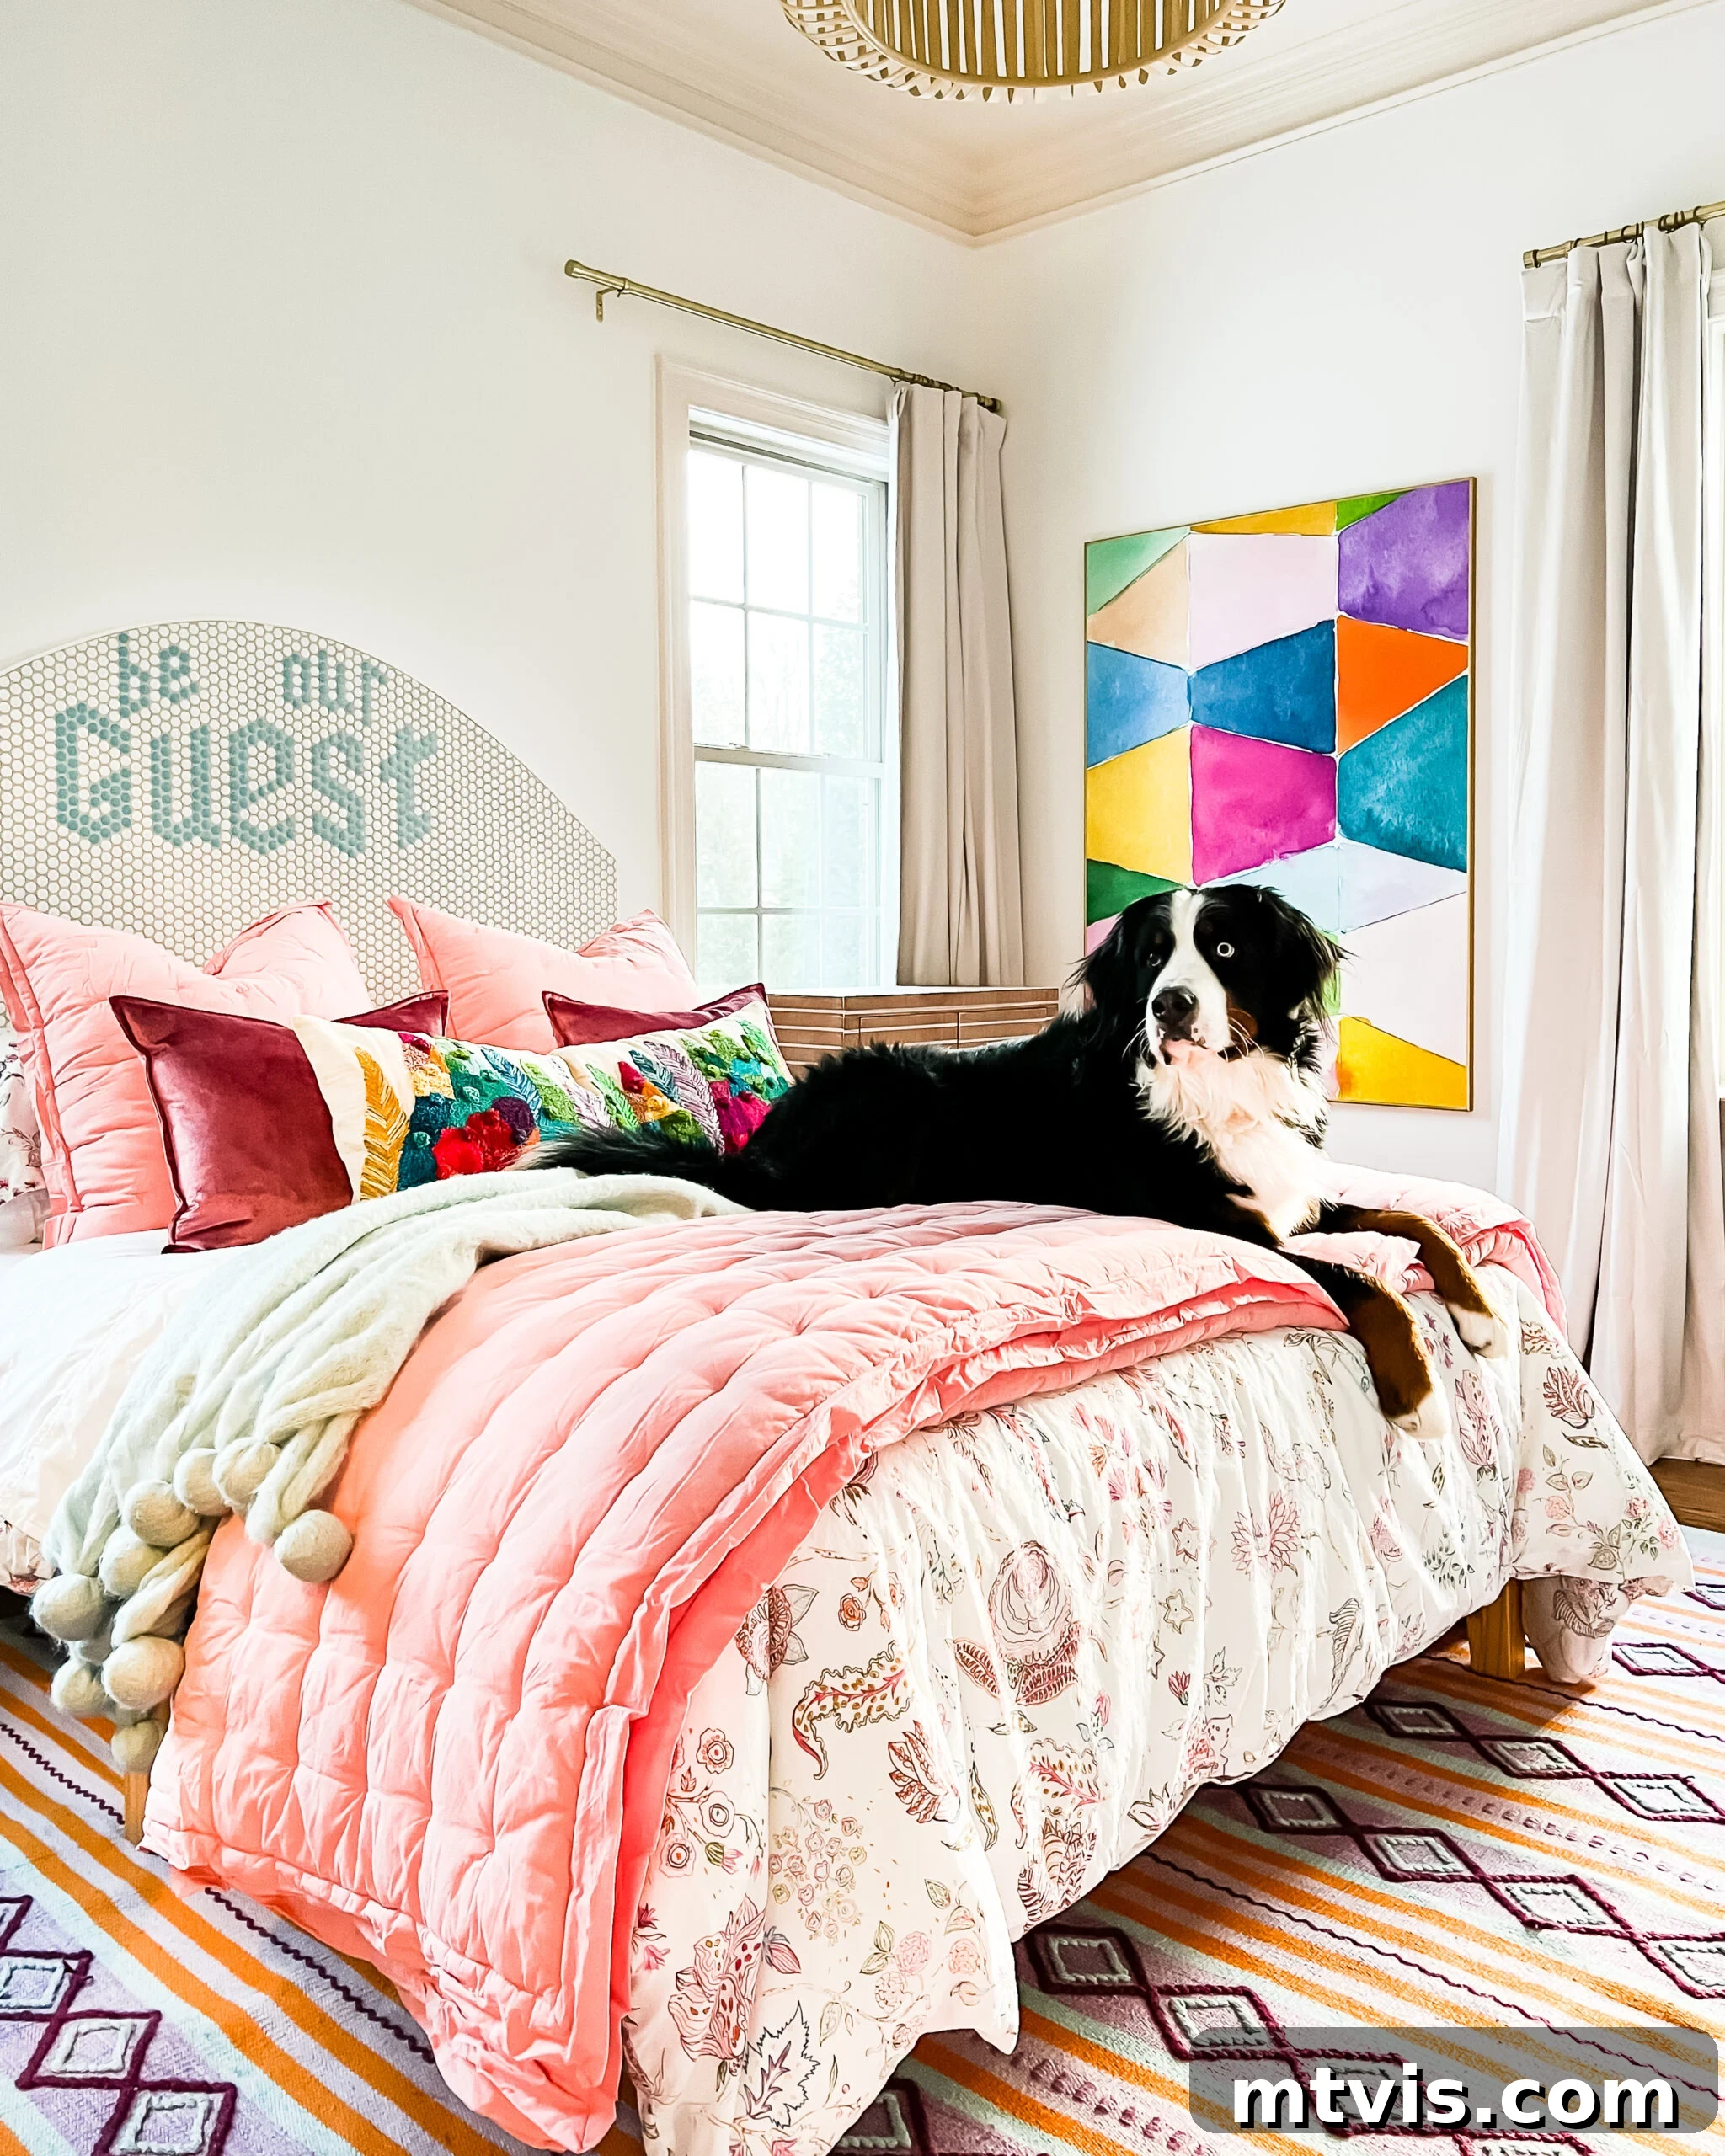
Ever feel like your small rooms are closing in on you? You’re not alone! Many homeowners dream of expansive, airy spaces, but the reality often involves making the most of more modest dimensions. The good news is that with smart design strategies, you can transform even the tiniest nooks into inviting, spacious-feeling areas. This comprehensive guide will equip you with nine powerful tips to visually enlarge any room in your home, making it feel more open, brighter, and undeniably stylish.
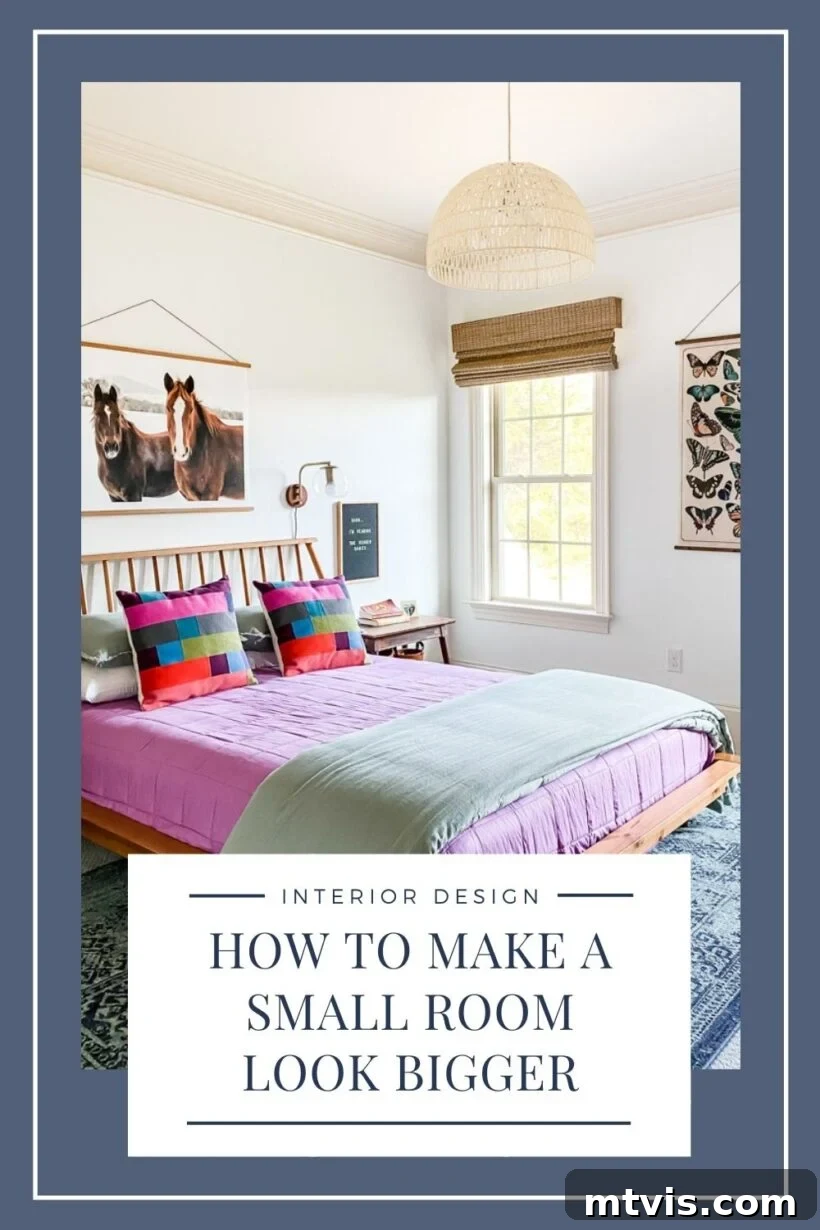
Through two decades of marriage, my husband and I have lived in a variety of homes, many of which featured surprisingly compact rooms. Our first home, just under 1,000 square feet, remains one of my favorites – a testament to how well-designed small spaces can truly shine. Even in our current, much larger residence, we still encounter smaller areas that benefit from clever space-saving and visual expansion techniques. Over the years, I’ve honed a repertoire of proven tricks to make a small room look bigger, encompassing everything from strategic color palettes and innovative window treatments to the transformative power of mirrors. Ultimately, your living space, regardless of its size, should always feel like a welcoming sanctuary. Let’s delve into these expert tips to maximize your home’s potential!
9 Expert Tips to Make Any Small Room Look Bigger
Tip 1: Elevate Your Curtains to the Ceiling for Instant Height
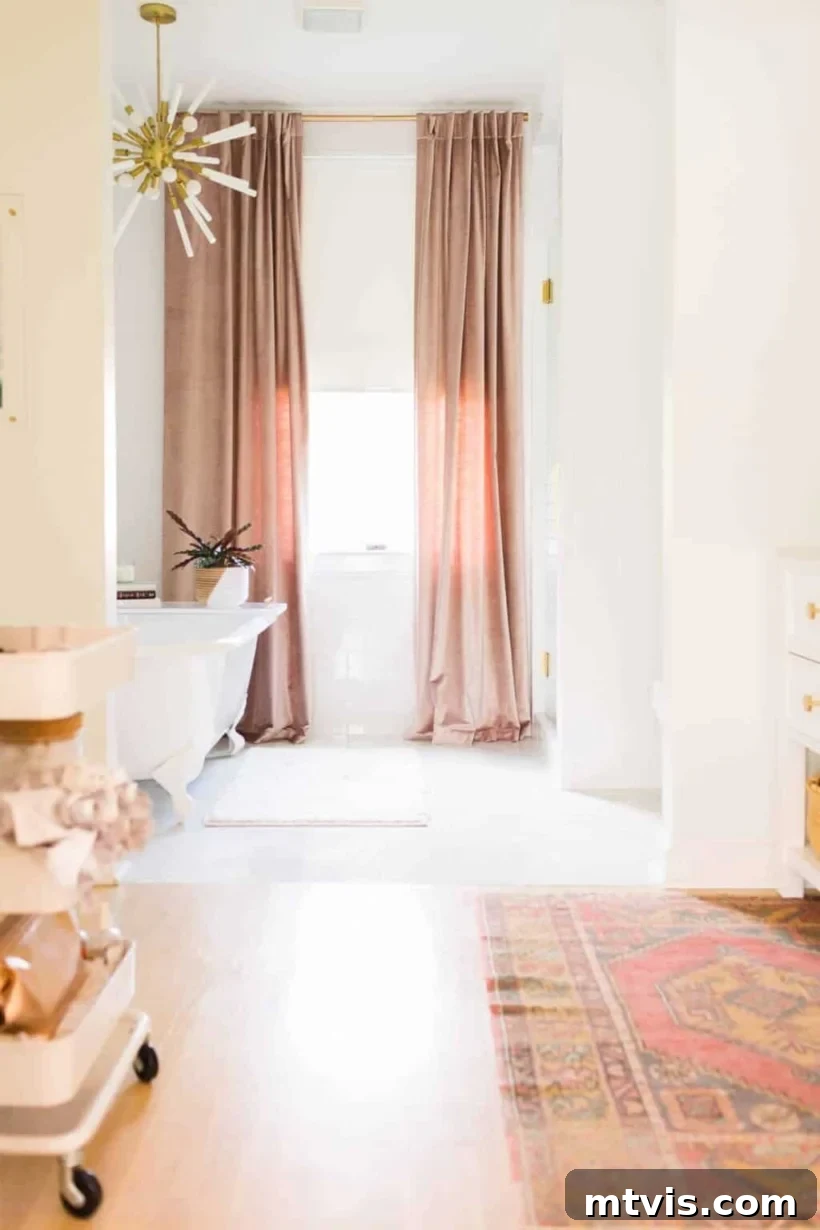
This is arguably one of the most impactful strategies for making any room, particularly smaller ones, appear larger and more luxurious. Instead of hanging your curtain rod just above the window frame, extend it as close to the ceiling as possible – ideally, right up to the crown molding. This simple adjustment creates a powerful illusion of height, drawing the eye upwards and making the walls seem taller than they are. It’s a trick we’ve employed in every home we’ve lived in, and it consistently delivers dramatic results.
For small bedrooms, where four walls often create a confined feeling, this curtain hack is a game-changer. By extending curtains from ceiling to floor, you visually elongate the room, making it feel more open and grand. In our primary bedroom, for instance, hanging the curtains as high as possible instantly transformed the space, adding an elegant vertical dimension. Remember, the bottom of your curtains should just graze the floor; avoiding “high-water” curtains is crucial for maintaining that fluid, expansive look.
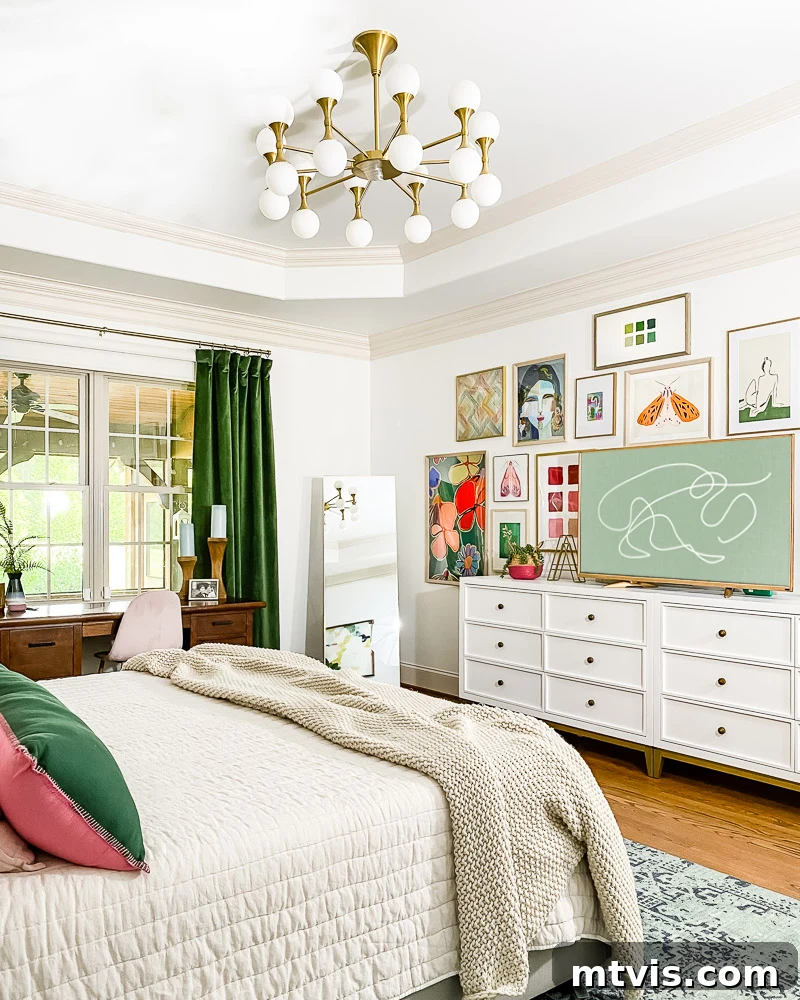
When repurposing curtains, as we did in Attley’s room with her DIY tassel curtains, aim to hang them at the maximum possible height while ensuring they still reach the floor. This balance is key to achieving the desired effect of openness and visual extension. Another excellent example comes from Elsie’s primary bathroom, featured on A Beautiful Mess, where floor-to-ceiling curtains effectively make the narrow space feel significantly taller. This simple, affordable interior design hack works wonders every time, making it an essential tool for maximizing small spaces. Just ensure you purchase curtains with adequate length to accommodate this elevated hanging method.
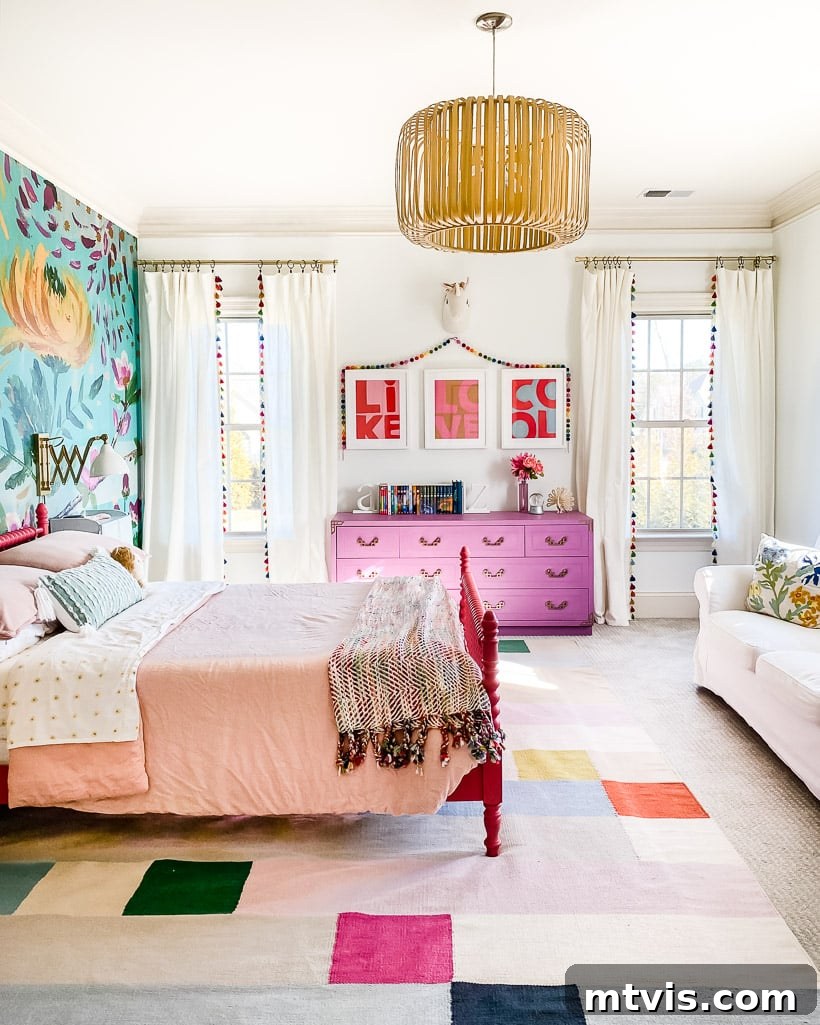
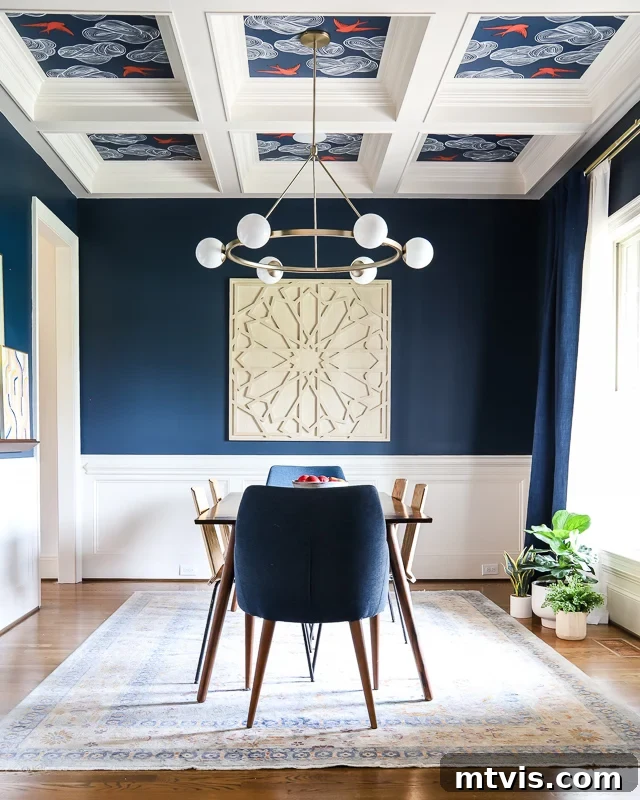
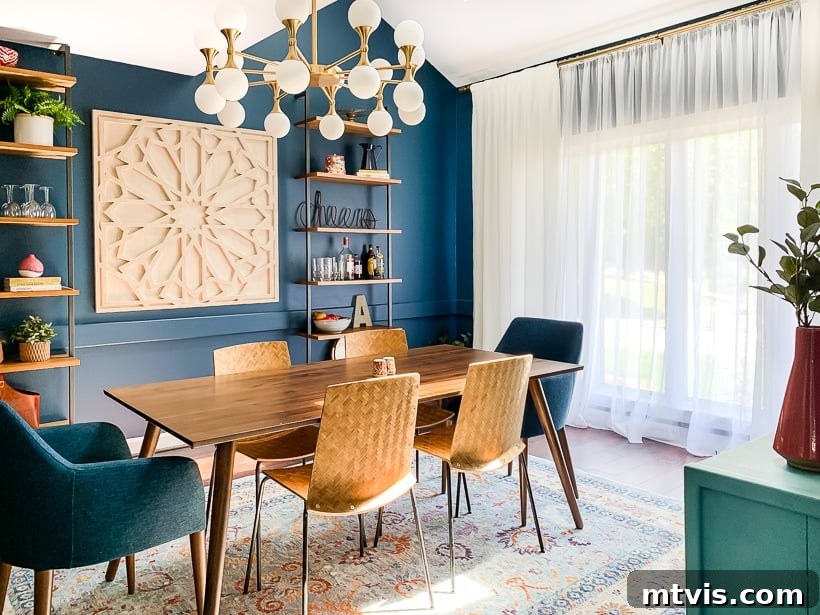
We’ve successfully applied this curtain-hanging principle in both our old and current dining rooms. While these rooms weren’t inherently tiny, they weren’t vast either. By extending the curtains from the ceiling to the floor, we consistently achieved an illusion of higher ceilings and a more spacious ambiance, proving that this trick is universally effective for enhancing any room’s perceived size.
Tip 2: Opt for Furniture with Exposed Legs to Create Visual Lightness
When selecting furniture for a small room, consider pieces that feature visible legs. This design choice prevents furniture from appearing heavy and monolithic, which can quickly overwhelm a compact space. By allowing light to pass underneath and revealing more of the floor, furniture with exposed legs creates an immediate sense of airiness and openness, making the entire room feel larger and less cluttered.
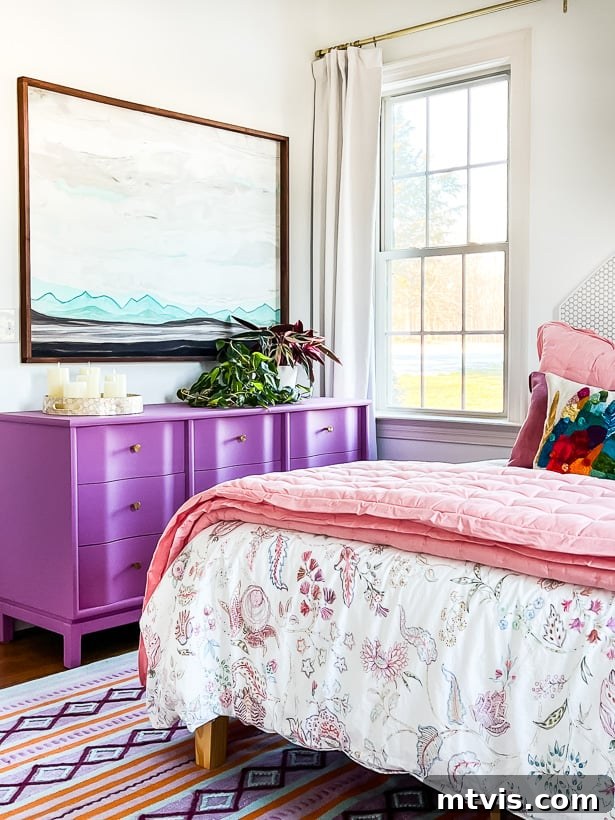
While not every single piece needs to have legs, aiming for at least one or two key items with some elevation – be it a sofa, armchair, nightstand, dresser, or bed – can significantly impact the room’s perceived size. In our small guest room, we opted for a simple platform bed and a dresser with modest legs. Even this subtle lift allows the floor beneath to remain visible, reducing visual bulk and contributing to an overall sense of spaciousness. The “leggy” nature of these pieces ensures the room feels less crowded and more inviting, proving that strategic furniture choices are essential for small room design.
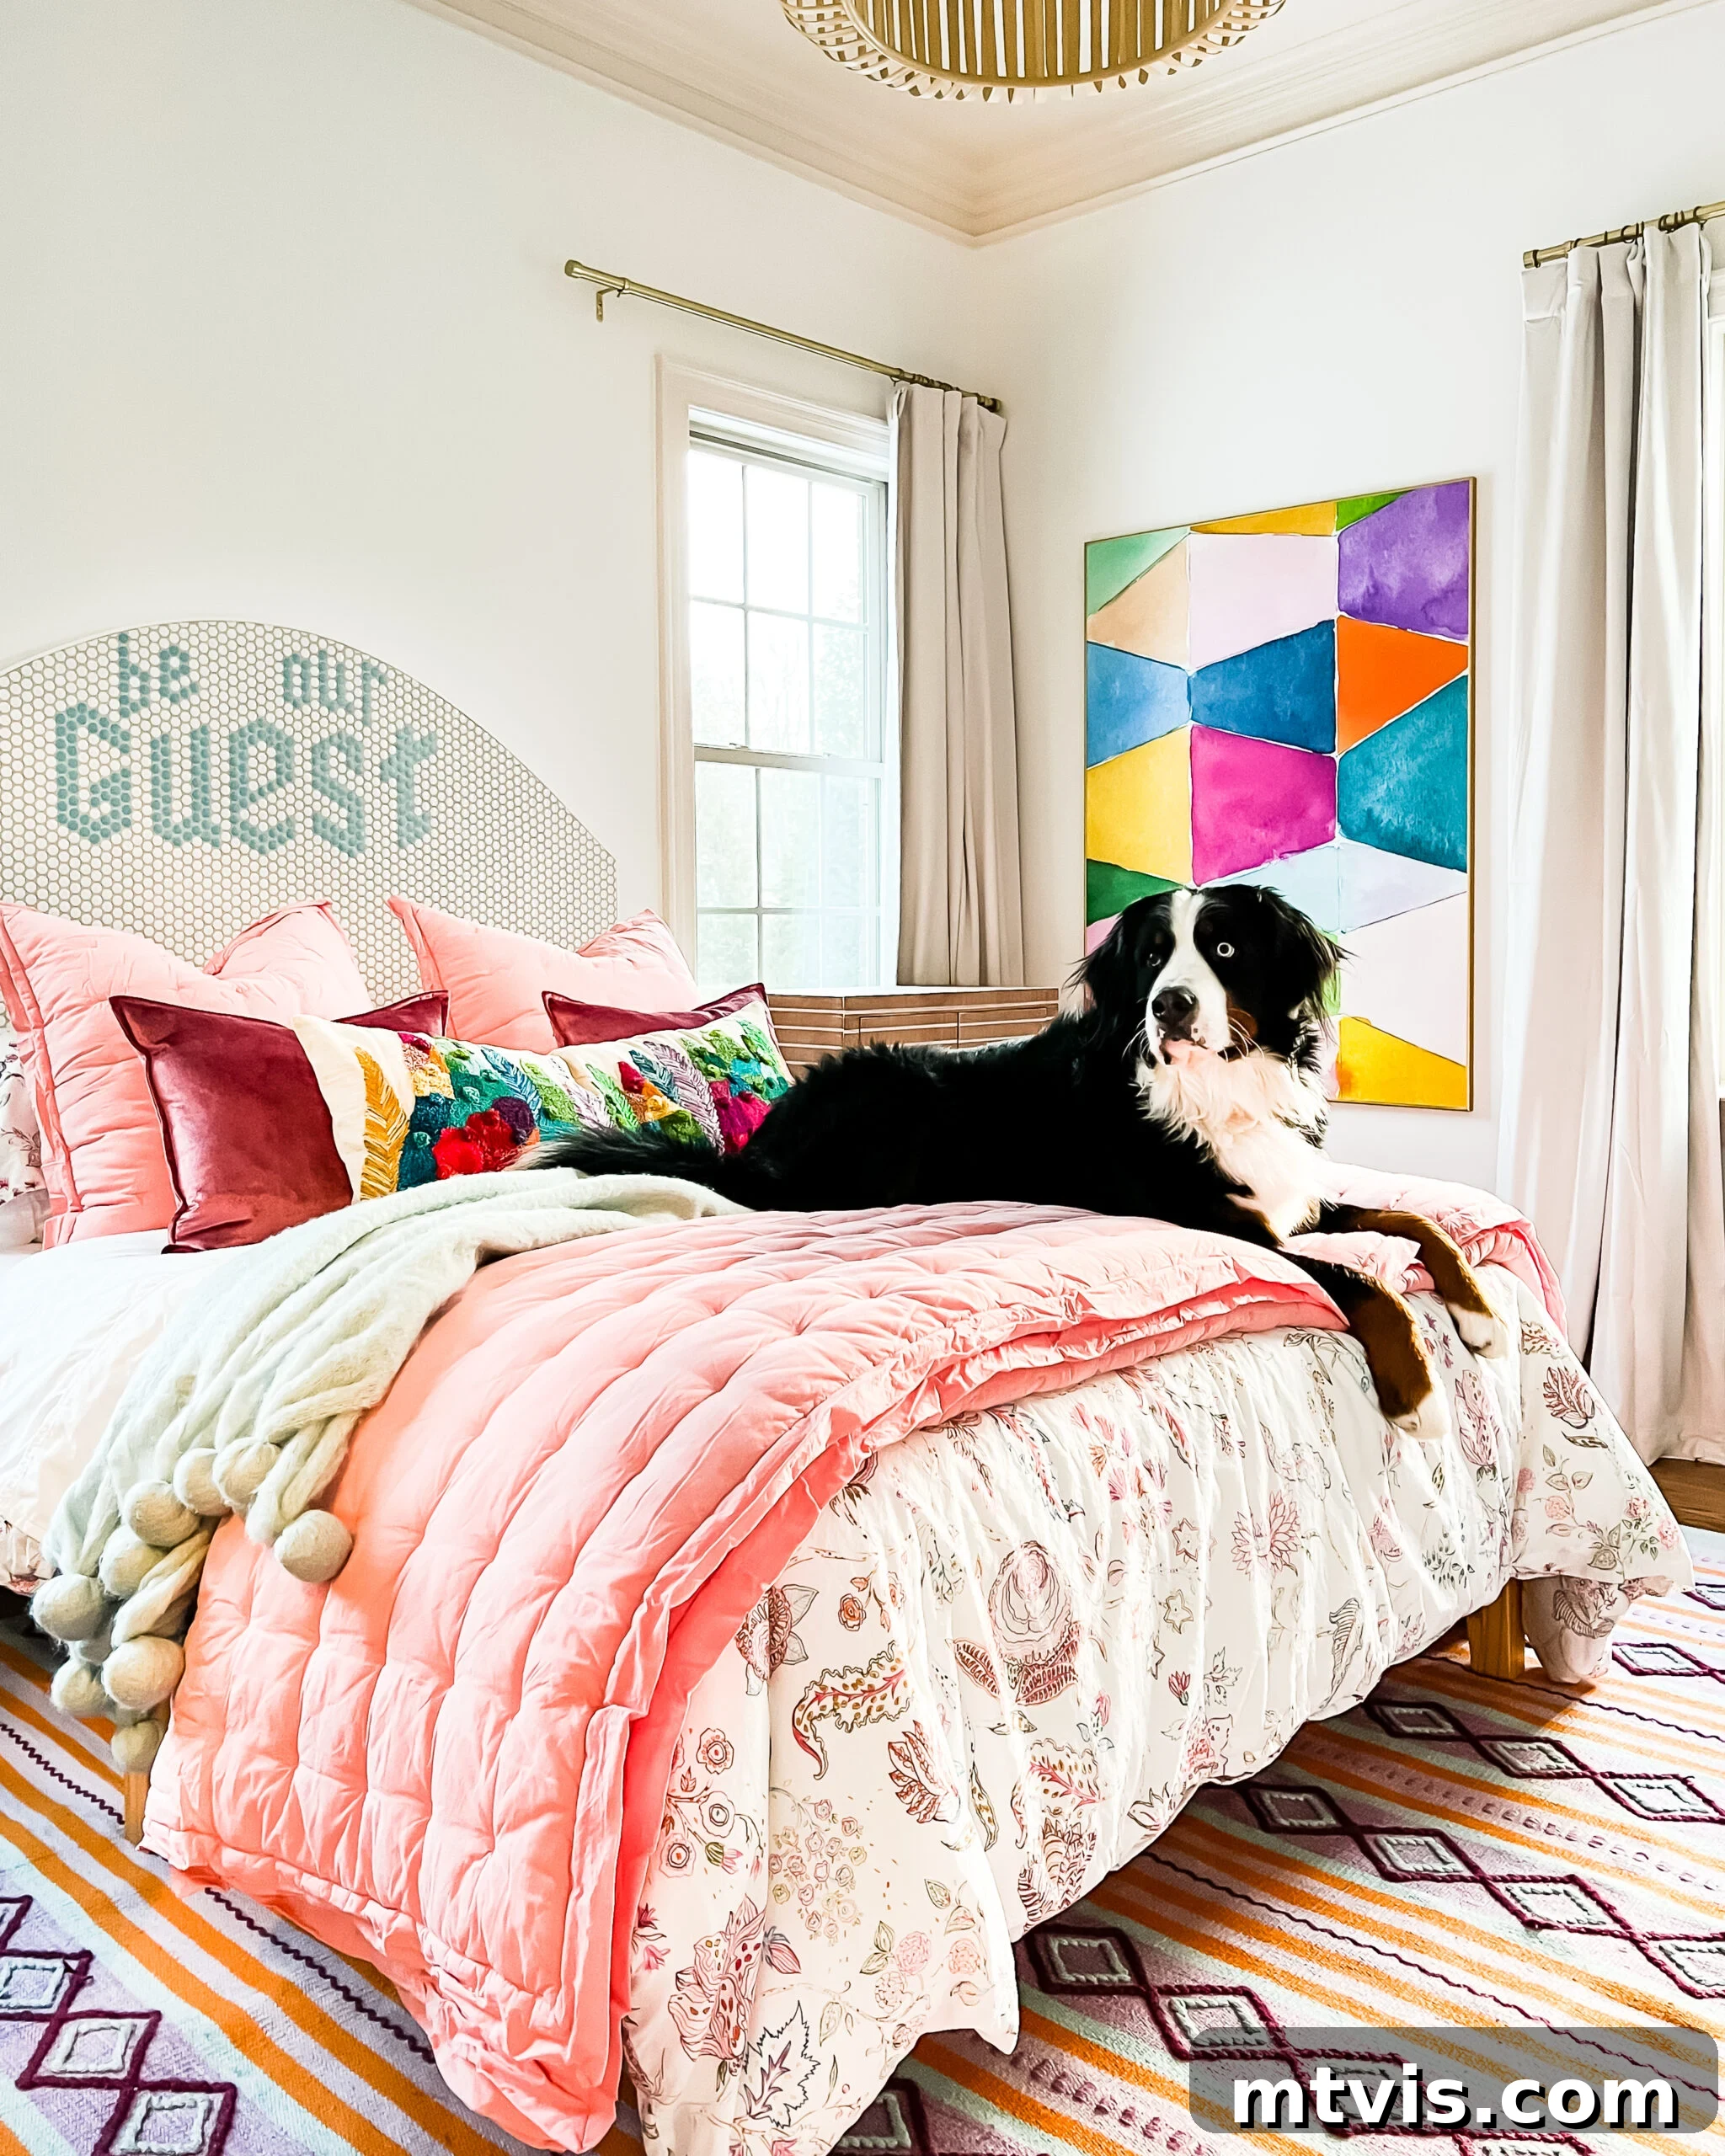
In smaller bedrooms, where the bed often serves as the dominant focal point, highlighting the openness beneath substantial pieces can trick the eye into perceiving less furniture. This technique means even small bedrooms can confidently incorporate vivid and bold colors, as the visible floor space around the base of the furniture prevents the room from feeling too enclosed. It’s all about creating visual flow and preventing solid blocks from segmenting the room’s floor plan.
Tip 3: Brighten Your Space with a Lighter Color Scheme
The psychology of color plays a pivotal role in how we perceive space. Dark colors, while often dramatic and cozy, absorb light and can make a room feel smaller and more enclosed. Conversely, lighter colors reflect light, pushing walls visually outwards and creating an expansive, airy atmosphere. The right paint color can initiate a dramatic transformation, making your small room feel significantly larger and more open.
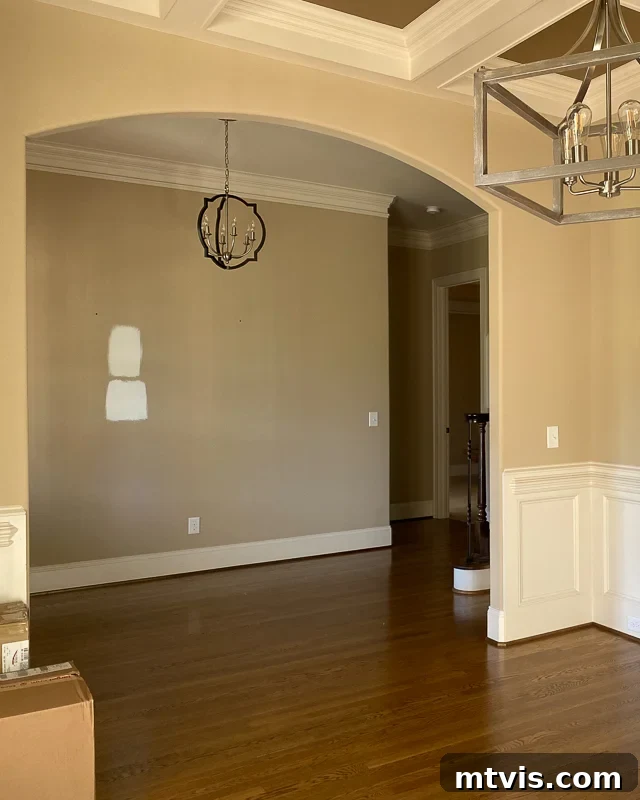
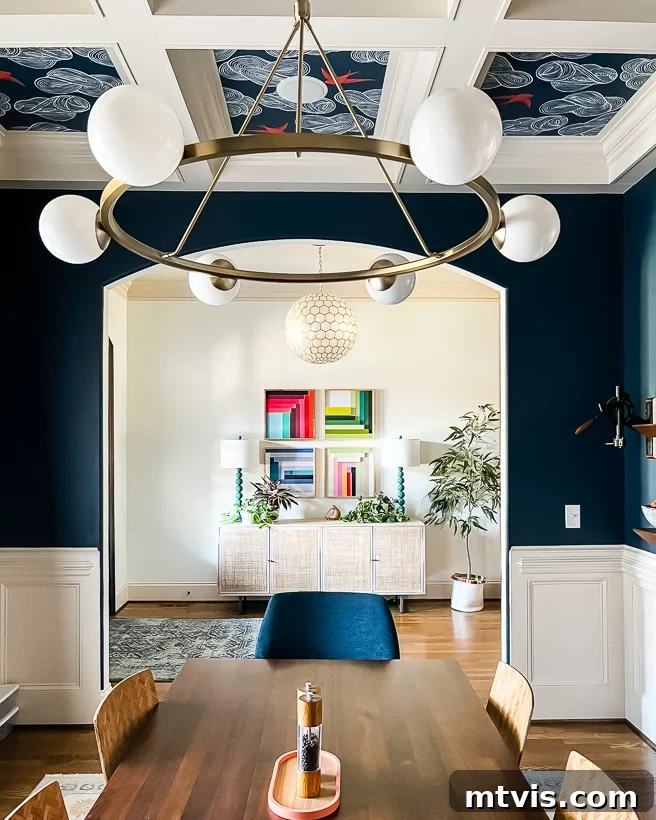
When we moved into our current home, the foyer featured medium beige walls. By repainting them a crisp white and incorporating vibrant, colorful artwork, the space immediately felt brighter, lighter, and more inviting. This stands in stark contrast to our dining room, where a deep navy hue creates a cozier, more intimate ambiance, precisely because dark colors tend to make spaces feel smaller. The key is to understand how different shades interact with light and choose accordingly for your desired effect.
Even in spaces completely devoid of natural light, like our old house’s powder room, a light color scheme can work wonders. Opting for a pale, cool color on the walls combined with effective artificial lighting made the tiny bathroom feel significantly larger and brighter. Light colors also make imperfections less noticeable, contributing to a clean and uncluttered feel. For small bathrooms or any confined area, a thoughtful application of a light and cool color palette is one of the easiest ways to boost the perception of space.
Tip 4: Strategically Introduce an Accent Wall for Depth and Interest
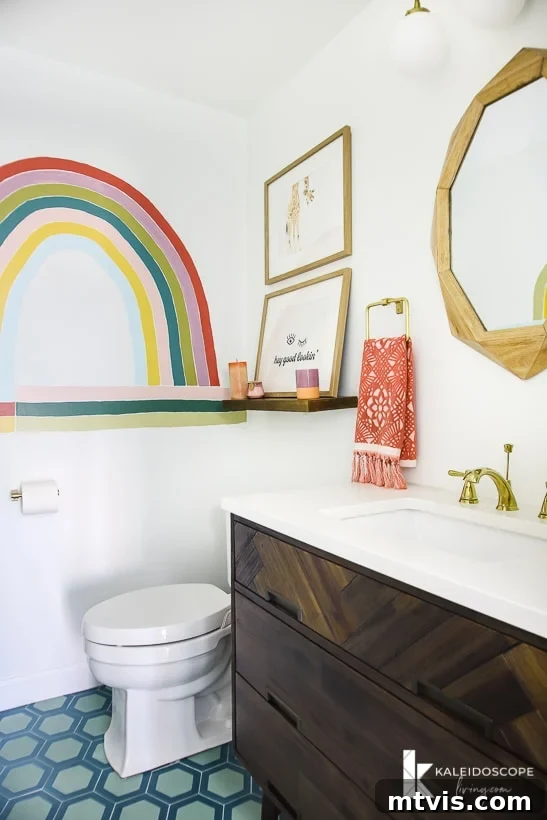
While many instinctively gravitate towards monochromatic schemes for small rooms to avoid “breaking up” the space, a well-executed accent wall can actually make a room feel larger and more dynamic. The key lies in creating a focal point that draws the eye, distracts from the room’s physical boundaries, and can even create an illusion of depth.
Accent walls work by providing visual interest, preventing a small room from feeling bland or box-like. Instead of making the room feel smaller, a feature wall can give it character and a sense of purpose. Consider Chelsea from Making Manzanita’s farmhouse bathroom renovation: she added a simple faux shiplap wall behind the toilet. This instantly gave the eye something engaging to focus on, redirecting attention from the bathroom’s modest dimensions. She also implemented other space-enhancing tricks, such as lightening the color scheme and choosing a slightly taller toilet, reinforcing the feeling of vertical space.
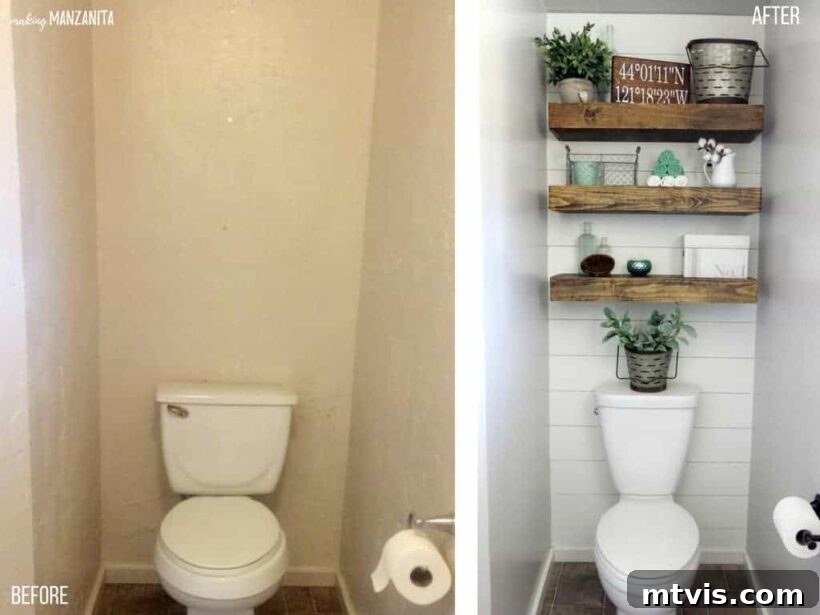
When designing an accent wall, consider patterns that offer depth, such as vertical stripes to emphasize height, or a wallpaper with a subtle landscape to create an illusion of distance. Even a bold color on one wall can serve as an effective focal point, making the room feel more intentional and less confined. Shelving on an accent wall can further enhance its purpose, adding both storage and visual layers that contribute to a larger feel.
Tip 5: Maximize Natural Light to Open Up Your Space
Natural light is a powerful design element, and maximizing its presence is crucial for making small rooms feel larger, brighter, and more inviting. Light not only illuminates but also connects indoor spaces with the outside world, instantly expanding perception. While adding skylights, as we did in our old primary bedroom, offers incredible natural light, it’s not always a feasible or budget-friendly option for everyone. Fortunately, there are many simpler ways to enhance the natural light in your home.
One of the easiest and most impactful changes is to remove heavy, dated window treatments like thick blinds or shutters. Opt for sheer curtains or go completely bare if privacy allows. This immediately allows more daylight to flood the room, instantly making it feel more open. Just observe the remarkable difference removing the old blinds made in our old laundry room. Combined with fresh white paint on the walls and a lighter floor color, the effect was transformative, turning a once dark and cramped space into a cheerful and expansive one.
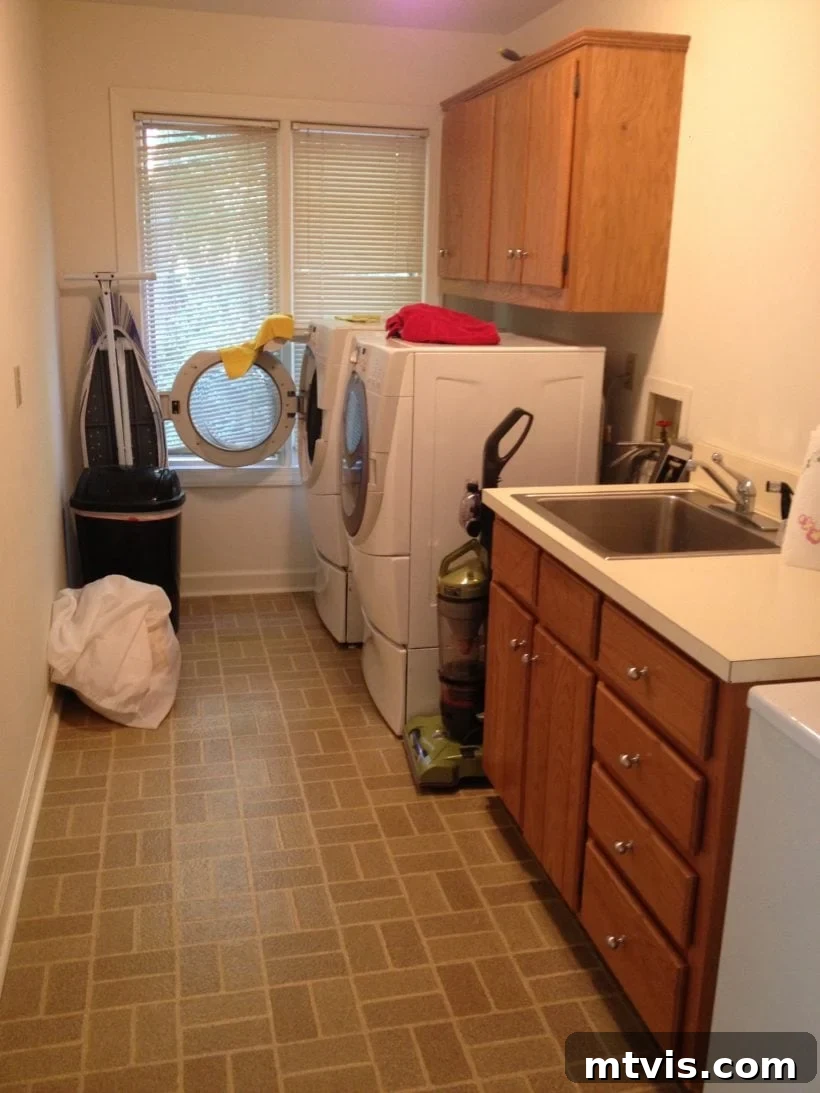
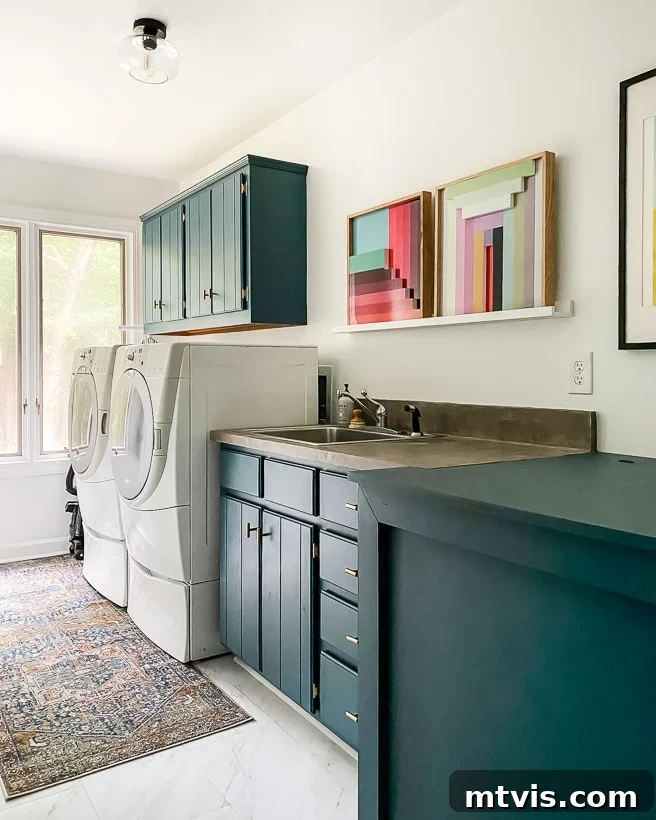
Other methods include keeping window panes sparkling clean, avoiding placing large furniture directly in front of windows, and using reflective surfaces like mirrors or glossy finishes opposite light sources to bounce light deeper into the room. Even the choice of light fixtures can play a role; opting for bright, diffused lighting can mimic natural daylight when the real thing is scarce. Embracing natural light is fundamental to making small spaces feel larger and more inviting.
Tip 6: Decorate with Large-Scale Art or a Wall Mural to Add Depth
Contrary to popular belief, filling a small room with numerous small pieces of artwork can actually make it feel more cluttered and, consequently, smaller. Instead, embrace the power of large-scale art or a captivating wall mural. These “statement pieces” act as a single, powerful focal point, reducing visual clutter and drawing the eye into a deeper perspective.
Large art creates a sense of scale, preventing the walls from feeling busy with many tiny details. When the eye has one compelling image to focus on, the boundaries of the room seem to recede. You can see this effect in Avery’s small bedroom, where a couple of generously sized art pieces make the room appear more substantial. This technique works by giving the room a specific visual anchor, which in turn makes the overall space feel more intentional and expansive.
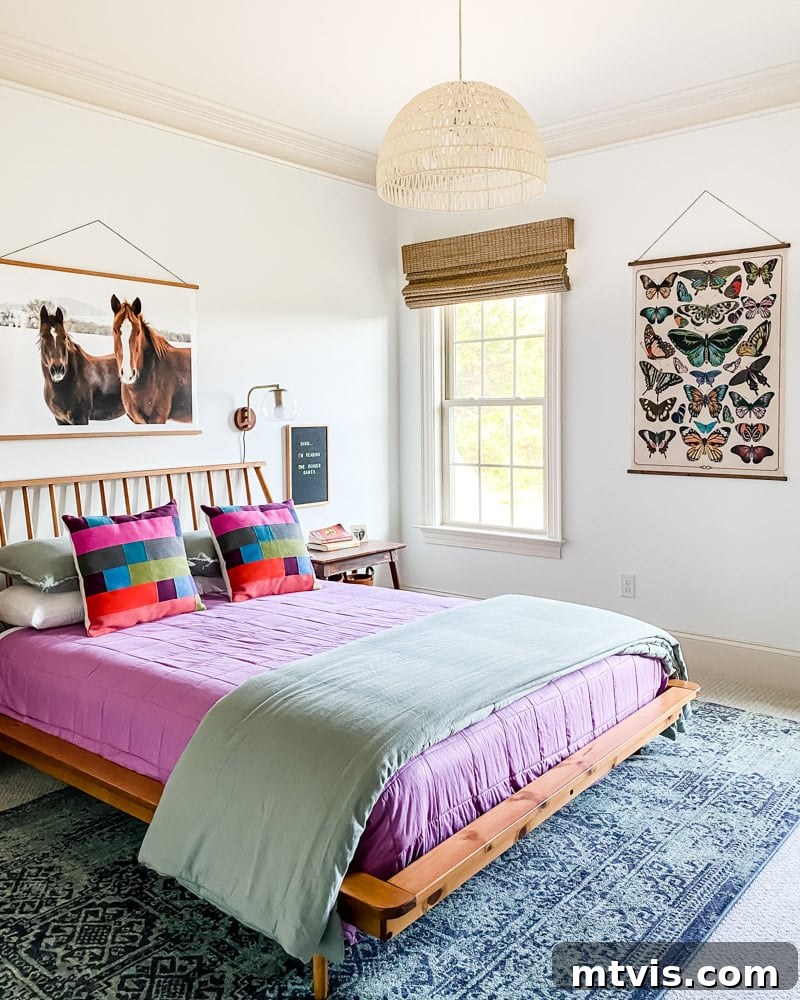
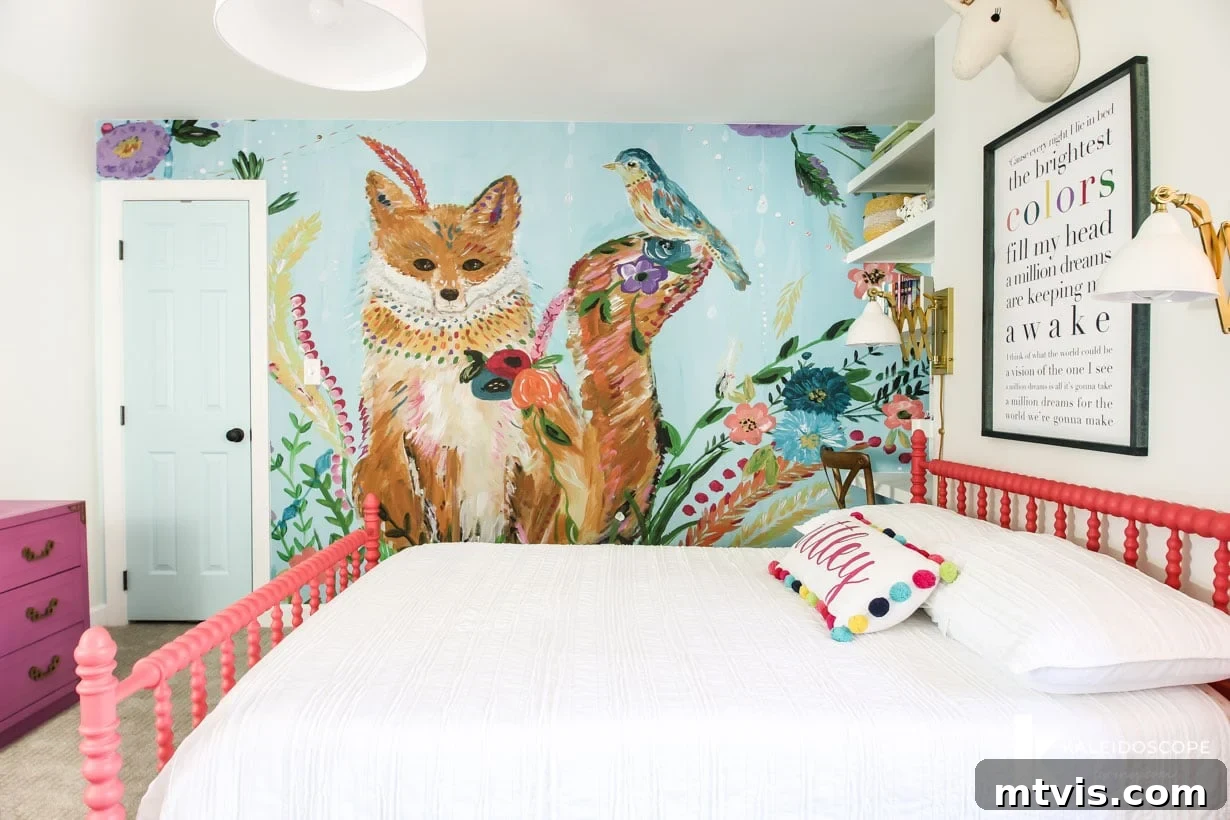
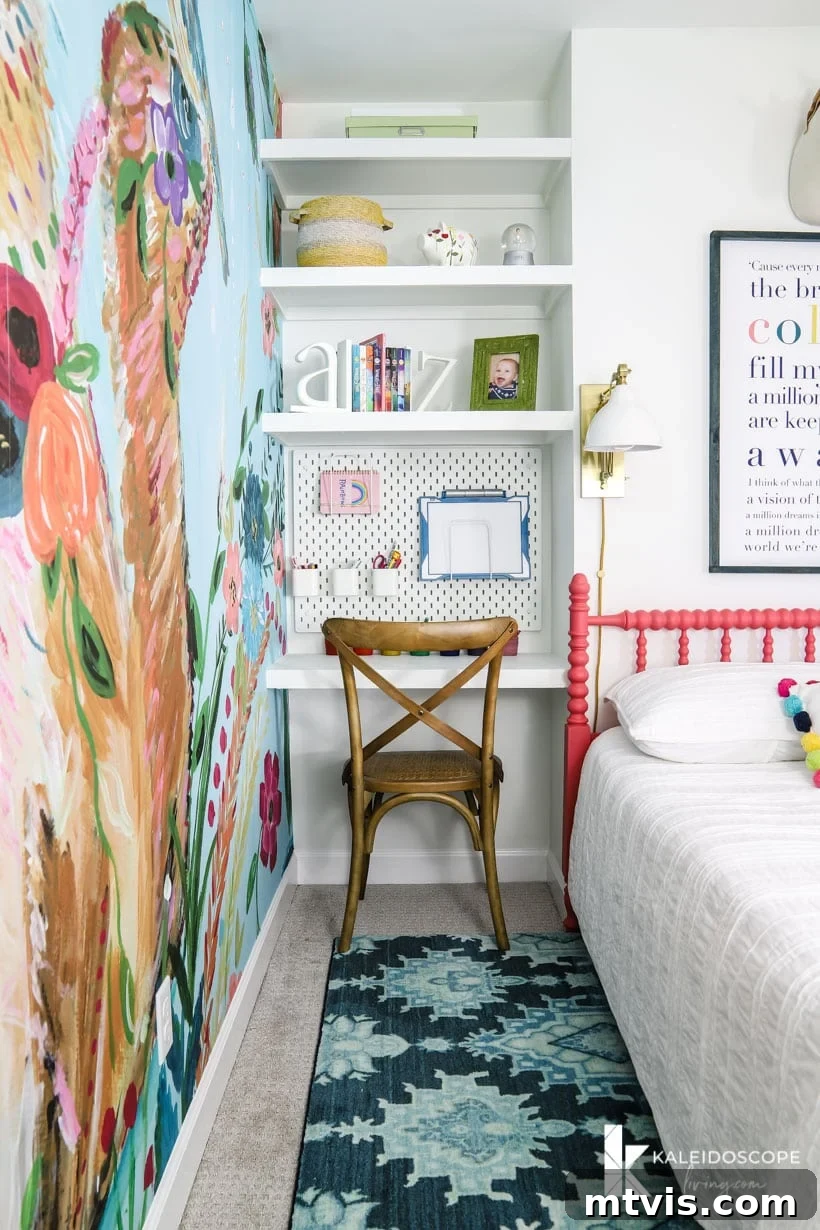
Wall murals offer an even more immersive way to expand a small room. In Attley’s former bedroom in our old house, a captivating mural made the space feel dramatically larger. This is likely because the mural’s design and colors flowed seamlessly from floor to ceiling, creating an uninterrupted visual plane. A mural can transport you to another scene, adding immense personality and a sense of extended space, particularly if it features a landscape or a perspective that creates depth. It’s a bold yet highly effective method to infuse visual ‘oomph’ and make a small room feel grander.
Tip 7: Harness the Reflective Power of Mirrors
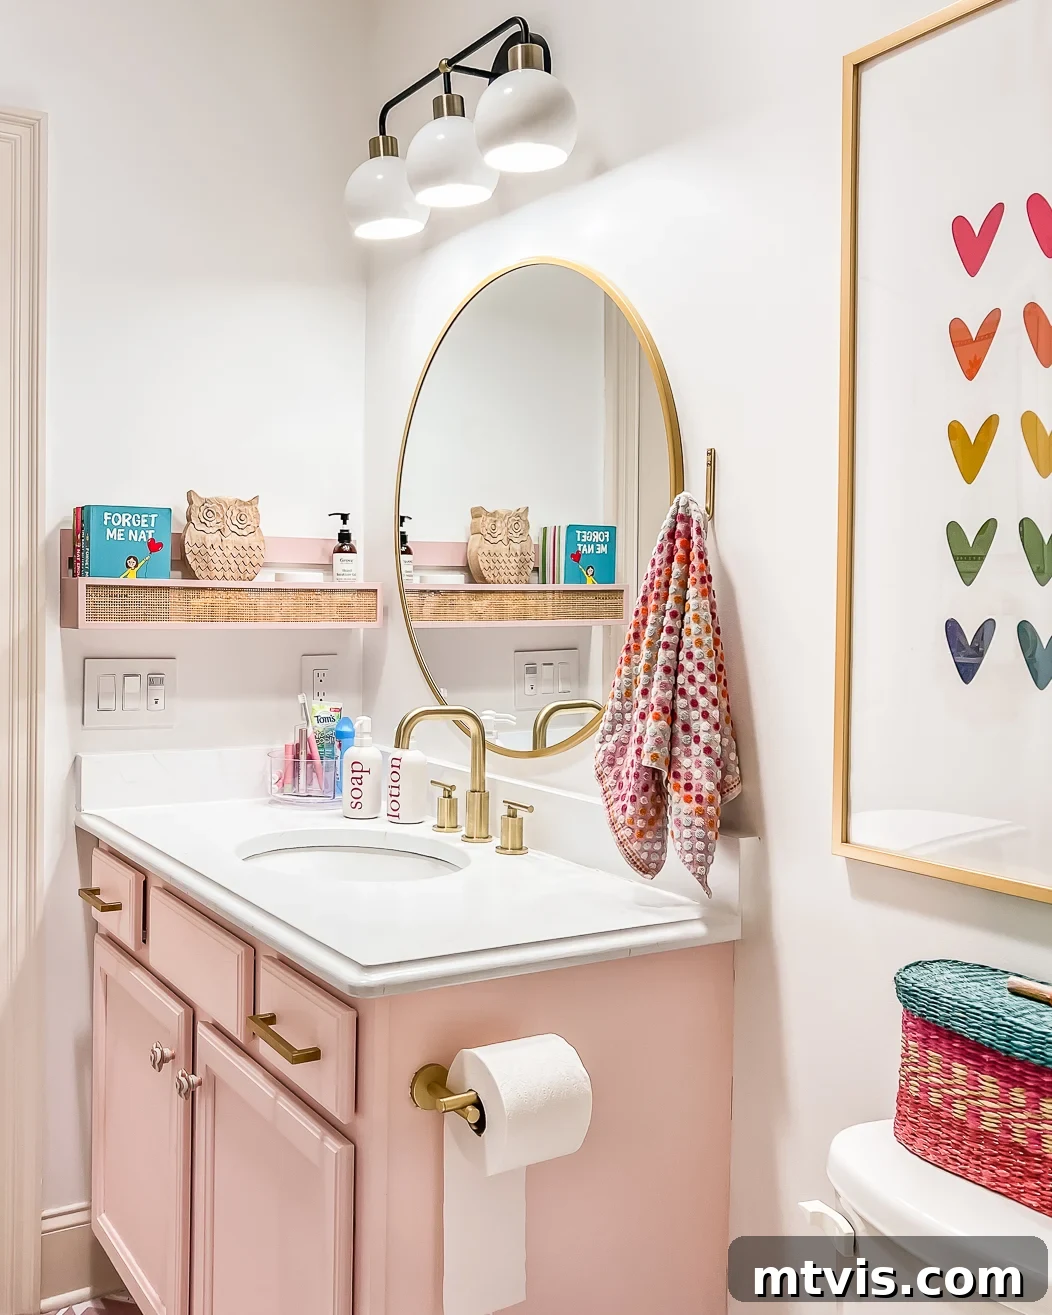
Mirrors are a classic and highly effective tool for making any room feel larger, a trick interior designers have relied on for centuries. Their power lies in their ability to reflect light and create an illusion of depth, essentially tricking the eye into believing there’s more space than there actually is. By bouncing both natural and artificial light around a room, mirrors instantly boost brightness and energy, making a small living room appear ample or alleviating the perception of limited space.
To maximize their effect, strategically place mirrors where they can reflect something interesting or beautiful – an accent wall, a window with a pleasant view, or a piece of art. A large mirror positioned opposite a window can double the amount of natural light entering the room, making it feel twice as bright and connected to the outdoors. Beyond their aesthetic appeal, mirrors offer practical functionality, making them invaluable additions to bathrooms, bedrooms, or entryways where a quick check of your appearance is often needed. Opt for large, frameless mirrors for a clean, modern look, or choose a statement mirror with an intricate frame to add character while still enjoying its reflective benefits.
Tip 8: Integrate Smart Storage Solutions to Minimize Clutter
One of the quickest ways to make a small room feel cramped and uninviting is through clutter. When surfaces are overflowing and items are left exposed, the room visually shrinks. This is where smart storage comes into play. Ingenious storage solutions, especially those that provide ample space without occupying precious floor area, are paramount for maximizing the perceived size of any small room.
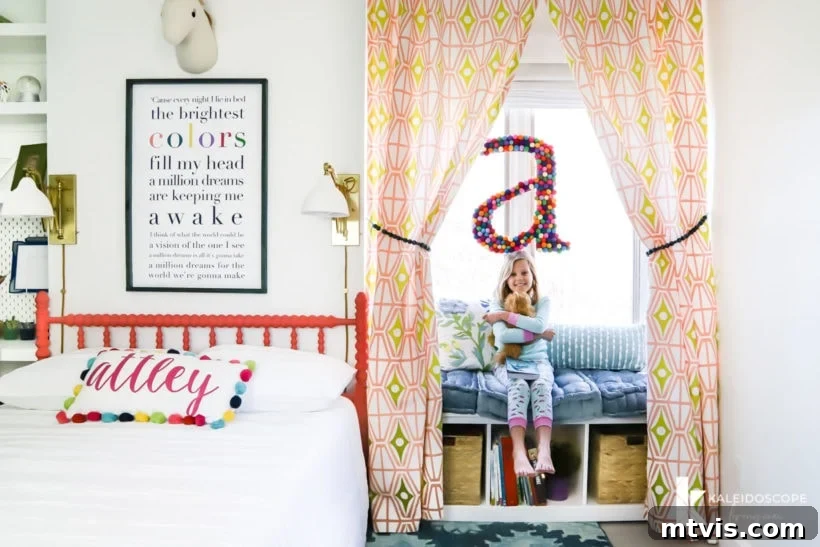
Traditional, bulky storage units can often break up a space and add visual weight. The goal is to integrate storage seamlessly, making it feel like a natural part of the room’s architecture. Built-in storage, or pieces that give the illusion of being built-in, are particularly effective as they create clean lines and unobstructed pathways. In Attley’s old room, we installed a window seat with integrated storage, providing a cozy nook and ample space for books and toys without consuming additional floor space. Other innovative ideas include utilizing the back of doors for vertical storage, designing a full wall of craft room storage that doubles as a feature, or incorporating benches with hidden compartments for games and blankets.
When everything has its designated place and is neatly tucked away, the room automatically feels more organized, serene, and spacious. Smart storage doesn’t just manage clutter; it contributes significantly to the overall aesthetic and functionality of a small home, making it feel larger and more welcoming.
Tip 9: Utilize Vertical Space to Maximize Functionality and Floor Space
In a small room, floor space is a precious commodity. The most effective way to combat this limitation is by looking up and strategically utilizing vertical space. Instead of crowding the floor with furniture, think about drawing the eye upwards and employing as many vertical solutions as possible. This approach not only frees up valuable real estate but also makes the room feel taller and more expansive, reinforcing the visual tricks from our first tip about high-hung curtains.
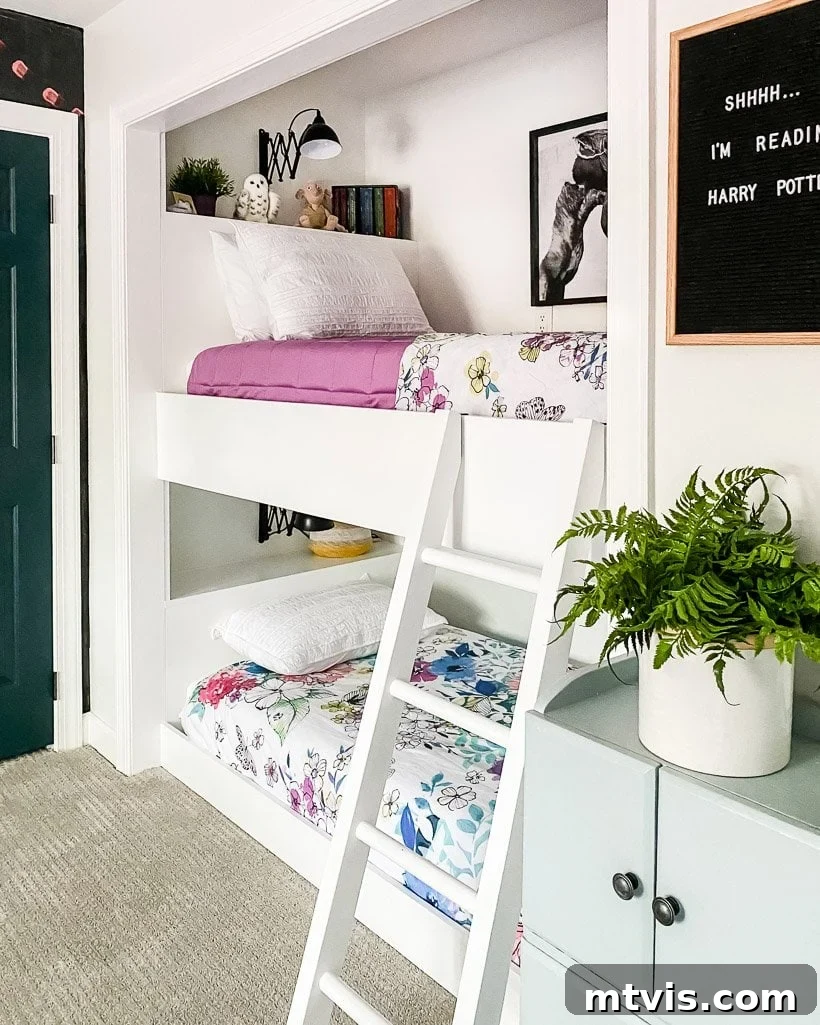
Built-in furniture is an excellent example of this. In Avery’s old room, which was a small bedroom but had two closets, we transformed one of the closets into built-in bunk beds. These bunk beds not only freed up a significant amount of floor space, allowing for more play area, but also incorporated integrated storage for books and stuffed animals – a double bonus. This creative use of existing architectural features turned a potential challenge into a highly efficient and visually appealing solution.
Similarly, in Attley’s old room, a peculiar, useless niche created by a fireplace chimney was transformed into a highly functional area by building in a desk and floating shelves. This maximized an otherwise wasted space, providing both a workstation and storage without encroaching on the main room. Other vertical solutions include tall, narrow bookshelves, wall-mounted desks, floating cabinets, and even vertical gardens. By extending your design vertically, you efficiently use the entire volume of the room, creating an optical illusion of greater size and an overall more organized and functional living environment.
Whether you’re contending with a tiny apartment or simply looking to enhance a compact corner of a larger home, these design principles offer practical and effective ways to make a small room look bigger. By applying these design goals, you’ll be amazed at how quickly and dramatically your spaces can transform, feeling more spacious, open, and inviting than ever before. Embrace these tips, and unlock the full potential of every room in your home!
For more insights into transforming your rooms and spaces, consider exploring proven design methodologies.
Stay tuned for more expert interior design tips and behind-the-scenes content!