
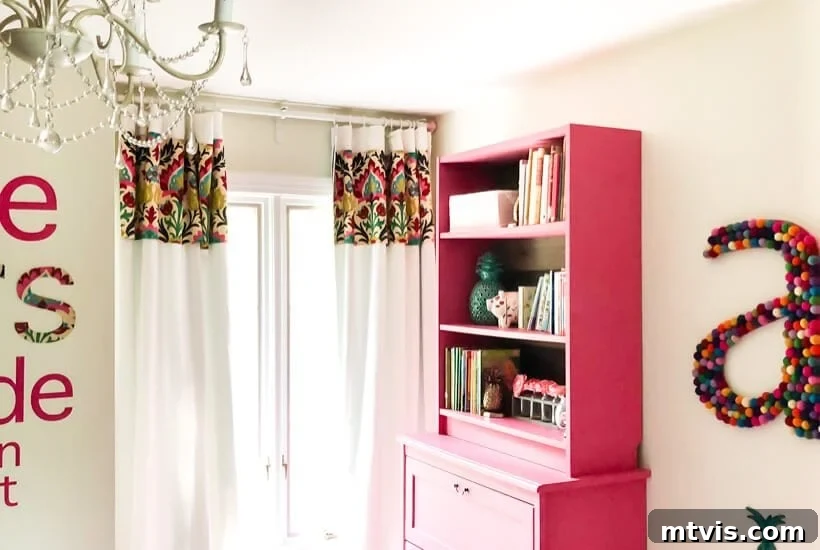
Transform Your Windows: The Ultimate Guide to No-Sew Custom Curtains
Dreaming of custom window treatments that perfectly complement your home décor without the hefty price tag or the need for a sewing machine? You’ve come to the right place! This comprehensive, step-by-step tutorial reveals the secret to crafting stunning, personalized curtains the easy, no-sew way. Say goodbye to complex patterns and tedious stitches; this “lazy” method delivers high-end custom looks with minimal effort and maximum savings. Whether you’re a seasoned DIY enthusiast or a complete beginner, you’ll discover how simple it is to elevate any room with unique, bespoke curtains.
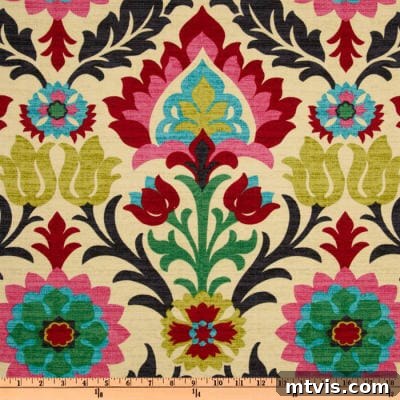
For years, I’ve openly admitted my aversion to sewing. While I can manage basic projects like simple curtain panels, a DIY bed canopy, or even duvet covers, given the choice, I’ll always opt for a no-sew alternative. This preference became even stronger when I stumbled upon a truly captivating fabric – the Waverly Santa Maria Desert Flower, which was absolutely perfect for Attley’s room. As much as I adored it, two immediate thoughts came to mind: first, purchasing enough of this beautiful fabric for full curtain panels would be exorbitantly expensive, and second, the thought of sewing entire panels was simply daunting. I needed an ingenious solution that allowed me to incorporate this gorgeous pattern without breaking the bank or spending hours at the sewing machine.
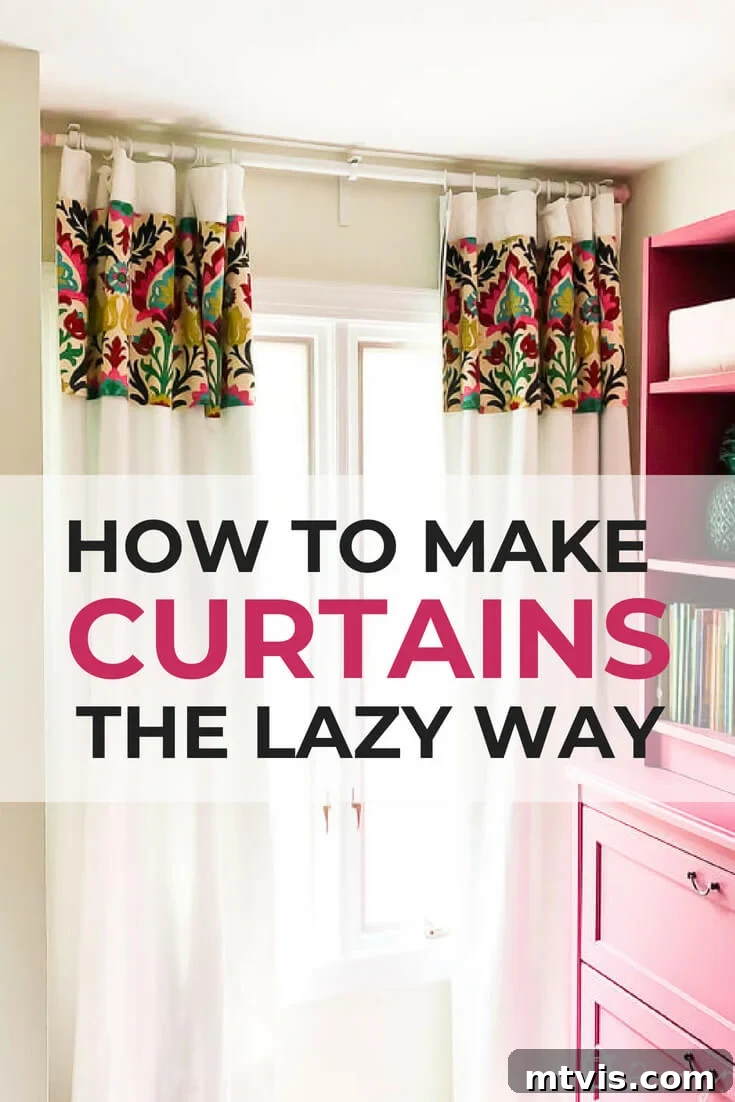
This challenge led me to develop a brilliant, truly lazy method for making DIY curtains that requires absolutely no sewing. The result? Custom-look curtains that are budget-friendly, effortless to create, and perfectly tailored to your style. Get ready to transform your windows and impress everyone with your DIY prowess – all without threading a single needle!
The Art of Effortless Customization: Why No-Sew Curtains Are a Game-Changer
The allure of custom curtains is undeniable. They add personality, warmth, and a polished finish to any space, but their cost can be prohibitive. Professional custom window treatments often run into hundreds, if not thousands, of dollars. For many, the only alternative is to sew them yourself, a task that comes with its own set of challenges. Sewing requires specific skills, specialized equipment (a sewing machine, threads, notions), and a significant time investment. For those of us who lack the time, the skill, or simply the desire to sew, traditional DIY curtains seem out of reach. This is precisely where the no-sew method shines as a revolutionary solution.
Utilizing iron-on hem tape, this technique empowers anyone to create custom-looking curtains. It’s an accessible, affordable, and incredibly satisfying way to achieve a designer aesthetic. By adding an accent strip of fabric to ready-made curtain panels, you get the benefit of a personalized touch without the complexity of constructing full panels from scratch. This not only saves money on expensive fabrics – you only need a small amount for the accent – but also significantly reduces the time and effort involved. It’s the perfect project for beginners and busy individuals alike, proving that sophisticated home décor doesn’t have to be complicated or costly.
Gather Your Essentials: Materials for Your No-Sew Curtain Project
Before diving into the creative process, gathering all your materials is crucial. This ensures a smooth, uninterrupted crafting experience. Here’s what you’ll need, along with some tips for making the best selections:
Materials Needed:
- Accent Fabric of Your Choice: This is where you infuse your personality! I used the Waverly Santa Maria Desert Flower fabric, which offered a vibrant pattern. When choosing, consider the overall color scheme of your room and the texture of the fabric. Heavy-duty upholstery fabrics might be harder to iron smoothly, while lighter cotton or linen blends work beautifully.
- Quantity: The amount of accent fabric you’ll need depends on several factors: the dimensions of your curtain panels, your desired thickness for the accent strip, and the width of the fabric you purchase. As a general guide, I found that 1 yard of fabric was sufficient for my project, creating a 12-inch thick accent strip for two panels. Always measure your window and plan your strip dimensions before buying. It’s always better to have a little extra than not enough.
- Premade Curtain Panels: These serve as the foundation of your custom curtains. Look for panels that are the appropriate length and width for your windows. Consider the fabric type – blackout for bedrooms, sheer for diffused light, or a standard cotton blend for everyday use. The color of your base panels should complement or contrast beautifully with your chosen accent fabric. I used these panels, which were 57 inches wide and 108 inches long, offering ample coverage.
- Iron-on Hem Tape: This is the magical ingredient for our no-sew project! Ensure you choose a high-quality, permanent hem tape that is washable. Different brands have varying instructions, so always read the packaging. This type of hem tape is widely available and effective.
- Iron: A good quality iron is essential for crisp hems and strong bonds.
- Ironing Board: Provides a stable, heat-resistant surface for working with your fabric.
- Sharp Scissors: Precision is key for clean, straight cuts, especially for your accent fabric. Fabric shears are recommended for best results.
- Measuring Tape or Ruler: For accurate measurements of your fabric and placement of your accent strips.
With these materials at hand, you’re well-equipped to embark on your no-sew curtain creation journey. Let’s move on to the exciting part – the step-by-step instructions!
Step-by-Step Guide: Crafting Your No-Sew Custom Curtains
This process is surprisingly straightforward, transforming ordinary curtain panels into extraordinary window treatments. Follow these detailed steps to achieve professional-looking results without a single stitch.
Steps:
1) Prepare Your Premade Curtain Panels: Ironing for Perfection
Start by laying your premade curtain panels flat on your ironing board. Thoroughly iron them to remove any creases or wrinkles. This step is crucial for achieving a smooth, professional finish for your final curtains. My panels measured 57 inches wide and 108 inches long; if your panels are too long for your windows, you can easily hem them to the desired length using the iron-on hem tape at this stage. A neatly pressed panel provides a clean canvas for your accent fabric.
2) Measure and Cut Your Accent Fabric Strips
Decide on the desired finished thickness of your accent fabric strip. For a bold statement, I opted for a 12-inch thick strip. To account for the 1-inch folds on the top and bottom edges (which we’ll create in the next step), you need to cut two strips of fabric that are 2 inches thicker than your desired finished measurement. So, for a 12-inch finished strip, cut your fabric strips 14 inches thick. The length of your strips should match the width of your curtain panels, or be slightly shorter if you plan to center them as I did. Once cut, iron both accent strips thoroughly to ensure they are smooth and free of any wrinkles, just like your main panels.
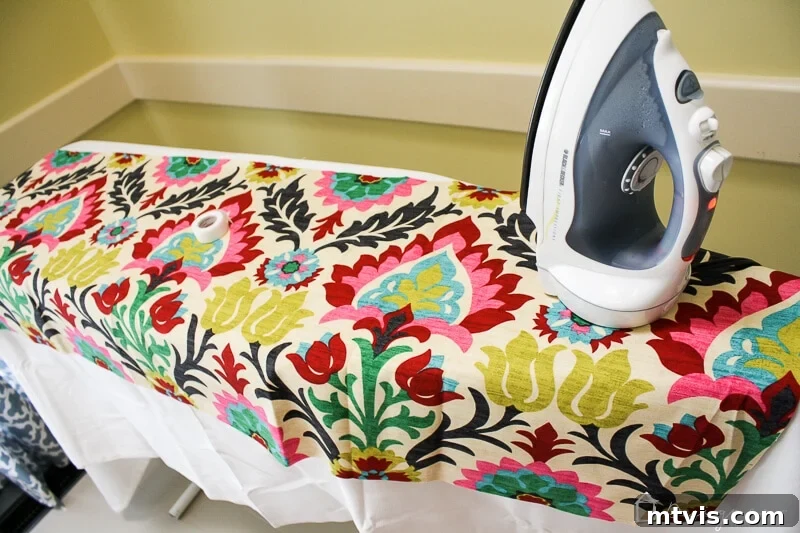
3) Hem the Top and Bottom Edges of Your Accent Strips
Take one of your accent fabric strips. Along both the top and bottom long edges, fold the fabric over by approximately 1 inch. Press these folds firmly with your iron to create crisp, defined creases. This initial fold ensures a clean, finished edge for your accent strip, mimicking a sewn hem without the need for a machine.
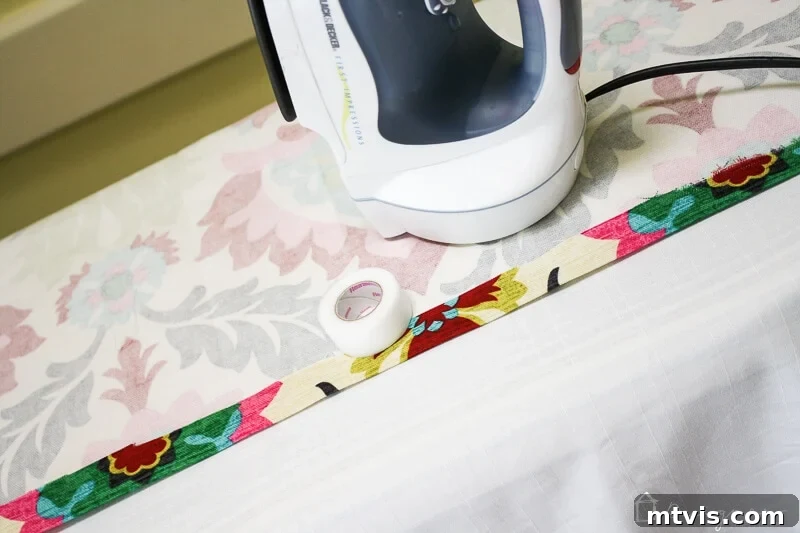
4) Secure Hems with Iron-On Hem Tape
Now, carefully position a strip of iron-on hem tape directly underneath each of the 1-inch folds you just created. Ensure the tape is fully tucked into the fold. Following the specific instructions on your hem tape packaging (as activation times and temperatures can vary by brand), press firmly with your hot iron. This heat-activates the adhesive, permanently securing the fold in place. Repeat this process for both the top and bottom long edges of your accent strip. For a fully finished look, repeat this step for the shorter side edges of your fabric strip as well. By folding and adhering all four edges, you create a beautifully neat and durable accent piece, as shown in the images below.
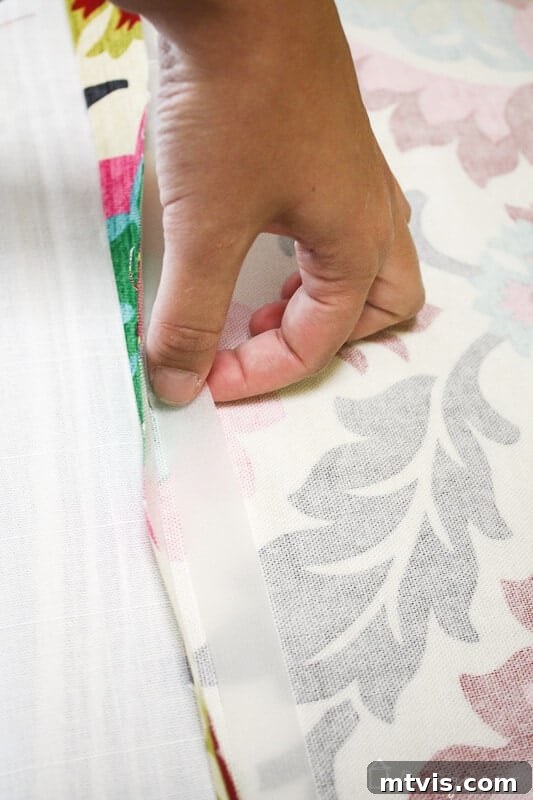
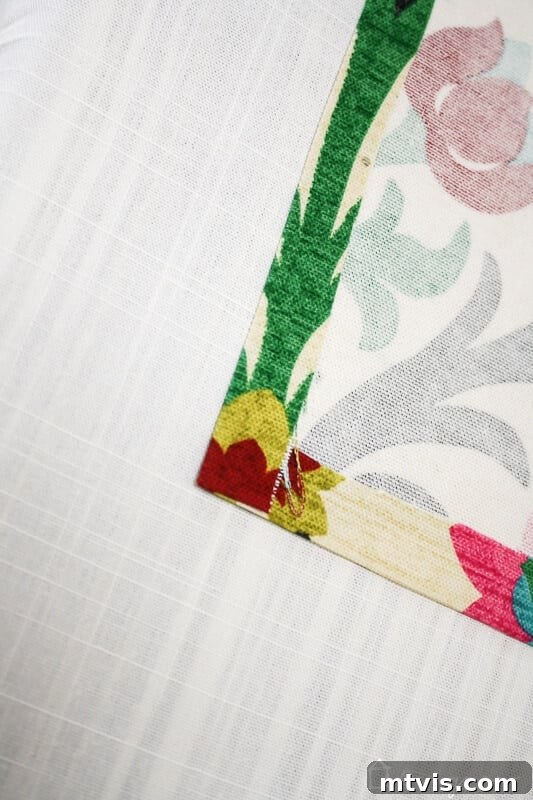
5) Position and Adhere the Accent Strip to Your Curtain Panel
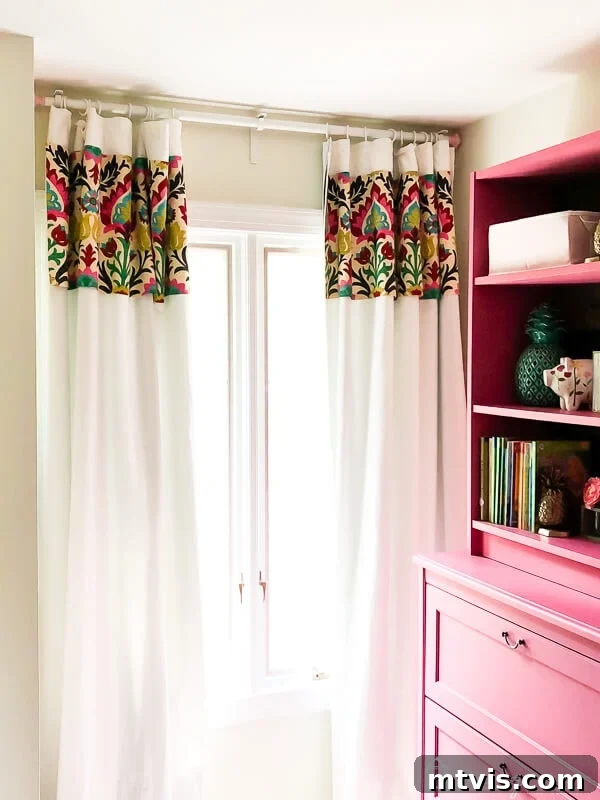
Lay one of your premade curtain panels flat again. Decide precisely where you want to position your accent strip. A popular and aesthetically pleasing placement is just below the curtain rod pocket at the top of each panel. Carefully place your prepared fabric strip right side up onto the curtain panel at your chosen location. Ensure it is straight and evenly aligned. Because my accent fabric (my fabric was 54 inches wide) was slightly narrower than my curtain panels (which were 57 inches wide), I opted to center the accent strip on each panel. This creates a subtle border on either side, which is hardly noticeable once the curtains are hung and adds to the custom feel.
Once you’re satisfied with the placement, lift the edges of your accent strip and strategically place strips of iron-on hem tape underneath all four edges of the fabric strip where it meets the curtain panel. Press firmly with your iron, following the hem tape’s instructions, to create a strong, permanent bond. Take your time to ensure all edges are securely adhered for a seamless finish. This final step brings your custom creation to life!
Enjoying Your Beautiful, Budget-Friendly Custom Curtains
And just like that, you’ve created beautiful, custom-look curtains the no-sew, lazy way! I told you it was simple, and I wasn’t kidding. Not only is this method incredibly easy, but it’s also remarkably cost-effective. Imagine the hundreds of dollars you would have spent on professionally made custom curtain panels. This DIY project, by contrast, came in at a fraction of that cost – typically around $50, depending on your fabric choices. The satisfaction of creating something so elegant and personalized for your home, without the stress or expense, is truly unparalleled.
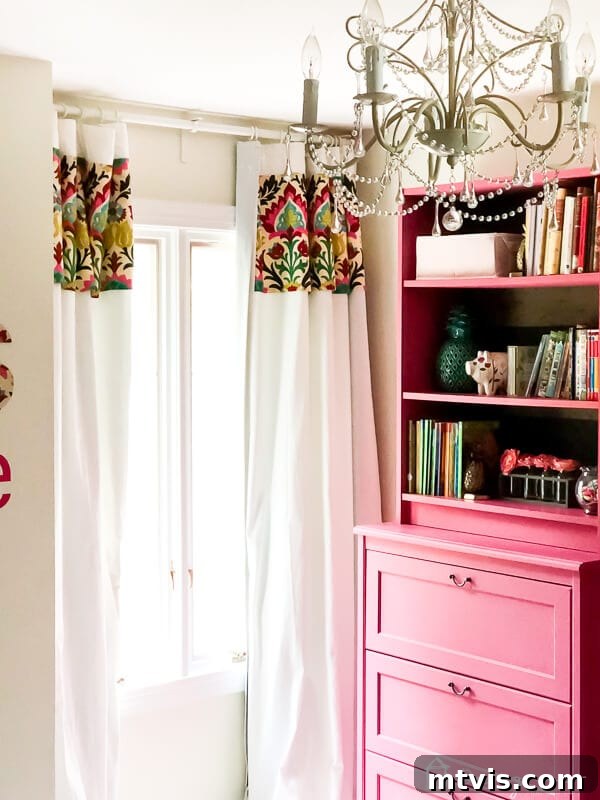
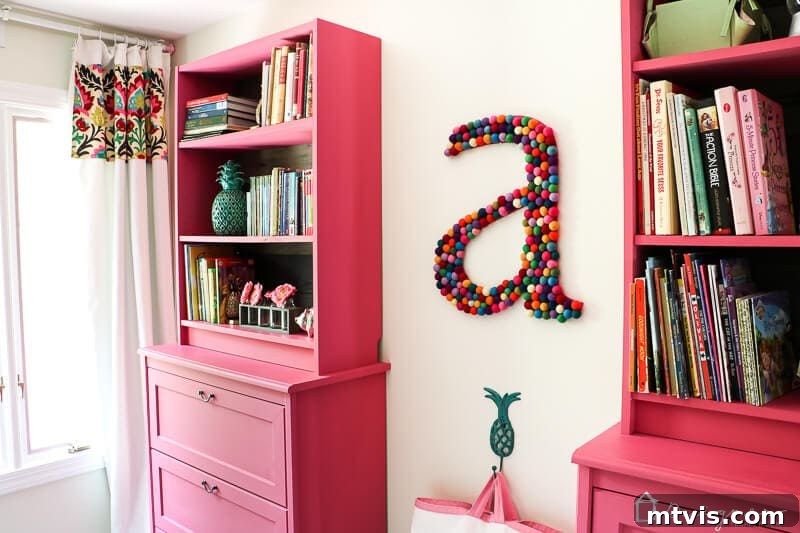
The transformation in Attley’s room was immediate and impactful. She loves the vibrant pattern, I adore the custom look and the savings, and Joe is happy that it didn’t cost a fortune. It’s a win-win-win! These curtains not only add a splash of color and design but also create a focal point that enhances the room’s overall aesthetic. Take a look at how wonderfully they turned out:
Beyond the Basic Strip: Tips for Further Customization
While a single accent strip offers a sophisticated custom look, this no-sew method opens up a world of possibilities for further personalization:
- Varying Strip Thickness: Experiment with different widths for your accent strips. A thinner strip might offer a subtle pop of color, while a wider strip creates a bolder statement.
- Multiple Strips: Why stop at one? Consider adding two or even three narrower accent strips, spaced creatively on your curtain panel, for a unique banded effect.
- Adding Embellishments: Once your accent strip is securely in place, you can further enhance your curtains with no-sew embellishments. Think decorative trims, pom-poms, or fringe. These can be attached using strong fabric glue or another layer of hem tape.
- Layering Fabrics: Instead of a single accent strip, you could layer two different fabrics for an even more dynamic look, ensuring the edges of both are neatly hemmed with tape.
- Choosing Different Panel Styles: This technique works with various premade curtain panel header styles – rod pocket, grommet, back tab, or even clip-ring curtains. The placement of your accent strip can be adapted to best suit the panel’s design.
- Coordinating Accessories: Use leftover accent fabric to create matching pillow covers, decorative ties, or even a table runner to tie the entire room together.
This tutorial provides the foundation, but your creativity is the only limit! With a little imagination, your no-sew curtains can truly reflect your personal style and transform your living spaces.
Final Thoughts: Unleash Your Inner Designer
Creating custom window treatments doesn’t have to be a daunting or expensive endeavor. This no-sew, “lazy” method is proof that with a few simple materials and a clear guide, anyone can achieve high-end results. You’ve learned how to craft personalized curtains that not only look fantastic but also fit your budget and your schedule.
If you’re inspired by this idea and ready to give your windows a fresh, custom look, be sure to save this tutorial to Pinterest for easy reference. And before you go, explore some of my other popular DIY posts and grab one of my free design guides to continue your journey of transforming your home, one beautiful project at a time. Happy crafting!