
Thank you to DAP Products for sponsoring this post. All opinions are 100% my own based on personal experience.
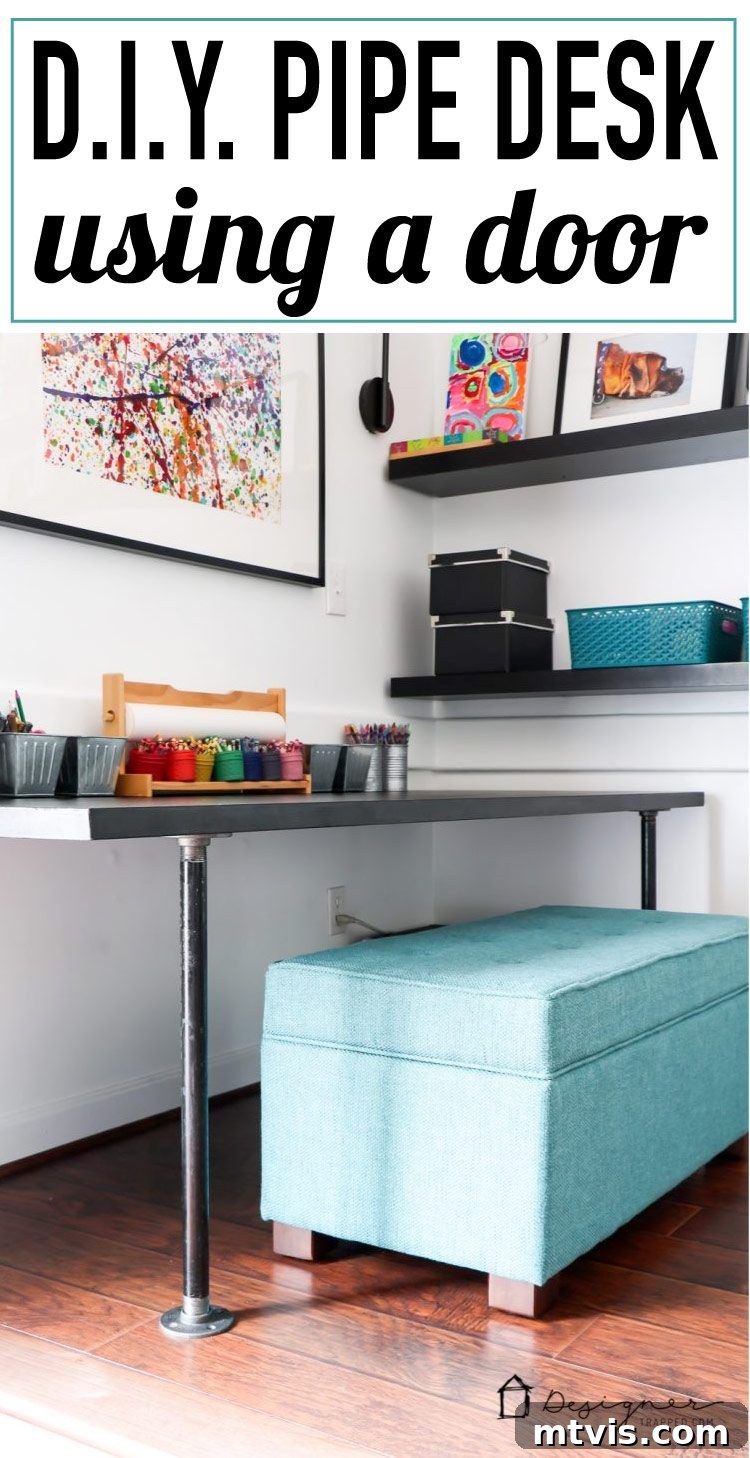
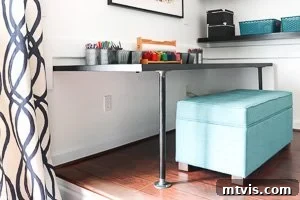
Hello, fellow DIY enthusiasts and home improvers! If you’re searching for an incredibly affordable, robust, and stylish desk solution, especially for a multi-functional family space or a dynamic kids’ room, you’ve landed in the perfect spot. Our family recently embarked on a significant home reorganization journey, which involved a complete reshuffling of rooms to create more dedicated and functional areas for our twin girls. This extensive undertaking meant relocating my home office into their former playroom, and in turn, carving out a new, versatile playroom zone within our family room. The centerpiece of this revamped space? A fantastic, budget-friendly DIY industrial pipe desk that serves as an art table, homework station, and creative hub.
We are absolutely thrilled with the outcome, and I’m beyond excited to share this straightforward, cost-effective tutorial with you. This DIY pipe desk not only boasts a chic industrial aesthetic but also proves incredibly durable and practical for the demands of everyday family life. Whether you need a spacious craft table, a study desk for multiple children, or an extra work surface in your home, this project offers an ingenious solution. Read on to discover how you can easily build your own custom industrial pipe desk and transform your space!
This post contains some affiliate links for your shopping convenience. Click here to read my full disclosure policy.
Build Your Own Industrial Chic: The Ultimate DIY Pipe Desk Tutorial
Creating a functional, stylish, and remarkably robust pipe desk from a basic hollow core door is far simpler than you might imagine. This project is ideal for anyone seeking a custom workspace, an expansive craft or art table, or a durable study area without straining their budget. The distinctive industrial design, achieved with standard steel pipes and flanges, lends itself beautifully to modern, farmhouse, or eclectic decor styles, offering a high-end look at a fraction of the cost. The allure of this DIY desk lies in its blend of aesthetics, practicality, and astonishing affordability.
Our goal was to create a large, stable workspace that could withstand the creative chaos of two young children, all while keeping costs to an absolute minimum. The traditional option of purchasing a large, solid wood desk would have been prohibitively expensive. This DIY pipe desk, however, came in at an astonishingly low total cost of approximately $60. Even better, the active build time was just about an hour, not including the necessary drying periods for the wood filler and paint. This makes it an incredibly rewarding weekend project for any skill level. Let’s gather our materials and get started on crafting your perfect industrial workspace!
Essential Materials for One DIY Industrial Pipe Desk:
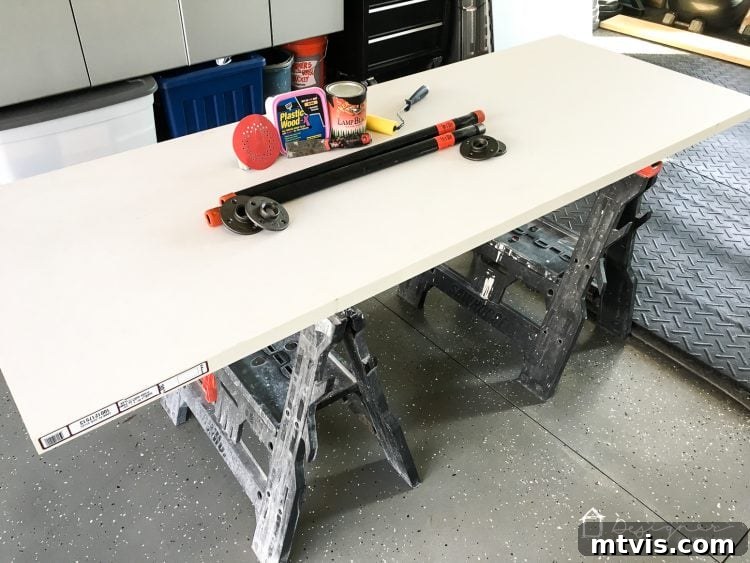
- 1 Hollow Core Interior Door: (We utilized this specific 30″ x 80″ door slab). Choosing a hollow core door is the secret to dramatically reducing project costs; we found ours for just $30. You might even discover one for less at a Habitat Restore or local thrift store, making this an exceptionally budget-friendly DIY desk.
- DAP Plastic Wood-X Wood Filler: This high-performance wood filler is essential for smoothing out the often-rough edges of a hollow core door, ensuring a seamless and polished finish.
- Sandpaper: A variety of grits (e.g., 100-grit for initial shaping, 220-grit for fine smoothing) will be needed for preparing the surface and refining the wood filler.
- Paint: Your preferred color and finish. We opted for black for its sleek, versatile appearance and its ability to complement the industrial pipes, but feel free to choose any color that matches your aesthetic.
- DAP Rapid Fuse All-Purpose Adhesive: A true hero product for this project, particularly when working with hollow core materials. Its unparalleled rapid bonding strength is key to securing the pipe flanges.
- Clamps: Essential tools for holding components securely in place while the adhesive cures, ensuring a strong and lasting bond.
- (2) 24″ Lengths of 1″ Diameter Steel Pipe: These sturdy steel pipes will form the front legs of your industrial desk, providing robust support and that characteristic raw, industrial look.
- (4) 1″ Floor Flanges: These circular fittings are used to attach the pipes to the desk surface and to create stable bases at the bottom of the pipe legs.
- (2) Right Angle Brackets: For an optional yet highly recommended wall mounting technique, which enhances stability and creates a built-in appearance.
Step-by-Step Guide to Crafting Your Industrial Pipe Desk:
1. Prepare Your Hollow Core Door Surface for a Flawless Finish
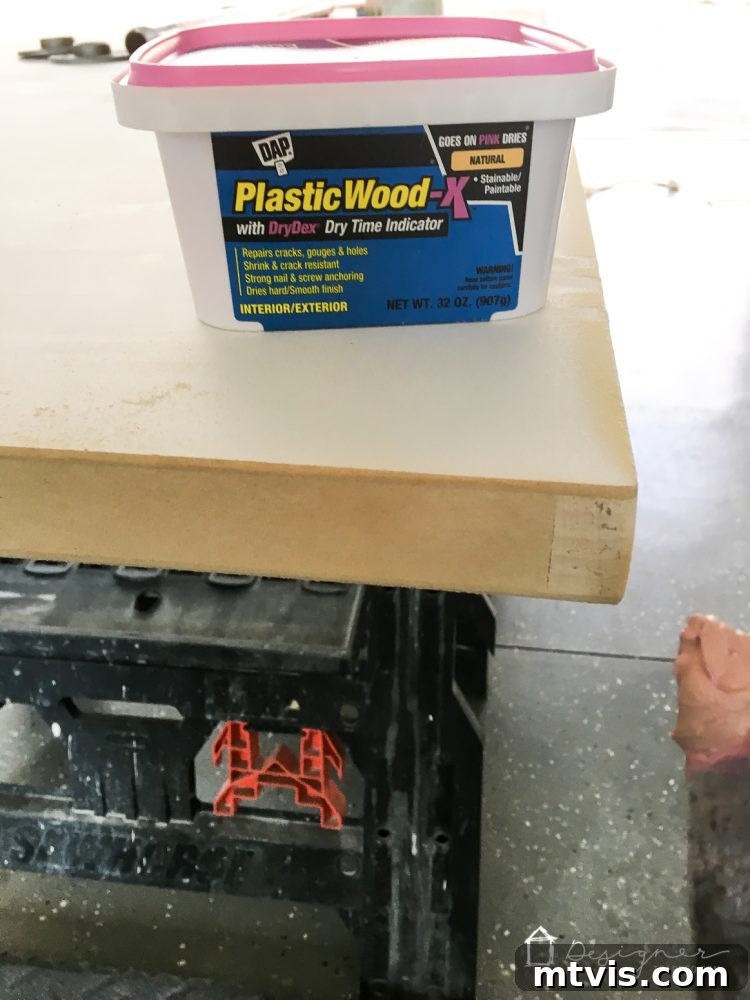
The primary advantage of using a hollow core door is its incredible affordability, but this often means compromising on perfectly finished edges. Our $30 door, while a fantastic base, came with edges that were noticeably rough and unfinished. Our initial, and highly crucial, step was to rectify these imperfections to ensure a smooth, professional-looking desk surface. We meticulously applied DAP Plastic Wood-X Wood Filler along all the rough perimeters of the door. This high-performance wood filler is incredibly versatile, easy to work with, and dries remarkably quickly, allowing for efficient project progression. Once the filler was completely dry, we carefully sanded the treated areas until they were perfectly smooth to the touch, seamlessly blending the filler with the door’s surface. This simple yet vital preparation step dramatically enhances the aesthetic and durability of the economical door, making it appear much more expensive than it is. Investing a little time here ensures a durable, beautiful finish that will withstand years of use.
2. Customize Your Desk with a Fresh Coat of Paint
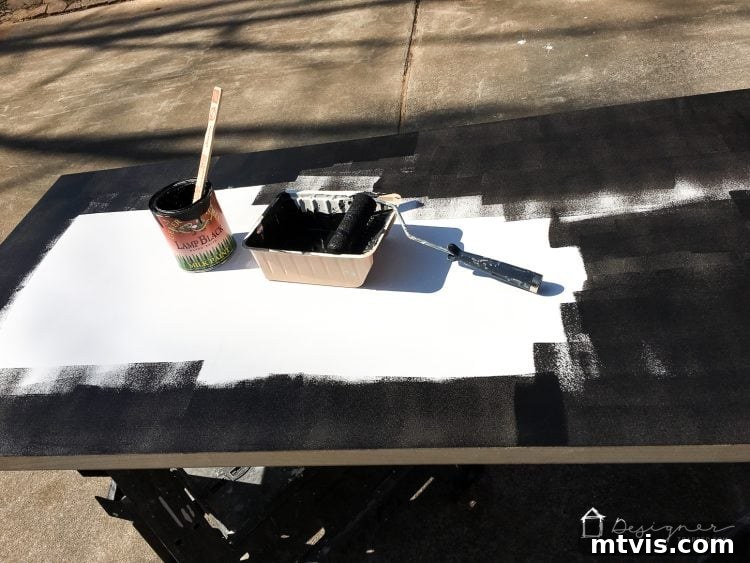
With your hollow core door edges flawlessly smooth, it’s time to infuse some personality with paint. We opted for a classic black finish, primarily for its sleek, sophisticated appearance that perfectly complements the industrial pipe legs. Black also offers the practical benefit of readily concealing any minor imperfections and providing a versatile backdrop for various decorative styles. Furthermore, using paint we already had on hand aligned perfectly with our goal of an ultra-affordable DIY project. However, this is your prime opportunity to truly personalize your desk! Consider a vibrant, playful color for a child’s playroom, a crisp white for a minimalist home office, or even a bold, primary hue to stimulate creativity. For optimal adhesion and long-lasting durability, especially on a primed hollow core door, we recommend applying a good quality primer before your chosen paint color. Be sure to allow adequate drying time between coats and before moving on to the next construction step, ensuring a durable and resilient finish that will stand the test of time.
3. Ingeniously Secure the Floor Flanges with Advanced Adhesive
This is arguably the most innovative and critical step in the entire project, particularly when working with a hollow core door – a material not traditionally designed to withstand the stress of heavy-duty screw attachments. Once the paint had fully dried and cured, we proceeded to attach the floor flanges to the underside of the desk. We carefully measured 9 1/2 inches from the outer edge of the desk to determine the ideal placement for our front legs. This measurement is primarily an aesthetic preference, so feel free to adjust it based on your desired look and stability requirements for your industrial pipe desk.
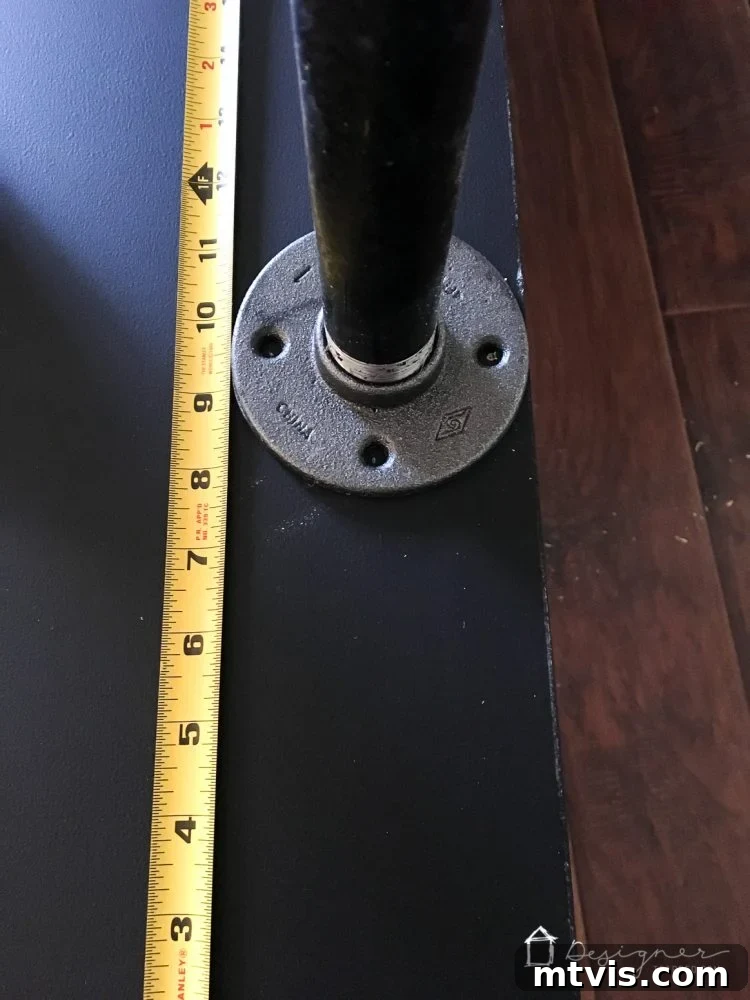
The inherent structural challenge with a hollow core door is its internal composition: only the very perimeter contains solid wood blocking. This means that for each floor flange, typically only one screw hole (the one closest to the door’s edge) will actually find purchase in solid material. Relying on a single screw per flange would result in an unstable and potentially unsafe desk – a completely unacceptable outcome, especially for a desk intended for children’s activities. This is precisely where DAP Rapid Fuse All-Purpose Adhesive proves to be an absolute game-changer, truly revolutionizing this DIY project.
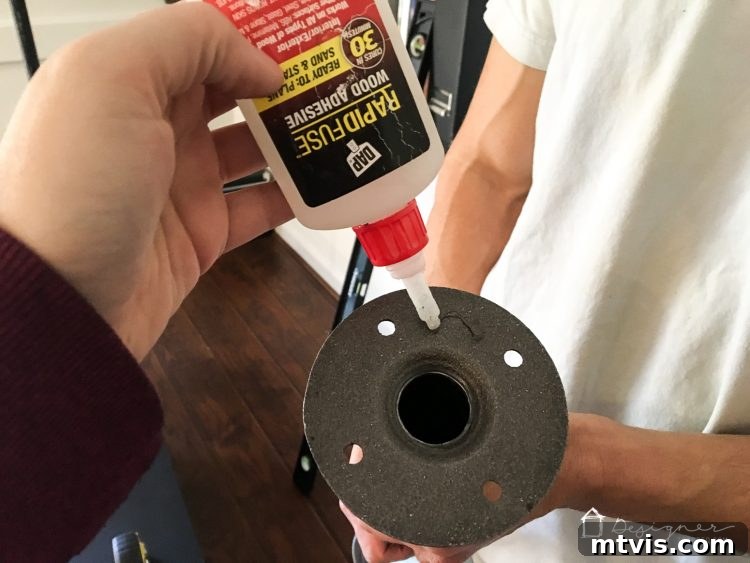
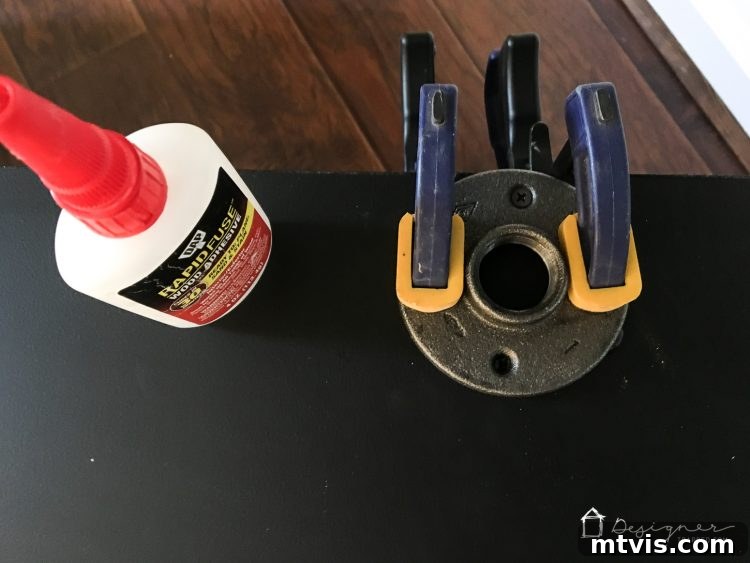
DAP Rapid Fuse is an extraordinary product known for its ability to bond a vast array of surfaces with exceptional strength and astonishing speed. We applied a generous, even layer of Rapid Fuse to the entire bottom surface of each floor flange. After carefully positioning the flanges on the underside of the desk, aligning them with our measurements, we then drove the single screw (the one that could securely anchor into the solid wood perimeter) into place. Immediately after, we firmly secured the flanges with clamps, applying consistent pressure to ensure maximum contact between the adhesive and both the flange and the door surface. The clamps are absolutely critical during this stage, holding the flanges perfectly still and tightly pressed against the door while the Rapid Fuse works its magic. Within mere minutes, this powerful adhesive forms an incredibly strong, permanent bond, effectively making the flanges an integral and immovable part of the door. Without the superior bonding power of DAP Rapid Fuse, achieving this level of stability with a hollow core door would be virtually impossible, forcing us to opt for a significantly more expensive solid wood door and drastically increasing the project cost. It truly is an indispensable tool for any serious DIY enthusiast seeking innovative solutions.
4. Swiftly Assemble the Industrial Pipe Legs
Once the DAP Rapid Fuse had fully cured – which, true to its name, was remarkably quick and effective, creating an unshakeable bond – it was time for the satisfying process of assembling the industrial pipe legs. This step is incredibly straightforward and requires minimal effort. First, we carefully screwed the two 24-inch steel pipe lengths into the top floor flanges that were now rigidly attached to the underside of the desk. Ensure these are tightened snugly by hand to prevent any wobble and ensure maximum stability. Next, we screwed the remaining two floor flanges onto the bottom of each pipe leg. These bottom flanges serve a crucial dual purpose: they provide a broad, stable base for the desk, effectively distributing its weight and preventing it from wobbling, and they further enhance the authentic, robust industrial aesthetic of the entire piece. The pre-threaded nature of these components makes assembly exceptionally quick and entirely tool-free, allowing you to see your impressive DIY pipe desk take its final shape almost instantly.
5. Enhance Stability with Optional Wall Mounting or Additional Legs
With the industrial pipe legs firmly attached, your DIY desk will be freestanding. However, for maximum stability, particularly in a high-activity environment like a children’s playroom, we highly recommend an additional anchoring step. We carefully moved our newly assembled desk into its final position against the wall. To make it exceptionally sturdy and safe for our energetic girls, we chose to attach right angle brackets to the wall and to the underside of the desk. For a cohesive and polished look, we spray-painted our metal brackets black to seamlessly match the desk surface and pipe legs.
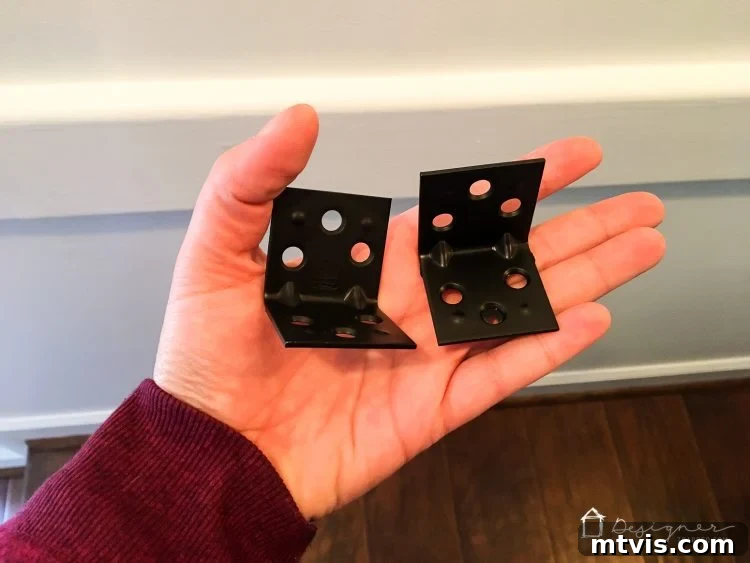
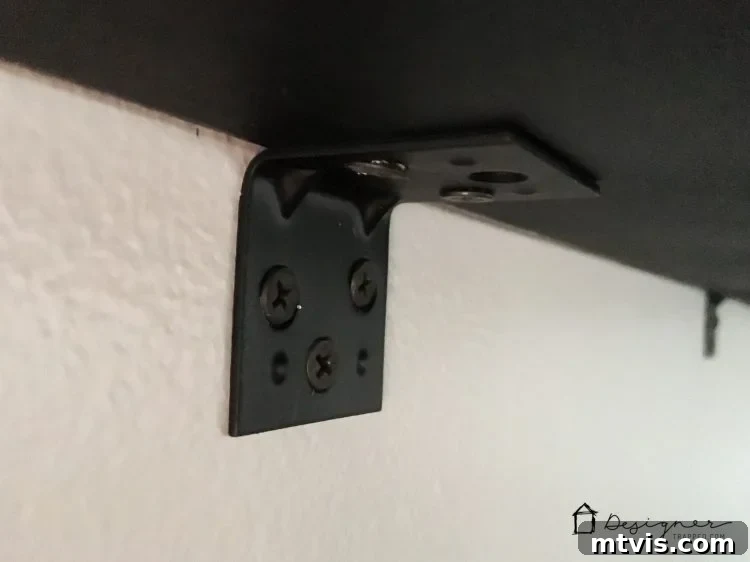
When attaching to the wall, it’s always best practice to aim for wall studs for the strongest and most secure hold. If wall studs aren’t an option in your desired location, be sure to use appropriate heavy-duty wall anchors specifically designed for the weight your desk will bear. This wall-mounting step, while optional, offers several significant advantages: it dramatically increases the desk’s overall stability, effectively preventing any tipping or wobbling – a critical safety feature for any piece of furniture used by children. Furthermore, it helps keep project costs down by eliminating the need for two additional pipe legs and flanges for the back of the desk. Aesthetically, it provides the desk with a sleek, built-in, industrial fixture look, seamlessly integrating it into the room as if custom-designed for the space. If wall mounting isn’t feasible or simply not your preferred method, you can easily create a four-legged freestanding desk by purchasing two more 24″ pipe lengths and two additional floor flanges for the back. Either way, ensuring paramount stability is key for a functional, safe, and long-lasting workspace.
The Finished DIY Industrial Pipe Desk: A Functional and Stylish Masterpiece
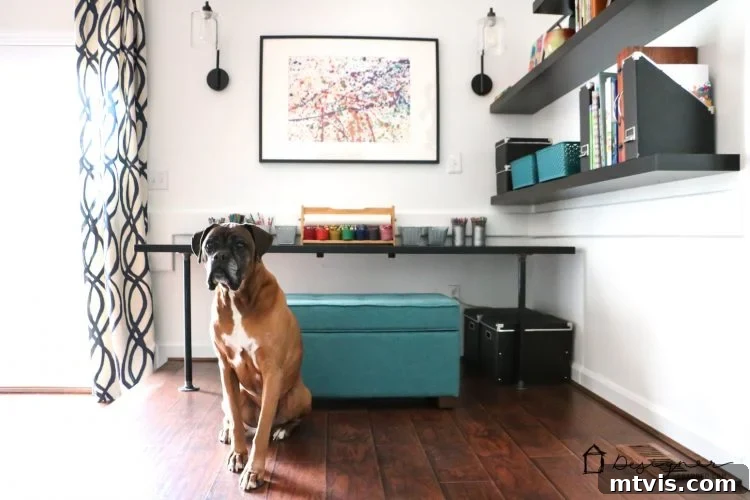
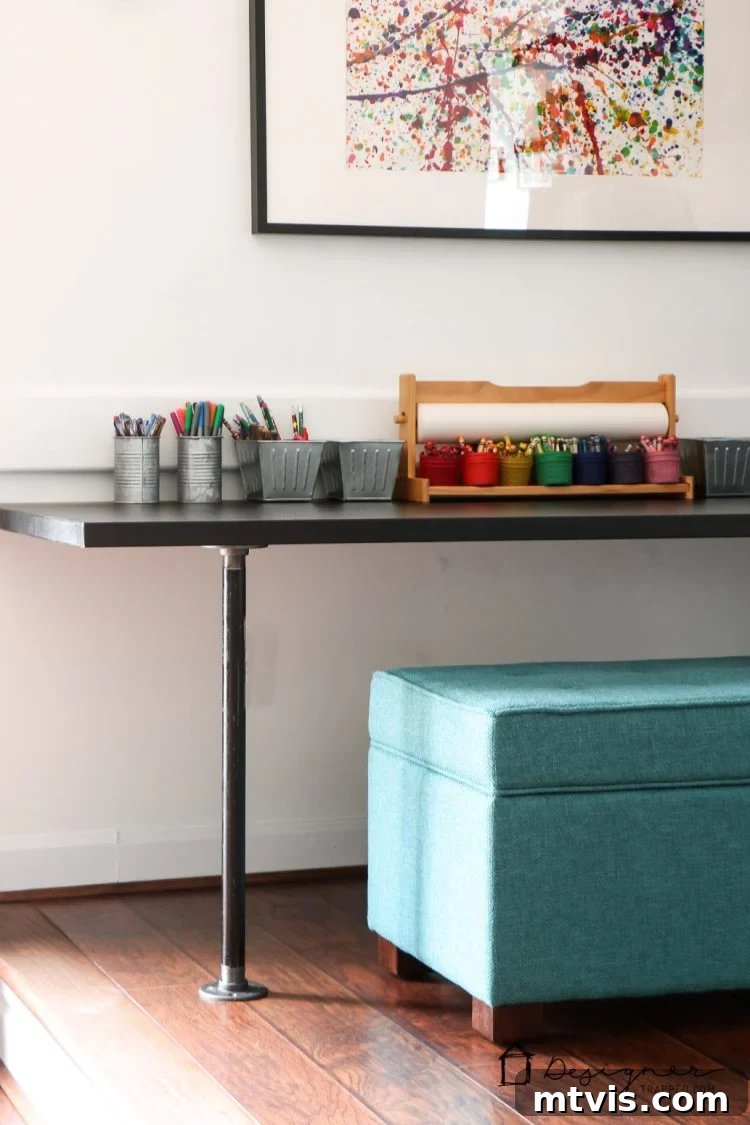
And just like that, our incredible DIY industrial pipe desk was complete! In approximately one hour of active construction time (excluding the essential drying times for wood filler and paint), and for an astonishingly low cost of around $60, we successfully created a massive, sturdy, and profoundly stylish desk for our twin girls. This expansive industrial craft table is now the perfect hub for their homework, art projects, puzzles, and countless hours of imaginative play. It stands as a testament to how simple, readily available materials and a clever, resourceful approach can yield professional-looking results without placing any strain on your budget. The satisfaction derived from building something so practical, beautiful, and perfectly tailored to your family’s needs is truly immeasurable.
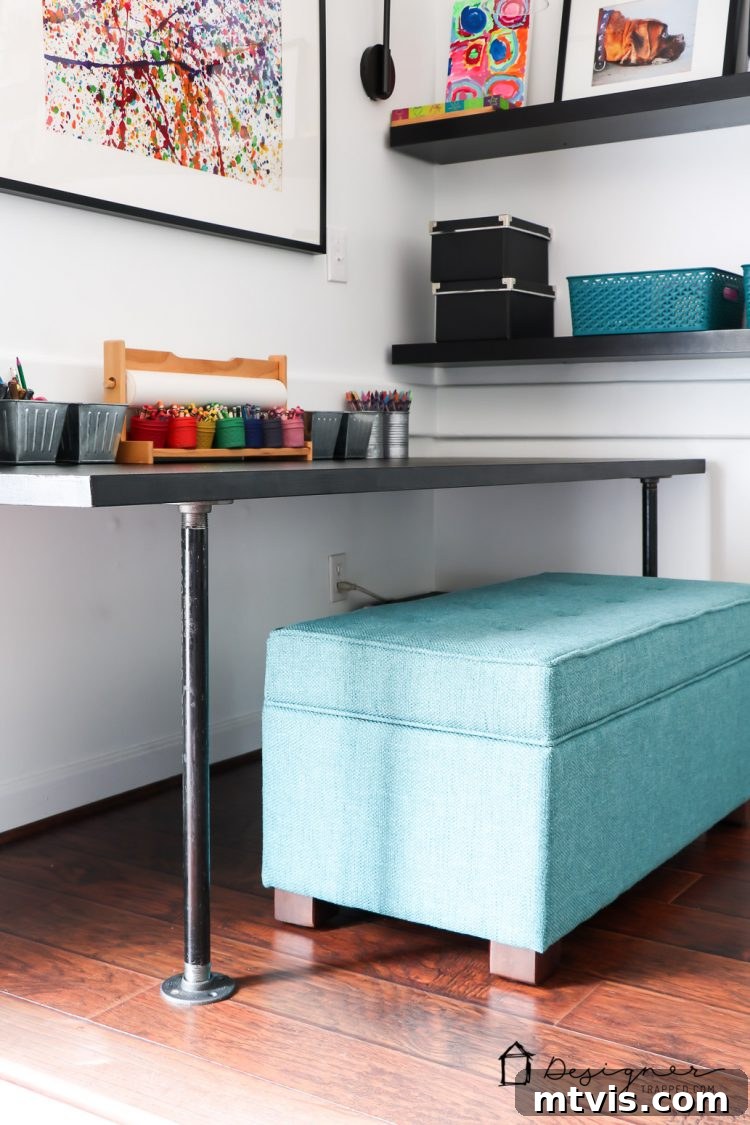
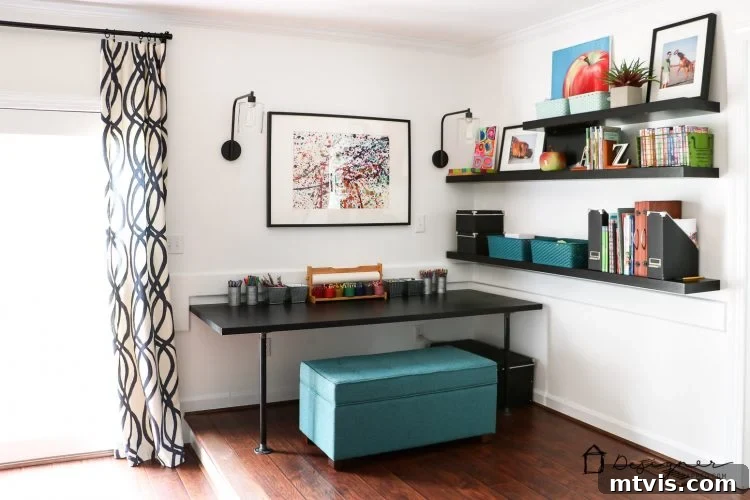
You might be wondering why we chose to pair our expansive DIY industrial pipe desk with a storage bench instead of traditional chairs. The answer lies in maximized functionality and smart, space-saving storage! This incredible bench not only provides ample seating for both girls and their friends but its true magic is revealed within. It offers significant hidden storage capacity, perfectly accommodating all our board games, art supplies, and other playroom essentials that often create clutter. This strategic choice helps keep the family room tidy and organized, making it a truly versatile and multi-functional space that adapts to various activities. If you’re seeking similar space-saving and organizational solutions for your home, incorporating a storage ottoman or bench is an absolute game-changer for maintaining a clutter-free environment. While we don’t have an affiliate link for the exact model, a quick search for “storage ottoman” or “storage bench” will reveal many similar options that can beautifully complement your new DIY desk.
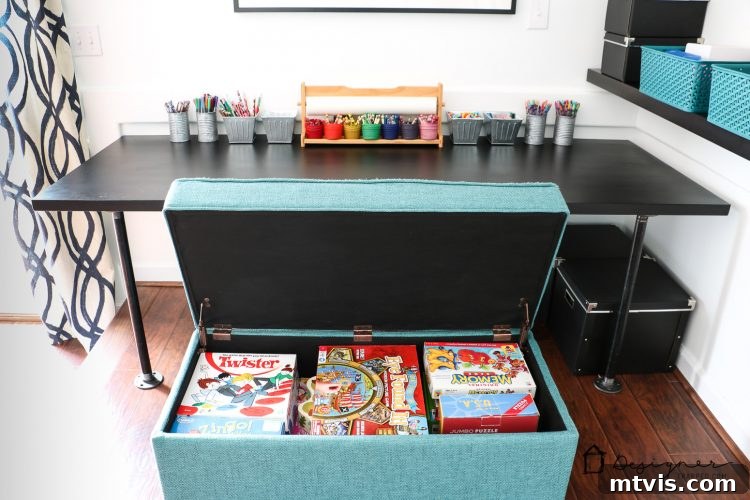
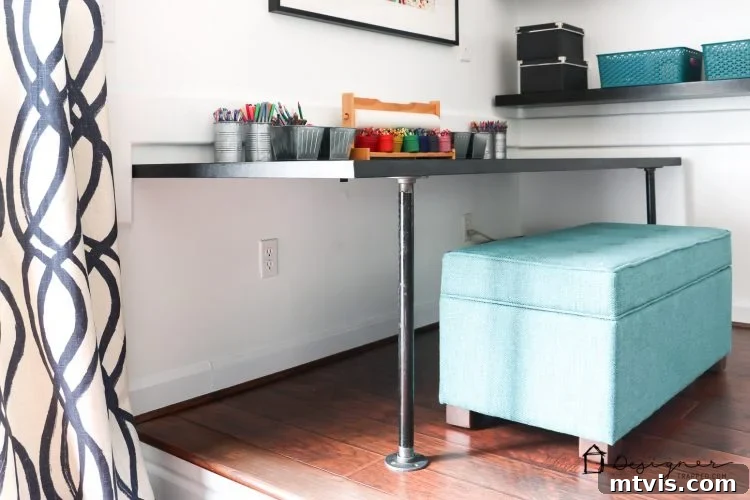
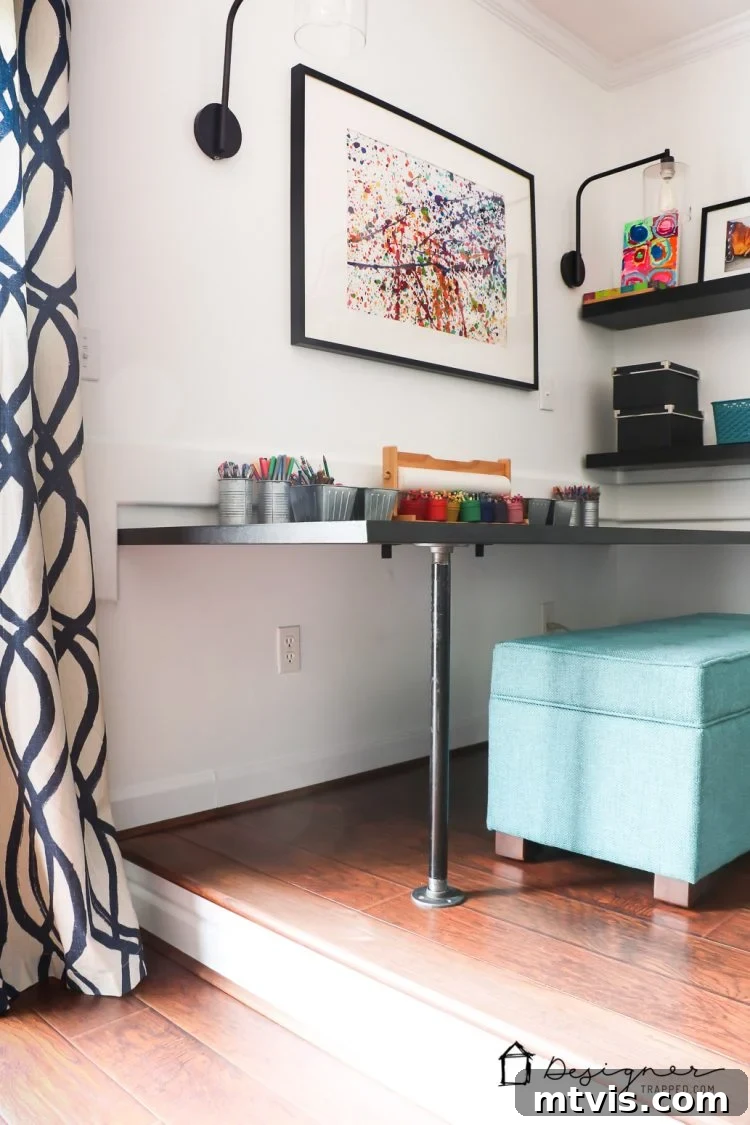
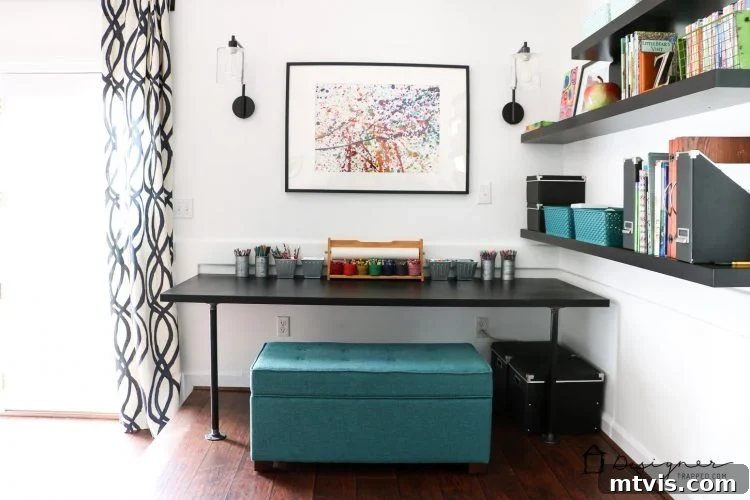
My sweet dog, Titan, couldn’t resist making an appearance in our finished desk photos, so I absolutely had to include a shot of him enjoying the new space! Pets always have a way of making a home feel more complete and adding a touch of warmth to any room.
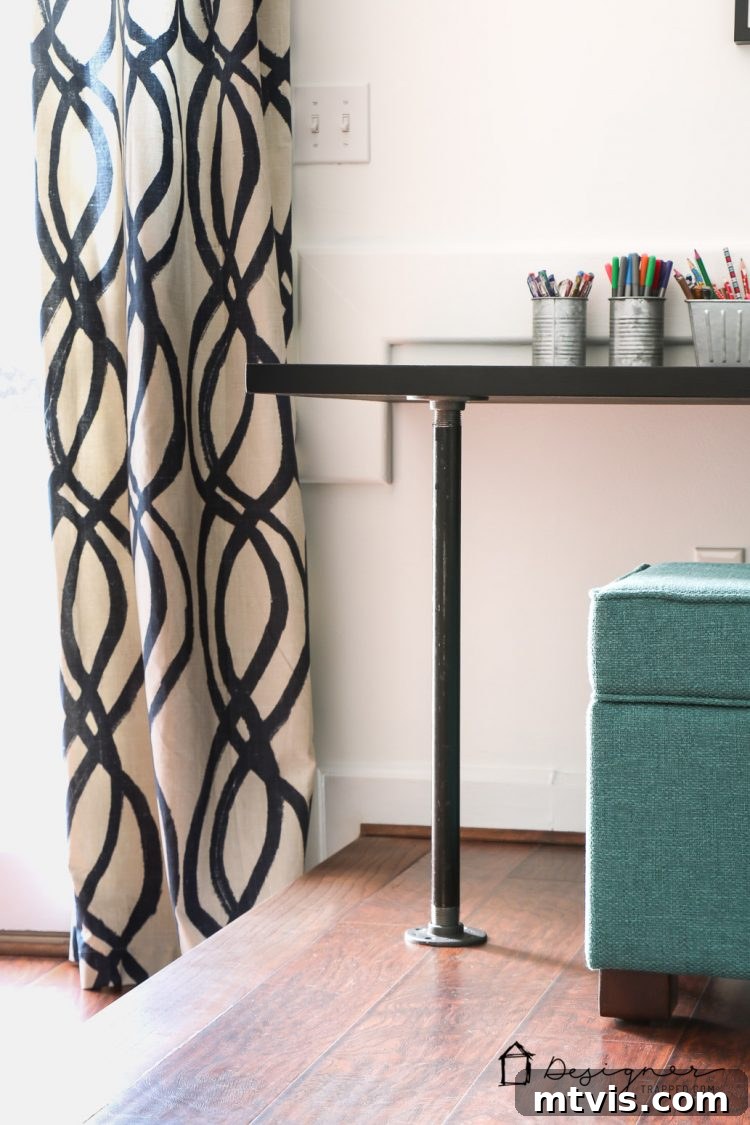
Now, let’s take a closer look at some of the subtle yet impactful design details that make this DIY pipe desk truly special and contribute to its industrial charm. The robust black steel pipe legs provide that coveted industrial look, adding distinct character and a touch of modern edge to the entire space. The striking contrast of the dark pipes against the sleek, painted desk surface creates a sophisticated yet playful aesthetic, making it perfect for a versatile family area. Every element, from the smoothly finished edges of the repurposed door to the sturdy and visibly strong connections of the pipe legs, contributes to a desk that is not only highly functional but also a stylish statement piece. The raw, utilitarian beauty of the pipes is celebrated, forming the backbone of this unique and affordable furniture item.
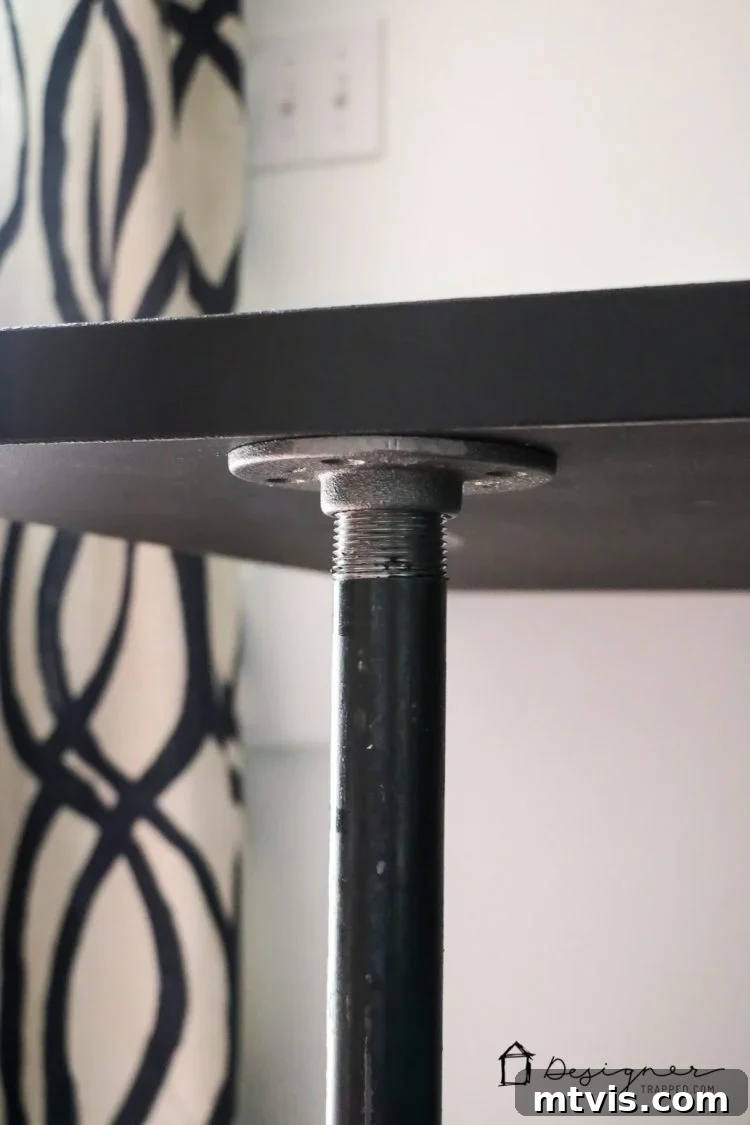
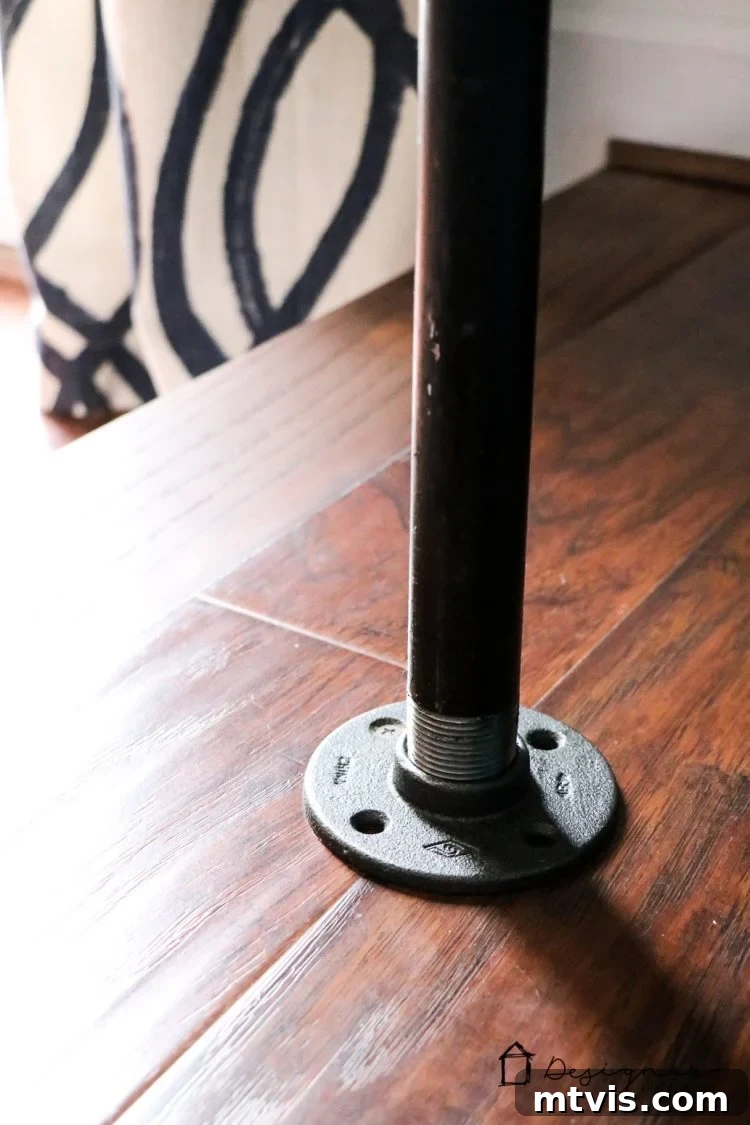
For an added layer of uncompromising safety, especially since this desk is primarily used by our energetic children, we took an extra precautionary step: we drilled one screw from the bottom floor flanges directly into the floor. This provides ultimate stability and peace of mind, ensuring the desk remains firmly in place no matter how enthusiastically our girls engage with their projects, preventing any accidental movement or tipping. When crafting for kids or for high-traffic areas, safety should always be paramount, and this small but significant measure makes a considerable difference in ensuring a secure and worry-free environment.
Well, friends, that concludes our exciting journey to creating this incredible DIY industrial pipe desk! I’m absolutely delighted with how this project turned out – it’s not only highly functional and aesthetically pleasing but also remarkably inexpensive, proving that great design doesn’t have to come with a hefty price tag. I’m finishing up this post just in time to go help my girls with their homework, seated comfortably at their fantastic new workspace. I sincerely hope this detailed tutorial inspires you to tackle your own home improvement projects, explore the possibilities of DIY, and discover the immense joy and satisfaction that comes from creating something beautiful and practical with your own hands. Happy building!
Looking for more innovative and budget-friendly DIY projects to transform your home? Explore our most popular creations for endless inspiration and practical guides:
