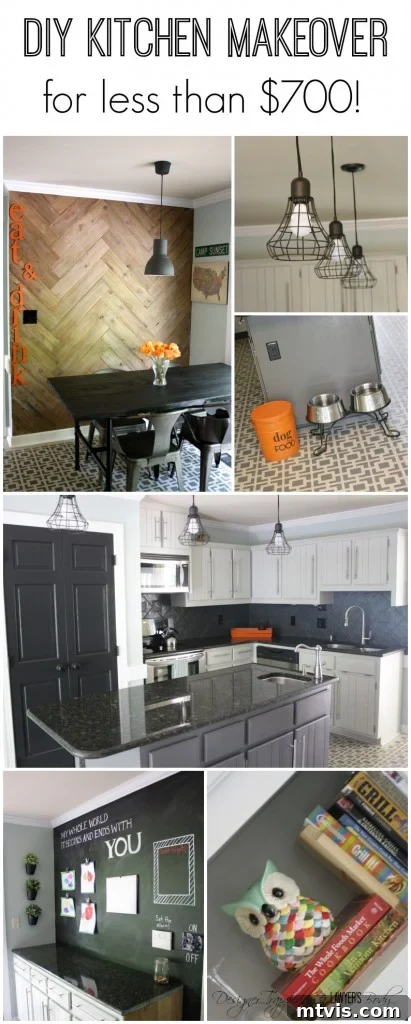
Unveiling Our Budget Kitchen Makeover: Part 2 – The Heart of Our Home Transformed
Welcome back, renovation enthusiasts and budget-savvy homeowners! If you’ve been following our journey, you know we’re on a mission to prove that stunning home transformations don’t require breaking the bank. Today, we’re thrilled to pull back the curtain on the second and arguably most exciting phase of our budget kitchen makeover reveal. Get ready to be inspired, because this post is brimming with detailed photos and innovative ideas that showcase how paint, ingenuity, and a little elbow grease can completely redefine a space.
For those just joining us, be sure to catch up on Part 1 of our kitchen reveal. There, we delved into the initial phases of our ambitious budget kitchen remodel, sharing the foundational techniques we employed. The cornerstone of our approach involved painting almost everything imaginable – yes, that includes our kitchen cabinets! We even managed to achieve a professional-looking finish on our cabinetry without the tedious steps of sanding or priming. It’s a game-changer for anyone looking to refresh their kitchen on a dime, and we promise, the results speak for themselves.
As you immerse yourself in the details of this budget-friendly kitchen transformation, you might find yourself wondering about specific items or materials we used. For your convenience, we’ve compiled a comprehensive list of resources. You can explore the full source list for our budget kitchen makeover here, or simply scroll to the very end of this article where all product details and links await. From paint colors to decor accents, we’ve got you covered.
While we were incredibly proud of the foundational work and aesthetic improvements shared in Part 1, it’s this second part of the reveal that truly ignites our passion. This is where the kitchen truly blossomed into the vibrant, functional heart of our home. I won’t sugarcoat it – you’re about to witness the areas of our kitchen that I absolutely adore the most. These are the spaces where design meets daily life, where every choice was made to enhance both beauty and practicality for our family.
Creating a Functional & Stylish Eat-In Kitchen Area
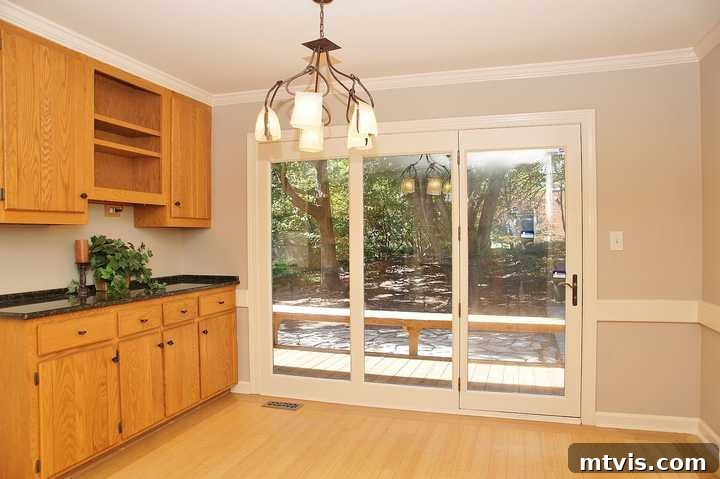
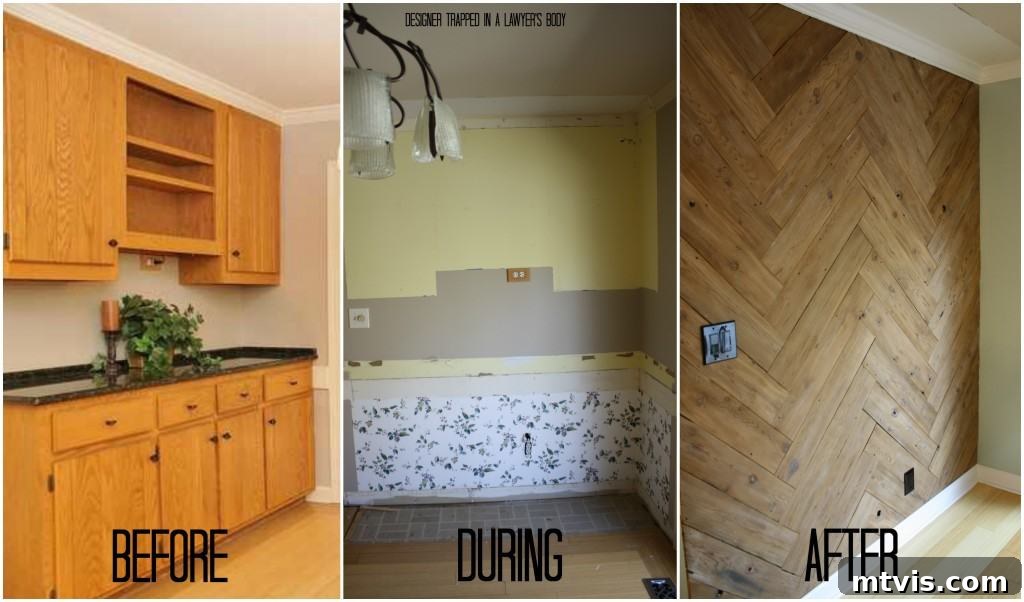
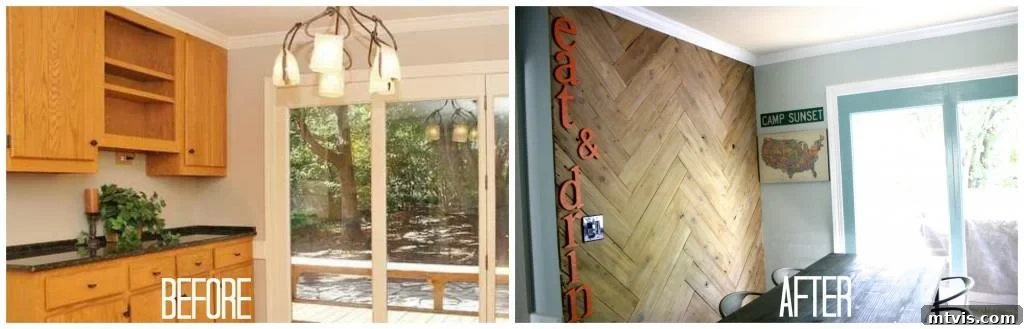
One of the most critical objectives of our budget kitchen makeover was to establish a truly usable and inviting eat-in kitchen area. Prior to our renovation efforts, this designated space felt cramped and underutilized. It was burdened by an excess of cabinets and an outdated chandelier that simply didn’t align with our evolving style. Crucially, there wasn’t enough room to comfortably accommodate a large enough table for our family of four, making family meals less enjoyable than they should be. Let’s take a quick look back at what we were working with in this section of the kitchen before the transformation began.
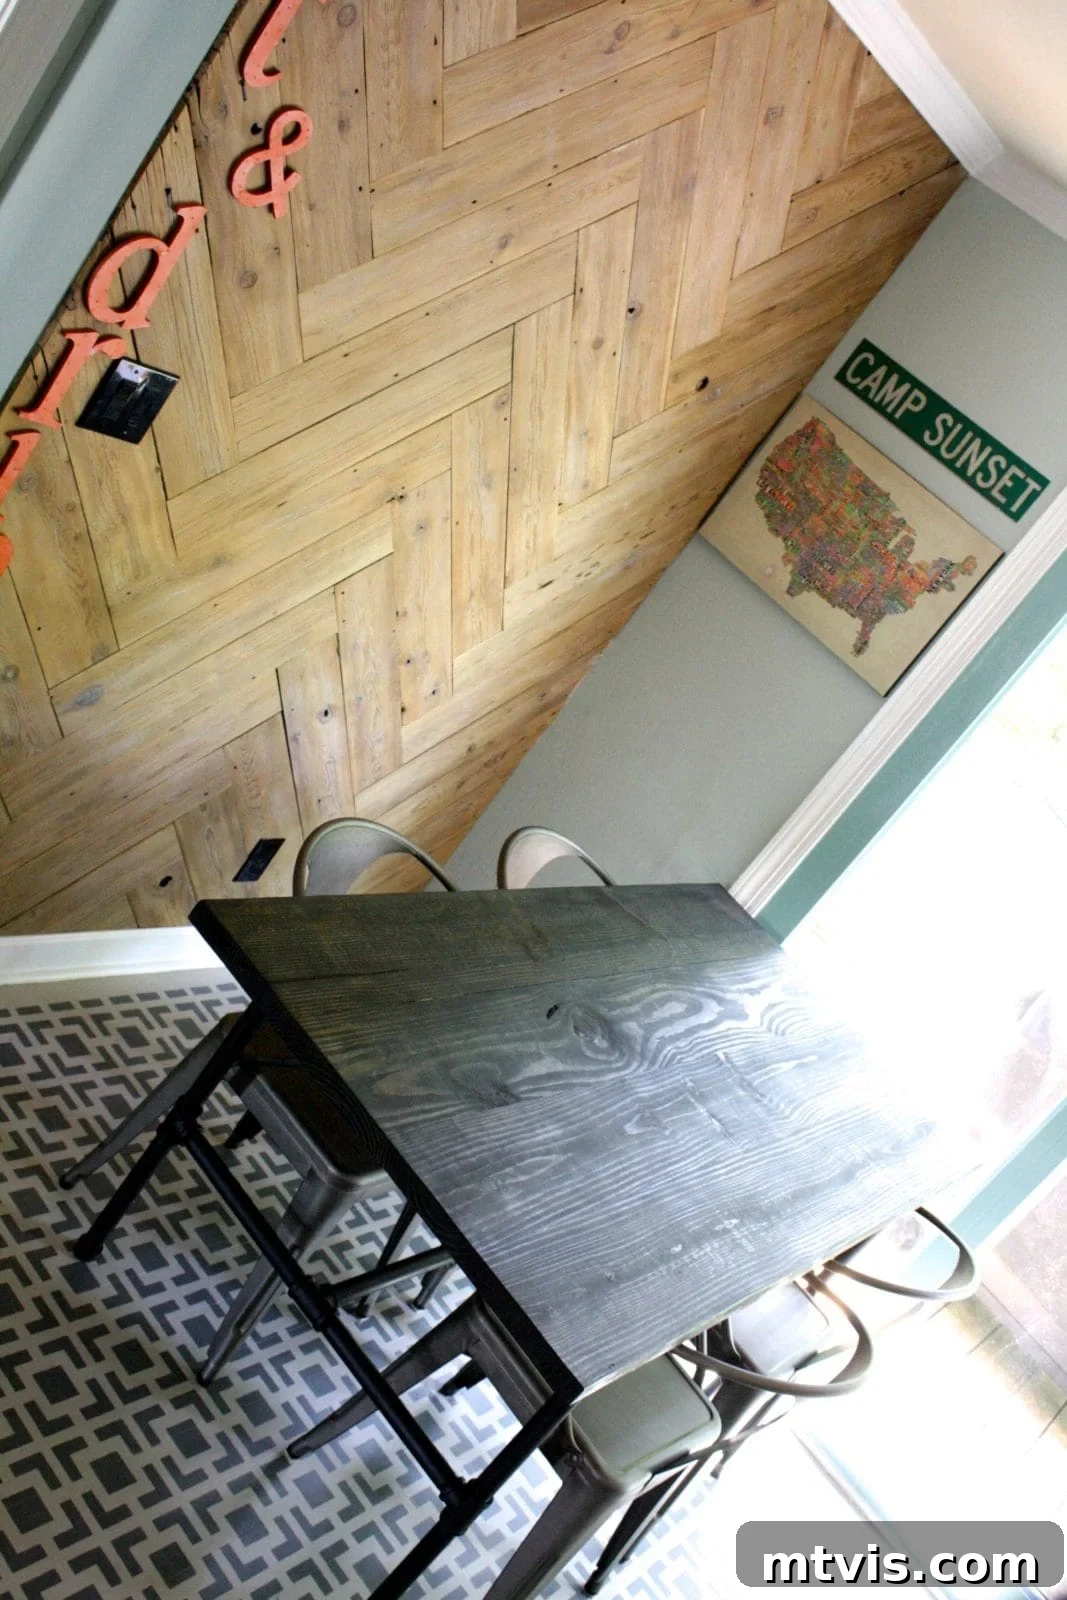
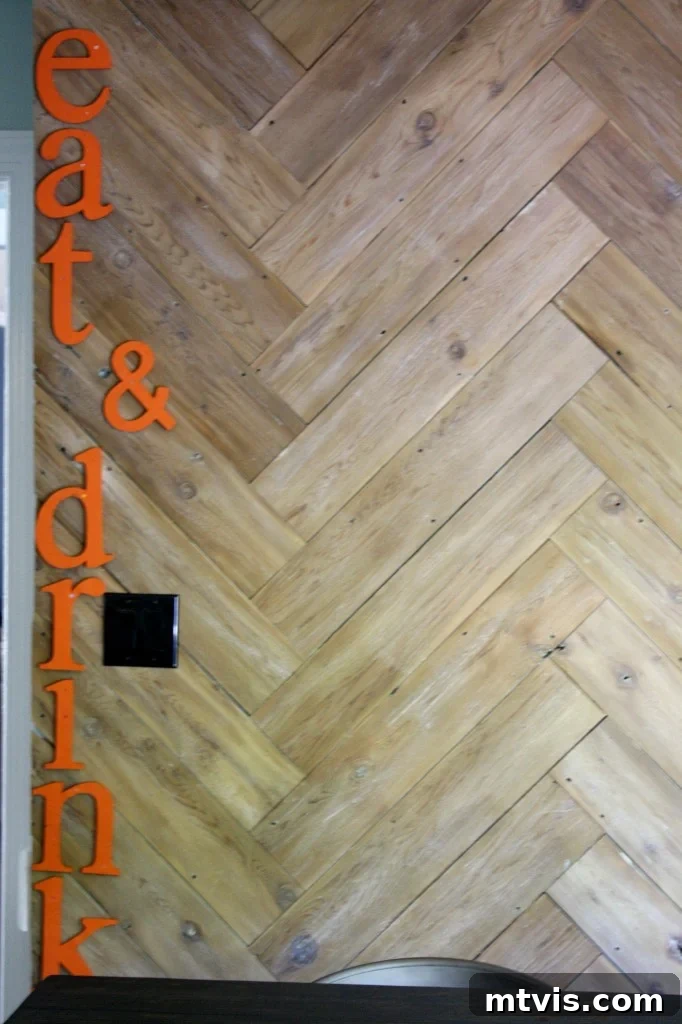
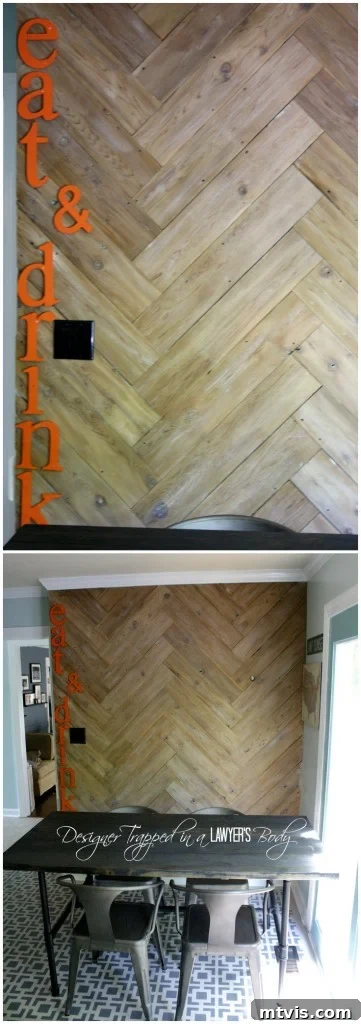
As loyal followers of our budget kitchen remodel journey will recall, we made a pivotal decision that completely reshaped this space. We strategically removed the upper cabinets from this area and brilliantly relocated the base cabinets to the opposite side of the kitchen. This proved to be one of the BEST decisions we made throughout the entire process! This bold move instantly liberated a remarkable amount of floor space, transforming a previously congested corner into an expansive and welcoming zone. The newfound openness allowed us the creative freedom to introduce our truly stunning DIY herringbone plank wall – an incredible feature that we lovingly upcycled from an old, neglected fence, proving that treasure can be found in the most unexpected places.
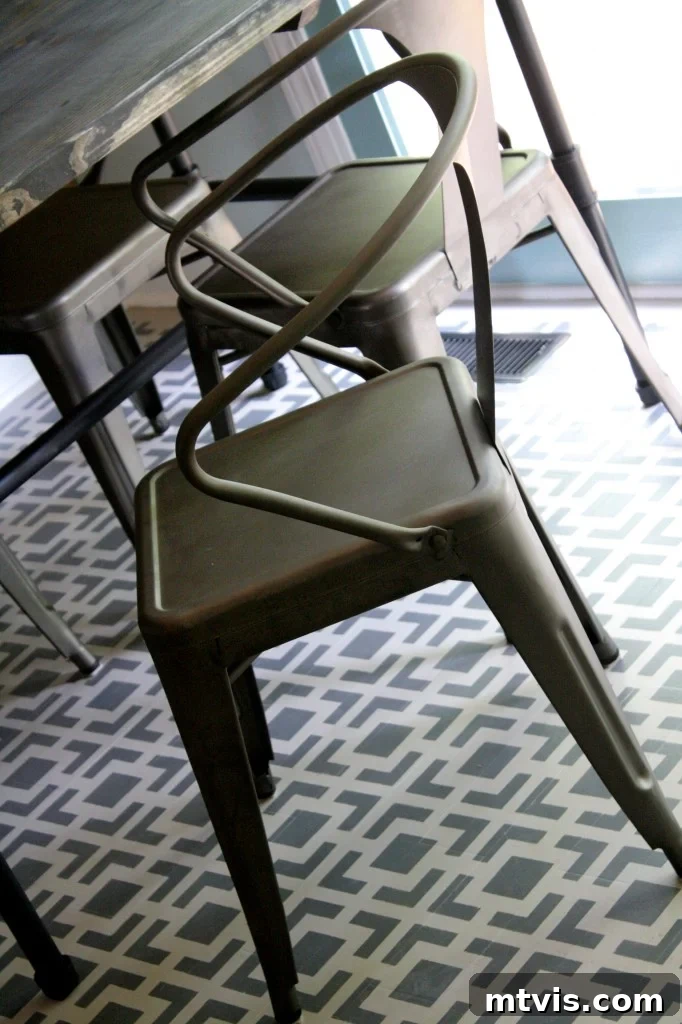
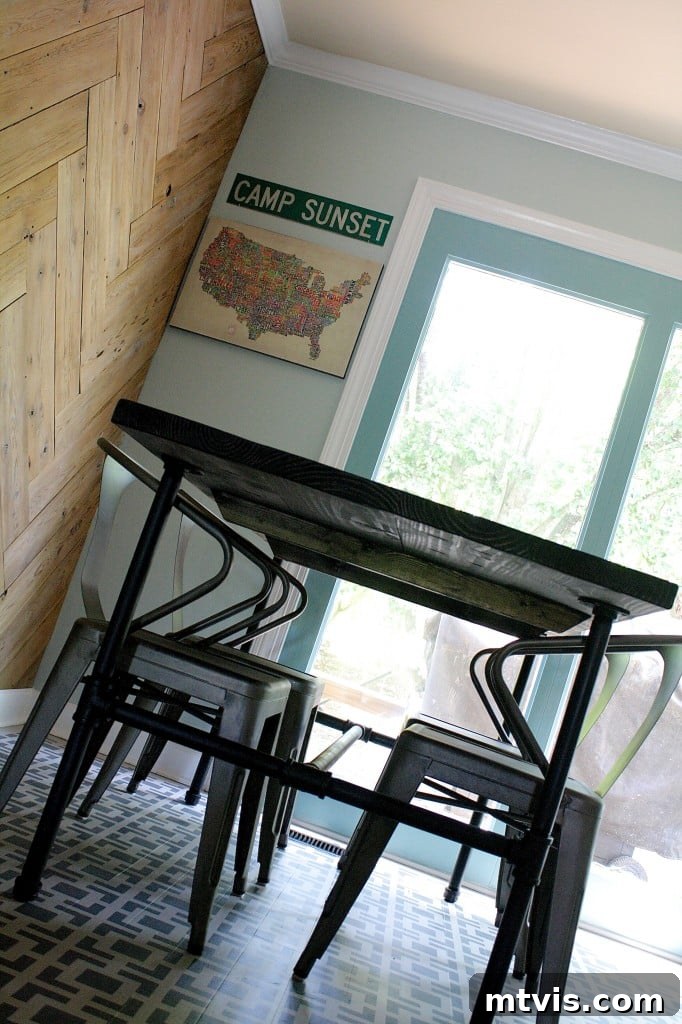
And now, behold the heart of our new eat-in area! With our magnificent herringbone plank wall serving as a captivating backdrop, this space now proudly hosts a stylish and functional table and chairs. We are absolutely enamored with our DIY industrial pipe table, complete with a detailed tutorial here for those eager to replicate its charm, complemented by fabulous industrial metal chairs. This combination strikes the perfect balance between rustic warmth and modern edge, creating an inviting spot for family meals, homework sessions, and casual gatherings. The entire ensemble perfectly embodies the budget-friendly yet high-impact aesthetic we strived for throughout this kitchen makeover.
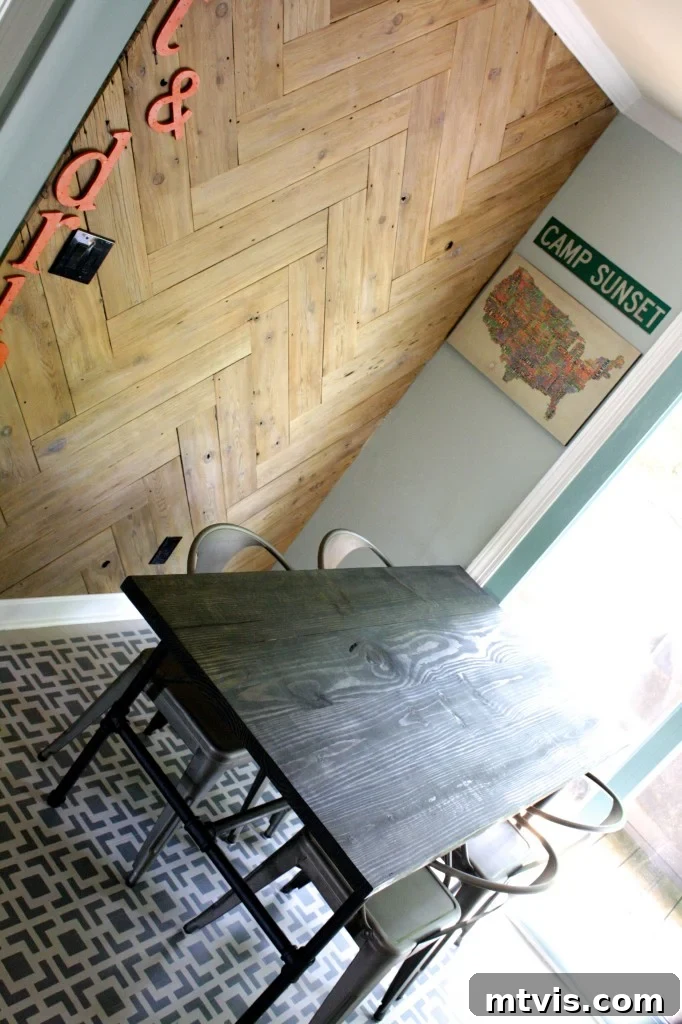
 I genuinely adore how our custom-painted “eat & drink” letters stand out against the rustic charm of the herringbone plank wall! It’s these small, personalized touches that truly make a house feel like a home, and this particular detail brings a smile to my face every single day.
The Versatile Chalkboard Wall: Function Meets Creativity
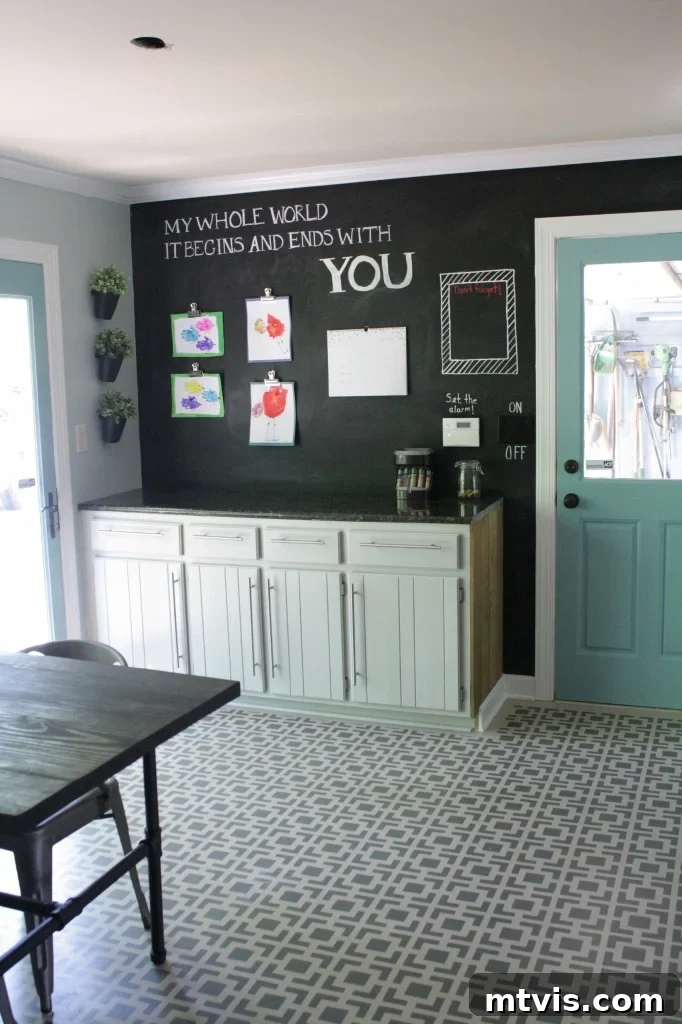
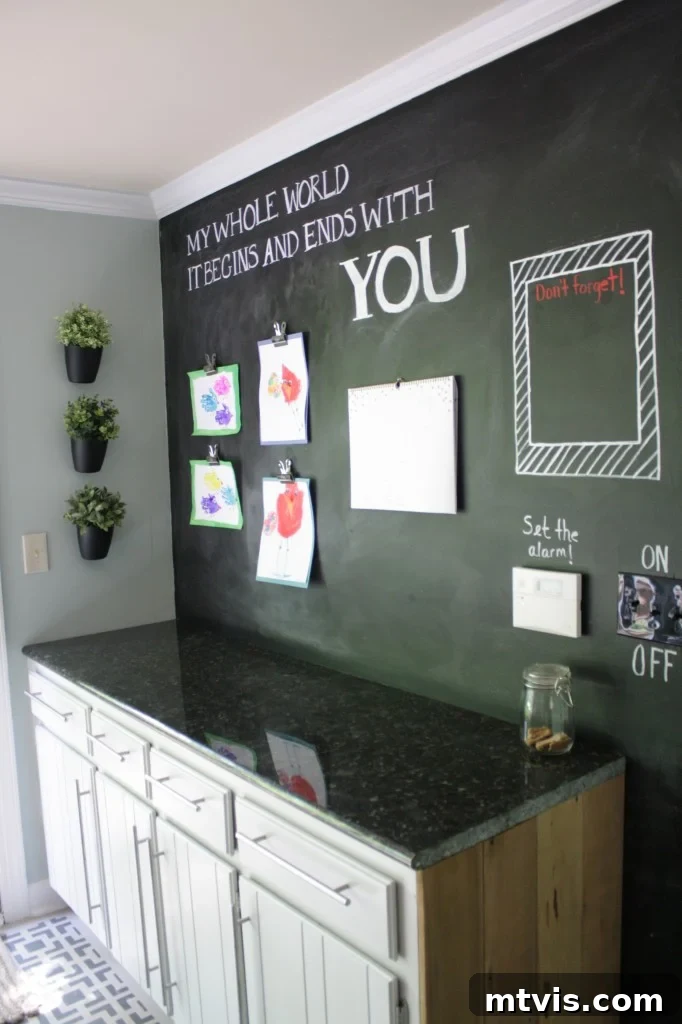
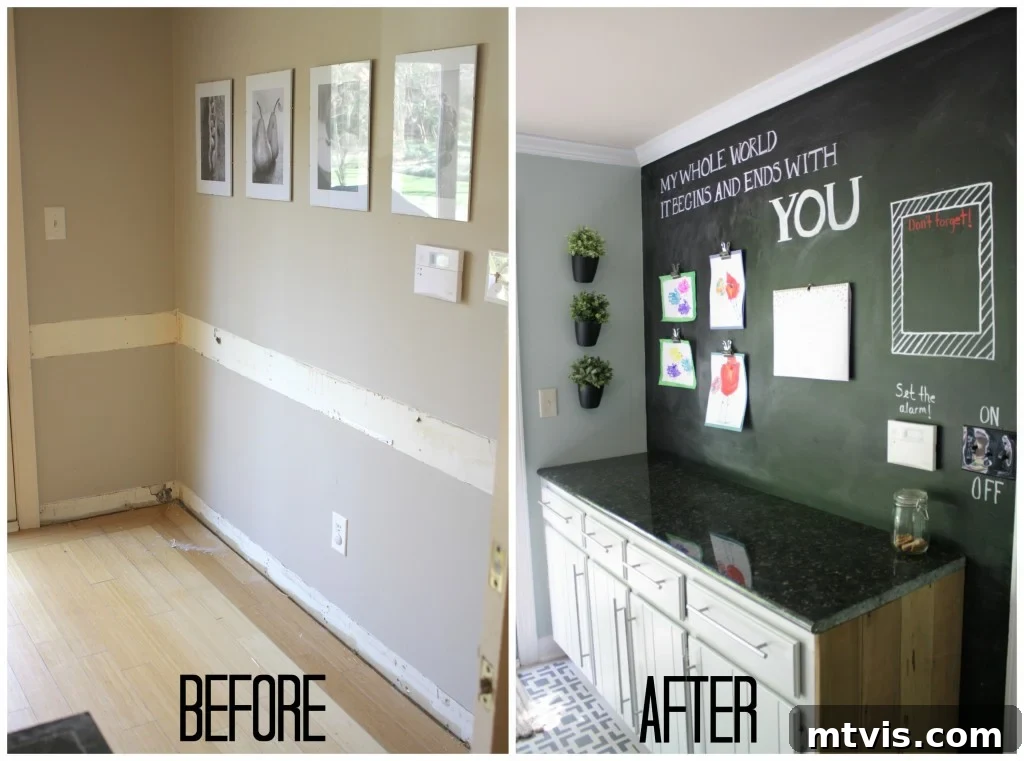
Now, let’s pivot our attention to the opposite side of our revitalized eat-in area, where functionality truly shines. I am absolutely delighted to introduce you to our fun and incredibly practical chalkboard wall, an area that now perfectly houses the base cabinets we relocated. This space has become an unexpected hero in our daily routine. The door you see here conveniently leads to our garage, a portal we traverse about 95% of the time. Having these base cabinets positioned right by the entrance is a stroke of genius – it offers an ideal spot for dropping off bags, keys, or any essentials upon arrival, and equally convenient for grabbing items on our way out. If you’re inspired by our cabinet transformation, you can dive into my comprehensive tutorial on how to paint kitchen cabinets without losing your sanity here.
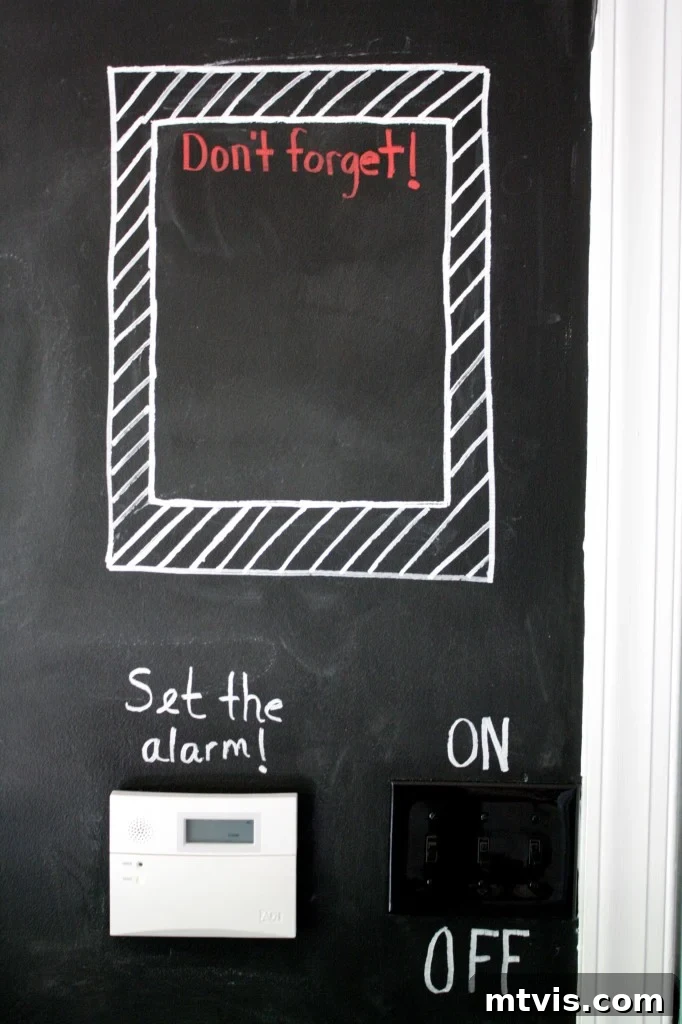
Beyond its organizational benefits, this chalkboard wall provides the perfect canvas for creativity and communication. It proudly displays the latest artistic masterpieces from Attley and Avery, adding a heartwarming, personal touch to the kitchen. It also features one of my absolute favorite lines from a beloved Zac Brown Band song, “Highway 20 Ride,” infusing the space with a dash of musical inspiration. We’ve also strategically hung our family calendar here, a daily lifeline that keeps us organized and helps everyone remember upcoming activities and appointments. Furthermore, I crafted a dedicated “frame” within the chalkboard area specifically for jotting down important reminders or spontaneous thoughts, ensuring nothing slips through the cracks. This wall isn’t just a surface; it’s a dynamic hub for art, inspiration, and family management.
You might notice a few unexpected holes in the ceiling within this eat-in area, particularly in the photo below. Rest assured, this is merely a temporary detail! These are the remnants from where we removed the old, rather unsightly chandelier. At the time these photos were captured, we hadn’t yet installed its stylish replacement. But don’t you worry, a much-anticipated lighting update for this space is coming your way very soon, promising to tie the entire room together with a finishing flourish!
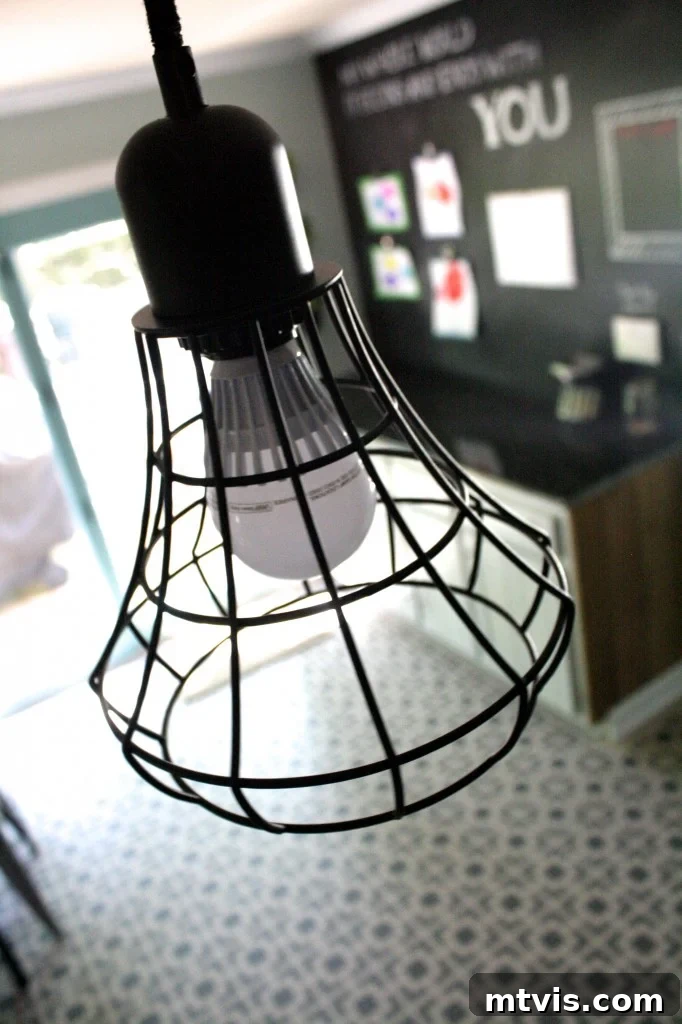
And speaking of lighting, I simply cannot resist sharing another glimpse of the industrial pendant lights gracefully suspended over our kitchen island. As you likely discovered in Part 1 of our kitchen reveal, these fixtures are an absolute favorite. Their robust design and warm glow significantly contribute to the overall industrial-chic aesthetic we’ve cultivated throughout the space. They’re not just lights; they’re statement pieces that add character and a touch of modern sophistication. For those eager to incorporate these stunning lights into their own home, you’ll be delighted to know that you can find them right here at Target!
Thoughtful Decorative Touches & Personal Accents
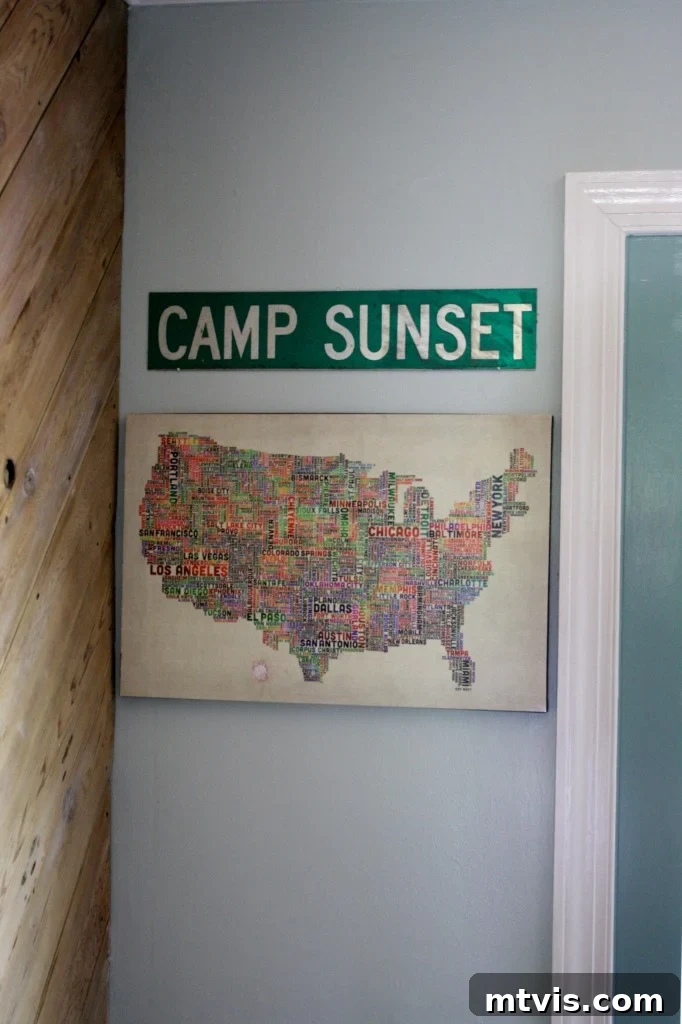
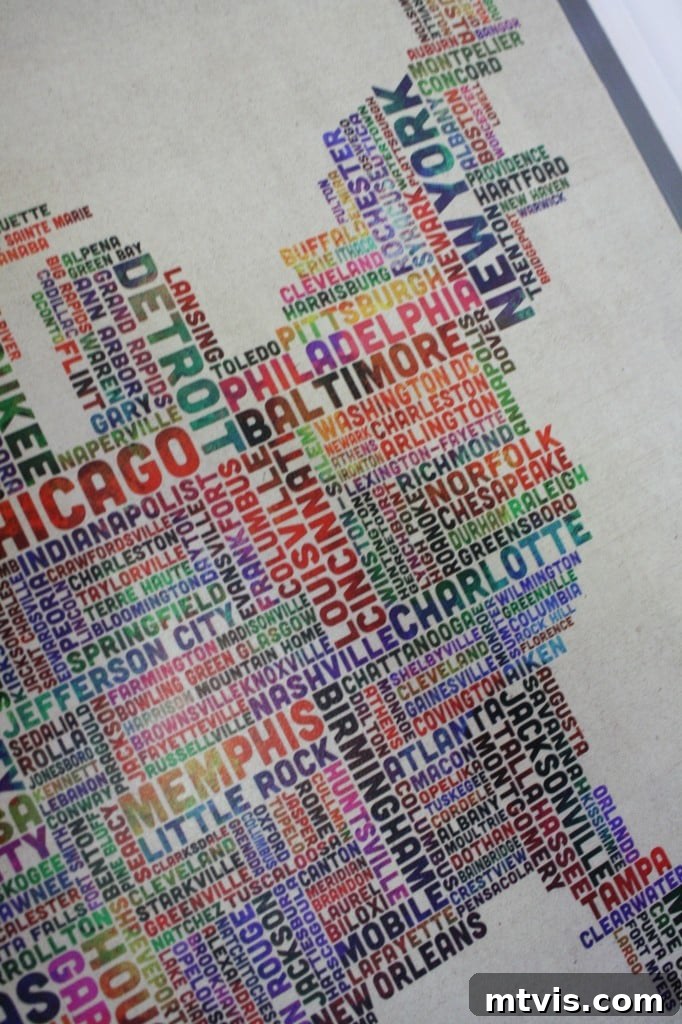
Now, let’s delve into the truly delightful aspect of any home transformation: the decorative touches. This is where personality shines through, and a house truly becomes a home. I’m utterly obsessed with the typography map that graces one of our walls – a unique piece that I proudly crafted myself! You can find the full tutorial for creating your own typography map right here, allowing you to infuse your space with a similar custom charm. Perched above this map is a street sign from Joe’s childhood backyard, a deeply sentimental touch that evokes cherished memories and adds a layer of personal history to our kitchen’s narrative. These elements, though seemingly small, contribute immensely to the overall warmth and individuality of the space, turning mere walls into storytelling canvases.
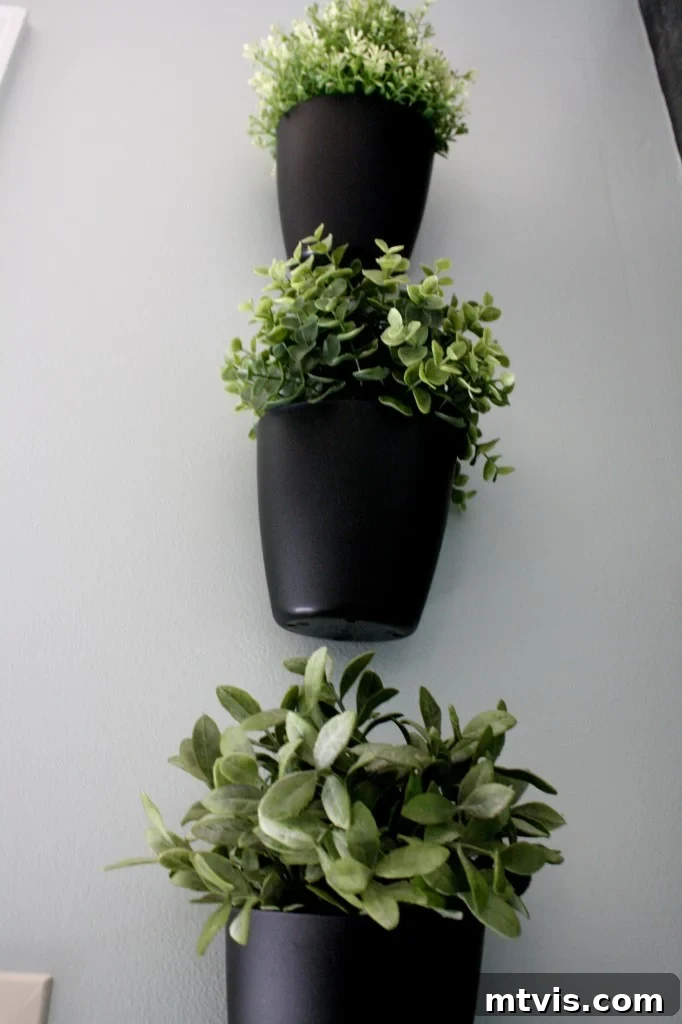
And how could I forget to mention my beloved vertical succulent “garden”? This charming living accent brings a refreshing touch of greenery and life into the kitchen, creating a serene and happy vibe. It’s a simple yet impactful way to introduce nature indoors, adding texture and a vibrant pop of color against our otherwise neutral palette. This little garden consistently brings a smile to my face and serves as a testament to how even the smallest additions can significantly enhance the atmosphere of a room.
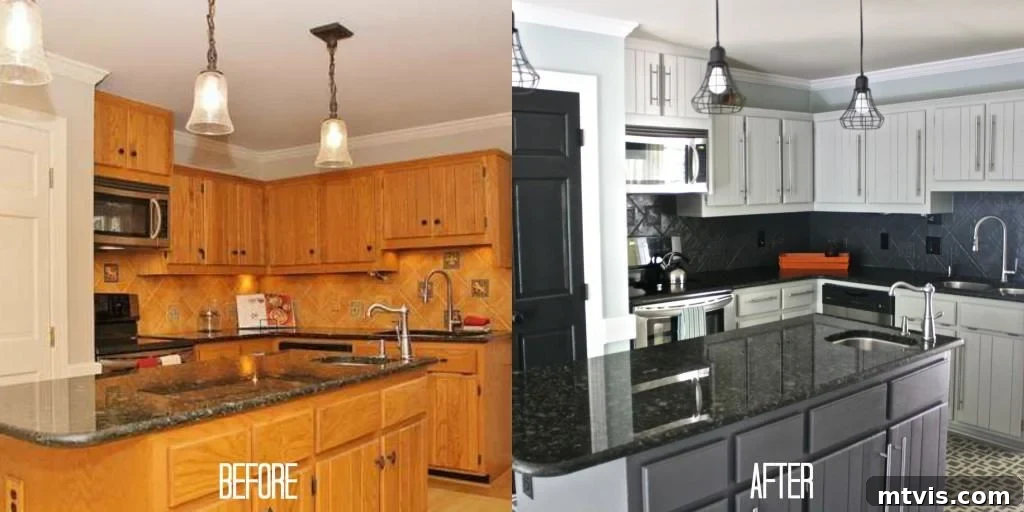
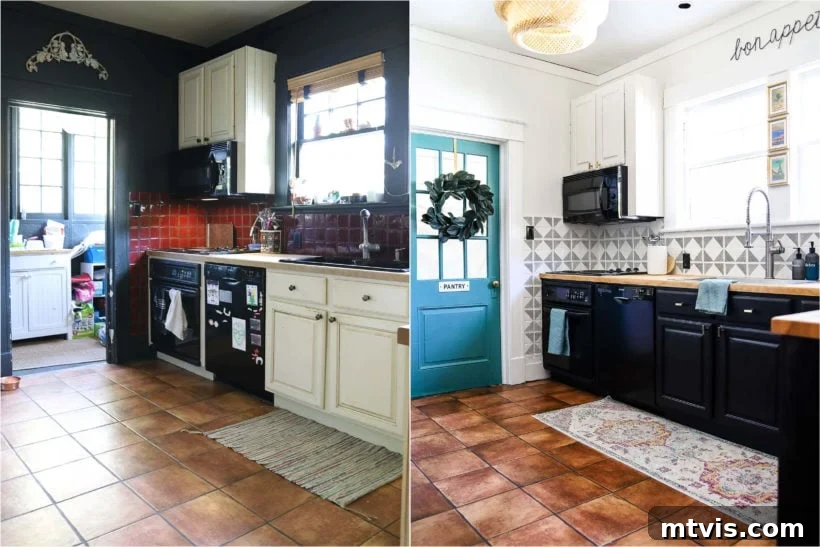
Whew! I told you this post would be packed with visuals, and I hope every single photo has provided a dose of inspiration for your own home projects. Before we wrap things up, it’s always incredibly satisfying to pause and reflect on the transformation. So, as is customary, I’m going to leave you with a couple of dramatic before and after comparison shots. These visual juxtapositions truly underscore the incredible power of a budget-friendly kitchen makeover and the remarkable change that can be achieved with vision and determination.
Your Comprehensive Budget Kitchen Makeover Source List
Curiosity piqued? We thought so! For those eager to replicate elements of our budget kitchen makeover, or simply to find inspiration for their own projects, here is the detailed source list. We’ve included photo legends to make it even easier to identify each item and understand its role in our transformation. Remember, achieving a high-end look on a budget is all about smart choices and knowing where to find those hidden gems!
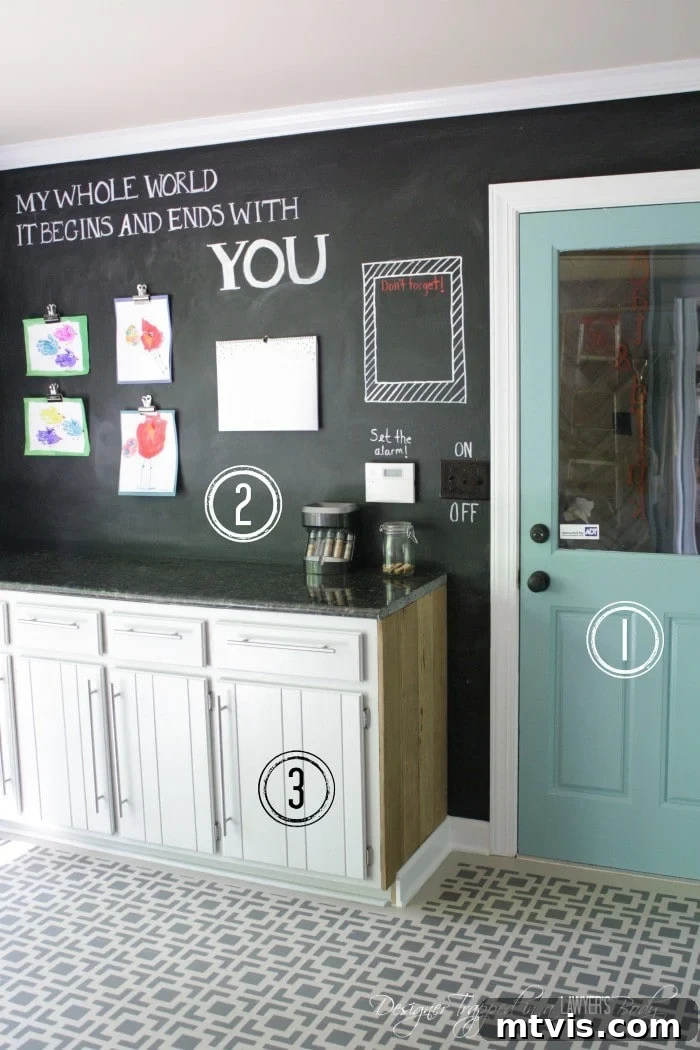
- Wall & Window Trim Paint: Lyndhurst Duchess Blue by Valspar (semigloss finish). This sophisticated shade provided a stunning contrast and cohesive feel, extending even to our exterior-facing window trims not visible in these specific photos.
- Chalkboard Paint:Chalkboard paint by Valspar. This was the magic behind our versatile and interactive chalkboard wall, chosen for its smooth finish and durability.
- Cabinet Paint:Seagull Grey Milk Paint by General Finishes. This particular paint was key to our cabinet transformation, offering a beautiful, durable finish without the need for extensive prep work like sanding or priming.
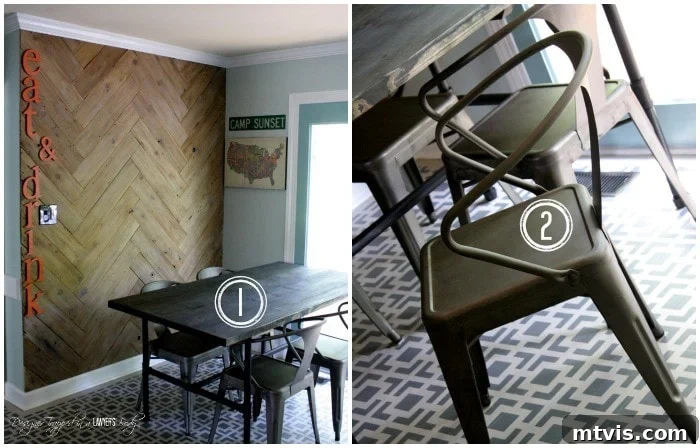
- Dining Table:Our very own DIY Industrial Pipe Table. A project we’re immensely proud of, offering a robust and stylish dining solution that saved us hundreds compared to store-bought alternatives.
- Dining Chairs: Vintage Tabouret Stacking Chairs, Set of 4 from Overstock.com ($209.00 – an incredible deal at around $50 per chair!). Finding these chairs was a testament to patience and savvy online shopping, proving that high style doesn’t have to come with a high price tag.
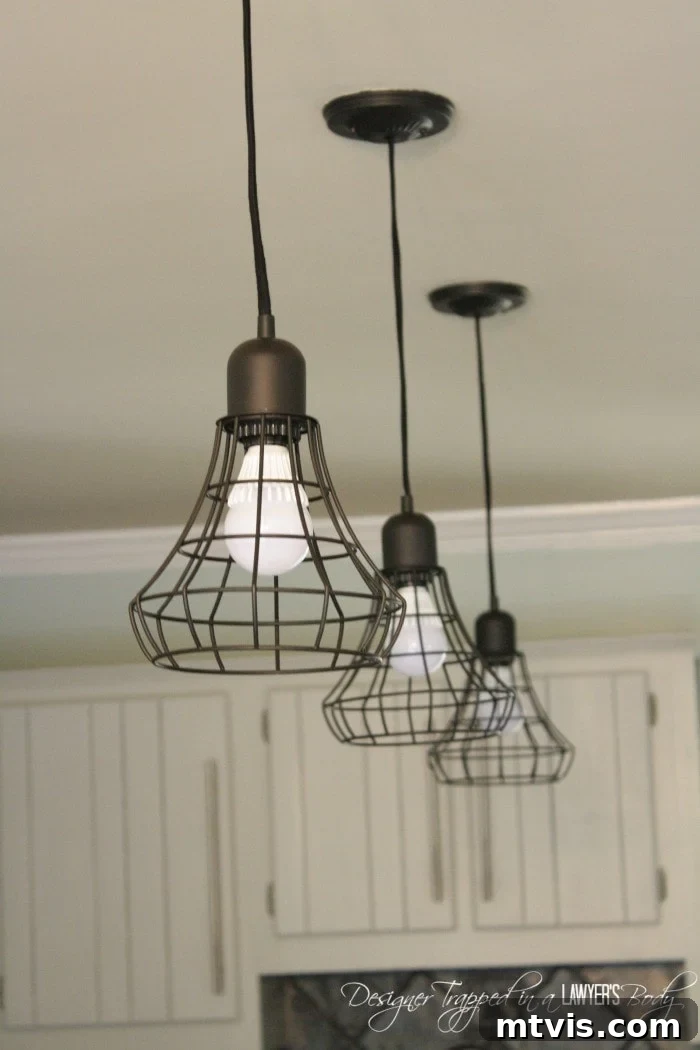 These stunning industrial pendant beauties that adorn our kitchen island were a fantastic find from Target, and are an absolute steal at only $22.99 each! Their affordability makes them an accessible option for anyone looking to add a touch of industrial charm without overspending.
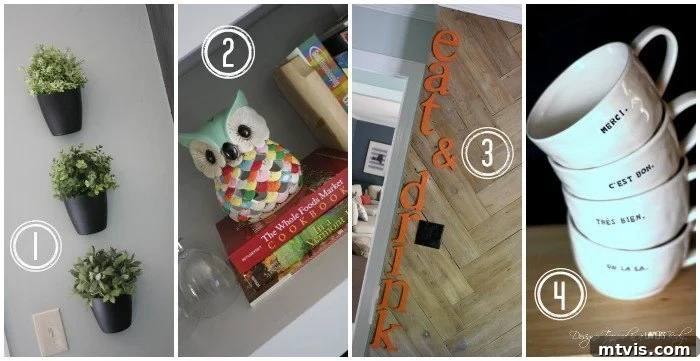
- Vertical Succulent Garden: All of the faux succulents and plastic wall pots (Bygel containers – only $.99 each!) were sourced from Ikea. While these budget-friendly finds are usually available, we recommend checking online for availability if you’re not near an Ikea store.
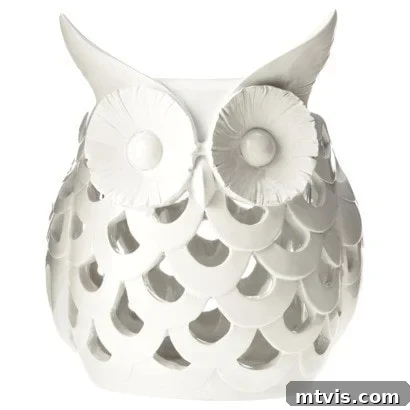
- Owl Statue: You guys, this fabulous owl originally came from Urban Outfitters and is sadly no longer available. However, fear not! I’ve done the legwork and found two fantastic alternatives for you. The first is a gorgeous option from Anthropologie, though it comes with a slightly higher price tag at $68.00. A more budget-conscious choice is another delightful owl from Urban Outfitters priced at $12.99. Finally, Target offers a charming owl for $29.99 that could easily be customized with paint to perfectly mimic the one in my kitchen. I’m so smitten with the Target option that I’m planning to order it myself for another spot in our home!
- “Eat & Drink” Letters: These iconic letters were acquired from Viva Terra many years ago. Originally crafted from misprinted cans, they displayed all their unique typography in our previous home. For this kitchen, we gave them a vibrant orange spray paint makeover, which perfectly complements our industrial-chic aesthetic. If you’re looking to recreate similar typography art, there are fantastic galvanized metal letter options available right now that offer a similar industrial vibe. And of course, you can always learn how we constructed our incredible herringbone plank wall for FREE right here, providing the perfect backdrop for such statement pieces.
- Coffee Mugs:My beloved Cafe Au Lait mugs from Bambeco. These have been a huge hit with many of you, and I’m thrilled to report that they are still available for purchase! It’s always a win when a favorite accessory remains accessible, allowing more people to enjoy a touch of everyday luxury.



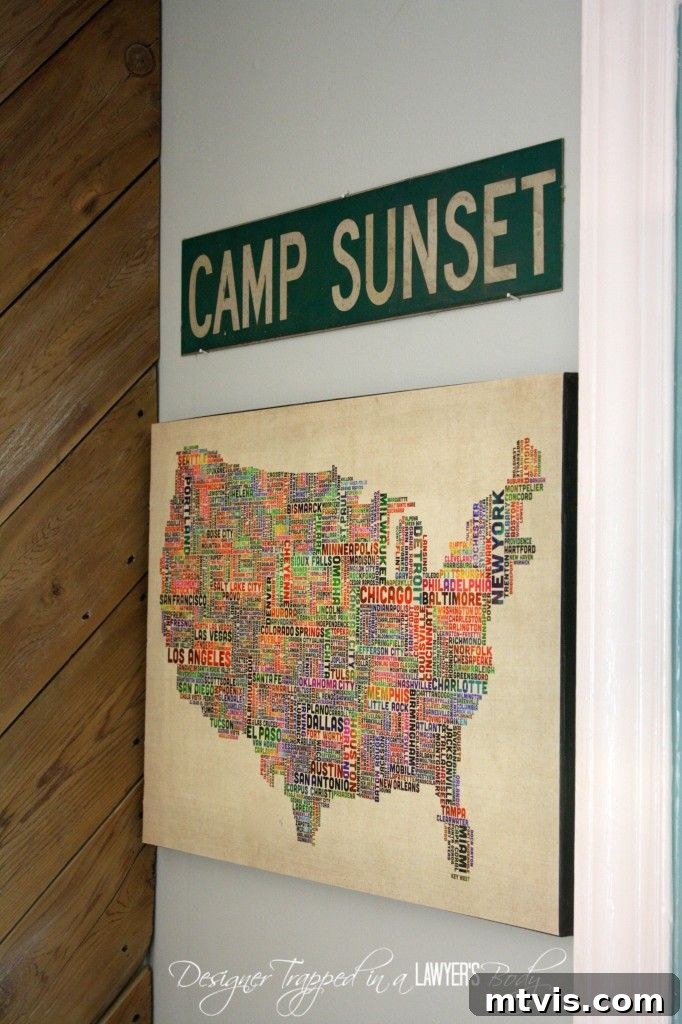
The fascinating typography map poster you see was a serendipitous find at a small, independent store. However, you can achieve a very similar look by ordering a high-quality print from GreatBigCanvas.com, and then transforming it into your own custom art canvas. We’ve even provided a comprehensive tutorial outlining exactly how I made this statement piece here, empowering you to replicate this unique decor element in your own home with ease.
So, after this deep dive into the second half of our budget kitchen makeover, what stands out to you the most? What’s your absolute favorite part of this transformation? We love hearing your thoughts and insights! If you’re still curious about other elements we used, remember you can check out the full source list for the rest of the kitchen here. Were there any surprising revelations or unexpected changes that particularly caught your eye? And most importantly, what brilliant budget-friendly ideas have you implemented in your own kitchen makeovers that you’d love to share with our community? Let’s inspire each other to create beautiful spaces without the hefty price tag!
Craving More Budget-Friendly Kitchen Makeover Inspiration?
If you’re hungry for even more proof that incredible kitchen transformations can happen on a shoestring budget, prepare to be amazed! We invite you to click here to discover the astonishing $1,000 kitchen makeover I orchestrated for my dear friend Thea. This project is a true testament to the power of creative problem-solving and smart budgeting, a seriously budget-friendly kitchen makeover that will undoubtedly leave you feeling incredibly inspired and ready to tackle your own home projects!
Ever wondered about the methodology behind transforming rooms and spaces within our home, particularly when striving for budget-friendly elegance? I’ve distilled my entire design philosophy and process into an accessible guide. Discover the secrets to creating spaces you adore without professional help or endless expenses by checking out Designer in a Binder®. It’s your comprehensive toolkit for navigating home decoration with confidence and creativity.
And for those who desire an even deeper dive into exclusive content, behind-the-scenes glimpses, and early access to our latest projects and tips, be sure to subscribe to our newsletter before you navigate away! Join our community of DIY enthusiasts and budget design lovers to stay continually inspired.