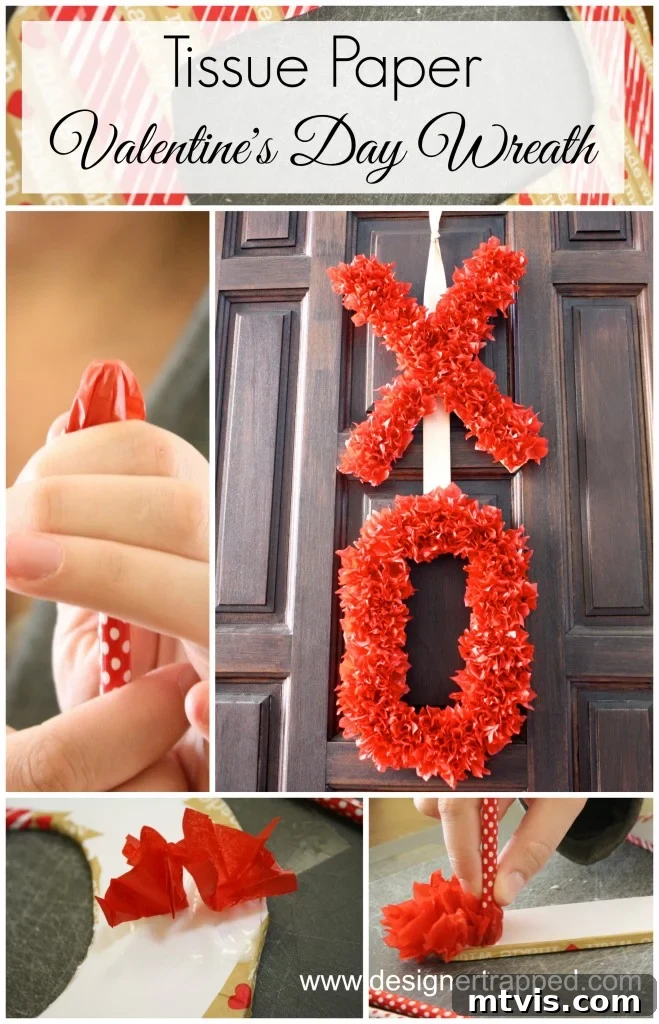
Craft a Fluffy & Fabulous DIY Valentine’s Day Wreath with Tissue Paper!

As the festive twinkle of Christmas decorations fades, many of us find ourselves grappling with a touch of the post-holiday blues. The vibrant energy of December gives way to the quieter, often colder, days of January, leaving our homes feeling a little too “normal.” If you’re yearning to inject some warmth, color, and cheer back into your living space, then you’ve landed in the perfect spot! This year, let’s banish those blues by embracing the sweet sentiment of Valentine’s Day with a delightful and surprisingly simple DIY project: a gorgeous tissue paper wreath.
While I don’t typically go overboard with Valentine’s Day decor, a touch of thoughtful, handmade ornamentation can make all the difference. This project offers just the right amount of festive charm without demanding extensive time or resources. It’s a fantastic way to transition your home from winter’s starkness to a welcoming haven filled with love and warmth. Trust me, a little DIY magic is incredibly therapeutic!
Ready to transform your space and lift your spirits? Dive into this comprehensive guide to create your very own custom Valentine’s Day wreath. We’ll walk you through each step, ensuring a smooth and enjoyable crafting experience. This post contains some affiliate links. Click here to read my full disclosure policy.
Your Ultimate Guide to Making a DIY Valentine’s Day Wreath
Crafting your own Valentine’s Day wreath is a rewarding endeavor that allows for immense personalization. Imagine a lush, fluffy display gracing your front door or adorning your mantelpiece, spreading love and joy throughout your home. This particular project focuses on creating eye-catching ‘X’ and ‘O’ shapes, symbolic of hugs and kisses, using the soft, textural beauty of tissue paper. The result is a dimensional, eye-catching piece that looks far more intricate than it actually is to create. Let’s gather our supplies and get started on this enchanting decorative journey.
Materials You’ll Need:
Before you embark on this creative adventure, ensure you have all the necessary items at hand. Having everything prepped will make the process much smoother and more enjoyable.
- Foam Core Board (2 pieces, 11 x 14 inches each): This provides a sturdy yet lightweight base for your letters. Its rigidity is perfect for holding the tissue paper’s volume.
- Washi Tape: Not just for decoration, washi tape helps to create a polished finish by neatly covering the rough edges of your foam core letters. Choose a color or pattern that complements your overall design.
- Red Tissue Paper: The star of our project! Red is a classic Valentine’s Day color, but feel free to explore pinks, whites, or even an assortment for a multi-tonal effect. You’ll be surprised how much fluffiness a single pack can provide.
- 1 1/4-Inch Old Gold Ribbon: This adds a touch of elegance and serves as the hanging mechanism for your wreath. Gold offers a beautiful contrast to red, but silver, white, or even a patterned ribbon would work wonderfully.
- Glue: A strong liquid glue or craft glue is essential for securely attaching the tissue paper. Make sure it dries clear.
- Scissors: For cutting tissue paper and ribbon. Sharp scissors will ensure clean cuts.
- Utility Knife: For precisely cutting the foam core board. Always exercise caution when using a utility knife.
- Cutting Board: A self-healing cutting mat or any sturdy surface to protect your work area when using the utility knife.
- Pencil: For drawing your letter outlines on the foam core.
Step-by-Step Instructions to Create Your Fluffy Valentine’s Wreath:
For a quick visual overview of the entire project, you can watch a short demonstration in this brief video tutorial. Otherwise, follow our detailed steps below:
1) Shape Your Foundation: Drawing and Cutting ‘XOXO’ Letters
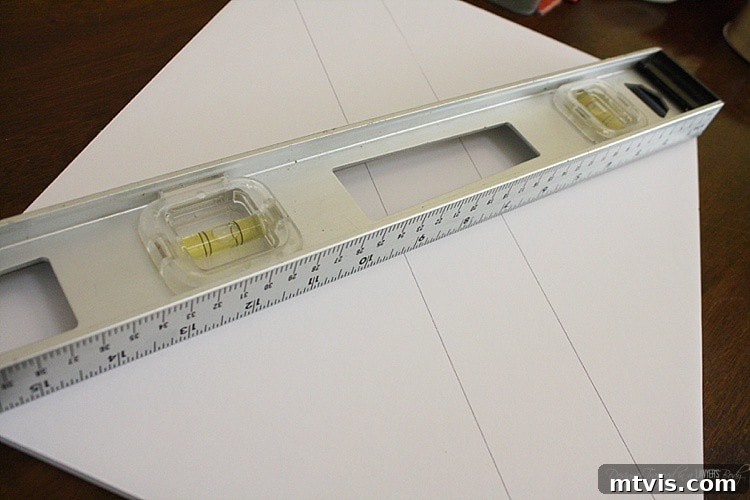
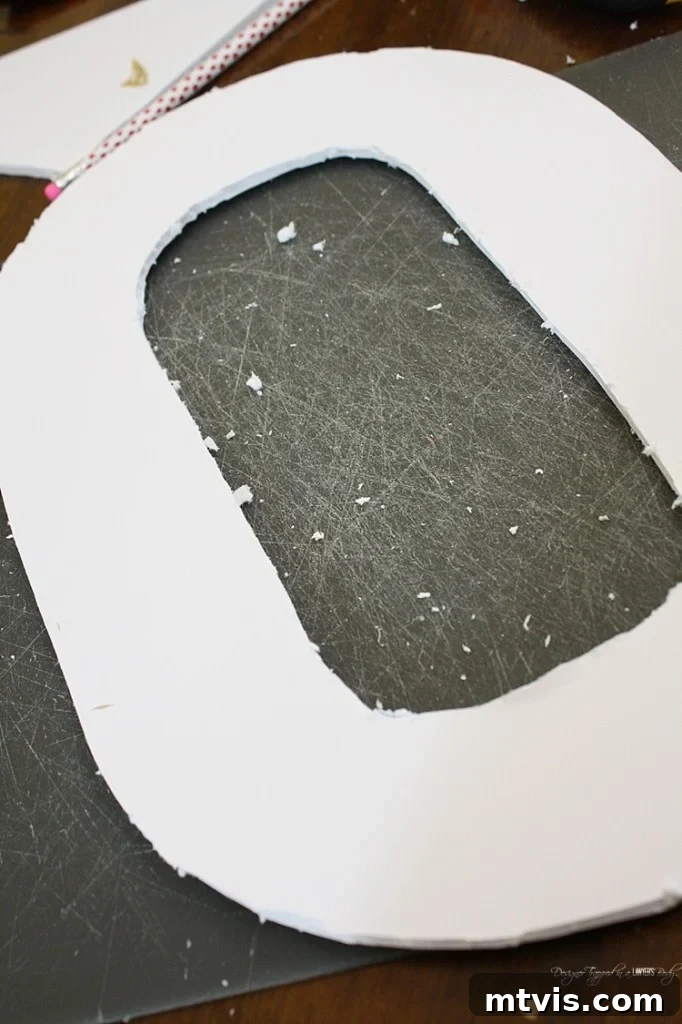
Your wreath begins with carefully crafted foam core letters. Lay your foam core board flat on your cutting mat. Using your pencil, draw out your ‘X’ and ‘O’ shapes. Precision is key here for a professional-looking finish. For the ‘X’, a small level or a ruler will be incredibly useful to ensure straight lines and symmetrical angles. Remember, you’re creating the “hugs” and “kisses” of your wreath, so aim for pleasing proportions.
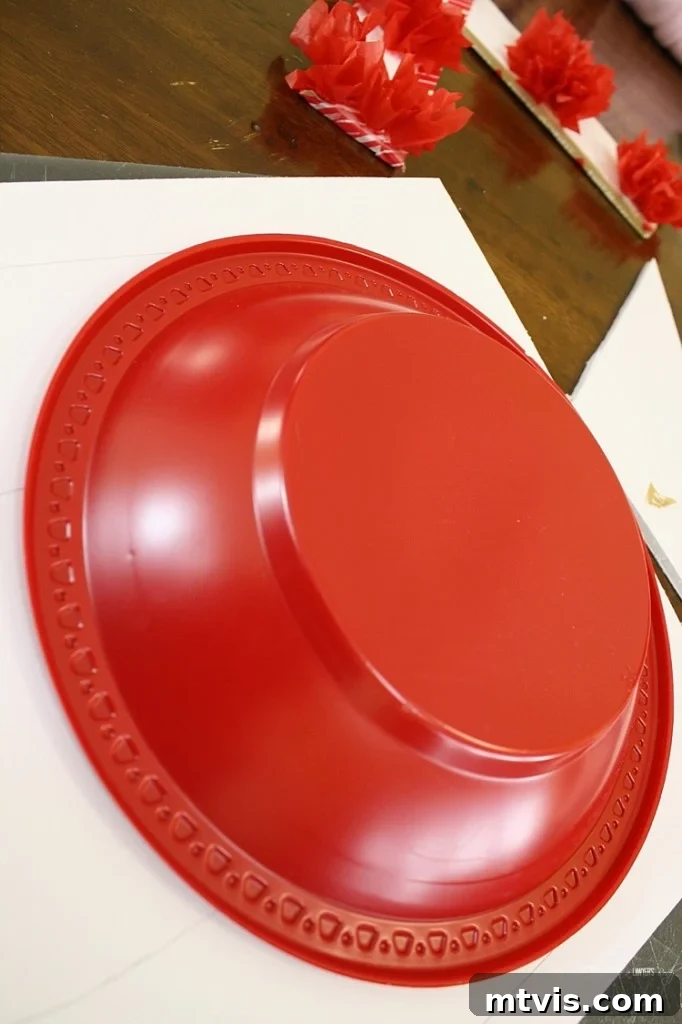
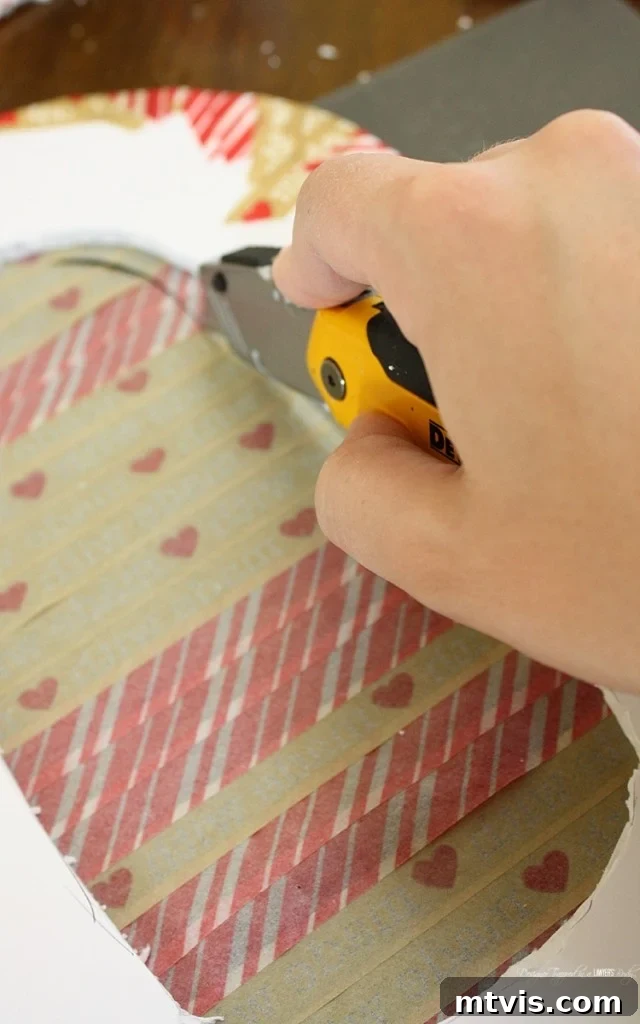
For the ‘O’, you can use household items to create perfect curves. A red plastic bowl, as mentioned, is excellent for the top and bottom arcs. If you desire an elongated ‘O’, as I did, you can freehand the side and middle sections once your initial curves are established. This technique makes achieving an appealing oval shape much simpler. Once your shapes are drawn, carefully cut them out using your utility knife. Always cut away from yourself, using multiple light passes rather than one deep cut, especially with thicker foam core. This ensures cleaner edges and greater safety.
2) The Finishing Touch: Covering Edges with Washi Tape
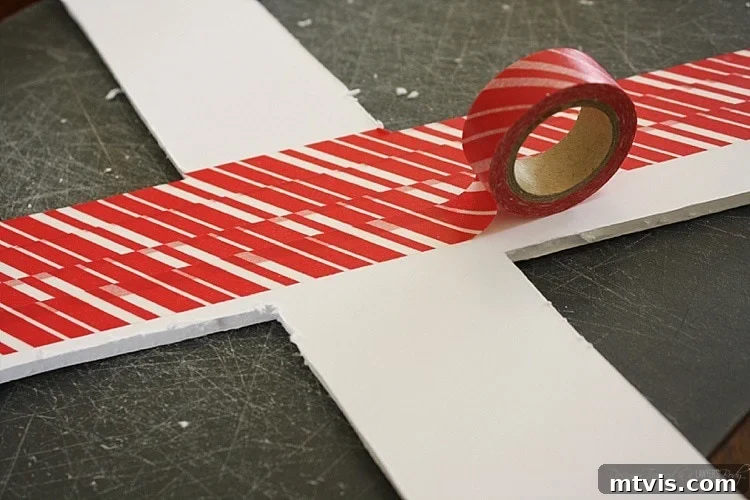
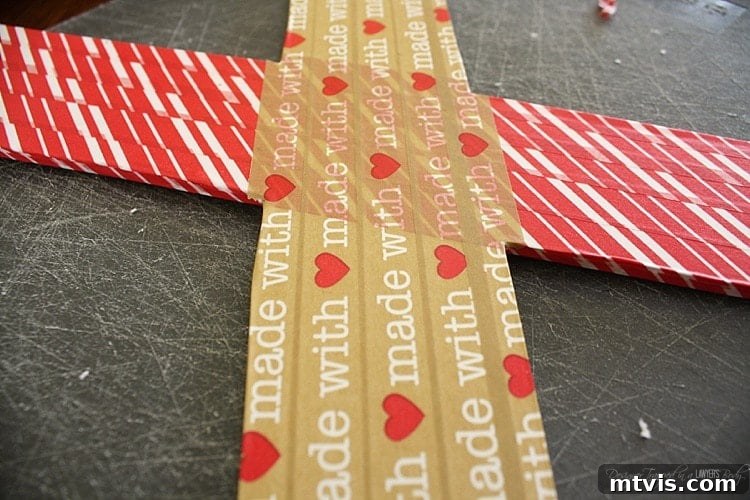
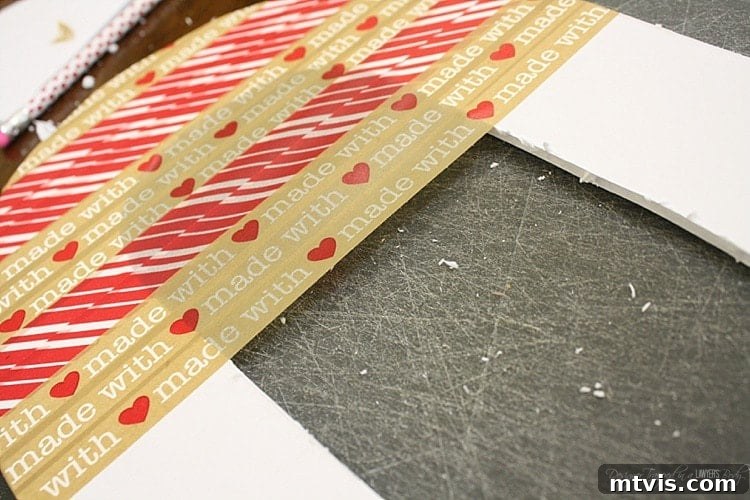
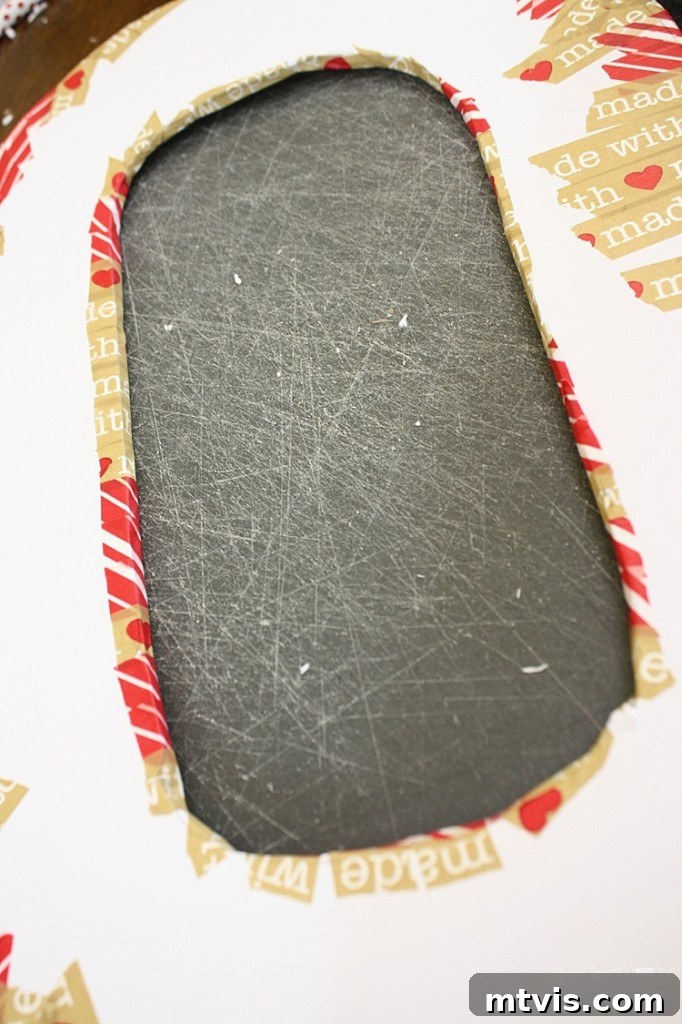
Now that your letters are cut, you’ll likely notice that the edges of the foam core can be a little rough or uneven. This is where washi tape comes to the rescue! While not strictly essential for the structural integrity of your wreath, this step significantly elevates its overall appearance. Washi tape provides a clean, finished look, covering any imperfections and adding a subtle decorative touch.
Begin by carefully applying the washi tape along the back edges of your letters. As you go, be sure to wrap the tape over the front edge of the foam core. This technique ensures that the rough, exposed foam core is completely encased, creating smooth, professional-looking borders. Not only does this enhance the aesthetic appeal, but it also helps to protect the edges from minor dings and wear over time. Experiment with different washi tape designs – a subtle pattern or a contrasting solid color can add an unexpected pop to your final design.
3) Preparing the Fluff: Cutting Tissue Paper Squares
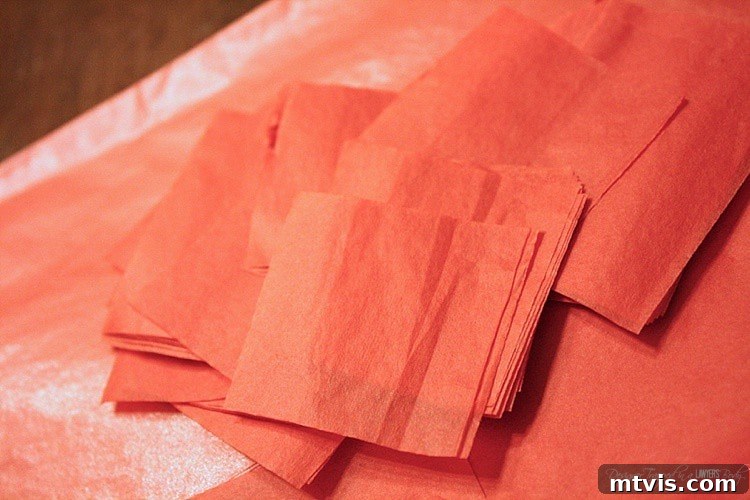
Now for the truly fun and transformative part: preparing your tissue paper! The key to achieving that wonderfully fluffy, textured look is to cut your tissue paper into small, manageable squares. I recommend cutting them into approximately 1-inch squares. Don’t worry about absolute perfection; slight variations will only add to the organic, textural appeal of your finished wreath.
To make this step more efficient, stack several sheets of tissue paper together and cut through them simultaneously. You’ll be amazed at how quickly you can accumulate a large pile of these tiny squares. For my Valentine’s Day wreath, I used less than one standard pack of tissue paper, and it yielded an abundance of these 1-inch squares – far more than enough to cover both letters generously. This technique is not only satisfying but also a testament to how budget-friendly this beautiful craft can be.
4) The Technique: Preparing Tissue Paper on Your Pencil
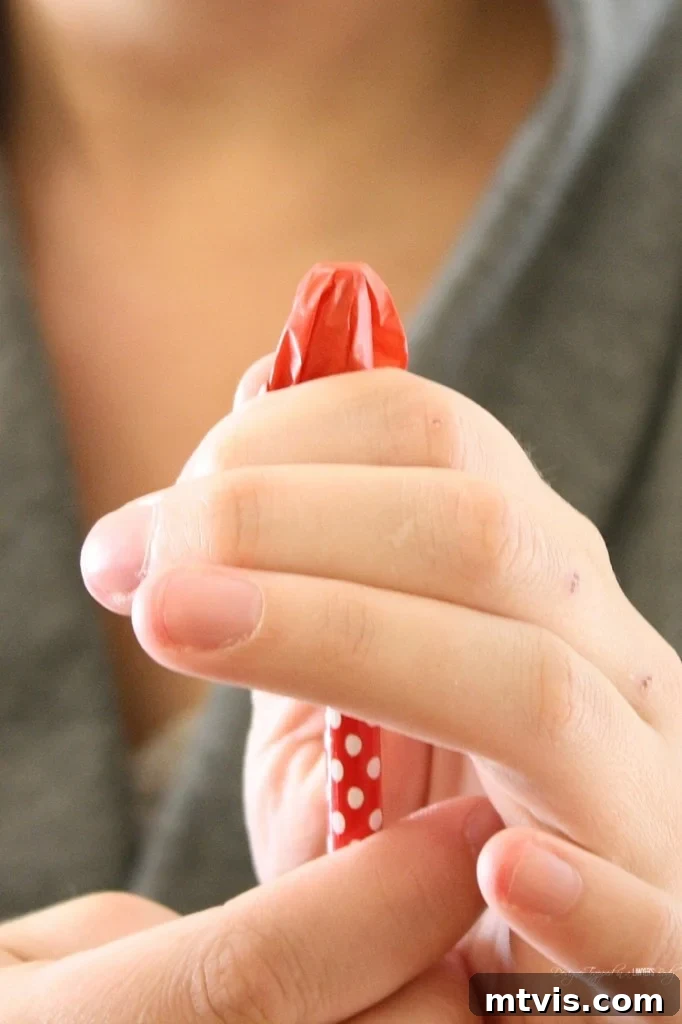
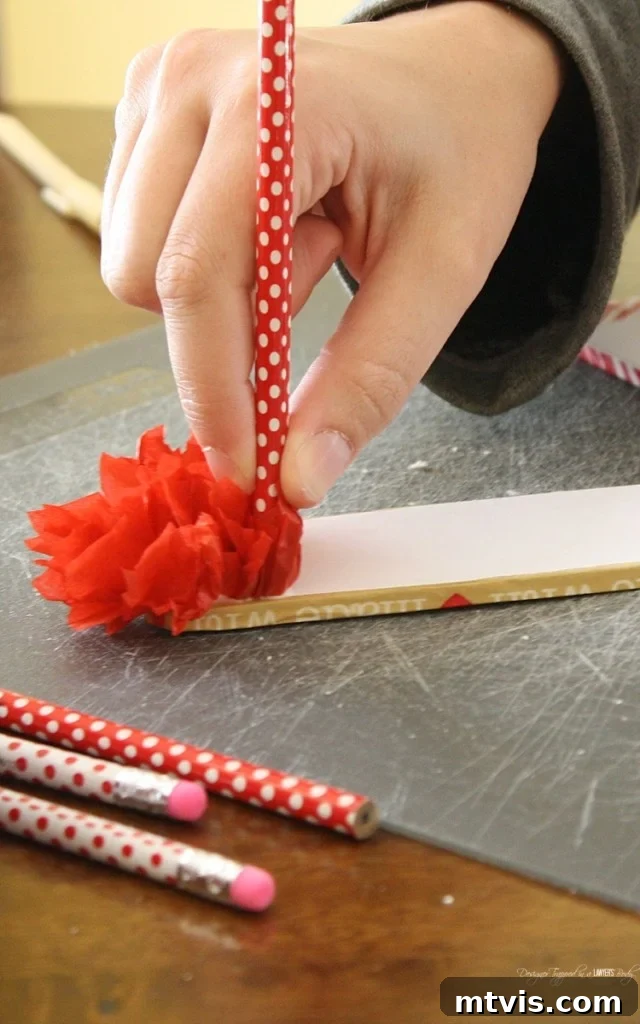
This is where the magic happens and your wreath truly begins to take shape! Take one of your neatly cut 1-inch tissue paper squares. Place the center of this square over the eraser end of your pencil. Gently gather the edges of the tissue paper around the pencil eraser, creating a small, crumpled cone shape. The pencil acts as a perfect tool for pressing the tissue paper into the glue, ensuring consistent fluffiness and coverage.
This simple technique is what creates the charming, three-dimensional texture that makes this wreath so unique and appealing. Don’t press too hard when gathering, just enough to hold the paper in place on the pencil. You’ll repeat this motion hundreds of times, so getting comfortable with the technique early on will make the process flow smoothly.
5) Building the Fluff: Applying Tissue Paper to Your Letters
With your tissue paper square securely on the pencil eraser, it’s time to bring your letters to life! Apply a generous but not excessive amount of glue to a small section of your foam core letter. Work in small sections to prevent the glue from drying before you can apply the tissue paper. Then, with the tissue paper still on the pencil, press the pointed, gathered end of the tissue paper firmly into the glue-covered portion of the foam board. Lift the pencil, leaving the tissue paper behind. Repeat this process, square after square, covering your letters entirely with the fluffy tissue paper.
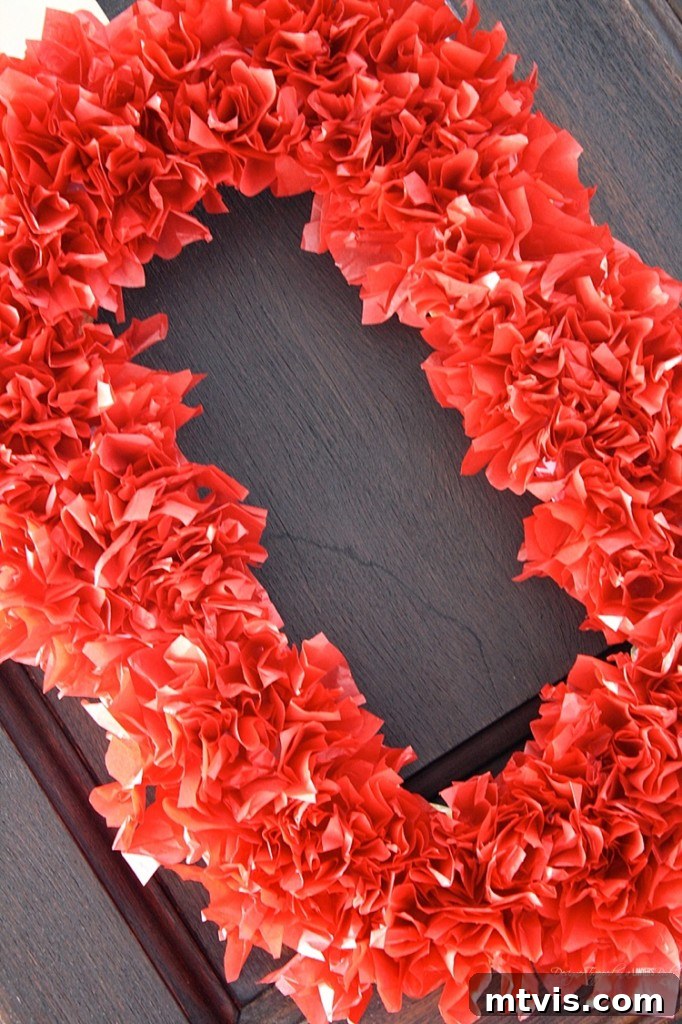
This step requires a bit of patience and dedication. I won’t sugarcoat it – covering both letters can take a couple of hours. However, it’s an incredibly meditative and enjoyable process, especially if you turn it into a family activity. My girls loved hanging out with me, busying themselves with their own crafts while I meticulously worked on mine. It becomes a wonderful opportunity for quality time and shared creativity. Ensure the tissue paper squares are placed close enough together to create a dense, unbroken field of texture, giving your wreath that luxurious, full appearance. Once you are finished covering your letters, set them aside and let the glue dry completely. This might take several hours, or even overnight, depending on the type of glue used and the humidity in your environment.
6) The Grand Finale: Adding the Hanging Ribbon
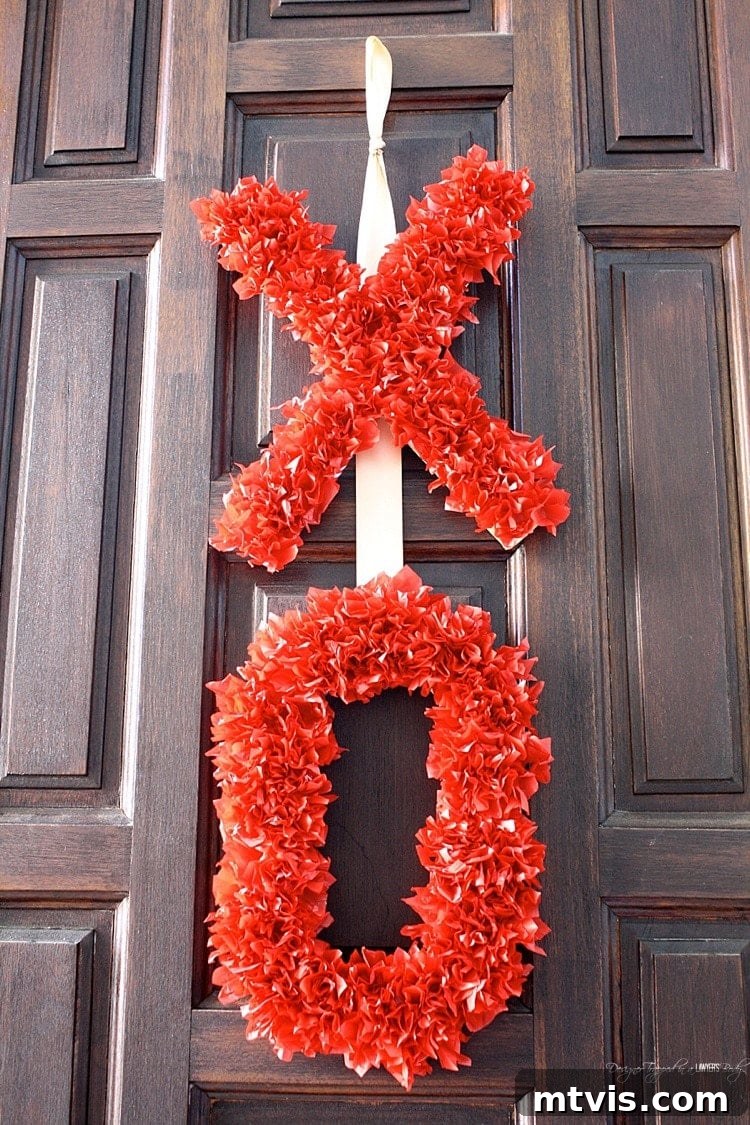
Once all the glue has thoroughly dried and your tissue paper creations are securely affixed to the foam core, you’re ready for the final, elegant touch: attaching the ribbon. I opted for a beautiful gold satin ribbon, measuring 1 1/4-inch wide. The lustrous gold provides a sophisticated contrast to the vibrant red tissue paper, elevating the overall aesthetic of the wreath.
Using a hot glue gun, carefully attach your chosen ribbon to the back of one of your letters. I chose to simply tie a loop from which to hang my finished “wreath” – for lack of a better term for this charming project! This creates a minimalist and clean hanging solution. However, you could also tie a pretty bow at the top for a more traditional or elaborate look, allowing the ribbon ends to drape gracefully. Ensure the ribbon is securely attached with the hot glue for safe hanging. Hot glue sets quickly, so position your ribbon carefully before pressing it down.
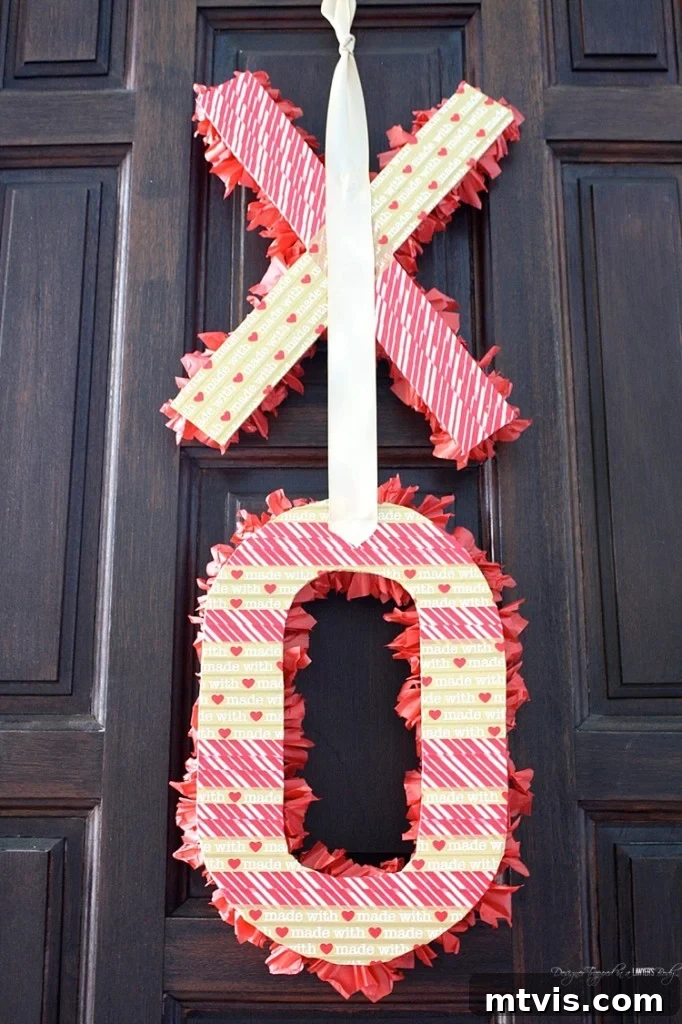
Hang it Up & Show it Off!
That’s it! Your stunning, fluffy, and fabulous DIY Valentine’s Day wreath is complete. Take a moment to admire your handiwork. The texture of the tissue paper, combined with the symbolic ‘XOXO’ letters, creates a truly unique and heartwarming piece of decor. Hang it proudly on your front door to welcome guests, display it over your fireplace mantel as a festive focal point, or even adorn a wall in a bedroom or nursery. Its lightweight nature makes it versatile for various placements without needing heavy-duty hanging hardware.
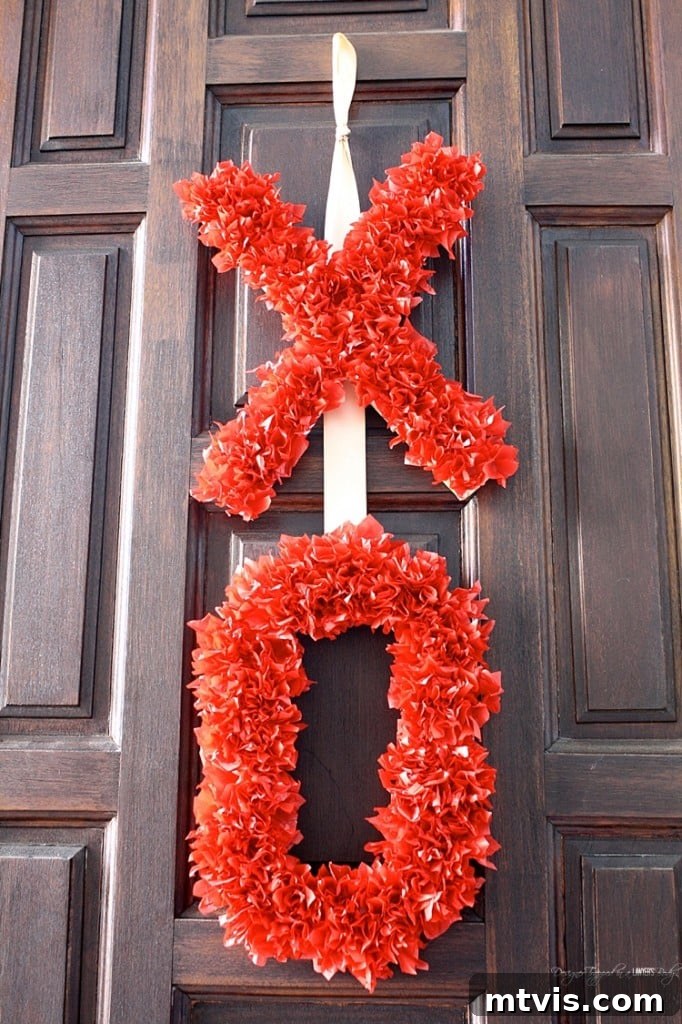

Customization Ideas to Make It Truly Yours
Do you love this Valentine’s Day wreath as much as I do? Are you eager to create one for your own home? The beauty of DIY lies in the endless possibilities for customization. Don’t feel confined to red; consider a palette of soft pinks, elegant whites, or even a mix of vibrant fuchsias and oranges for a playful twist. Imagine an ombre effect, transitioning from a deep red to a light pink or white across your letters – it would be absolutely fabulous! Someone should definitely try that and share the results!
- Color Variations: Experiment with shades of pink, purple, or even multi-colored tissue paper. You could do one letter in pink and the other in red, or create a rainbow effect.
- Glitter & Embellishments: Before the glue dries completely, sprinkle a fine layer of glitter for some extra sparkle. You could also hot glue small artificial flowers, pearls, or tiny hearts onto the tissue paper for added charm.
- Different Shapes: Instead of ‘XOXO’, why not create a classic heart shape, or the initials of a loved one? This project is incredibly adaptable to any simple silhouette.
- Varying Texture: Try cutting some tissue paper squares slightly larger or smaller to create subtle variations in the fluffiness. You could even incorporate different materials, like small fabric scraps, for a mixed-media look.
- Hanging Options: Beyond a simple loop or bow, consider attaching multiple ribbons of varying lengths for a cascading effect, or even incorporating battery-operated fairy lights for a magical glow in the evenings.
This DIY tissue paper wreath is more than just a decoration; it’s a labor of love, a joyful expression, and a delightful way to celebrate the season of romance. It proves that beautiful home decor doesn’t have to be expensive or complicated. So, gather your materials, put on some cheerful music, and get ready to craft a stunning piece that will bring smiles and warmth to your home this Valentine’s Day.