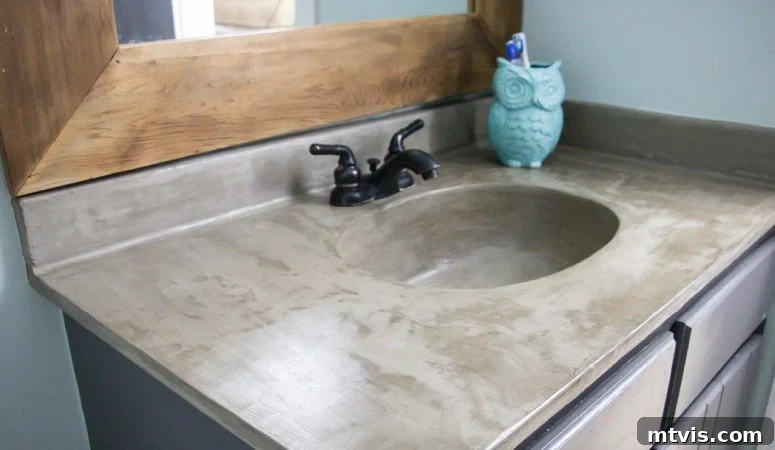
The Enduring Charm: A Long-Term Review of Our DIY Concrete Vanity and Essential Updates
Greetings, fellow DIY enthusiasts! One of the most common questions I receive revolves around the longevity and performance of our various home decor projects. It’s a valid concern – after all, who wants to invest time and effort into something that won’t stand the test of time? That’s why I’m thrilled to launch our new “How’s It Holding Up?” series, where we revisit some of our most popular transformations to give you the honest truth. Kicking off this exciting series, we’re diving deep into the performance of our beloved DIY concrete vanity. This project, which brought a dramatic transformation to our powder room, was first completed way back in August 2014 – meaning we’ve had well over nine years to put it to the test! Today, we’ll share an extensive update, reveal a small but crucial tweak we made, and offer comprehensive insights into its lasting durability.
From Drab to Fab: The Story Behind Our DIY Concrete Vanity
Every great DIY story begins with a problem, and our powder room was no exception. Let me take you back to what we were working with:
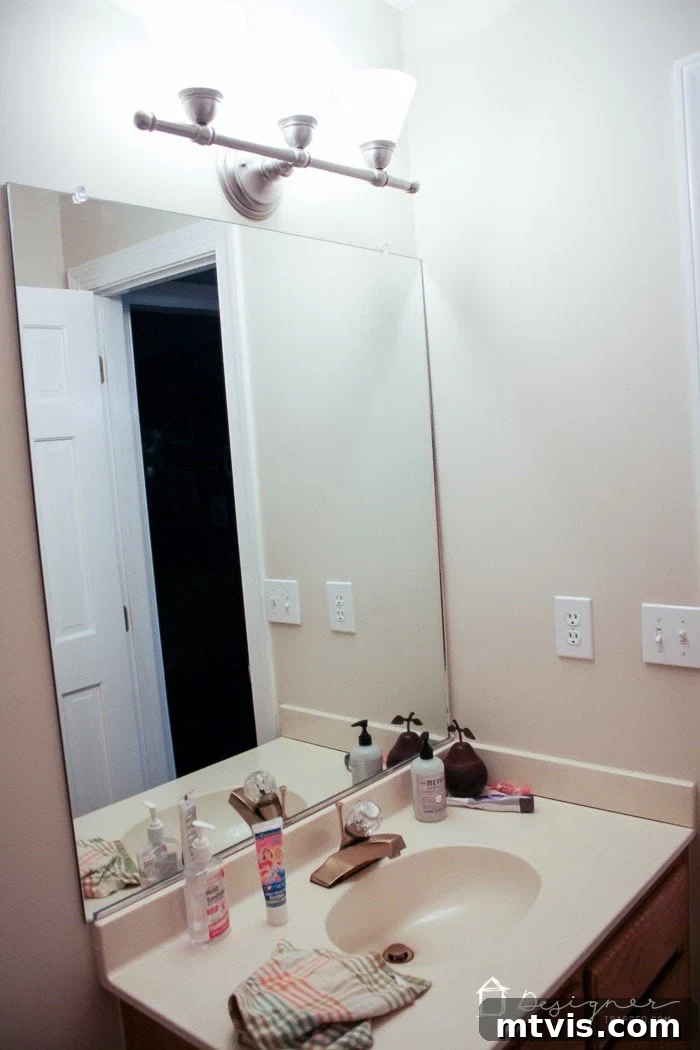
Ah, the memories! Picture this: a distinctly uninspiring cultured marble vanity, a standard-issue builder-grade mirror, and a truly vibrant, orangey oak cabinet base. It was the epitome of dated and certainly not the aesthetic we envisioned for our home. Like many homeowners, we were navigating a tight budget during our powder room renovation. We desperately needed an economical yet impactful solution to revitalize the vanity without resorting to a full, costly replacement. Having previously achieved remarkable success with our DIY concrete fireplace – a project that proved concrete could be both versatile and budget-friendly – we felt emboldened to tackle the vanity. The idea was simple: apply a concrete overlay directly over the existing surface. But let’s be honest, the thought of smearing concrete all over a sink felt a little… unconventional. Who does that? Well, this girl, apparently!
Despite the initial skepticism, the results were nothing short of spectacular. We absolutely adore the raw, industrial aesthetic that concrete brings, and we were eager to see if this unconventional approach would truly pay off in a high-moisture environment like a bathroom.
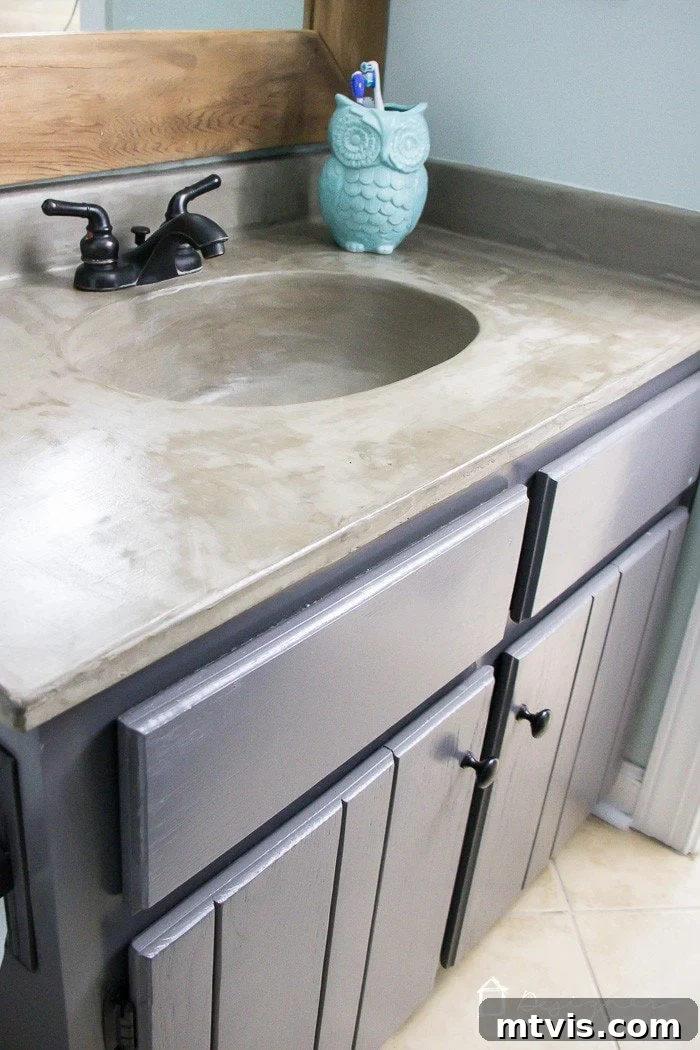
It’s genuinely challenging to believe that these are photos of the same powder room, isn’t it? The transformation was profound, turning a bland space into a modern, custom-looking area that feels both sophisticated and uniquely ours. If you’re inspired to embark on your own concrete vanity journey and want to see how we achieved this incredible look from start to finish, you’ll find our comprehensive tutorial packed with all the details you need to get started.
***** Ready to create your own stunning concrete vanity? Discover the complete step-by-step tutorial for the DIY concrete vanity overlay by clicking HERE. *****
DIY Concrete Vanity Update: Long-Term Performance and an Essential Tweak
After nearly a decade of daily use, I’m thrilled to report that our DIY concrete vanity has held up phenomenally well overall! The surface remains durable, the aesthetic is still incredibly appealing, and it continues to be a focal point that receives countless compliments. However, transparency is key in these long-term reviews, and there’s one specific tweak we made that I absolutely need to share with you. This adjustment, while minor, significantly improved the longevity and appearance of the vanity around its most vulnerable point: the drain.
Initially, we encountered some discoloration around the drain, which we quickly identified as a likely consequence of water seeping underneath the concrete overlay in that specific area, causing a darkening effect. While not catastrophic, it was certainly noticeable and something we wanted to address for a truly flawless finish. The lesson learned? If we were to undertake this project again, our primary adjustment would be to leave the drain *in place* during the initial concrete application, carefully working the concrete around it. This would create a more seamless, water-tight seal from the beginning. You can get a sense of what I mean by looking closely around the drain in the following photo (please excuse the low quality; many of our original tutorial photos were taken with a phone camera at night!).
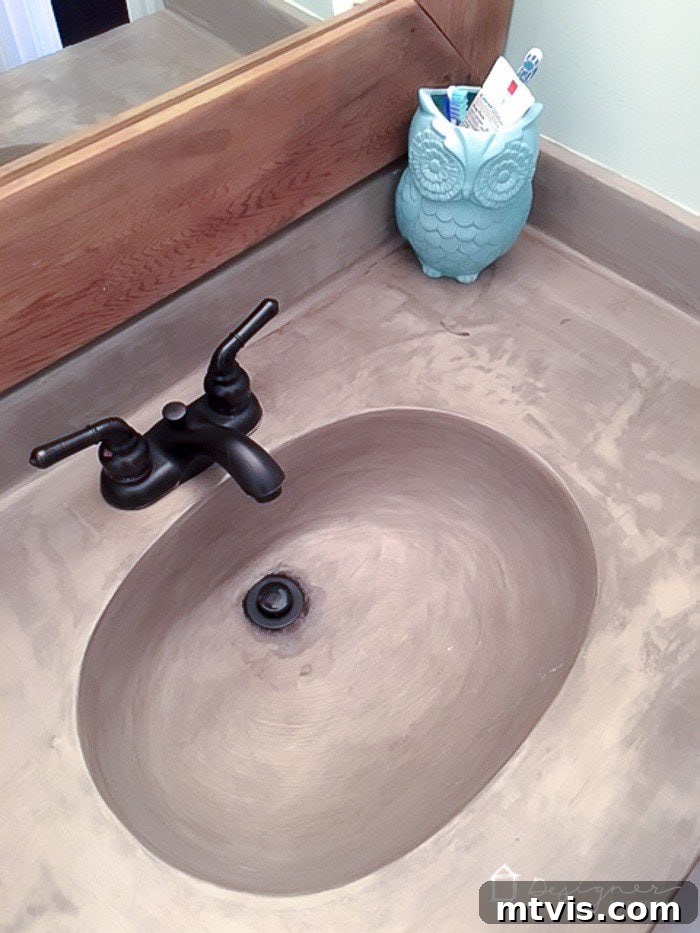
The excellent news is that even if you’ve already completed your concrete vanity and are experiencing similar drain discoloration, it’s a remarkably straightforward fix! The process involves a few simple steps to remove the affected concrete, re-seal the area, and restore your vanity to its pristine condition. Follow the detailed instructions below to tackle this common issue effectively.
How to Correct Any Darkening Around the Drain of Your DIY Concrete Sink Overlay
Addressing the drain discoloration is an achievable task that requires patience and precision. Here’s a step-by-step guide to revitalizing your concrete sink:
1) Prepare the Area: Score Around the Drain. Begin by taking a utility knife and carefully scoring the concrete overlay around the rim of your drain. This initial score creates a clean boundary and helps prevent chipping beyond the repair area when you start removing material.
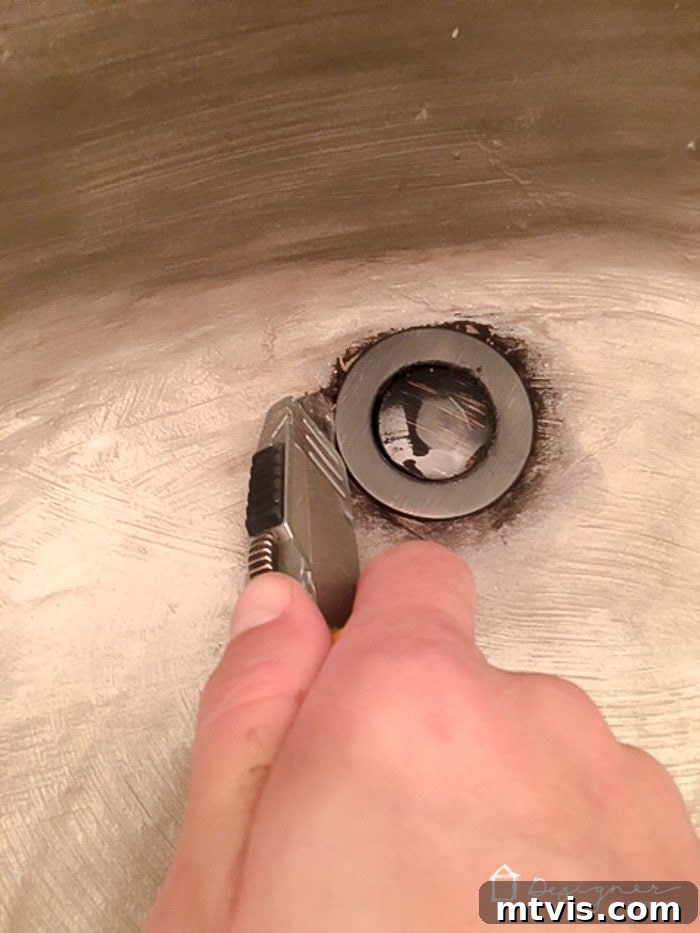
2) Remove the Affected Concrete. Carefully remove the drain assembly. Continue scoring along the circular line you just created with your utility knife. Apply gentle pressure, working your way around the circle, until you are able to carefully break away the discolored concrete that was sitting directly underneath your drain. Don’t stress about achieving a perfectly precise circle at this stage, but ensure the cleared area is slightly larger than the drain itself. This provides ample space for the new concrete and a better seal.
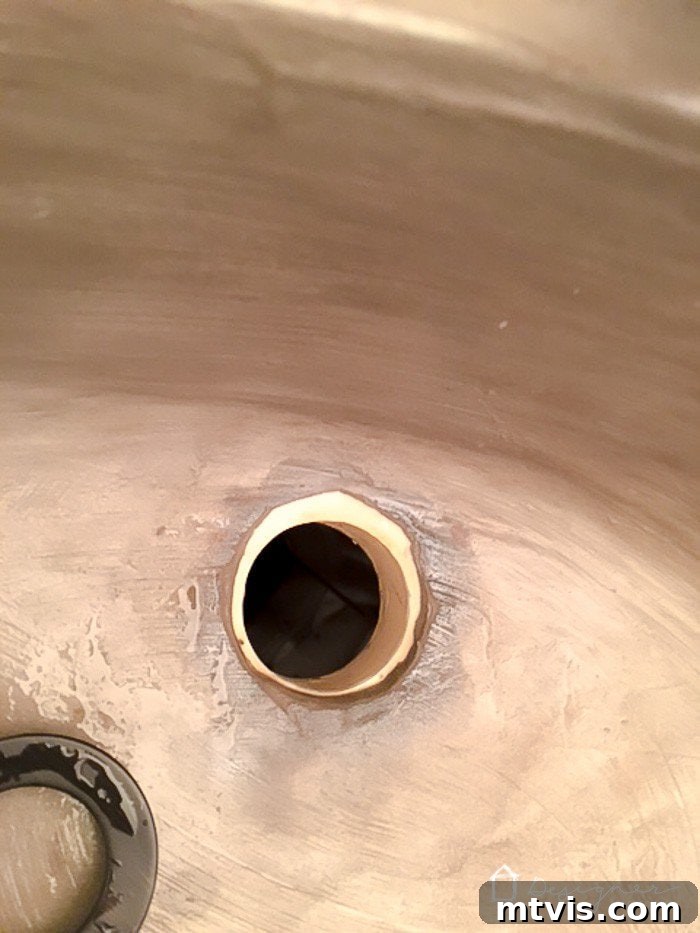
3) Re-install Your Drain. Once the old concrete is removed and the area is clean, carefully re-install your drain. Ensure it’s properly seated and secure according to the manufacturer’s instructions. This creates the base for your new concrete application.
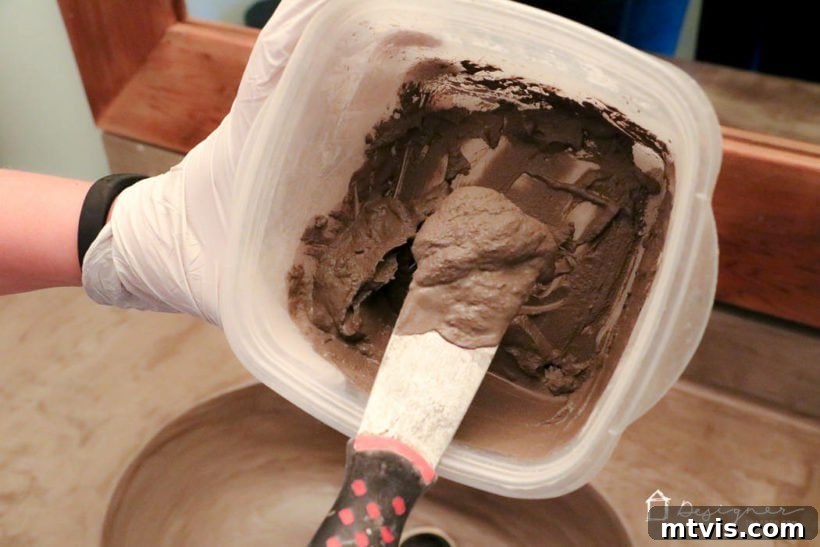
4) Prepare Your Concrete Mixture. In a separate container, mix your Ardex Feather Finish to a smooth, pudding-like consistency. This consistency is crucial for easy application and achieving a seamless finish. Avoid a watery mix, as it will be difficult to control, and a too-thick mix will be challenging to apply evenly.
5) Apply the New Concrete Around the Drain. Using your finger for precision, carefully apply the mixed concrete around the newly installed drain. Be sure to slightly overlap it onto the surface of the drain ring. This overlapping technique is vital for creating a tight, waterproof seal. Don’t fret if you make a slight mess on the drain itself; any excess can be easily wiped away later.
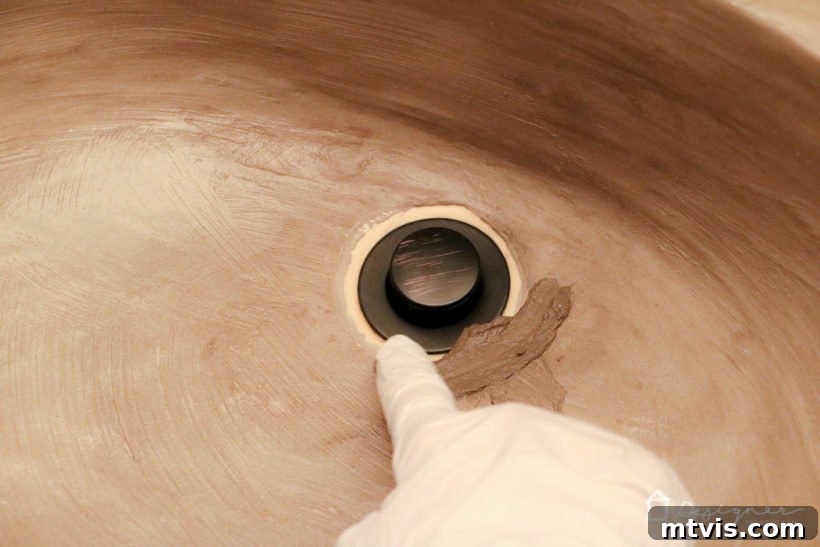
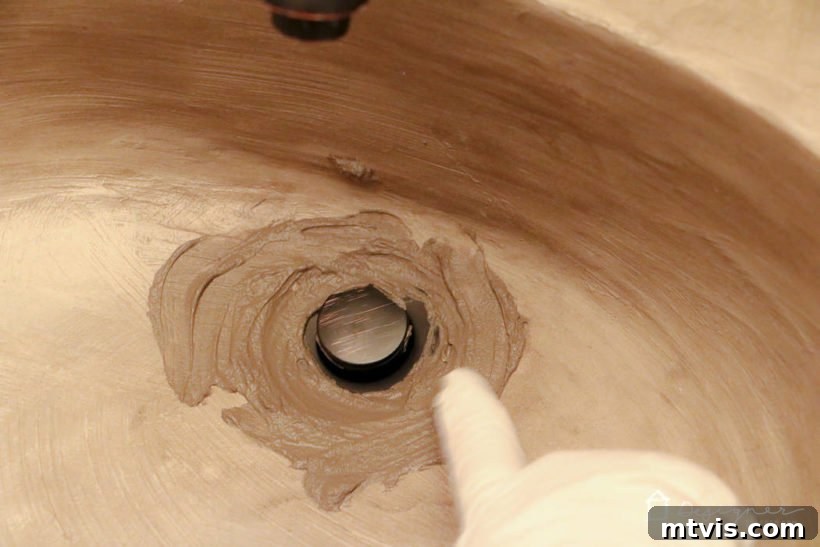
6) Smooth and Clean. Immediately after application, use a damp paper towel to gently remove any excess concrete from the drain itself. Simultaneously, carefully smooth out the new concrete circle, ensuring it blends as seamlessly and evenly as possible with the existing vanity surface. Aim for a polished, integrated look.
7) Even Out Color Differences. To ensure a uniform appearance and blend the new concrete with the old, use your hand or a soft cloth to lightly wipe a very small amount of freshly mixed concrete all over the entire sink basin. This thin layer will help to even out any subtle color variations that might occur from adding new material to the existing surface.
8) Allow to Dry & Repeat Layers. Let the first layer dry completely (overnight is ideal). For optimal durability and a flawless finish, repeat steps 4-7 at least once, or even two more times. You want to build up enough concrete around the drain to create a strong, lasting repair. Each layer should be thin. Allow the final coat to dry overnight to ensure maximum curing.
9) Apply Quickcrete Sealer. This is a crucial step for waterproofing and protecting your newly repaired surface. While we only re-sealed the sink basin this time (our first re-seal in years!), it’s important to get excellent coverage, especially around the drain. Follow the directions on your Quickcrete sealer package carefully. We applied three coats, allowing adequate drying time between each application, to ensure comprehensive protection against water penetration.
And that’s it! We implemented this “tweak” several months ago, and the results have been absolutely perfect. The drain area is now free of any discoloration, seamlessly integrated with the rest of the vanity. Wooo hooo! Here’s a look at our DIY concrete vanity in its present-day, flawless glory after addressing the drain issue:
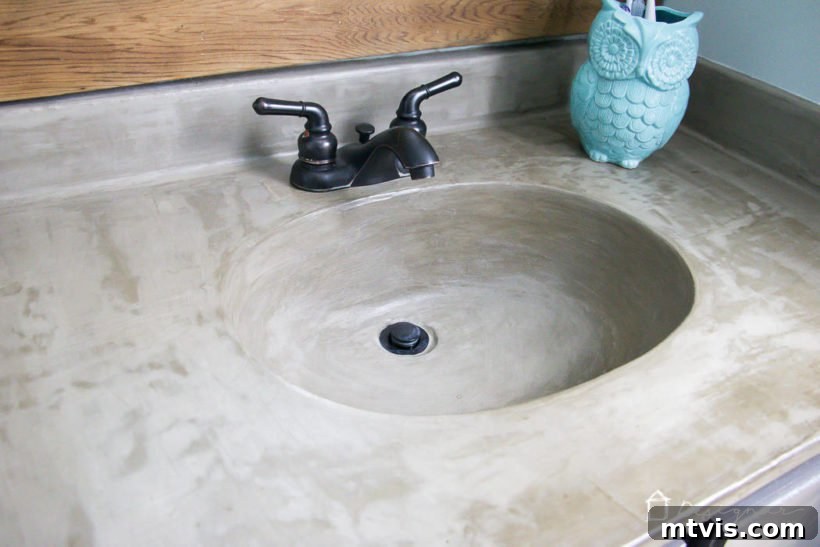
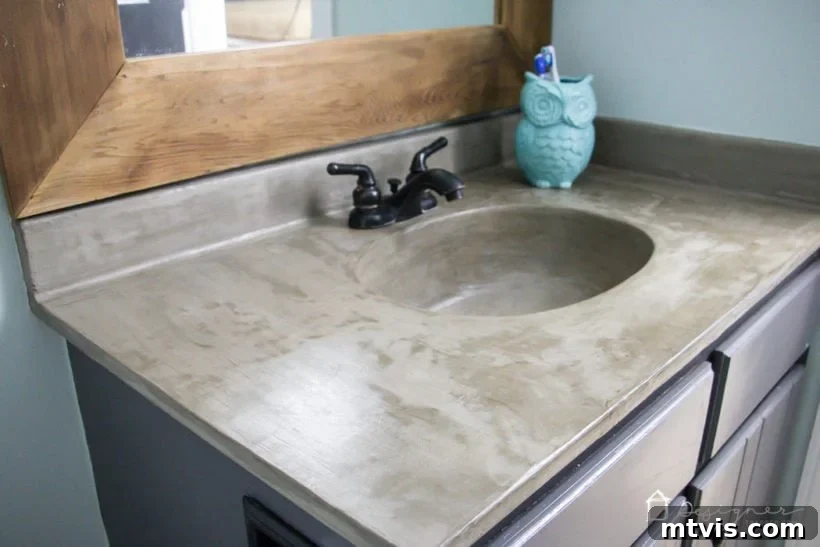
Our Verdict: Would We Do It Again?
A resounding, enthusiastic, million-zillion times YES! Seriously, this DIY concrete vanity project cost us roughly $20 for the materials (not including the new faucet we bought as part of the initial transformation) and continues to be one of our favorite and most impactful home improvements. Even before we performed the drain tweak, the slight discoloration would absolutely NOT have deterred me from recommending or repeating this project. The sheer visual impact and custom feel for such an incredibly low cost are unbeatable.
With the simple fix to the drain, it is now 100% perfect, and we couldn’t be happier with its long-term performance and stunning aesthetic. This project truly embodies the power of DIY to achieve high-end looks on a shoestring budget. If you’re looking for a dramatic and affordable bathroom update, a concrete overlay is definitely worth considering.
Beyond the Build: Cleaning and Maintenance for Your Concrete Vanity
One of the most frequently asked questions about our DIY concrete vanity is, “How do you clean it?” It’s a great question, as proper maintenance is key to preserving its beauty and durability for years to come. I’ve actually put together another video specifically addressing this topic, which you can find embedded below. In the video, I share our simple and effective cleaning routine that keeps our vanity looking fresh and pristine.
In general, cleaning a sealed concrete vanity is quite straightforward. We recommend using mild soap and water with a soft cloth or sponge. Avoid abrasive cleaners, harsh chemicals, or scrub brushes, as these can damage the sealer and eventually the concrete surface itself. Regularly wiping down the vanity after use helps prevent water spots and soap scum buildup. As for sealing, while our initial application lasted for years, periodic re-sealing, especially in high-traffic areas or around the sink basin, is a wise practice to ensure maximum water resistance and stain protection. Always follow the specific instructions on your chosen concrete sealer for the best results. Enjoy the video for more practical tips!
Explore More DIY Transformations for Your Home
If you loved this deep dive into our concrete vanity, you’ll be thrilled to discover more of our budget-friendly and impactful DIY home decor projects. We believe that with a little creativity and effort, anyone can transform their living spaces without breaking the bank. Don’t miss these other popular posts for more inspiration:
- How to Paint Countertops to Look Like Marble: A Budget-Friendly Faux Finish
- The Easy Way to Update Bathroom Tile Without Replacing It!
- Gorgeous Yet Cheap Flooring Ideas That Will Transform Your Home
- Build a Stunning DIY Concrete Fireplace For Less than $100!
- 15 Affordable DIY Countertop Ideas That Will Blow Your Mind with Their Style and Savings
- 18+ Budget-Friendly DIY Backsplash Ideas for a Kitchen Refresh
- Affordable Master Bathroom Remodel REVEAL: See Our Complete Transformation
Curious about my unique approach to transforming rooms and spaces in our home efficiently and beautifully? You’ll love my signature system, Designer in a Binder®. It’s the simple, affordable way to plan and execute stunning home decor projects with confidence.
And if you want exclusive content, behind-the-scenes sneak peeks, and direct access to my latest tips and tricks, be sure to subscribe to our newsletter before you head out! Join our community of DIY enthusiasts and never miss another inspiring project.