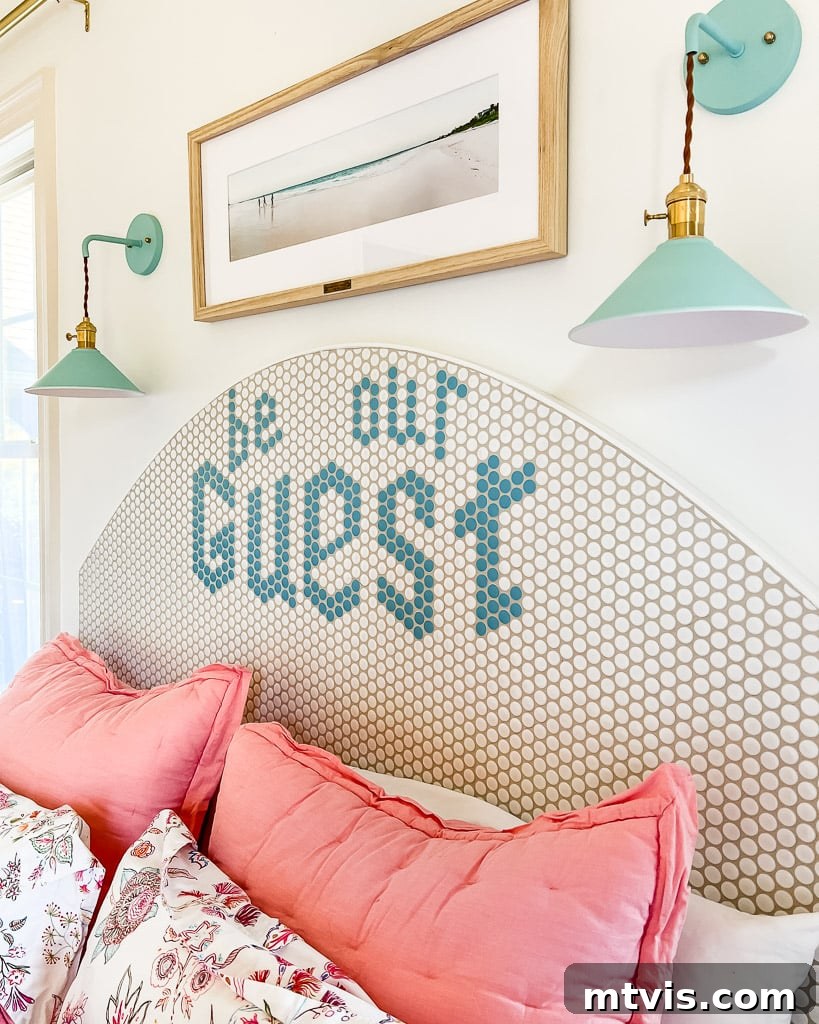
Transform Your Bedroom with a DIY Customizable Tile Headboard: A Unique Statement Piece for Any Home
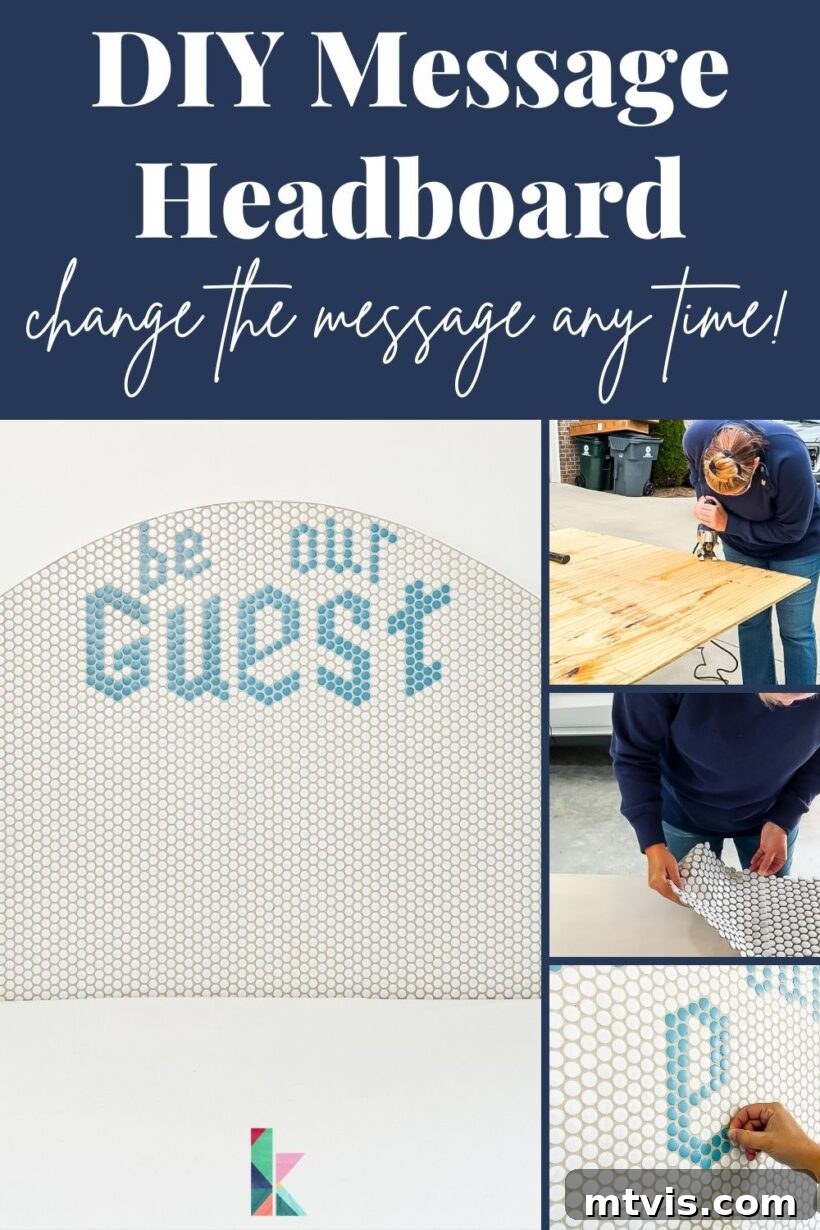
Are you searching for a genuinely unique way to infuse personality into your bedroom? Do you dream of a focal point that not only stands out but also evolves with your mood, the seasons, or special occasions? If so, prepare to be inspired! We’re thrilled to share our innovative DIY headboard project – a stunning tile headboard that allows for endless customization through interchangeable vinyl messages and designs. Forget bland, static headboards; this is about creating a dynamic piece of art that truly reflects your style.
For those who follow our home renovation journey, you know our guest room has been a recent focus. While planning its eclectic and colorful design, you might have noticed a crucial element missing from our initial mood board: a bed. This was no oversight! We intentionally left it blank because we envisioned crafting a DIY headboard that was unlike anything available on the market. Our goal was to move beyond traditional upholstered, leather, or wooden headboards and create something truly original – a statement piece that could easily adapt to different themes throughout the year. The answer? A beautiful penny tile headboard, designed to be personalized with removable vinyl circles. This project has since become the undeniable showstopper of our guest room.
This headboard offers an unparalleled blend of classic elegance and modern versatility. The timeless appeal of penny tile provides a sophisticated backdrop, while the ability to add and remove vinyl decals means your bedroom decor can be refreshed in mere minutes. Imagine welcoming holiday guests with a festive message, celebrating a special event, or simply changing your decor to match a new duvet cover. The possibilities are truly limitless, making this DIY headboard a smart and creative investment for any homeowner.
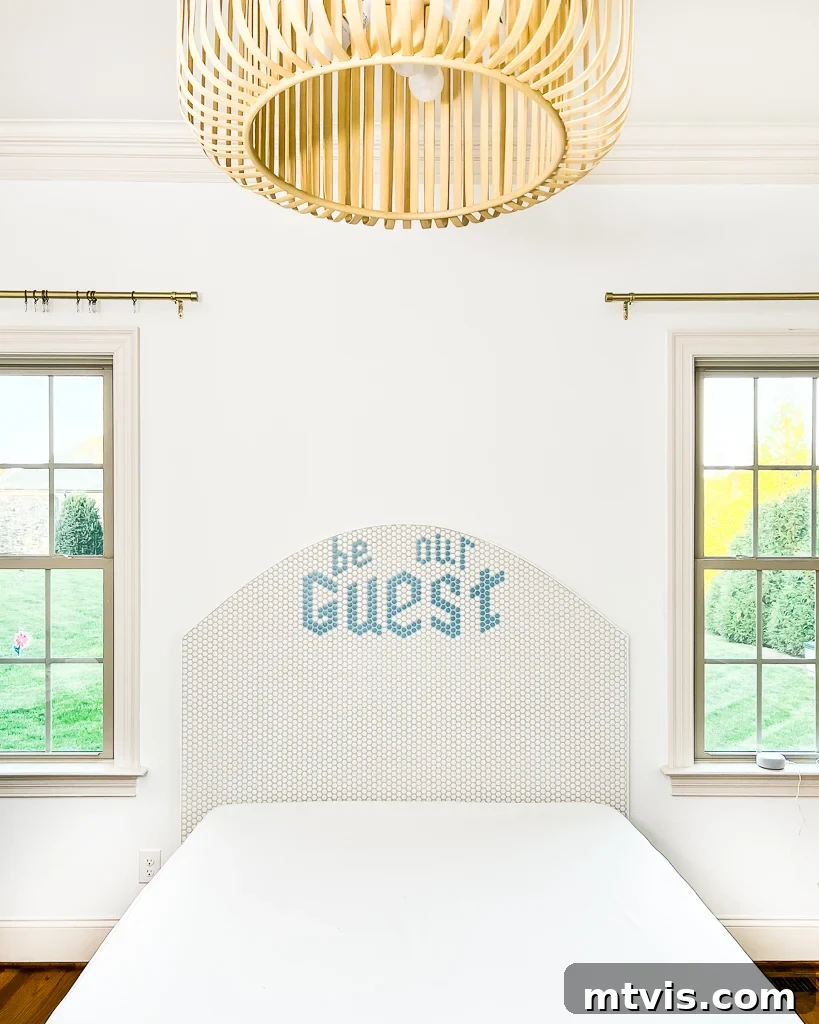
Ready to embark on this exciting journey and craft your own personalized bedroom masterpiece? We’ve meticulously detailed every step, from selecting materials to the final customization touches. Let’s dive into this comprehensive tutorial and create a headboard that’s as unique as you are!
We extend our sincere gratitude to DAP Products for their sponsorship of this project. Please note that this post contains affiliate links for your convenience. For a comprehensive understanding of our disclosure policy, please click HERE.
Customizable DIY Tile Headboard Tutorial
Materials Needed:
- One 4 x 8 sheet of 1/2 inch plywood or MDF board (plywood offers greater stability, while MDF is often smoother).
- 1/4 in. x 1-1/2 in. x 8 ft. Primed White PVC Lattice Moulding (ensure enough linear feet to frame your entire headboard).
- White penny tile (the quantity will depend on your headboard’s dimensions; we used 1 1/2 packages of Musselbound Adhesive Tile Mat, so plan accordingly for the tile).
- Musselbound Adhesive Tile Mat (a fantastic, clean alternative to traditional thin-set mortar for DIY projects; we used 1 1/2 packages for our 64″ wide headboard).
- Grout (we selected this grout in the color Biscuit for a soft, warm contrast).
- Wood cleats or a French cleat system (essential for securely hanging your heavy headboard; while we crafted our own, purchasing them can save significant time and effort).
- Brad nailer and 1-inch brad nails.
- DAP Weldwood Original Wood Glue (for strong, lasting bonds).
- DAP RapidFuse All Purpose Adhesive (ideal for quick-setting, durable adhesion).
- DAP Plastic Wood X (for effortlessly filling nail holes and imperfections).
- Jigsaw (crucial for cutting intricate shapes, especially if opting for an arched design).
- Sandpaper (various grits for smoothing edges).
- Wood screws (various lengths, suitable for cleats and general assembly).
- Tile nippers (a must-have for precisely trimming individual tiles).
- Drill driver or screwdrivers.
- White paint (for the trim, ensuring a cohesive look).
- Vinyl in any color and finish you desire (for endless design possibilities).
- Cutting machine or round punch cutter that precisely matches the size of your penny tiles.
- A cutting machine (we highly recommend the Cricut Explore Air 2 for its versatility). If you’re considering investing in a cutting machine, a DIY enthusiast’s best friend, you can delve into our detailed comparison of Silhouette vs. Cricut in this post to help you make an informed decision. Discover the myriad Cricut projects we’ve tackled here.
Step-by-Step Tutorial for Making This Headboard:
1) Cut the Plywood Base: Begin by using your jigsaw to precisely cut the desired shape of your headboard from the 1/2-inch plywood or MDF sheet. We opted for an elegant arched design, measuring 64 inches wide. This width provides a pleasing overhang beyond our 60-inch queen-size mattress, accommodating bedding and creating a more substantial presence. For a simpler project, a rectangular or straight-edged design would be significantly easier to cut and still offer fantastic customization potential. Remember to measure twice and cut once, always prioritizing safety by wearing appropriate eye protection and ensuring a stable work surface.
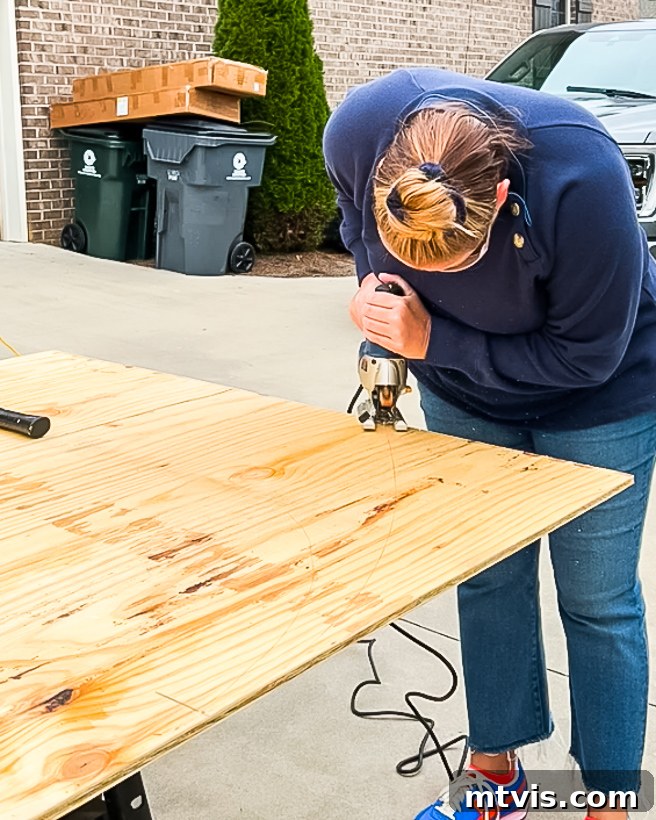
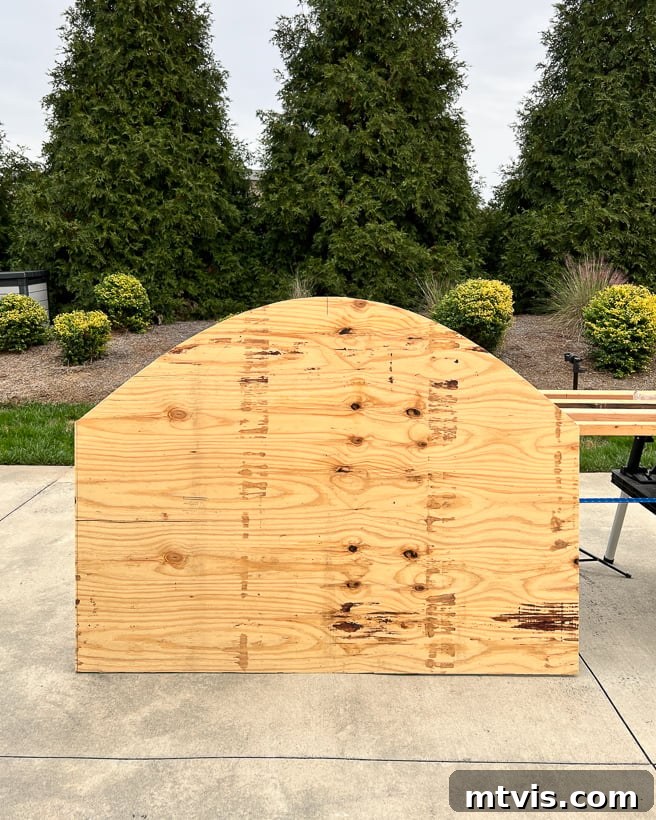
2) Smooth the Edges: Once your headboard shape is cut, use sandpaper to thoroughly smooth all edges. This not only enhances the finished appearance but also prevents splinters and prepares the surface for subsequent steps. Start with a coarser grit (e.g., 80-100) to remove major imperfections, then follow with a finer grit (e.g., 150-220) for a silky smooth finish.
3) Apply Musselbound Adhesive Tile Mat: This innovative product streamlines the tiling process. Carefully apply the Musselbound Adhesive Tile Mat to the entire face of your plywood base. This mat eliminates the need for messy thin-set mortar, making tiling a clean and efficient DIY task. Ensure a smooth application, pressing firmly to remove air bubbles. Trim any excess mat precisely with a utility knife, creating a clean canvas for your tiles.
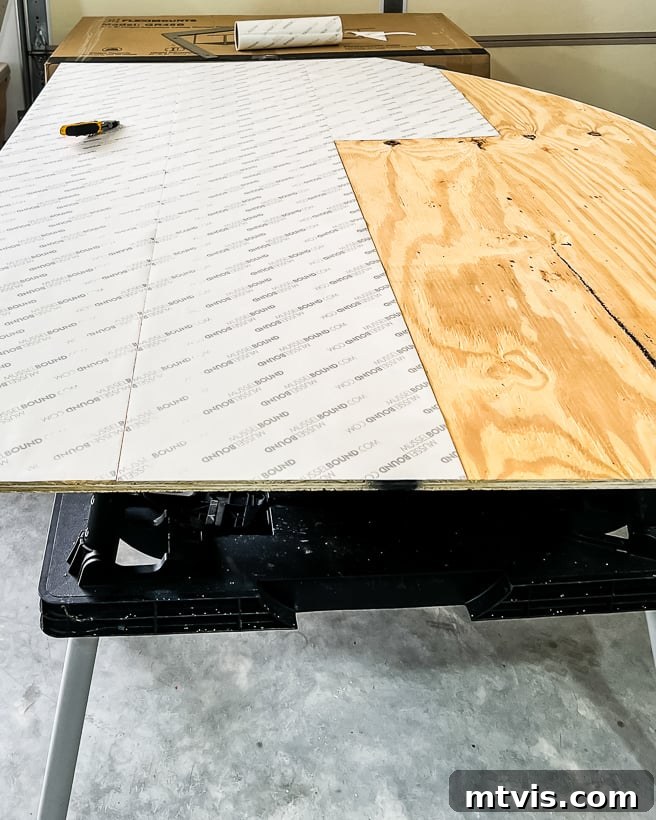
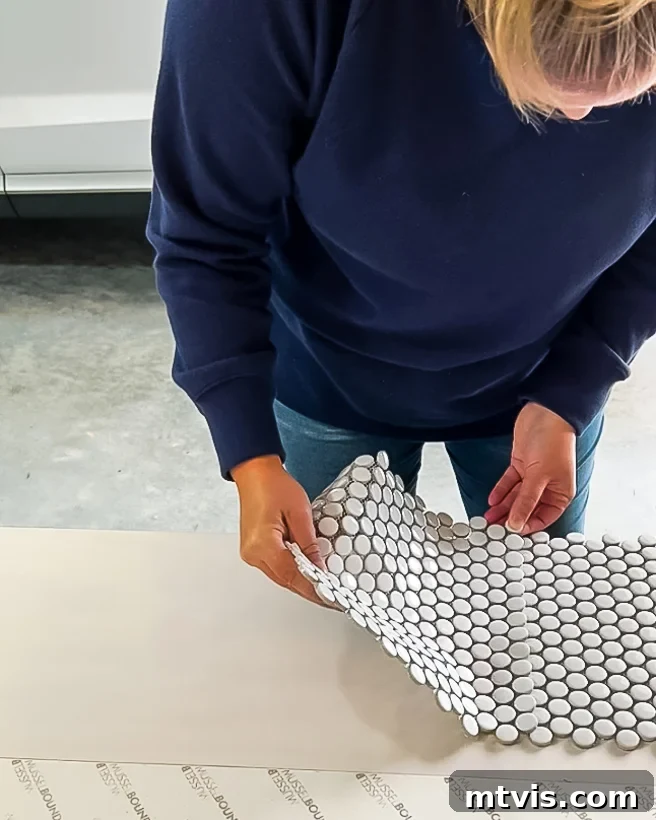
4) Lay Your Penny Tiles: With the adhesive mat in place, begin laying your chosen penny tiles. These small, circular tiles are typically sold in sheets, making installation relatively straightforward. Press each sheet firmly onto the Musselbound mat, ensuring good contact and even spacing between the individual pennies. Work methodically across the entire surface, aligning the tile sheets as seamlessly as possible to maintain a consistent grid pattern. Take your time to achieve a professional-looking layout.
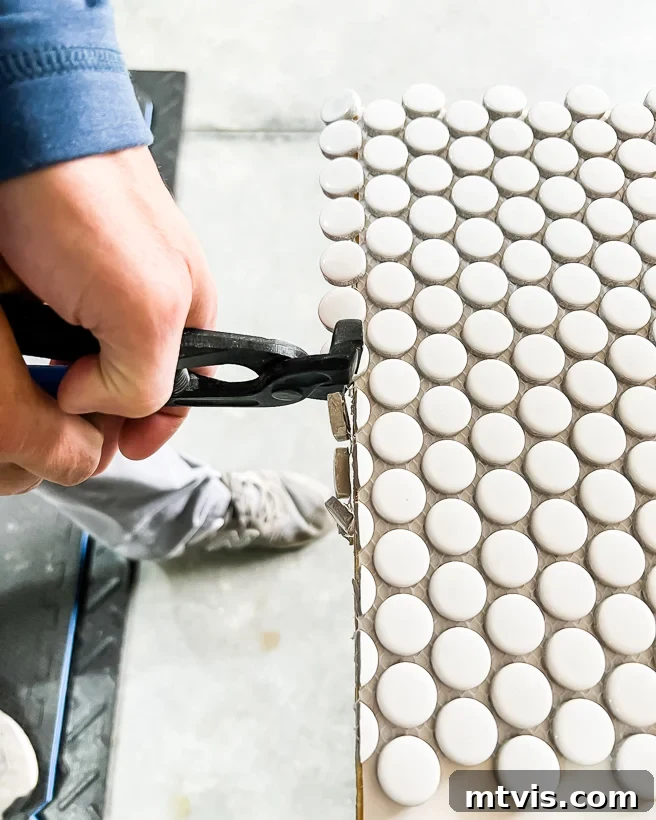
5) Trim Excess Tiles: As you approach the edges of your headboard, you’ll likely encounter areas where full tile sheets don’t fit. This is where tile nippers become indispensable. Use them to carefully trim individual penny tiles so they sit flush with the perimeter of your plywood. This meticulous step is vital for a clean, finished edge, especially if your headboard has an arched or irregular shape.
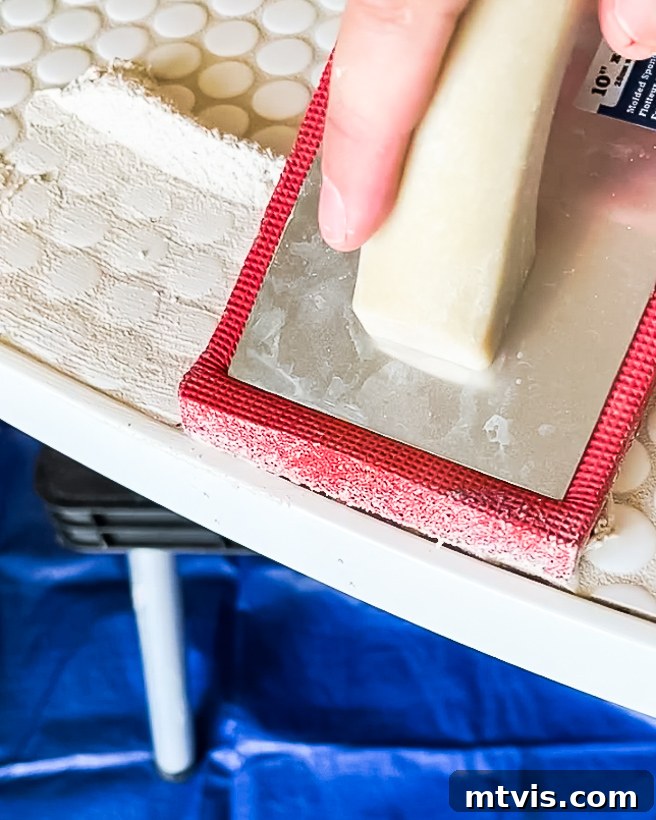
6) Grout the Main Surface (Partially): Apply your chosen grout to the main tiled surface of the headboard. Spread the grout evenly using a rubber float, working it into all the gaps between the pennies. Wipe away excess grout with a damp sponge, ensuring the tile surface remains clean. Importantly, leave about an inch of the edge ungrouted for now; this area will be grouted after the trim is attached, creating a seamless finish. Allow the grout to cure overnight according to the manufacturer’s instructions for optimal strength.
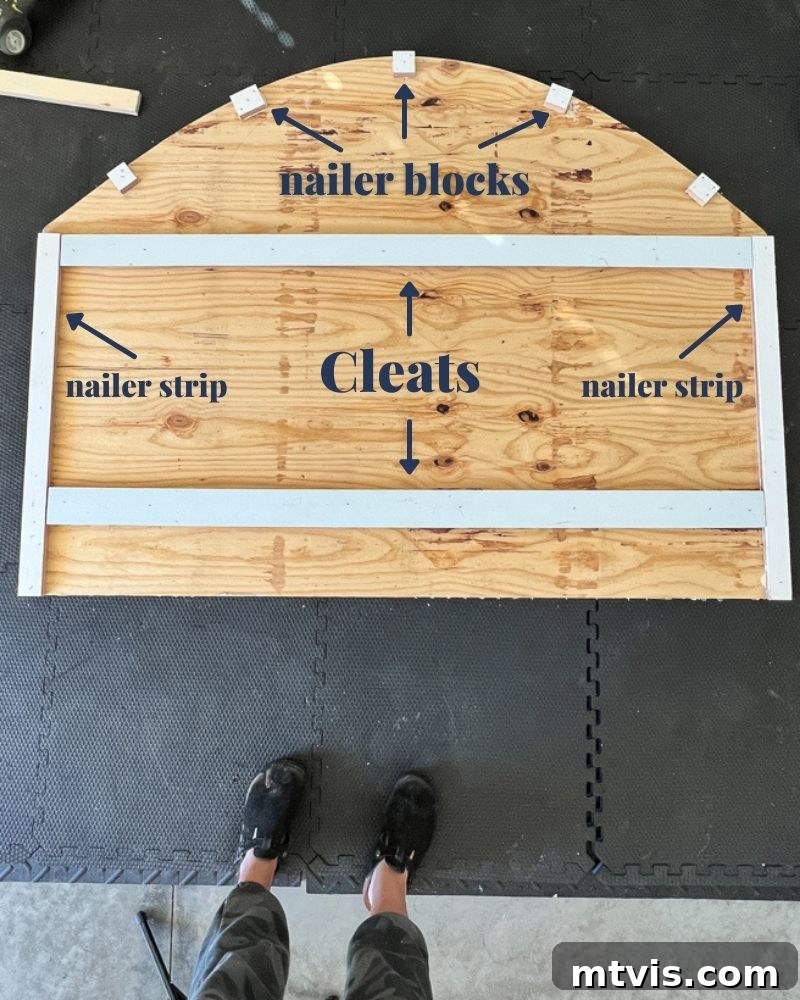
7) Attach Nailing Blocks: Flip your headboard face down. Along the perimeter of the plywood, attach scrap wood pieces using DAP Original Wood Glue and a brad nailer. These “nailing blocks” provide a solid surface to secure the decorative trim in a later step. If you’ve created an arched headboard, you’ll need to cut smaller, custom-shaped blocks to follow the curve, ensuring a consistent attachment point for the moulding.
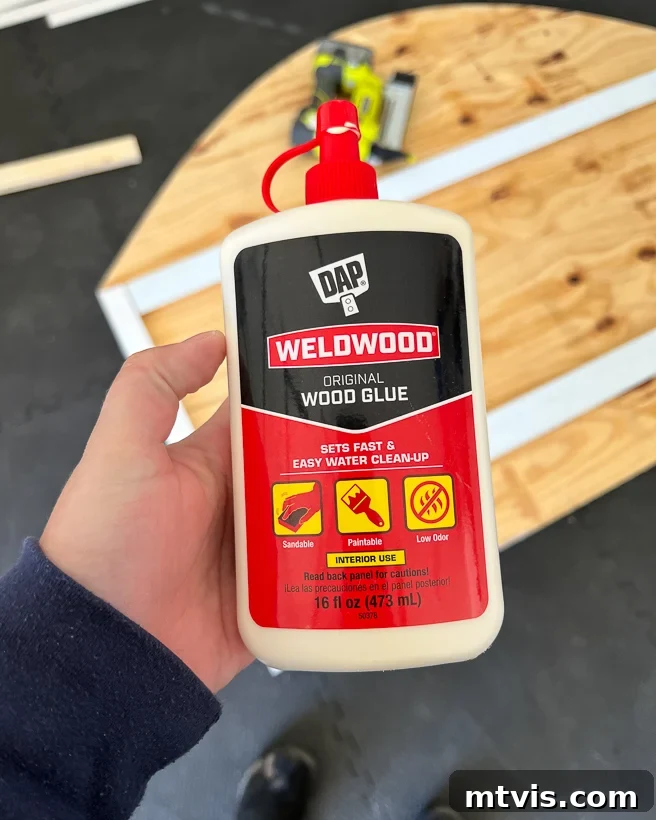
8) Secure Hanging Cleats: Given the substantial weight of a tile headboard, direct attachment to a bed frame isn’t feasible or recommended. We opted for a robust cleat system (specifically, French cleats) for secure wall mounting. While we fashioned our own, purchasing pre-made cleats is a time-saving and cost-effective solution. Attach your cleats to the back of the headboard using DAP Original Wood Glue and 1-inch wood screws. Countersink your screws so they sit flush with or slightly below the wood surface, preventing any interference with the wall. We recommend using two cleats for enhanced stability and to prevent any rocking motion against the wall, a common issue with single-cleat installations for heavier items. Ensure the angled edges of the cleat are facing away from each other so they can interlock with their counterparts mounted on the wall. This design distributes weight effectively and makes hanging incredibly secure.
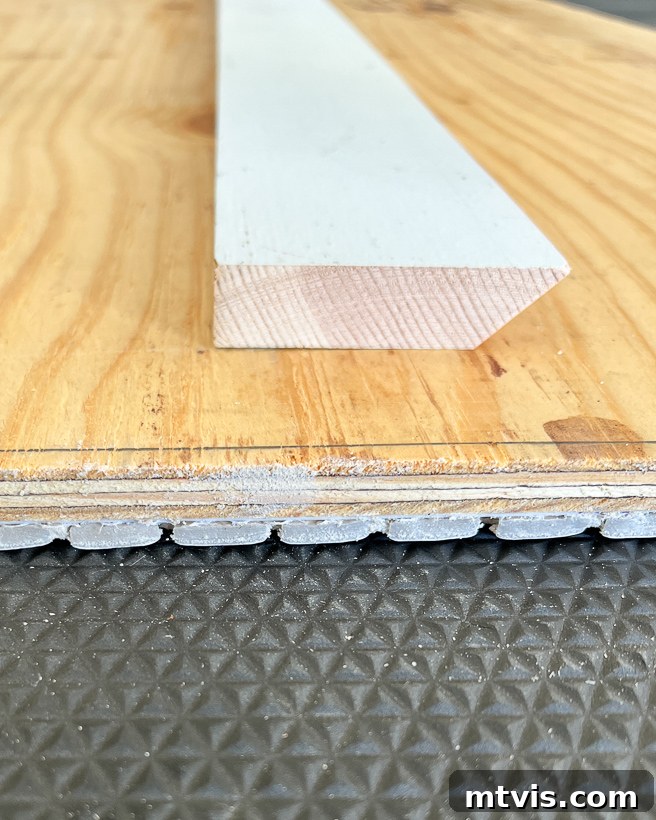
The image below illustrates the back of our headboard after securely attaching both the nailing blocks and the robust cleat system, ready for the next stage of framing.
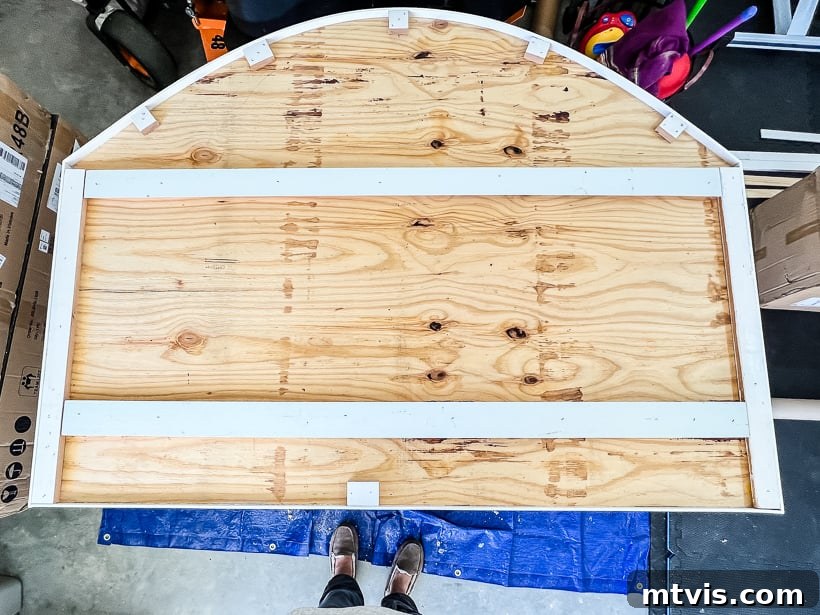
9) Attach Decorative Trim: Carefully measure and cut your PVC Lattice Moulding to length. The exact lengths and mitered angles will depend on your headboard’s specific dimensions and shape. Use DAP Rapid Fuse adhesive, known for its quick grab and strong bond, along with your brad nailer, to attach the trim along the outer edge of your headboard. Position the trim so it sits perfectly flush with the tiled surface and slightly overhangs the back of the headboard. This strategic placement is crucial; it will neatly conceal the cleats and nailing blocks once the headboard is mounted, presenting a clean, professional finish. If a brad nailer isn’t available, a heavy-duty staple gun could serve as an alternative.
The image below displays the back of the headboard after the trim has been meticulously attached, showcasing how it effectively hides the internal hanging mechanism.
10) Grout the Edges: Now, return to the ungrouted edge around the perimeter of your headboard. Apply grout to fill the small gap between the tile and the newly installed trim. This final grouting step creates a clean, sealed transition and ensures no raw edges are visible, contributing significantly to the finished aesthetic of your DIY headboard. Wipe away any excess carefully.
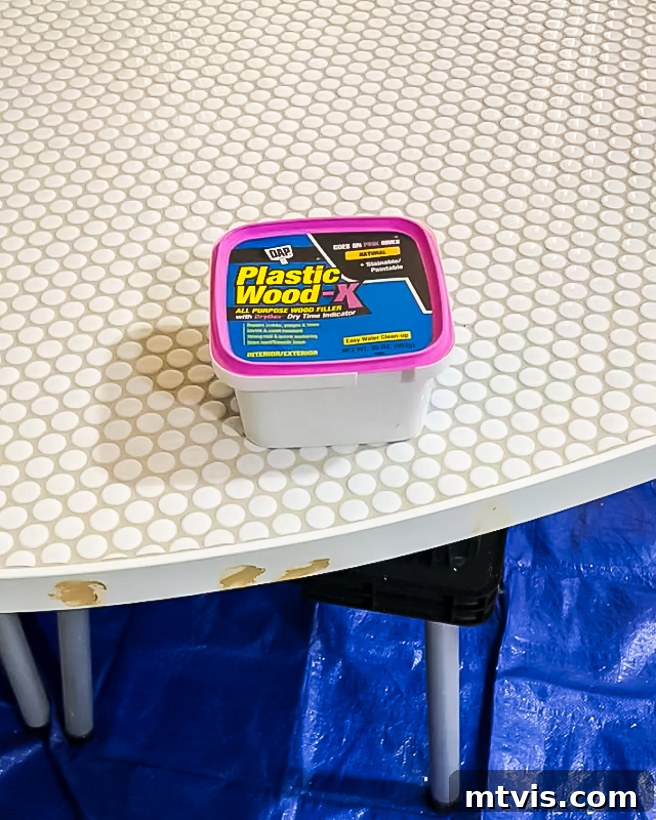
11) Finish the Trim: With the trim securely in place, use DAP Plastic Wood X to fill any visible nail holes from the brad nailer. This wood filler is easy to apply and dries quickly. Once dry, sand the filled areas smooth to be flush with the trim surface. Finally, paint the entire trim white (or your desired color) to match your aesthetic and achieve a polished, cohesive look.
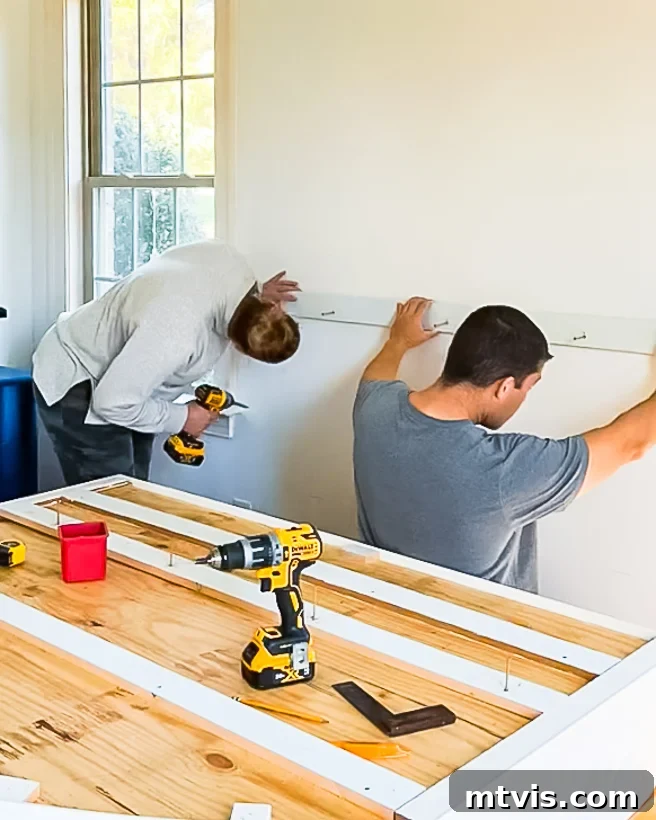
12) Mount Cleats to the Wall: Determine the ideal height for your headboard to hang above your mattress. Accurately measure and mark the corresponding positions for the wall-mounted cleat components. It is absolutely crucial to screw these cleats directly into wall studs. This provides the necessary structural support to safely bear the considerable weight of your tile headboard. Utilize a stud finder and a level to ensure precise and secure installation.
13) Hang Your Headboard: With the wall cleats firmly in place, it’s time for the exciting final step! Carefully lift your headboard and align its attached cleats with those on the wall, allowing them to interlock. This unique design ensures a secure, flush mount that will keep your beautiful, heavy headboard safely in position for years to come. Step back and admire your handiwork!
How to Add Custom Messages to Your DIY Headboard:
The true magic of this DIY headboard lies in its customizable surface. Here’s how to add personalized messages and designs:
1) Cut Your Vinyl Circles: The key to effortless customization is vinyl. Using a cutting machine (like our beloved Cricut Explore Air 2) or a specialized round punch cutter, create vinyl circles that are the exact same size as your penny tiles. We found that .7 inches was the perfect dimension for our tiles, ensuring a snug fit. You can choose any color or finish of vinyl to match your design vision – matte, glossy, metallic, or even glitter vinyl can add an extra layer of flair.
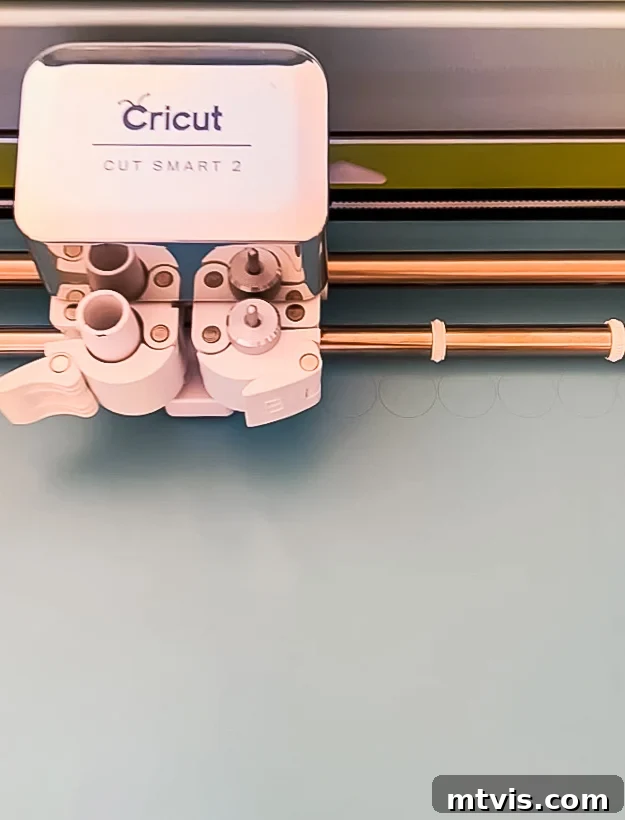
2) Plan Your Design: Before you start sticking, take a moment to plan your message or pattern. Sketch it out on paper or use a digital design tool. A helpful tip is to identify the center of your headboard and work your design outwards from there. This approach helps maintain symmetry and ensures your message is well-centered. Consider the overall balance and readability of your chosen text or graphic.
3) Peel, Stick, and Re-Style: Once your design is finalized, simply peel the backing from your vinyl circles and carefully stick them onto the individual penny tiles. The adhesive on quality vinyl is strong enough to adhere well but gentle enough to be removed without leaving residue or damaging your grout. This incredible flexibility means you can change your headboard’s look whenever inspiration strikes – for holidays, birthdays, or just a seasonal refresh! No commitment, just endless creative expression.
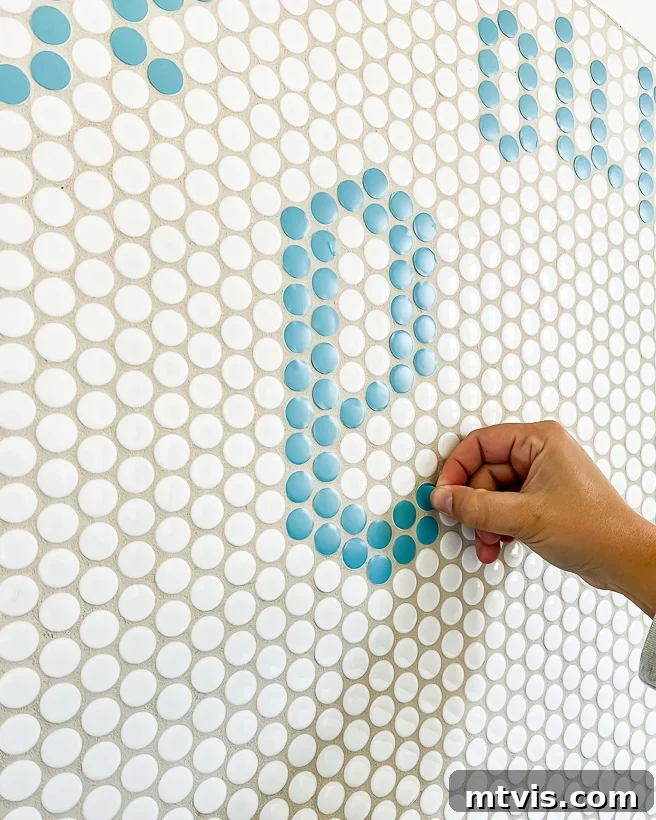
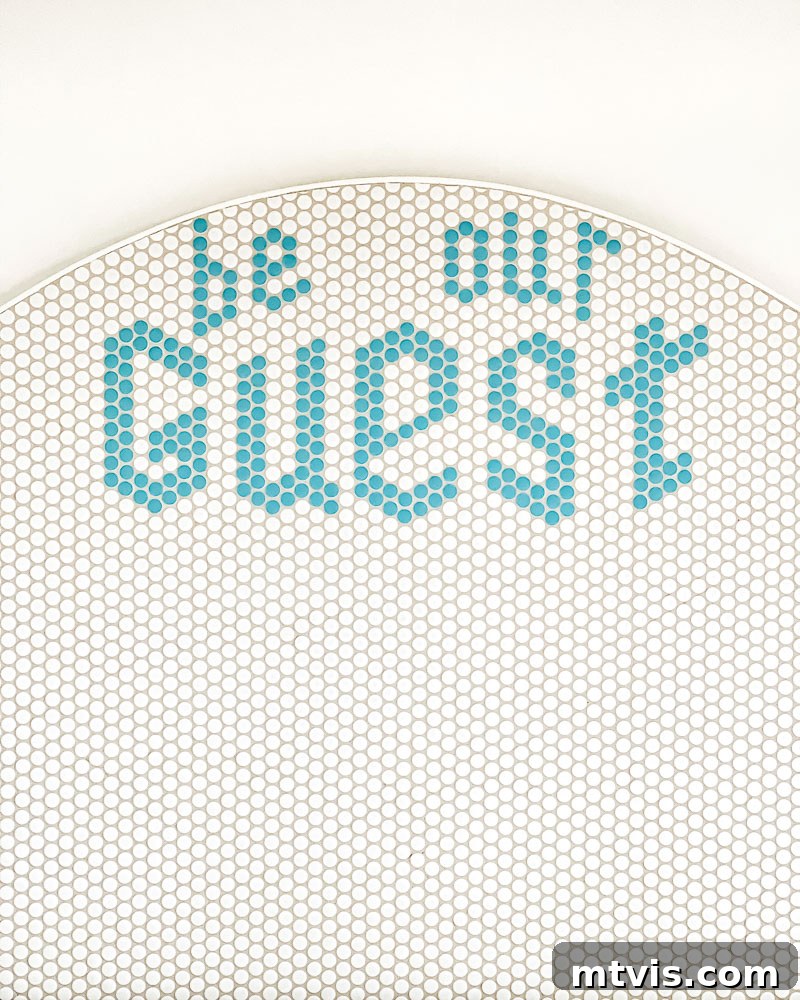
We are absolutely thrilled with our inaugural message, “BE OUR GUEST,” a warm welcome that perfectly suits our guest room. But this is just the beginning! We’re already envisioning festive holiday messages and seasonal greetings for future transformations. What exciting phrases or captivating patterns will you choose for your customizable headboard? The power to transform your bedroom decor is now literally at your fingertips. Share your thoughts and ideas – we’d love to hear how you plan to personalize your space!
Looking for more inspiration to elevate your home? Explore these related posts and transform your living spaces:
- Eclectic & Colorful Guest Room Reveal
- How to Make a Large Lumbar Pillow (the EASY way!)
- 17 Gorgeous DIY Headboard Ideas
- Stylish Dressers We Love (That Don’t Break the Budget!)
- Bedroom Wall Art: Top Designer Picks
For those eager to master the art of transforming rooms and spaces, delve into our acclaimed system: Designer in a Binder®. It’s an affordable and straightforward guide to decorating your home with confidence and style.
Don’t miss out on exclusive content, behind-the-scenes sneak peeks, and fresh DIY ideas! Be sure to subscribe before you go, and let’s keep creating beautiful spaces together.