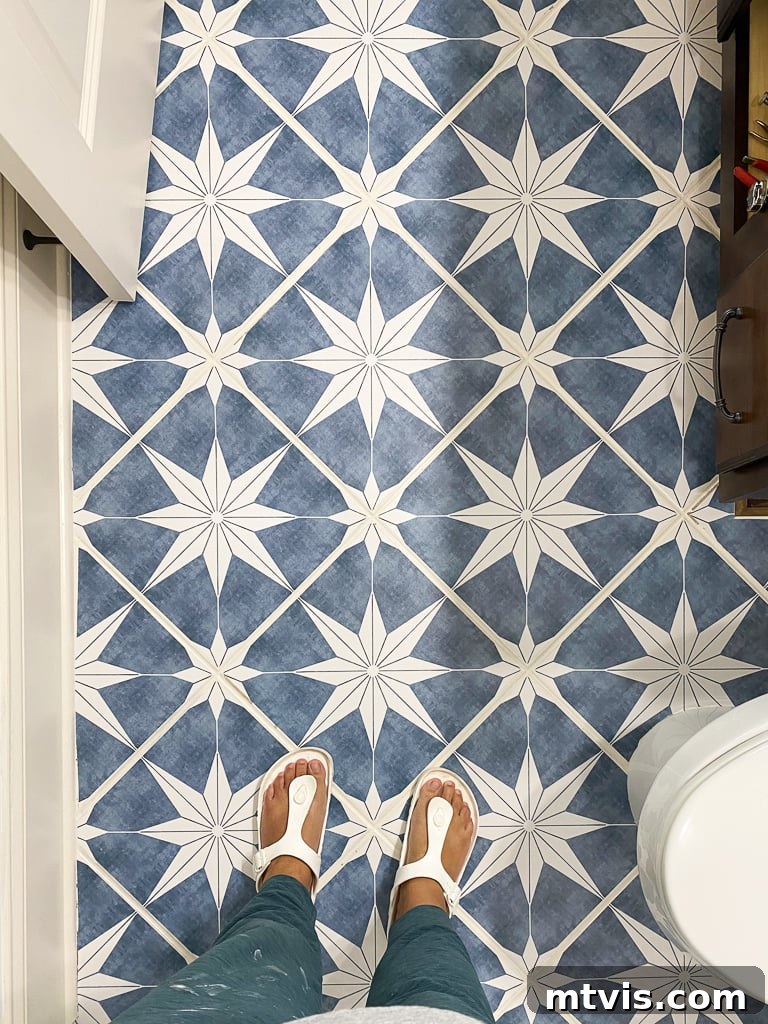
Are you tired of staring at that old, worn-out bathroom tile floor, wishing for a fresh look but dreading the thought of a full-scale renovation? Many homeowners face this dilemma: a desire for an updated space conflicting with the high costs and disruptive nature of traditional tile replacement. The good news? You absolutely can achieve a stunning bathroom makeover without the mess, the hefty price tag, or the need for power tools and demolition. The secret to a quick, easy, and incredibly effective bathroom tile refresh lies in one ingenious product: tile stickers. These innovative peel-and-stick solutions are not only simple to install but also surprisingly durable, provided you follow the expert tips outlined in this comprehensive guide!
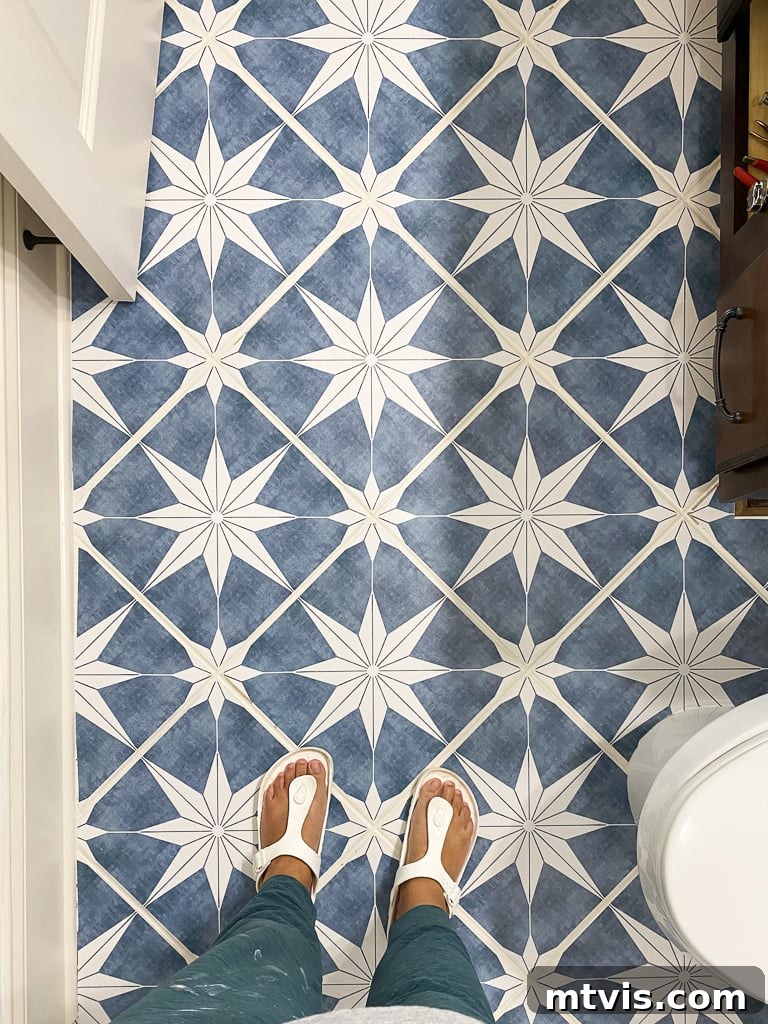
Table of Contents
Toggle
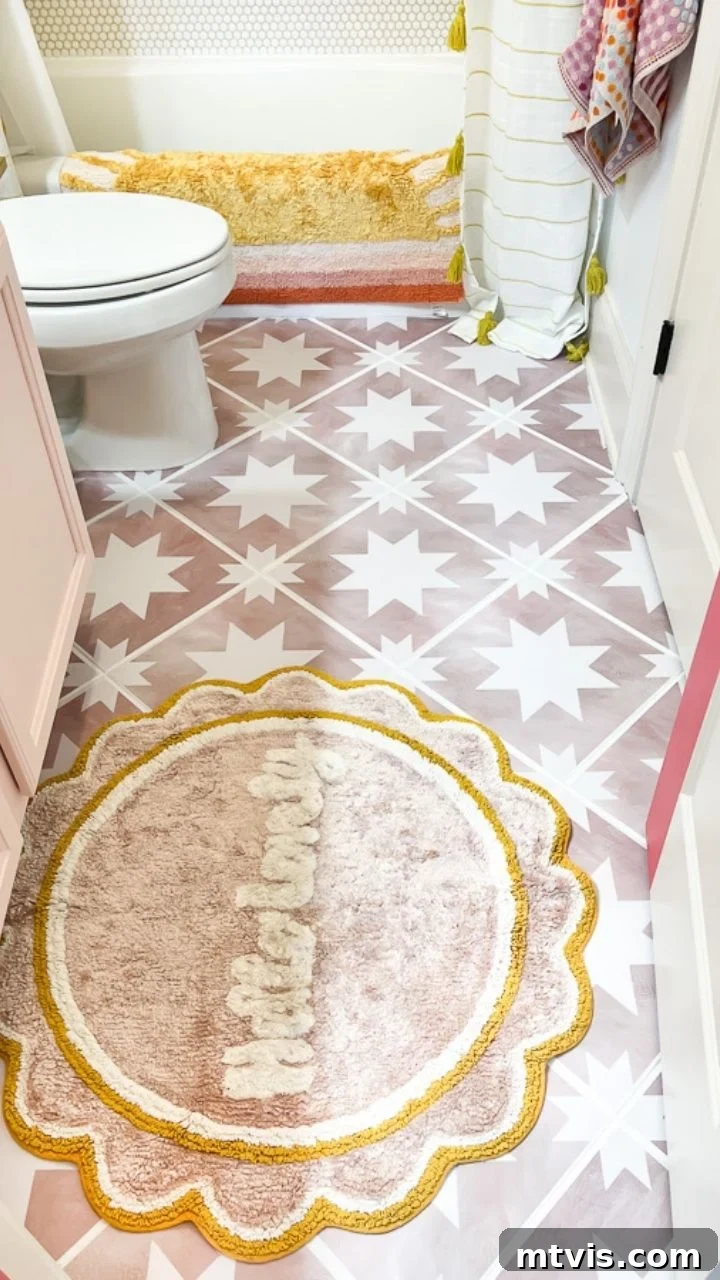
The stunning floor you see pictured above? Believe it or not, that’s not newly installed ceramic tile; it’s the magic of high-quality floor tile stickers! My own journey to discover this budget-friendly bathroom update began with my daughter’s outdated brown tile floor. Like many of you, I desperately wanted to refresh the space without undertaking a massive renovation that would involve removing the toilet, chiseling out old tiles, and enduring weeks of disruption. We simply didn’t have the time or the budget for a complete bathroom floor replacement.
While some homeowners consider tiling over existing tile, I personally find it less ideal for floors. Doubling the floor’s thickness can create awkward transitions between different floor surfaces and sometimes even interfere with door clearance. My goal was to find the absolute best way to update the bathroom floor tile without replacing it entirely. After thorough research and experimentation, giving the existing floor tiles a vibrant new look with durable tile stickers emerged as the perfect solution. It offered an unparalleled combination of aesthetic impact, ease of installation, and cost-effectiveness.
Through my experience, I’ve gathered invaluable insights into the proper way to use floor tile stickers, ensuring they adhere securely and last for years. There are a few crucial tricks and techniques you need to master for long-term success, so be sure to read on for all my expert tips!
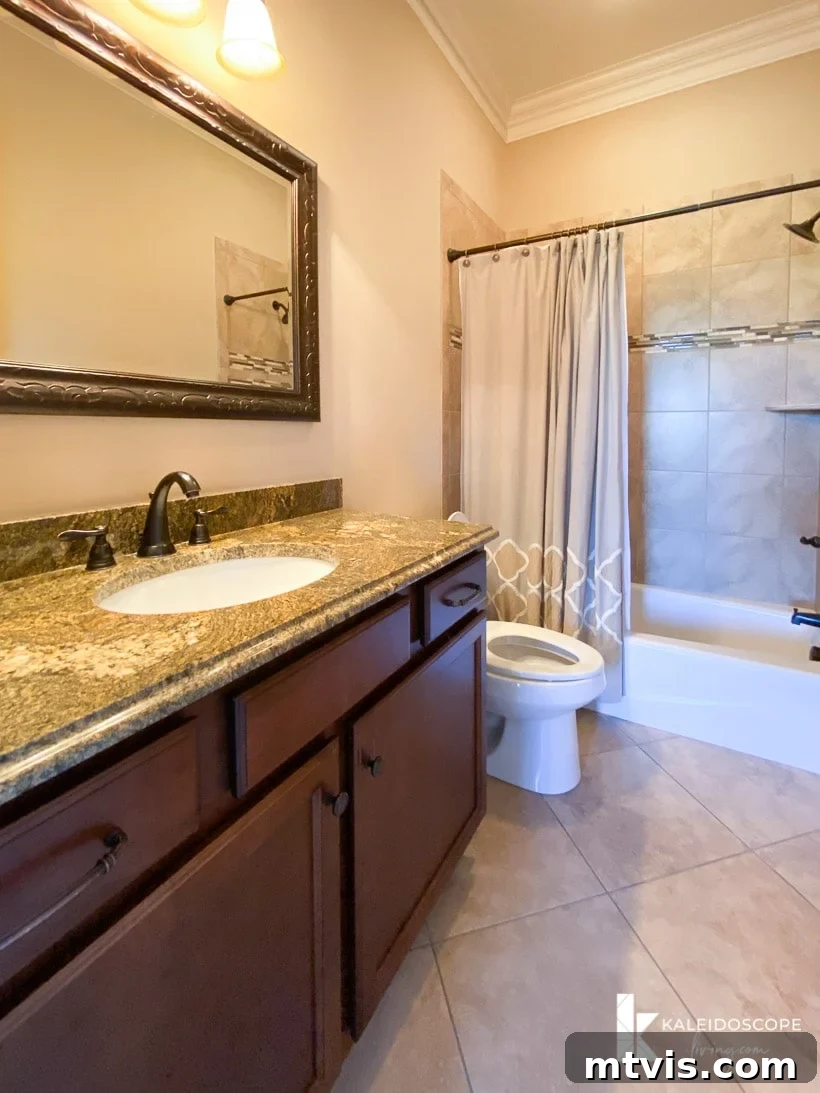
Before this incredible transformation, my daughter’s bathroom sported a rather drab and uninspiring look, as you can see in the “before” photo below. It was functional, but certainly lacked personality and style. We were eager to infuse some color and modern charm into her space as part of her budget-friendly bathroom makeover.
This post contains affiliate links for your convenience. Click here for my full disclosure policy.
When I embarked on the design process for Avery’s bathroom (a task I always streamline using my trusted Designer in a Binder® method), I meticulously selected every element: the perfect light fixtures, a charming shower curtain, plush towels, a cozy rug, and stylish cabinet knobs. The final piece of the puzzle was finding the exact right shade of blue and a captivating pattern for her floor tile. That’s when I discovered these incredible floor tile stickers, and I instantly knew they were ‘the ones.’ Both Avery and I fell in love with the vibrant color and the playful star pattern.
Once the tile stickers arrived, the installation was astonishingly swift. It took me a mere hour to completely transform her bathroom floor. The best part? The cost of these tile stickers was a fraction of what new ceramic tile would have cost. Now, Avery’s bathroom boasts a completely revitalized look with a gorgeous, personalized floor. This simple DIY project not only saved us time and money but also delivered a dramatic visual upgrade that truly redefined the entire space.
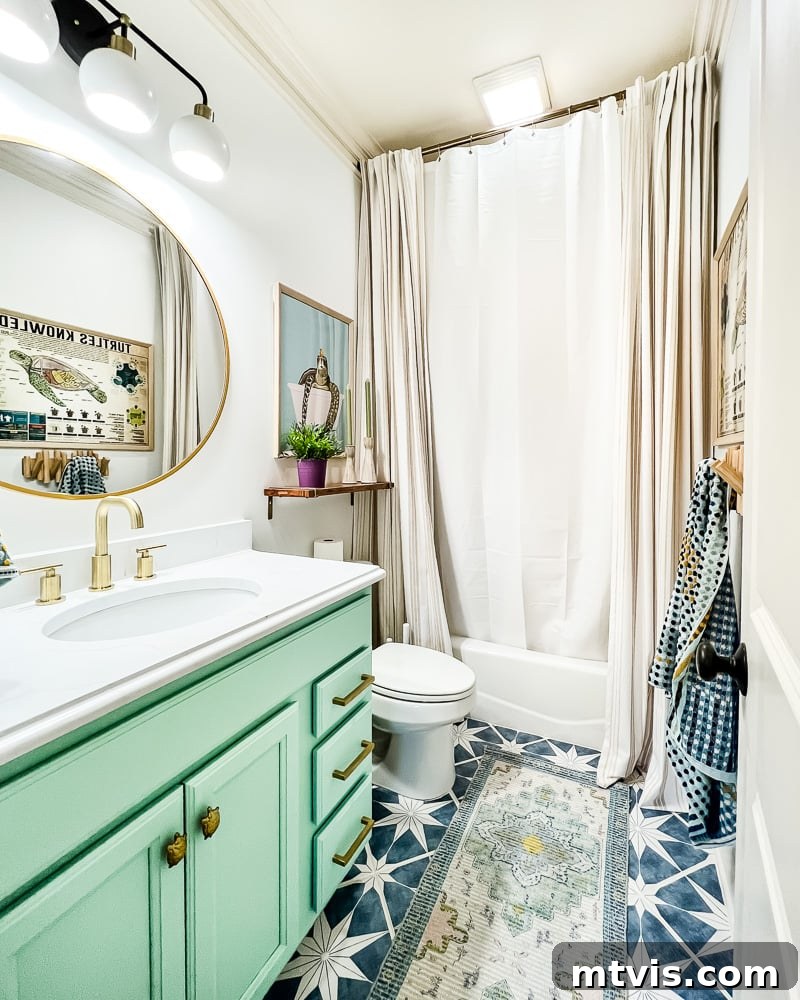
The success of updating Avery’s tile floors without replacing them was so resounding that just a few months later, we confidently used these very same tile stickers for Attley’s budget-friendly bathroom makeover. We meticulously followed the exact same process, and the results were equally beautiful and, importantly, just as easy to achieve! This further solidified my belief in tile stickers as a game-changer for affordable home renovations.
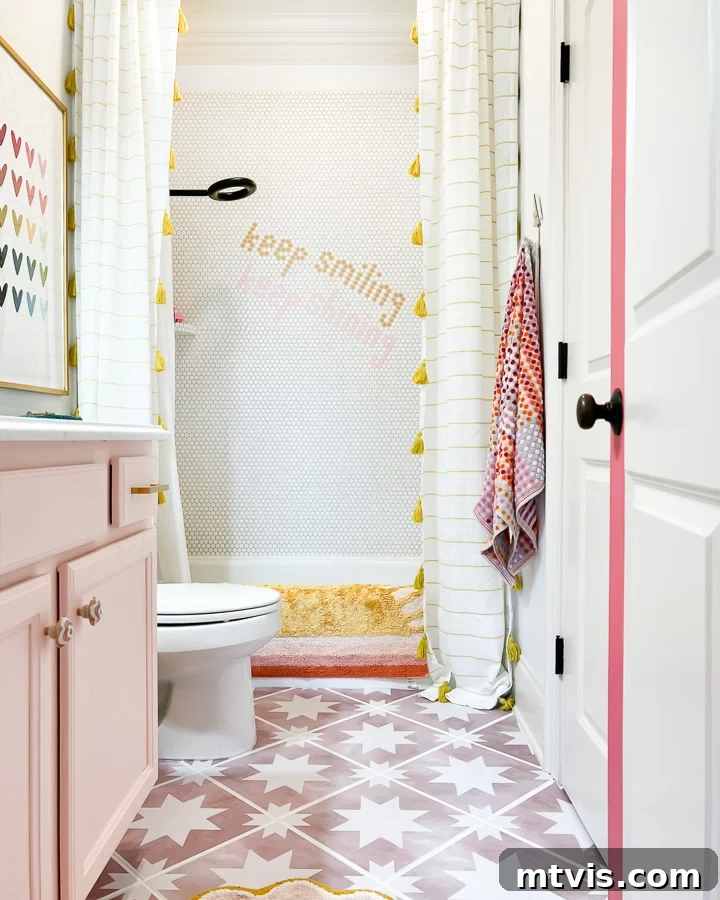
If you’re inspired to transform your own space, explore some of my favorite tile sticker designs below!
Click on any image for full product details.
Step-by-Step Guide: How to Install Peel and Stick Floor Tile Stickers
Time needed: 1 hour and 30 minutes
The process of installing peel-and-stick floor tile stickers is incredibly straightforward, even for beginner DIYers. Just follow these detailed steps to achieve a professional, long-lasting finish.
- Choose and Order Your Perfect Tile Stickers
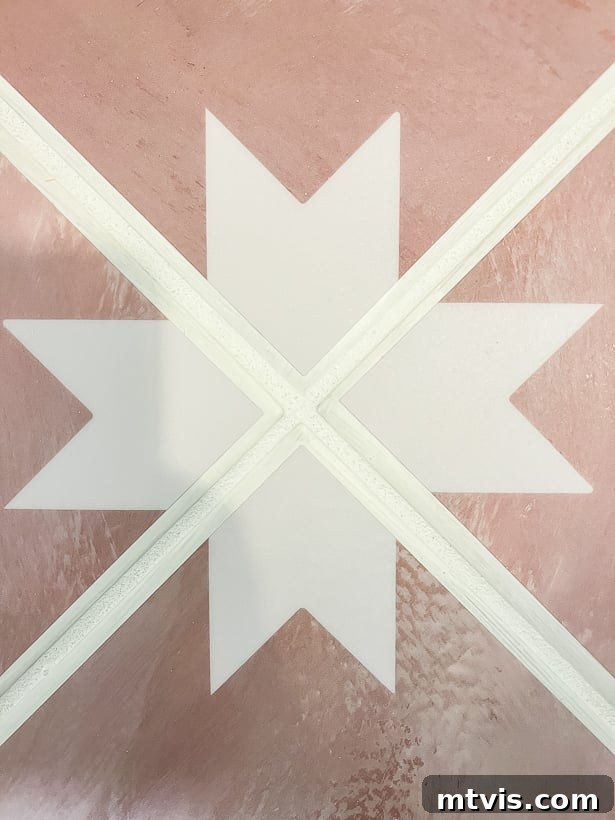
The market offers an astounding array of gorgeous patterns, vibrant colors, and sophisticated designs to choose from, ensuring you’ll find the ideal match for your bathroom’s aesthetic. This initial selection is perhaps the most fun part of the process! However, there’s a critical detail when ordering: always specify that your stickers should be cut approximately 1/8″ SMALLER THAN YOUR ACTUAL TILES on each side. This slight reduction creates a small, even border around each sticker. This border is essential because it ensures the sticker adheres perfectly to the flat surface of your existing tile, rather than extending onto any slight slope, bevel, or irregular edge some tiles might have. More importantly, it prevents the sticker from encroaching upon or overlapping the grout lines, which is a common cause of peeling. Most reputable tile sticker companies offer custom cutting services, even if their online listings show only standard sizes. Don’t hesitate to message them with your exact tile dimensions and request a custom cut; they’ll almost certainly accommodate your needs and guide you through the ordering process.
- Thoroughly Clean Your Existing Tile Floor
Proper preparation is paramount for the longevity of your tile stickers. You need to ensure your existing tile floor is impeccably clean, free from all dirt, grease, soap scum, and grime. I highly recommend using a heavy-duty cleaner like TSP (trisodium phosphate). This powerful cleaning agent will effectively strip away any residue that could compromise the adhesive’s bond. Follow the product instructions for dilution and application, and make sure to rinse the floor thoroughly to remove all traces of the cleaner. Allow the floor to dry completely before moving on to the next step; any moisture can hinder adhesion.
- (Optional) Paint Your Grout Lines for a Seamless Look
If you’re covering an old tile floor with contrasting or discolored grout lines, painting them beforehand can significantly enhance the final aesthetic. For instance, our original grout lines were a dark brown, which would have clashed with our chosen light-colored tile stickers. To achieve a seamless, integrated look, simply grab a small paintbrush and some durable porch and floor paint in a color that complements your new stickers (often white or a light gray works well). Carefully paint over the existing grout lines and the very outer edges of each tile. This step serves two purposes: it refreshes the look of your grout, making it appear clean and new, and it helps the small border you’ll leave around each tile sticker (from step 1) blend perfectly into the ‘grout’ area. This attention to detail creates a much more polished and professional finish.

- Install Your Peel-and-Stick Tile Stickers
Once your floor is sparkling clean and any optional grout painting has dried, you’re ready for the exciting part: installing your peel-and-stick tile stickers! This is truly a beginner-friendly DIY project, requiring no special skills or tools. Start in a corner, peeling back only a small portion of the backing from your first sticker. Align it carefully with your existing tile, ensuring the 1/8″ border is even on all sides. Once positioned, slowly peel away the rest of the backing while smoothing the sticker down with your hand or a soft cloth, working from the center outwards to prevent air bubbles. For tricky areas like around the toilet or oddly shaped corners, you can easily trim the vinyl stickers with a utility knife or sharp scissors. Take your time with each sticker, ensuring it’s perfectly aligned and smoothed before moving to the next. The forgiving nature of vinyl allows for slight repositioning if needed, but aim for accuracy from the start. Watching a quick video tutorial (like the one linked below) can provide an excellent visual overview of the installation process, making it even simpler to follow along.
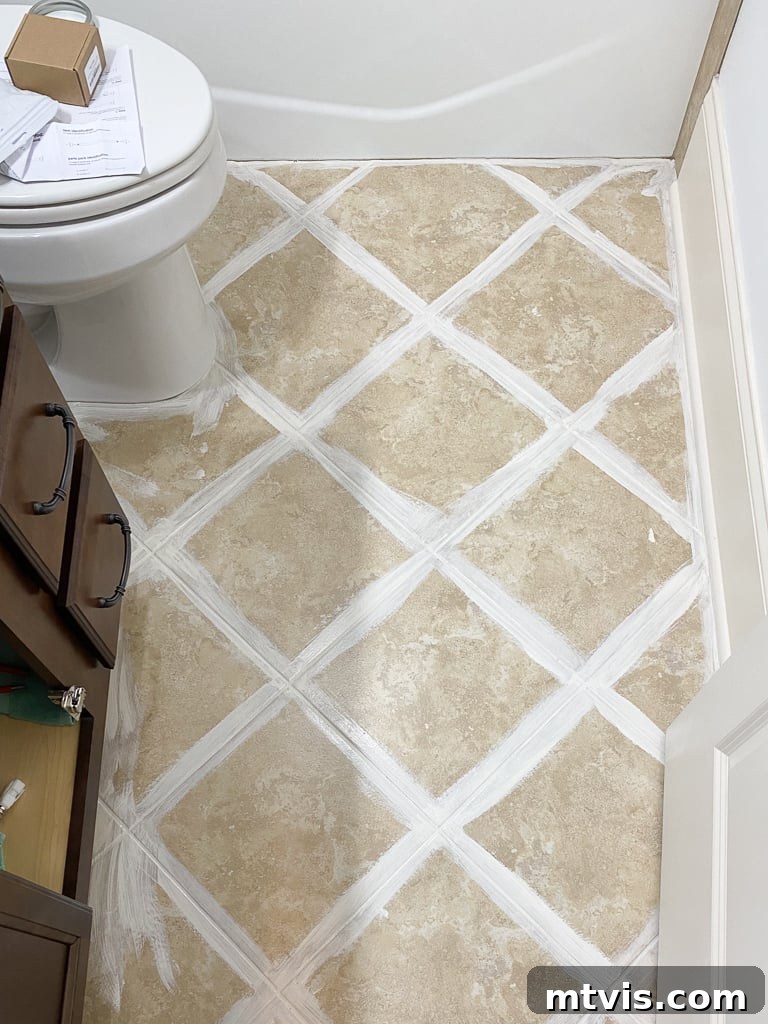
Curious to know all the ins and outs of using tile stickers to transform your space without the hassle of replacement? Below, I’m diving deep into all your most pressing questions about tile floor stickers. And let me tell you, there were A LOT of inquiries! Many of you followed this DIY makeover closely and flooded my Instagram with more comments and questions than I ever anticipated about these incredible stickers!
First up, the BIG question that’s on everyone’s mind…
Long-Term Durability: How Do Tile Stickers Hold Up?
This is undeniably the most common question, and I’m thrilled to provide an answer rooted in real-world experience. We installed tile stickers in both of our daughters’ bathrooms over 16 months ago, and I can confidently report that they are holding up ABSOLUTELY PERFECTLY! Despite a flurry of skeptical comments on social media about the longevity of such a project, these floors have endured daily use, spills, and regular cleaning without a single issue. There’s no peeling, no ripping, and no signs of wear and tear. To truly put your mind at ease and demonstrate their resilience, I’ve created a dedicated video that shows you exactly how our tile sticker floors are performing after more than a year and a half. See for yourself – the results speak volumes! (The video will play after a brief advertisement.)
Frequently Asked Questions: Your Comprehensive Guide to Bathroom Floor Tile Stickers
This detail is absolutely paramount for a successful and long-lasting installation. My initial venture into tile stickers for our laundry room about 10 months prior involved having them custom cut to the *exact* size of our ceramic tiles. This, I later learned, was a significant mistake. It wasn’t until I ordered from Snazzy Decal on Etsy for Avery’s bathroom that I understood the crucial difference. Snazzy Decal provided very specific instructions: you should order your tile stickers approximately 1/8″ SMALLER THAN YOUR TILES on each side. This strategic sizing creates a small, consistent border around the perimeter of each sticker, ensuring that the adhesive only makes contact with the perfectly flat surface of the tile itself. It prevents the sticker from extending over any subtle slopes, bevels, or into the grout lines, which are typically recessed and can cause edges to lift over time. To be crystal clear: the tile sticker should not go all the way to or overlap the grout line at all. You can observe this ideal placement in the image below, showcasing how the tile stickers in Attley’s bathroom neatly stop short of the tile edge, blending seamlessly into the painted grout. Remember, almost all tile sticker companies offer custom sizing. If you only see predefined sizes (e.g., 12″ x 12″) that don’t match your needs, simply message the seller and inquire about custom cuts. They will undoubtedly be able to assist and guide you on how to place your order with your specific dimensions.
When properly sized and installed, high-quality tile stickers are designed to last a very, very long time and withstand daily wear beautifully. The floor tile stickers in our daughters’ bathrooms, for example, have been installed and subjected to consistent daily use for well over 16 months now, and they are holding up absolutely perfectly. We’ve observed no peeling, ripping, or significant signs of wear, which has made us incredibly thrilled with this solution. This longevity, however, hinges on one critical factor: correct sizing. In stark contrast, because we purchased what I now understand was the incorrect size (cut to the exact tile dimensions, not 1/8″ smaller) for our laundry room, we unfortunately experienced issues with the edges beginning to peel up. Ultimately, we had to install a floating tile floor over the old tile in that space to remedy the problem. This experience served as a powerful lesson. Based on our ongoing success with the correctly sized stickers in the bathrooms, I don’t foresee any issues with those floors for years to come, demonstrating that proper application truly makes all the difference in their durability and lifespan.
Tile stickers are typically crafted from high-quality, durable vinyl. This isn’t just any ordinary vinyl; it’s similar to the specialized vinyl materials used for vehicle wraps, which are engineered to withstand various environmental conditions and constant exposure. This means they are inherently very sticky, designed for robust adhesion, and incredibly durable against foot traffic and everyday wear. A key advantage of this material is that it is entirely waterproof. This makes them an excellent choice for moisture-prone areas like bathrooms, as they can be easily wiped clean without fear of water damage or bubbling.
One of the most appealing aspects of using tile stickers is the minimal amount of preparation needed, especially compared to traditional tiling projects. The primary requirement is a thorough cleaning of your existing floor. You need to ensure the surface is completely free of dirt, dust, grime, and any residues that could prevent the adhesive from bonding properly. As mentioned in the tutorial, a powerful cleaner like TSP is highly recommended for this step. Beyond cleaning, the only other “prep work” is the optional, but highly beneficial, step of painting your grout lines if their original color doesn’t complement your new sticker design. That’s it! No sanding, priming (unless otherwise specified by the sticker manufacturer), or complex leveling is typically necessary.
I’ve experimented extensively with floor transformations, including painting and stenciling the floor in our old kitchen and figuring out how to paint a vinyl floor in our old laundry room. Both of those painted floors, using durable floor and porch paint, looked fantastic and held up remarkably well. However, when it comes to intricate patterns or smaller, more complex spaces like bathrooms, tile stickers offer distinct advantages. While you can achieve similar patterns with floor paint and a stencil, it is an incredibly time-consuming and labor-intensive process. Furthermore, achieving crisp, perfectly straight lines with a stencil, especially around obstacles like toilets, vanities, and tubs, can be extremely challenging and often yields less precise results than pre-cut stickers. For large, open, and relatively obstruction-free areas, a painted and stenciled floor can be a great DIY. But for a bathroom, installing tile stickers is undeniably quicker, significantly easier, and generally produces a cleaner, more professional-looking finish with comparable durability to a well-painted floor. They simplify the process of achieving intricate designs in tight spaces.
This is a frequently asked question, and the answer is quite interesting! While the tile stickers add a thin layer to your existing floor, your brain generally doesn’t register them as separate or distinct from a regular tile floor. They certainly aren’t perfectly smooth, which is actually a positive attribute, as a perfectly smooth vinyl surface could be quite slippery when wet. Instead, they possess just the tiniest bit of texture, often comparable to the vinyl cover on a binder or a subtle matte laminate finish. This slight texture provides a comfortable and safe walking surface, making them feel like an integral part of your flooring rather than an applied layer. You won’t find yourself tripping or noticing an unusual sensation; they simply blend into the overall feel of the floor.
Tile stickers are incredibly versatile and can be applied to most flat, smooth floor surfaces. They perform exceptionally well on smooth ceramic tile and porcelain tile, which is what we successfully used them on in our bathrooms. However, it’s crucial to understand their limitations. For heavily textured tiles, such as slate, travertine, or any tile with an uneven or rough surface, tile stickers are unfortunately not a good idea. The adhesive requires a consistently flat contact point to bond effectively, and irregular surfaces will prevent proper adhesion, leading to peeling and a poor finish. The existing tile surface needs to be fairly smooth, and its edges should be relatively straight for the best results. Beyond traditional tiles, you can also use tile stickers on linoleum, vinyl, or even hardwood floors. If you’re applying them to these non-tiled surfaces, you have the flexibility to either butt the tile stickers directly against each other for a grout-less look, or you can paint the floor underneath and space them out slightly to create custom-colored “grout lines” of your choosing, adding another layer of design personalization.
While tile stickers are waterproof, I exercised caution and did not use them inside Avery’s shower, nor would I recommend them for a shower pan or bathtub surround. My primary concerns revolved around the potential for mold development along the tiny exposed edges of the stickers in a constantly wet environment, as well as the compatibility of certain harsh shower cleaners with the vinyl material over time. These areas experience extreme moisture and frequent direct water exposure, which could test the limits of even the most durable adhesive. However, tile stickers are perfectly suitable for bathroom wall tiles or as a decorative backsplash outside of the direct shower spray zone. They can add a fantastic pop of pattern and color to these areas without the same high-risk factors. Just to reiterate, for areas of continuous water immersion or heavy moisture, such as the inside of a shower or bathtub, tile stickers are not a recommended application.
This is a common concern, especially in a bathroom environment, but rest assured: vinyl tile stickers are indeed waterproof! You can confidently mop them and wipe them down with no issues whatsoever. Water spills are not a cause for concern; simply wipe them up as you would with any traditional tile floor. For cleaning, I recommend using mild, non-abrasive cleaners. Avoid harsh or caustic tile cleaners, as these could potentially affect the vinyl’s finish over extended periods. A simple solution of warm water and a small amount of dish soap, or a gentle floor cleaner, will work perfectly. As for the painted grout lines, some people worry about them getting dirty. My perspective is this: I would much rather occasionally brush on a quick touch-up of paint to refresh a grout line than spend countless hours scrubbing embedded grime from actual grout. It’s a low-maintenance solution that keeps the floor looking fresh and clean with minimal effort.
My experience with our laundry room floor serves as a perfect cautionary tale. Since we ordered tile stickers that were cut to the exact size of the tiles instead of slightly smaller for that space, I can tell you precisely what can go wrong. The most common and frustrating issue is that the corners and edges of your tile stickers will begin to peel up. This happens because if the sticker extends too close to or overlaps the grout line, it’s adhering to an uneven, recessed, or sometimes even crumbling surface. The constant foot traffic, moisture, and cleaning then put stress on these improperly adhered edges, causing them to lift. This not only looks untidy but also compromises the durability of the entire installation. Want to see a visual example of what happened to our laundry room tile stickers due to incorrect sizing? Just watch the short video below. This video also conveniently demonstrates how to install a floating tile floor, which we ultimately pursued as another excellent option for updating a tile floor without having to undertake the dreaded demolition of the old one.
Overall, our experience with tile stickers for updating outdated bathroom tiles has been nothing short of fantastic. We couldn’t be happier with this creative and highly effective solution. It proved to be a remarkably quick and easy fix, allowing us to completely transform the look and feel of our bathrooms without the expense, time commitment, or disruption of a traditional renovation. The vast array of colors, patterns, and designs available means there’s truly something for every aesthetic, enabling personalized and stylish results.
So, after learning about the simplicity, affordability, and proven durability of this method, what do you think? Are you ready to embrace the tile sticker trend and update your bathroom tile without the need for replacement? It truly stands out as one of the simplest, most impactful, and budget-friendly ways to cover old, ugly, or simply outdated tile with a fresh, brand-new look that will impress for years to come.
More Bathroom Inspiration and DIY Ideas
SEE ALL bathroom POSTS
-
Tips for a Budget Bathroom Makeover + Attley’s Bathroom Reveal
-
Cute Bathroom Signs for Your Doors & Walls
-
25 Genius Powder Room Ideas
-
Tiling Over Existing Tile: What You NEED To Know
-
15+ DIY Bathroom Remodel Ideas to Save You Money
-
Everything You Need to Know About Tile Stickers
Here are some other posts you may enjoy:
- Gorgeous But Cheap Flooring Ideas
- DIY Vanity Makeover : Concrete Overlay
- 15 Affordable DIY Countertops That Will Blow Your Mind
- 18+ Budget Friendly DIY Backsplash Ideas
- How to Paint a Tile Backsplash in 5 Simple Steps
Wondering how I approach transforming rooms and spaces in our home, from initial concept to stunning completion? Check out Designer in a Binder®, my proven system for stress-free and beautiful home design.
And if you want exclusive content, behind-the-scenes sneak peeks, and fresh DIY and design inspiration delivered straight to your inbox, be sure to subscribe to our newsletter before you head out!