
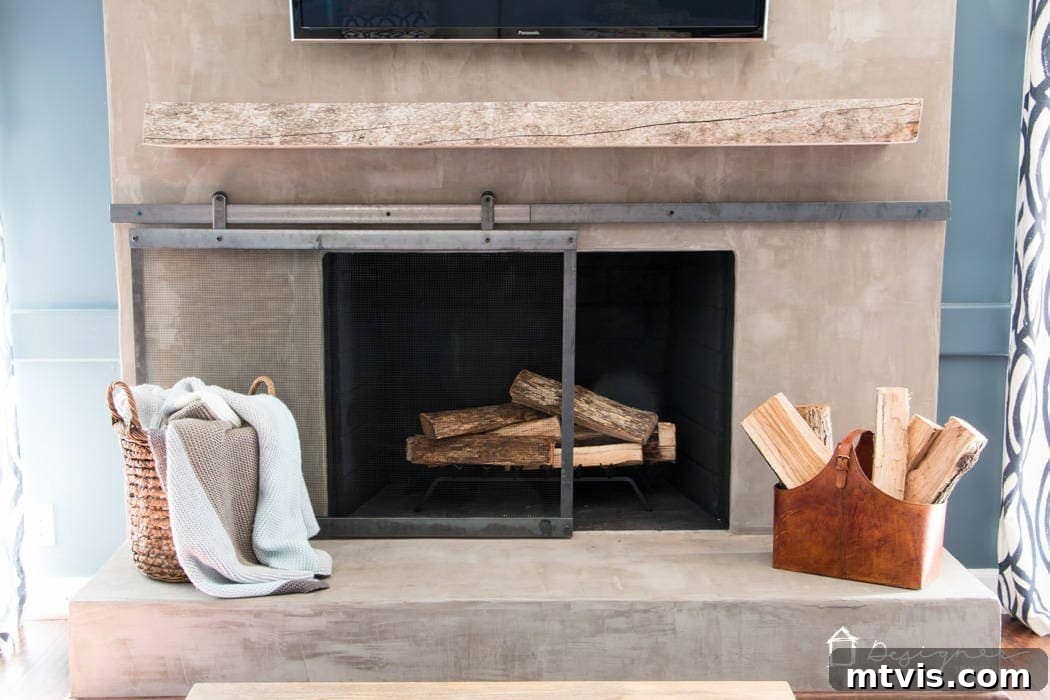
Are you dreaming of a stylish, modern fireplace screen that slides open with ease, but balking at the custom fabrication costs? Look no further! You’ve found the ultimate guide to creating a stunning barn door style fireplace screen right in your own home, without needing any welding skills. We’re incredibly proud to present this unique DIY tutorial, which we believe is one of a kind. While this project involves numerous steps, they are straightforward and achievable for any dedicated DIYer. Don’t be intimidated by the length of this guide; each stage is meticulously explained to ensure your success. You absolutely can transform your fireplace with this elegant, functional design!
The Inspiration: A Design Dream Comes to Life
Our journey began when we stumbled upon an exquisite fireplace screen featured in a Porch.com article, showcasing a home design project by the talented Robin Chell Design. The moment we saw their gorgeous sliding fireplace screen, we were captivated. It was clear that this masterpiece was professionally crafted by a skilled welder, exuding a high-end, sophisticated aesthetic. We were absolutely enamored by its design and functionality, imagining how it could elevate the look and feel of our own living space.
However, like many homeowners, my husband and I faced a common dilemma: neither of us possessed welding expertise, nor did our budget allow for hiring a professional. This challenge sparked our creative spirit. Instead of abandoning the dream, we decided to do what we do best: find a way to DIY it! This project became a mission to replicate that beautiful barn door style sliding fireplace screen using accessible tools and techniques, proving that a custom look doesn’t always require professional intervention or specialized skills.
Join us as we walk you through the process of building your very own barn door style sliding fireplace screen, completely welding-free. Get ready to enhance your home with a functional piece of art that will be the envy of all your guests.
This post contains some affiliate links for your convenience. Click here to read my full disclosure policy.
How to Build a Barn Door Style Fireplace Screen Without Welding
Why Choose a DIY Sliding Barn Door Fireplace Screen?
A sliding barn door fireplace screen offers a unique blend of style, safety, and practicality that traditional screens often lack. Opting for a DIY approach further enhances its appeal:
- Customization: You can perfectly size your screen to fit your specific fireplace opening, ensuring complete coverage and a tailored look.
- Cost-Effectiveness: Building it yourself significantly reduces the expense compared to purchasing a custom-made, professionally welded screen.
- Unique Aesthetic: The barn door style brings a touch of rustic charm mixed with industrial elegance, becoming a striking focal point in your living room.
- Enhanced Safety: A sturdy, well-fitting screen provides crucial protection against sparks and embers, keeping your home and loved ones safe.
- Rewarding Experience: There’s immense satisfaction in creating something beautiful and functional with your own hands. This project is challenging yet incredibly rewarding.
Before You Begin: Important Considerations
Before diving into the build, it’s crucial to prepare and understand the scope of your project.
- Measure Your Fireplace: The dimensions provided in this tutorial are specific to our fireplace opening (42 1/2″ x 30 1/4″) and resulted in a finished screen measuring 45″ x 32″. You MUST accurately measure your own fireplace opening and adjust all material lengths accordingly. Consider both the width and height you need for full coverage and proper clearance.
- Safety First: Working with metal and power tools requires proper safety gear. Always wear safety glasses, gloves, and hearing protection. Be mindful of sharp edges and hot surfaces when cutting and grinding metal.
- Read Through: Familiarize yourself with all the steps and gather all materials and tools before you start. This will help streamline the process and prevent interruptions.
Materials Needed:
*Note: Our finished fireplace screen measures 45″ x 32″, designed to cover our large fireplace opening (42 1/2″ x 30 1/4″). All materials and measurements below are specific to our project. Please alter the dimensions to fit your fireplace opening!*
*Quantities needed are noted in parentheses*
- (4) 48” x 2” x 1/8” Steel Bar (These robust bars form the top and bottom rails of the screen frame, providing essential structural integrity.)
- (2) 48” x 1 1/4” x 1/8” Steel Bar (These narrower bars are used for the vertical side rails of the screen, creating a sleek profile.)
- (2) 48” x 2” x 3/16” Steel Bar (These thicker bars are designated for the main sliding rail system that mounts to your fireplace, ensuring smooth and stable operation.)
- (1) 3’ x 5’ x 1/4” Hardware Cloth (23 gauge) (This durable metal mesh forms the protective barrier of your screen, safely containing sparks and embers.)
- (2) 1/2” Swivel Pulleys (These crucial components allow your screen to glide effortlessly along the rail.)
- (6) 1.25 x 25mm bolts (Used for assembling various parts of the screen frame.)
- (2) 1.25 x 35mm bolts (These longer bolts are typically used for attaching the pulley wheels.)
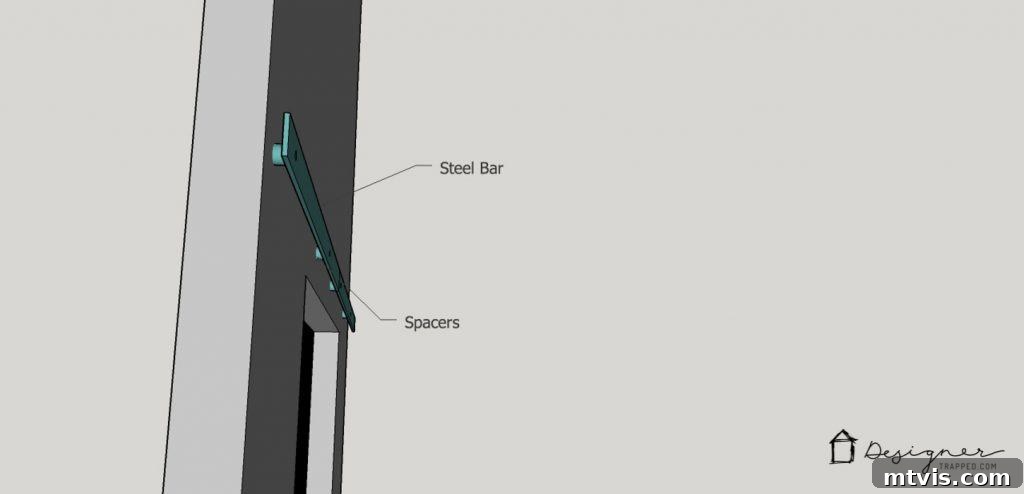
- (4) 5/16 x 1” Chrome Steel Spacers (Essential for creating separation between the rail and the fireplace surface, allowing the screen to slide freely.)
- (4) 1/4” x 3 1/4” Tapcon Hex Head screws (These specialized screws are designed for securely fastening the rail to masonry or concrete fireplaces.)
- (10) 1/4” washers (Used to distribute pressure and ensure a tight fit for bolts and screws.)
- High heat spray paint in black (We recommend Rustoleum, as it’s formulated to withstand high temperatures and provide a sleek finish.)
Tools Needed:
- Power drill and various size drill bits (For creating pilot holes and final bolt holes in the steel.)
- Power driver (For efficiently tightening screws and bolts.)
- Metal snips (Crucial for precisely cutting the hardware cloth.)
- Angle Grinder (An indispensable tool for cutting and shaping metal bars, surprisingly affordable and versatile for many DIY projects.)
- Metal cutting blade (Required for the angle grinder to cut through steel bars.)
- Metal file (For smoothing rough edges after cutting, ensuring a clean and safe finish.)
- Hammer drill (If your fireplace surface is masonry or concrete, a hammer drill will be necessary for pre-drilling holes for Tapcon screws.)
- Measuring tape and marker/pencil (For accurate measurements and markings.)
- Level (To ensure your sliding rail is perfectly horizontal.)
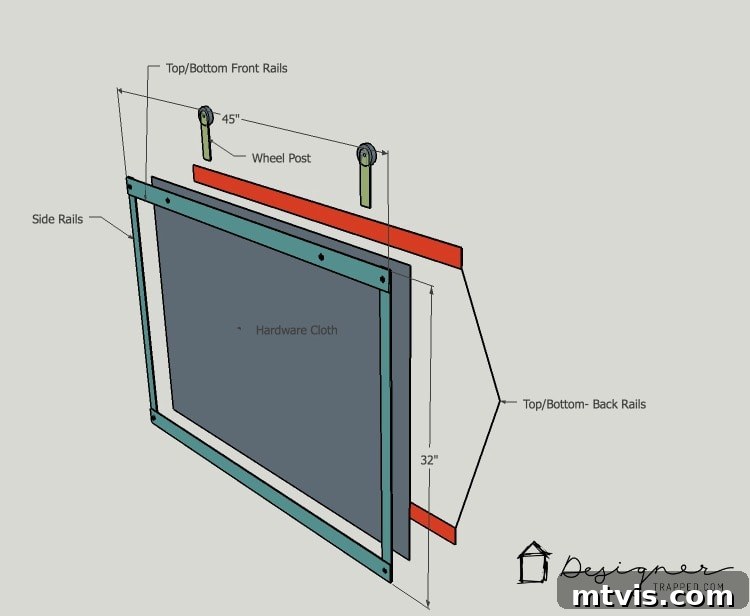
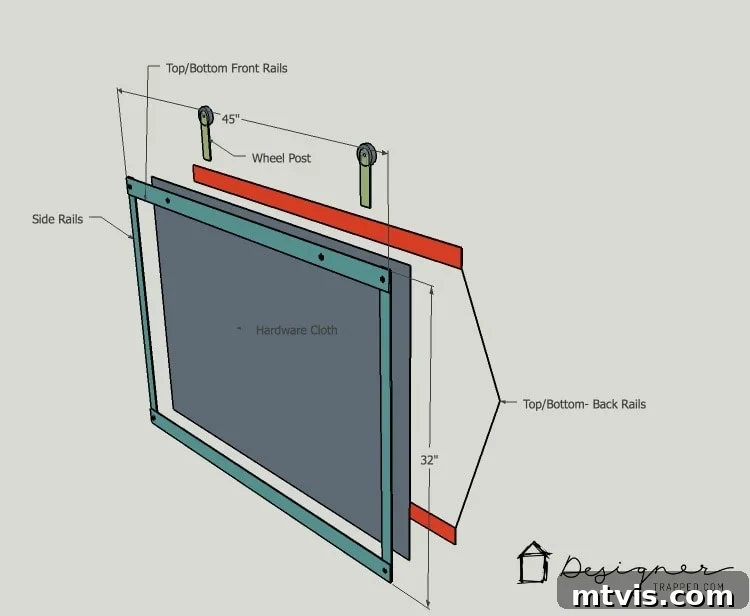
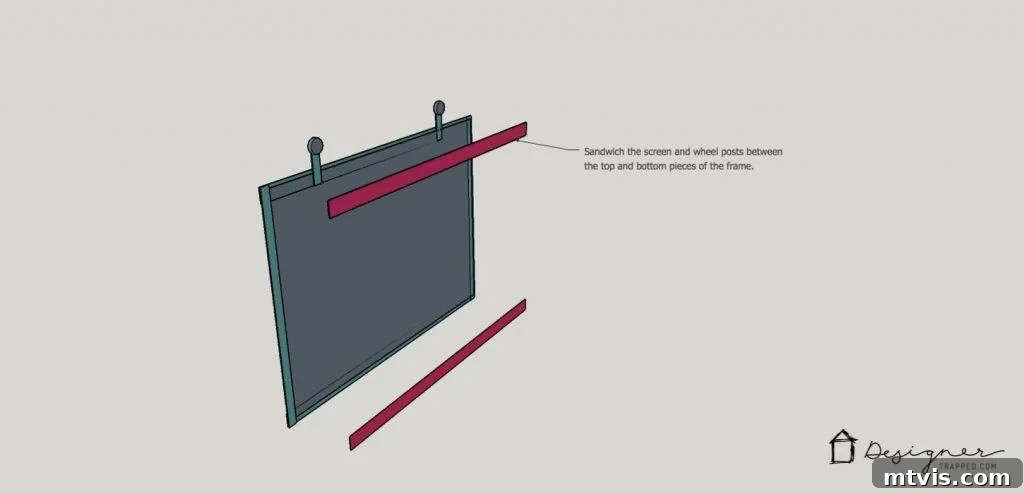
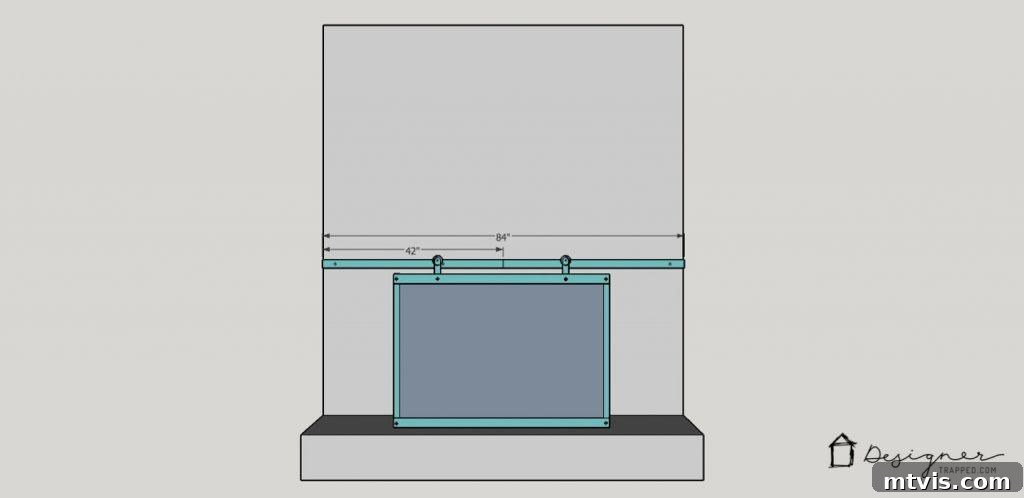
Before diving into the detailed steps, take a moment to review the diagram below. It will help visualize how all the components of your barn door fireplace screen come together.
Step-by-Step Guide: Building the Screen Portion
1. Prepare the Hardware Cloth
Begin by cutting your hardware cloth to a rough size of approximately 40” x 50” using your metal snips. This initial trim makes the material much more manageable. Hardware cloth often comes rolled, so to ensure it lays flat for easier assembly, we recommend placing a piece of plywood with some weights on top of it overnight. This will help flatten out any curves or kinks.
2. Painting Components
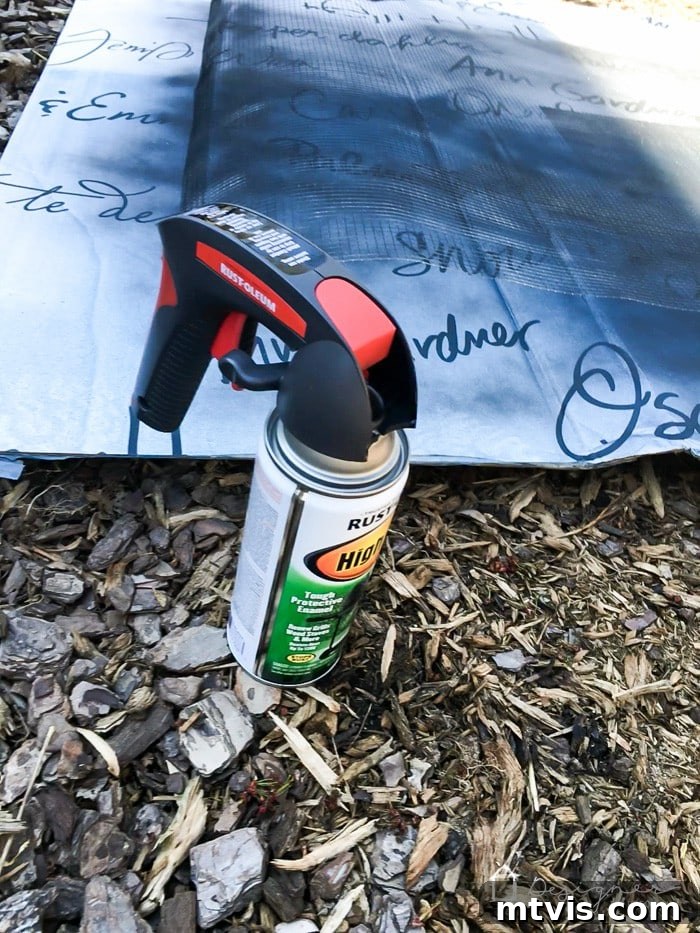
Next, carefully separate the pulley wheels from their swivel mechanisms. Most pulleys have a simple cotter pin that can be removed for this step. Using high-heat spray paint in black, paint the hardware cloth, the chrome spacers, all washers, and the pulley wheels. Allow these components to dry thoroughly according to the paint manufacturer’s instructions. We were fortunate to find black bolts, so we didn’t need to paint them, saving an extra step!
3. Cutting the Top and Bottom Steel Rails
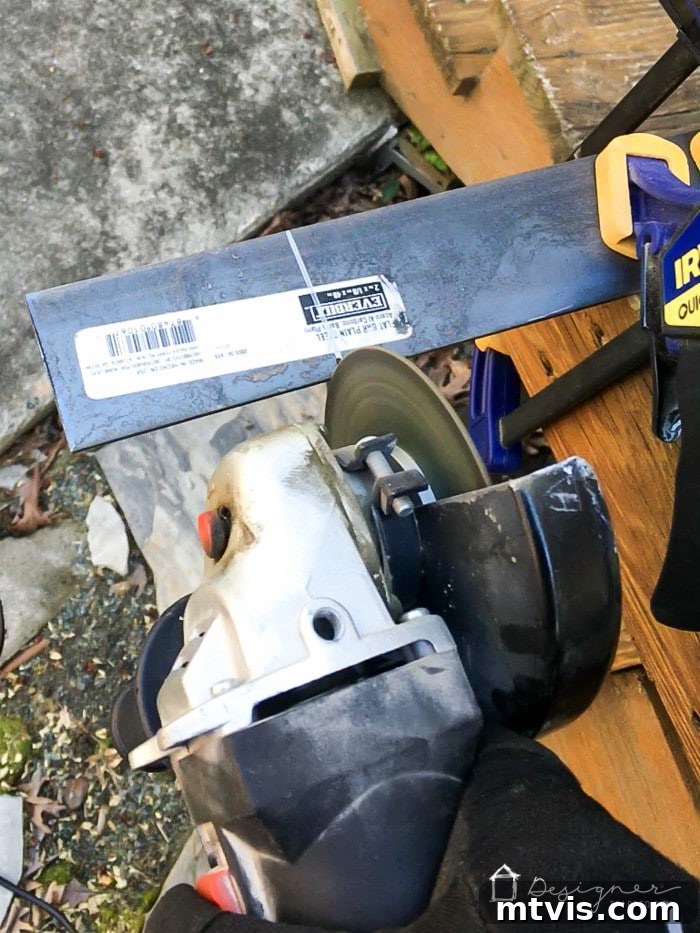
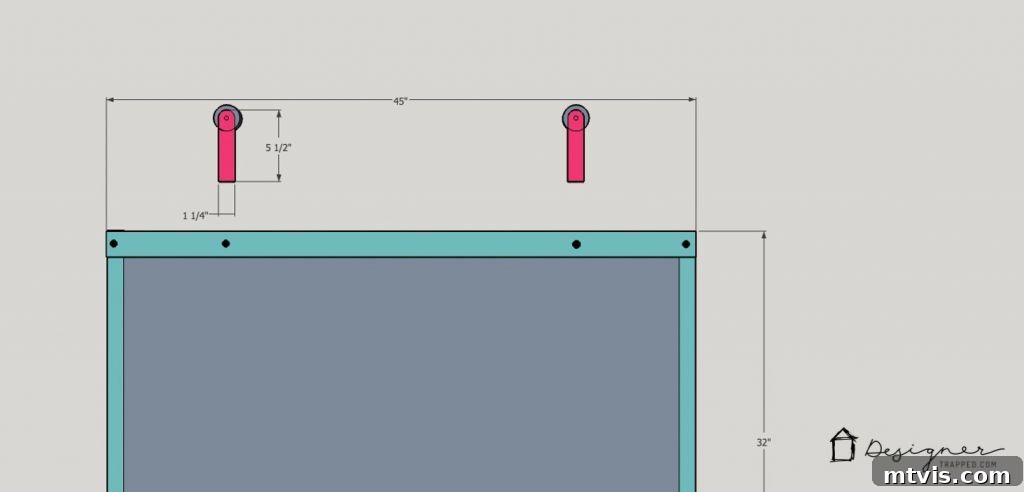
Take your two 48” x 2” x 1/8” steel bars and cut them down to your determined length (45” for our project) using an angle grinder fitted with a metal cutting wheel. Remember to wear appropriate safety gear, including eye protection, gloves, and hearing protection, during all cutting operations.
4. Cutting the Side Steel Rails
Next, cut the two 48” x 1 1/4” x 1/8” steel bars down to your desired height (32” for our project). After cutting, use a metal file to smooth any rough or sharp edges on all cut pieces. It’s important to keep the 16” pieces that you cut off these bars, as they will be used in the next step.
5. Creating the Wheel Posts
From the 1 1/4” bar offcuts from the previous step, create two “wheel posts” (these are often shown in diagrams in pink for clarity). For our screen, we cut these posts to 5 1/2” long. Then, using the actual pulley wheels as a guide, trace the curve of the wheel onto the top of each wheel post. Carefully use your angle grinder to cut along the traced curve, shaping the top of each post to perfectly cradle the pulley wheel.
6. Lay Out the Screen Frame
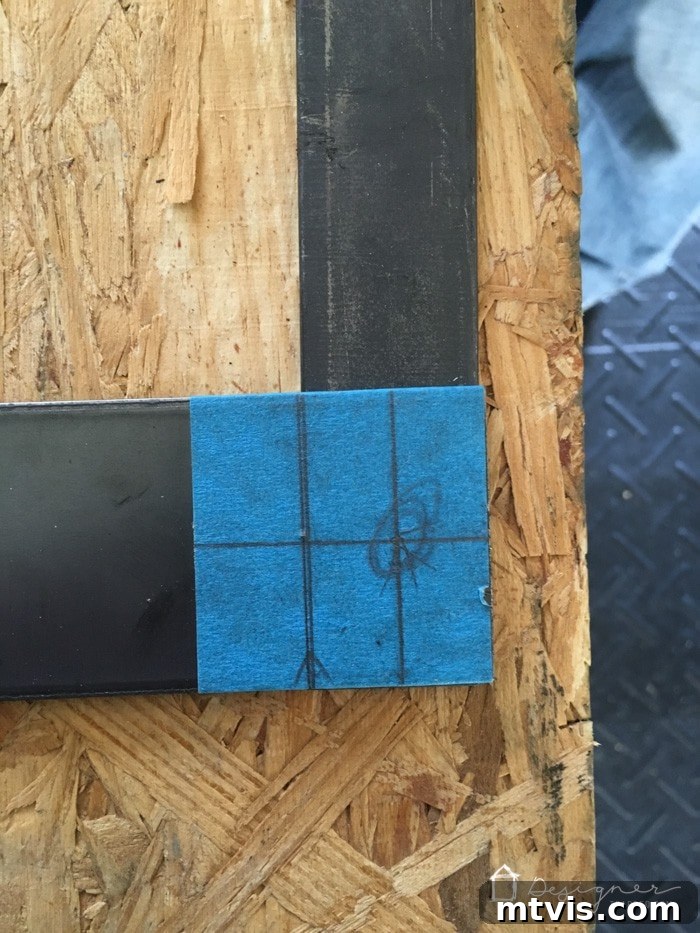
Now, it’s time to lay out the steel bars that will form the exterior frame of your fireplace screen. Using a pencil and painter’s tape, mark the exact center of each corner where the bars will connect. Remember that the top and bottom rails, made from the 2″ steel bars, will be *doubled up* – one on each side of the hardware cloth. The narrower 1 1/4″ steel bars will be used for the vertical sides of the fireplace screen and are positioned only on the front side of the screen. This layering is crucial for sandwiching the hardware cloth.
7. Drilling the Bolt Holes
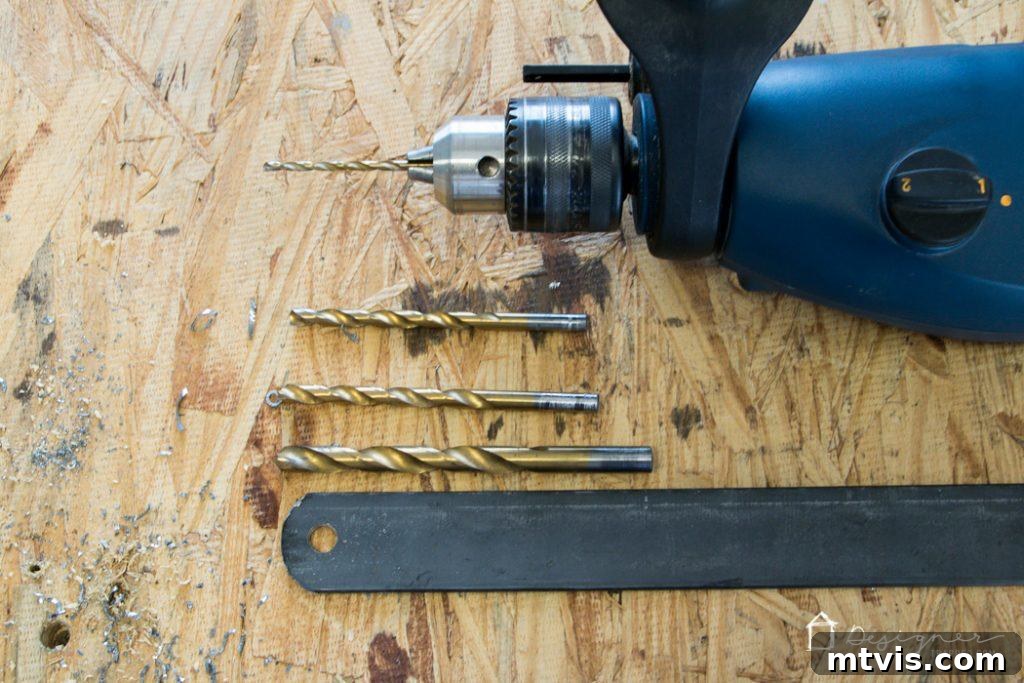
Using an electric drill, create the holes for your bolts. This step requires patience. We recommend starting with a small drill bit to create pilot holes and gradually increasing the bit size until you reach the final diameter of 5/16”. To make this process as efficient as possible, drill all the small pilot holes first, then switch to the next larger drill bit and enlarge all holes, repeating until all holes are 5/16″. This systematic approach saves time compared to constantly changing bits for each individual hole.

8. Assembling the Screen Frame with Hardware Cloth
With all your holes drilled, lay out the top and bottom rails (the doubled-up 2″ bars) and the side rails (the single 1 1/4″ bars) on a flat surface. Carefully place the hardware cloth on top of this framework. For added stability and a cleaner edge, we folded the side edges of the hardware cloth over by about 1 inch before placing them. Now, position the “back” top and bottom rails on top of the hardware cloth, effectively creating a sandwich.
9. Securing the Frame with Bolts
This step involves carefully feeding the bolts through all the layers. The order is crucial:
- Insert bolts through the front top and bottom rails.
- Thread them through the side rails.
- Push them through the hardware cloth (screen).
- Pass them through the wheel posts.
- Finally, feed them through the back top and bottom rails.
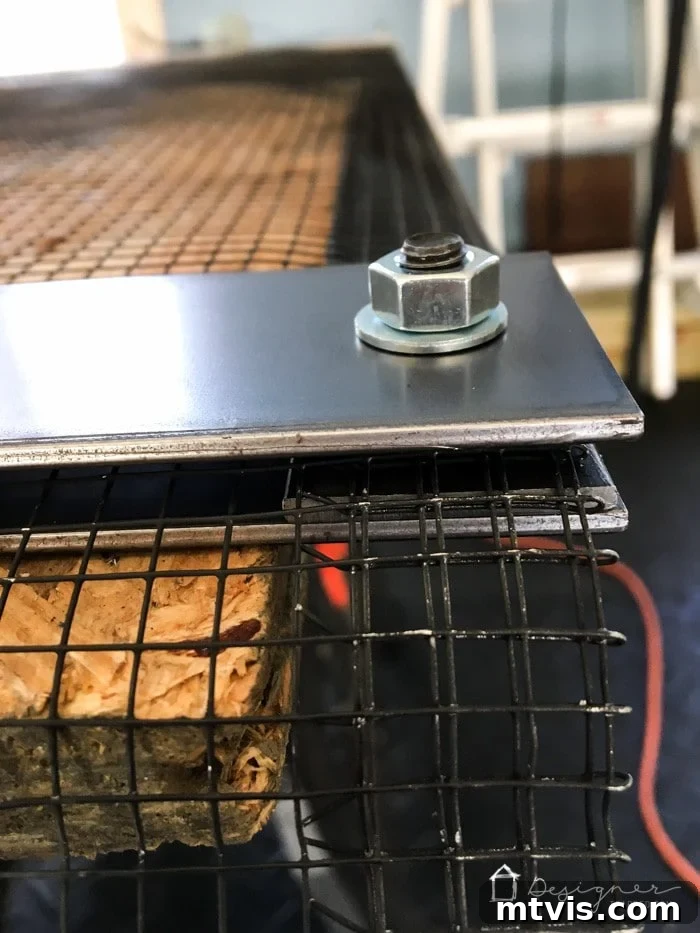
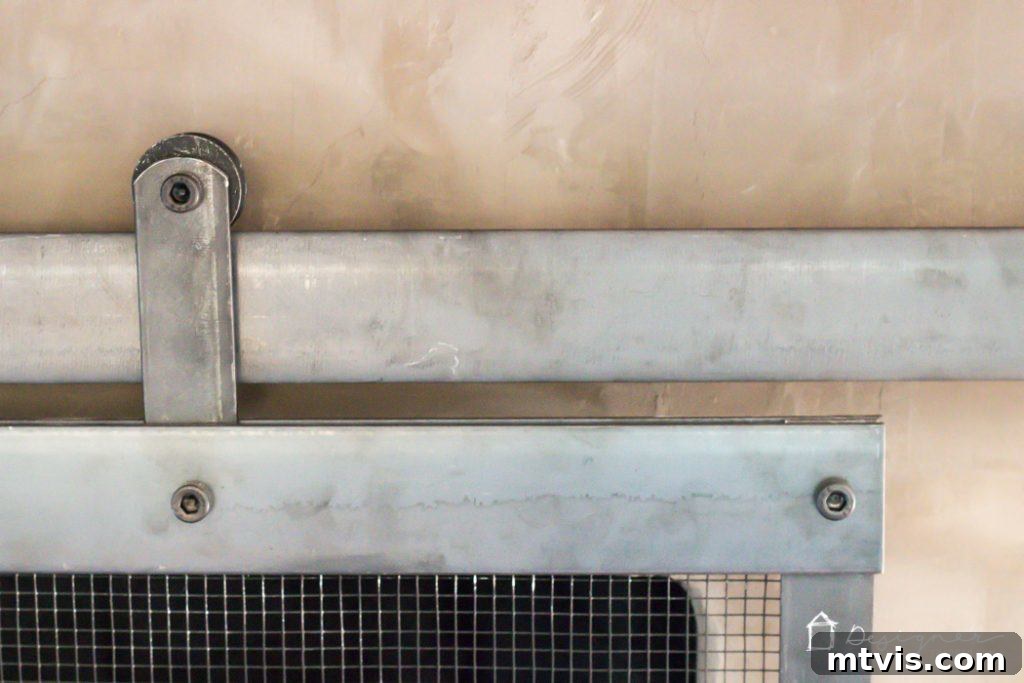
Once the bolt is through all layers, place a washer onto the bolt, followed by a nut. Tighten each nut securely using your power driver or a wrench. You are essentially creating a robust “sandwich” where the hardware cloth and wheel posts are held firmly between the doubled-up top and bottom steel rails. Remember, the side rails are single and are only on the front side of the screen. Refer to the diagrams and photos below for a clearer visual guide.
10. Trim Excess Hardware Cloth
After the frame is securely bolted together, use your metal snips to carefully trim off any overhanging hardware cloth. Ensure the edges are flush with the steel frame for a clean and professional appearance.
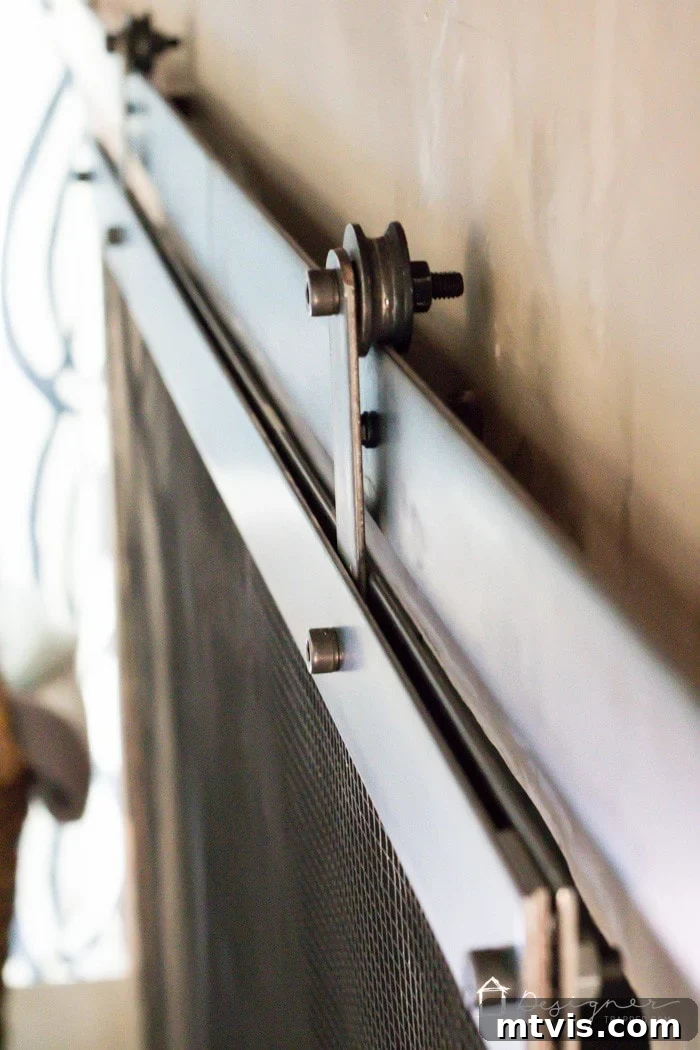
11. Attaching the Pulley Wheels
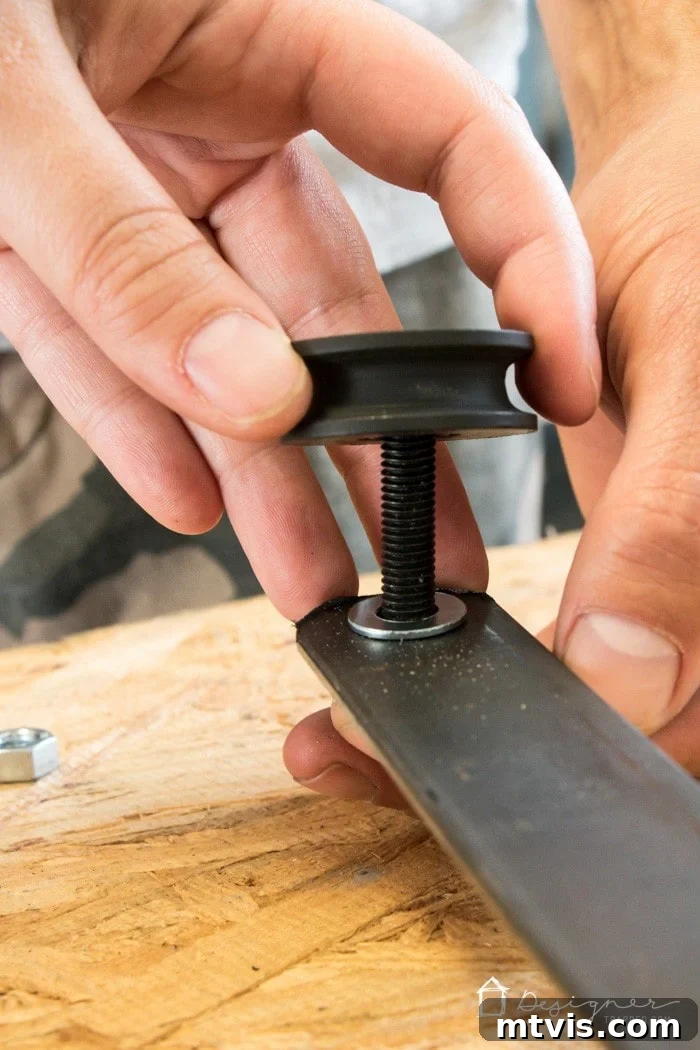
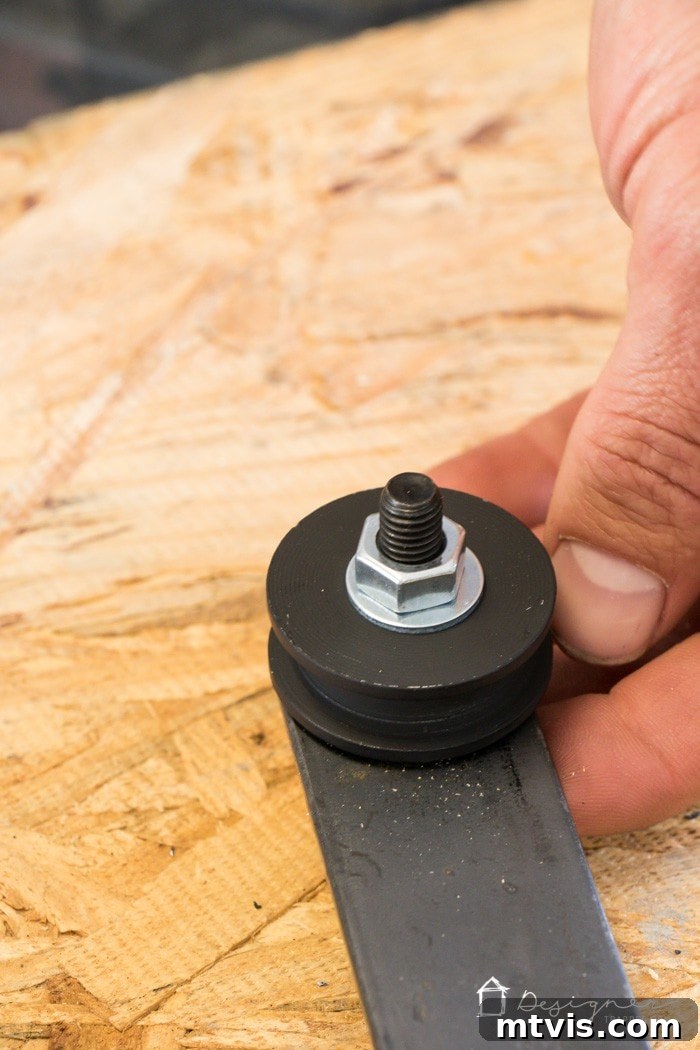
The final step in building the screen itself is to attach the pulley wheels to the prepared wheel posts. Insert one of the longer bolts (1.25 x 35mm) through each wheel post. Then, add a washer, followed by the pulley wheel, another washer, and finally a nut. Tighten these bolts securely, but ensure the pulley wheel can still rotate freely.
Installing the Sliding Rail System to Your Fireplace
1. Determine Rail Height
Before mounting the rail, it’s critical to determine its correct height. Using your fully assembled screen as a guide, position it against your fireplace to find the ideal height that allows sufficient clearance (approximately 33” above the hearth for our project). This ensures the screen can slide back and forth smoothly without dragging on the hearth or obstructing the fireplace opening. Use a pencil to mark this height on your fireplace surface.
2. Prepare the Steel Bar Rail
Cut the two 48” x 2” x 3/16” steel bars to your desired length (42” each for our fireplace). If your fireplace is narrower, you might be able to use a single, continuous length of steel bar for the rail, which simplifies installation. Due to the width of our fireplace, we opted for two separate bars to create the full rail.
3. Drill Holes in the Rail Bars
Using the same progressive drilling method as for the screen frame, drill holes into your rail bar(s). We drilled holes at 3” and 28” from each end of our 42” rail pieces. These holes will be used to attach the rail to your fireplace.
4. Mark Fireplace for Drilling
Hold the steel rail bar(s) up to your fireplace surface at the previously determined height. Use a level to ensure the rail is perfectly horizontal. Once aligned, use a marker or pencil to accurately transfer the drill hole locations from the steel bar(s) onto your fireplace surface. These marks will guide your pre-drilling.
5. Pre-Drill Fireplace Holes
Following the instructions for your chosen Tapcon screws, pre-drill holes into your fireplace surface at the marked locations. For our brick fireplace covered with cement board and a thin cement overlay, a hammer drill was necessary. Ensure you use the correct drill bit size and depth as specified by the Tapcon screw manufacturer. You can find more details about our DIY concrete fireplace renovation here.
6. Attach Rail to Fireplace with Spacers
Now, feed the Tapcon screws through the holes in your steel bar rail(s), followed by the steel spacers. The spacers are crucial for creating a gap between the rail and the fireplace surface, allowing the pulley wheels to roll freely. Once the screws and spacers are in place, tighten the Tapcon screws into the pre-drilled holes, securely fastening the rail to your fireplace.
7. Final Touches and Hanging the Screen
To finish, use a touch-up of black paint to cover the visible blue on the Tapcon screws, ensuring they blend seamlessly with the black steel rail. Once dry, carefully hang your newly constructed fireplace screen onto the rail by placing the pulley wheels on top of the installed steel bar. Test the sliding mechanism to ensure smooth operation.
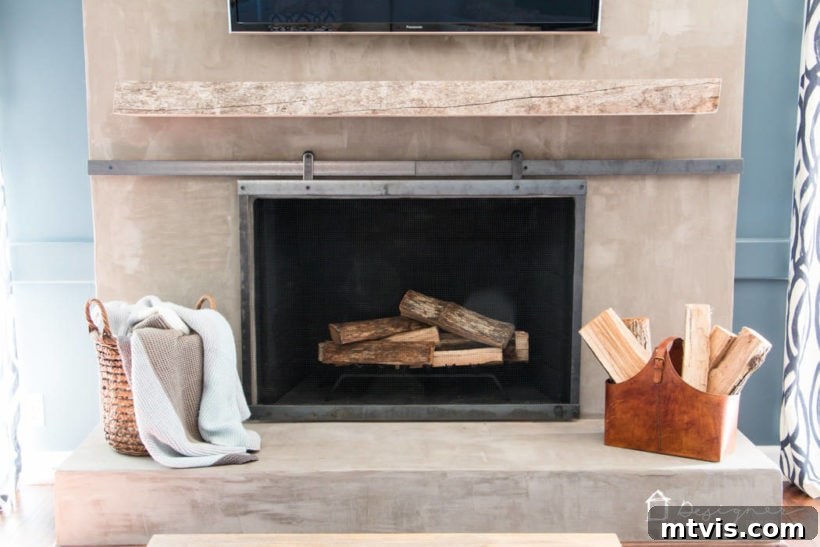
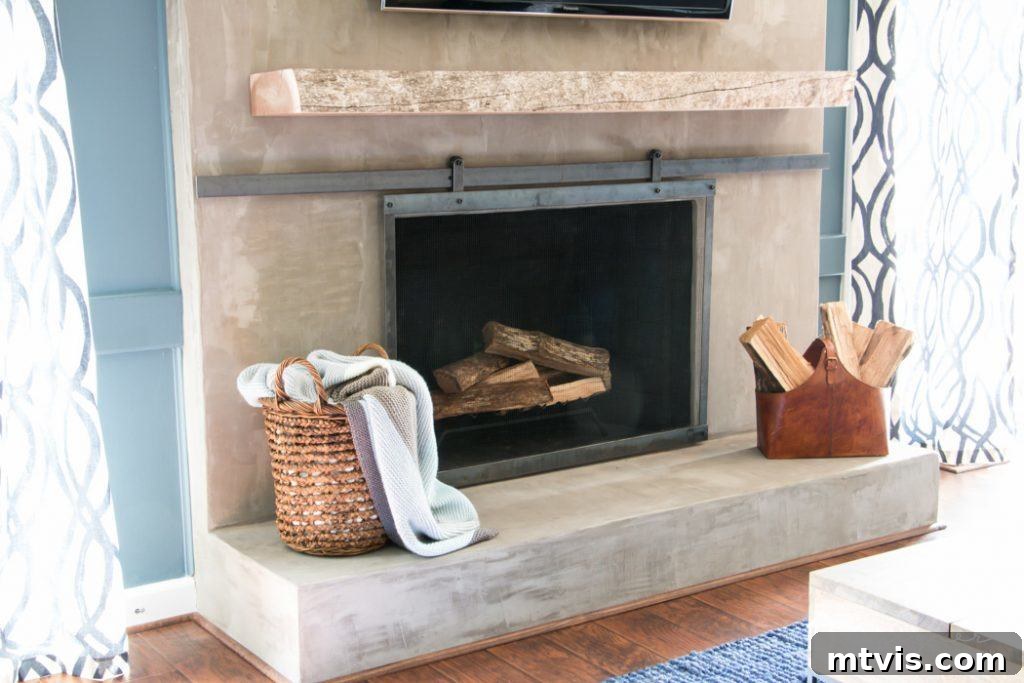
The Stunning Reveal: Your New Barn Door Fireplace Screen
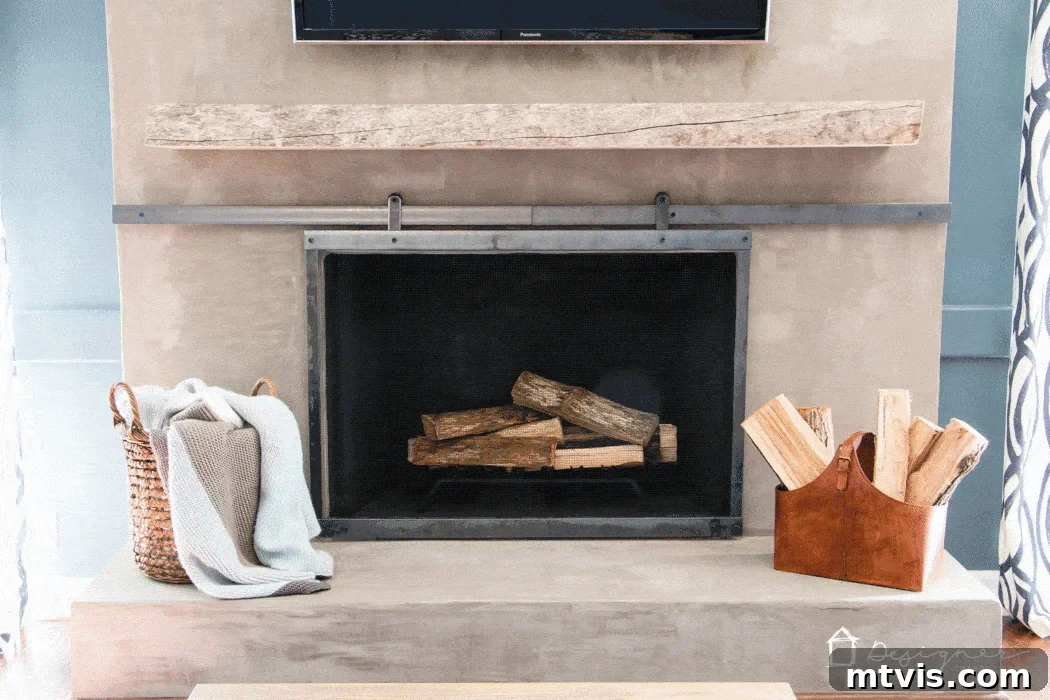
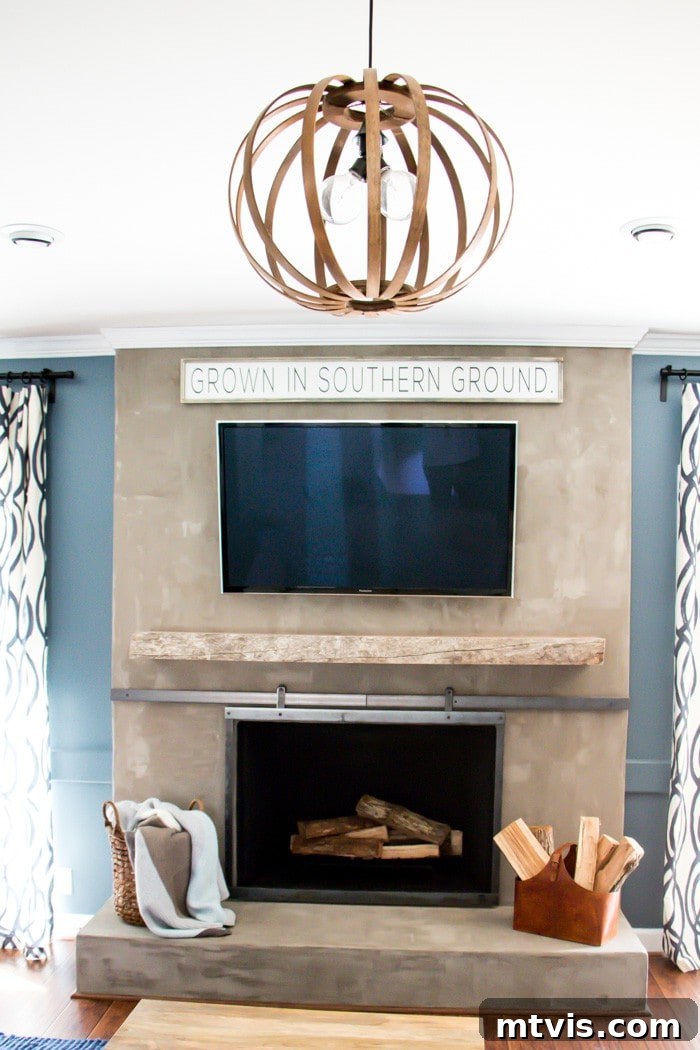
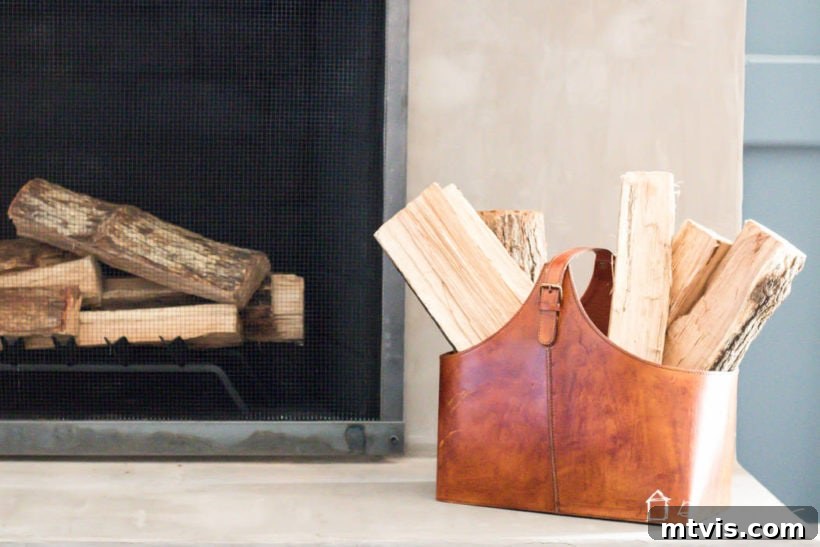
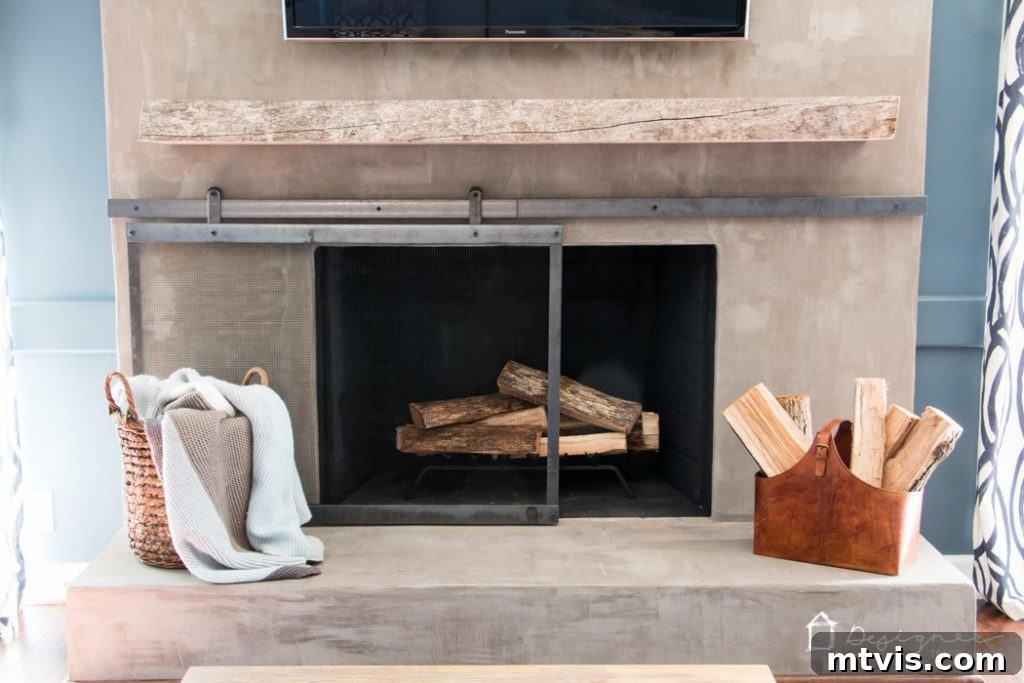
That’s it! While the process of learning how to make a barn door style fireplace screen involves a number of steps, the project itself is truly not difficult. The end result is not just functional but absolutely amazing, transforming your fireplace into a striking centerpiece. Take a moment to admire your handiwork!
Tips for Maintaining Your Barn Door Fireplace Screen
To ensure your new barn door fireplace screen remains beautiful and functional for years to come, consider these simple maintenance tips:
- Regular Cleaning: Dust the steel frame and hardware cloth periodically to prevent buildup. For a deeper clean, use a damp cloth and mild soap, then dry thoroughly to prevent rust.
- Inspect Moving Parts: Annually check the pulley wheels and the sliding rail for any signs of wear or debris. A small amount of dry lubricant can keep the pulleys gliding smoothly.
- Check Bolts and Nuts: Over time, vibrations or temperature changes might loosen bolts. Periodically inspect all fasteners on the screen frame and the mounting rail, tightening them as needed.
- Touch-Up Paint: If the high-heat paint shows any chips or scratches, use your black high-heat spray paint for touch-ups to maintain a pristine look and protect the metal.
We are incredibly happy with how this project turned out, and we hope you will be too! This DIY sliding fireplace screen adds so much character and functionality to our home. What do you think of this no-weld solution? If you’re inspired to tackle this project, be sure to pin this tutorial so you can easily find it later when you’re ready to start building your own. Happy DIYing!